Want to create a simple burlap bulletin board? I’ll show you how!
I don’t know about you but my kitchen island tends to be a collector of all things paper – receipts, coupons, grocery lists, you name it. In my quest to tame the kitchen clutter I decided to create a simple burlap bulletin board that not only helps me stay organized but looks pretty darn cute doing it! 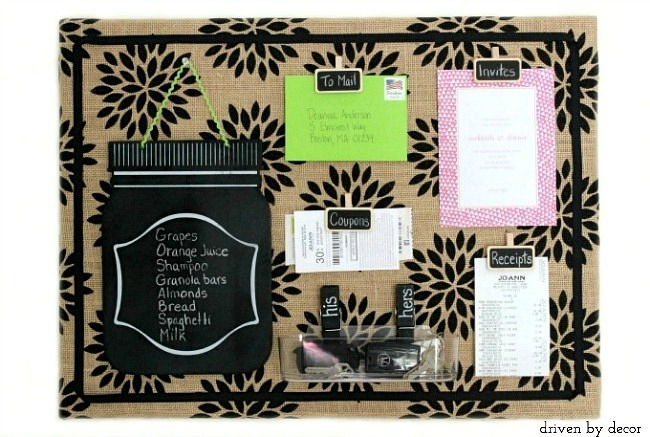
 From start to finish, making the bulletin board was a pretty easy project – here are the supplies you’ll need to get the job done:
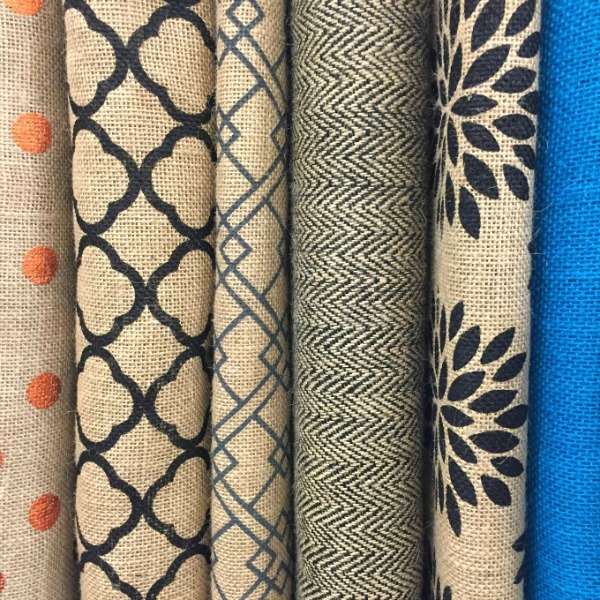
- Patterned burlap – I found a ton of choices at Jo-Ann Fabrics:
- Thick, unframed cork board – mine is 17″ x 23″
- Scissors
- Light duty staple gun with staples like {this}
- ⅜″ grosgrain ribbon
- Glue dot runner such as {this one}
- High temperature hot glue gun such as {this}
Start by cutting your piece of burlap about 5″ wider and longer than your cork board. The cork board that I used was 17″ x 23″ so I cut my burlap piece to 22″ x 28″. Place your piece of burlap (pattern down) on a smooth surface and center your cork board (face down) on top of it. Wrap your burlap around the edges of the board and staple it to the back with a staple gun, pulling the burlap tight as you go. When you get to the holes for hanging your cork board, simply notch out the burlap and staple around it. 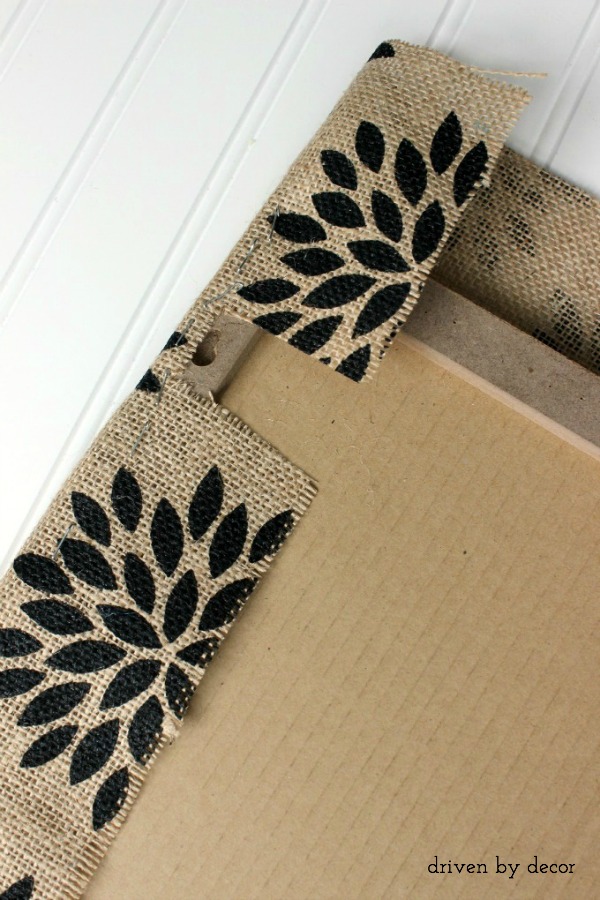 Wait to do each corner until you’ve stapled the burlap along the length of the board on both sides of it. Then take the corner piece, pull it tight towards the center of the board and staple it down.
 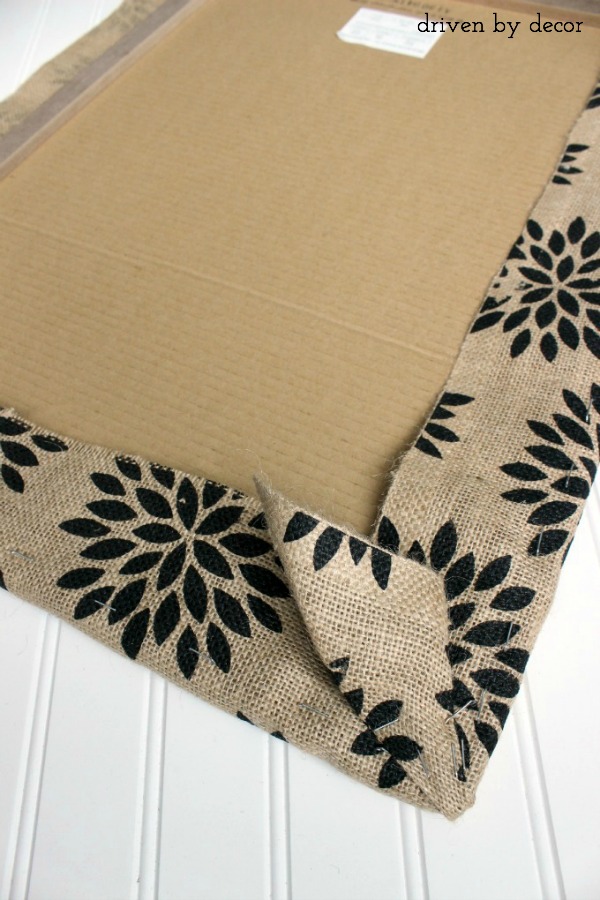 If any of your staples are sticking up a bit from the back of the cork board, simply use a small hammer to tap them all the way in. Now flip your board over and admire your craftiness!
 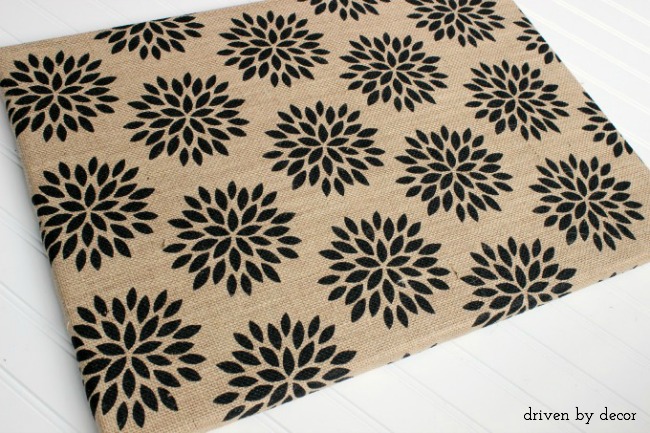 To give your patterned burlap cork board a finished look, use a coordinating grosgrain ribbon to create a decorative border. Simply use a glue dot runner to apply glue dots to one side of your ribbon along a length about 2″ shorter than the length of the side of your cork board. Starting 1″ in from the edge of your board, lay down the glue-dotted ribbon so it adheres to burlap. When you get to the corner, flip your ribbon over and follow the same steps for the next side. A small dot of glue from a hot glue gun will help keep your corners laying flat and staying in place.
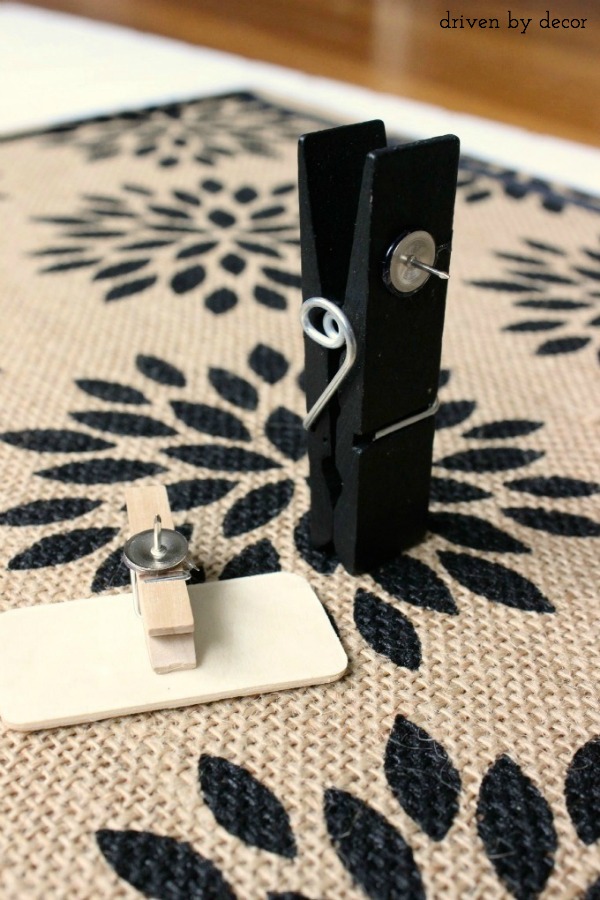
  Now it’s time for the fun stuff – adding all sorts of organizational goodies to your board. I like the idea of clipping things onto the board instead of using thumbtacks so that you aren’t putting holes in invites and mail. My solution was to use a hot glue gun to glue thumbtacks onto the back of some chalkboard clothespins similar to {these} and mini chalkboards with clips like {this}:
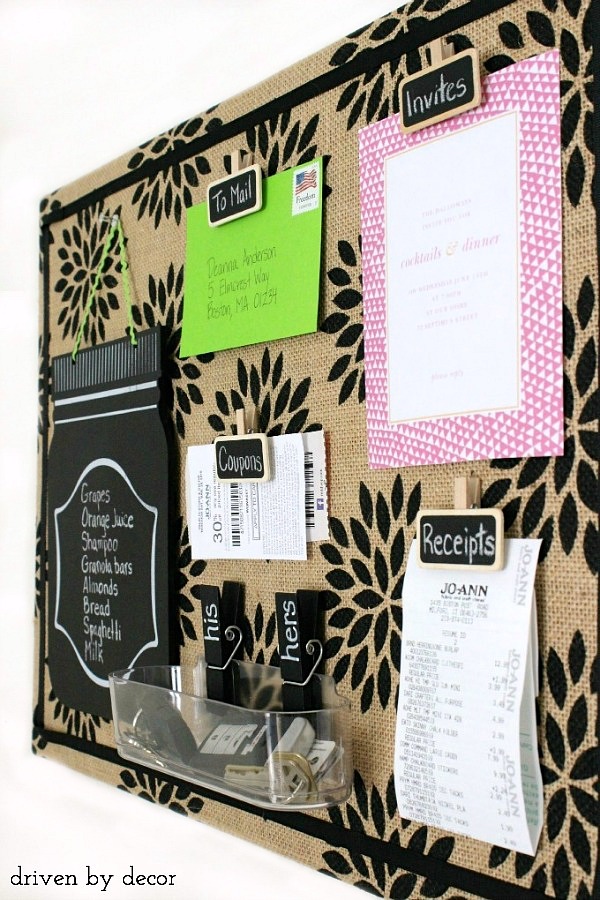
 I used two of the chalkboard clothespins to clip on {this clear caddy} that’s the perfect spot to drop our keys as we come in the door:
 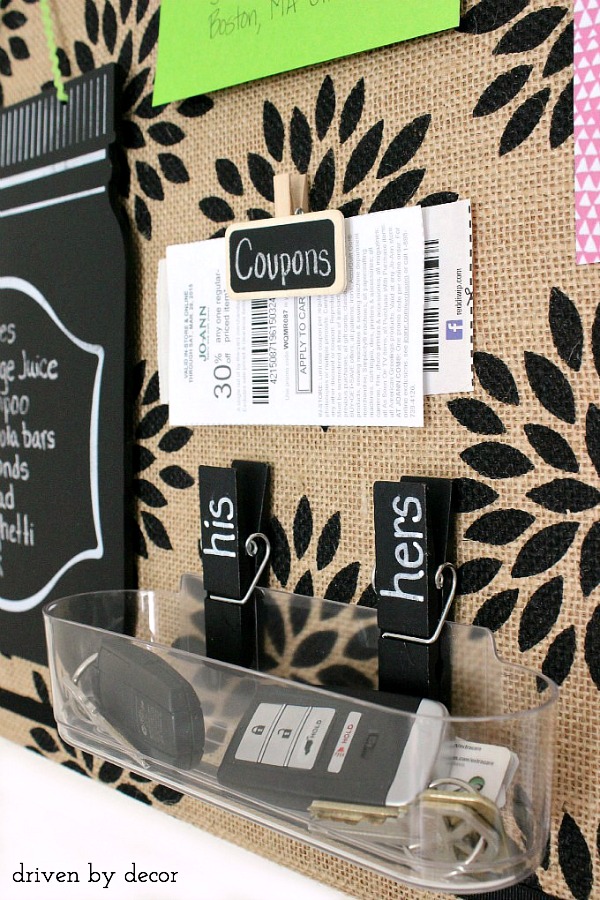 I also added a mason jar chalkboard plaque found at Jo-Ann’s that can be used to keep a grocery list or as a place for the family to jot quick notes to each other. I replaced the twine hanger that comes with the mason jar plaque with a thin ribbon to add some color:
 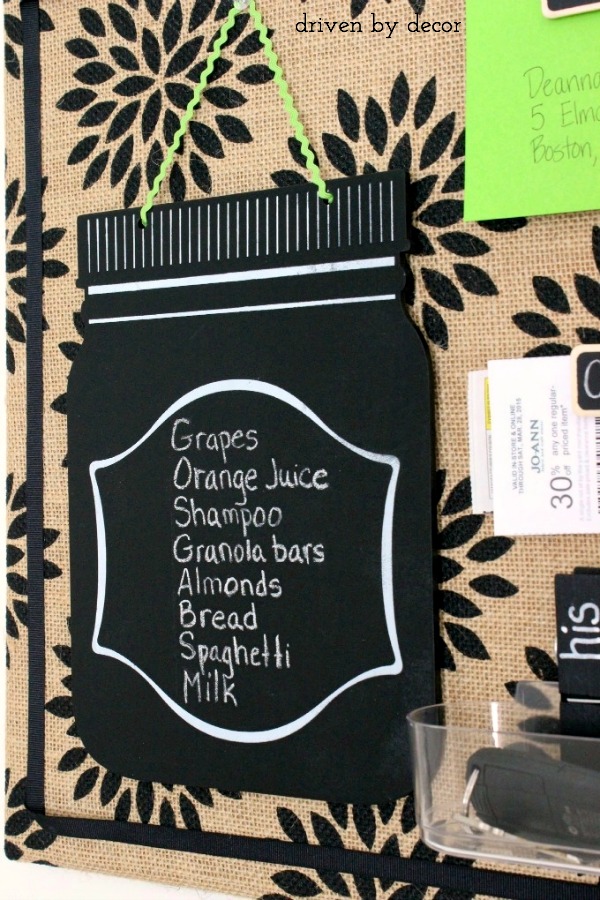 I then used chalkboard clothespins clips to clip on receipts, coupons, invites, and outgoing mail. I love that the chalkboard surface makes erasing and rewriting on them super easy.
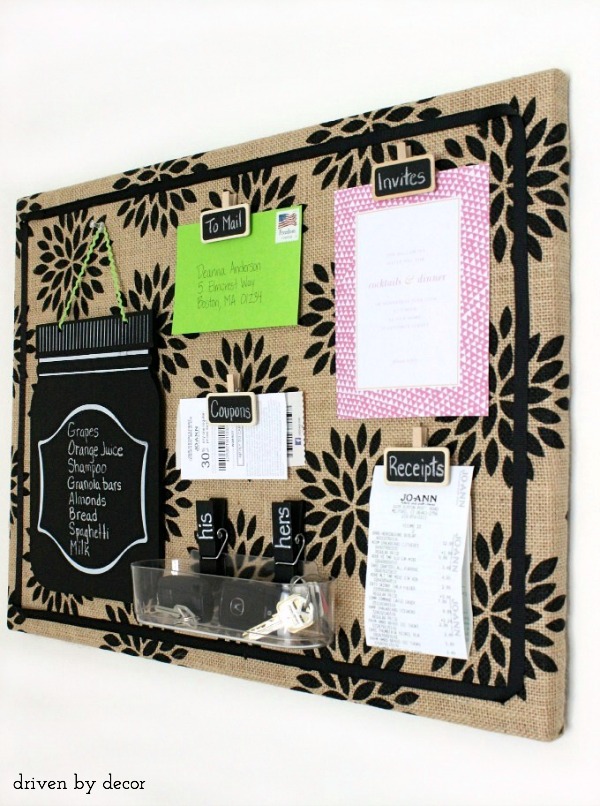
It’s been such a great clutter-tamer in our kitchen that my only regret is that I didn’t get around to making it sooner! I found the perfect spot for my bulletin board on an empty wall in the kitchen right by the door to the garage so I can grab my car keys, any letters to mail, or coupons as I run out the door to do errands.
And there’s still plenty of wall space left for a future project or two…
Hope you all have a great week,


