I love sharing “before” and “after” room makeovers and I sure have a LOT of them with all of the renovations we’ve done on our home. Today I’ve narrowed them down to the five “before” and “after” home projects that are my favorites! (post includes affiliate links – full disclosure statement available {here}):

The Power of Paint (and Plates!)
When we first moved into our house, it had a light blue, yellow, red, and green color scheme going on that was sooo not me. Our dining room and living room were two of the first rooms I painted because I knew before even moving in that I wanted to reuse the same color we had at our old house (a tweaked version of Sherwin Williams Keystone Gray).
Our dining room was a total bear to prep because the top half of the walls were a textured faux finish and it had a wimpy chair rail that I wanted to get rid of so I removed the chair rail, patched it, skim coated and sanded the entire room (worst job ever!) and finally finished up with paint. It ended up going from this:
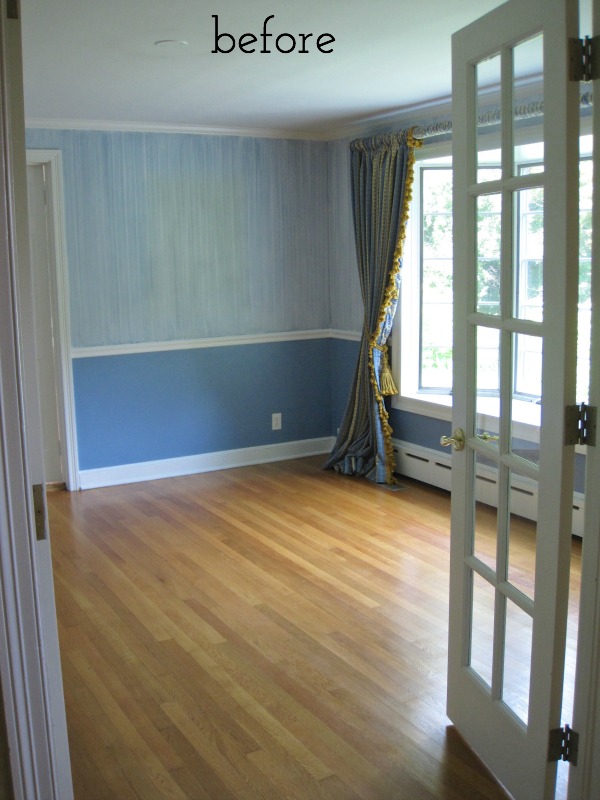
to this:
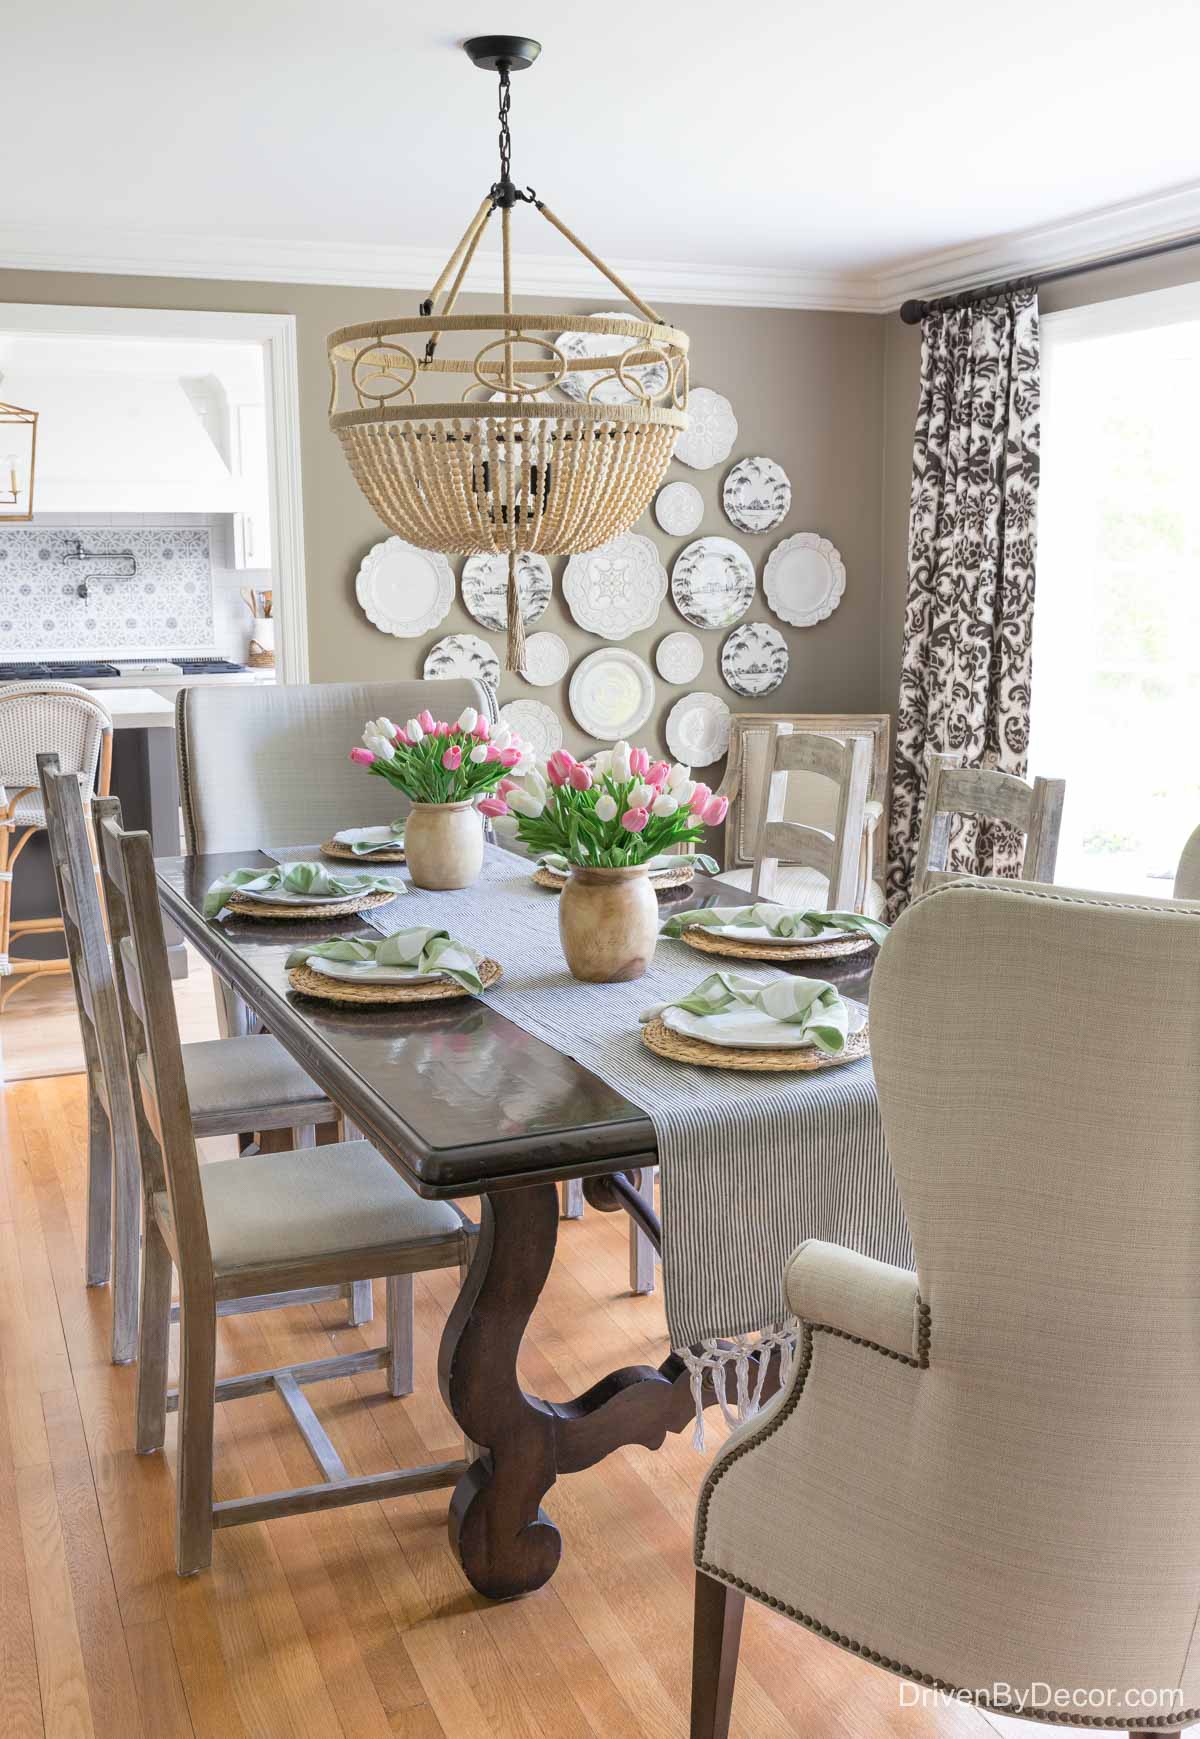
Dining Room Sources: Wood bead chandelier | Table & chairs – no longer available | 13″ Rattan chargers (similar) | Green & white plaid napkins | Table runner (similar) | Wood vases – no longer available | Faux pink tulips | Faux white tulips | White wall plates | Patterned wall plates | Drapes – no longer available
We reused all of our dining room furniture from our old house so didn’t have to buy a single new piece. Our drapes were transplants too! The only new things we bought were the chandelier and the plates that I hung on the wall as art.

Statement-Making Art Walls
I’ve always loved a good gallery wall but before moving into our current home, had never attempted one. The idea of creating a gallery wall totally intimidated me! But some friends invited me to be part of a group design challenge and before I knew it, I had committed to creating a gallery wall in our home office. I won’t lie, there were some moments of serious “this-is-going-to-be-an-epic-fail” panic in the week before the big reveal but somehow it all came together in the end. This is what that wall in our home office looked like when we moved in:

and this is what it looked like after:
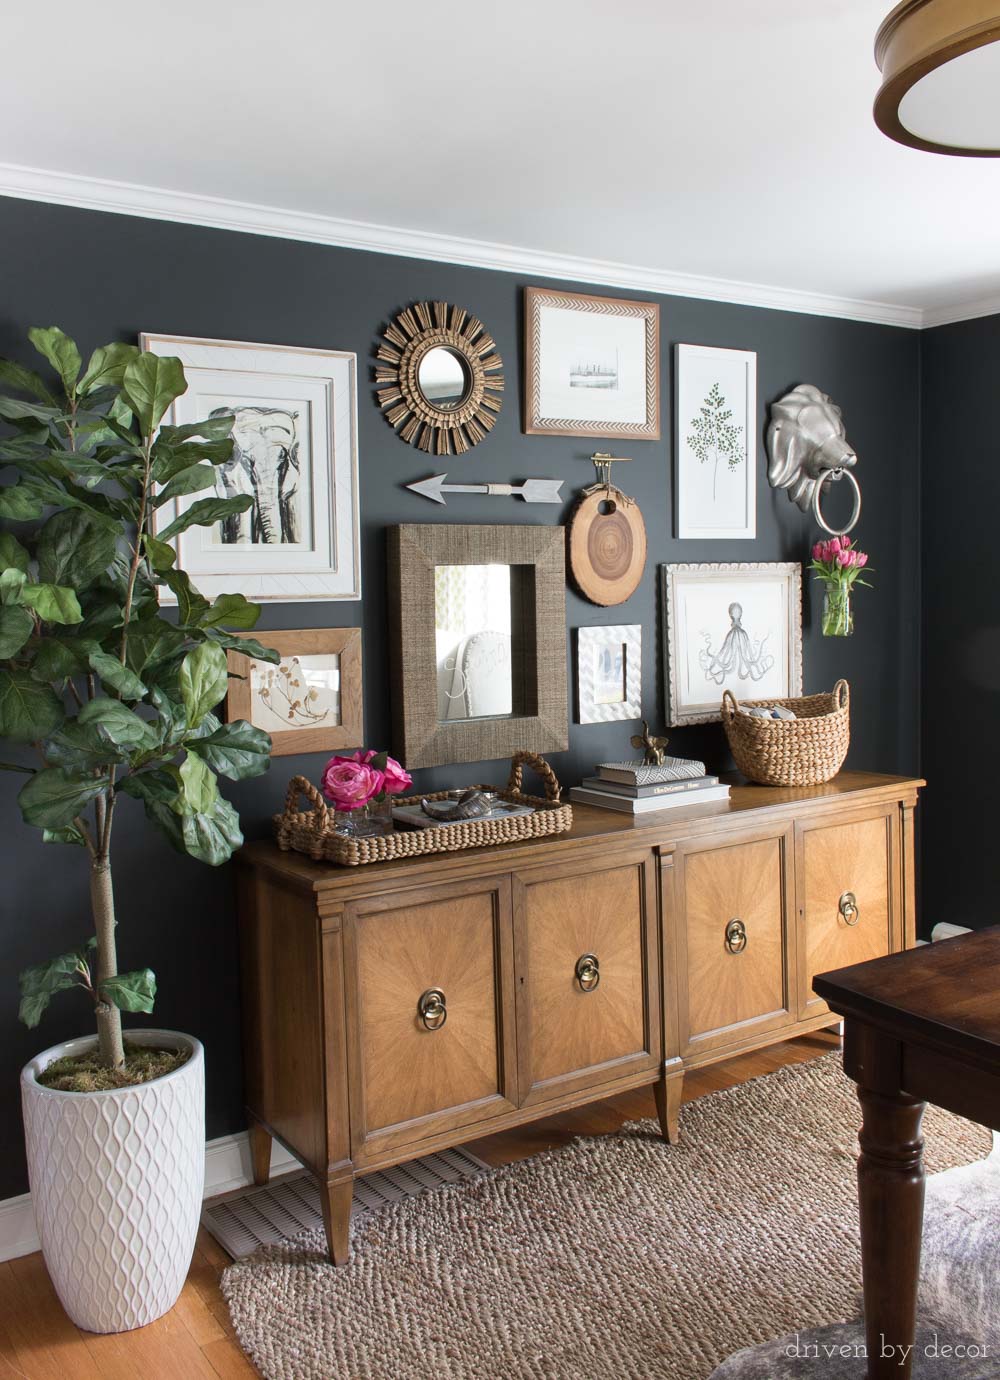
Obviously a few other things changed along with adding the gallery wall – the biggies were painting the walls (Benjamin Moore Nightfall) and adding a new credenza that I scored on Craigslist. I kept our gallery wall the exact same, only changing up what sits on the console, for the rest of the time we live din our home. That’s speaks volumes for a girl like me who is typically always changing and rearranging! You can check out {this post} on our home office for more pics!
A year after creating our home office gallery wall, I decided to add a second art wall to our home – this time in our family room. I went with a more tailored, grid arrangement which transformed this big blank wall:

into a statement-making feature wall:
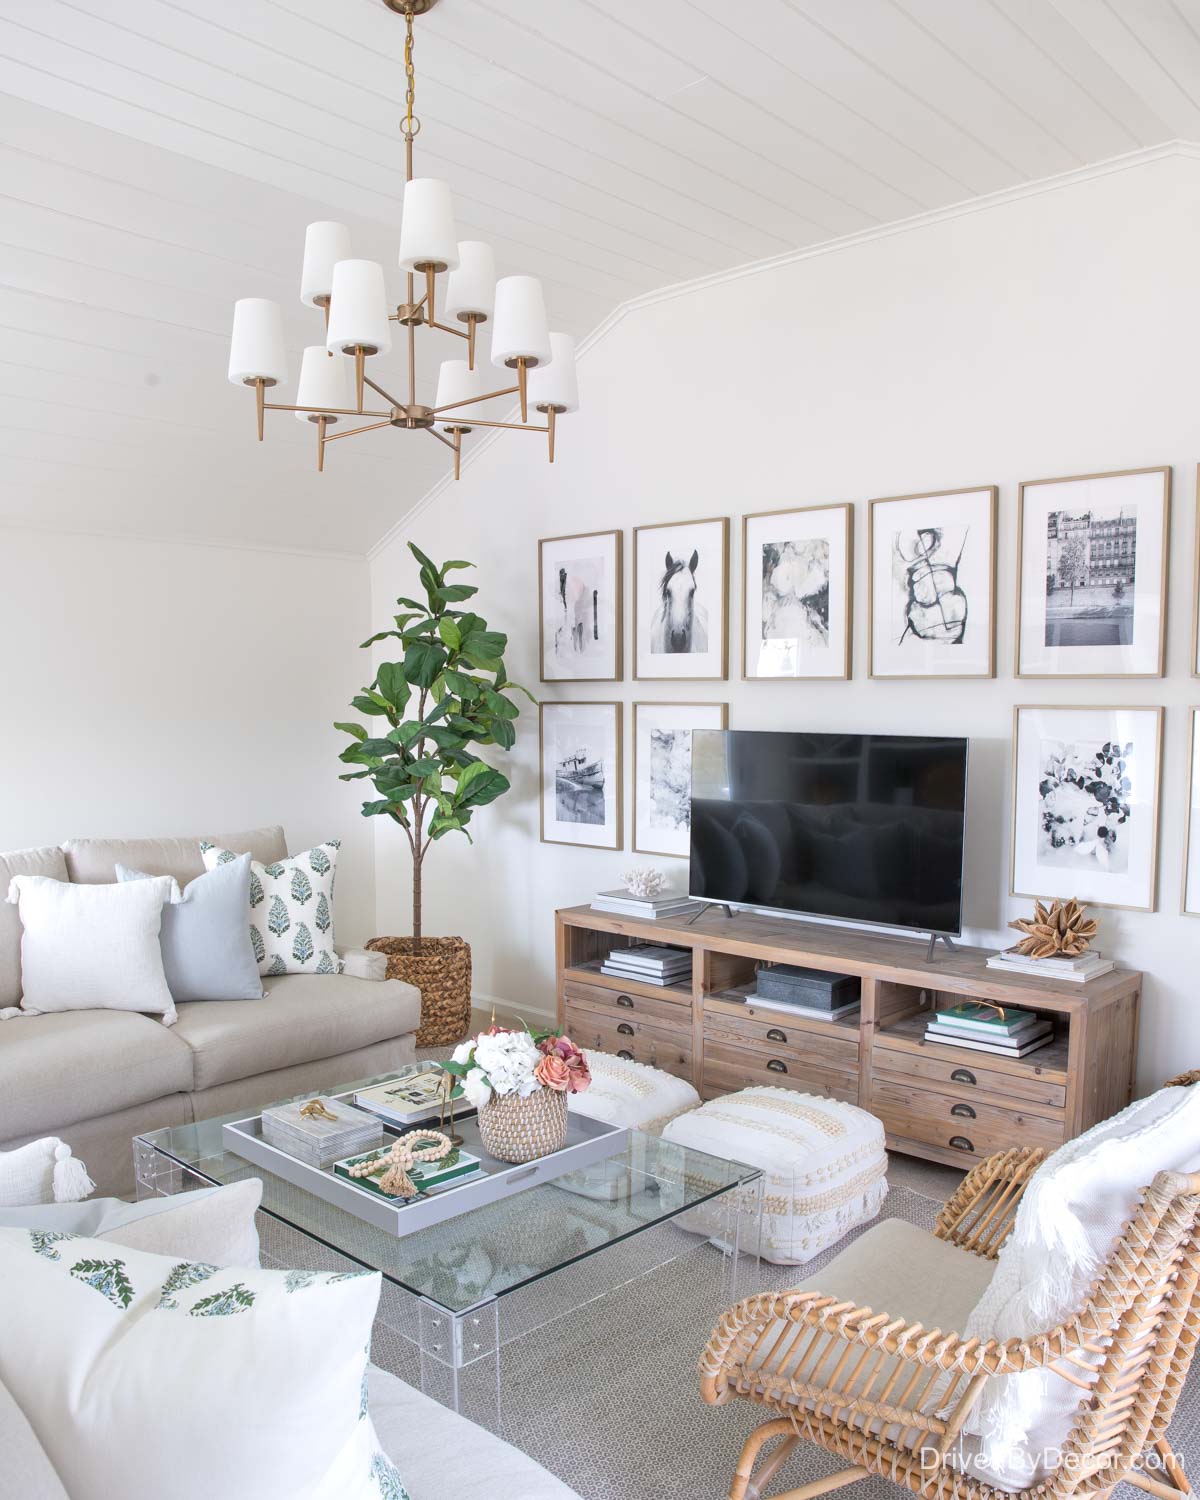
Sources: TV console (similar) | Chandelier (satin bronze) | White tasseled pillow cover | Blue linen pillow cover | Green & blue block print pillow cover | Faux fiddle leaf fig tree | Rug | Pair of floor poufs | Art prints (details in {this post} | Acrylic coffee table (similar) | Coffee table tray (28″ square) | Black and white striped box (on coffee table) | Brass cricket (on coffee table) | Wood beads | Basket planter | Rattan chair
I was pretty psyched with how it turned out considering I ordered everything at the last minute as part of my One Room Challenge makeover of this space and if it hadn’t worked out there was no backup plan in place. Most of you guys who come over to to the blog regularly have seen this space several times before but if you’re new here, you can check out the entire before and after transformation of our family room {here}, including a complete source list.

Our Drab Closet Turned Fab
Number three on my list wins the award for best functional improvement of my makeovers. Our master bedroom closet used to drive me CRAZY! It was a decent sized closet but with the center divider and the two sets of bifold doors, about ⅓ of it was pretty much inaccessible. Plus, when we opened the door to our bedroom, if the closet door was open it slammed right into it.
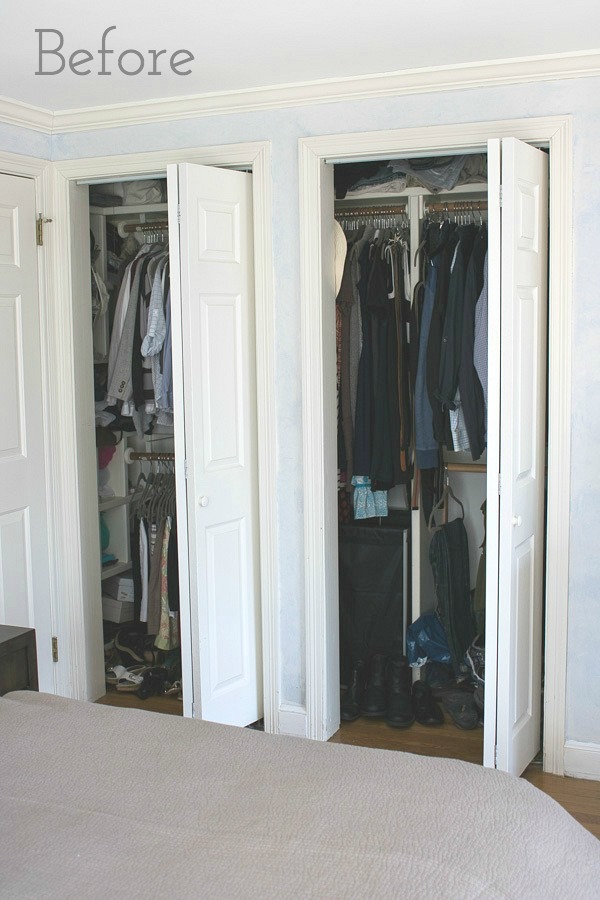
As part of the One Room Challenge makeover of our master bedroom, I had my contractor remove the center divider and bifold doors and I added IKEA drapes on a brass rod (a sprayed plumbing pipe!) to create a new glam closet that was 100% accessible:
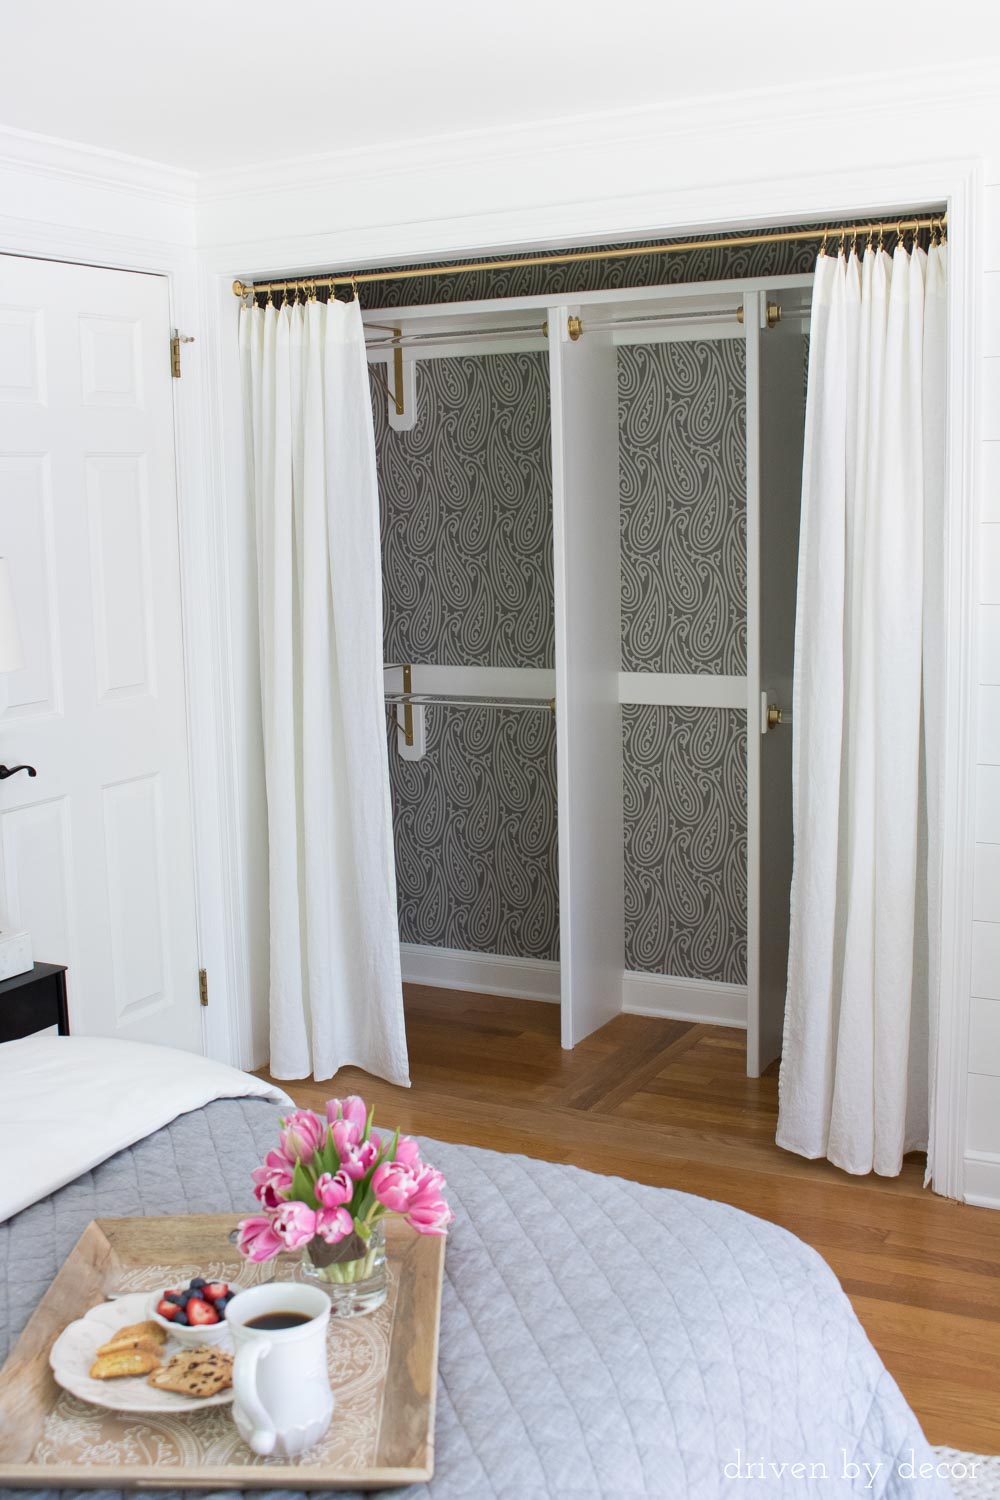
I’ve had several people ask me how I like having curtains instead of doors and after living with it for several years I have to say that I truly loved it. To be honest, 95% of the time the drapes just stay open and it’s super easy to grab things with no doors clanging into each other. And if we’re having guests over, it’s quick and simple to draw the curtains closed (and it looks nice that way too!). If you didn’t catch it when I made over this room, you can see my full One Room Challenge bedroom makeover {here} and see my more detailed post about my closet makeover (including links to each piece used) {here}.

Kicking Dated Tile to the Curb
Our house had a lot of dated tile when we moved in, including this yellow tile backsplash in our kitchen that had farm animals and flowers. And while the cow was pretty cute 🙂 I wasn’t feeling the country vibe. Add that to the fact that there were no outlets here (and we wanted to put our coffee machine in this spot) and it was time to say goodbye to the tile backsplash and countertops:
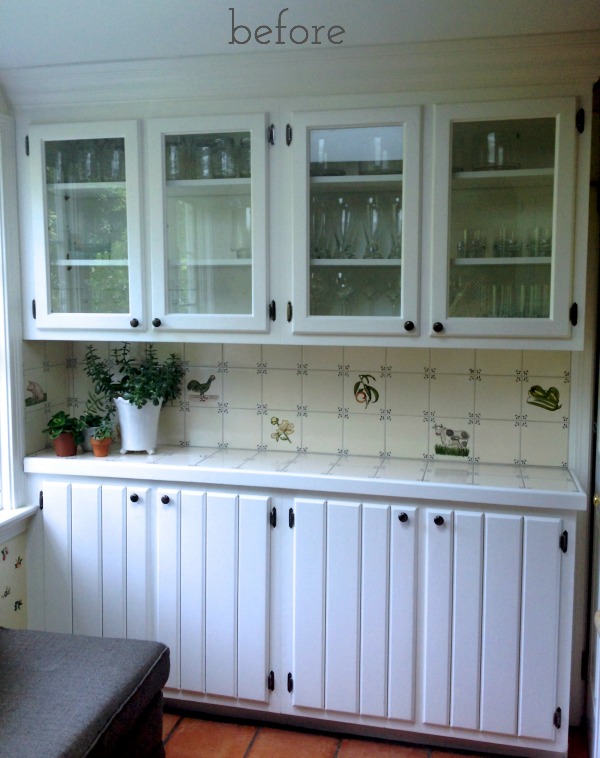
We didn’t want to spend a lot of money so just drywalled the backsplash – there’s no sink or reason for there to be water issues in this spot. And for inexpensive countertops, we used IKEA butcher block that my contractor cut to size and that I then sealed with Waterlox. We ended up turning this little corner of the kitchen into a cute little coffee station:
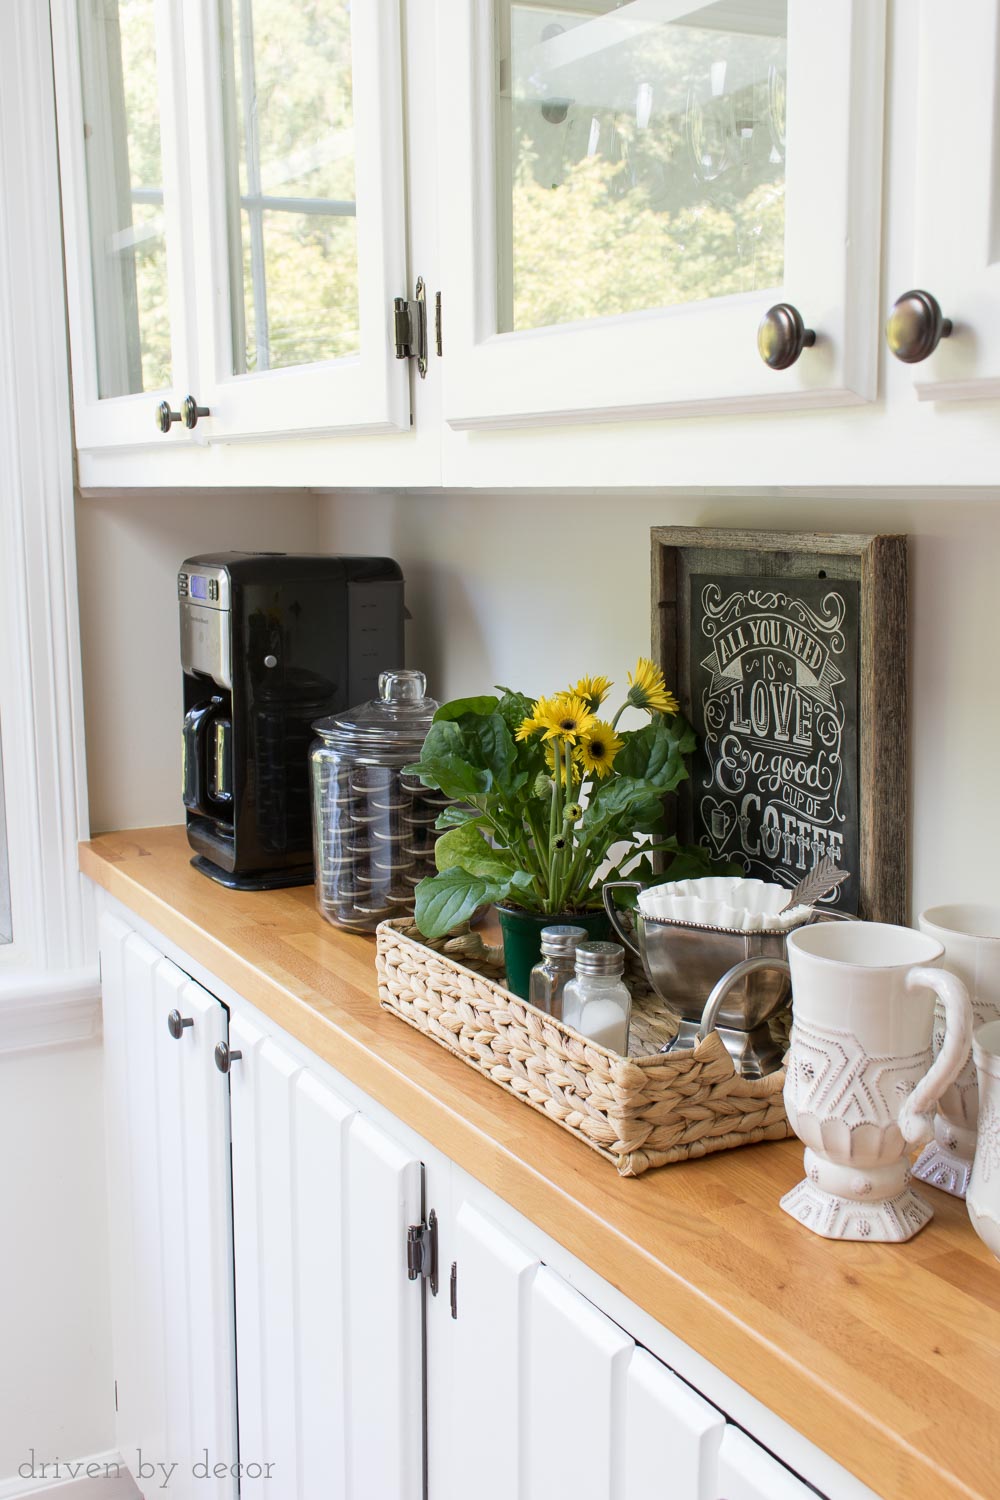
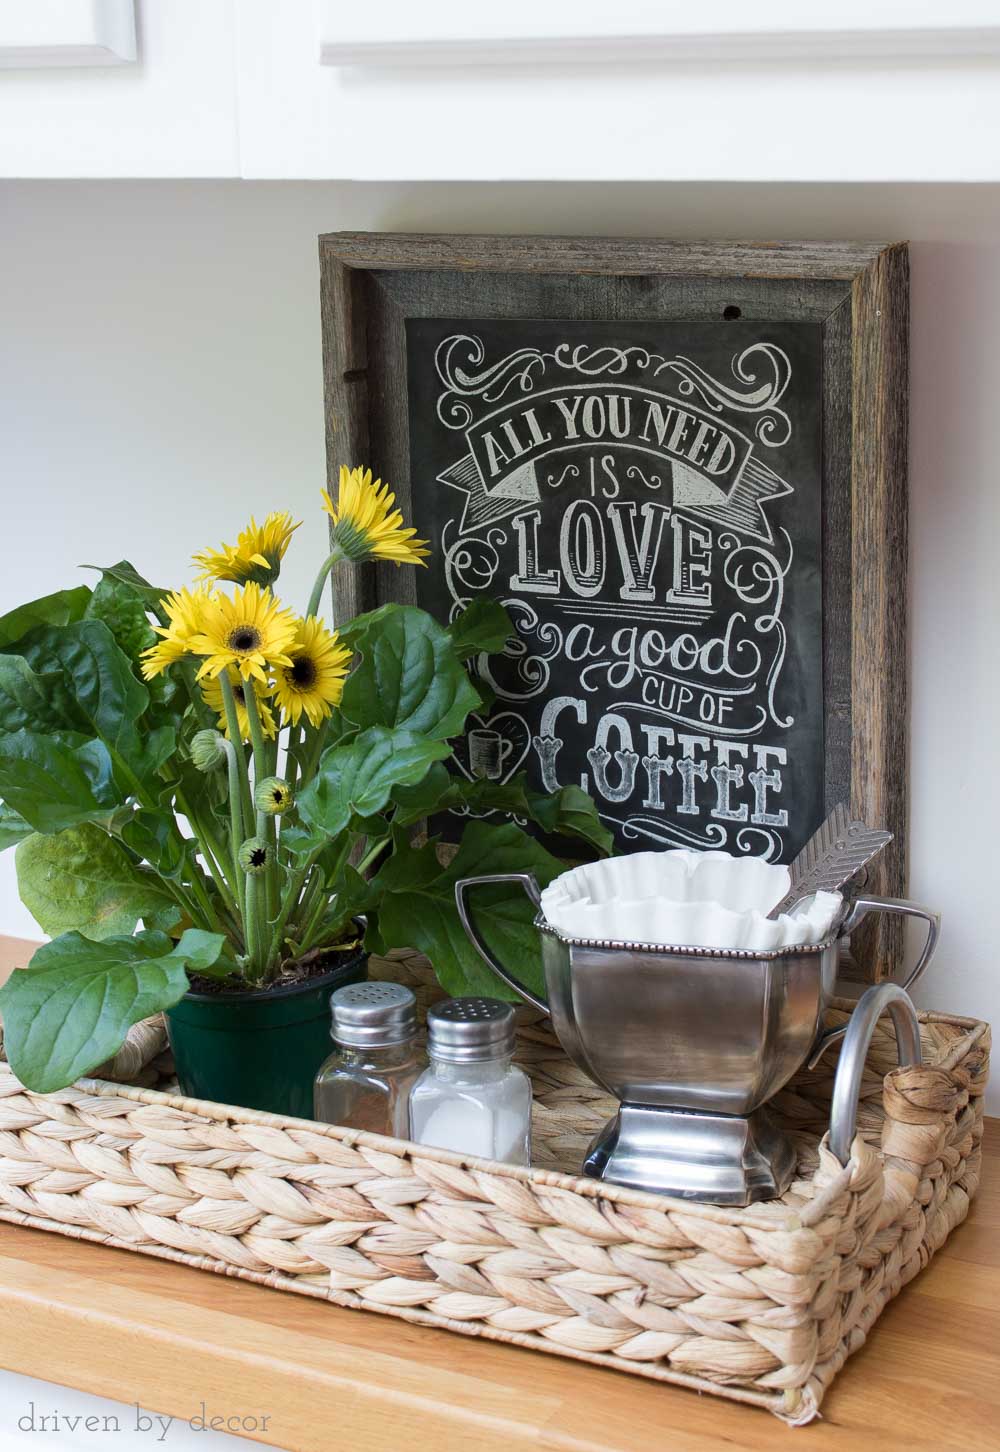
Coffee bar sources: Coffee chalkboard print | Glass lidded jar | Heart shaped coffee scoop
Of course a few years later we did a full kitchen remodel and I couldn’t love our new kitchen more! Check out our remodeled kitchen {here} if you missed it!
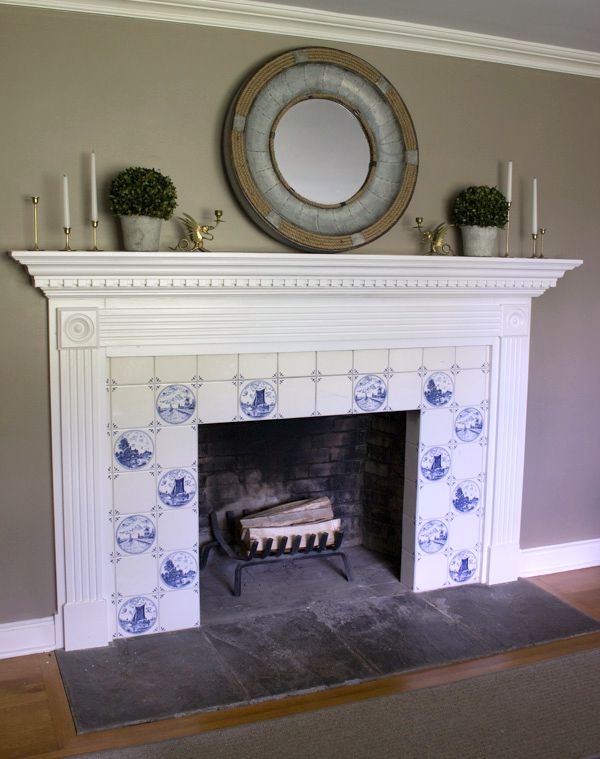
Another tile demo job was in our living room. I actually had a hard time deciding whether or not to tear this tile out because I kind of liked it but it just didn’t work well with everything else that I had in the room (and it was an inexpensive reproduction, not real delft tile). Once our fireplace makeover project was over (we also redid the mantel), I had no regrets because our fireplace went from this:
to this:
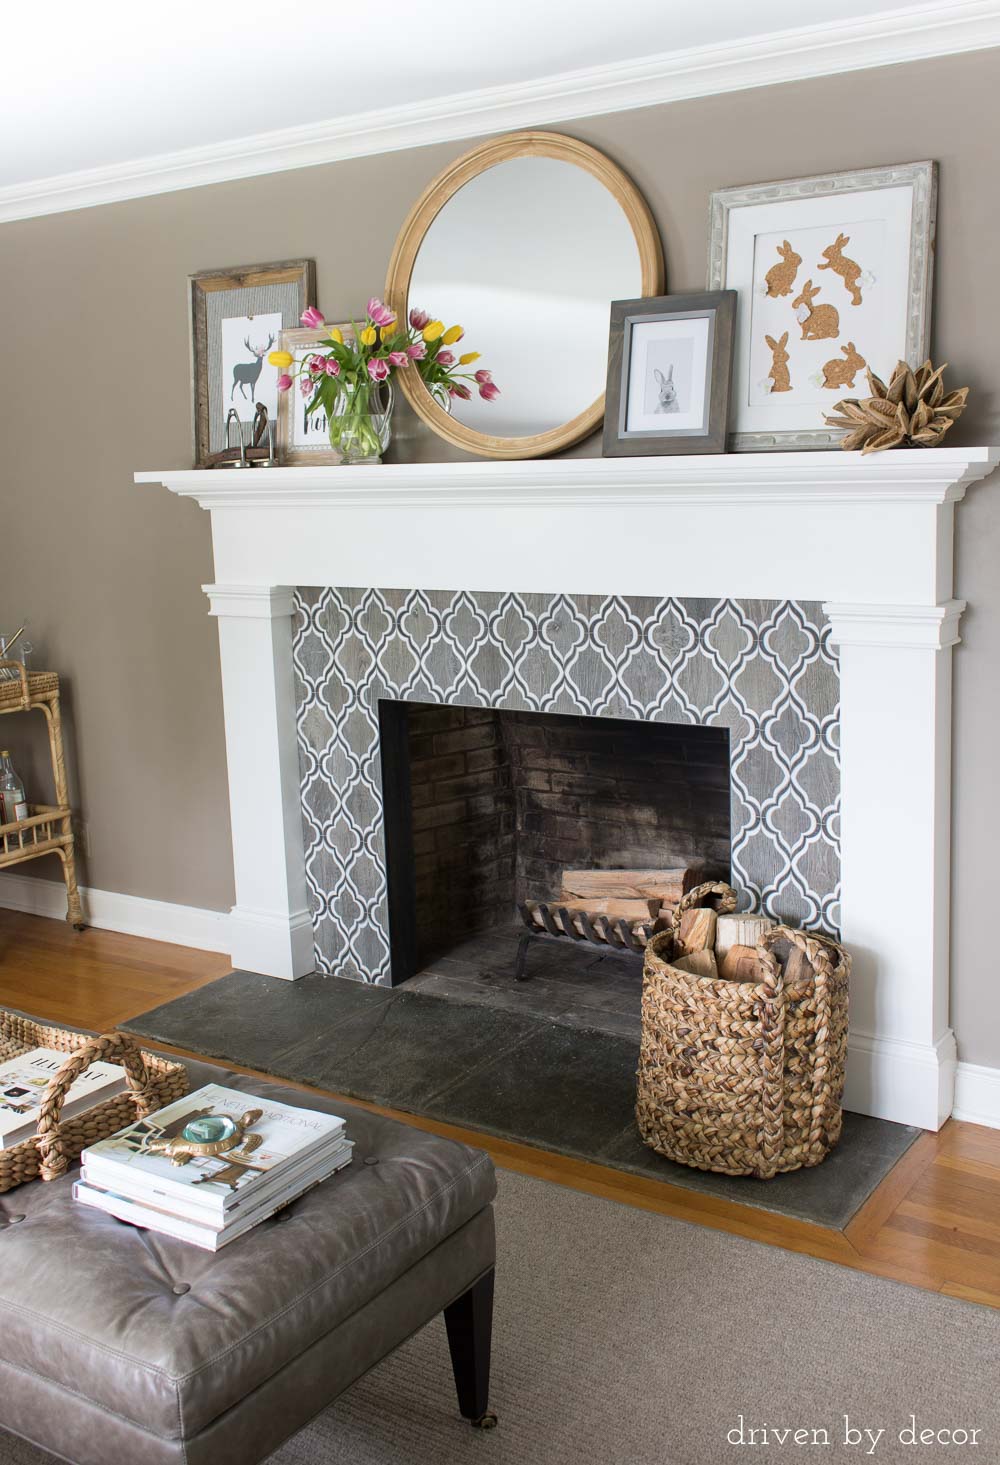
I couldn’t be happier with how it turned out and and how the new tile is so much more of a cohesive fit with the rest of our living room decor. If you want to read more about our fireplace makeover see {this post} and if you want a full tour of our living room check out my post on this space and the new paint color (Anew Gray) {here}.

Blue & White Teen Bedroom
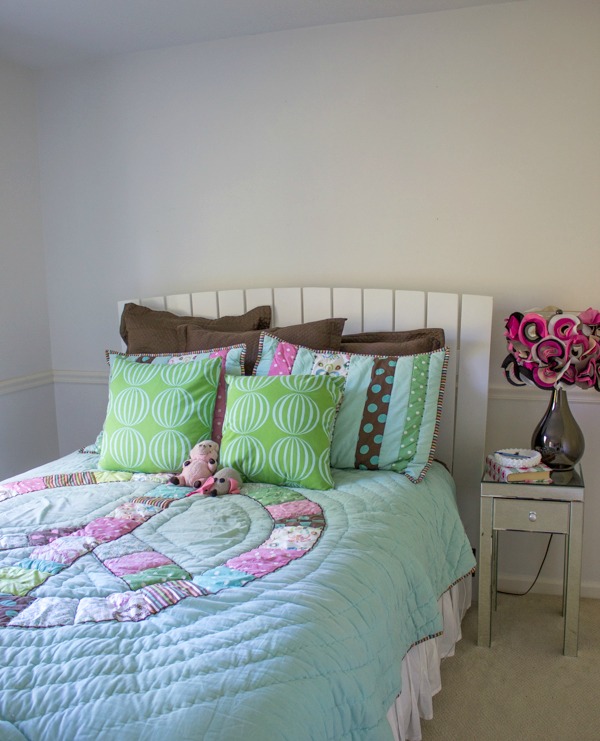
I’m wrapping things up with a makeover that wasn’t my favorite because of the way it turned out (although I do totally love it!) but because of how fun the makeover reveal was. Several years back I completely redid my oldest daughter’s room and while she definitely had a say in some of the things I chose for the room, she was willing to let me make a lot of the decisions on my own and surprise her with a big reveal. So I kicked her out of her room for a few weeks and kept all of the progress behind closed doors. The last time she saw her room it looked like this:
and when she returned to it, it looked like this:
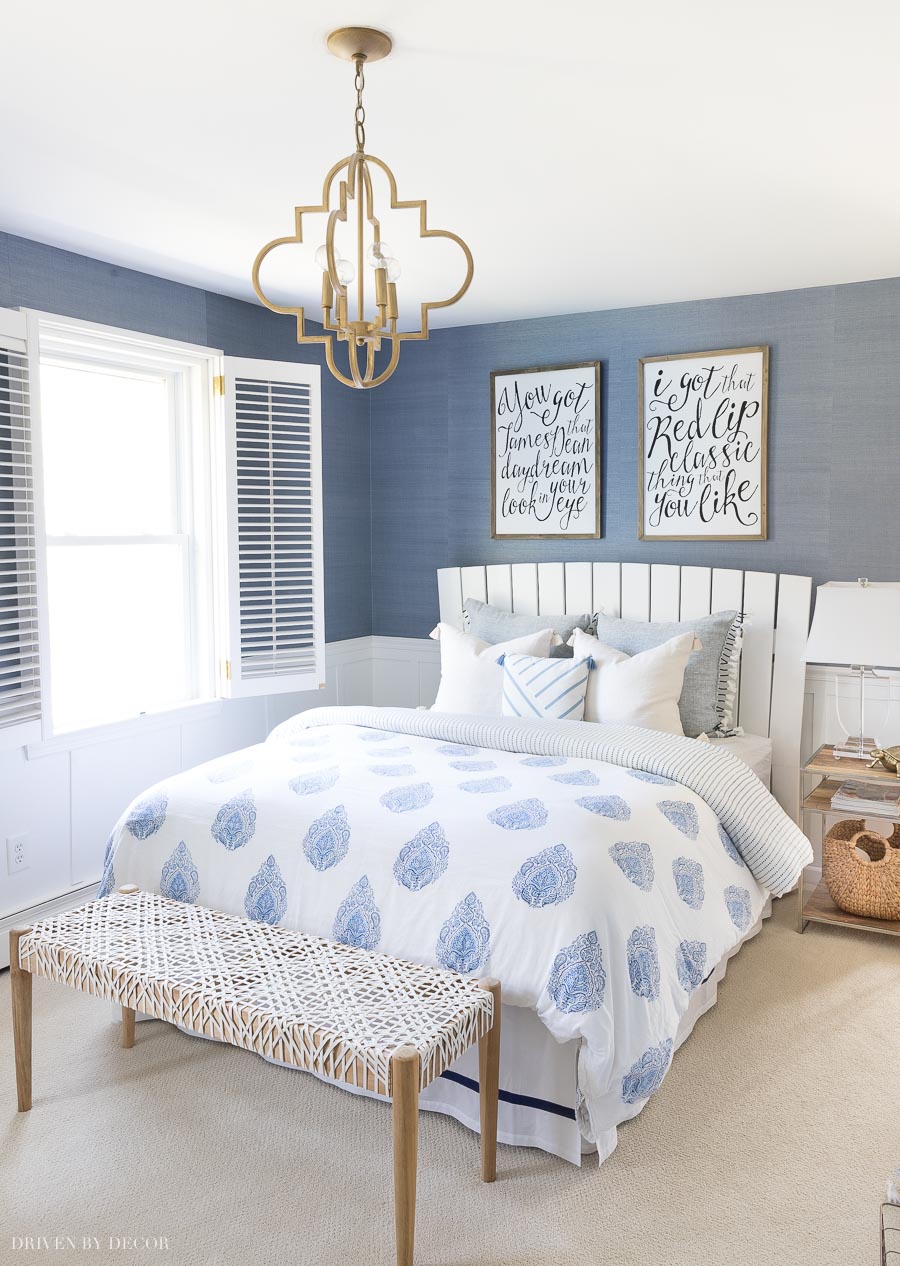
Scroll & click/tap images below to shop my daughter’s room:

Her reaction was priceless and it made the whole makeover process so much fun! Other than the obvious redecorating there were several projects that I knocked out as part of the makeover, my favorite of which is the transformation of her flat closet doors:
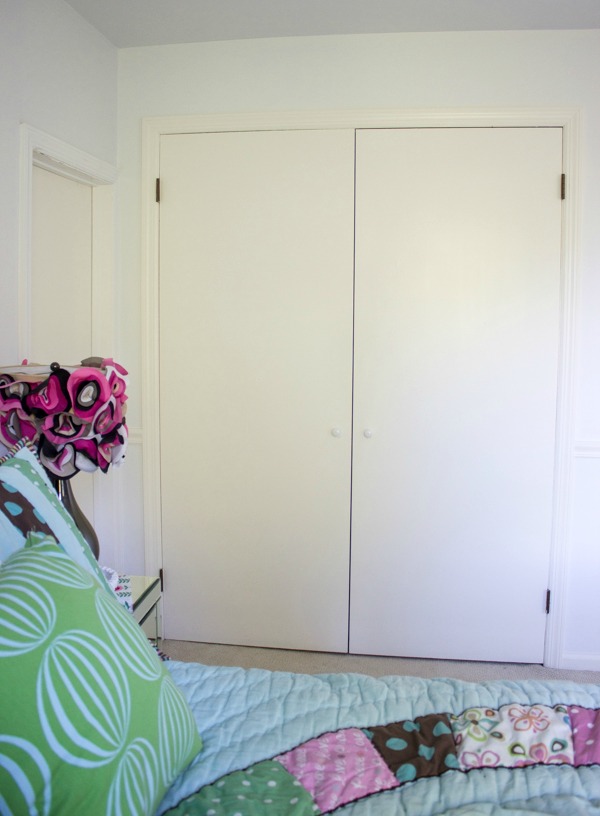
into paneled doors with inset cork boards. It’s the perfect spot for her to pin and repin things without having to take up wall space with a bulletin board:

You can get the details of this makeover in my post on closet door ideas.
So there you have it… those are my all-time favorite “before” and “after” makeovers. I’d love to know which one you like the best!
Update!: Since the time of this post, we did a master bathroom addition that turned out better than I had ever dreamed! Check out our master bathroom {here} for pics and sources!


