Looking for some garage organization ideas? We went to town on our mess of a garage and organized it from top to bottom. Here’s how!
When we finally finished our kitchen remodel, we had the beautiful new kitchen that we had dreamed of but we also had a garage that looked like it came out of an episode of Hoarders. To be honest, it wasn’t exactly neat and tidy before our kitchen renovation but the addition of extra tools, molding samples, packaging materials, painting supplies, and a massive layer of construction dust took it to next-level chaos:
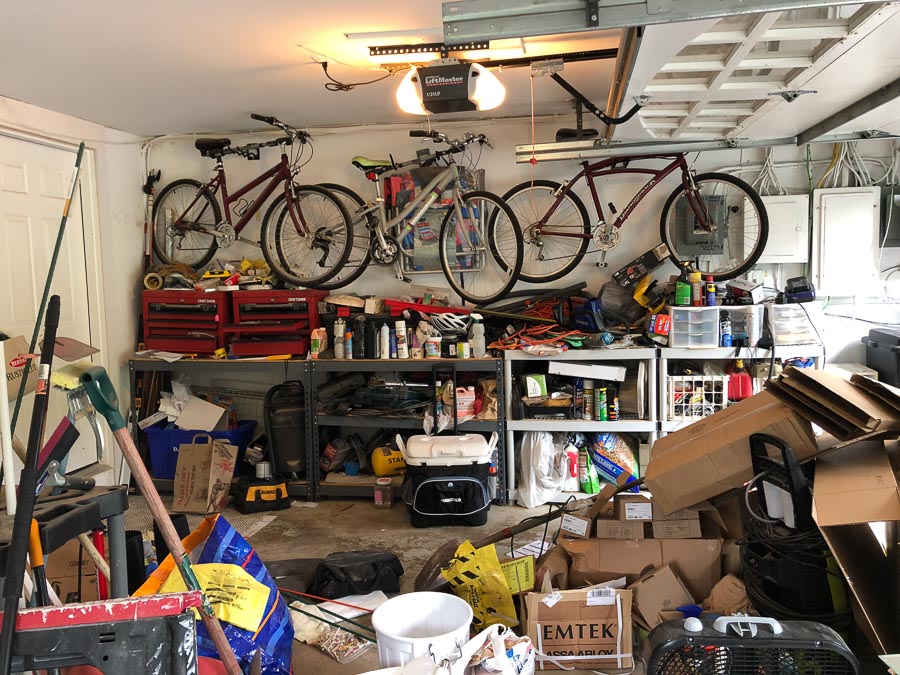
Not only could we not get even one of our cars into the garage, but finding anything in this disaster ended in a 20 minute hunting expedition with only about a 30% chance of unearthing what we were looking for. With our current “system” of a few freestanding shelves, there was simply no way that we’d be able to organize and find a home for everything piled high on the shelves and littering the garage floor. I started looking at options for custom garage organization systems and landed on The Container Store’s Elfa system as the perfect one to get the job done (and look pretty doing it too!).
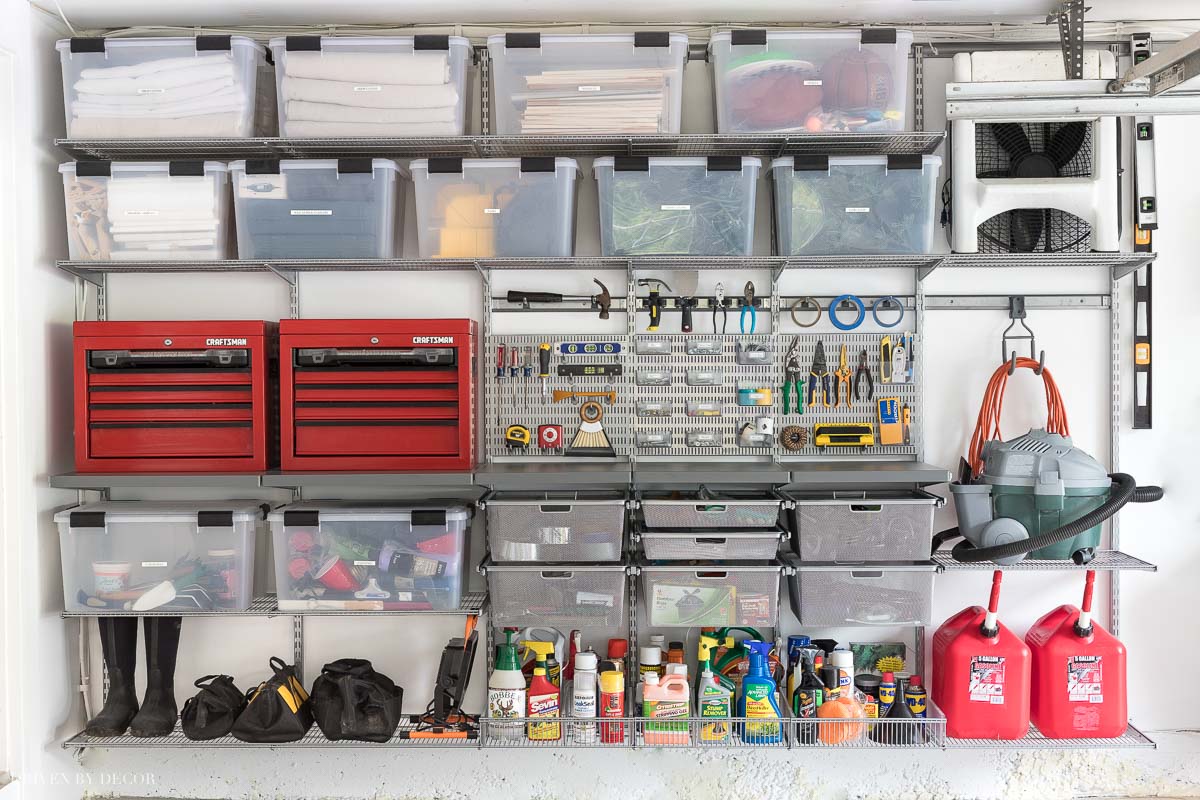
Within just a few weeks, we transformed our embarrassing mess of a garage from a total disaster to this organized beauty:
Yes, that is seriously my garage! And yes, I seriously have the happiest husband on the planet right now! 🙂 There are two other areas of our garage that we also redid to hold all of our tools and while I’m DYING to show you more of this main storage space plus those other two spaces, first I’m going to share a little bit about getting from point A (hoarder status) to point B (a garage system I want to whisper sweet nothings to). Here’s how to get the job done (post includes affiliate links – full disclosure statement available {here}):
1. Measure Your Available Wall Space & Take Inventory
To kick off my garage organization project, I took measurements of the available wall space in the three areas of our garage that I wanted to organize. I also made notes about anything on the walls or close to them that I’d need to work around such as wires, outlets, and the garage door track. These are the three spaces that I was looking to tackle:
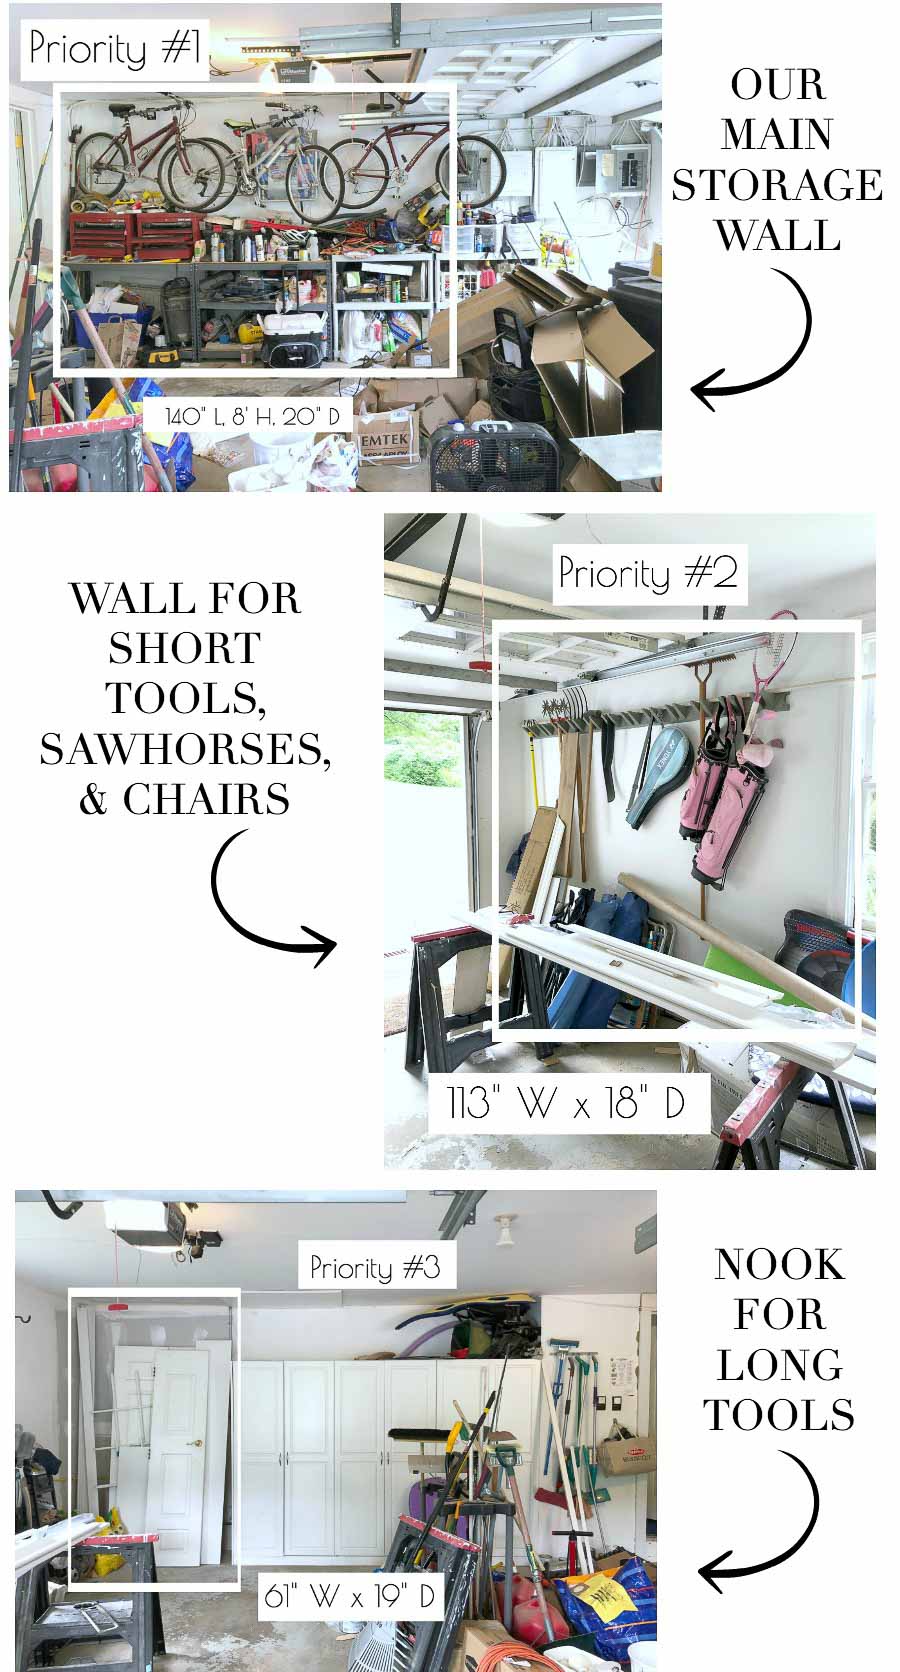
I also recorded the measurements of the larger/oddly sized items that I wanted to store like our twin tool boxes, Shop Vac, sawhorses, box fan, etc. to make sure that our design plan included a designated space for them.
2. Search The Container Store’s Garage Solutions for Inspiration
The best way to start designing a garage organization solution that you’ll love is to first check out all of your options! I scoured the Elfa garage solutions {here} and found several must-haves including {these Elfa utility boards} that {these board hooks} and {these clear board boxes} hook onto. I love them! They keep all of my most-used hardware and tools organized and easy to grab:
3. Design Your Space
Now’s the fun part – designing your new, custom organized space! The fact that you get FREE expert design help is one of my favorite things about the Elfa system. You can meet with an Elfa designer at your local Container Store or work with one over the phone or by email – whatever works best for you. I started the process by giving an Elfa designer some photos of my garage, the measurements of my available garage wall space, dimensions of the larger items I wanted to incorporate, my budget, and a bunch of wish list notes. After he came up with a design plan for all three of my spaces, I made an in-store appointment at my local Container Store to review the plan and tweak and finalize everything in person.
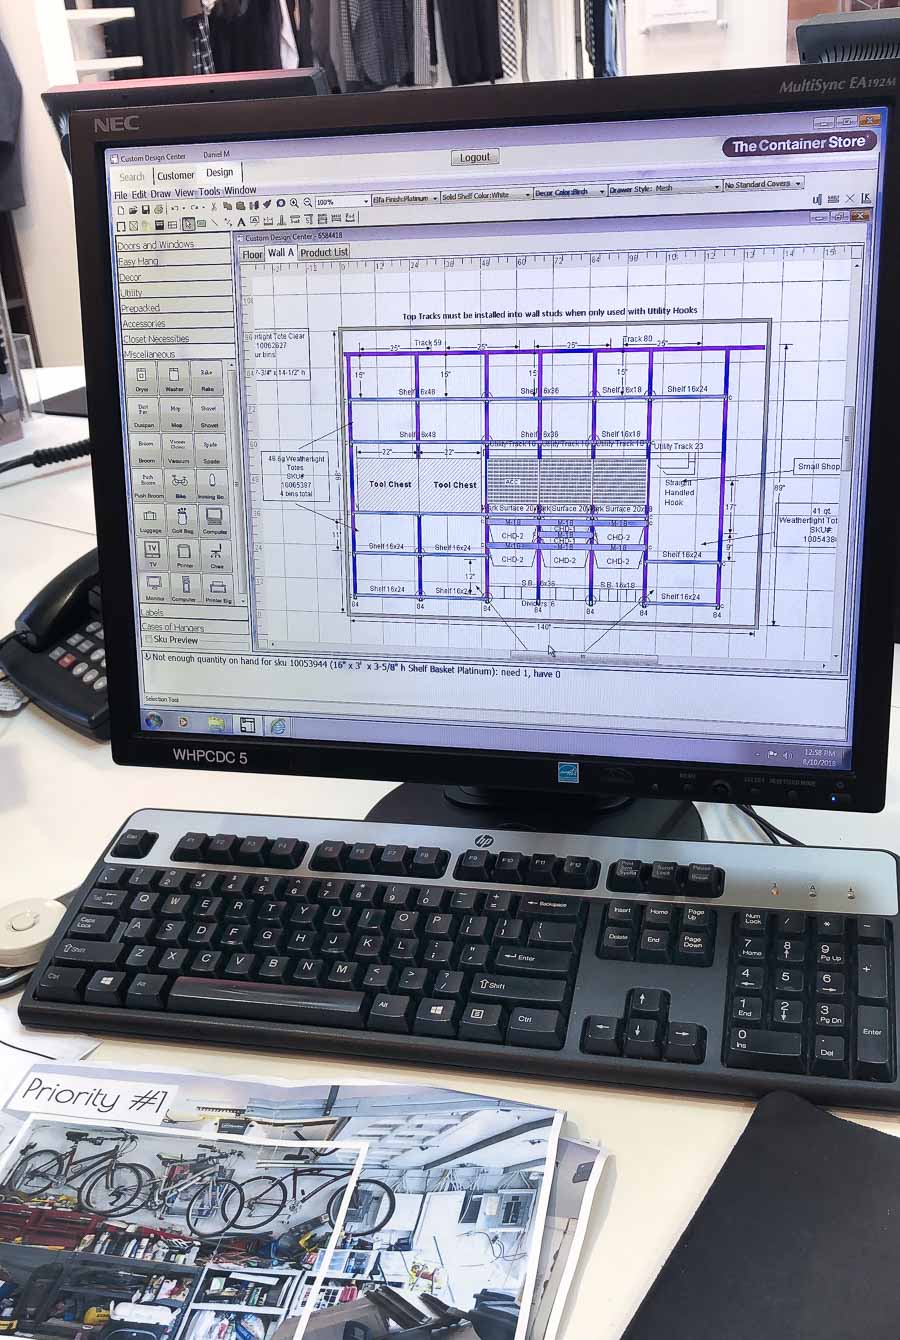
The designer (thanks Daniel!) also scheduled the delivery of my Elfa components and my installation date. I decided to use their installation services since I knew I’d be putting a ton of hours into this garage project already but DIY installation is an option that will save you about 20% so it’s a good way to save money on a tight budget!
4. Get The Dirty Work (Literally) Done!
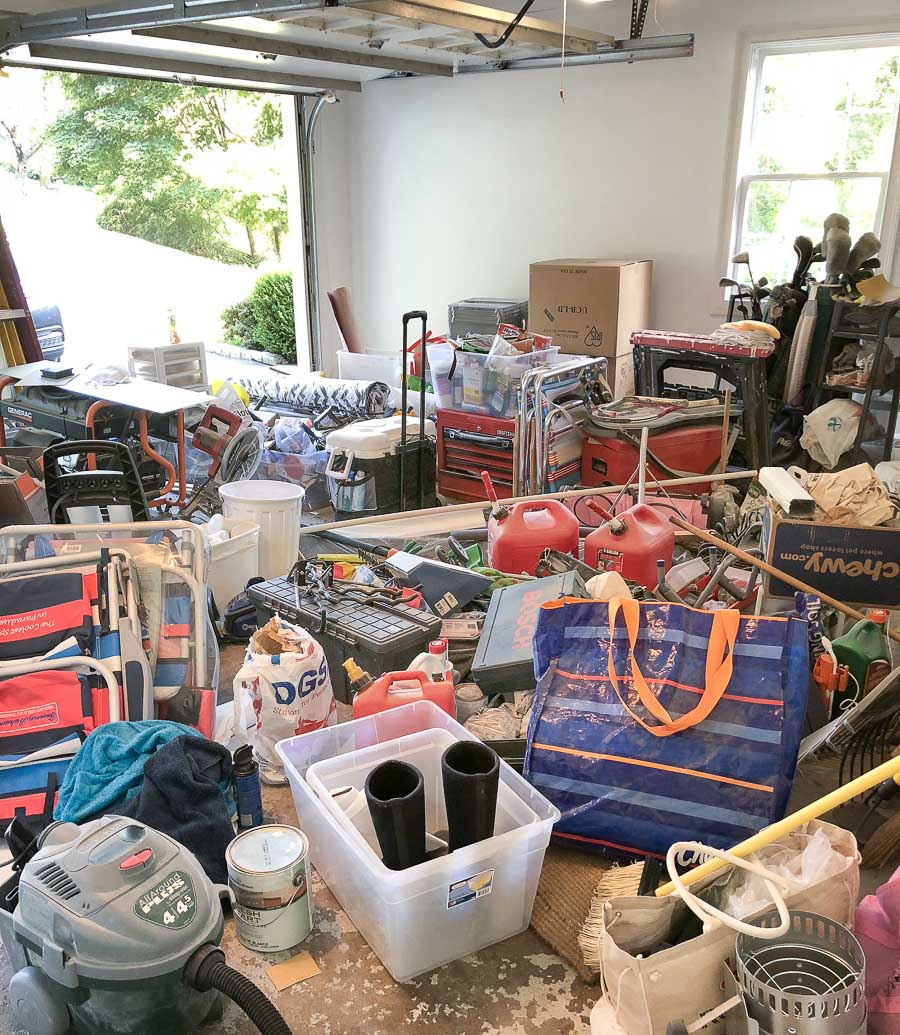
I left The Container Store SO excited about my design plans that would finally get our garage chaos under control! It was the motivation that I needed to do a big garage clean-out and also get everything out of the way for the installers who would be arriving in about a week. I roped my daughters into helping me take the piles of crap off our old shelving and pile it into the middle of the garage – shield your eyes people because this stage wasn’t pretty:
My husband and I then weeded through it all and threw away anything that was broken or unusable, took the old paint cans to be recycled, and drove two car loads of stuff to Goodwill. Basically, if we hadn’t used it in the five years that we’ve been in this house, it was outta here! Of course I chose the hottest week of the year for my garage clean out (learn from my mistake and do this in the spring or fall!). It was SO NOT fun but having an installation deadline looming over me was actually a beautiful thing – it forced me to knock our garage cleanup out instead of procrastinating about it for weeks like I know I would have.
5. Delivery of Supplies & Installation of Your New Elfa System!
Once everything was away from the garage walls, they looked pretty dingy and sad so I filled any nail holes and rolled on a fresh coat of paint to make it a clean slate. Then I was finally ready to start putting everything back together! The next day my Elfa supplies were delivered to my house (they schedule a delivery window so you can make sure you’re home if you’d like to be):

And then the day following that was my scheduled installation day! A local installer came on what was literally one of the hottest days of the year (poor guy, he was drenched by the end of the install) and he had all three of my Elfa systems up on the wall in just a few hours. One of the cool things about how installation works is that they can cut things to size on site so after my installer arrived we reviewed the design plan and a few things we had to work around in our garage and then were able to make a few minor tweaks on things like the height of some of the Elfa rails and shelves.
6. Put Everything Back On Your Brand New, Beautiful Elfa Units!
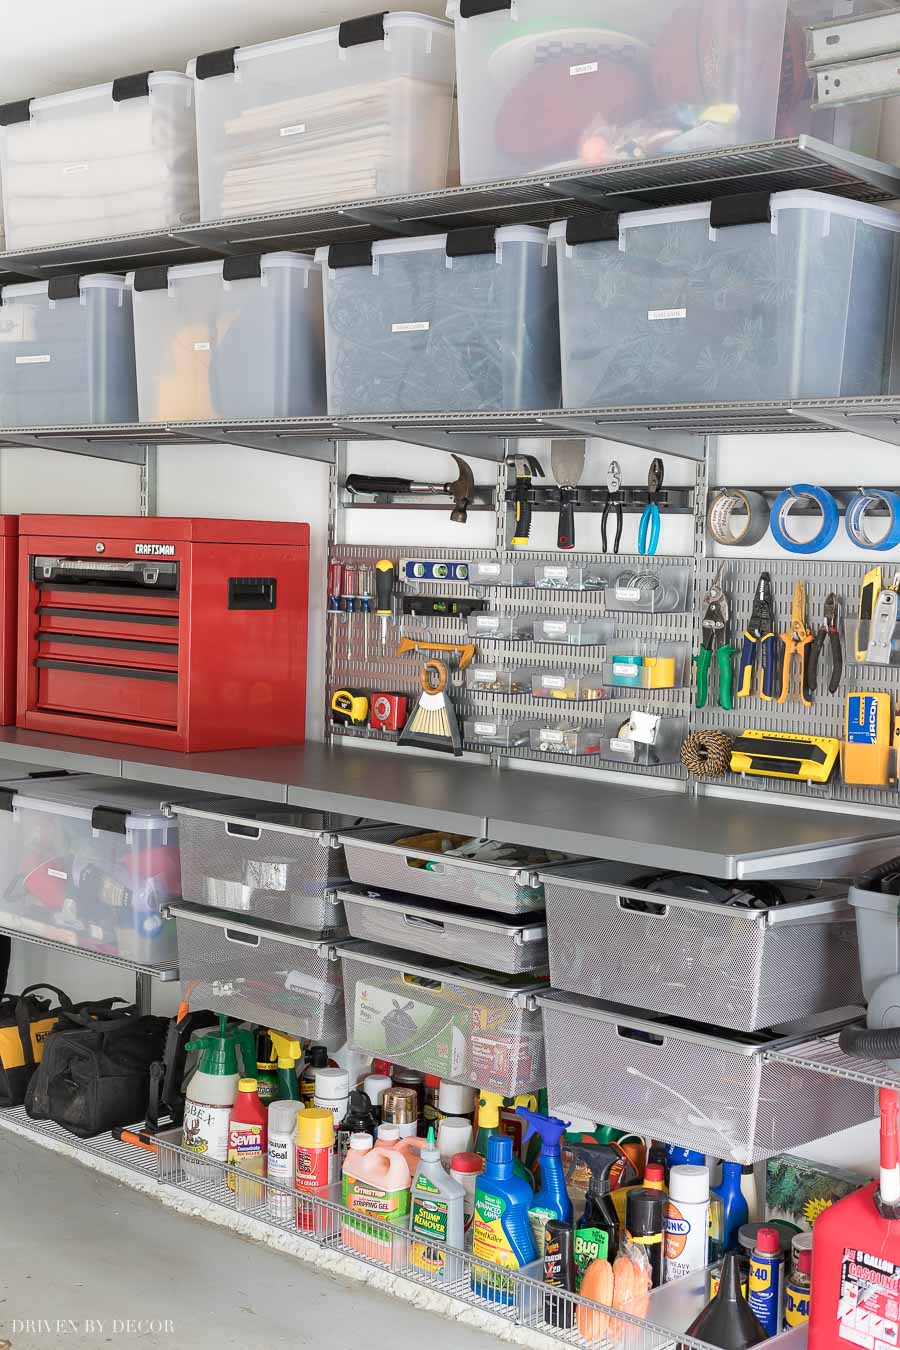
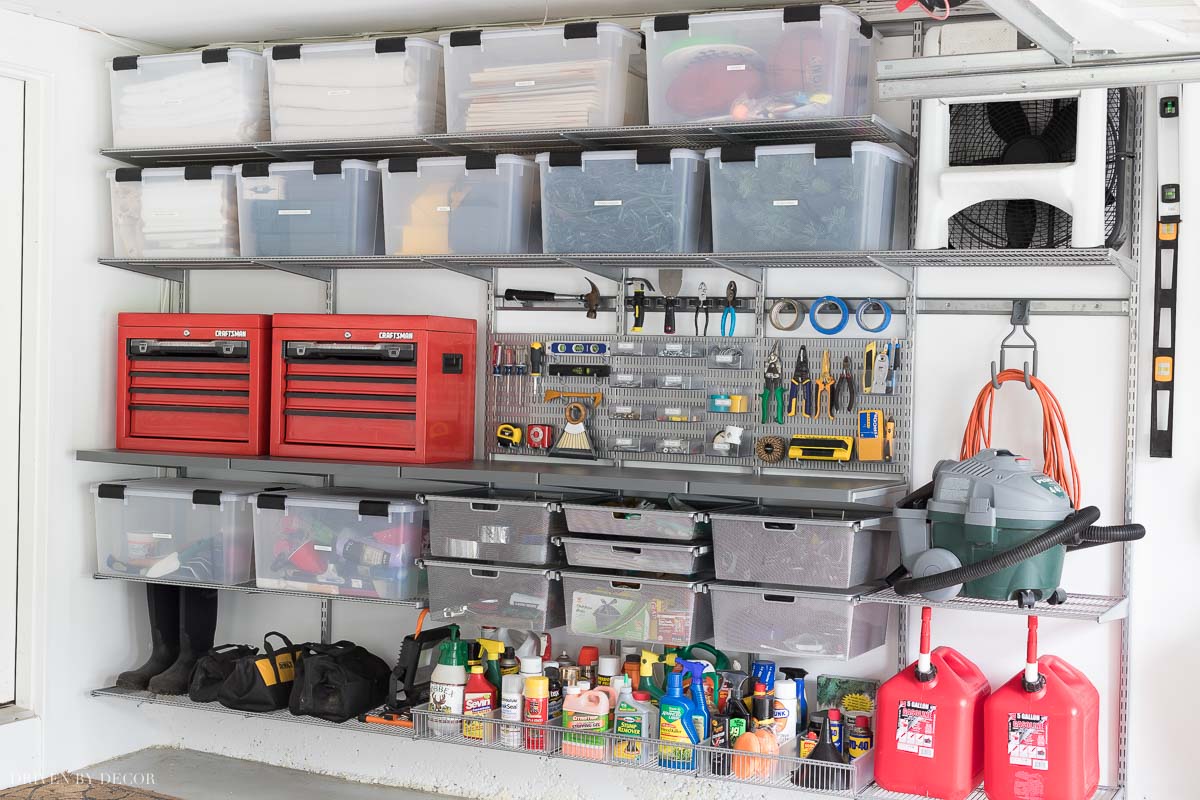
It was a slow process, but over the course of several days my husband and I worked to get everything that was piled in the middle of our garage onto our new Elfa units. This is when our garage organization project really started to take shape! We had decided to move the three bikes that were previously hanging in the garage down to our basement for storage since we only use them a few times a year – this allowed us to go all the way to the ceiling with our Elfa unit to totally maximize our space:
The top two racks were filled with {these clear weathertight totes} with lids that lock securely in six spots so that they’re air- and water-tight. I have larger 62 quart totes on the tops shelves and smaller 46 quart totes on the shelf below. They hold everything from painting tarps to saws and sports equipment to Christmas lights and garlands. I used my label maker to print out labels for the front of each tote which was probably unnecessary since they’re clear but labels make me happy. The second shelf also holds our box fan and folding stool – we designed the top shelf to be a bit shorter specifically to allow room to store them.
The next row down we have {these Elfa work surfaces} instead of typical shelves. They’re made of epoxy-bonded galvanized steel to withstand a lot of wear and tear and they can also support quite a bit of weight (our red tool boxes are super heavy!):
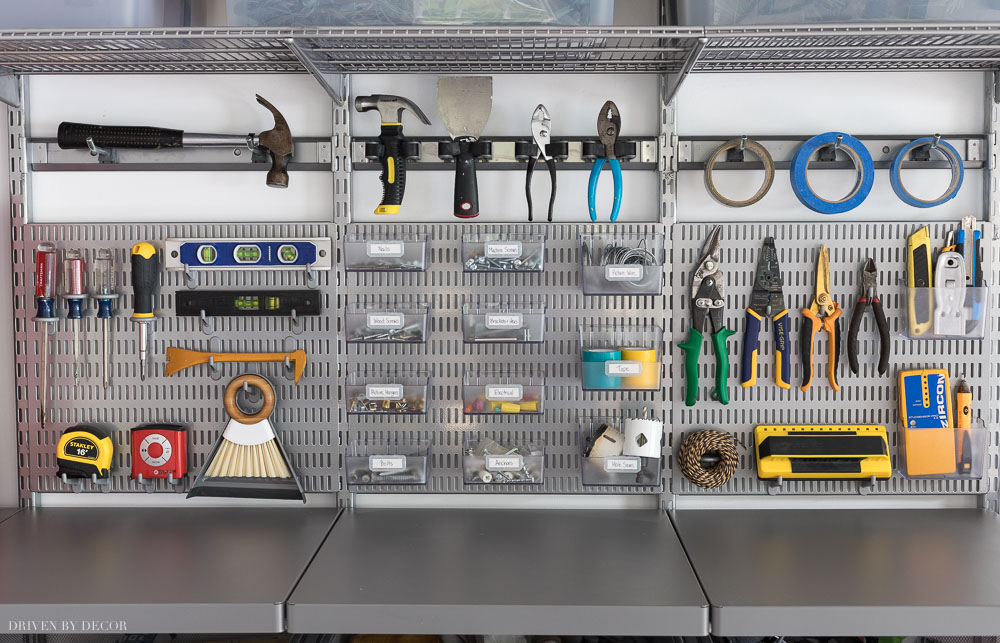
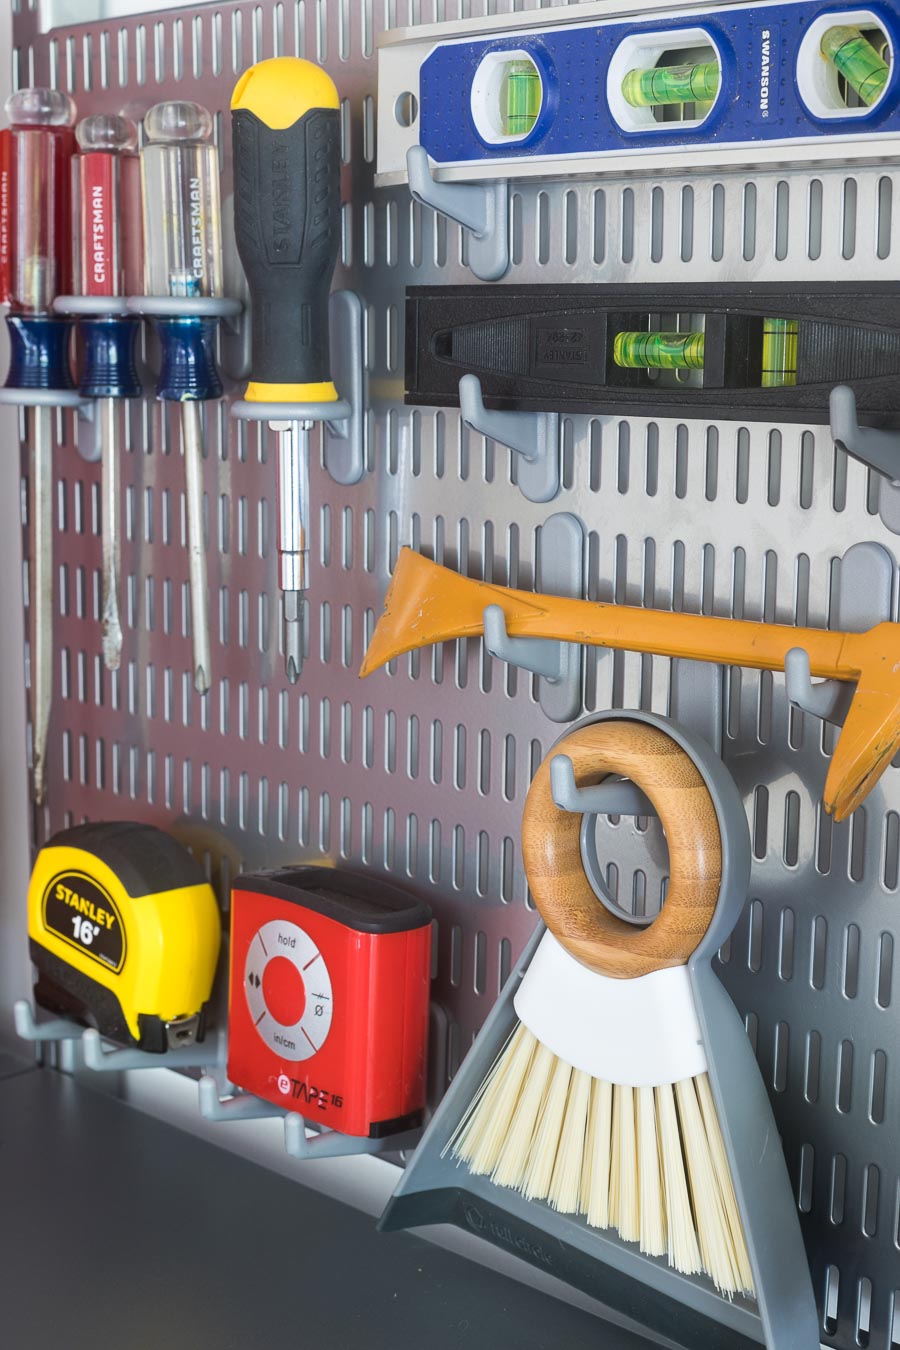
And then there’s my much-loved utility boards: 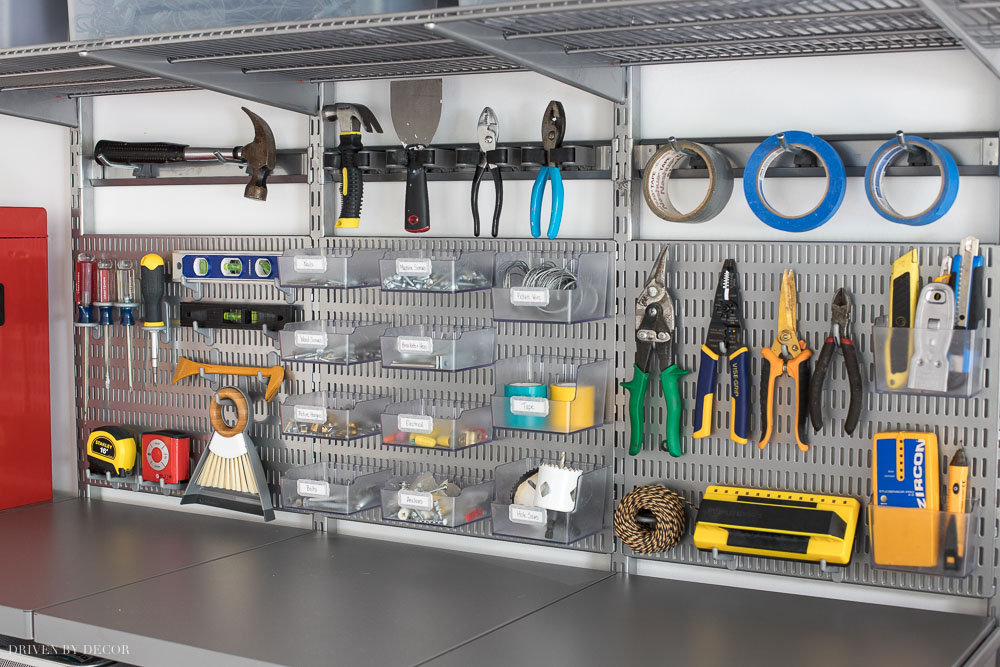
Scroll & Click/Tap Images Below to Shop my Utility Board:

Over on the left side I used {these circle board hooks} to hold screwdrivers and {these short and long board hooks} to hold levels, a tape measure, and {this super cute mini brush and dustpan}:
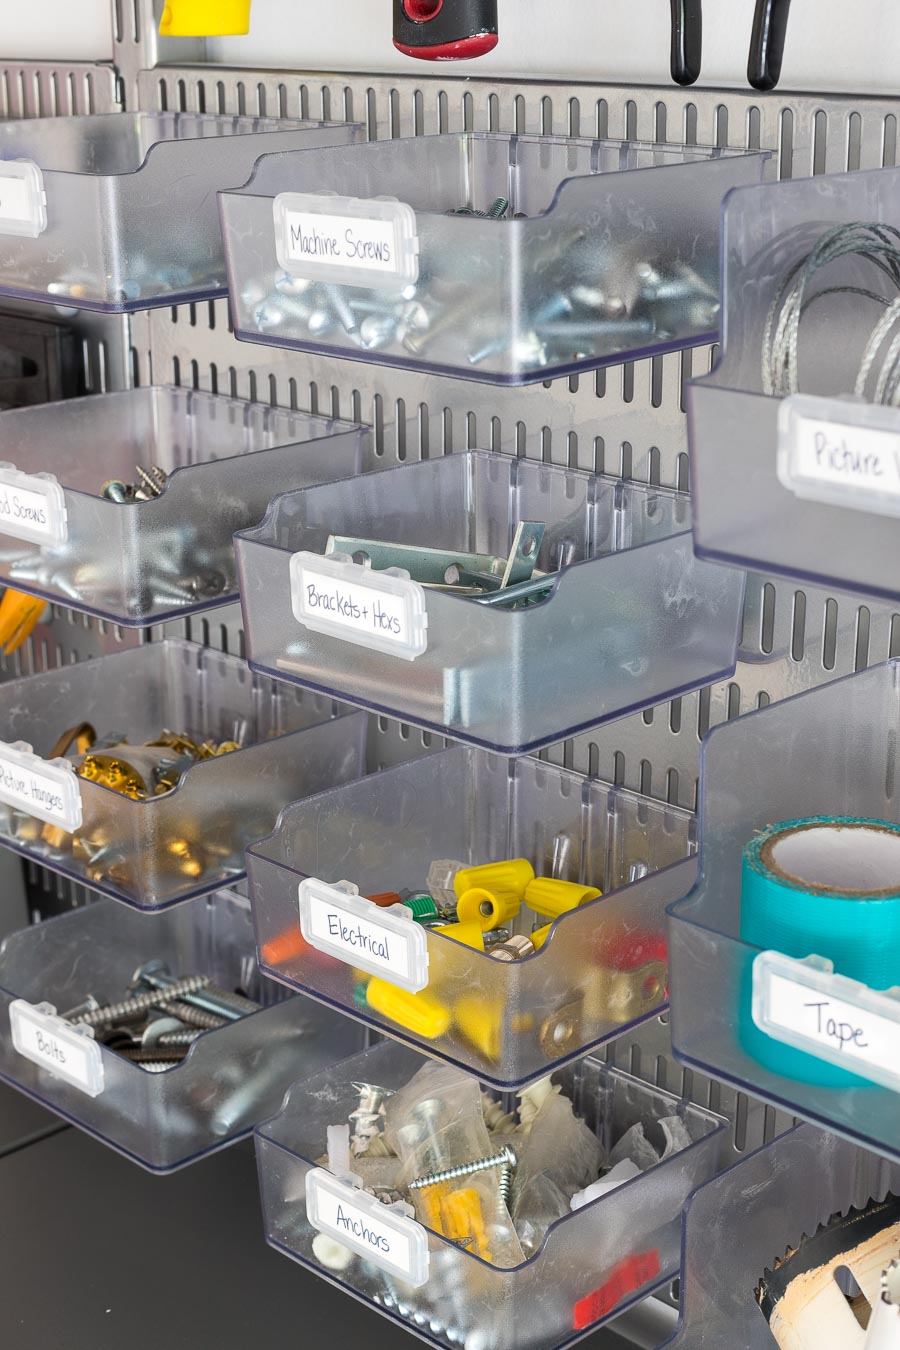
In the middle, I used a bunch of {these utility board boxes} to store things like screws, picture wire, and wall anchors. They lift on and off the boards easily so you can take them down to look through or to take with you for use on a project. I used {these Elfa label holders} to label the contents because again… I heart labels:
And then on the last board on the right, I have several of {these slim utility hooks} holding wire cutters along with hooks holding our stud finder and twine and clear board boxes holding razors:
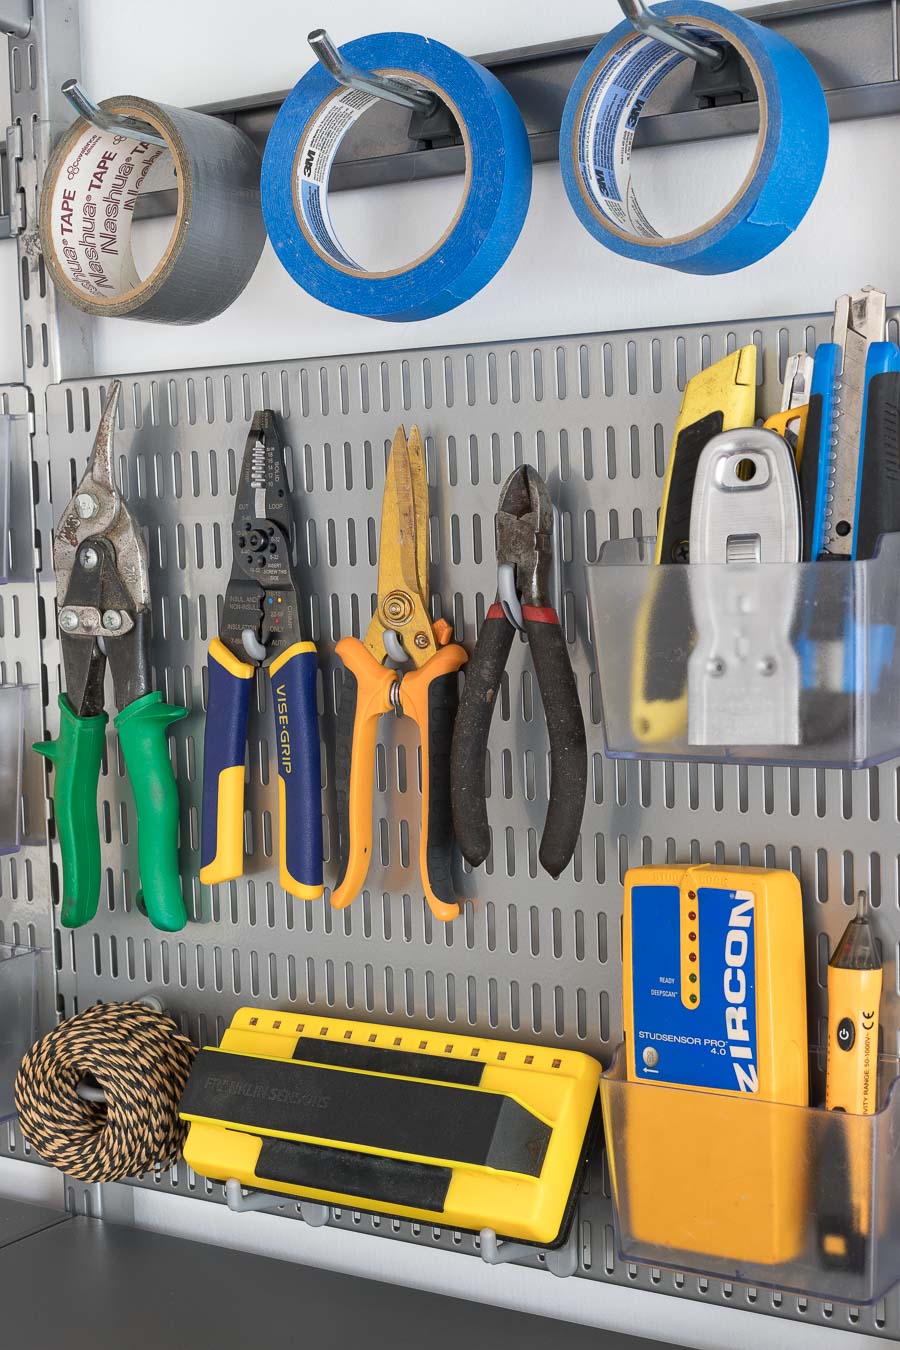
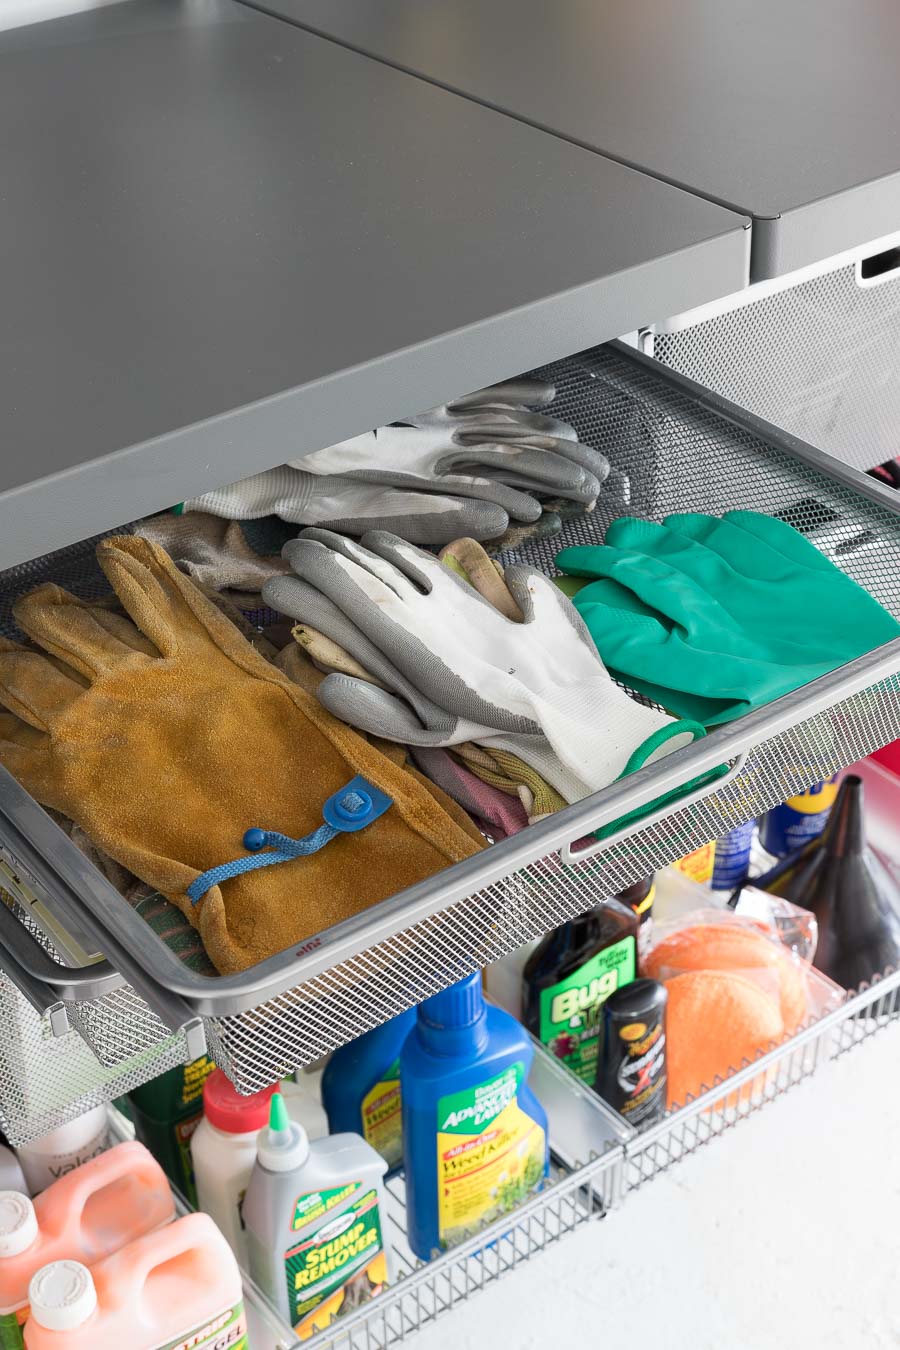
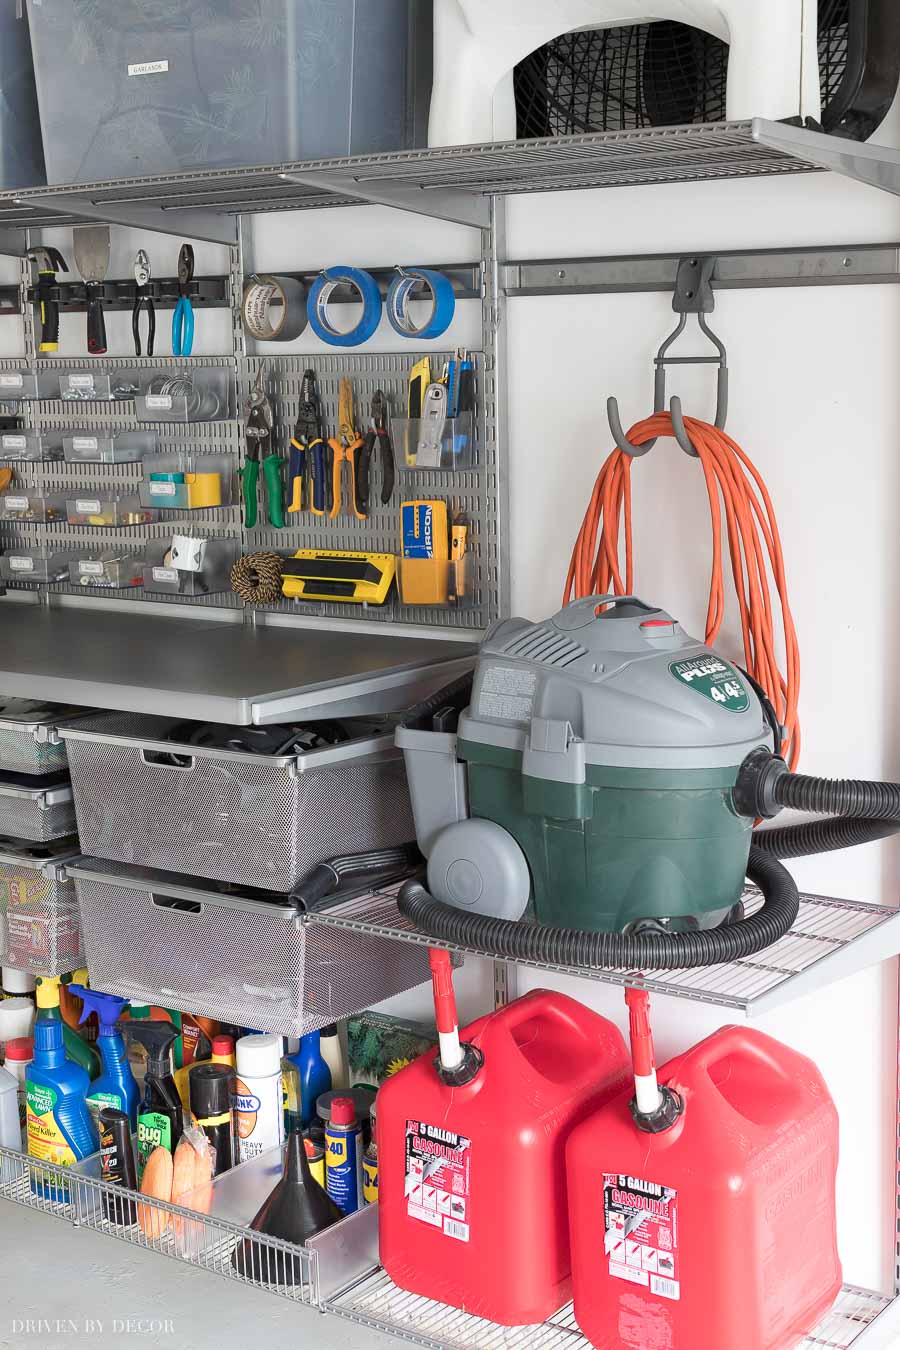
Above the utility boards we have several of {these accessory hooks} and {these small tool holders} holding rolls of tape, a hammer, pliers, and a putty knife. Going down one row lower, we have seven of {these mesh drawers} in two different sizes. One of the drawers holds all of our work gloves:
And another drawer holds our trash bags (when our garage was a mess, we kept buying trash bags we didn’t need because we couldn’t find the ones we had so we are stocked!):
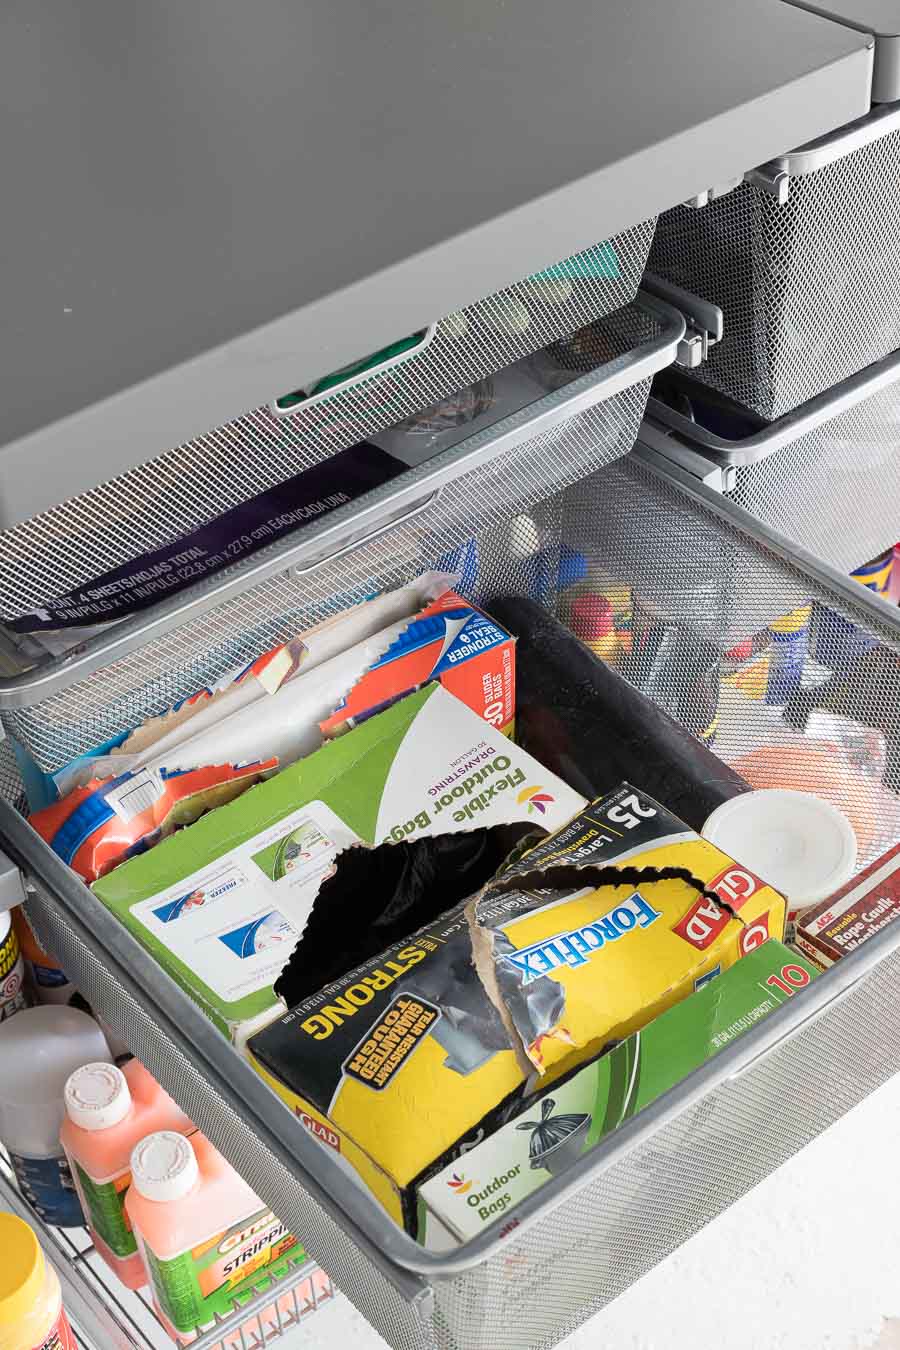
One of the more shallow drawers holds all of the manuals for our lawn equipment and then another drawer is dedicated to my husband’s bike helmet, gloves, and all of his other biking equipment (this one little drawer that’s all his makes him way happier than it probably should 🙂 ). Below the mesh drawers are {these Elfa shelf baskets} that hold all of our bottles and spray cans:
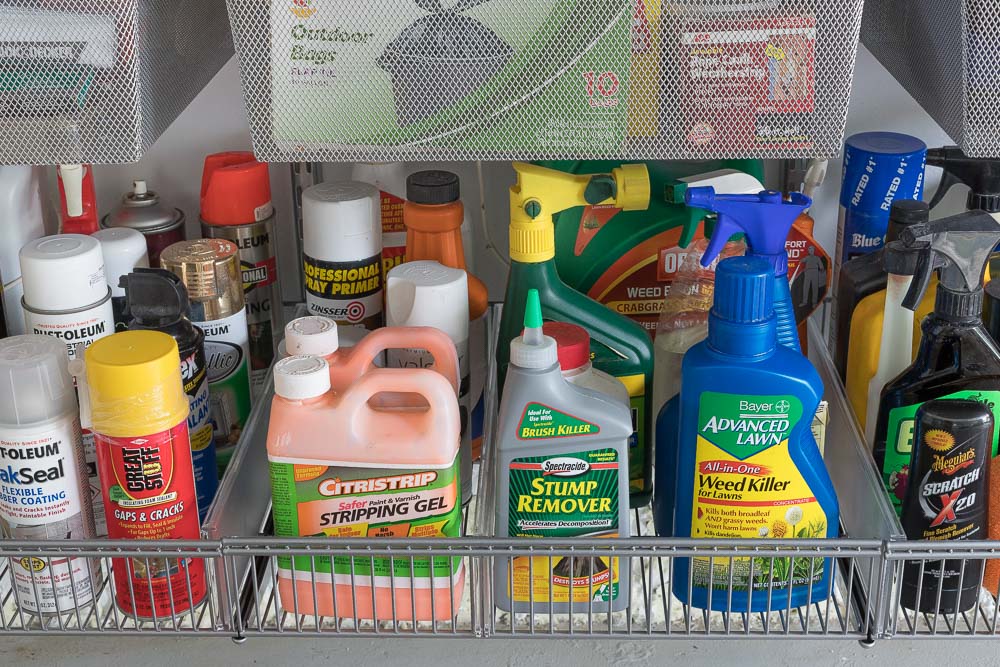
I have several of {these clear basket dividers} so that I can divide the bins into any width I like, making it easier to group products together (lawn care, painting supplies, car supplies, etc.):

And finally, we have a spot for an extension cord and our shop vac, along with shelving space for two of our large gas cans that we keep on hand for powering our generator during those crazy winter storms that can leave us without power for days:
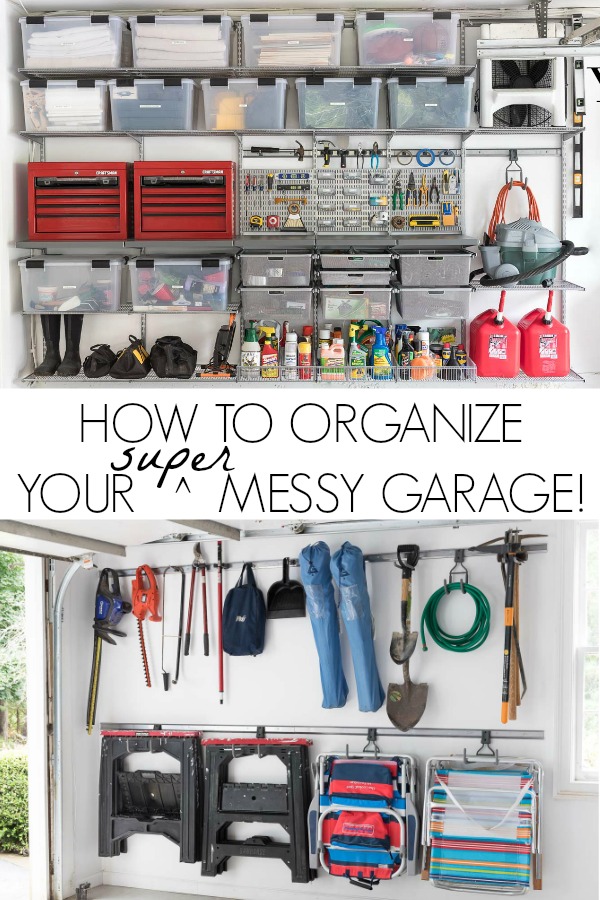
Now are you ready to see what we did with our tools? On the long wall on the other side of the garage, we had a rack for tools that the previous owner left but it wasn’t adjustable and didn’t hold the tools securely. This is “my side” of the garage and I can’t tell you how many near misses I had from tools falling off the rack (garden weasel, I’m looking at you!) when I brushed by them after getting out of my car.
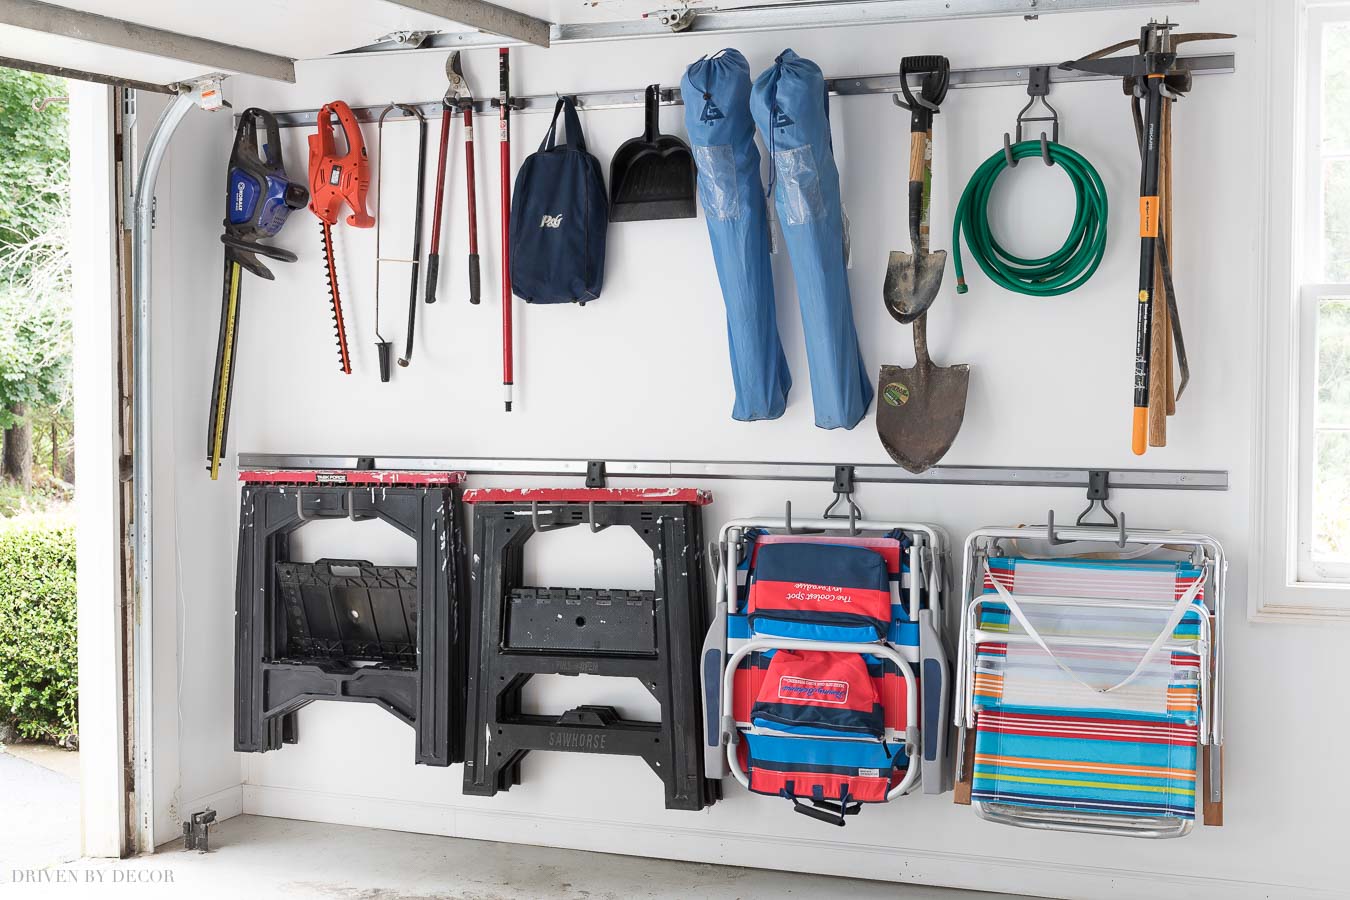
We replaced it with a super functional new Elfa system that has two rows of hooks so we can store twice as much in the same space!
Scroll & Click/Tap Images Below to Shop my Tool Racks:
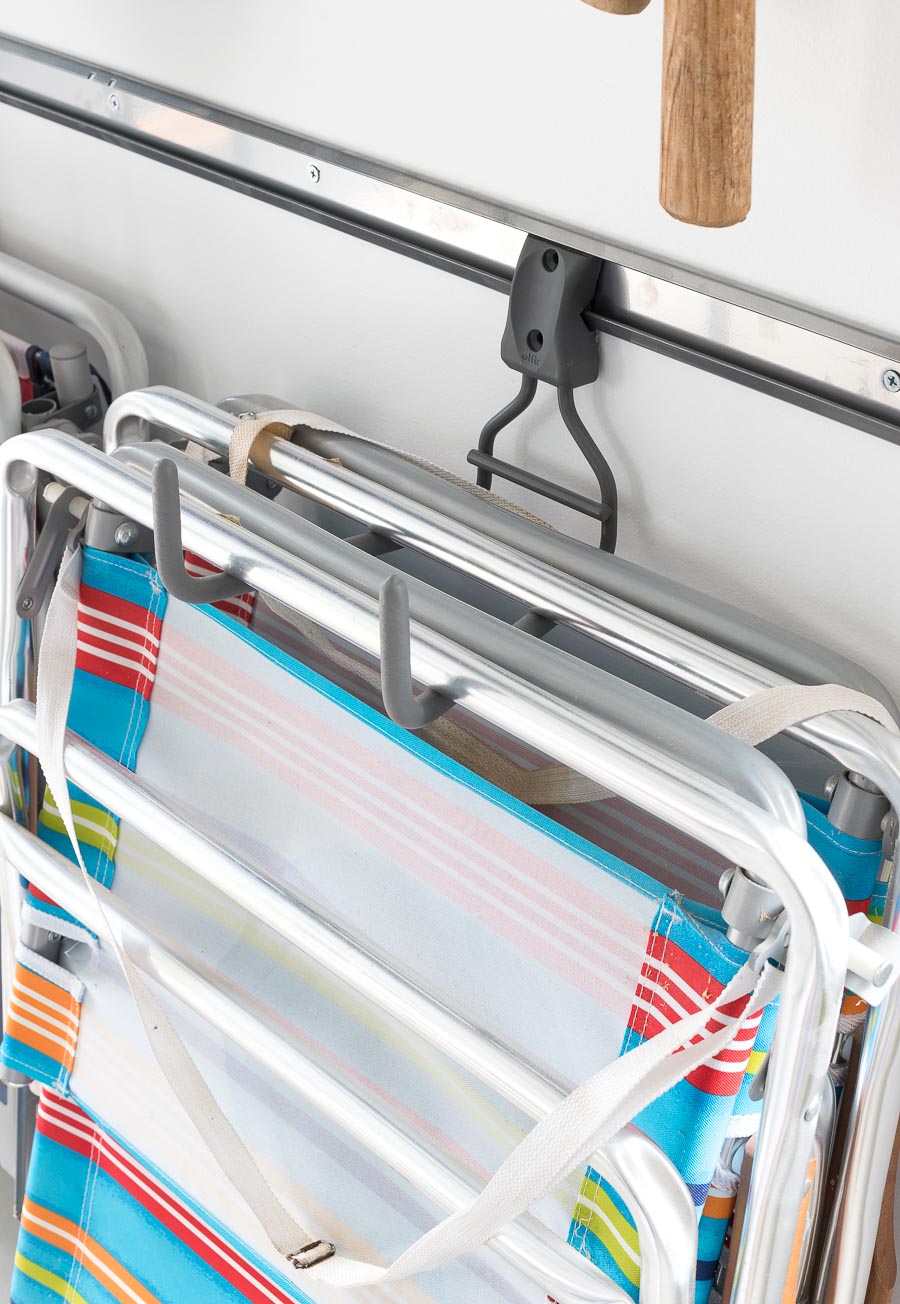
And what I really love about it is that it’s completely adjustable – you can take the different types of hooks on and off and slide them into any position you choose. We have our sawhorses and folding chairs on the bottom row hanging from {these wide ladder hooks}:
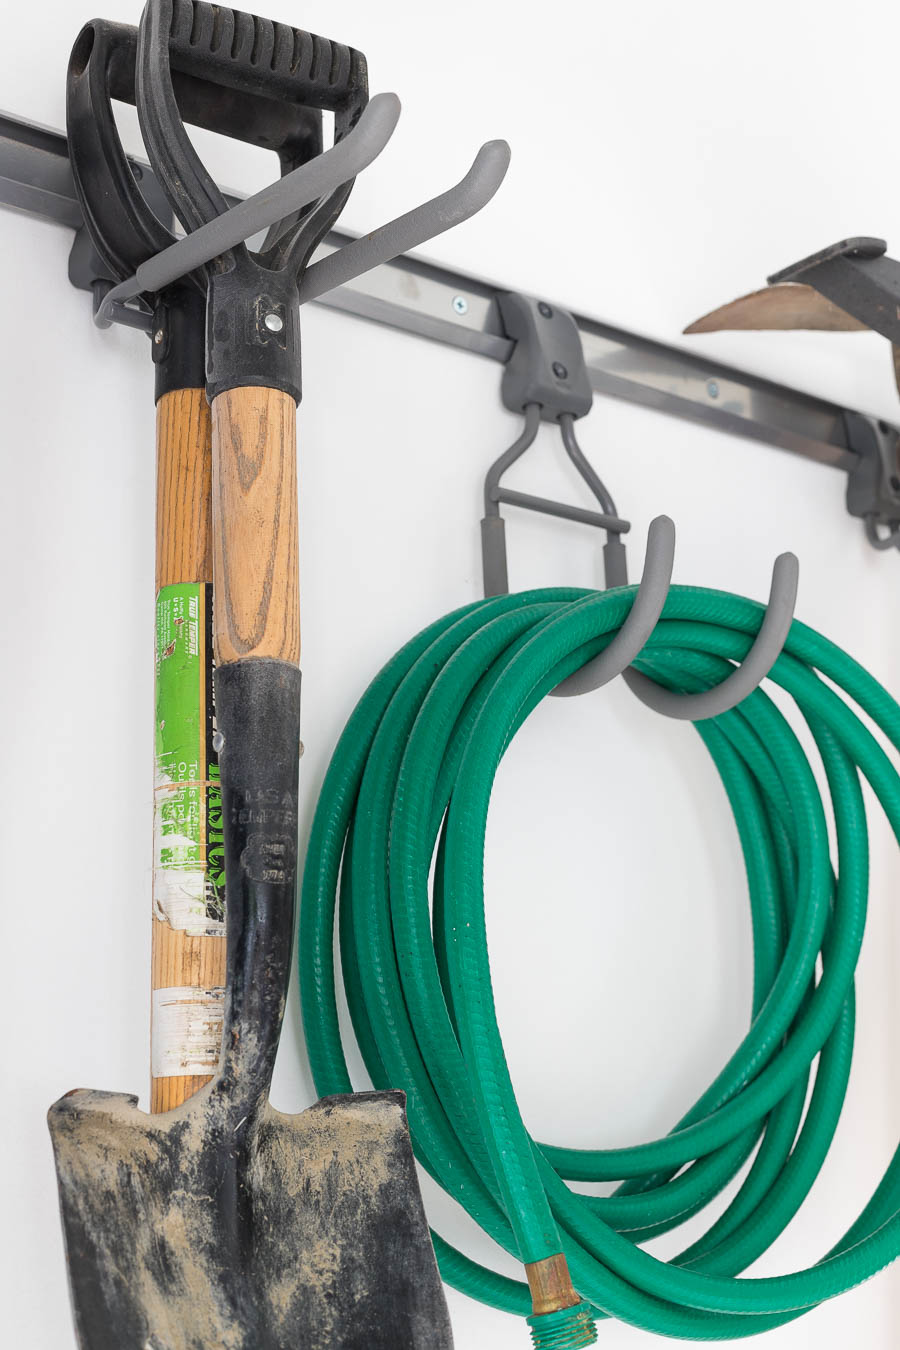
On the top row, we have our electric trimmers, folding chairs in bags, and a few other tools hanging from {these simple accessory hooks}. Shovels, axes, and our stand-up weeder hang from {these straight handled tool hooks} which are really nice because you can save space by hanging multiple tools on a single hook. We also have a hose hanging from {this round cord hook}:
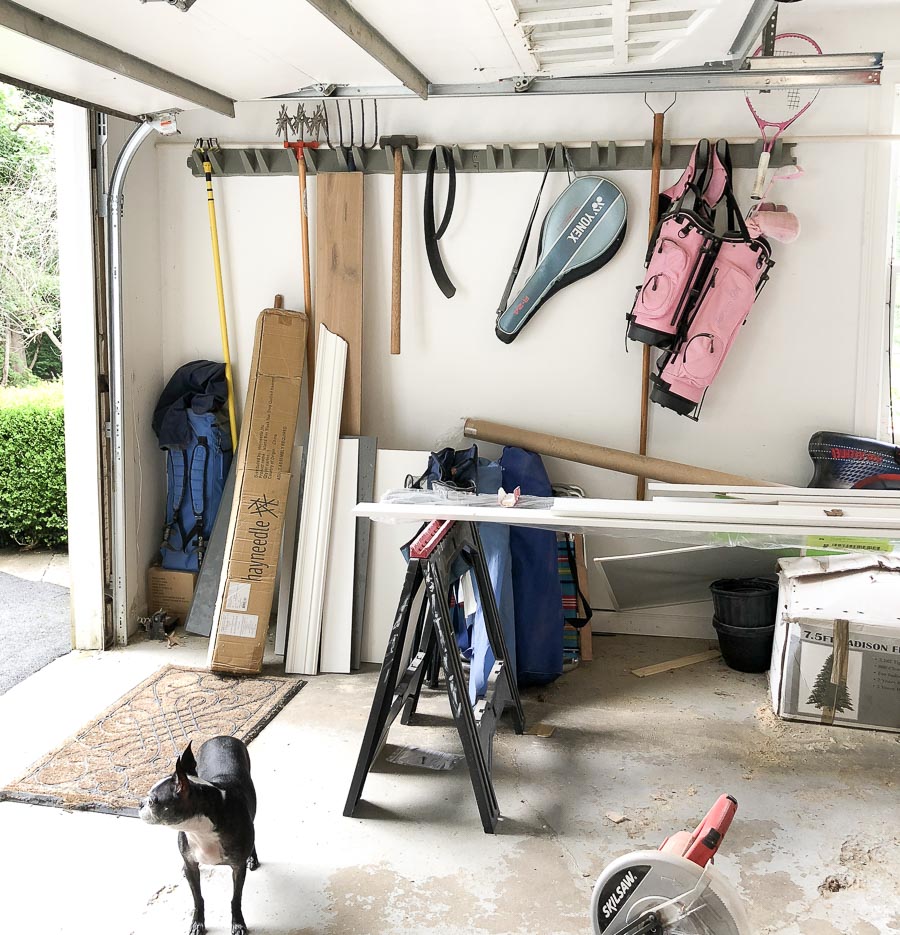
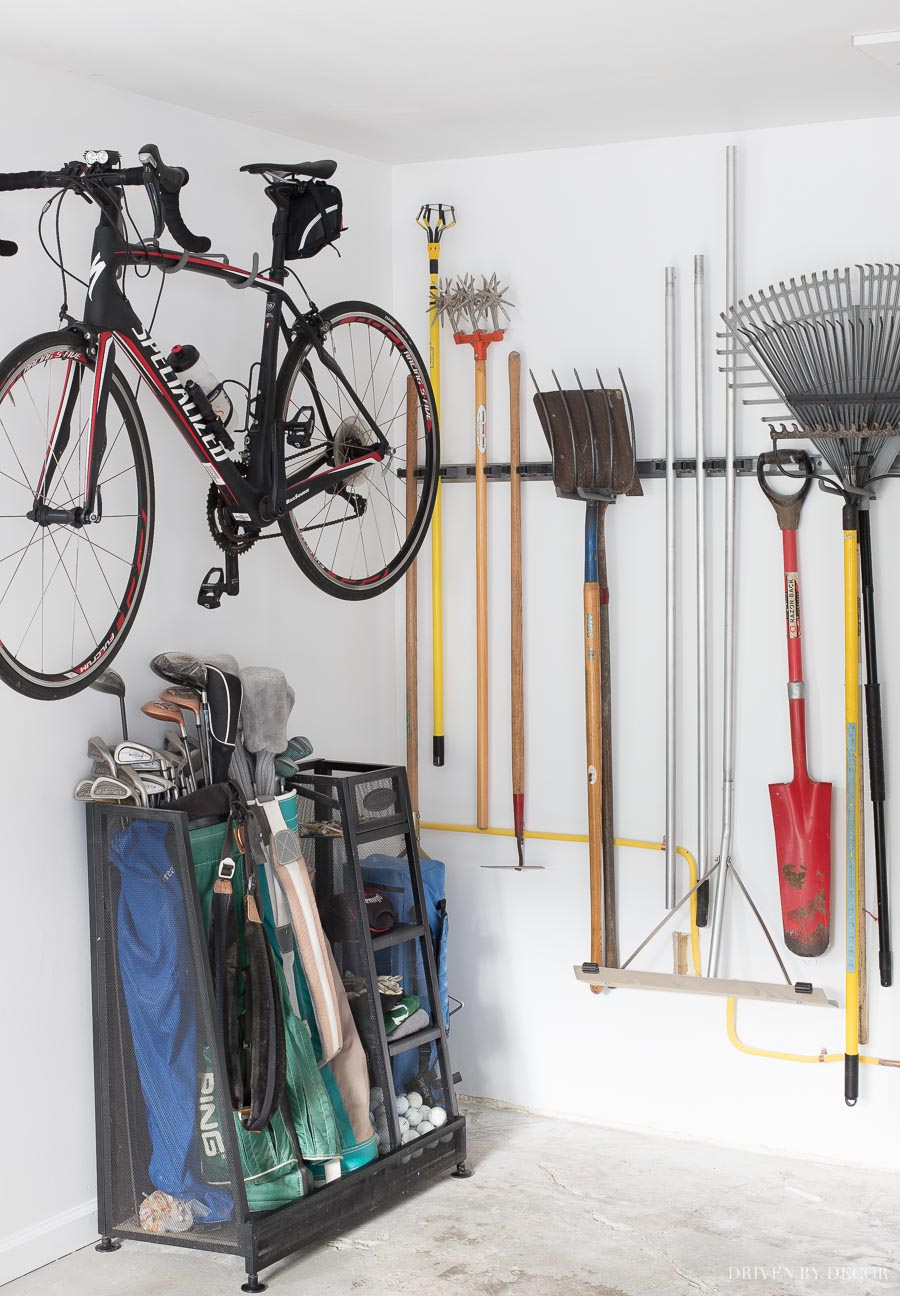
Moving on to organization project #3, we wanted to make good use of this little nook at the back of our garage where our old fireplace once was – it looked like this at the end of our kitchen remodel:
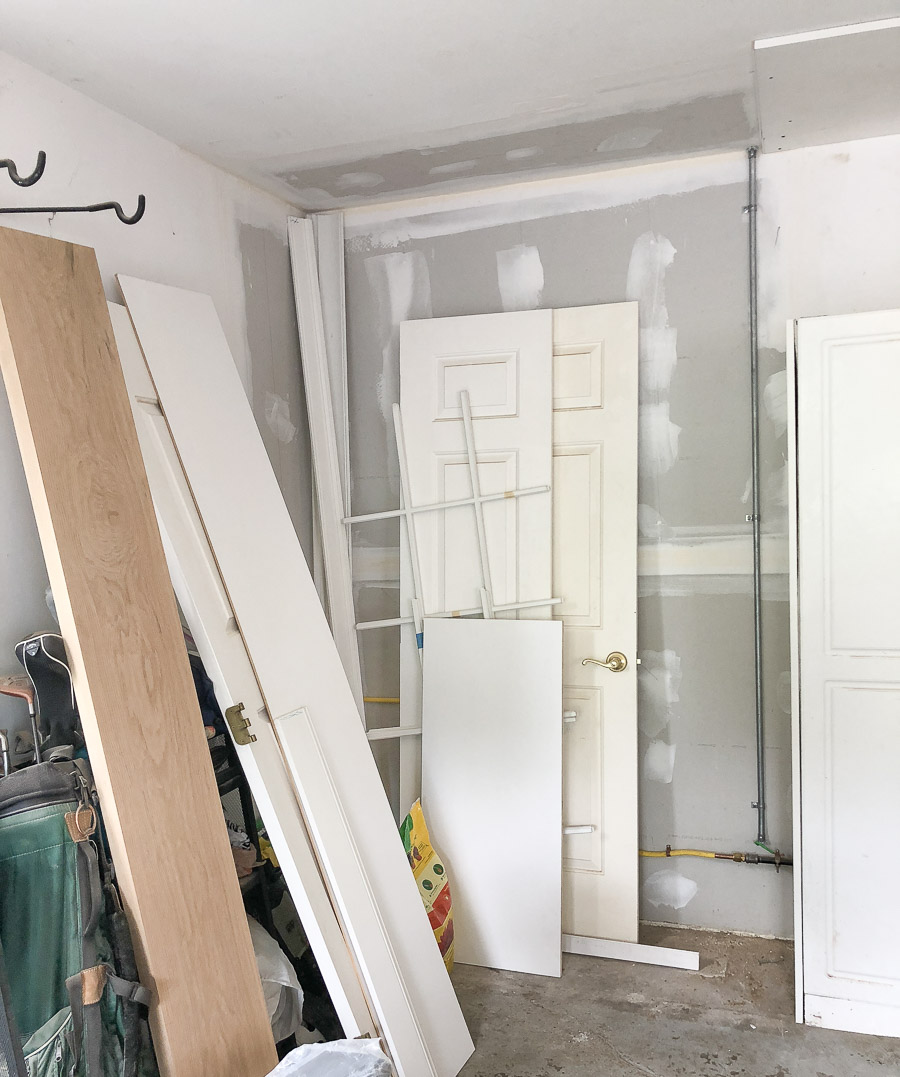
And now it looks like this:
Scroll & Click/Tap Images Below to Shop my Tool & Bike Racks:
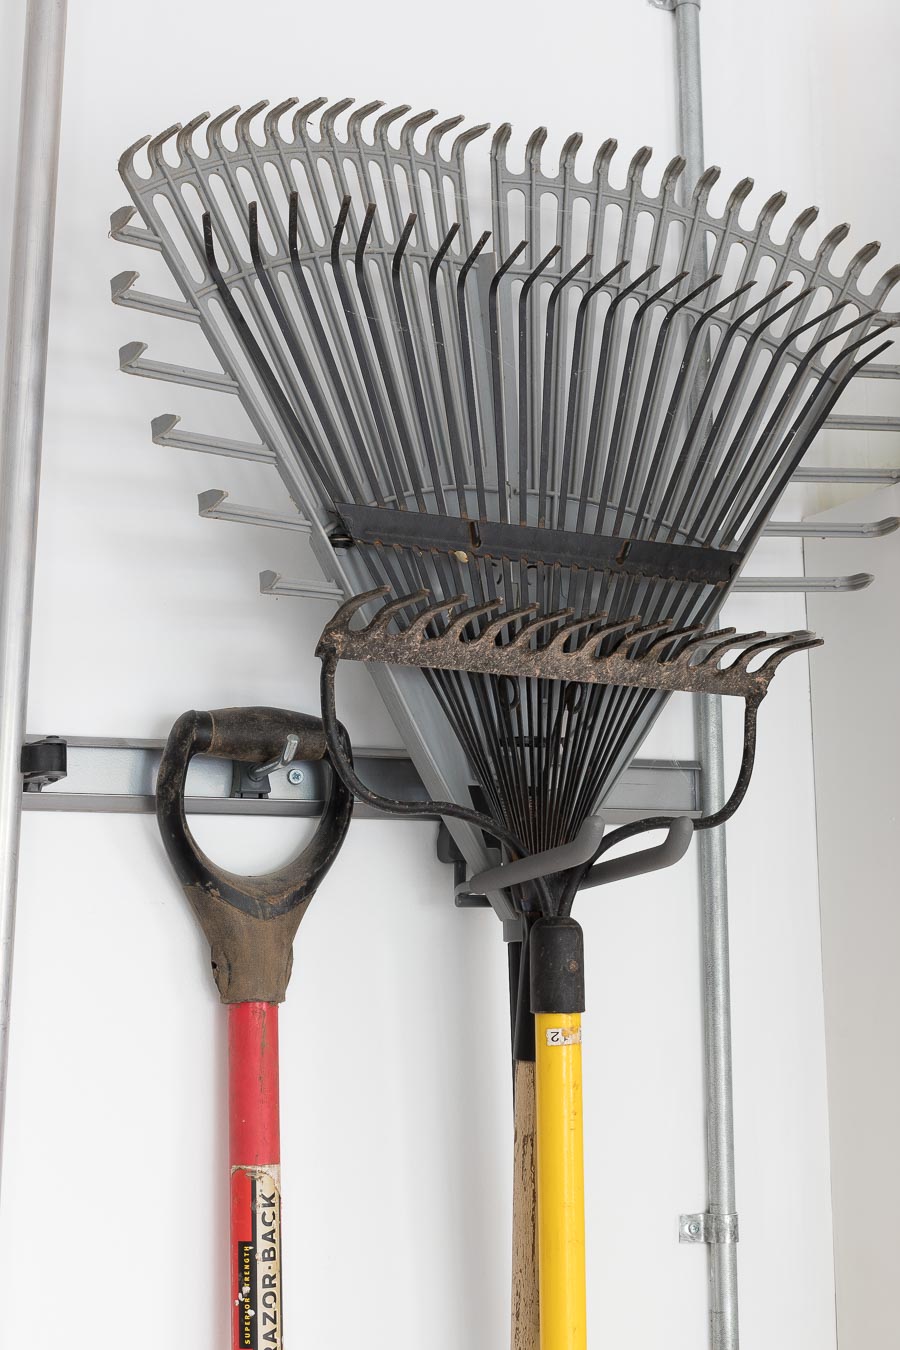
We added just a single rack to the wall that we use for all of our long handled tools so we were able to get rid of the freestanding tool holder that used to sit right between our cars. This was a huge victory because this sucker has always been a pain to maneuver around getting in and out of our cars:

Most of the tools are hung with {these simple individual tool holders} that make it super easy to take tools on and off but also grasp them really securely:
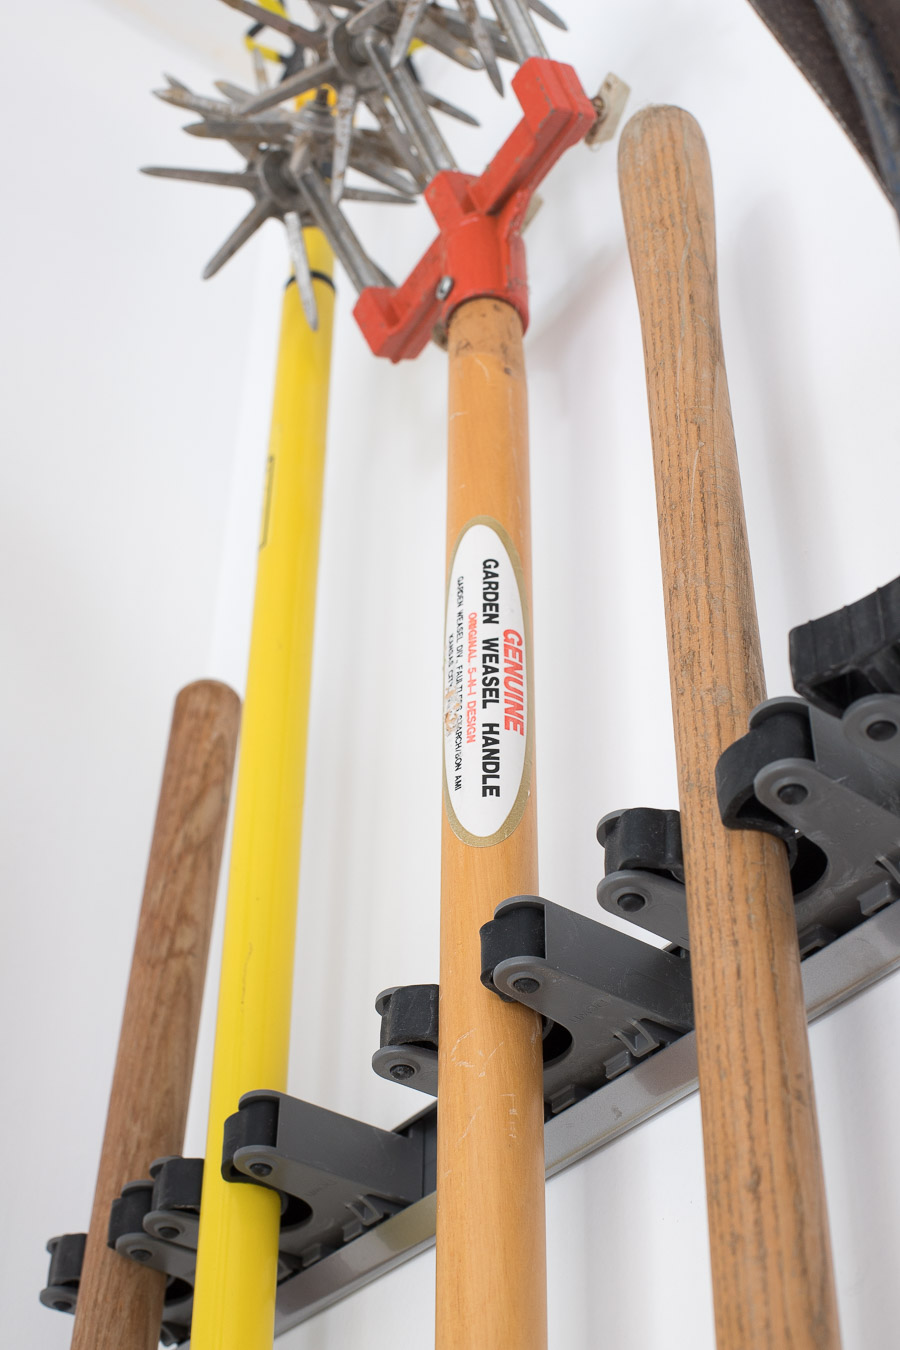
We also have a few things hung by simple accessory hooks and others like the rakes that are hung from {this straight handled tool hook}:
Unlike the rest of us that don’t bike often, my husband bikes several times a week so he wanted to keep his bike in the garage where it was easy to get to. Since it’s the only thing on the wall, we didn’t install an Elfa rail but instead just mounted {this Elfa bike rack} directly to the wall:
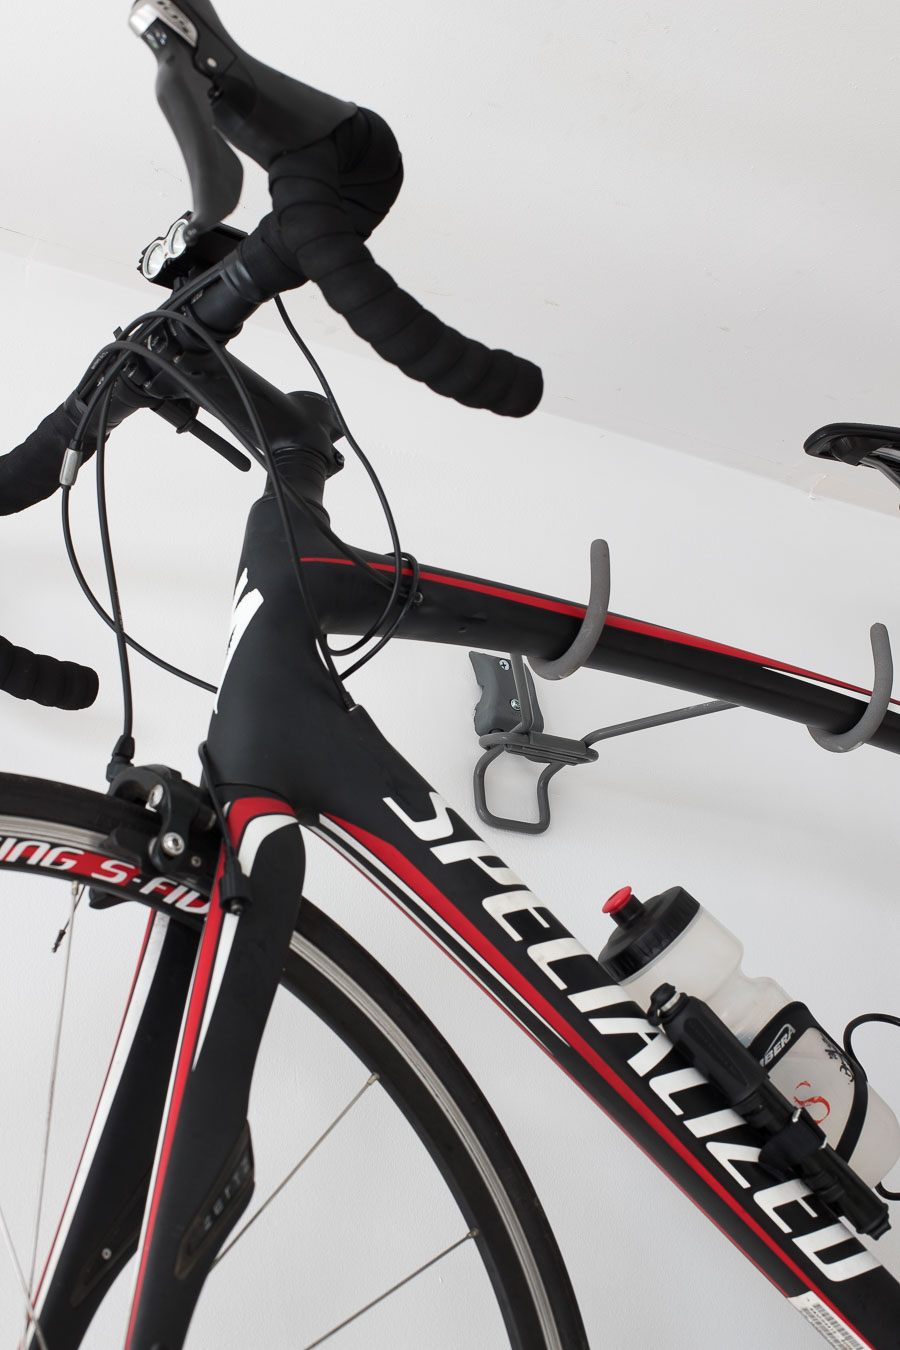
I actually didn’t realize until after we put our Elfa system in that many of their accessories can be wall mounted. When they’re mounted to the wall instead of on an Elfa rail, you obviously don’t have the advantage of being able to move the hooks around or take them on and off but if a full Elfa system is out of your budget, it’s a great way to go. And you could always add Elfa rails and use them as part of a bigger system years down the road.
Did you forget that we’re counting through the steps? I almost did but we’re wrapping up with the final two:
7. After Installation & Organization, Add or Swap Accessories As Needed
It’s almost impossible to design your space so that you know EXACTLY what type of Elfa accessories and how many of them you’ll need. Once you’ve found a home for everything in your newly organized garage, take stock of the Elfa accessories that you need more of and accessories that you can return and make a final Container Store run. All you need is your order number or receipt for the Container Store to be able to look up your project and help you return any extras.
My Elfa installer actually told me that The Container Store keeps your Elfa design on file in their system for years so he has clients who move to a different house and take their Elfa systems with them (it’s easier to do than you think because it’s only the top rail that’s mounted to the wall!). The Container Store can pull up your old design and reconfigure it to your new space using the Elfa pieces that you already have to cut down what you need to buy to a fraction of the cost of an entirely new system.
8. Enjoy Your Newly Organized Space!
I can tell you that step 8 is a pretty awesome place to be! In our 20 years of home ownership, we’ve honestly never had a well organized garage and my husband and I are both still kind of in awe of it! When we were cleaning it out, I can’t tell you how many times we said, “Oh, that’s where that was!”, as we unearthed item after item that we had unsuccessfully searched for weeks or months before. Now we not only know where everything is and can grab it quickly, but we can get both cars in the garage and can get in and out of our cars and into the house without having to navigate a garage obstacle course and we maximized every square inch of space. #winning
This project will definitely go down as one of Jeff’s favorite home organization ideas! If you have any questions about our new Elfa system or the whole garage organization process, leave them for me in the comments and I’ll do my best to help you! I’ll be sharing some video of our newly organized garage on Instagram Stories and answering questions over there too – you can follow along {here} on Instagram if you aren’t following already.
And if you’re thinking about tackling reorganizing your garage in the future but aren’t quite ready to jump into it, Pin the below image now so you’ll be able to find this post easily later ->
Update: How Much Did My Custom Elfa Garage System Cost?
From comments on this post and messages I received via email and Instagram, many of you wanted to know the cost of my Elfa garage solutions so I thought I’d update this post to share approximate costs with you. Here’s the scoop – please note that these prices are from during one of The Container Store’s Elfa sales that they have a few times a year::
- Solution #1 (full wall with drawers, utility boards, etc.) – cost of Elfa components with DIY installation is around $1600/with professional installation is around $1900. This includes absolutely everything, including all of the utility board accessories, weathertight totes, etc.
- Solution #2 (two long Elfa rails with hanging accessories) – cost of Elfa components with DIY installation is around $220/with professional installation is around $400.
- Solution #3 (one Elfa rail with hanging accessories + bike rack) – cost of Elfa components with DIY installation is around $110/ with profession installation is around $300
- Another good way to get an idea on pricing is to check out {this Container Store page} that shows several different Elfa garage systems, the components involved and the total price
Obviously the price varies greatly depending upon the specific Elfa solutions but there truly is a system for every budget and the designers at The Container Stores are experts at taking your available space plus your budget and coming up with a plan to maximize it. Also check out my post on our Elfa closet system we installed in our bedroom closet – it made such a difference! Happy organizing!
XO,


