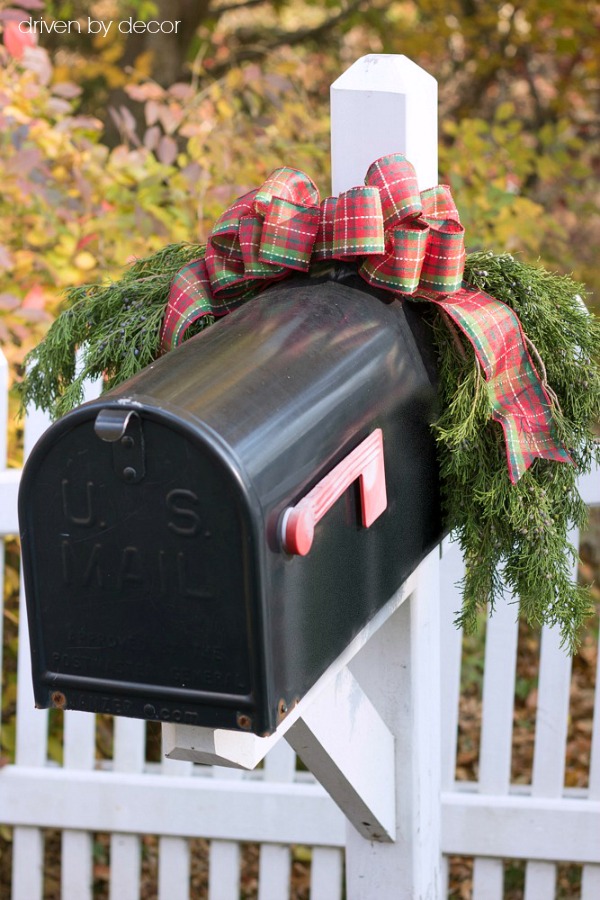
With the pile of mail that we get every day it can get out of control pretty quickly. Last year I created a home mail organizer and it’s been amazing for helping me to stay on top of our mail, get bills paid on time, and clear any junk mail out of our house as soon as it comes in. It’s super simple to create and makes such a difference in keeping our home more clutter-free.
So if you’re ready to show your mail who’s boss and do away with your countertop stacks of mail once and for all, read on because I’m going to share all of my tips from lessening the amount of junk mail you get in the first place to sorting and organizing your incoming mail pile each day! (post includes affiliate links – full disclosure statement available {here})
Stop Getting Junk Mail & Know What’s Arriving
Before jumping into sharing my mail organizer, I wanted to share a few things you can do on the front end to give yourself a head start in staying on top of your mail.
- Get off of unnecessary mailing lists & reduce junk mail – for just $5 for a period of ten years, you can register at the Direct Marketing Association’s (DMA) consumer website {HERE} via a step-by-step process in which you choose what mail you do and do not want. So worth it!
- Sign up for electronic bill pay and switch your magazine subscriptions to digital. I handle almost all of my bills electronically but I have to admit I really enjoy sitting down with a paper magazine rather than reading it on a screen so I haven’t switched my magazine subscriptions to digital but I have cut way down on the number of magazines I subscribe to.
- Get a preview of the mail you’re getting that day by registering for Informed Delivery by USPS {HERE}. We’ve had some mail theft issues in our town recently and it’s nice knowing what’s arriving so I know right away if I’m missing something. You simply get a daily email that looks like this:
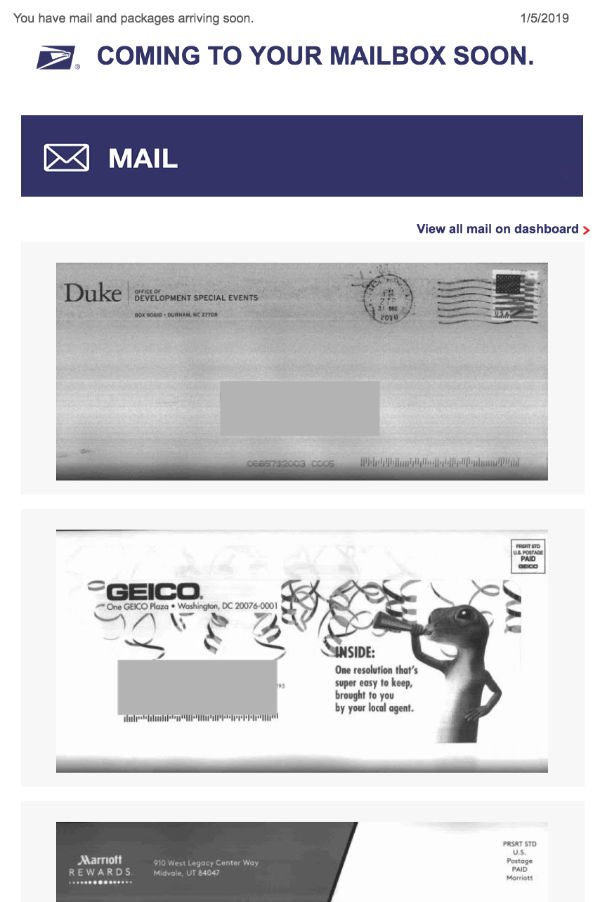
You can also use Informed Delivery to track USPS packages, leave delivery instructions, and reschedule missed deliveries (and it’s all free). And while this is more package related than mail related, I also recommend registering with FedEx {HERE} and UPS My Choice {HERE} (also free!) to take control of your FedEx and UPS deliveries. Once registered you’re notified when a FedEx or UPS package is coming your way and when it’s expected to arrive, you can sign for a package online instead of having to reschedule a delivery and then wait around to sign for it, and you can even provide preferences on where you want your packages placed. It’s especially nice to have these notifications when you’re on vacation so a package doesn’t sit outside your house without you knowing about it.
Create a Mail Organizer
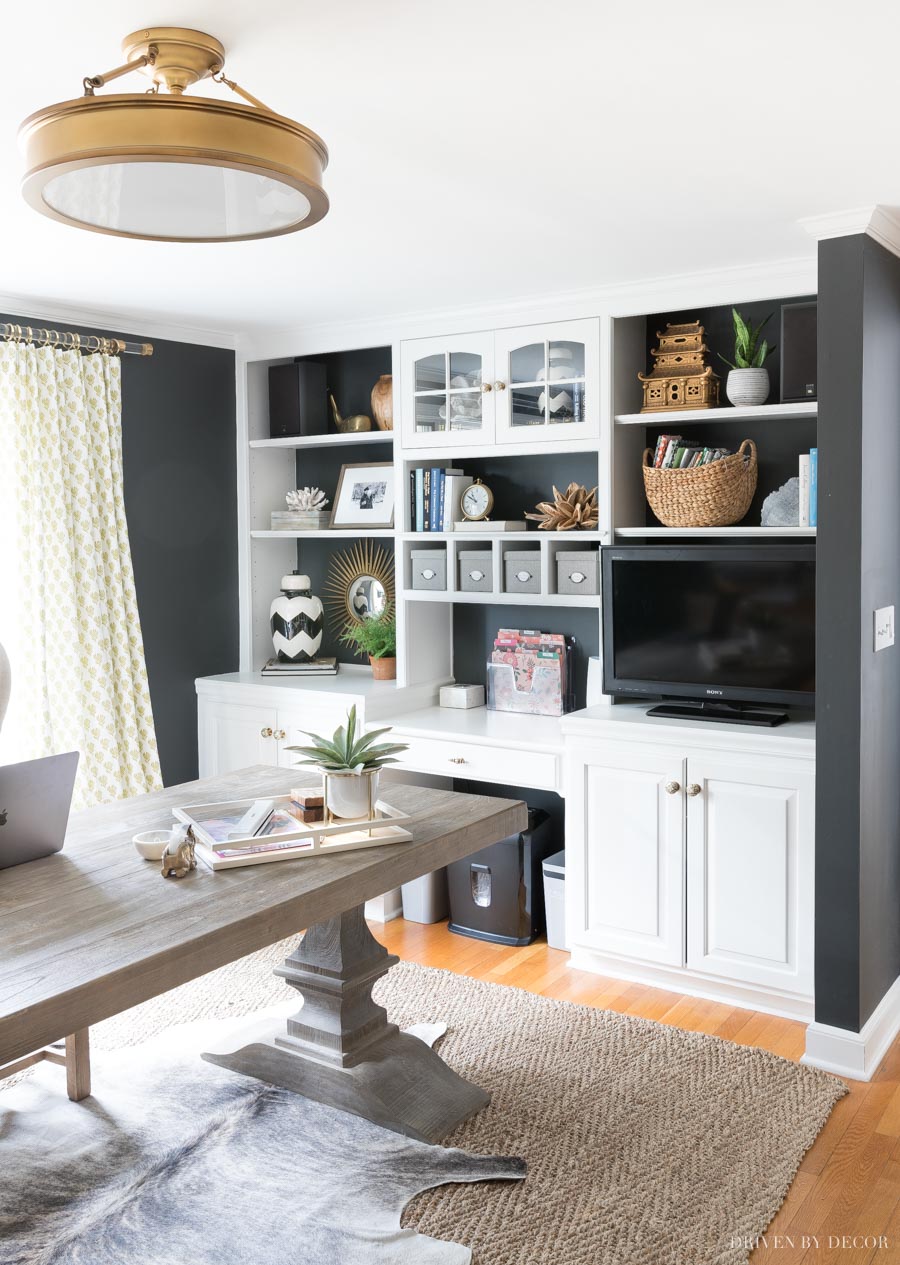
Putting together a mail organizer is inexpensive and quick and easy to do but makes all the difference in taking charge of your mail. You simply need a small designated space with a paper shredder (unless you never use one, in which case you can skip it!), a small file folder organizer with folders, and trash and recycle bins. Ours is set up underneath the built-in desk area in our home office (after sharing the details of ours, I’ll share a few ideas for where/how to set up your own mail organizer station if you don’t have a similar space in your home!). Can you spy it?
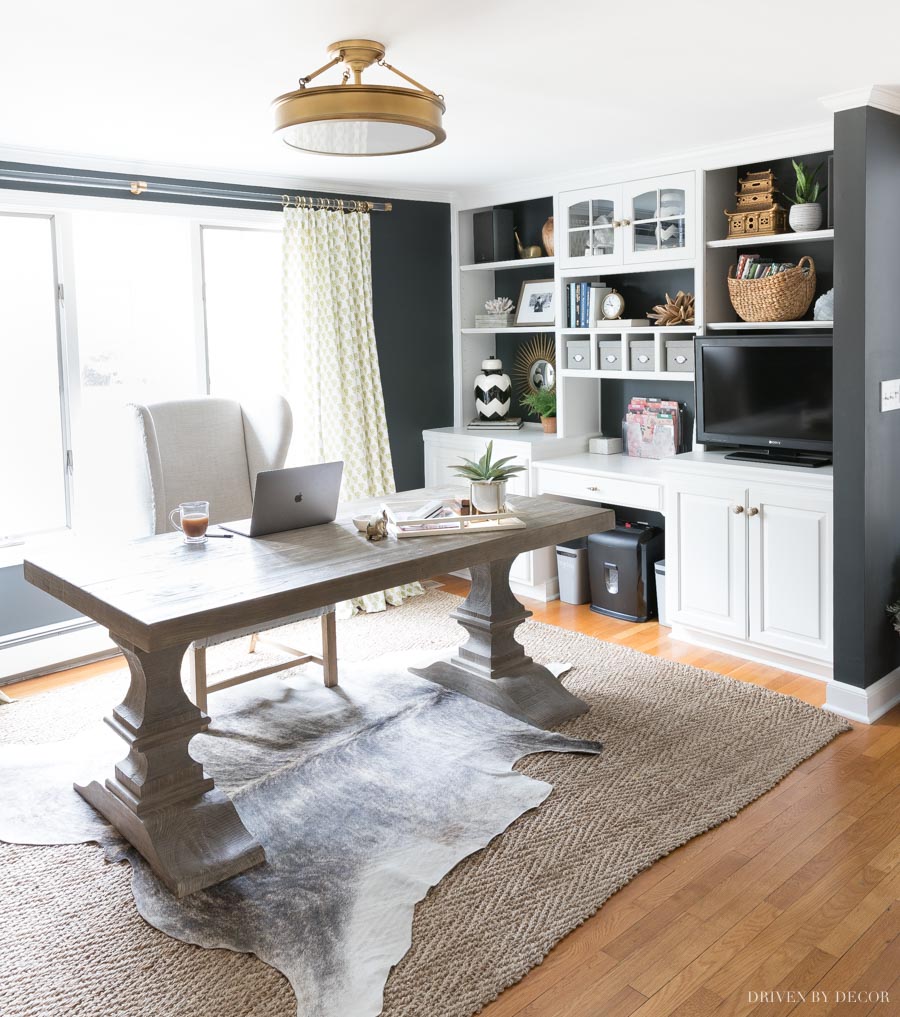
Home Office Sources: Desk (similar) | Wingback chair (similar) | Jute rug (similar) | Faux cowhide (similar) | Cross base planter | Semi flush mount ceiling light | Acrylic curtain rods | Drapes & desk tray – no longer available
We used to have an ottoman pushed under our built-in desk but it hadn’t been used since the day we moved in so creating this mail organizing station was as simple as putting that unused space to work:
Shelf accessories: Starburst mirror | Faux fern | Pocket watch clock | Dried star pod
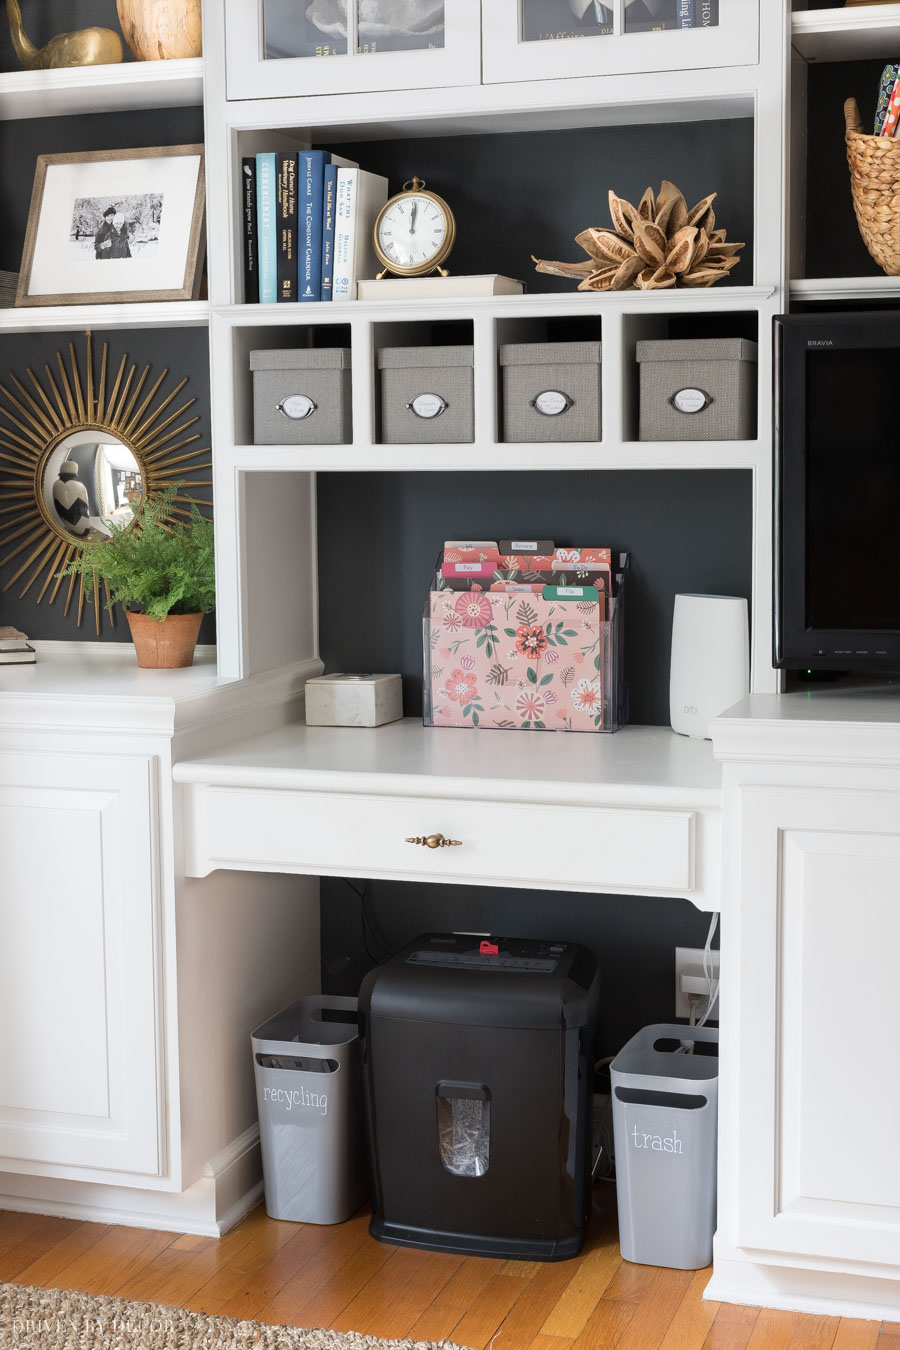
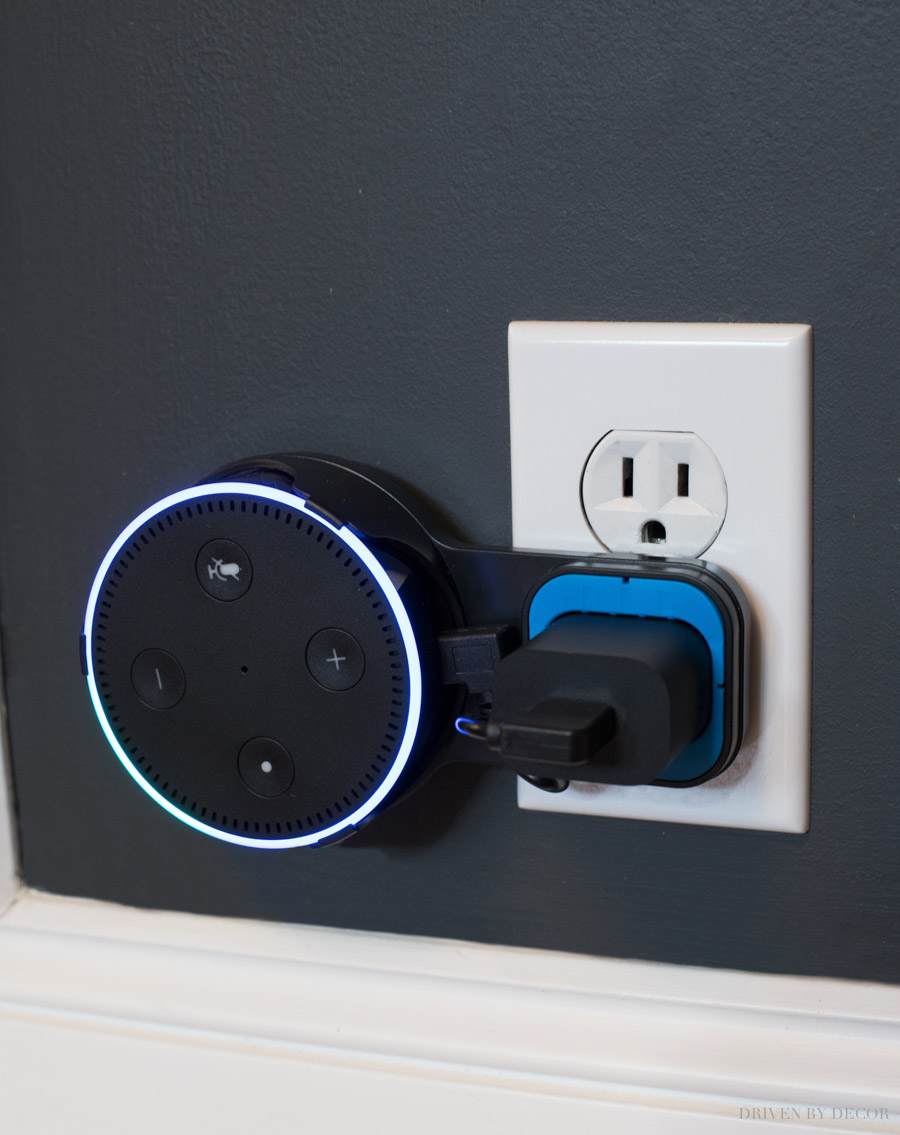
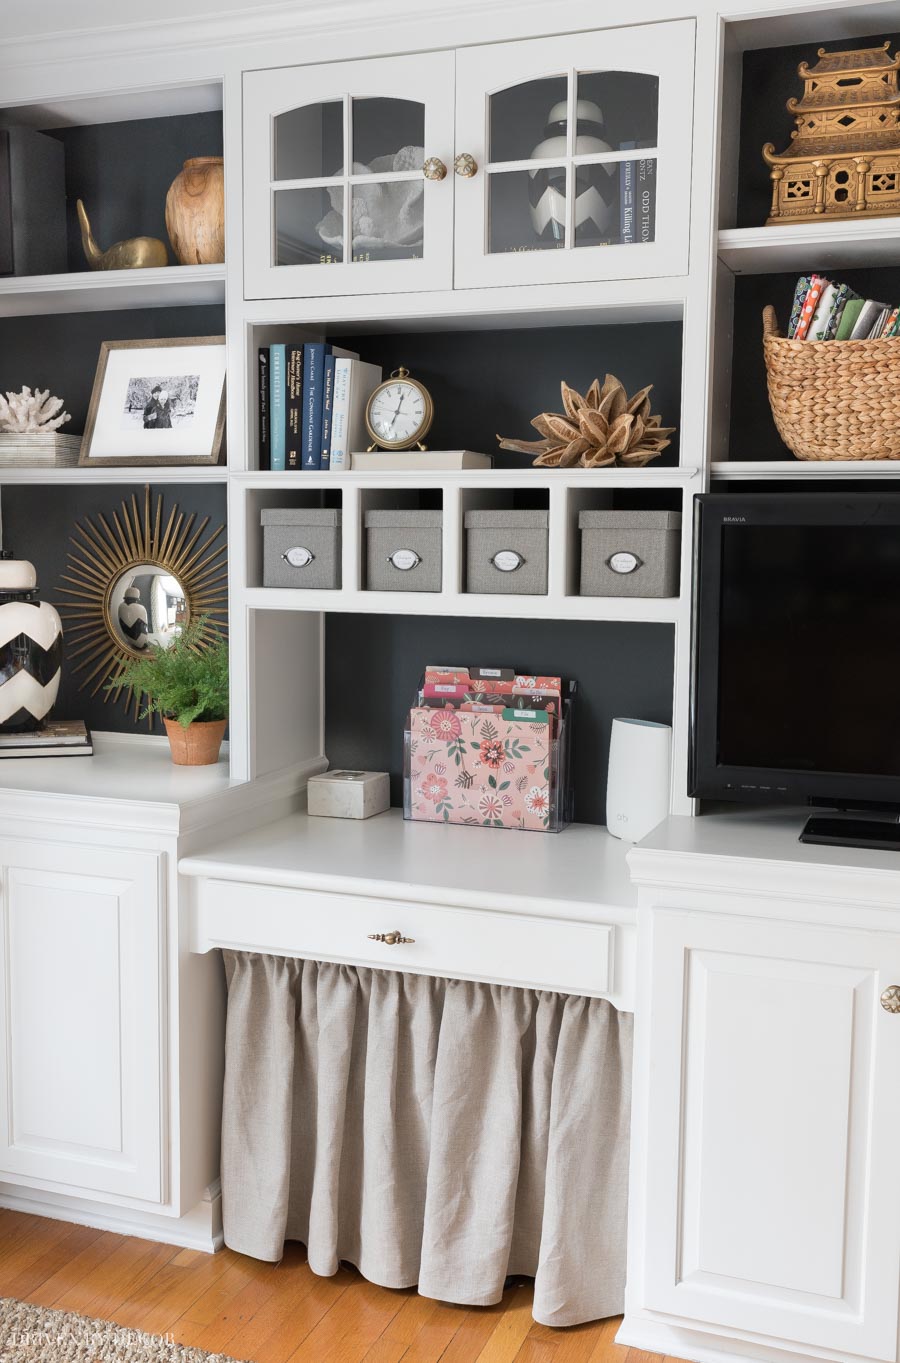
The first thing I did was clear off everything from the desktop that didn’t need to be there. One thing I relocated was {our Echo dot} which used to sit there – I found {an outlet wall mount hanger {HERE} specifically made to get your Echo dot off the counter/desktop – love it!! It also comes in white and allows you to choose between hanging your Echo dot horizontally or vertically
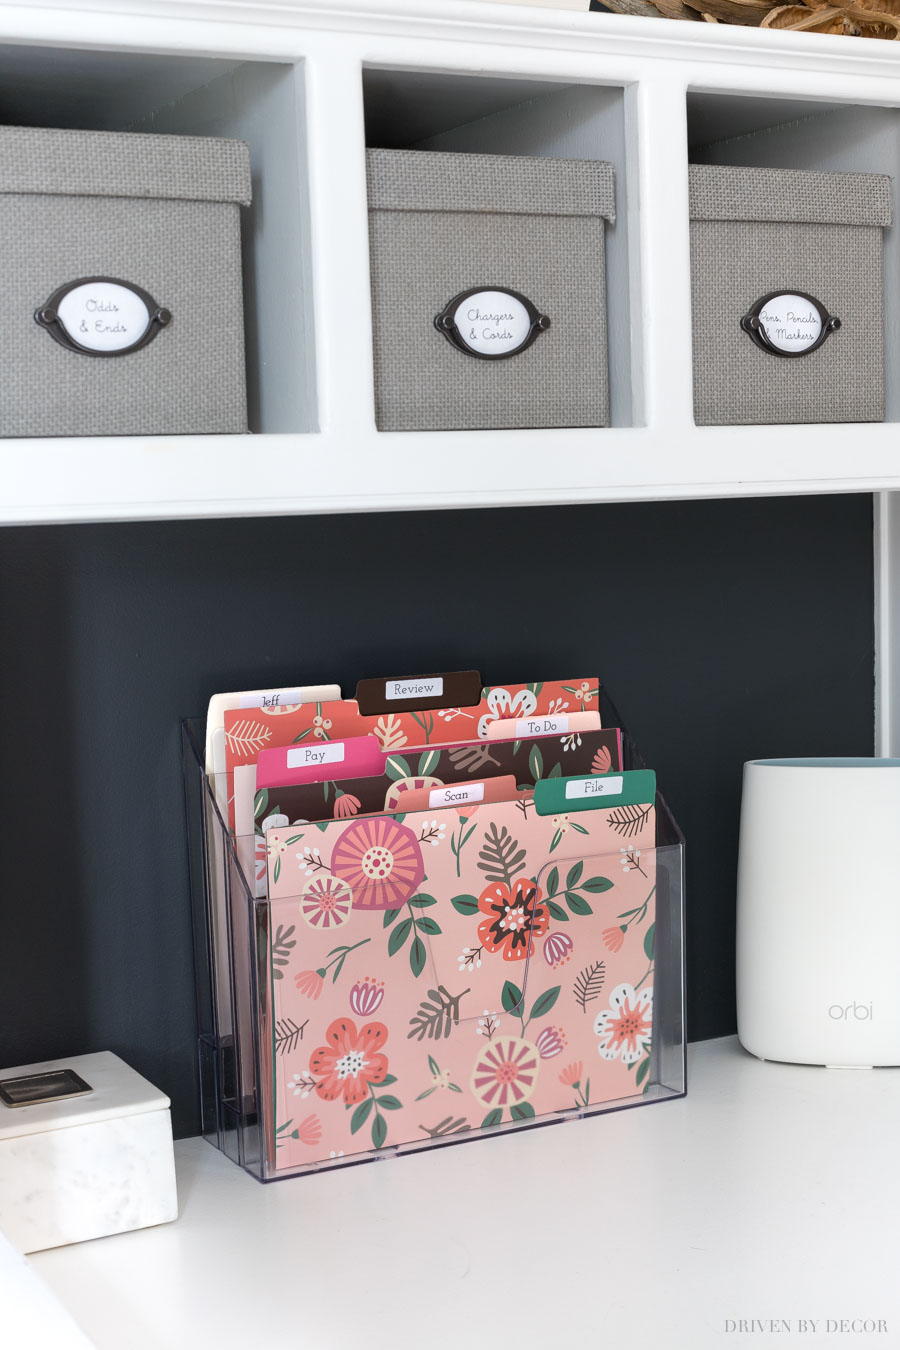
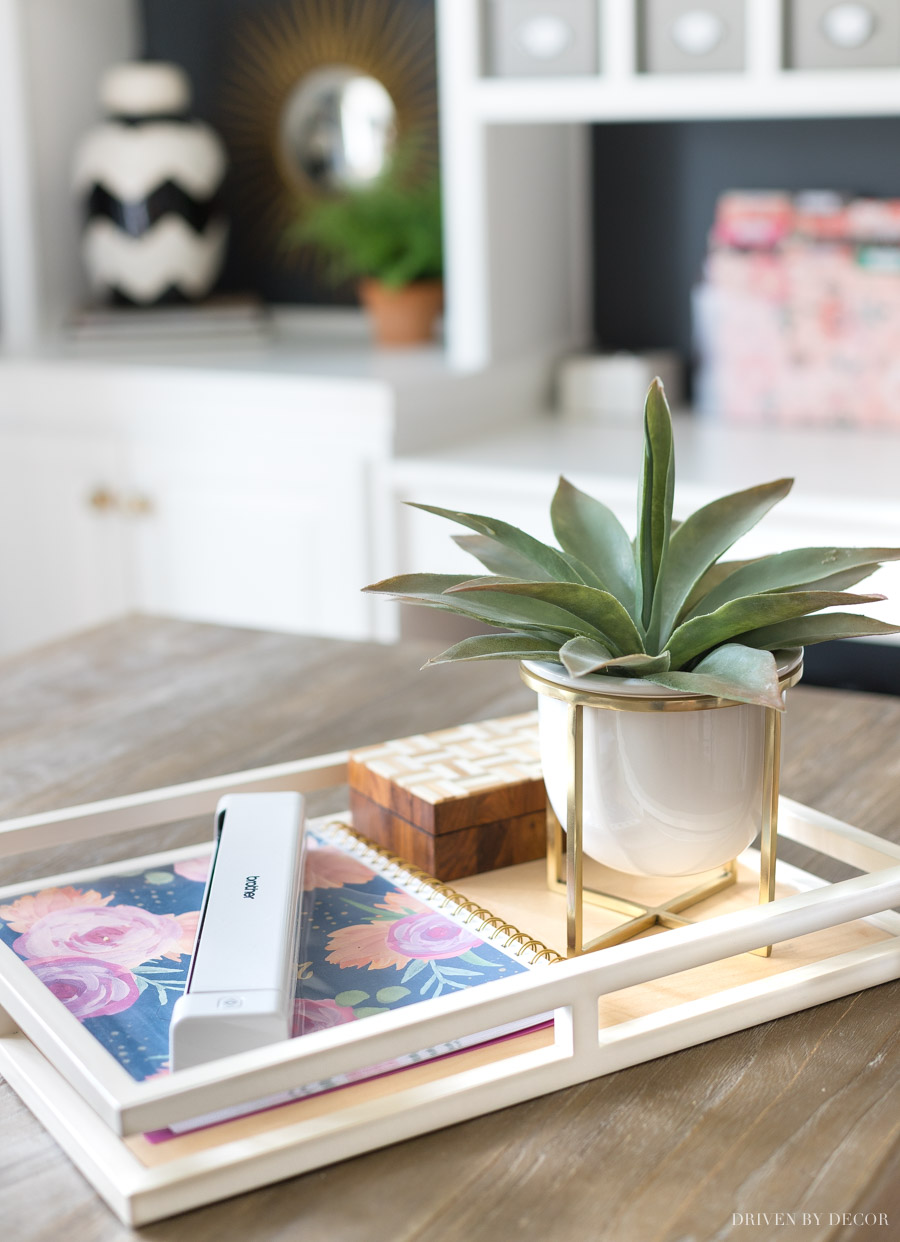
For my desktop mail organizer I used a clear acrylic file folder organizer found {HERE} with patterned file folders found {HERE} on top of the desk:
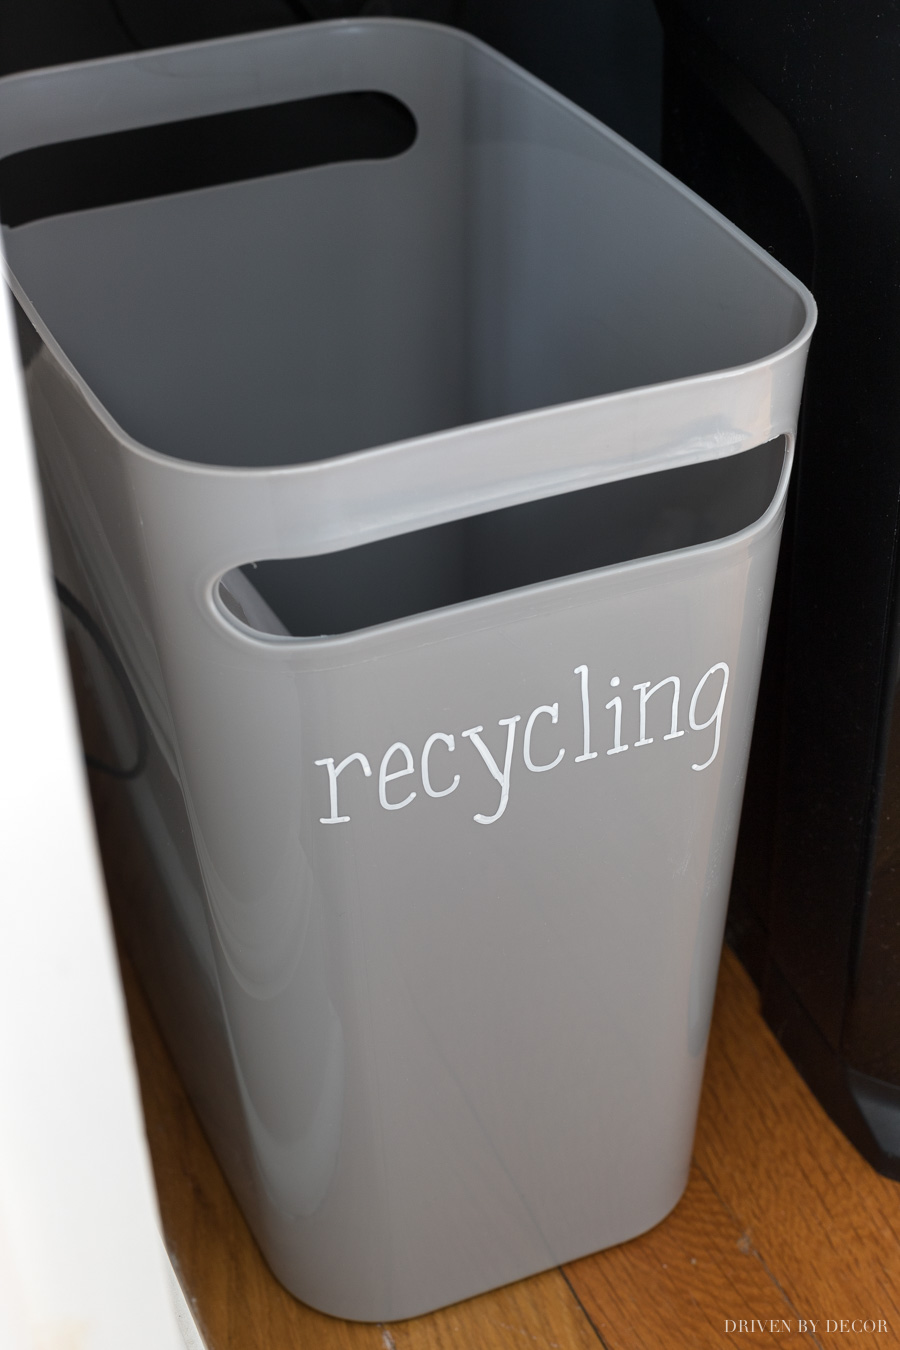
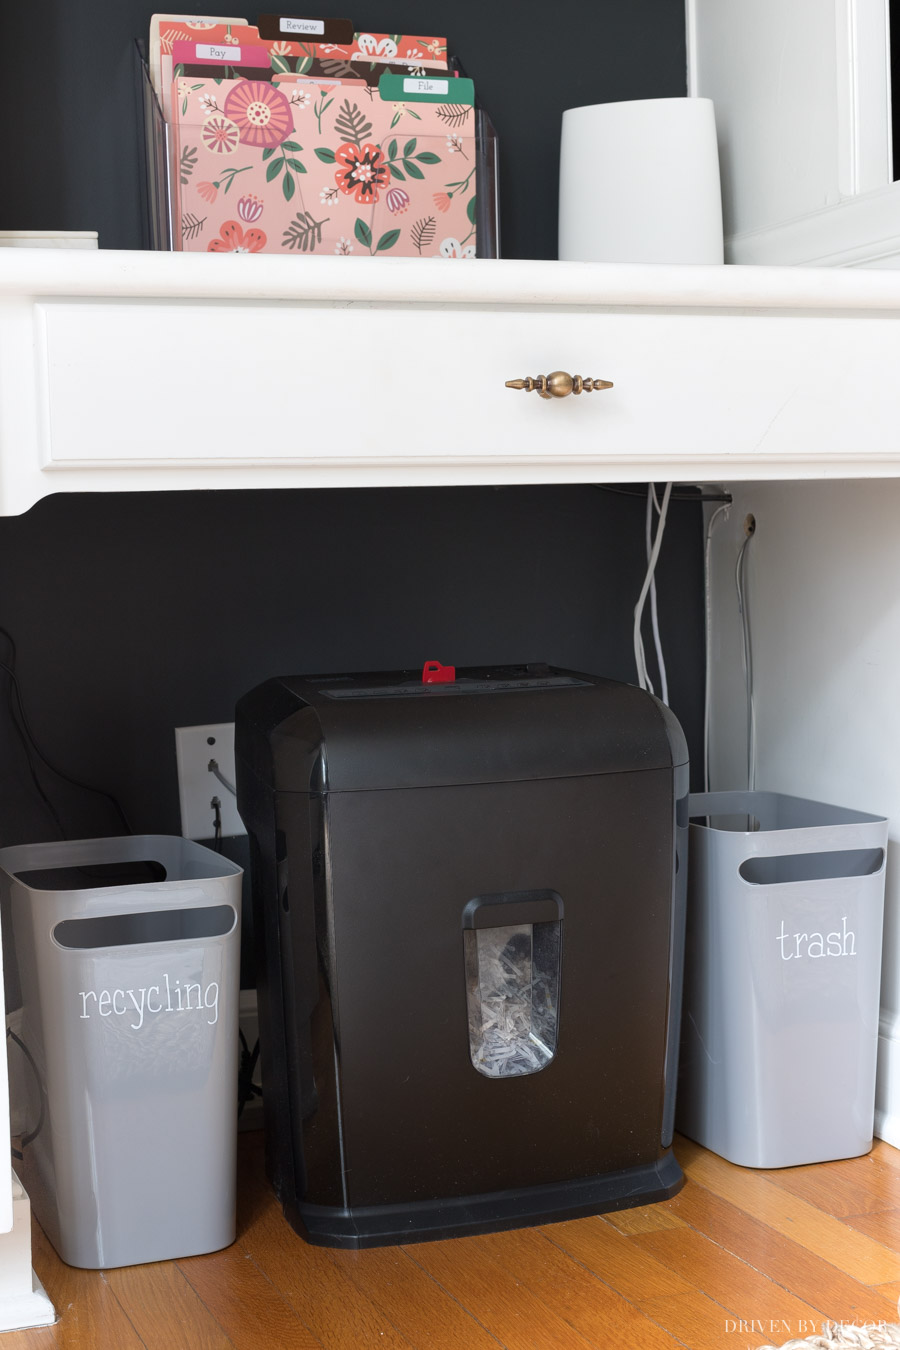
Then below the desk I have two slim gray wastebaskets found {HERE} (also check out {these similar cans in navy}) labeled for “trash” and “recycling” with a chalk pen bought {HERE}:
They sit on either side of our paper shredder (we’ve had ours for years so it’s no longer available but {this paper shredder} is a highly rated, well-priced option).
Don’t have a spot in your home similar to this? A closet would be another great place place to set up a mail sorting area with a shredder and recycling bin on the floor of the closet and the file folder organizer attached to the inside of the closet door (the clear file folder organizer I used has holes in the back for hanging it up!). Another option is to set up a similar station in the kitchen near your trash and recycling bins that are already there – place the file folder organizer in a drawer or hang it on the inside of a pantry door and add another file for anything that needs to be shredded to take care of as the file fills up!
How I Organize/Sort Incoming Mail
I have my file folder mail organizer filled with six of {these folders} with {these printed labels}:
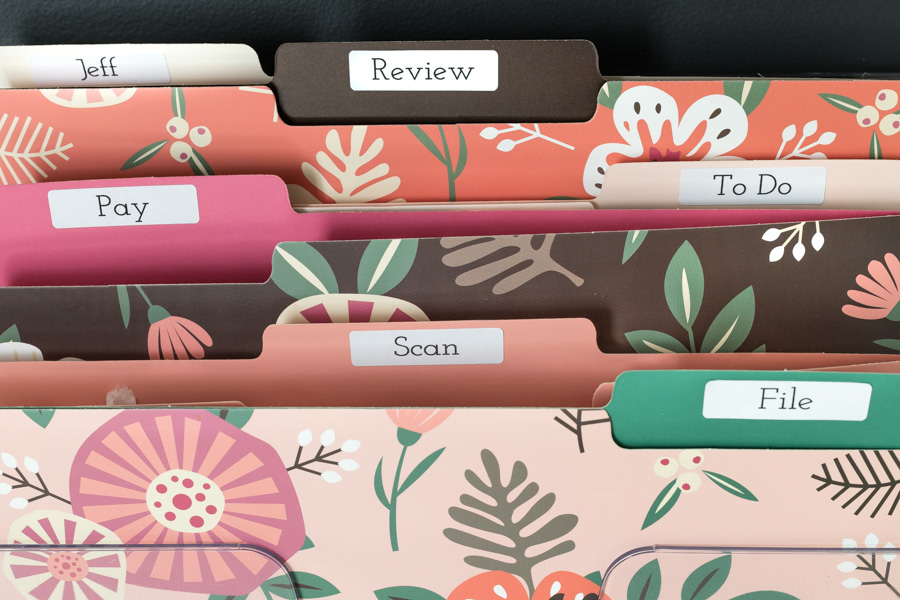
Every day (it’s so easy when you get in the habit of doing it daily instead of letting it pile up) I take just a few minutes to take the stack of mail and sort it into these files:
- File – anything that I want to keep long-term that I don’t want to just scan (such as documents with signatures) go in this file. Once it starts filling up (usually 1-2 times/month), I file it all at once.
- Scan – 90% of things that I want to keep long-term, I scan into my laptop. I have this small mobile scanner found {HERE} that sits on our office desk in a tray:
It’s super easy to use – after downloading the software on your computer/laptop when you first get it, it’s as simple as connecting the two with a USB cord, opening up the program you downloaded, choosing the folder you want your scan to go it, and then feeding each sheet through the front to scan it:
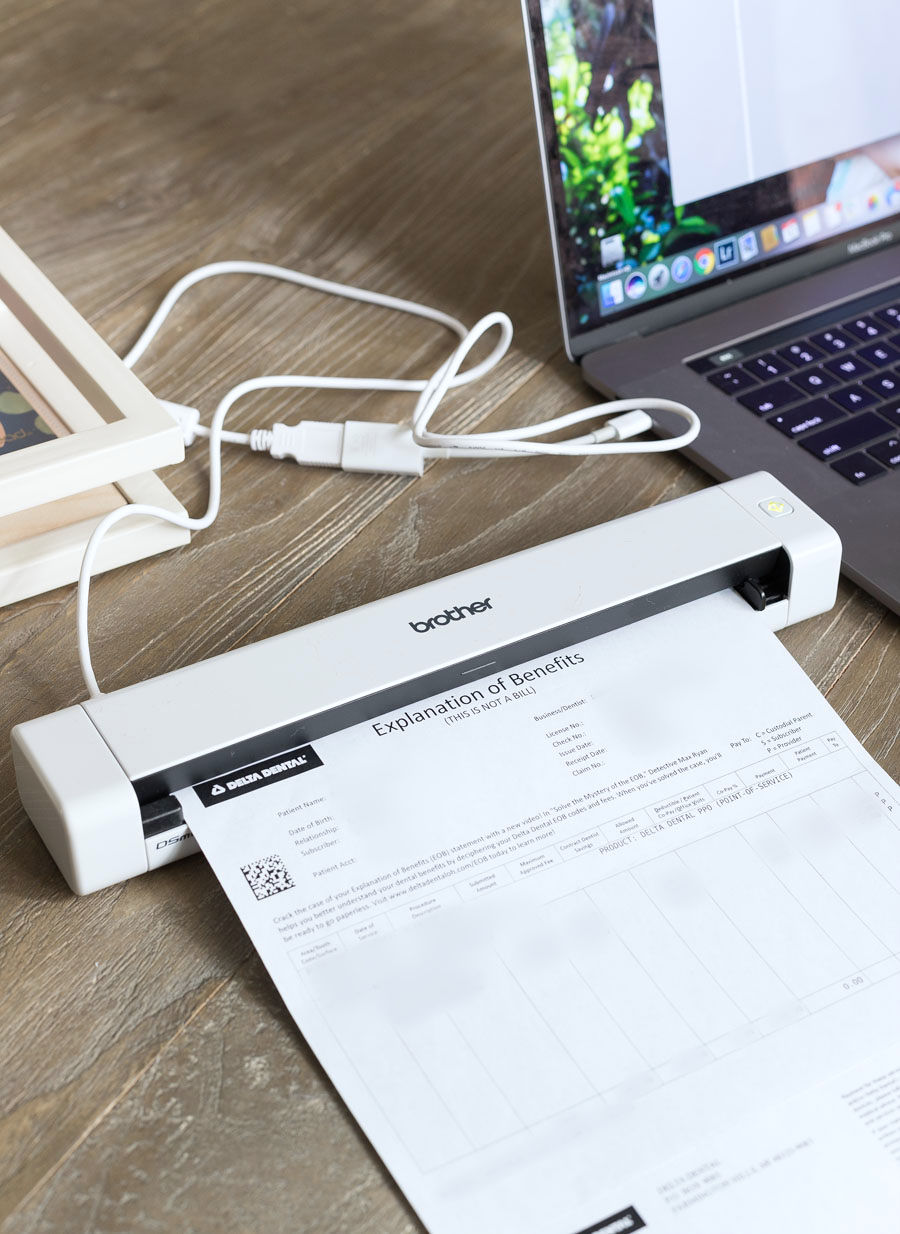
I love that I can do it all while sitting at my laptop without any back and forth like I used to have to do with our printer scanner. Once everything is scanned, I shred anything with personal info. Definitely a must-have! I wait until I have several papers in my Scan folder to do the scanning – I don’t mess with it daily.
3. Pay – any paper bills that need to get paid go in this file. I have alerts on my electronic calendar (I use the Google Calendar app) to pay any bills in the folder plus any I’ve received electronically on the 1st and 15th of each month.
4. To Do – anything I need to act on goes into this file.
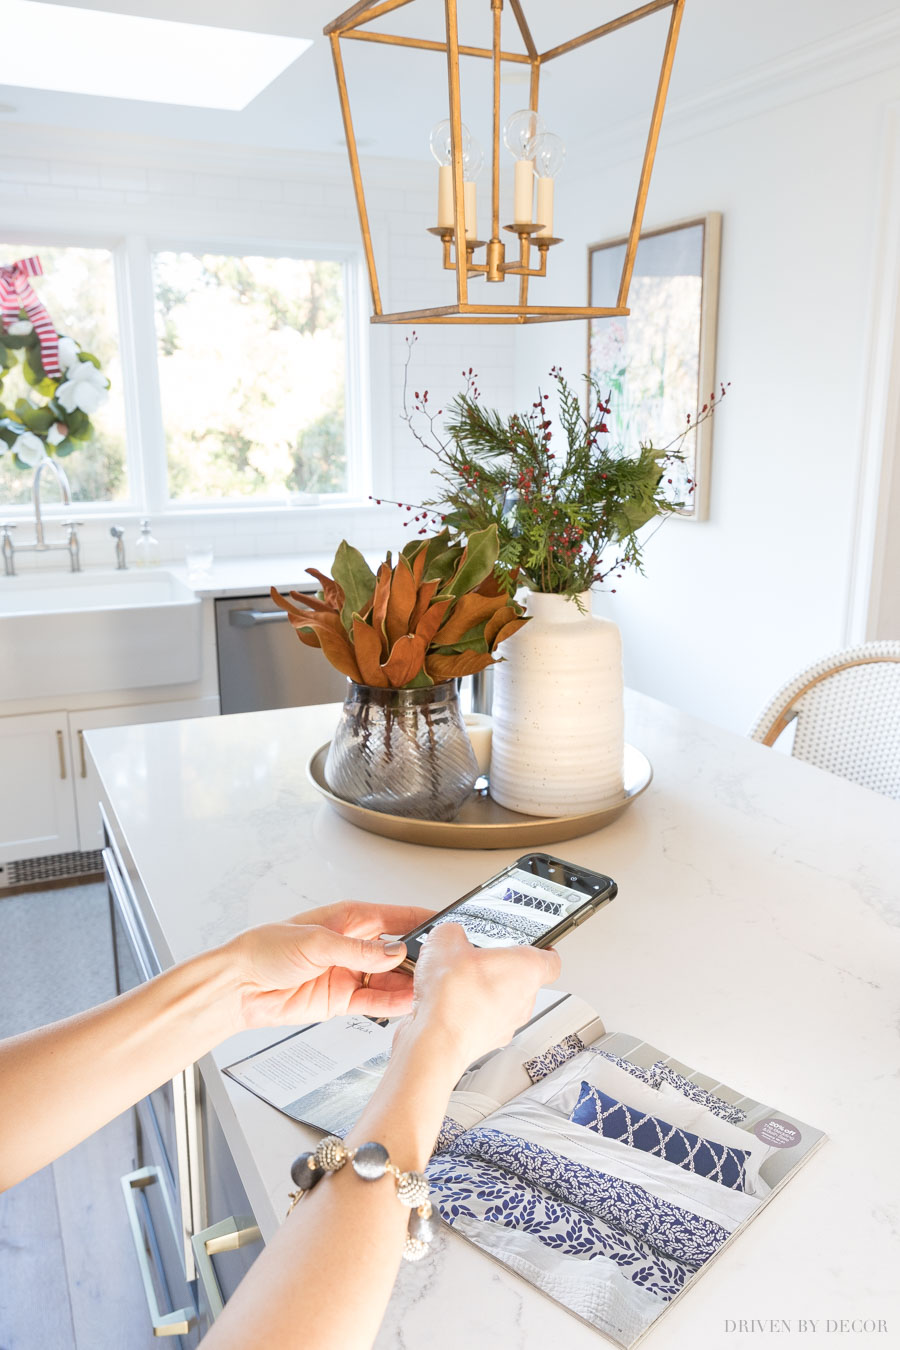
5. Review – any mail that involves something lengthy I need to read before figuring out what to do with it or any catalogs I want to look at later go in the Review file. I pull both the To Do and Review files at the same time at least once a week and tackle most or all what’s in them. When I find things in catalogues that I’m thinking about buying or referring to in a blog post, I take a picture of the catalogue page with my phone and upload it to one of my secret Pinterest boards (on the Pinterest app, just click the “+” in the upper right corner and then “pin”) so I can then be done with the catalogue and recycle it. (If you’re not yet following me on Pinterest, you can find me {here}!)
6. Jeff – anything that comes for my husband that isn’t junk mail goes in here. He checks it and empties it out every weekend.
Any mail that’s junk or that I had a chance to look through and don’t need goes into either Recycling, Trash (things like the plastic wrapped around some brochures & catalogues), or the shredder (credit card applications, etc.). The whole process takes less than five minutes and leaves you with a totally clear desk and countertops. I got in the habit of organizing the flow of our mail this way during our kitchen remodel when my usual mail dumping ground of the kitchen countertop was unavailable and it’s been a game changer. Now it’s a daily habit that I don’t think twice about.
Oh and one other thing – you know that I like to keep things looking pretty so might wonder if I hate having the shredder and trash cans under our built-in desk instead of the pretty ottoman that used to be there. In a perfect world, I’d have my home mail organizer center tucked away where no one would see it but still in a convenient location but that perfect world doesn’t exist in my house. 🙂 It’s honestly not all that obvious when you see the room as a whole so it doesn’t bother me:
but I did keep the little “desk skirt” I made several years back to hide cords (more details in {this post}) and if we’re having a party or I want my house to look particularly nice for some reason, I can just pop that right on in:
I hope you found a tip or two that helps get you just a little bit more organized! Do you have any other tips to share for taking charge of your mail or struggle with other areas of organization you’d like to see addressed on the blog? Dish it! Want more organizing inspiration? See my post about my 20 favorite home organization ideas!
XO,


