Preparing walls for painting is the key to a good paint job! I’m sharing how to prep your walls for painting including my tip and tricks for patching your walls, sanding, and cleaning away drywall dust that will make your finished walls turn out beautifully!
I don’t know about you, but while I really don’t mind painting, I HATE preparing walls for painting. Spackling and sanding ranks right up there with cleaning out the refrigerator, pooper scooping the backyard, and waiting in the neverending line at our grocery store deli. Fortunately, after having prepped and painted many, many rooms, I’ve perfected my methods time and time again so now the wall prep process is a little less painful and a little faster while still giving me that beautiful base for a perfect paint job. Today I’m sharing my wall prep tips with you! (post includes affiliate links; full disclosure statement available {here})

It’s important to know how to paint a room, but the perfect paint job starts with…
Repairing Drywall Holes & Nicks Before Painting
Patching any holes, nicks, and other imperfections is one of the most important steps in preparing your walls for painting. You can either buy the premixed type of spackling paste in plastic containers such as {this} or one that you mix yourself such as Sheetrock’s Easy Sand Joint Compound:
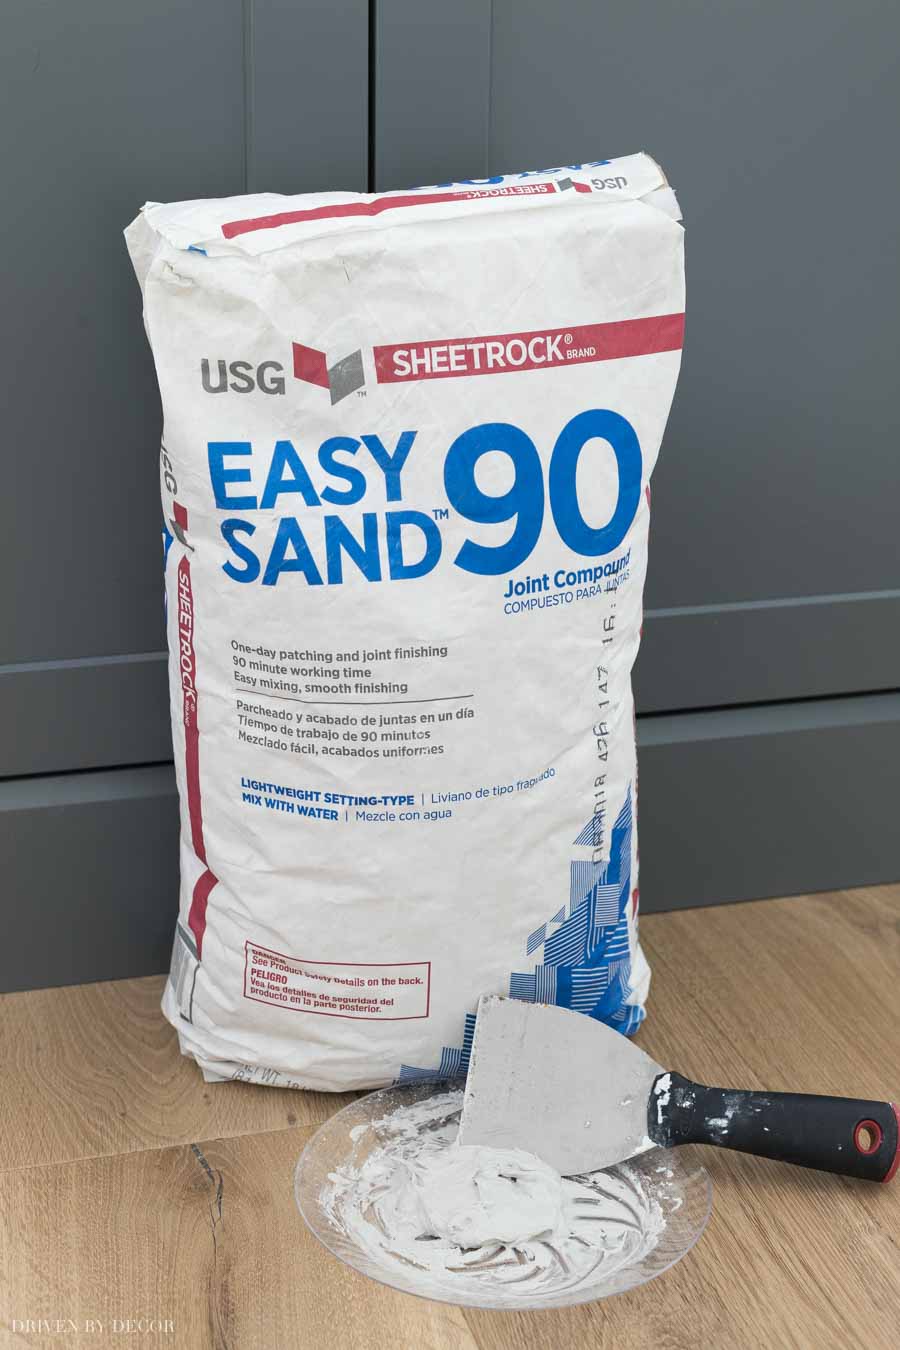
The plus of using the pre-prepared type is that it’s easy! I personally like the type that you mix yourself – it only takes a minute or two to mix and I don’t bother with any measuring but instead just add a little bit of water at a time until it gets to the consistency that I want. In exchange for spending just a few minutes mixing, you get to reap all of the benefits of using this type of joint compound over the premixed kind – it’s much less expensive, you can mix as much or as little as you need, it goes on nice and smoothly (you have no small dried pieces like I sometimes get when using joint compound from a container), it dries faster, and (most importantly) I think it’s much easier and quicker to sand.
It comes in five different grades which are based on the average setting and working time for the joint compound. The lower the grade, the faster it will dry (both on the wall and in your mixed batch) – there is a chart on the back of each bag that shows you the approximate setting times and working times for each different grade. Unless you’re patching just a spot or two, don’t use a very low grade like 20 or your joint compound will start drying up on you before you’re done using it. I usually use grade 90 of Easy Sand that’s available {here}. It sets within 85-130 minutes (meaning it’s ready to sand and paint after this time) and has a working time of one hour (meaning that you have an hour before your mixed joint compound begins to dry up).
Sanding Walls Before Painting
For the best results, use a good quality sandpaper (I like 3M’s Pro Grade Advanced Sandpaper available {here}) and a sanding block ({this one} is the best I’ve found). The sandpaper I use is more expensive than your average sandpaper but it has a coating that resists clogging so that it lasts much longer and I get my sanding job done much faster – worth every penny in my book! By using it with a rubber sanding block, you’ll save wear and tear on your hands and get your sanding done faster and easier. Be sure to wear a mask, goggles, and gloves while you sand.
How to Clean Walls Before Painting
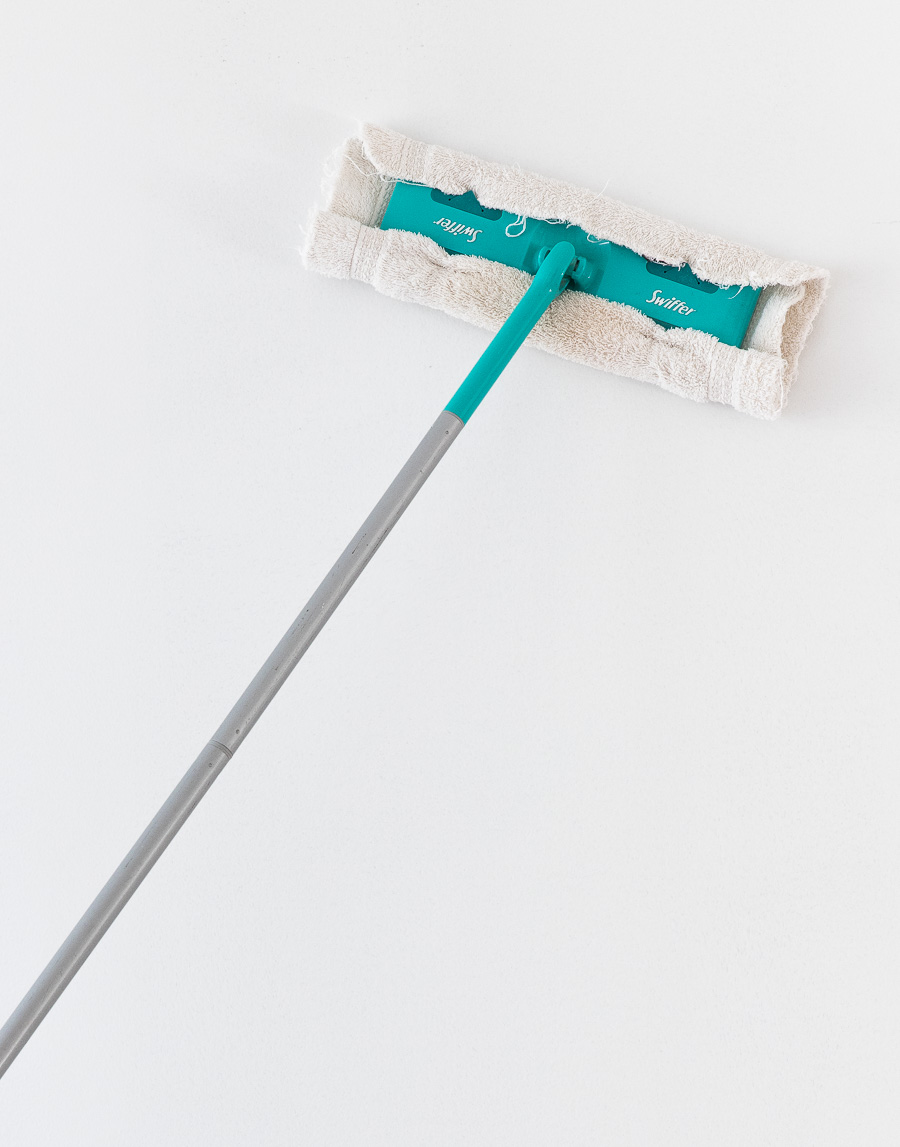
Remove the drywall dust from your walls by vacuuming off the worst of the dust (I use my Shop-Vac with a wide floor nozzle/brush) and then use your secret weapon – the Swiffer. If you don’t already own a Swiffer, you are missing out – they’re not only great for cleaning floors but come in handy for so many other things too (you can get them {here}). You can use Swiffer’s Dry Cloths or if you want to save money you can attach your own washcloths or small towels. Whichever you use, simply dampen then a little, attach them to the Swiffer and you’re ready to go.
Start at the left hand side of your first wall and swiffer in a straight line from the top of the wall to the bottom, moving down the wall as you go.
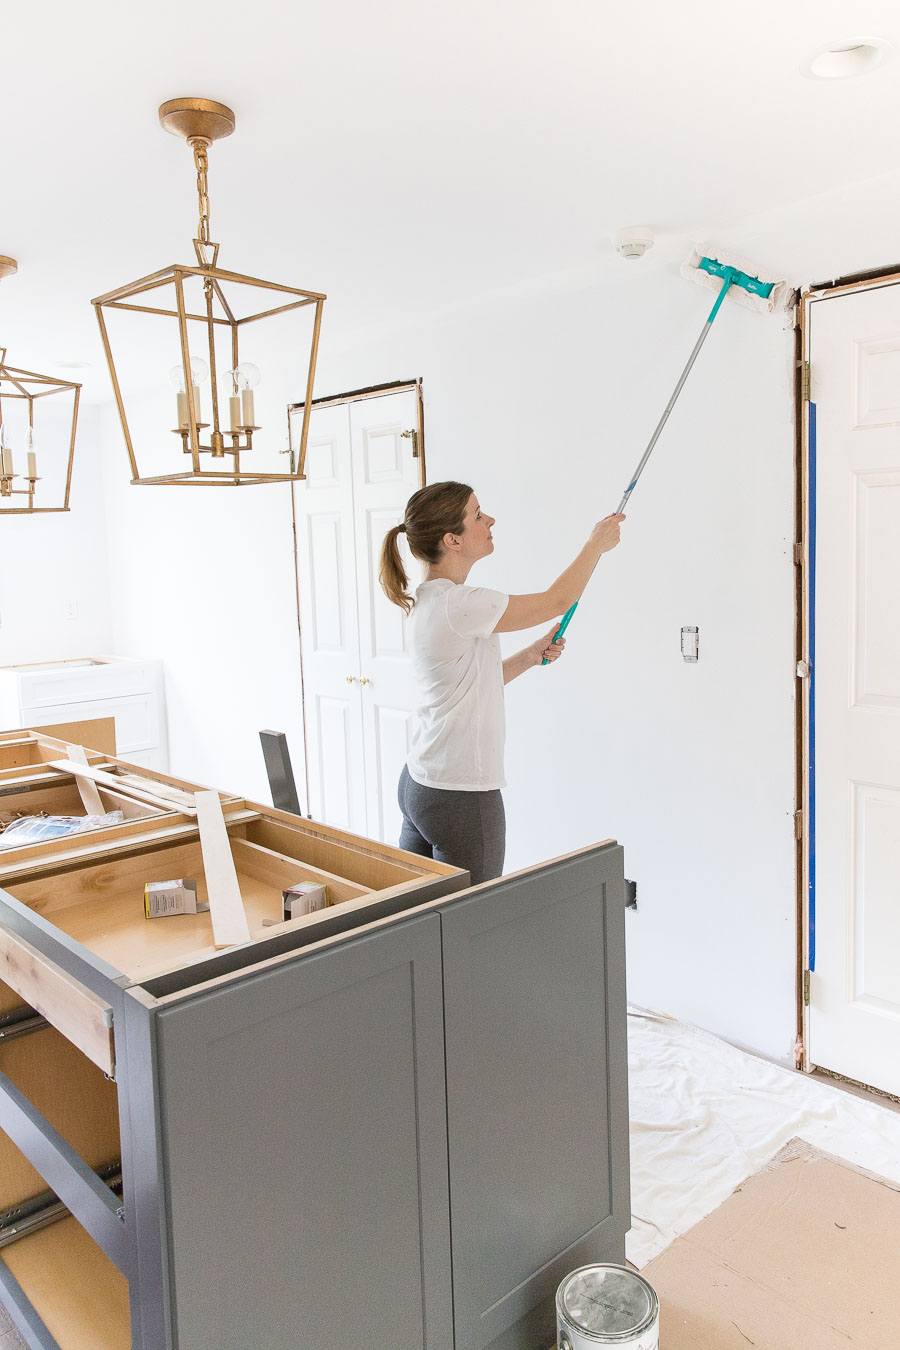
The more dust that you have, the more times that you should change out your cloth as you swiffer your room (I changed out mine with each new wall). Don’t worry about removing every speck of drywall dust (you couldn’t even if you tried!) but a quick swiffering of your room does help in getting a great painted finish.
There you have it! Do you have any wall prep tips of your own to share? Be sure to also catch my post on 7 time-saving painting tips {here} and how to paint a room {here} it will help you get that next-level paint job that you’re looking for!!


a shade fancier says
I have no tricks, I have no tips, and I unfortunately have nothing constructive to add. All I can do is fret and complain because this same task is awaiting to be started at my home — and I am just dreading the entire process!! The positive part is that I will be able to refer back to your post and profit from your experience. Thanks.
Missy M
Kris @ Driven by Décor says
You have my sympathies – such a hateful task! Good luck – hope it is quick and painless 🙂
Designing Domesticity says
Great tips. I would never have thought about the swiffer. So smart. Can’t wait to see the next step! Thanks for sharing, liz
Kris @ Driven by Décor says
Thanks Liz – just finished priming the walls tonight. Have to finalize the paint color tomorrow – still undecided…
Miss Me says
The Swiffer works great for shower walls too.
Kelli b says
exactly what I came for! love the blog. 🙂
Thomy S. Boulto says
Good share. You have a good point here. Anyway, my brother bought an apartment in Waltham ma, and it’s pretty small. He wanted to meet the best painters Waltham ma or get huge info to decorate his house to make it look wide bigger and at least trendy like ours haha! Thanks for the tips here, I just sent this link to him already because I believe this post has given us some great ideas for any home remodeling ( no need to elaborate)
Good day. ~ Thomy~
Shannon M Ward says
Your tips here are fantastic! The joint compound for repairing damage is absolutely a game changer! SO much better than the plastic tubs of spackling, but SO much dust when we sanded! I reviewed several blogs before we painted, and yours was the most helpful. We bought the sanding block, too, and I was surprised how much I like it better than the one we used before. Thank you for the suggestions!
NC Renovator says
Great tips! The key is using the shop vac first – and cleaning the filter often since sheetrock dust loves to clog it up in about 3 minutes, lol 🙂
Nick in the sticks says
Thanks for the excellent tutorial! I have working through my first drywall repair and am almost ready to start painting, but I had been unclear how to clean the walls first. I like your idea of using the vacuum and Swiffer and just picked up a Swiffer due to your recommendation.
I also will try out your easy-to-sand joint compound for my next job. I have been struggling with the heavy, all-purpose variety (green lid kind) and was growing intimidated and frustrated by online videos that show people artfully spreading joint compound like they’re frosting drywall cakes. And I had no idea there is such a variety in the types of drywall mud. (I even learned they use different types of mud in Canada!) Anyway, I am introvert who sometimes gets a little too obsessive with going doing a rabbit hole in my research. Thanks for getting me back on track so I can complete my project! I look forward to exploring more of your site.