Ready for some spring cleaning? Get ready to whip your home into shape with these ten tips!
While I love having a clean home, life is busy and there’s only so much time that I’m willing to devote to cleaning so being efficient is key! I definitely wouldn’t describe my house as being one that’s always clean enough to eat off the floors (I don’t vacuum daily, there are weeks when sheets don’t make it into the wash, and I don’t even want to speak of the condition I’ve let our showers fall into during particularly busy times), but overall I feel like I do pretty well keeping our house clean with the time that I have.
Today I’m sharing my ten must-have cleaning tips for getting your house the cleanest it can be in the least amount of time for all of you busy girls (and guys) out there. Ready to jump on in with my first tip?! (post includes affiliate links; full disclosure statement available {here})
1. Have Your Cleaning Supplies Delivered to Your Doorstep
I use several different brands of cleaning supplies and there isn’t a single store that I could walk into and find them all. That’s partly because I’m trying more and more to choose greener cleaning products. This is the first home we’ve lived in that has a septic system and since bleach and other harsh cleaners kill the good bacteria in the septic system that keeps it working, it’s been some serious extra incentive to go more green :)! I found Grove Collaborative through a friend about three years ago and I’ve been hooked ever since. Grove has all of my favorite hard-to-find products including some that are only available through Grove, their customer service is amazing, and everything shows up right at my door which saves me time every month!
2. Use White Vinegar for Mineral Deposits – It Works Wonders!
If you have hard water, I’m sure you’re all too familiar with the stubborn mineral deposits that build up around the base of your faucet handles and on shower and faucet heads. White vinegar works like magic on these! You can’t just spray them with white vinegar and wipe it away though, the vinegar has to soak on them. On the faucet/handle bases, I’ve found the easiest way to do this is to wrap a small piece of paper towel around the base and spray it with white vinegar until it’s soaked through. Push the soaked paper towel down around your faucet/handle base so it’s in close contact and let it sit until the mineral deposits have loosened up and you can simply wipe them away!
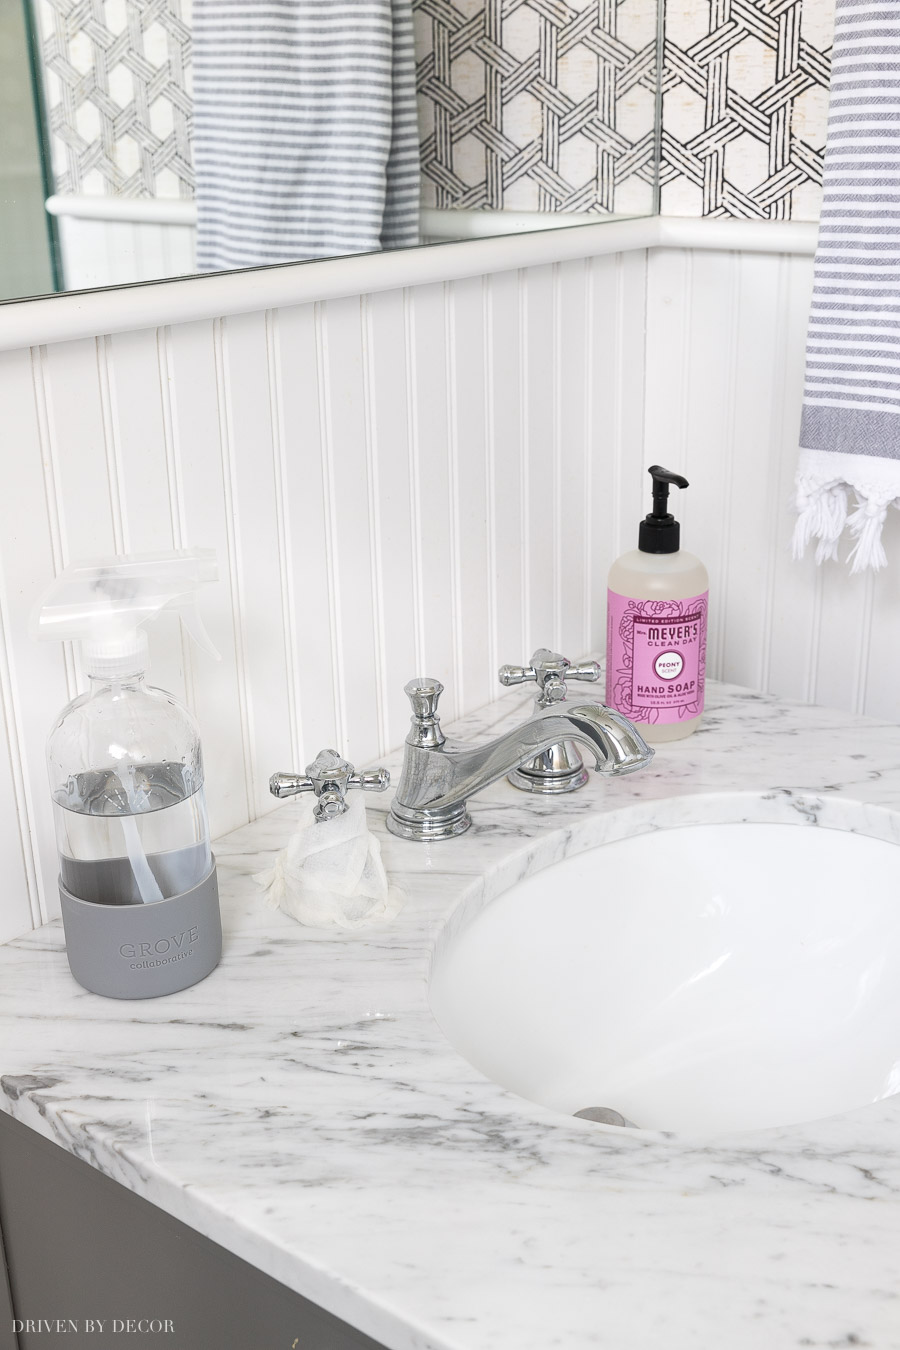
White vinegar works great for cleaning glass and mirrors too! I keep mine in this pretty glass spray bottle that has a no-slip silicone sleeve. I actually have a set of three of them in gray, blue, and green – love these!:
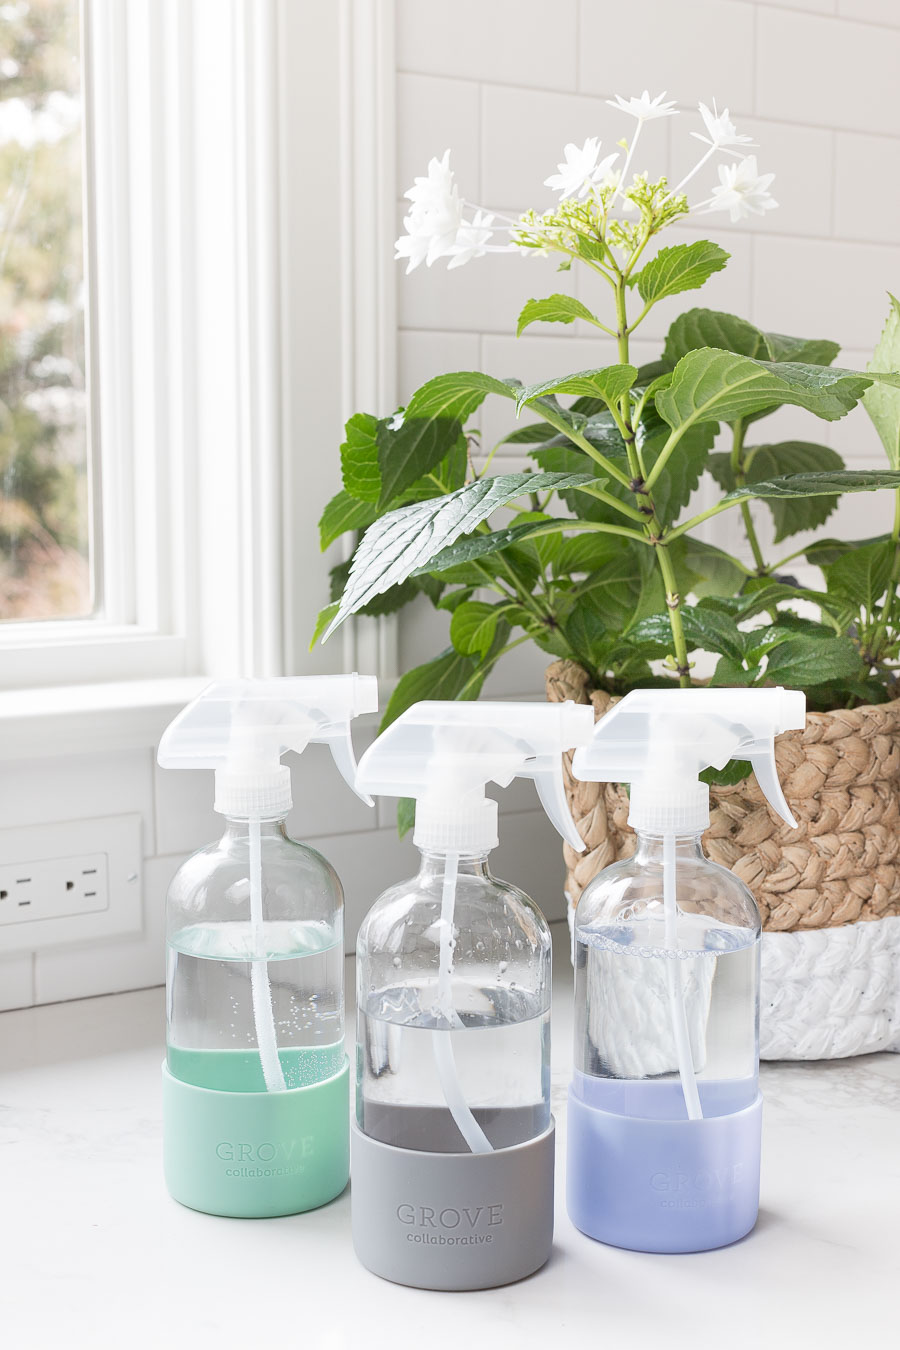
I got mine from Grove but you can also find similar ones {here}.
For faucet and shower heads that have mineral deposits, I fill a baggie with white vinegar, submerge my faucet or shower head in it and wrap a rubber band around it to soak.
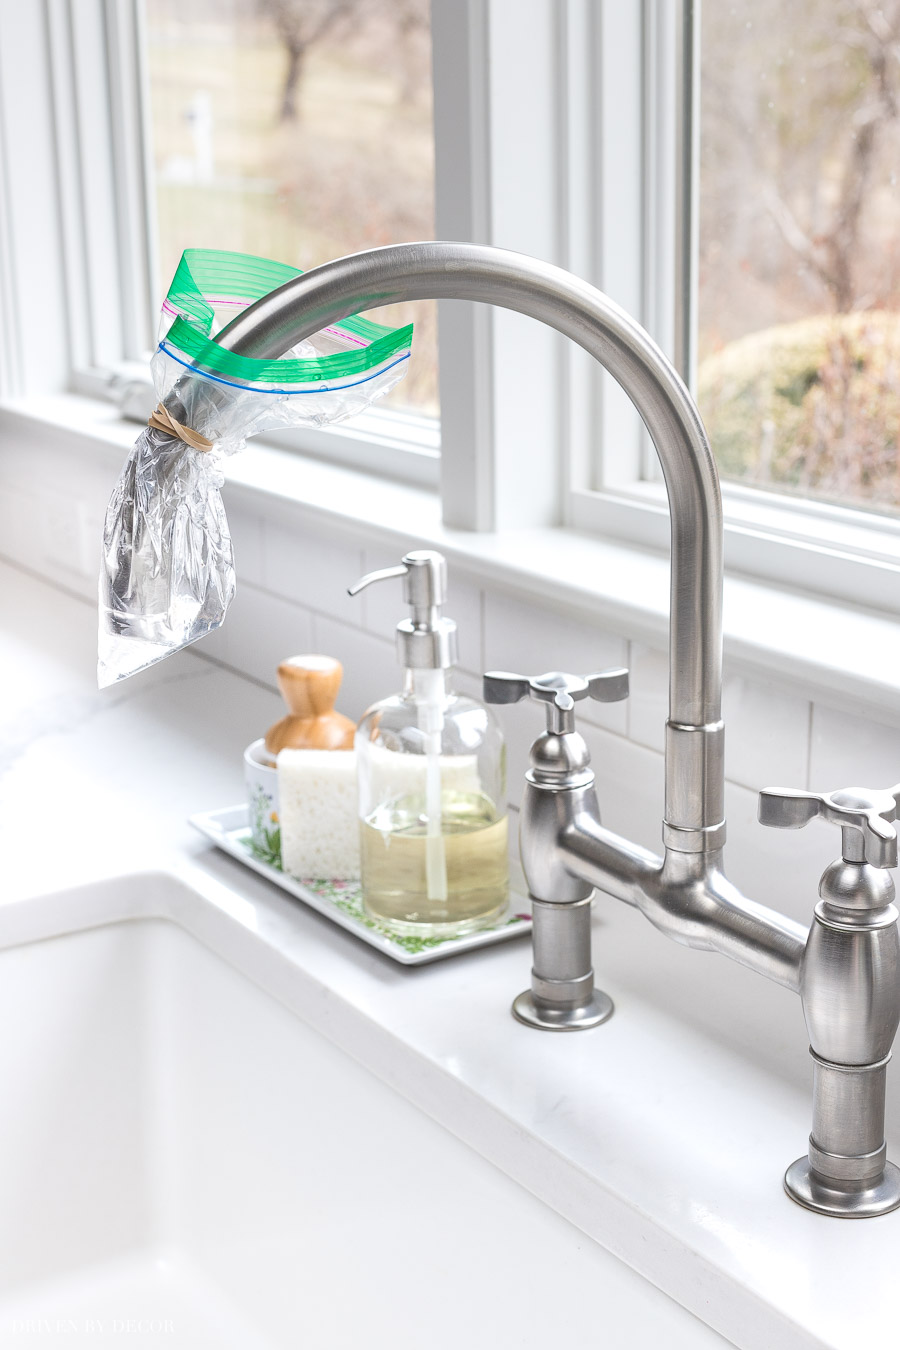
Sometimes just 30 minutes is enough time but it you have really built-up deposits, you’ll want to let it sit for longer. It’s amazing how easily the stubborn deposits then wipe off!
You can also use vinegar to clean stainless steel! See my post on how to clean stainless steel appliances {here} for more details on cleaning with vinegar as well as other cleaning methods that will keep your appliances smudge and streak free.
3. Have the Right Cleaning Tools
As is the case with any task, having the right tools for cleaning is key for making it easier and quicker! One of my favorites is this 2-in-1 grout and tile brush available {here} that has stiff bristles at the top for cleaning grout and softer bristles below for scrubbing tile so I can make short work of scrubbing showers:
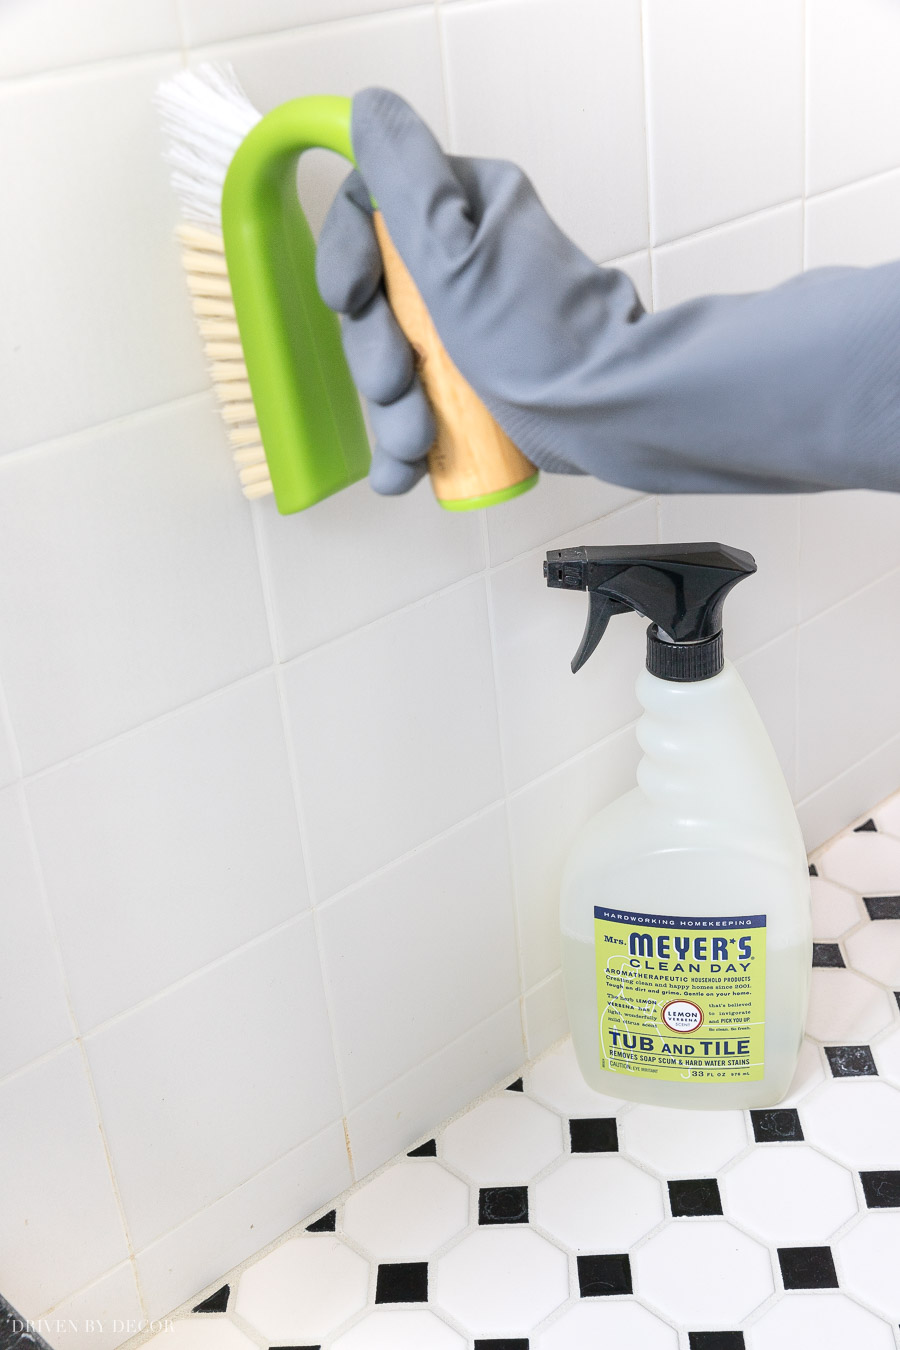
I use it with Mrs. Meyer’s Tub and Tile Cleaner for an overall cleaning and Soft Scrub with Bleach for stained grout (don’t use anything with bleach if you have marble or other natural tile). I also love these gray cleaning gloves (mine are from Grove but {these gloves} are similar) and use them for all of my deep cleaning – they fit well and are soft inside! You can’t see it from this pic but they have cotton cuffs to keep water from running down your arm which is especially nice if you use gloves to clean dishes (and the cuffs have the cutest colorful patterns too)!
4. Use Dryer Balls to Dry Your Clothes Faster
I bought wool dryer balls for the first time a few years ago – I’ve always used dryer sheets but thought I’d give wool balls a try after reading about potential health concerns with the dryer sheets I was using. The truth is that the dryer balls made my laundry a little softer and less staticky but didn’t make as big of a difference as I’d hoped. What I was impressed with is that throwing several wool balls into my dryer definitely helped speed up drying time! I now use them religiously with every load to speed things along. And for some loads like towels, instead of using dryer sheets I put a few drops of essential oils on my wool balls (you need to make sure the oil is totally dried on the balls before throwing them in with your clothes!) to add a nice scent:
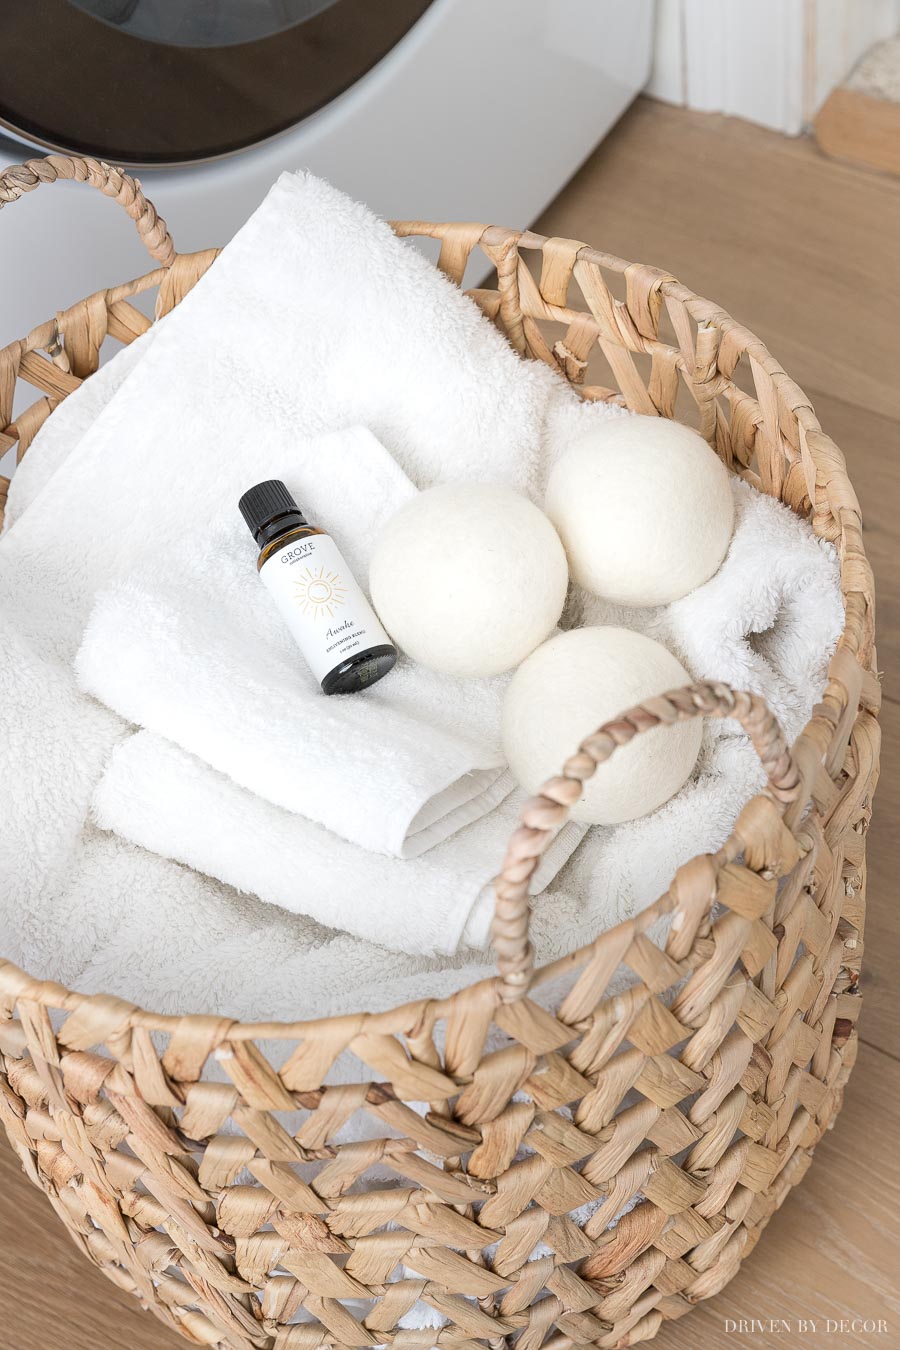
Grove’s “Awake” natural oil blend is a favorite – it’s a fresh, citrus smell that I love for the laundry and my daughter loves using in her diffuser. For loads of clothes, I still haven’t 100% weaned myself away from dryer sheets but I’ve at least gotten to where I only use ¼ a sheet plus my wool balls and I’m hoping to keep going from there – baby steps!
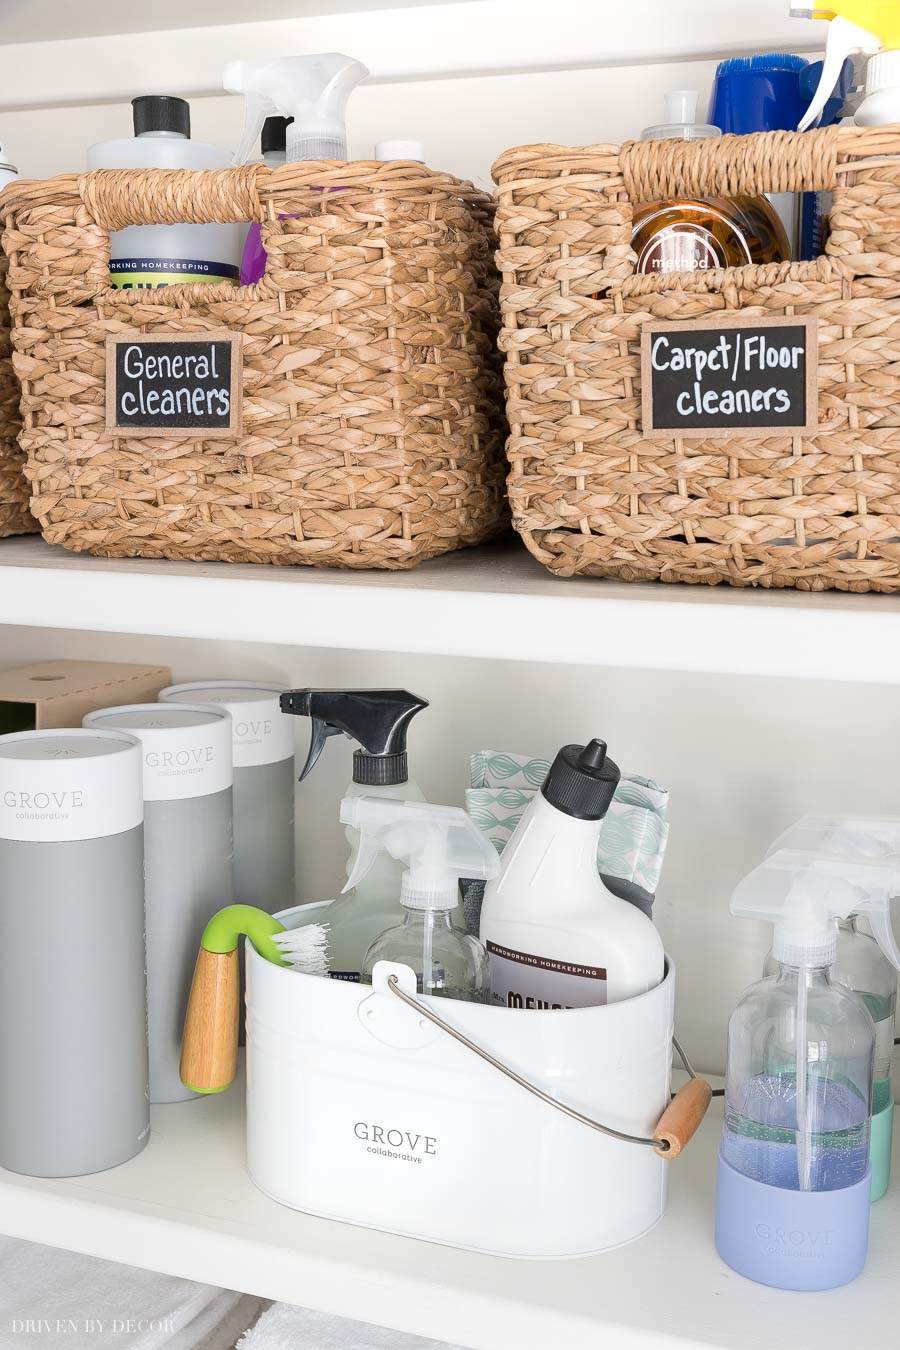
5. Organize Your Cleaning Supplies & Keep Only What You Use
When you have time to clean, the last thing you want to be doing is hunting for your supplies, sorting through fifty cans of cleaners to find the one you’re looking for. I keep a few cleaning bottles under our kitchen sink but everything else is in this shallow closet off of our kitchen eat-in area. When we remodeled our kitchen, I did a major clean-out of our cleaning supplies and pared it down to only those I really need and use. I keep them all in these labeled baskets:
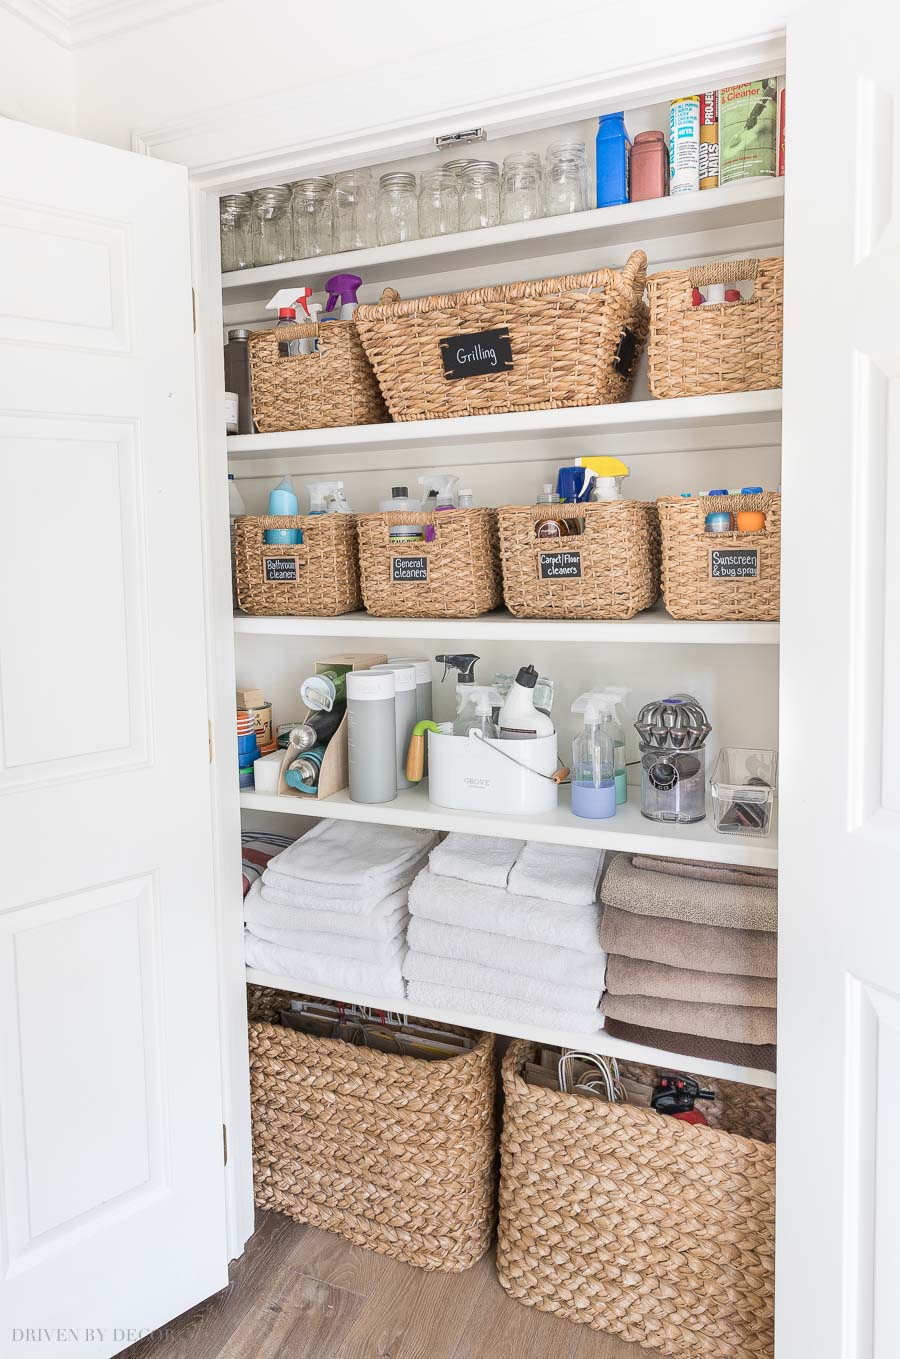 Storage sources: Small woven baskets on shelves | Large console baskets on bottom | Mini chalkboards on woven baskets (labeled with {these chalk pens}
It’s such an improvement over how it was before I whipped this closet space into shape! Now I know where everything is so no time is wasted searching and I have more shelving space left to store other things.
6. Have a Grab & Go Caddy
While I have several specialty cleaners like leather cleaners, carpet cleaners, etc. I have only a few go-to’s that I use every week – I keep those in this cute white enamel Grove caddy in my storage closet:
It holds my Mrs. Meyer’s Toilet Cleaner, Tub & Tile Cleaner, vinegar spray bottle, grout brush, gloves, a sponge, and microfiber cloth. I love that the handle is large enough to go over the top of my cleaning bottles so I can simple grab it and go from bathroom to bathroom without wasting time gathering supplies. And as a side note, the gray and white cardboard Grove tubes to the left of my caddy are what my spray bottles came in – they’re perfect for corralling little things like matches, candles, felt pads for chair bottoms, and more!
7. Let Degreasers Do the Work for You
Cleaning your range/stovetop is never fun but it’s a lot easier if you let a degreaser do the work for you in loosening up the stuck-on grease! A friend of mine who’s a fellow Grove fan recommended this Method degreaser to me and it works great!
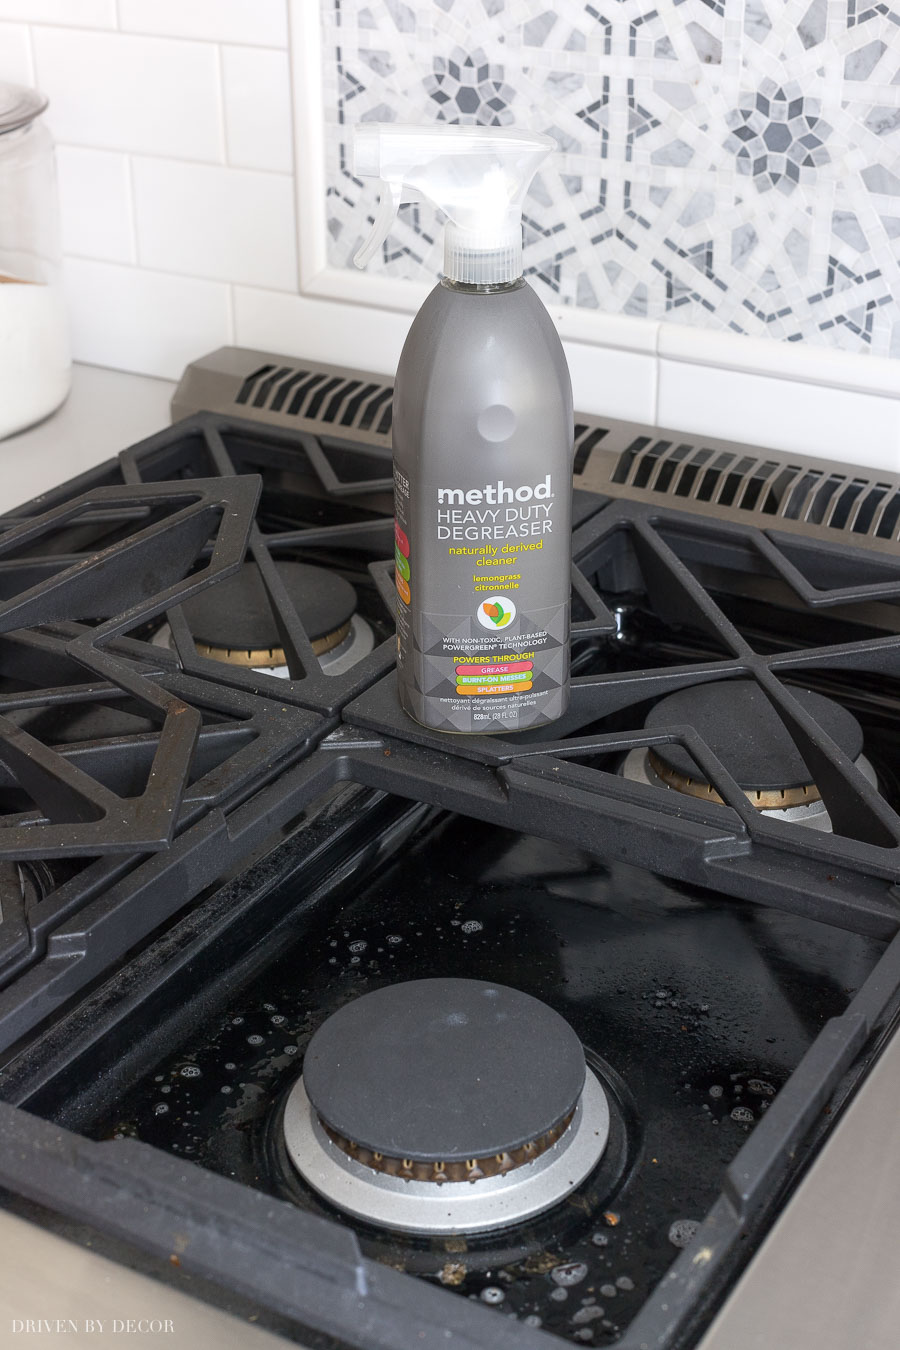
I lift off my grates and spray it on when I first start cleaning my kitchen so it has time to soak in and work it’s magic. I do the dishes and all of my other kitchen cleaning and then come back to wipe off the degreaser (and all of the gunk that comes with it) at the end. It works well for soap scum too! My grates are dishwasher friendly so I clean those by throwing them in with my dishes but if yours aren’t, this degreaser can be used on grates too.
8. Microwave Water + Lemon for Easy Cleaning
One question I get asked a lot is how easy or hard is it to clean our drawer microwave. The answer is that it’s a mixed bag. The part of the microwave that gets the dirtiest (bottom and sides) is actually easier to clean than a normal microwave while the top is a bit more challenging – you’ve really gotta kinda get your head in there :). But no matter what kind of microwave you have, a tip for getting it clean easier and faster is to microwave a small bowl of water with lemon for a few minutes until it boils and then let it sit in the closed microwave for 15+ minutes.
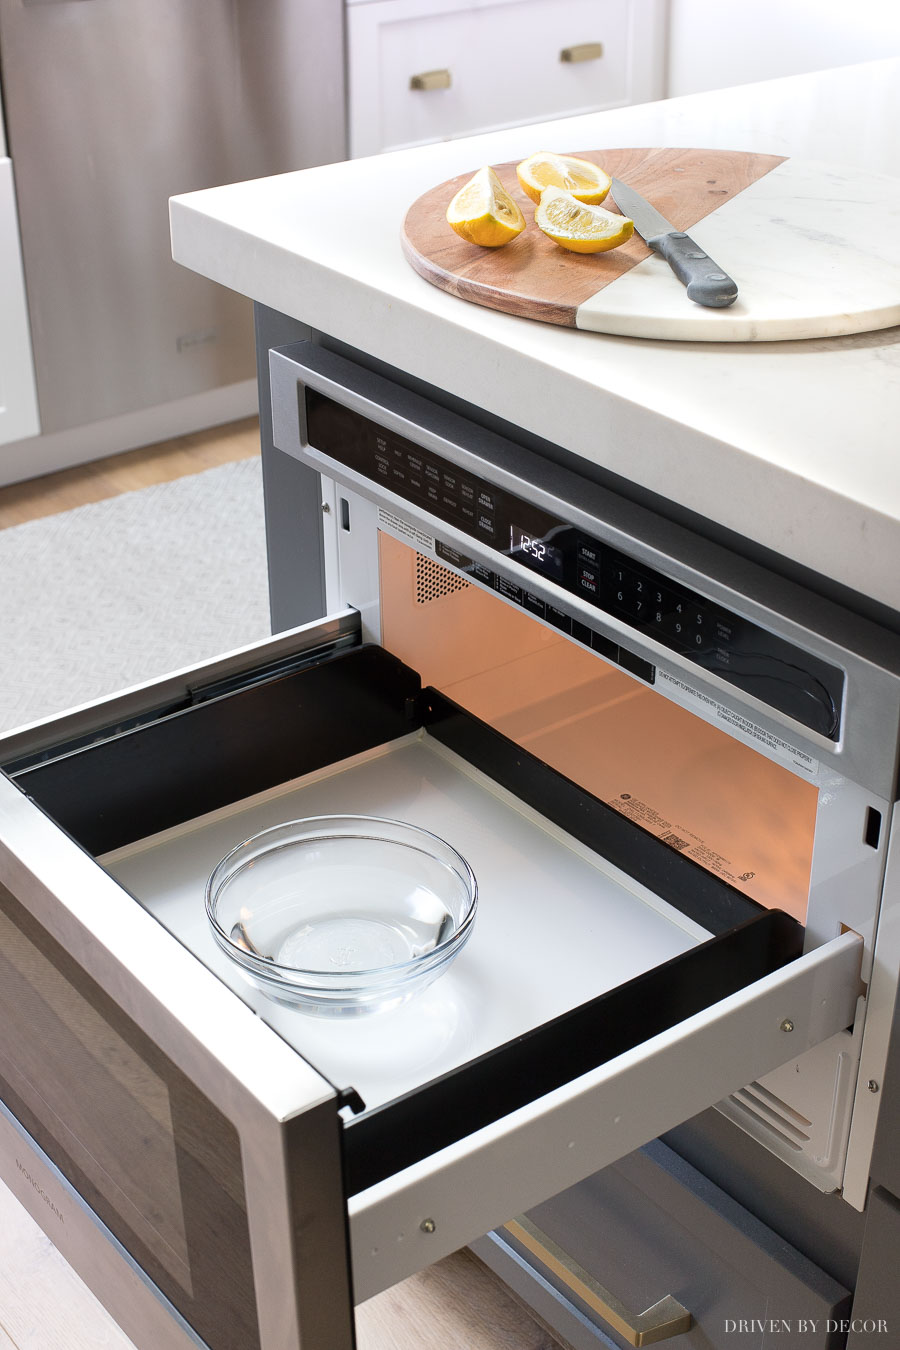
It steams the hardened junk off the walls of your microwave so it’s super easy to just wipe it away!
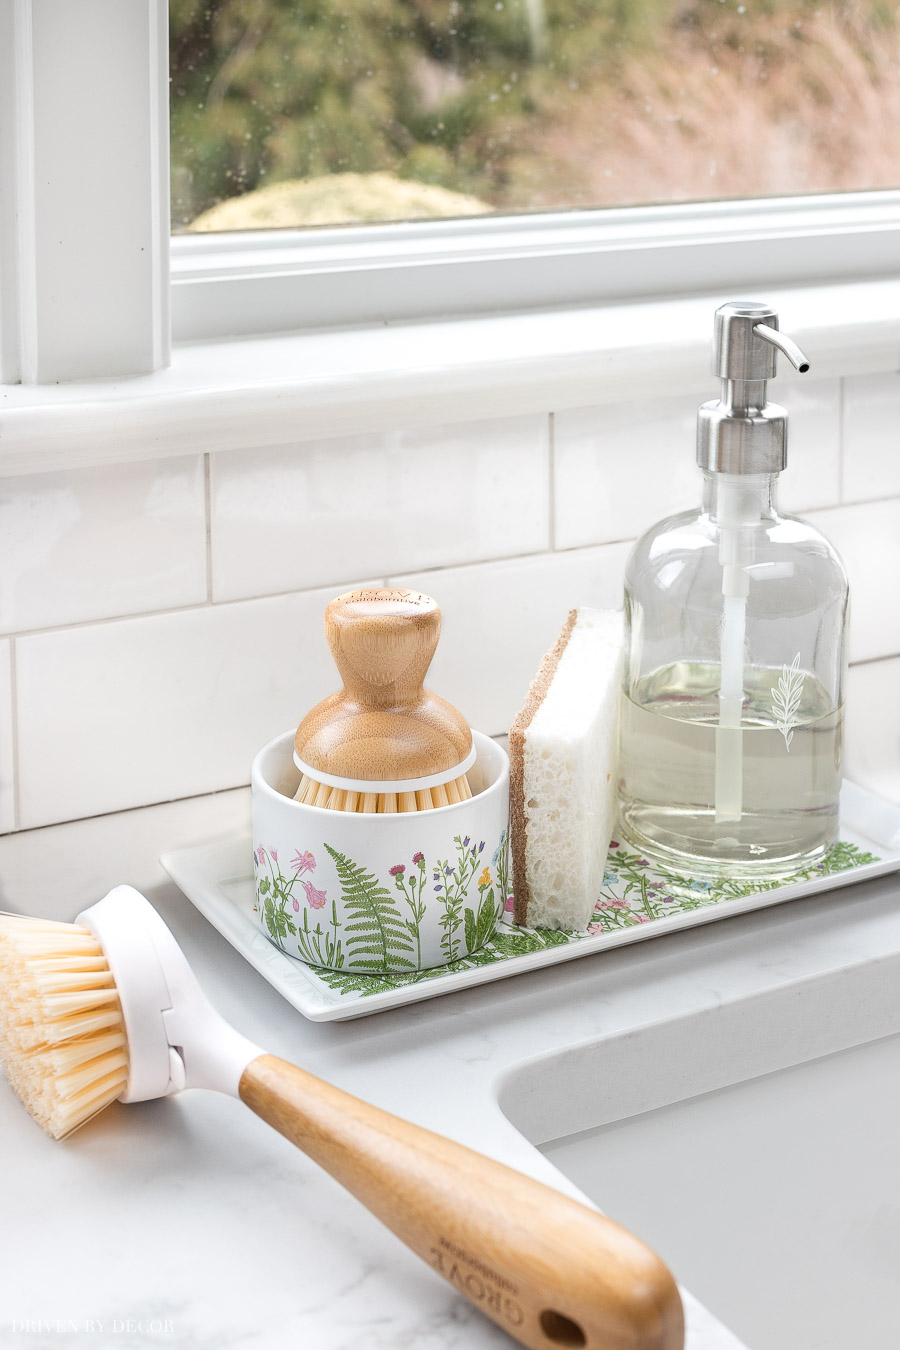
9. Clean With Things That Are Pretty & Smell Amazing
OK, not everyone is going to understand this one but if anyone does, it will be you guys who appreciate beauty in your homes like I do. I honestly find that when I have cleaning supplies that are pretty and cleaners that smell good, cleaning is something that I dread less and am willing to do more. Case in point – I recently got Grove’s wildflower tray and Bubble Up (a soap dispenser & dish brush set) and it truly makes me happy – it’s the prettiest spring pattern that makes me dread dishes just a little less! Even something as simple as a prettier sponge can make a difference – I’ve dissed all of my ugly blue sponges for {these neutral walnut scrubber sponges} and never looked back:
As far as scents go, I’m totally crazy about the smell of Mrs. Meyer’s products and find it so rewarding to have a beautifully smelling house once I’m done cleaning. My favorite scents are Apple Cider, Iowa Pine, and Peony. I took a little survey on Instagram Stories before ordering my spring scent because I couldn’t decide between Lilac and Peony – it was a close call so Lilac must be a pretty good choice too!

The only Mrs. Meyer’s scent I’ve tried that I didn’t like is Pumpkin – once fall rolls around that’s one I’d recommend skipping!
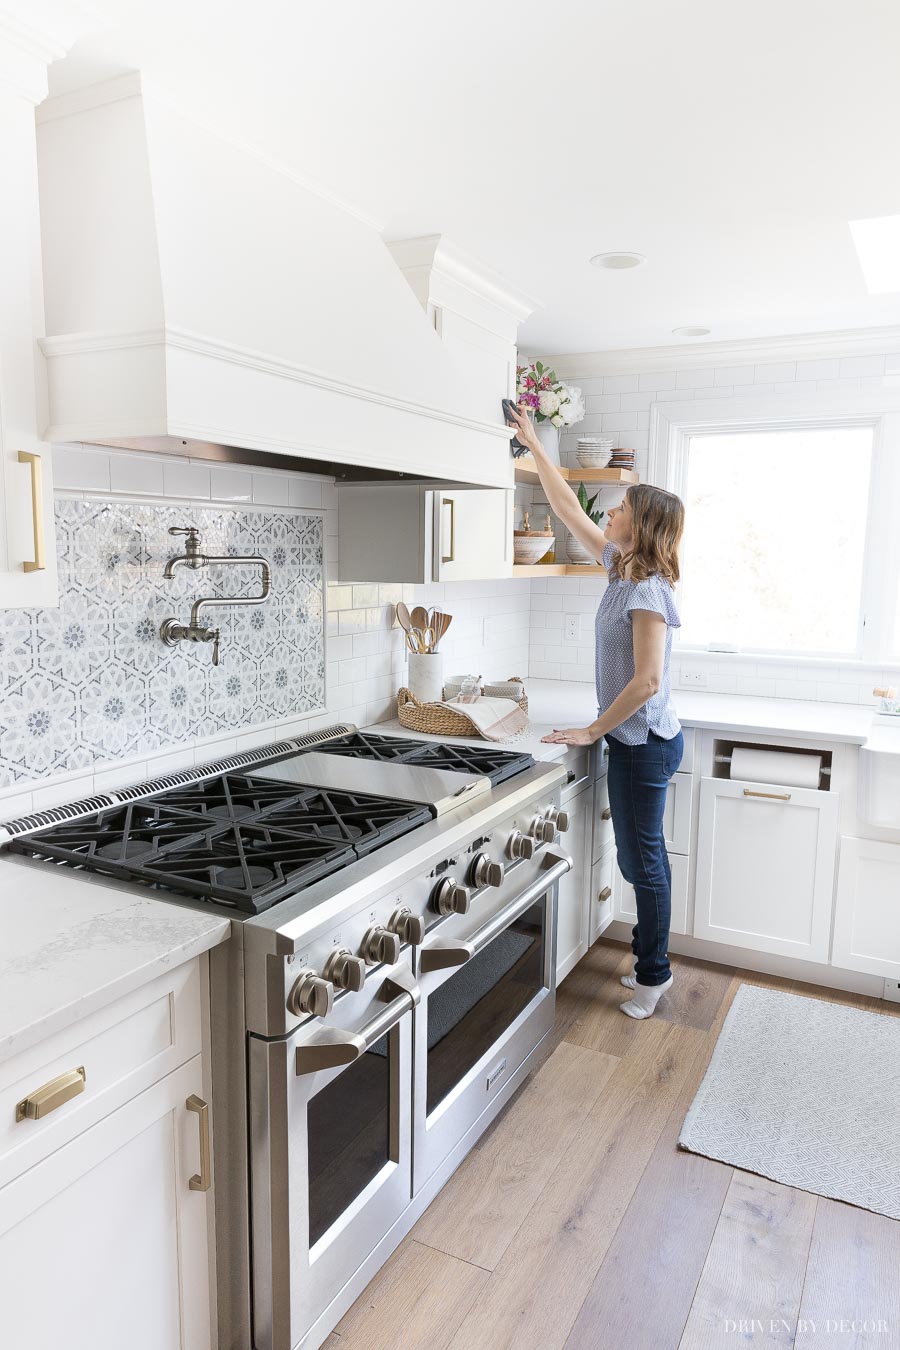
10. Use Microfiber Cloths for Dusting, Windows, & Cleaning Cabinets
I’m a HUGE fan of microfiber cloths for all sorts of cleaning. They’re especially great for painted surfaces like my baseboards and cabinets where I don’t want to use cleaners. I love my Shaker cabinets and would choose them again in a heartbeat but that bottom ledge is a serious dust collector! I just use warm water and a microfiber cloth to clean the dust and any splatters off my cabinetry – it works beautifully:
 See {this post} for all kitchen sources
I also use microfiber cloths to clean off my cabinet hardware and while it probably wasn’t made for this, the super soft white part of Grove’s microfiber towels works really well for a quick hardware polish after I’ve wiped them down:

I also have a ton of {these microfiber cleaning cloths} that I use all over my house daily.
So there you have it – my ten favorite tips! If you have any tried and true cleaning tips of your own to share, please let us know in the comments!
Thanks as always for stopping by and enjoy your weekend,


