One of the many features about our Connecticut home that made us fall in love with it was the tiny study space off of the upstairs landing. My girls have always been crafty and I knew that I could turn it into a small craft room that they’d love!
Today I’m sharing the “before” and “after” of this space along with the small craft room ideas we used to transform it. Come on in and I’ll show you around… (post includes commissionable links; for more information, see my full disclosure statement {here})
In case you didn’t see what it looked like when we moved in, we’ll start by throwing it back to the “before”. It’s a TINY room that was honestly pretty dreary:
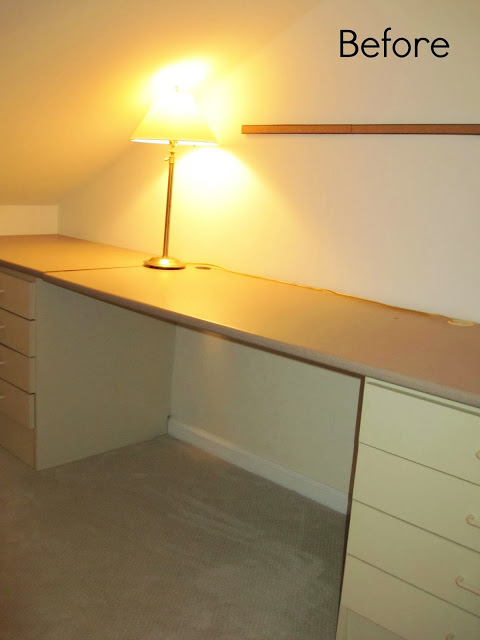
Here’s what that same spaced looks like after its transformation:
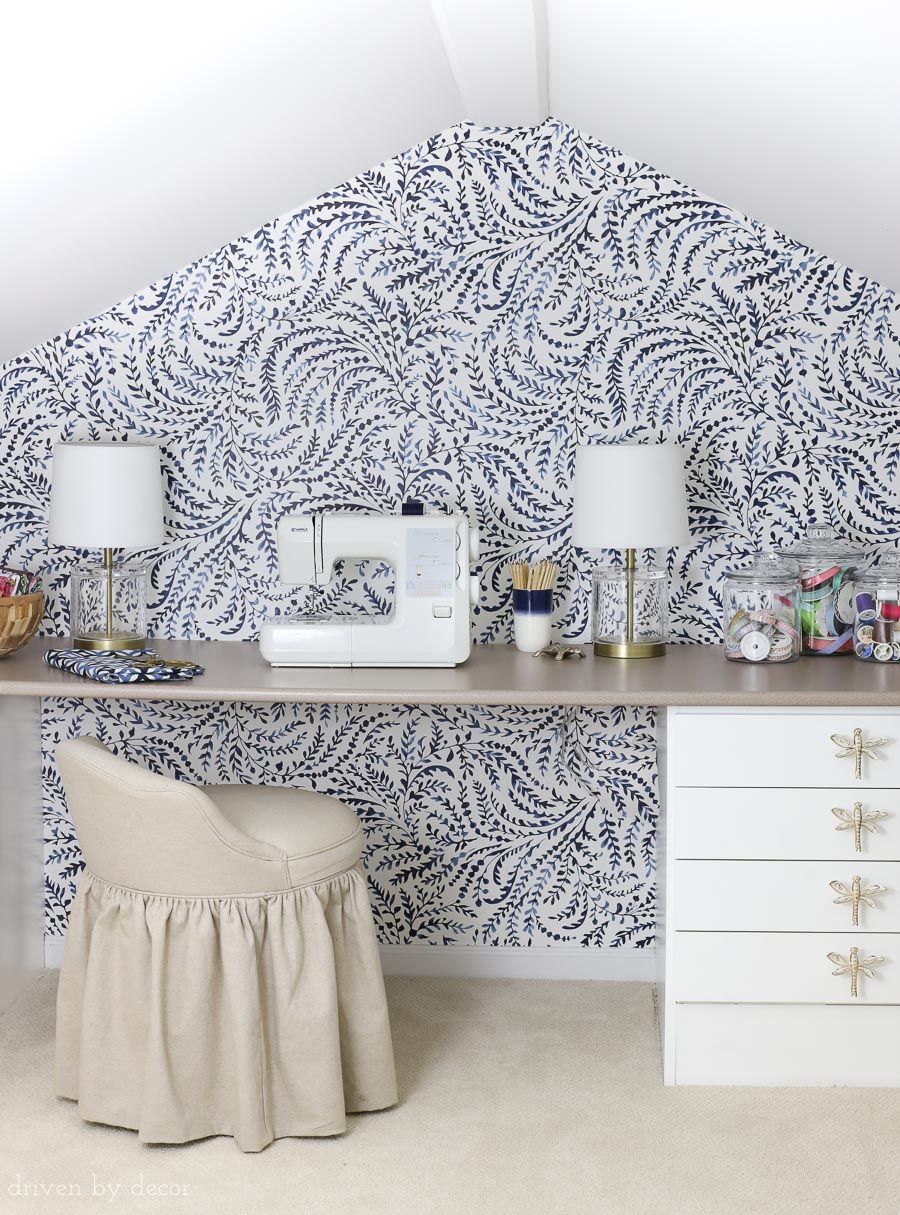
These are the small craft room ideas that I used to give this little space a glow-up…
1. Wallpaper or Paint an Accent Wall
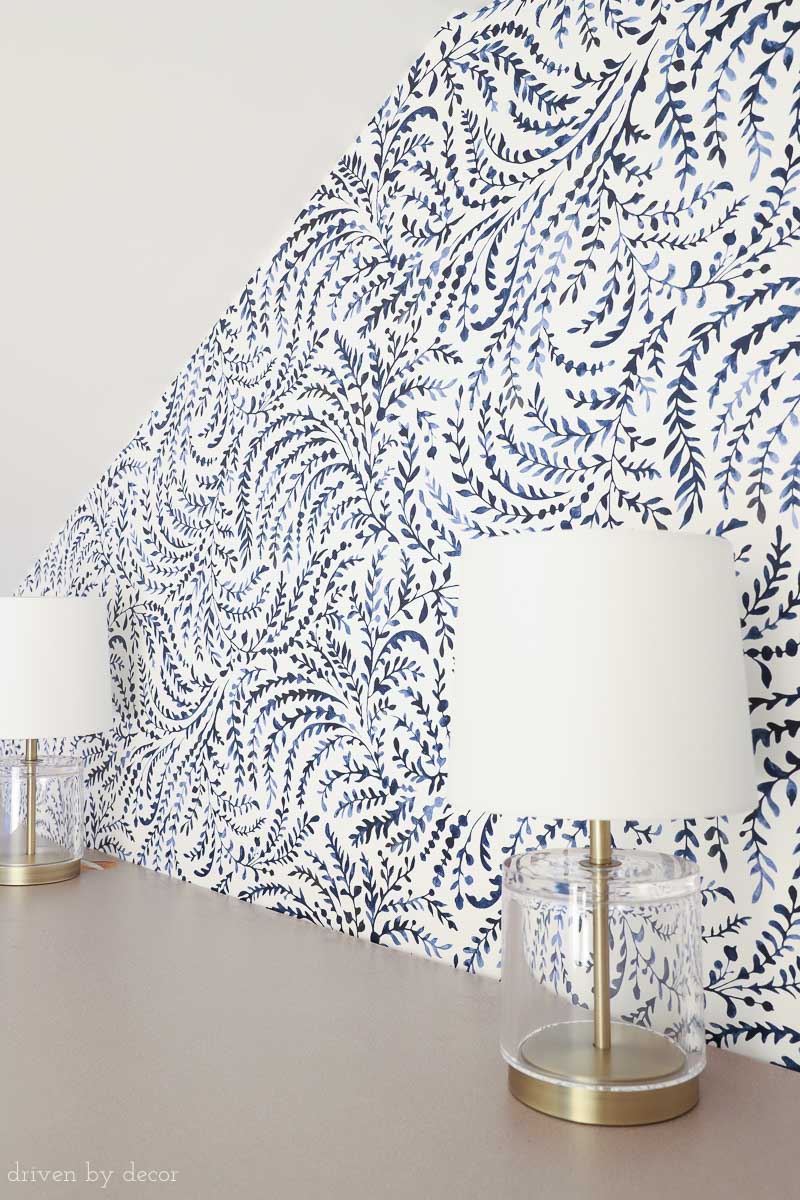
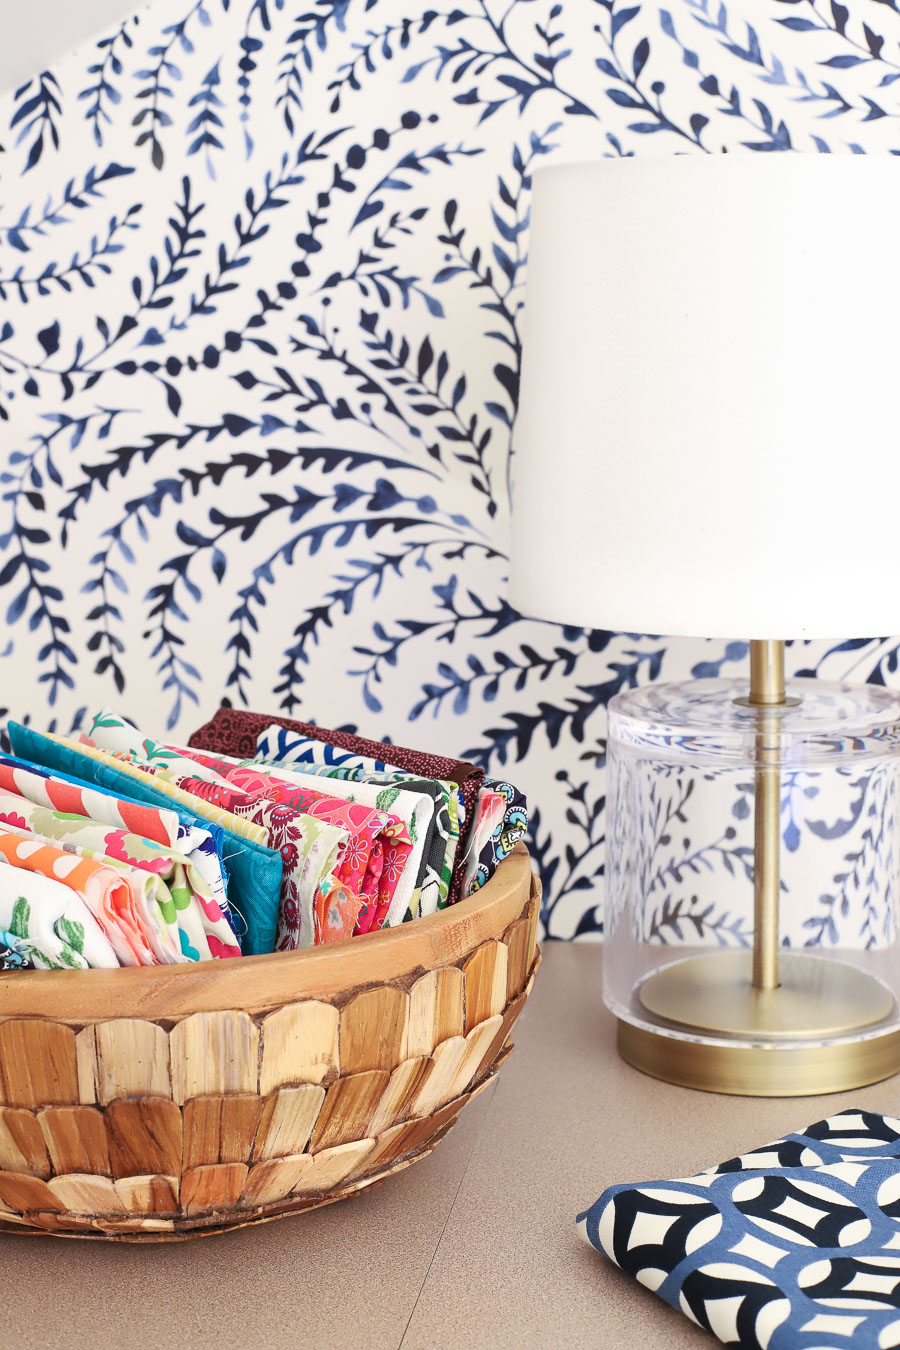
One of the biggest changes to the feel of this space is the wallpaper! I hung {this blue and white leafy vine wallpaper} that adds a flowy, creative feel:
I’m pretty addicted to wallpaper and how much style you can add even by using just a single roll. Check out my post on Serena & Lily wallpaper for some of my other favorite wallpapers and get ideas for other ways you can use a small amount of wallpaper for a big impact in my post on wallpaper ideas.
Add Cabinetry (Or Freshen Up Existing Cabinets with Paint!)
The other thing that made a huge difference is that I painted the cabinetry white. I wasn’t sure how that would work out since it’s inexpensive laminate cabinetry but it turned out beautifully! I did it using the same step by step as I did with our painted bathroom vanity – using a primer that sticks to slick surfaces was key!
Change the Vibe with New Knobs
I dressed our new no-longer-puke-yellow cabinets up with some fun new dragonfly knobs too:
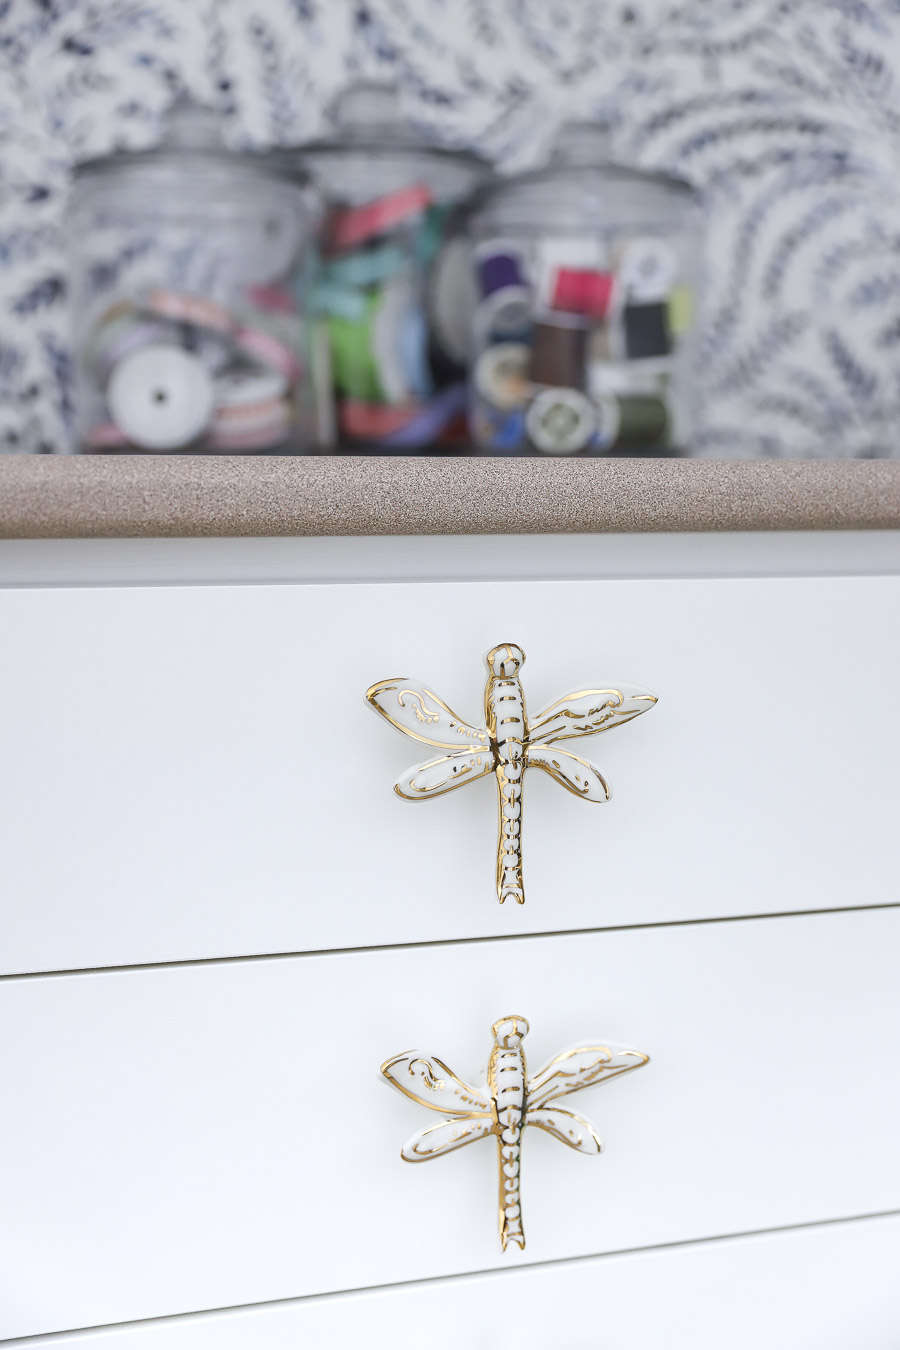
How cute are they?! It always amazes me what a difference a simple change in hardware can make!
Store Supplies in Glass Jars
I also added a few of {these glass storage jars} to hold the ribbons and threads that my daughters use the most:

Not only are they easy to access since they’re out on the desk, but since they’re clear it’s easy to see inside and find what you’re looking for.
Don’t Skimp on Lighting
You definitely need ample lighting in a craft room – a combination of overhead lighting and table or desk lamps is ideal. I added a pair of {these petite brass and acrylic lamps} and think they’re the cutest!
And do you want to see what our newly made-over landing looks like too? Here’s where that space started out:
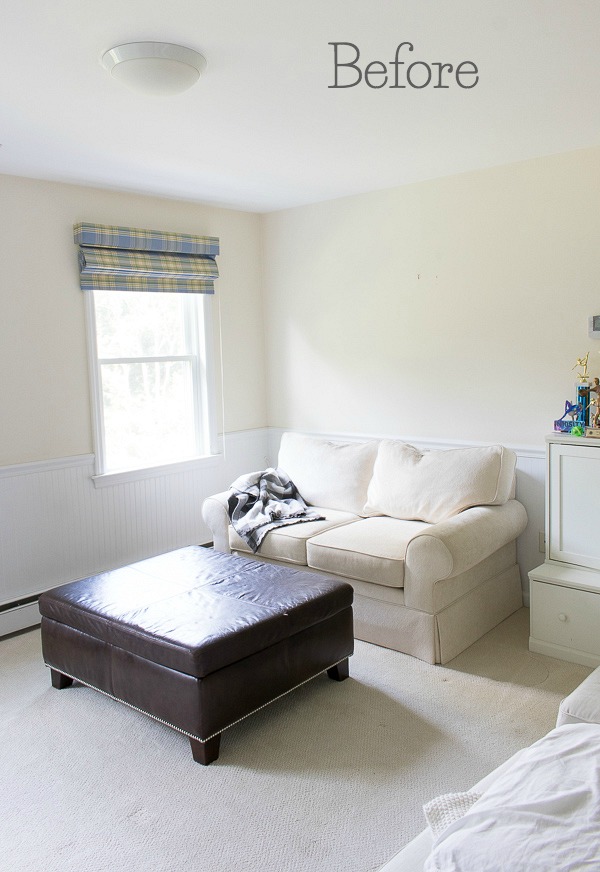
Could it be any more boring? Umm….no! There was nothing wrong with the loveseat or the ottoman but this just didn’t exactly scream “fun place for two teenage girls to hang out” which is exactly what the purpose of this space is. After six weeks of working away, this is what our upstairs landing area looks like today:
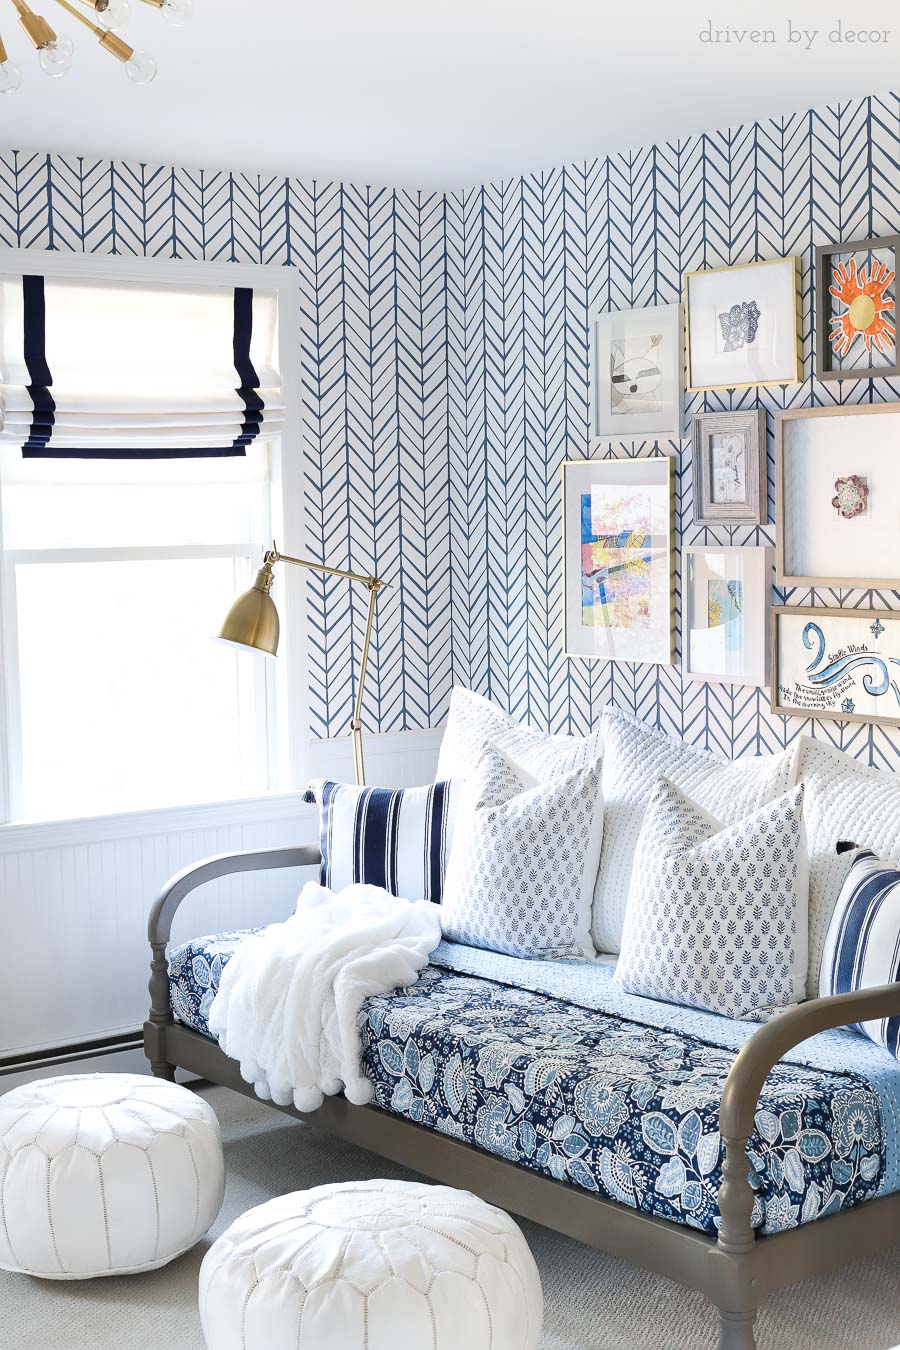
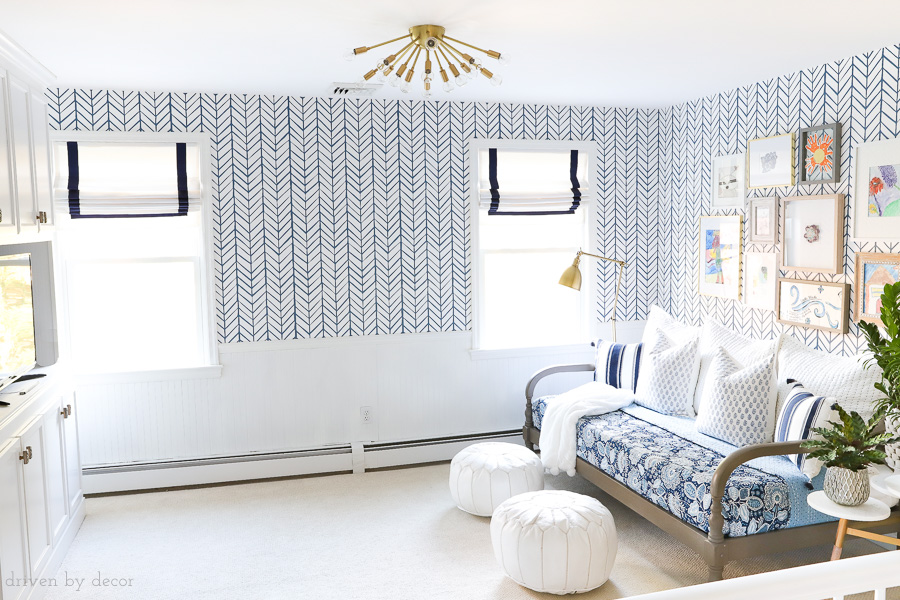
Bonus Room Sources: Herringbone wallpaper (color: denim) | White quilted Euro shams (similar) | Blue & white block print pillow covers (similar) | White cozy pom pom throw | Brass sputnik flush mount light fixture (similar). | Roman shades with ribbon trim in Light Navy trim | White Moroccan leather poufs | Other finds are no longer available
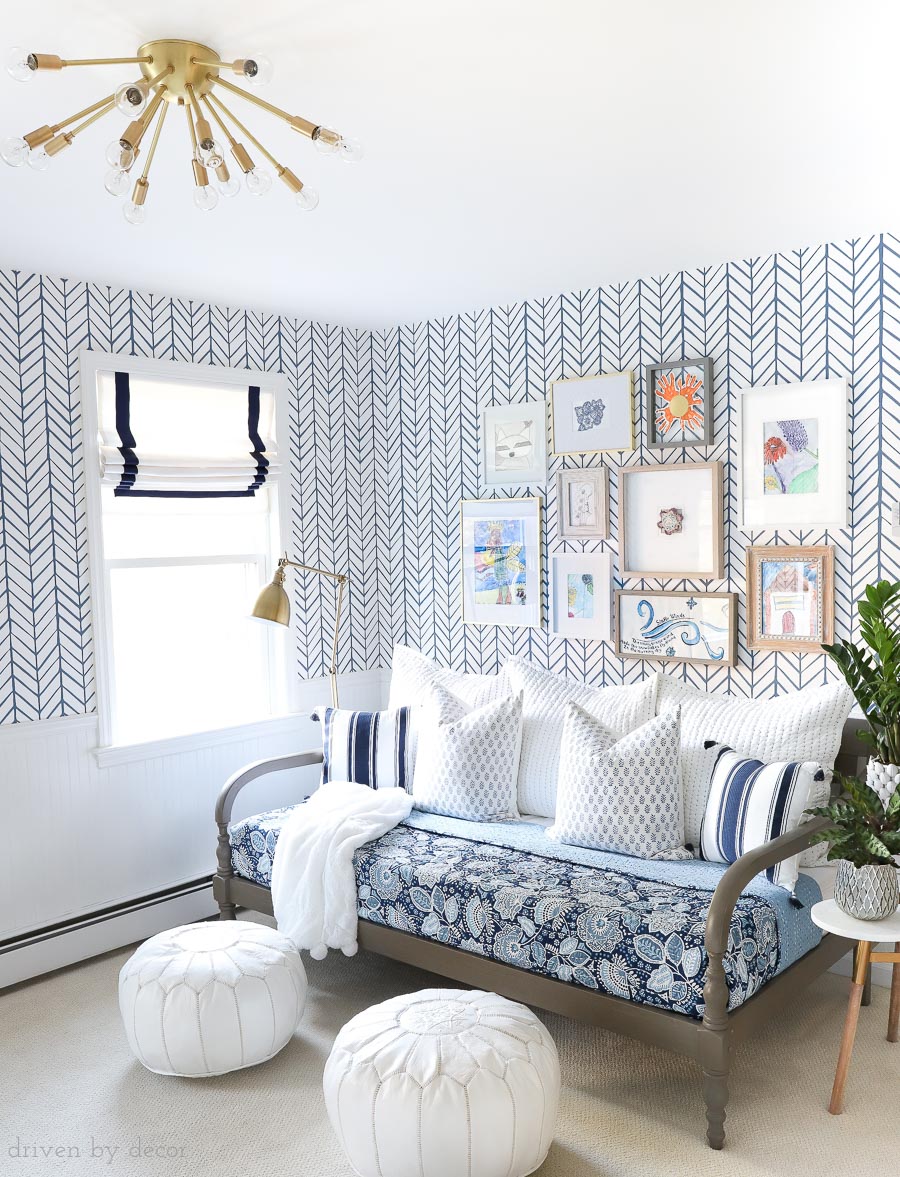
Now THIS is a space that my girls will love hanging out in! The whole transformation started with this beautiful daybed and {this foam mattress} that so many of you recommended to me and slowly went from there. If you’ve been following along from the beginning you might remember that the wallpaper was one of the first things that I picked out but it unexpectedly went out of stock and I had to go to plan B and use {this herringbone wallpaper} instead. Well sometimes things happen for a reason because I think it’s a perfect fit for the space:
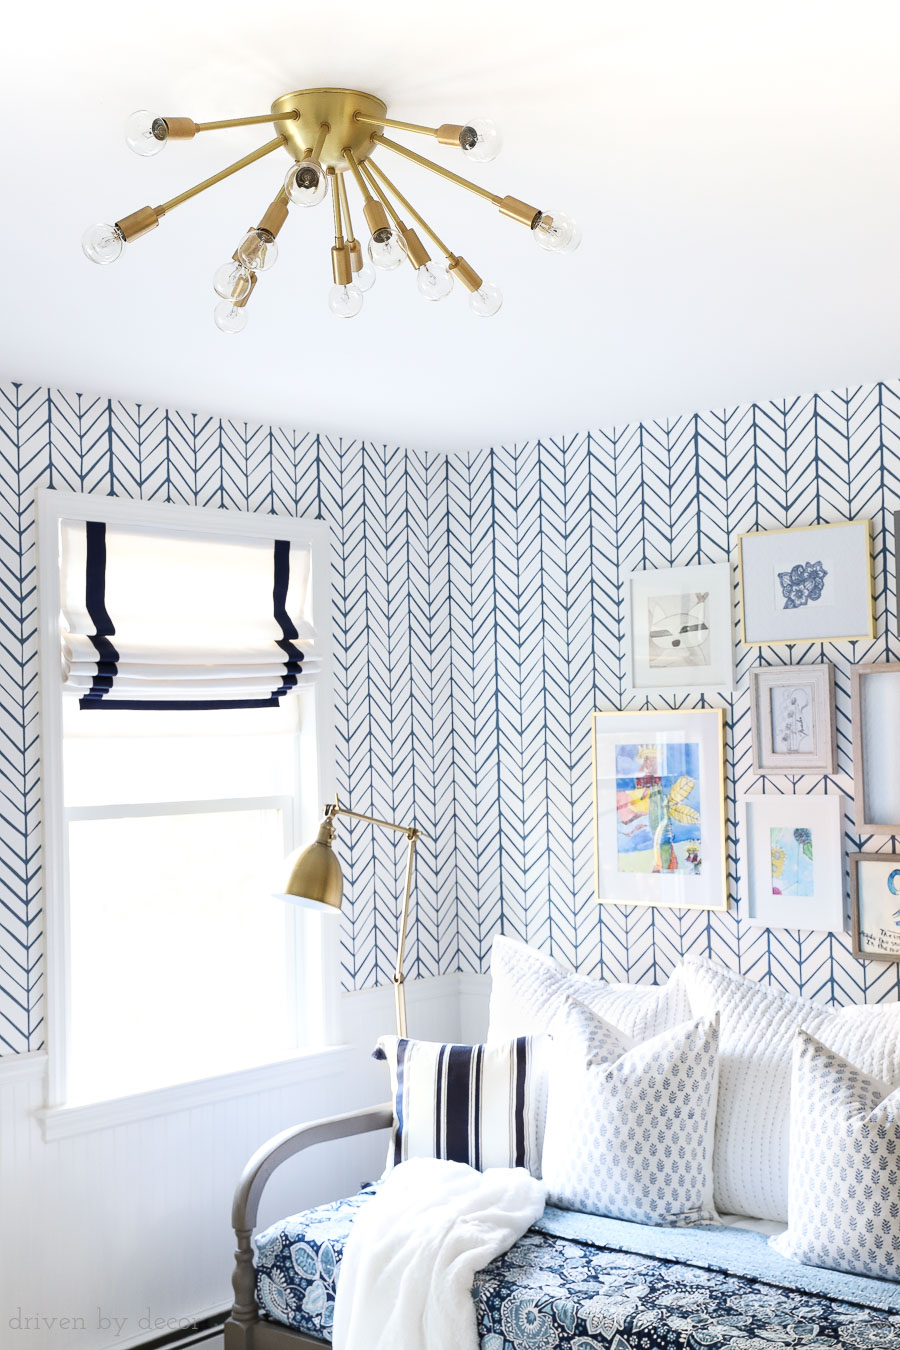
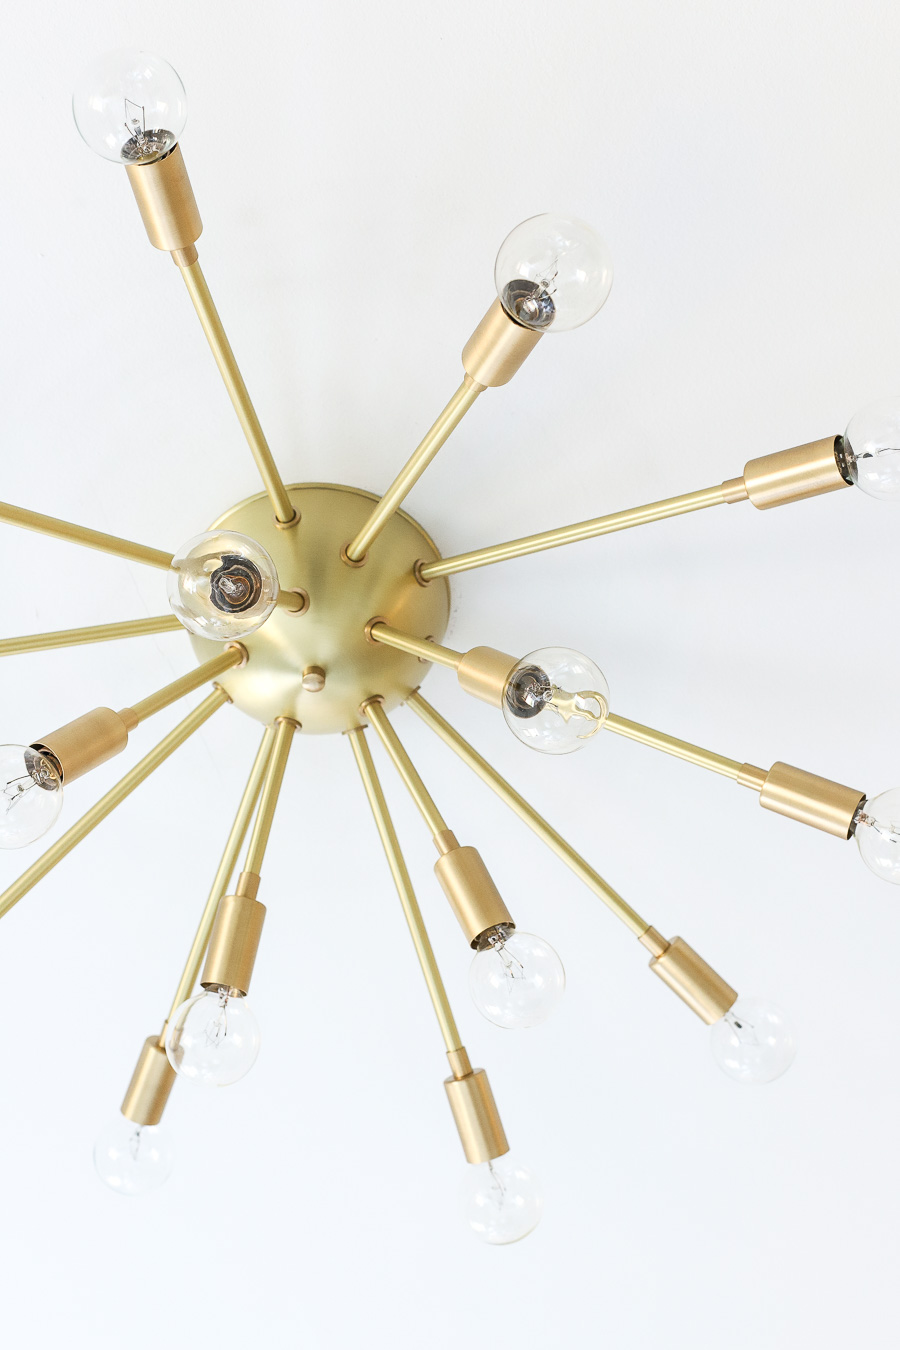
And speaking of perfect fits, can we talk about our new lighting?? Before we had only a dim, ugly overhead dome light that I replaced with this gorgeous flush mount brass sputnik. Honestly, I surprised even myself when I chose this brass beauty since it’s more modern that what I traditionally go with but I fell for it the second I saw it and now want to sputnik-ify every room of my house – I LOVE it!
And for someone like me who loves well lit rooms, this baby can light up a room like no other (I used a combination of {these 15 watt bulbs} and a few 25 watt bulbs I already had on hand to get the perfect amount of light for the room).
I also added a brass floor lamp next to the daybed for reading – such a great buy and I love that it ties in the brass at the other end of the room!
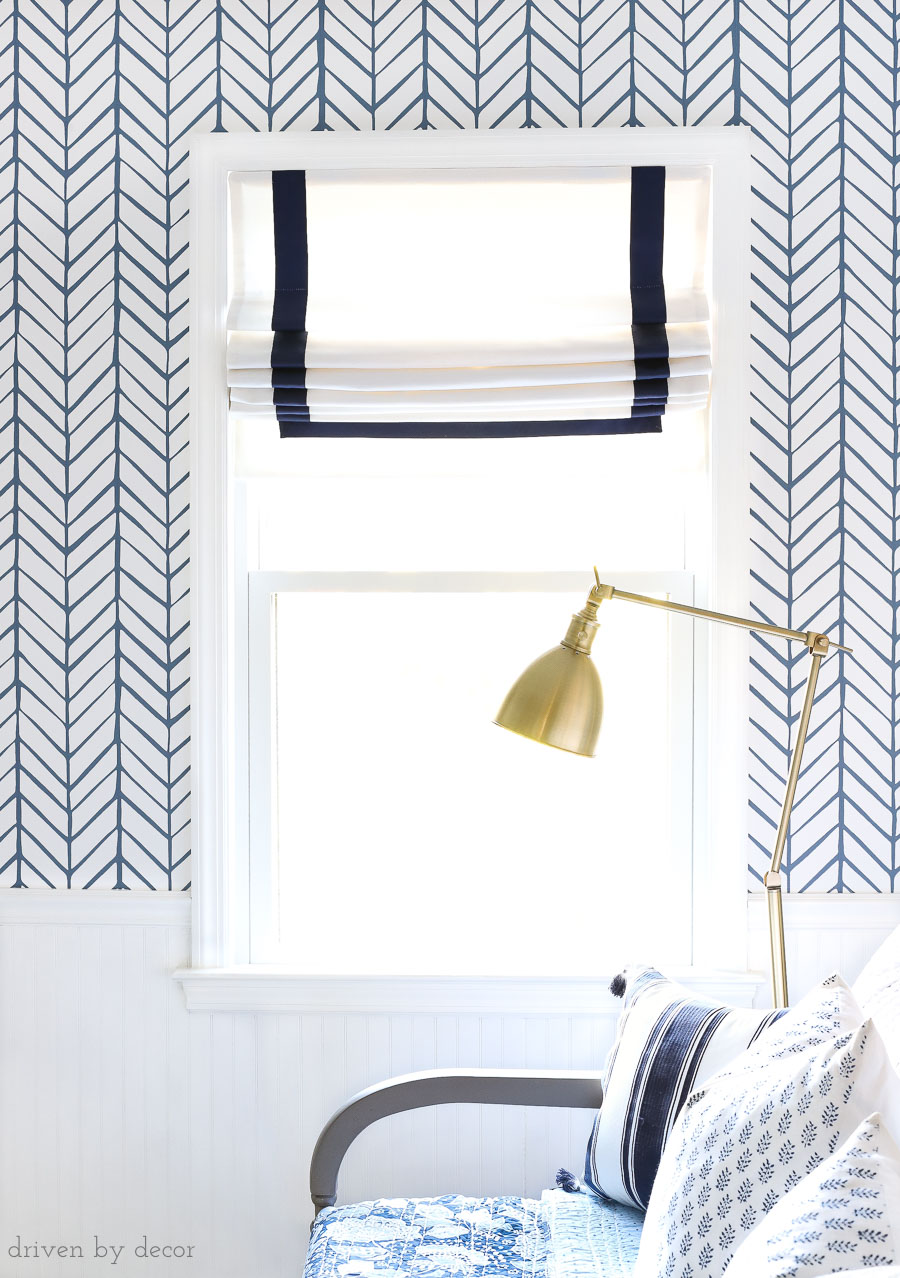
I shared the deets about {my new Roman shades with light navy ribbon trim} last week but had to mention once more how gorgeous and well made they are. Melissa does beautiful (and very reasonably priced!) work and I highly recommend her. I’m super glad that I decided to go with inside mount shades instead of outside mount which is what was there previously – the inside mounts are so clean, tailored, and fresh looking!
Other new additions are these two white leather Moroccan poufs:
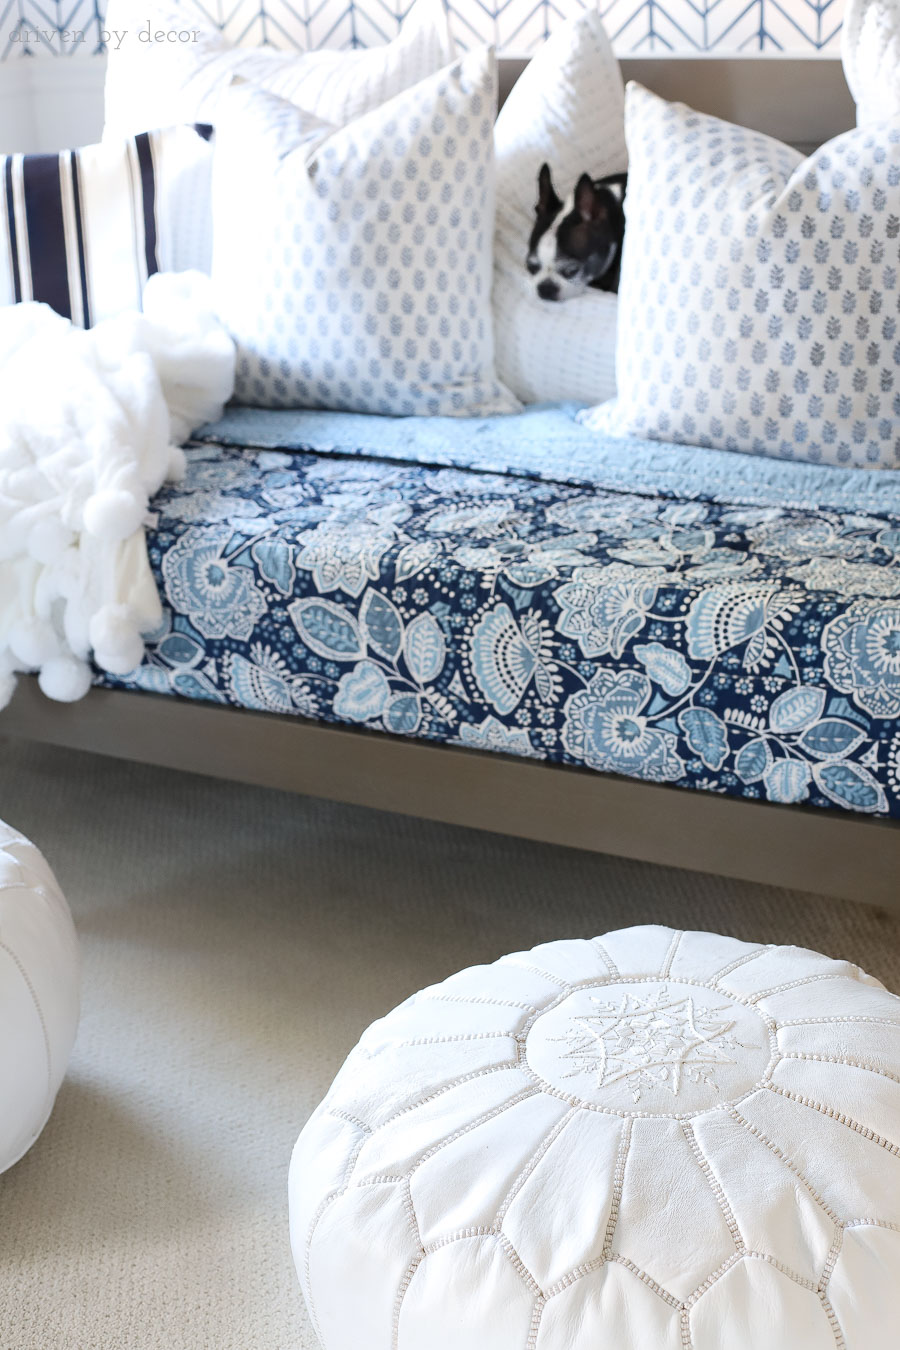
I love that they’re so versatile and can be used for foot rests but also for extra seating when my kids have a bunch of friends over. I’ve seen similar ones for big bucks but spent a lot of time looking for reasonably priced options and reading reviews and ended up buying {these poufs} which actually come in white along with a bunch of other different colors. I’m really happy with how they look and excited that they were such a great deal.
Did you notice in my pouf pic that someone furry came along and joined us mid tour? Hope decided that this whole daybed thing is pretty boss and divides her time between cuddling into the super soft pom pom throw and cozy Euro shams that are mixed in with two block print pillows and a pair of striped tassel pillows.
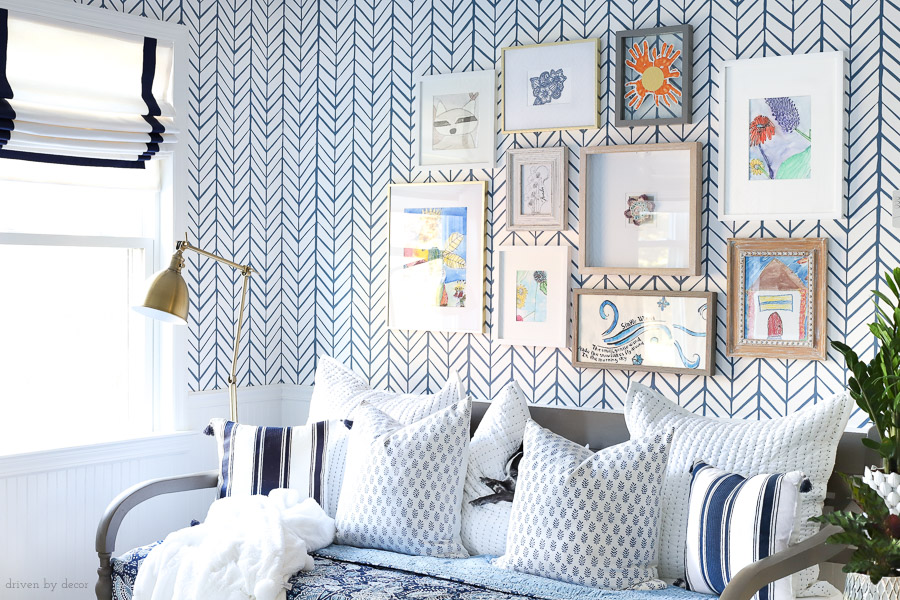
And how about that kids’ art gallery wall over the daybed, let’s talk about that too – do you like how it turned out?

I used an eclectic mix of frames to frame artwork from both of my girls throughout the years, starting with drawings from when they were super little all of the way through to some current art pieces like the pencil sketch in the middle. I love being able to show off their creativity and get some of their older artwork that I truly cherish out of storage boxes and up on the wall where we can all enjoy it. I would guess that there will be a lot of art swapping going on in this little gallery wall over the next several years as new pieces get created!
If you struggle to arrange art in a gallery wall, see my post on gallery wall layouts that makes it easy!
Let’s take one more “before” and “after” peek before we go, ok? Here’s the entire bonus room space before:

and here it is now:
Thanks to all of you who followed along with this fun project!


Michelle Sturm says
Hi! Can you let us know where the tiered side table is from so we can search for it if it comes back in stock? Thanks! Love love love your style and site 🙂
Cindy Muschany says
Hi, I love how you styled your daybed. I bought a daybed today and don’t like the matchy matchy look of daybed sets. Did you use a regular quilt on your daybed and just tuck it all in? Is it made for a daybed? Is there just a fitted sheet under the quilt? Sorry for all the questions, I am just lost on how to style mine.
Thanks a bunch!
Cindy
Lindsay says
For the roman shades in this room, did you go with a blackout or drapery lining?
Also, would you recommend mixing and matching roman shades with long sheers in the same space? I’d like to get these exact same shades for the two windows in our living room, except with black trim, and was thinking to pair with long white sheers for our french doors.
Jan says
This space is beautiful! I’d love to see how the built ins were built. Also how you have your craft / sewing items stored. I have a similar room but I’m thinking every wall would have to have built ins to fit everything! You did a wonderful job!
Kris Jarrett says
Hi Jan – I’ll actually be sharing more details on storage in our craft room in June so stay tuned!
Elizabeth Whitesides says
As usual, gorgeous results! I immediately spotted Miss Hope and every time I see her in your pix I want to scoop her up and squeeze the stuffing out of her! How do you get anything done with that adorable girl around??? Could you say a bit about how you make your daybed? I now have one in my office and I am befuddled by how I’m supposed to neatly get the quilt on without having a wrestling match with it every day. I have an Ikea Hemnes daybed with solid sides & back. I love how yours looks all tucked in, which would be perfect for how I want to use mine (as a sofa for reading/napping). Thanks for the excellent work you consistently do!
Kris Jarrett says
OMG, you crack me up! We are ridiculous about Hope and carry her all over the house and tell her how cute she is about a hundred times a day 🙂 For my quilt, I have the long end tucked in at the front of it and then I fold back the other end on top of the daybed (that’s how you see the pattern on the other side of the quilt too) and then tuck in the sides. That way I never have to wrangle with tucking anything in at the back of the daybed which would be a pain!
Susan Paul says
Hi – Where did you get the mattress for the daybed and is it comfy? Thanks for sharing! Susan
Kris Jarrett says
Hi Susan – I got the mattress from Amazon – there’s more info about it in this post: https://www.drivenbydecor.com/best-inexpensive-foam-mattress/ It hasn’t been slept on yet but it’s very comfy for sitting on the daybed and came highly recommended!
Laurie Carpenter says
Hi Kris,
Your taste is impeccable. I’m such a fan. You did a fabulous job on the craft room wall paper. Such patience! One question. How did you camouflage the electrical outlet under the workspace. I swear, I don’t see it at all!
Looking forward to more inspiration in 2018!
Kris Jarrett says
Thank you so much Laurie! I recessed it back behind the cabinetry where you can’t see it because it’s so big and ugly but it’s actually been kind of a pain in it’s new location for my daughter to plug things in and out so I think that ugly clunker might be coming back out. Sometimes practicality has to win over pretty I guess 🙂
Suzanne Anderson says
LOVE it! Especially your coordinating wallpapers and the art gallery on the wall. Well done!
Kris Jarrett says
Thank you so much Suzanne!
Kristen says
I love all of the patterns you used here… So well done! Congrats on a gorgeous ORC reveal! This was my first time participating as a guest, and it was so fun!
Kris Jarrett says
Thanks Kristen! And congrats to you too – it feels so great to get it done doesn’t it?!
Cindy says
Absolutely beautiful! Love the wallpapers especially in your craft room. I am a huge blue and white/neutral fan so love the color theme in both rooms. Your daughters are lucky to have such a beautiful space to hang out in. Thanks for always inspiring me! Happy Thanksgiving!
Kris Jarrett says
Cindy thank you so much! Happy holidays!
Michaela @ Michaela Graves Designs says
Those wallpapers! Just beautiful! And I love all the art in your gallery wall as well. The whole space is so pretty and inspiring, wonderful job!
Kris Jarrett says
Thank you so much Michaela!!
Brenna@Domestic Charm says
Just gorgeous Kris, as always! I’m sure your girls are thrilled to have a space to hang out in. Love both of the wallpaper choices. And the sputnik light fixture is fabulous!
Kris Jarrett says
Brenna, thank you so much! They are definitely happy to have a much more kid friendly space to hang out in!
Kelley Nan says
Kris, you knocked BOTH rooms out of the park! I can’t pick a favorite part- the entire spaces as a whole are incredible but then you didn’t miss a beat on those sweet details. Down to the cabinet knobs. And if I wasn’t brave enough to try some of that gorgeous wallpaper before, I think I may be now. What an incredible transformation and ridiculously amazing ORC for the books!
Kris Jarrett says
You’re too sweet to me! Thanks Kel! Thank goodness you were in this with me – it made it a zillion times more fun!