Want to create a simple burlap bulletin board? I’ll show you how!
I don’t know about you but my kitchen island tends to be a collector of all things paper – receipts, coupons, grocery lists, you name it. In my quest to tame the kitchen clutter I decided to create a simple burlap bulletin board that not only helps me stay organized but looks pretty darn cute doing it! 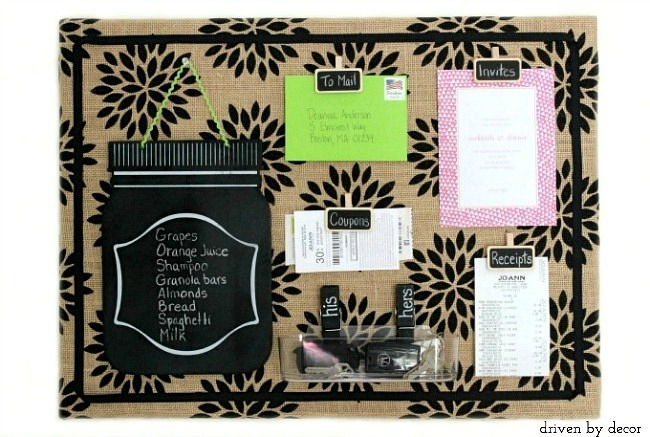
 From start to finish, making the bulletin board was a pretty easy project – here are the supplies you’ll need to get the job done:
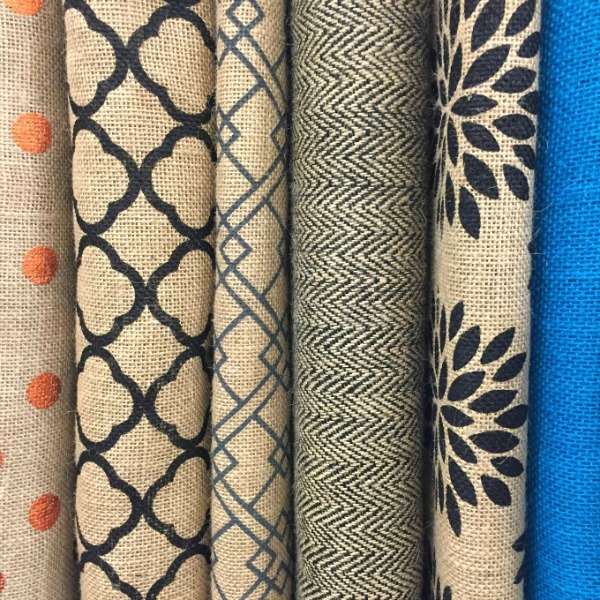
- Patterned burlap – I found a ton of choices at Jo-Ann Fabrics:
- Thick, unframed cork board – mine is 17″ x 23″
- Scissors
- Light duty staple gun with staples like {this}
- ⅜″ grosgrain ribbon
- Glue dot runner such as {this one}
- High temperature hot glue gun such as {this}
Start by cutting your piece of burlap about 5″ wider and longer than your cork board. The cork board that I used was 17″ x 23″ so I cut my burlap piece to 22″ x 28″. Place your piece of burlap (pattern down) on a smooth surface and center your cork board (face down) on top of it. Wrap your burlap around the edges of the board and staple it to the back with a staple gun, pulling the burlap tight as you go. When you get to the holes for hanging your cork board, simply notch out the burlap and staple around it. 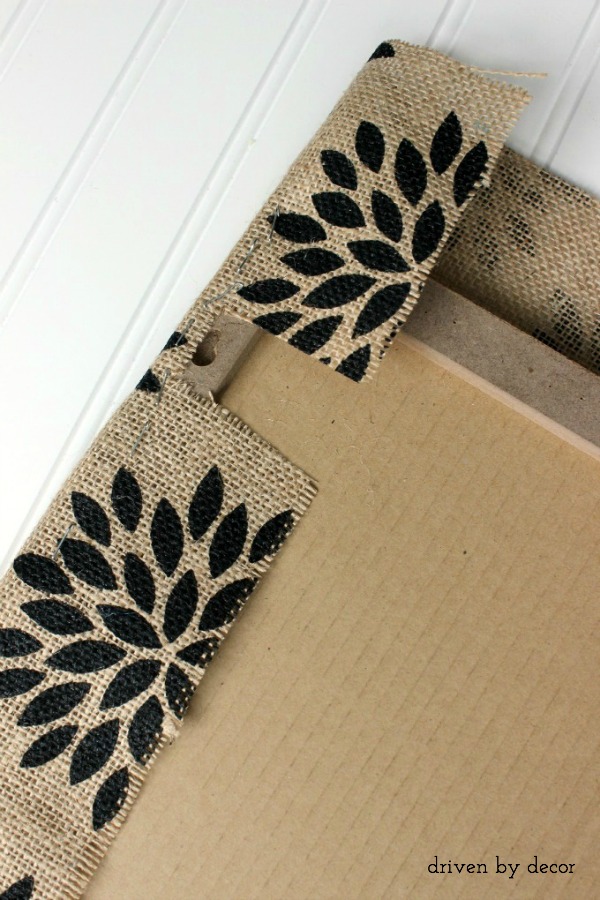 Wait to do each corner until you’ve stapled the burlap along the length of the board on both sides of it. Then take the corner piece, pull it tight towards the center of the board and staple it down.
 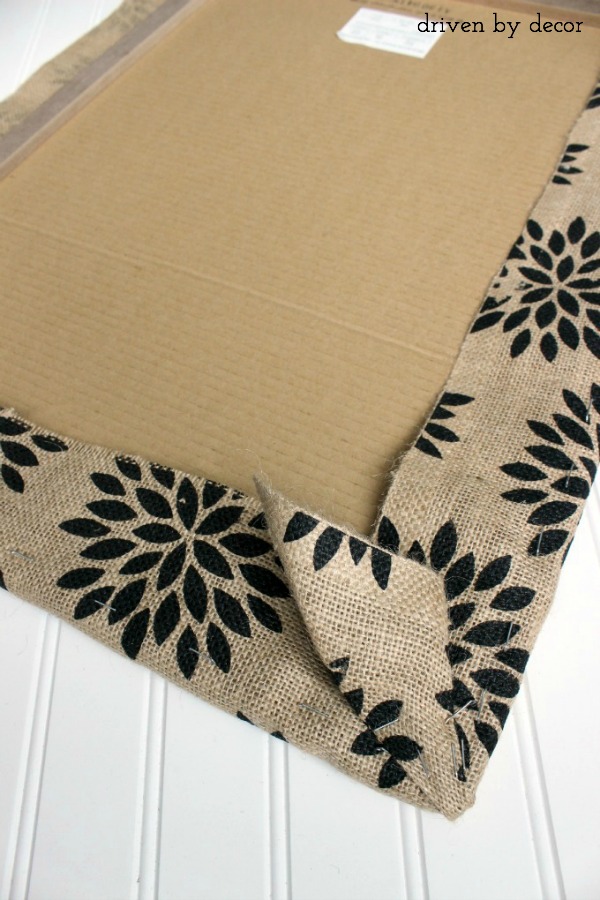 If any of your staples are sticking up a bit from the back of the cork board, simply use a small hammer to tap them all the way in. Now flip your board over and admire your craftiness!
 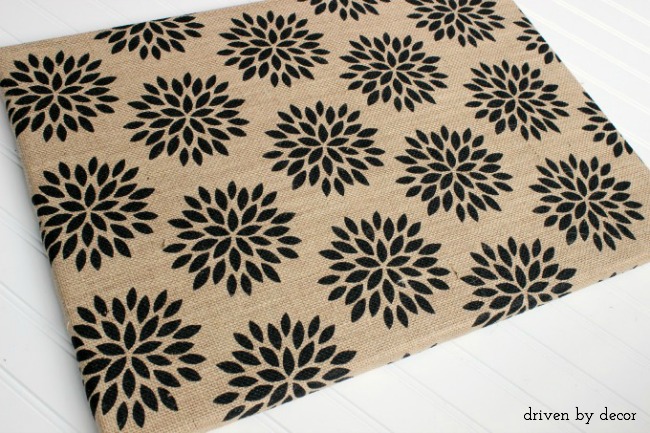 To give your patterned burlap cork board a finished look, use a coordinating grosgrain ribbon to create a decorative border. Simply use a glue dot runner to apply glue dots to one side of your ribbon along a length about 2″ shorter than the length of the side of your cork board. Starting 1″ in from the edge of your board, lay down the glue-dotted ribbon so it adheres to burlap. When you get to the corner, flip your ribbon over and follow the same steps for the next side. A small dot of glue from a hot glue gun will help keep your corners laying flat and staying in place.
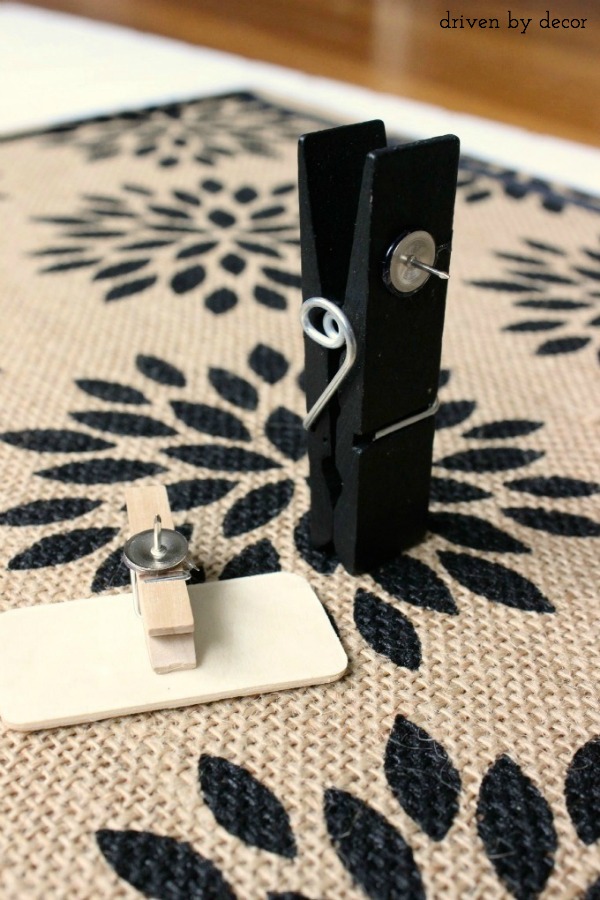
  Now it’s time for the fun stuff – adding all sorts of organizational goodies to your board. I like the idea of clipping things onto the board instead of using thumbtacks so that you aren’t putting holes in invites and mail. My solution was to use a hot glue gun to glue thumbtacks onto the back of some chalkboard clothespins similar to {these} and mini chalkboards with clips like {this}:
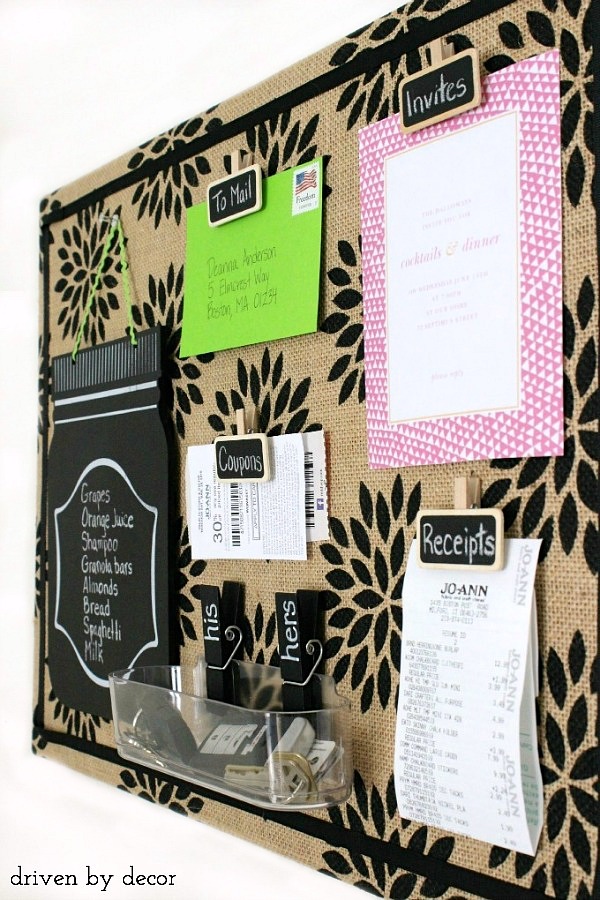
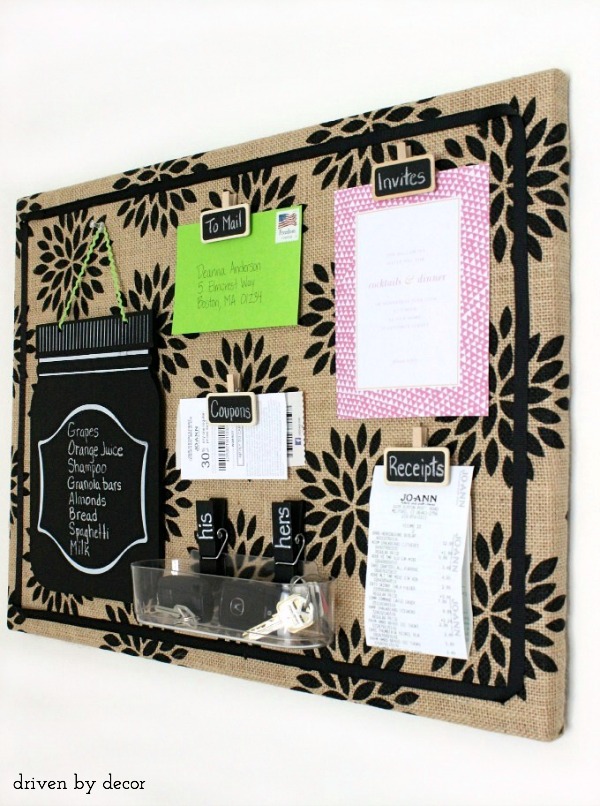
 I used two of the chalkboard clothespins to clip on {this clear caddy} that’s the perfect spot to drop our keys as we come in the door:
 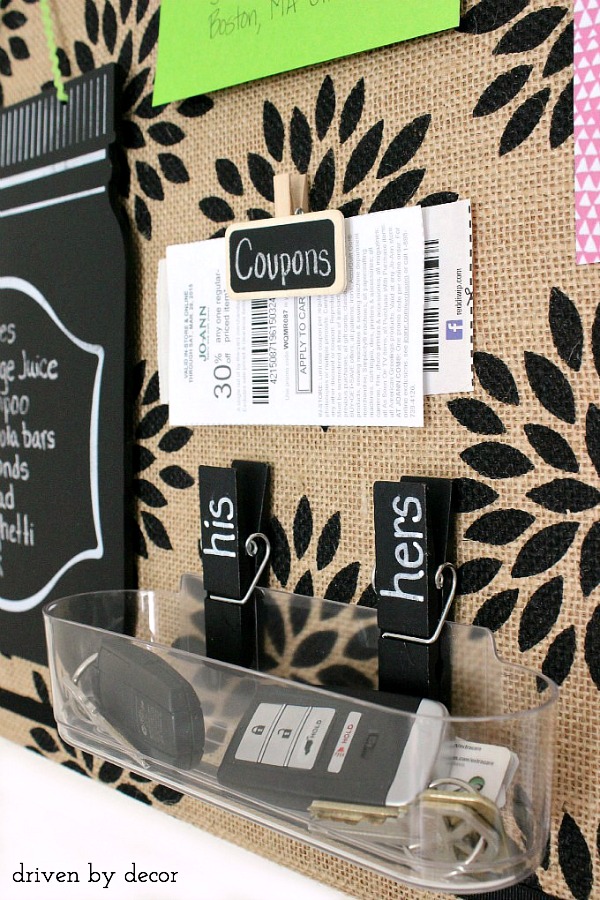 I also added a mason jar chalkboard plaque found at Jo-Ann’s that can be used to keep a grocery list or as a place for the family to jot quick notes to each other. I replaced the twine hanger that comes with the mason jar plaque with a thin ribbon to add some color:
 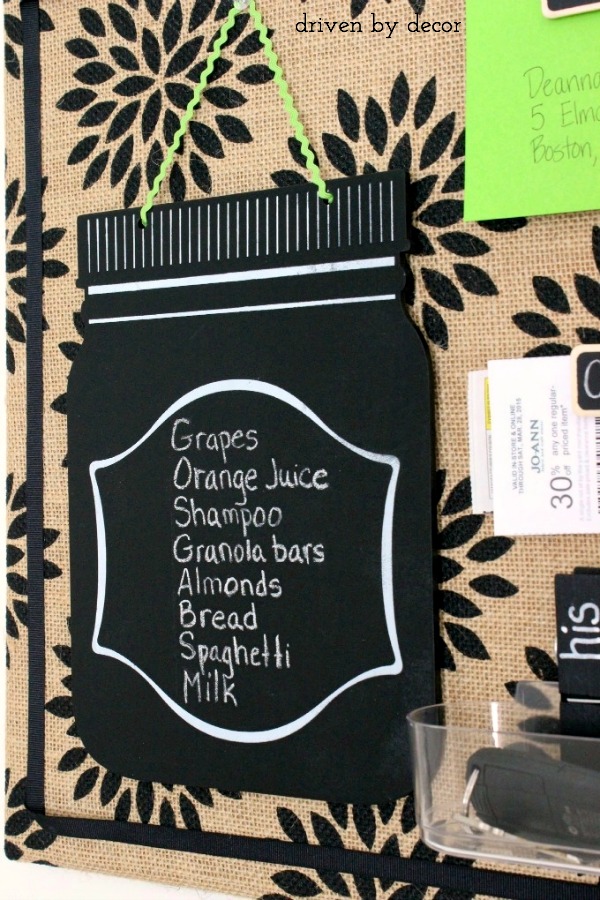 I then used chalkboard clothespins clips to clip on receipts, coupons, invites, and outgoing mail. I love that the chalkboard surface makes erasing and rewriting on them super easy.
It’s been such a great clutter-tamer in our kitchen that my only regret is that I didn’t get around to making it sooner! I found the perfect spot for my bulletin board on an empty wall in the kitchen right by the door to the garage so I can grab my car keys, any letters to mail, or coupons as I run out the door to do errands.
And there’s still plenty of wall space left for a future project or two…
Hope you all have a great week,


Becky says
Super cute! I did not realize there were so many different printed burlap patterns. Love your pick!
Kris @ Driven by Decor says
Thanks Becky! There are so many cute ones – I especially love the black herringbone!
Karenn says
What was the total cost for this project?
Kris Jarrett says
Hi Karen! Honestly, I had a lot of the supplies already and the ones that I needed to buy I got at a couple of different times so I never added up the cost. Some of it depends upon whether you have things like the staple gun already or not. Near the top of the post is a supply list with clickable links so it would be pretty easy to figure out the cost based on which supplies you’ll need to buy!
debra @ 5th and state says
brilliant kris and so doable, clever you!
now i am intrigued with those boxes on the adjacent wall. did you do a previous post on those, love!
debra
Kris @ Driven by Decor says
Thanks Debra! Glad you found the post on the nesting herb crates – they have been a great addition to our kitchen!
debra @ 5th and state says
never mind kris, i perused your blog and found the crates, wonderful!
debra
cassie says
i had no idea burlap came in so many great patterns- love the herringbone! your board looks fabulous!
Kris @ Driven by Decor says
Thank you Cassie!
Garden, Home and Party says
Kris,
What a great looking board. I love the selection of patterned burlap, I can think of a couple of pillows for the patio that I’d like to make using one or two of the patterns. The board is such a useful tool and it sure looks great on your wall.
Karen
Kris @ Driven by Decor says
Thank you so much Karen. I hadn’t thought of making pillows with it but that would be really cute!
Lisa @ Shine Your Light says
That is such a burlap, Kris! The board turned out great! Hope you have a wonderful time in sunny FL and that by the time you come back there will be signs of life around your yard! Enjoy.
Kris @ Driven by Decor says
Thanks so much Lisa! Yes, my hope is that the last of the snow will be gone by the time we get back so I don’t have to see any more of that white stuff for a long, long time 🙂
Karbo says
Such a creative way to add order to our family chaos. Love it!
Kris @ Driven by Decor says
Thanks! It’s definitely helped to tame the mass of papers that were always populating our kitchen island!
Taylor Greenwalt says
So cute…love the pattern burlap.
Kris @ Driven by Decor says
Thank you so much Taylor! My wheels are spinning about other ways to use all of these fun patterned burlaps – love them!
Kristi @ Chatfield Court says
So cute Kris, love the patterned burlap. Hope you enjoy the time with your girls.
Kris @ Driven by Decor says
Thank you so much Kristi!!
cindy hattersley says
Now my only problem would be remembering to put the keys etc. where they belong!! Darling bulletin board!!
Kris @ Driven by Decor says
Ha – sounds like we share the inability to keep track of our keys – I am CONSTANTLY misplacing mine. Having this right by the door when I come in has helped big time 🙂
Brenna@DomesticCharm says
Another adorable project, Kris. Love the fabric choice! I’m going to have to head to JoAnn’s pronto!
Kris @ Driven by Decor says
Thanks Brenna – you’ll have to check out their herringbone burlap pattern – I love that one and bet you would too!
Vel says
Never thought of using burlap! looks great and I love the clothespin touch you added too!
Kris @ Driven by Decor says
I honestly had no idea that there were so many cute burlaps until I went shopping for this project. Love them!
janet says
Hi again, just saw that you got it at Joanns. Thanks for the great idea–so cute!
Irene says
Where can I buy that mason jar chalkboard?
Kris Jarrett says
It’s from Jo-Ann Fabrics!
Angela says
Love this idea! I’d want to use it in my classroom! I don’t have a glue or staple gun though. Do you have an Etsy shop?
Kris Jarrett says
Unfortunately I don’t Angela!
Natalia says
Totally fell in love with this board! I made one this weekend for my office. It came out beautifully. Thank you so much for your step by step instructions.
Kris Jarrett says
I’m so glad you made one and you love it!!!
Kiruthika Manikandan says
Hi this is is such an awesome idea. I m going to give it a try.
Just one question. Would I be able to use velcro alphabetso on the burlap ?
I m thinking of use this board in my 3 yr old’s room for fun learning. Thanks much in advance
Kris Jarrett says
That would be such a cute idea! Unfortunately I don’t know if velcro sticks to burlap or not – I don’t have any velcro in my house to try it out or I would!
Brenda says
How did put it on the wall ?
I have one I put up with Velcro and it keeps falling down.
Kris Jarrett says
I screwed a saw tooth hanger into the back of it and hung it on a nail!
Phyllis says
Not sure what u use for the cork board. I thought you said frameless but you show a frame where the hang holes are.
Gorgeous.
Linda L Autry says
Absolutely love the cork board wrapped in burlap, I’m going to buy me a cork board then cover it . Great job!!! 😊