• Skip to primary navigation
  • Skip to main content
  • Skip to primary sidebar
  • Home
  • Home Tour
    • Master Bathroom
    • Kitchen
    • Kitchen Eat-In Area
    • Family Room
    • Living Room
    • Home Office
    • Laundry Room
    • Master Bedroom
    • Craft Room
    • Dining Room
    • Garage
    • Guest Room
    • Guest Bathroom
    • Patio
    • Powder Room
    • Teen Blue & White Bedroom
    • Teen Boho Chic Bedroom
  • Projects
    • Room Remodels
    • DIY Projects
    • Decorating Tips
    • Cleaning
    • Organizing
  • Subscribe
  • Shop My Faves
  • Instagram
  • About
    • Contact
    • Meet Kris
    • FAQs
    • Media
    • Disclosure
    • Privacy Policy

Driven by Decor logo

menu icon
go to homepage
subscribe
search icon
Homepage link
  • Home
  • Home Tour
    • Master Bathroom
    • Kitchen
    • Kitchen Eat-In Area
    • Family Room
    • Living Room
    • Home Office
    • Laundry Room
    • Master Bedroom
    • Craft Room
    • Dining Room
    • Garage
    • Guest Room
    • Guest Bathroom
    • Patio
    • Powder Room
    • Teen Blue & White Bedroom
    • Teen Boho Chic Bedroom
  • Projects
    • Room Remodels
    • DIY Projects
    • Decorating Tips
    • Cleaning
    • Organizing
  • Subscribe
  • Shop My Faves
  • Instagram
  • About
    • Contact
    • Meet Kris
    • FAQs
    • Media
    • Disclosure
    • Privacy Policy
    • Facebook
    • Instagram
    • Pinterest
  • ×

    Updated: Apr 6, 2022 by Kris Jarrett

    Our Painted Bathroom Vanity: The “Before” & “After” and How-to Guide!

    Painting my daughters’ bathroom vanity is something that has been on my to-do list for YEARS but somehow other projects always took priority, keeping it from ever getting done. With our master bathroom addition currently in progress, my girls’ bathroom was the lone untouched bathroom in the house. I finally decided to bump this project to the top of the to-do list and knock it out before my oldest daughter comes home from college for the holidays. I’m now kicking myself for not having done it years ago because it made such a huge difference to the look and feel of the space! By using the right paint and painting tools, you’d honestly never know that it was a DIY rather than a job I hired out to have professionally done. (post includes affiliate links; full disclosure statement available {here})

    Here’s what my girls’ bathroom vanity has looked like for the past six years:
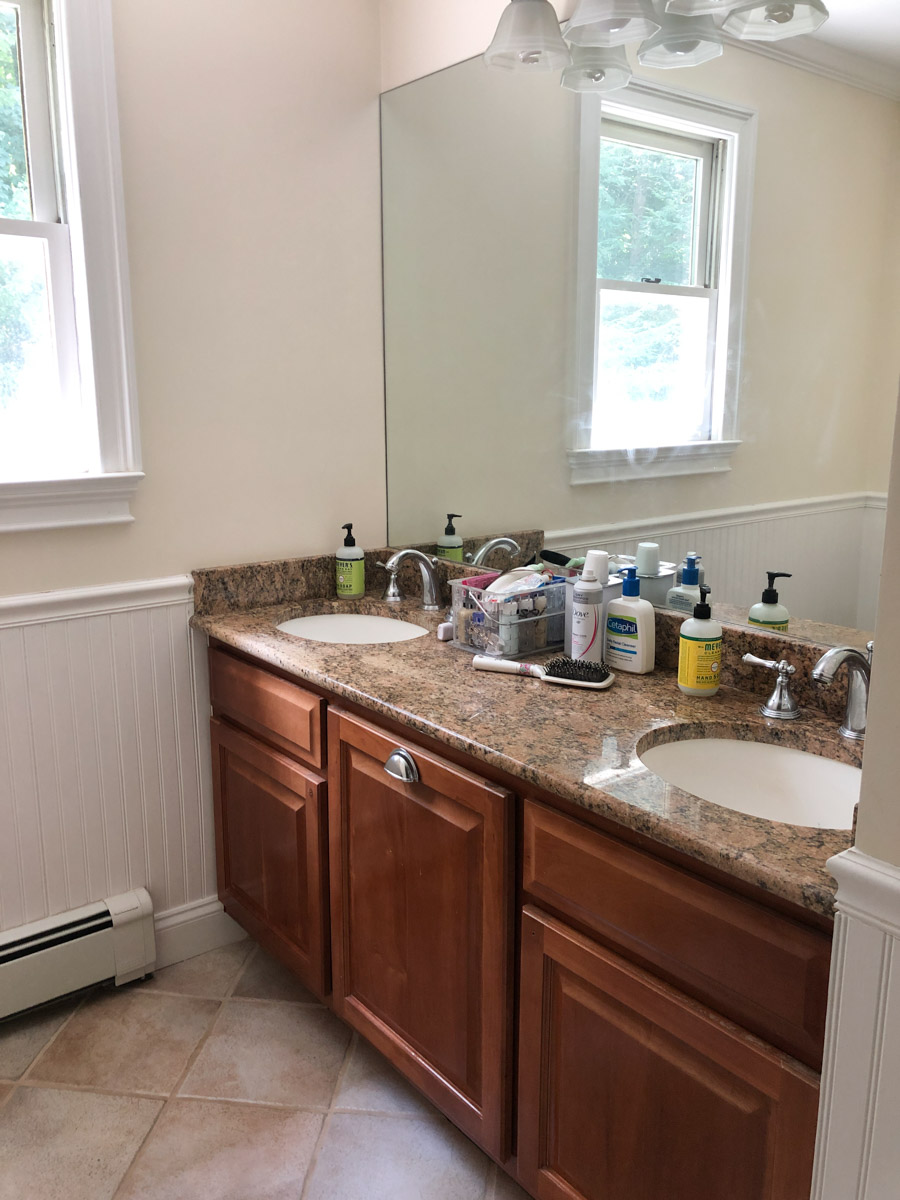
    The "before" and "after of painting our bathroom vanity!

    From a distance, it doesn’t look too terrible but the dark cabinets in combination with the dark countertops gave the room a really gloomy feel. And closer up you can see that the cabinet doors were a hot mess with a lot of wear and tear from previous owners:
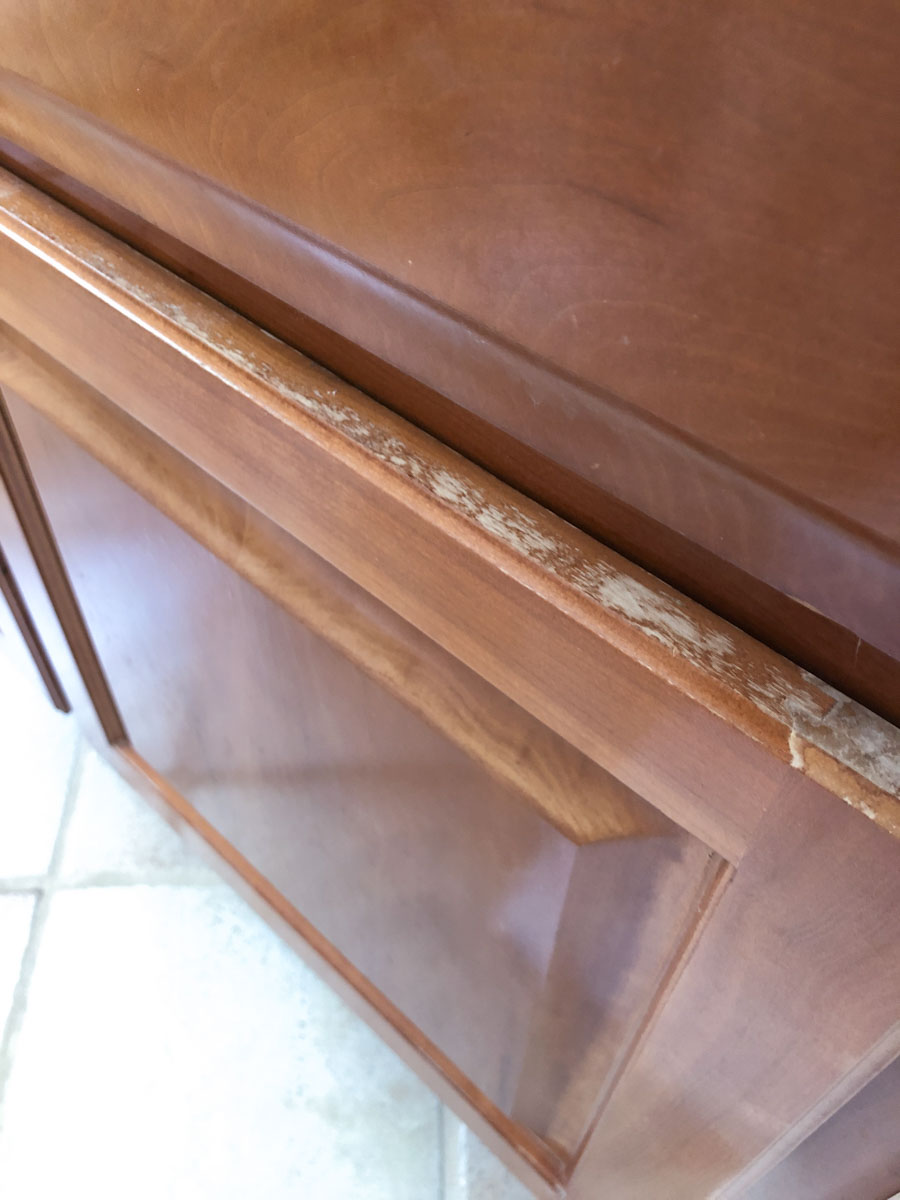
    Wear and tear on wood doors before painting our bathroom vanity

    With only a quart of paint, the right tools, and a little DIY action, say hello to my newly painted, brighter and lighter girls’ bathroom!
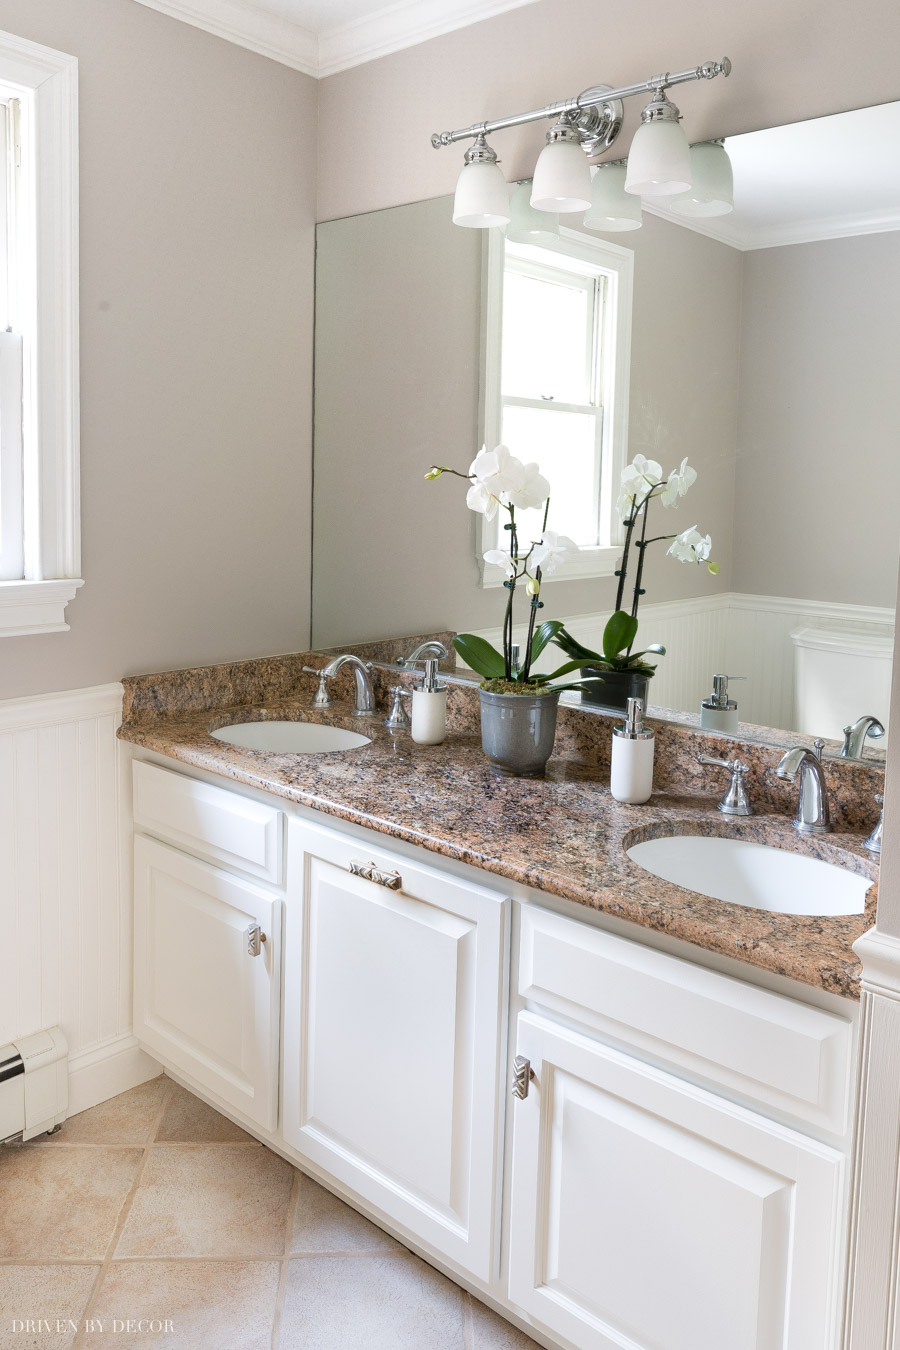
    Painting our bathroom vanity made SUCH a difference! Come see the before and after!

    I’m thrilled with how it turned out – the vanity truly looks brand new:
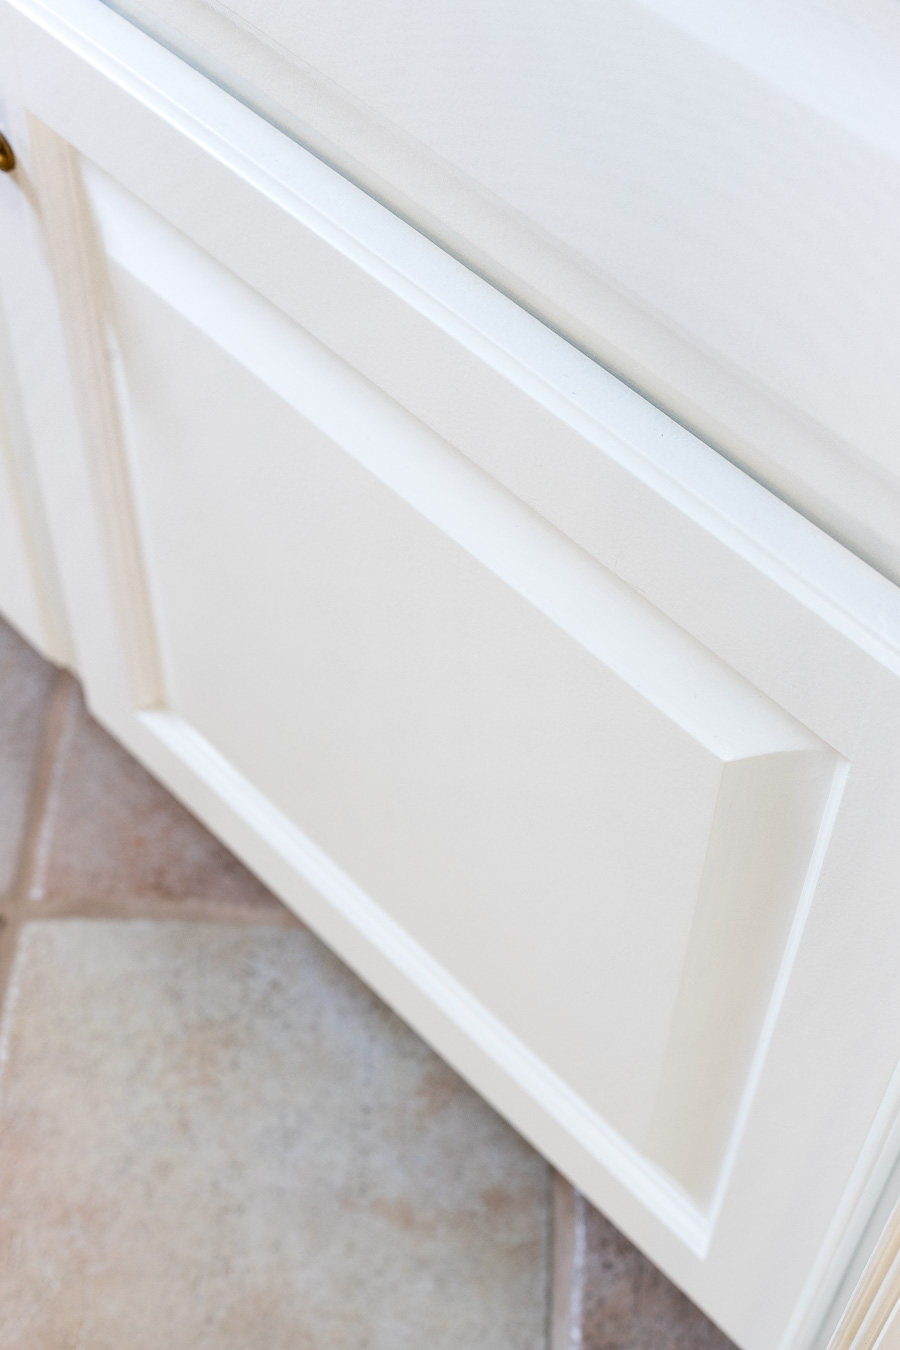
    You can get a super smooth finish on painted cabinet doors if you prep and paint the right way!

    While it might seem like an intimidating project, with the right tools and know-how, it’s one that even a beginner DIYer can do. If it’s a project you’ve considered tackling, this post will give you the step by step how-to to get it done! Let’s go…

    Step 1: Remove Vanity Doors & Drawers

    The first step is to remove your vanity’s doors and drawers along with any hardware so that all that’s left is the frame:
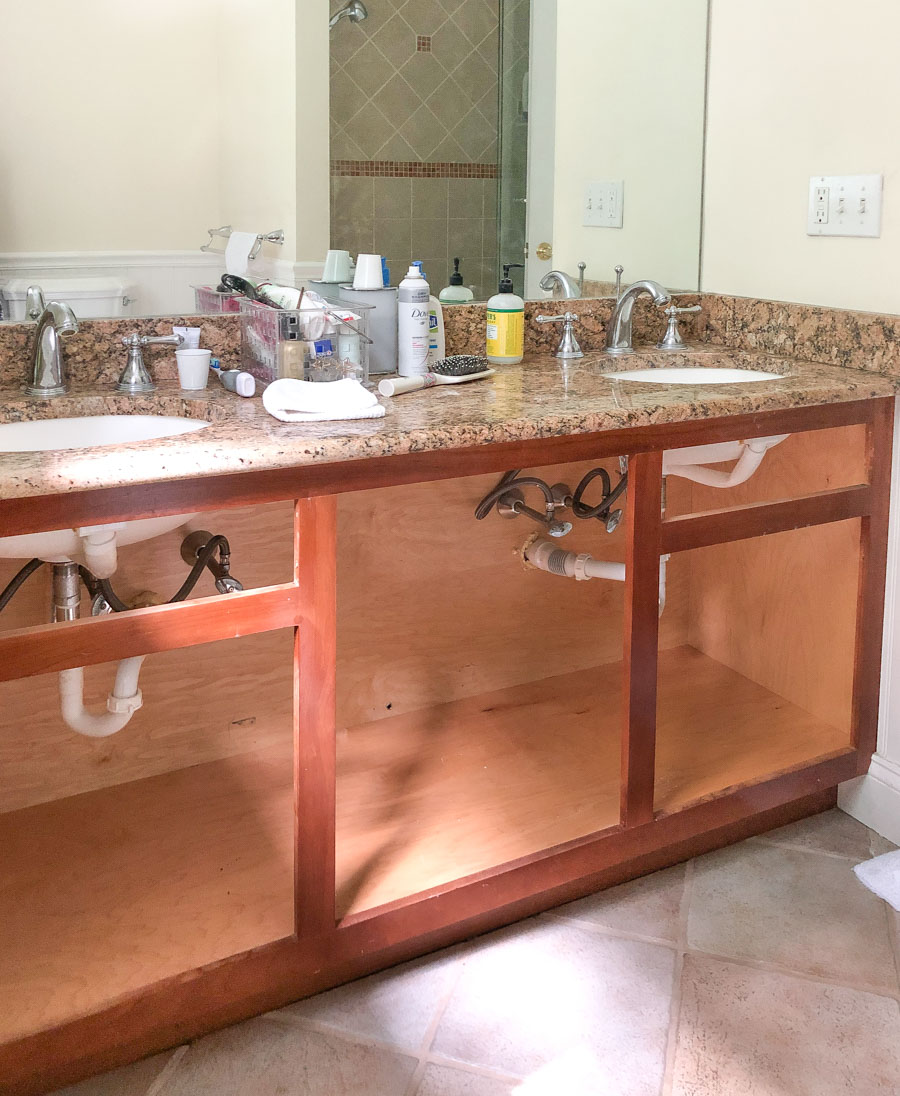
    The first step to painting a vanity is to remove the doors and drawers

    Be sure to take photos or notes and label the hardware that you remove so you know what goes back on where when it’s time to put your vanity back together.

    Step 2: Set Up a Painting Station

    A lot of people paint in their basement or their garage but unless there’s a ton of sanding involved, I prefer to set up shop somewhere that I have good natural light and a TV 🙂 (I don’t mind painting one bit if I can binge-watch Netflix while doing it!). My go-to spot is our bonus room at the top of the stairs since there’s a large open area to use. I put a dropcloth on the floor and set up a folding table covered with a second drop cloth to lay all of the cabinet doors and drawer fronts on.
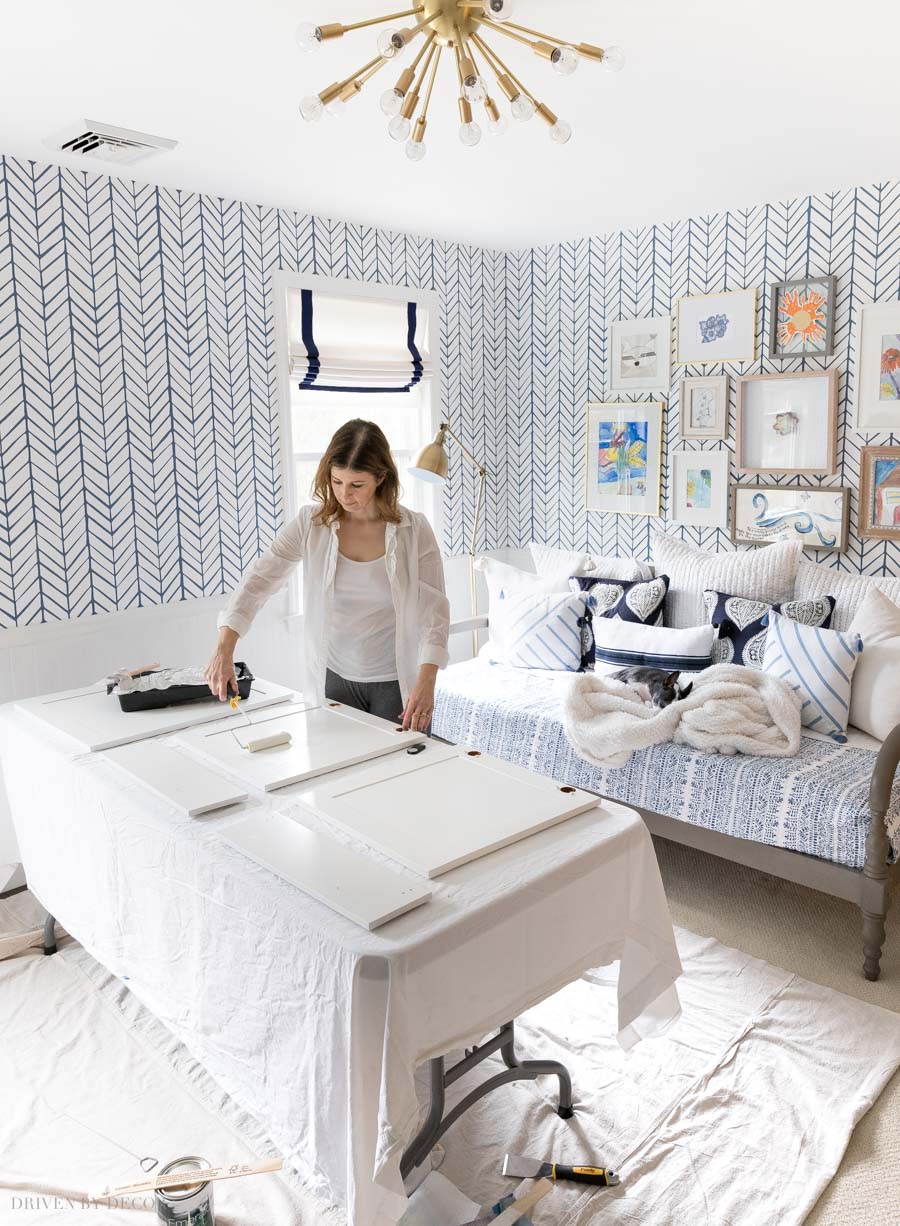
    Such a helpful step by step for painting a bathroom vanity!

    Step 3: Clean All Surfaces You’re Painting

    Preparation is key and it begins with cleaning all of the surfaces that you’re going to paint. Even if your cabinet doors don’t look dirty, you might be surprised by what you get off of them with a good cleaning! There are various products you can use but I use a small amount of no-rinse TSP substitute like {this one}. Using a clean cloth dampened with the solution, give all of the vanity surfaces a good scrub (don’t forget gloves and eye protection).

    Step 4: Fill Holes & Scratches and Sand

    If you’re going to be changing out your cabinet hardware and the new hardware will be in a different location than the old, now’s the time to fill the old holes. I used {this white wood filler} and {this 2″ Purdy flexible putty knife} to push the wood filler down into the holes on both sides and remove the excess filler:
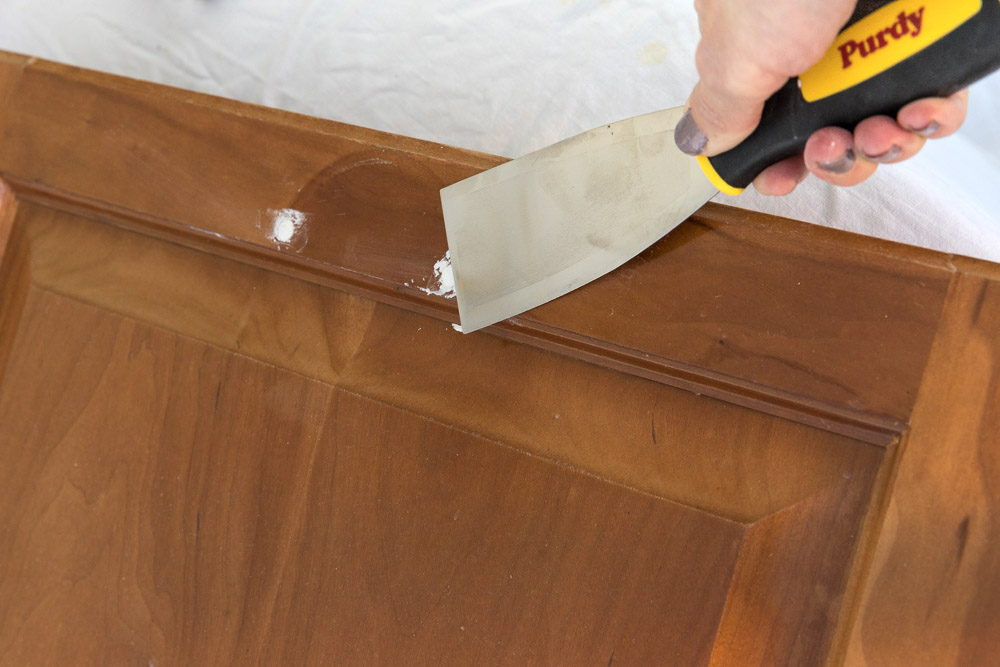
    Before painting your bathroom vanity, fill any holes from hardware that won't be put back in the same place.

    If your cabinets have any nicks or scratches, fill those too. Once the wood filler has dried, sand your filled holes, nicks, and scratches smooth:
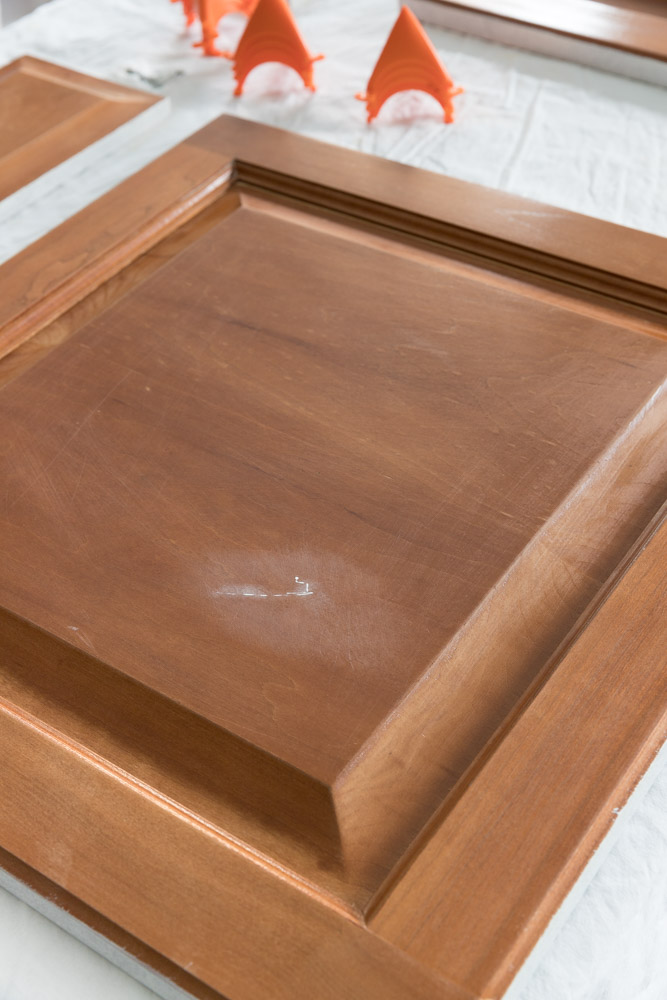
    Use wood filler to fill nicks and scratches before painting your vanity

    You’ll sometimes find that hardware holes require a second layer of wood filler to sand completely smooth. Also lightly sand (I use 220 grit sandpaper) all of the surfaces that you’re going to paint including the vanity frame, doors, and drawers. Sanding is an important step for helping your primer & paint adhere, especially when your cabinets have a glossy top-coat like mine did:
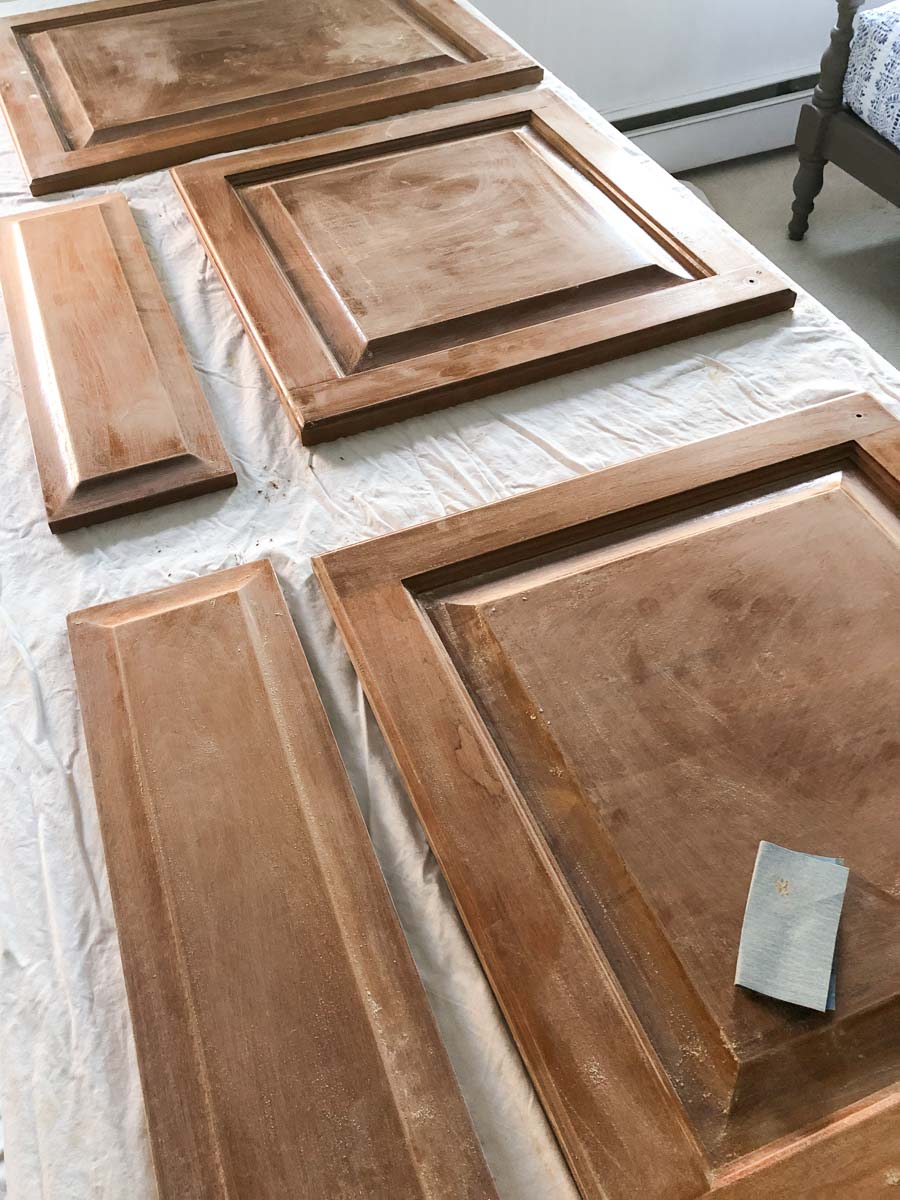
    Sanding all surfaces of your bathroom vanity before priming and painting is key!

    After everything is sanded, vacuum off the sanding dust and wipe all of the surfaces down with a clean microfiber cloth. I finish off my prep by wiping all of the surfaces down with a liquid deglosser like {this one} which both cleans off any remaining dust particles and is extra assurance that you’ll get good adhesion of primer and paint.

    Step 5: Brush & Roll on a Bonding Primer

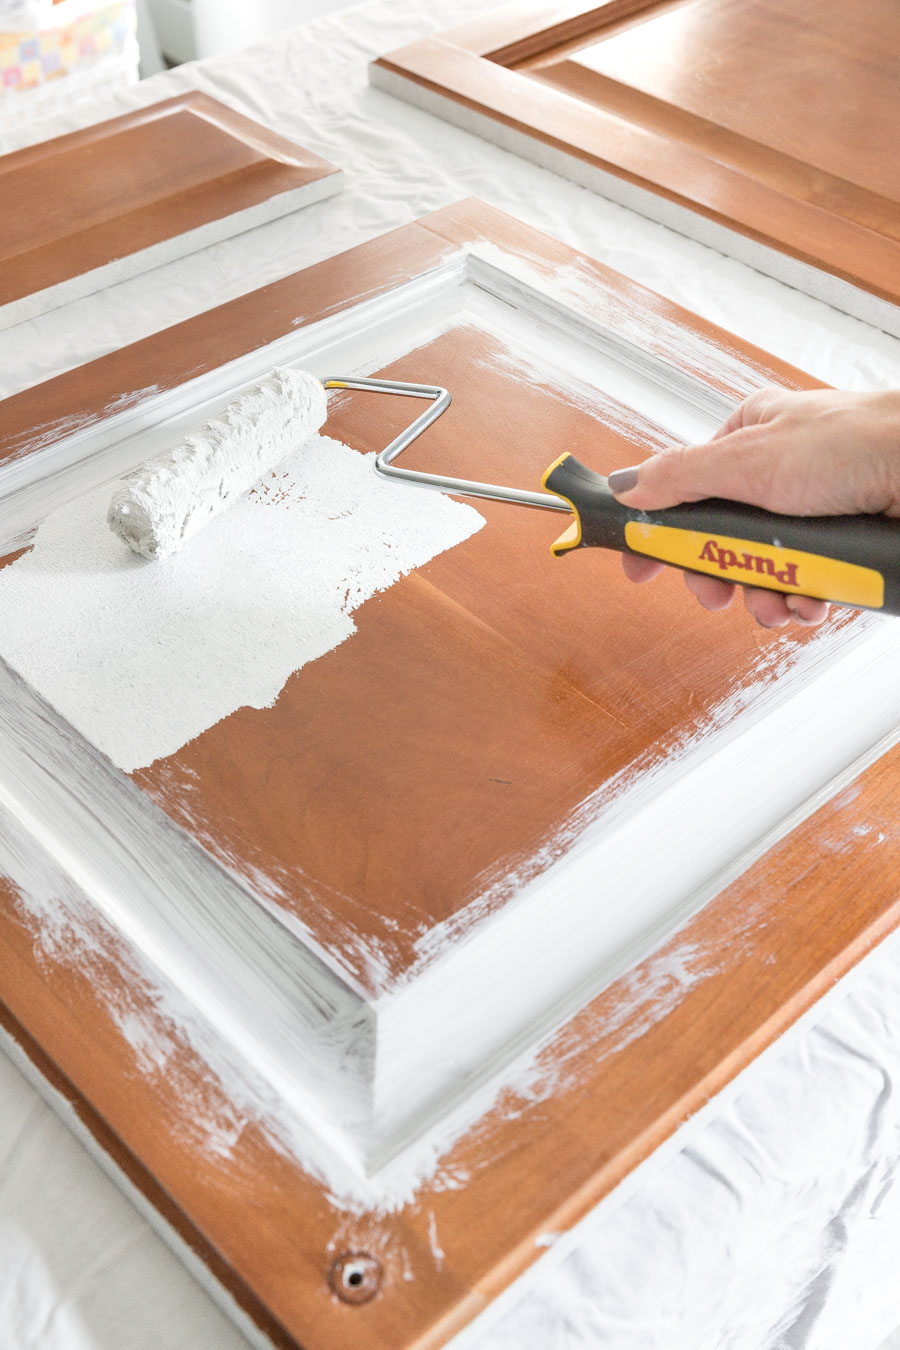
    The next step is to brush and roll on the bonding primer. Since my bathroom vanity was previously stained and coated with a glossy polyurethane, I chose Sherwin-Williams Extreme Bond Primer which is made for adhering to hard to stick surfaces. It truly sticks to anything – I highly recommend it! {This STIX primer} is another one I’ve used several times that’s a great choice! I start by rolling the backs and edges of the vanity doors with the doors sitting on top of four {these plastic painter’s tripods} to raise them up off the table I’m painting on. Once thoroughly dry, I flip the doors over to paint the front, using a combination of a paint brush and roller.

    Having the right tools makes all the difference for this step and every other step in this project. If you’re guilty of spending days figuring out paint colors but then grab the closest paint brush and roller on the shelf to apply it, rethink that the next time you have a painting project. Investing in high-quality tools will keep you from getting the excessive brush marks and lint that come from using cheaper products and can ruin your final finish. Ever since I took a painting class with Jeff as newlyweds and we were told that Purdy has the best brushes and rollers, it’s what I’ve always used – I still have and use some Purdy brushes that I bought over 20 years ago:
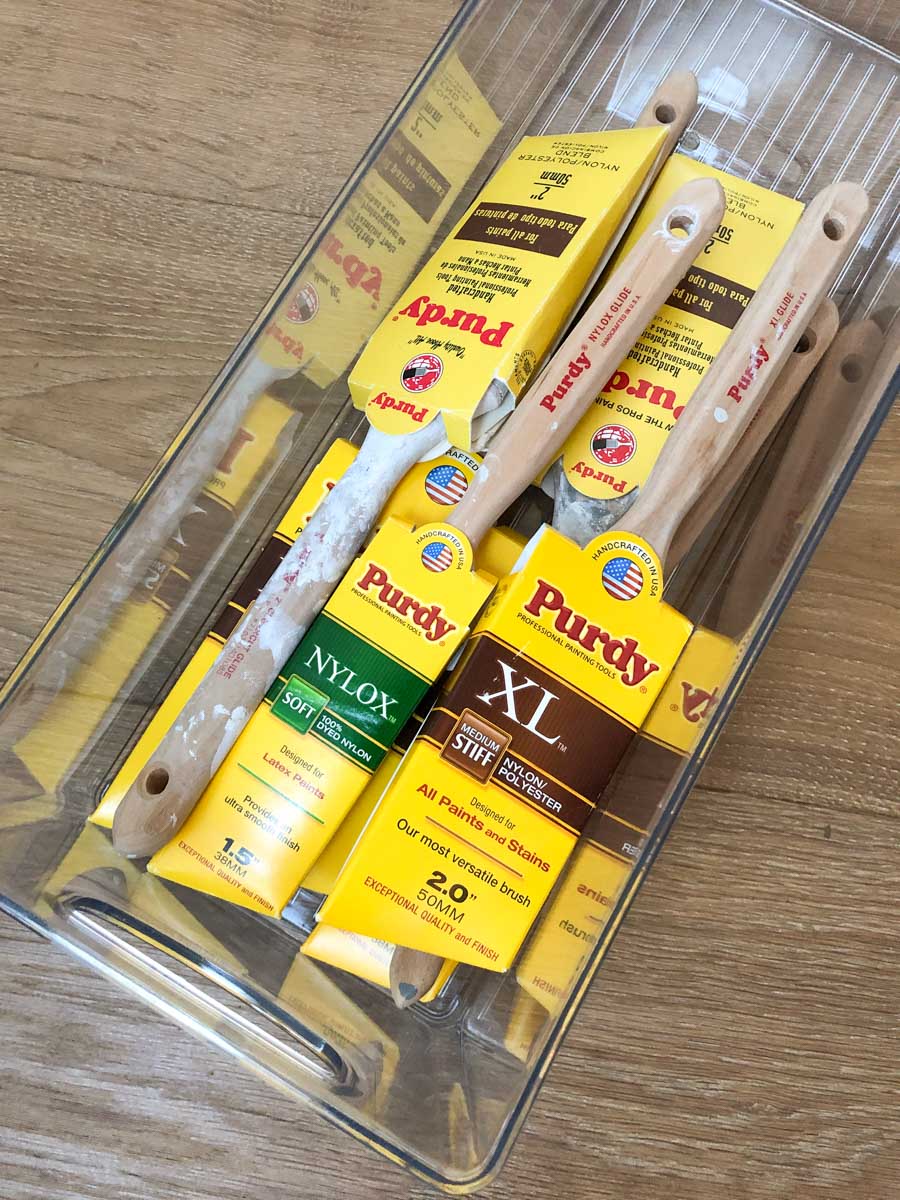
    My stash of Purdy paint brushes!

    For priming, I started with {this Purdy 1.5″ Nylox Glide brush}, brushing the primer into all non-flat areas of the door:
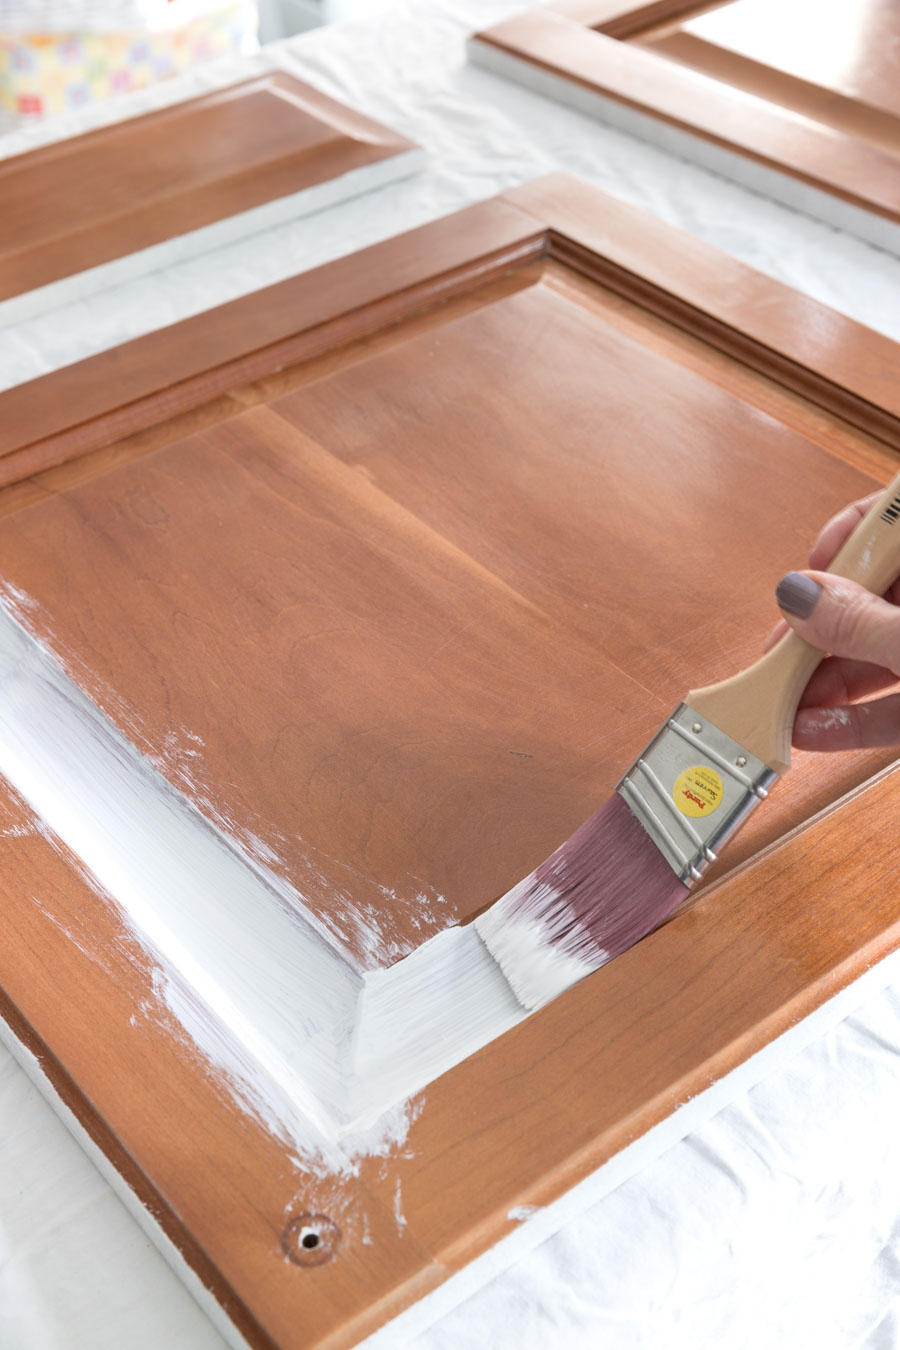
    Using a combination of a paintbrush and roller when painting a bathroom vanity. This post has a great step by step how to!

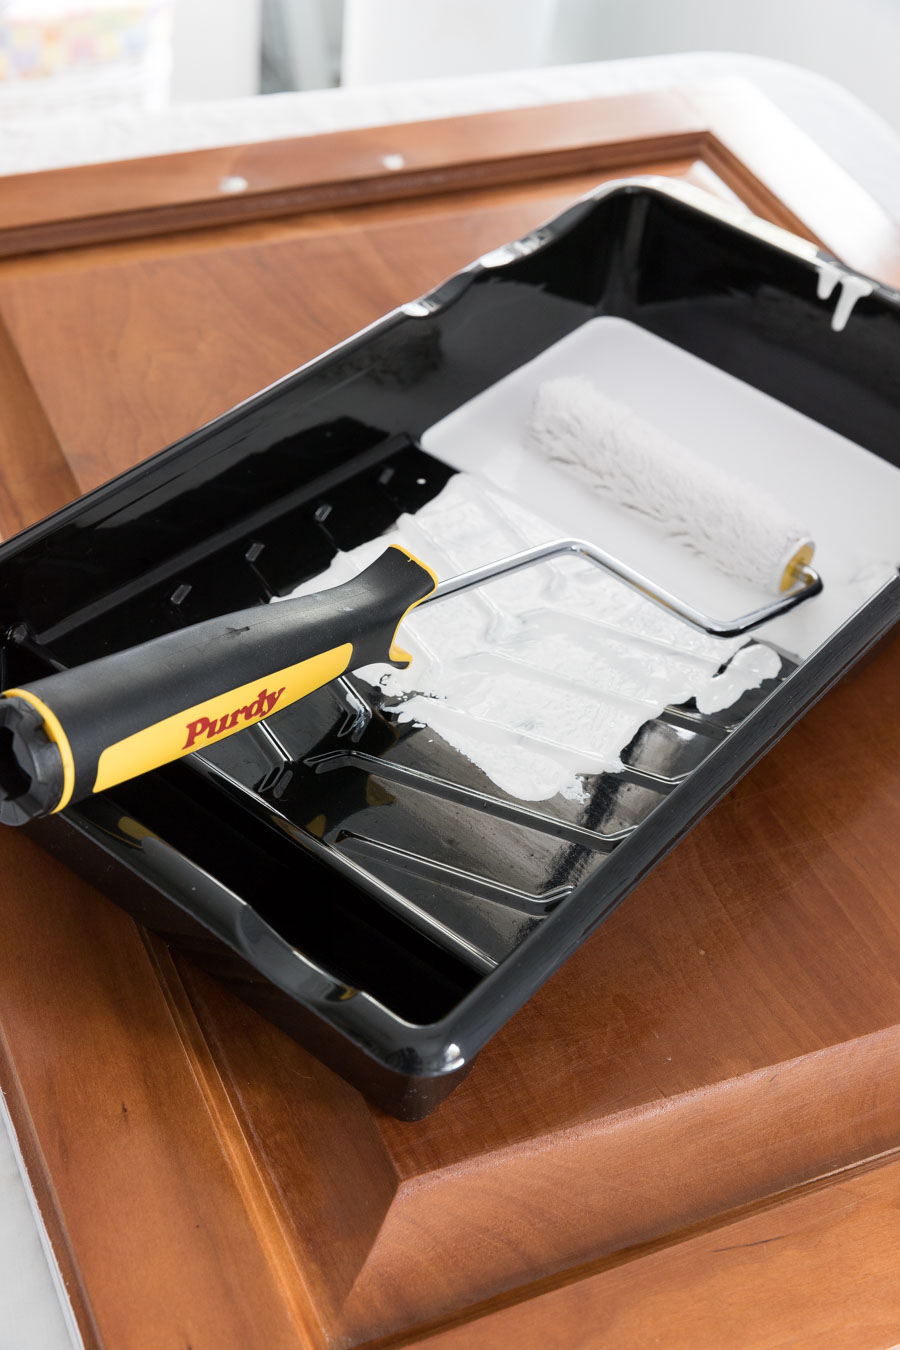
    Then I immediately rolled all flat surfaces with {this ¼″ nap Purdy White Dove Mini Roller} on {this Jumbo Mini Roller Frame} using a mini roller tray like {this} (Note: be sure to use a ¼″ nap roller instead of a ⅜″ nap roller – you’ll get a smoother finish!):
    Want to save this post?

    We'll email this post to you, so you can come back to it later!

    The roller, roller handle, and tray I used for painting our bathroom vanity!

    Rollering on the primer is the next step in painting your bathroom vanity

    While you don’t need to rush going from brushing to rolling, you’ll get the best results if you do them back to back before the brushed paint dries. And don’t forget to primer the vanity frame too:
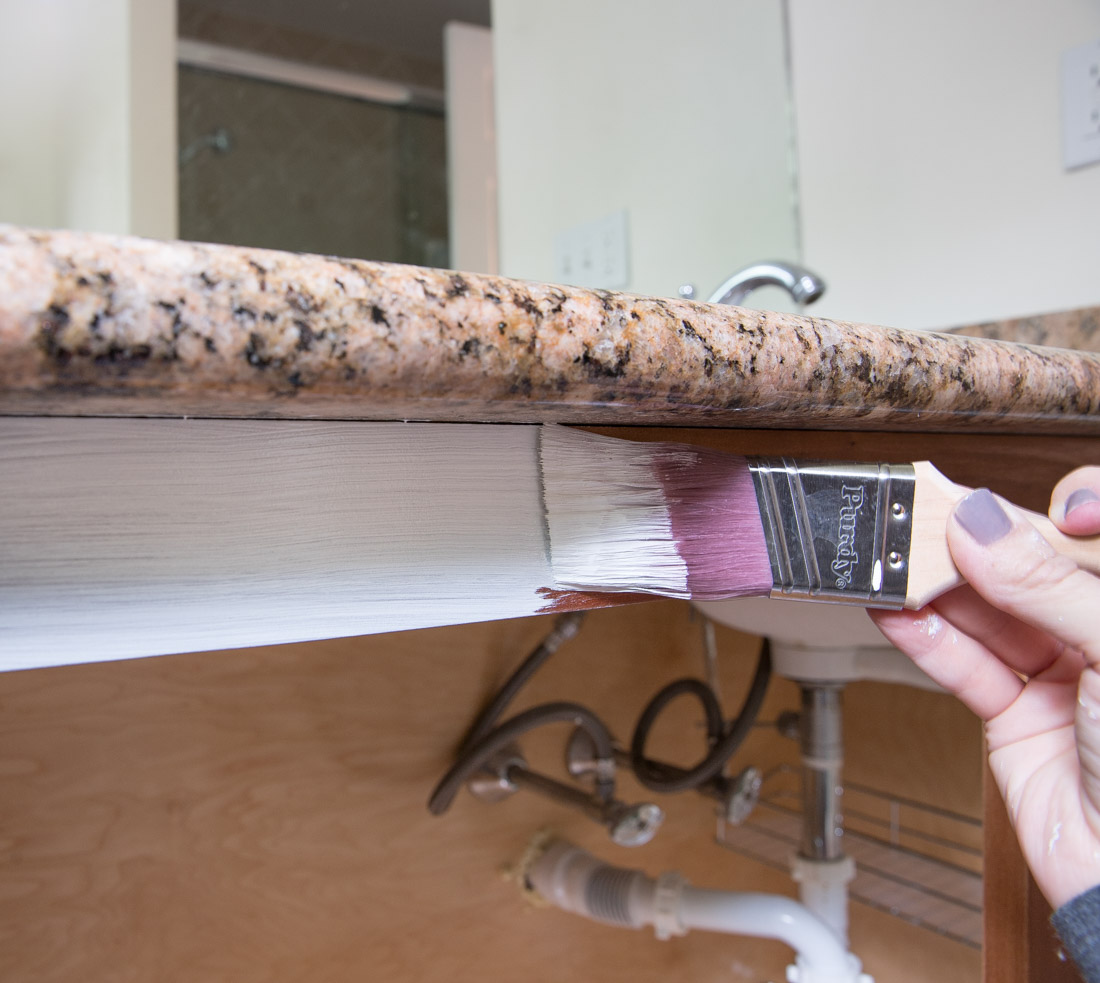
    A detailed step by step for painting your bathroom vanity!

    Step 6: Paint!

    After letting your primed door fronts dry overnight, lightly sand all of your primed surfaces (I like to use a sanding sponge like {this one} for this) and remove sanding dust with a microfiber cloth or tack cloth like {this}. Then it’s time for paint! Just like with the primer, start by rolling the paint on the back and edges of the vanity doors and drawers. Once they’re thoroughly dry, flip them over and use the combination of a paint brush and roller on the front just like you did with the primer. The key to getting an ultra smooth finish is to use the right paint, brush, and roller for the job.

    For paint, I used Sherwin-Williams Emerald Urethane Trim Enamel in Semi-gloss which provides the durable surface you want for a bathroom vanity. I chose Alabaster for my paint color which is a white with just a touch of warmth (quick tip: when choosing a white paint color, use a cool white if your vanity top has cool colors in it and a warm white if your vanity top has warm colors). I used the same combination of the Purdy 1.5″ Nylox Glide brush:
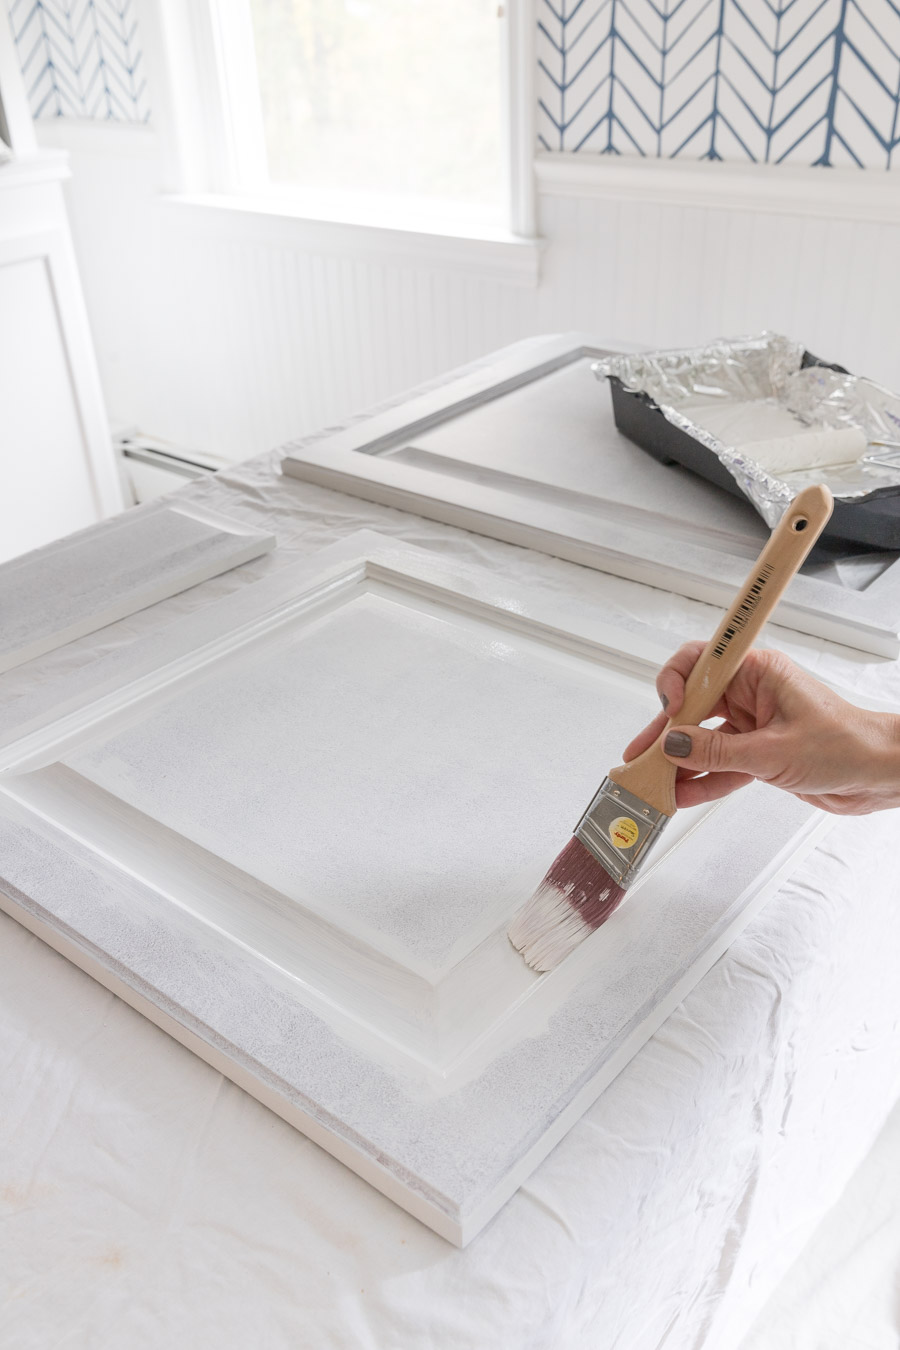
    The step by step for painting a bathroom vanity

    with a ¼″ nap mini roller as I did when priming. The combination of this Purdy paint brush and mini roller results in a beautiful, ultra smooth finish:
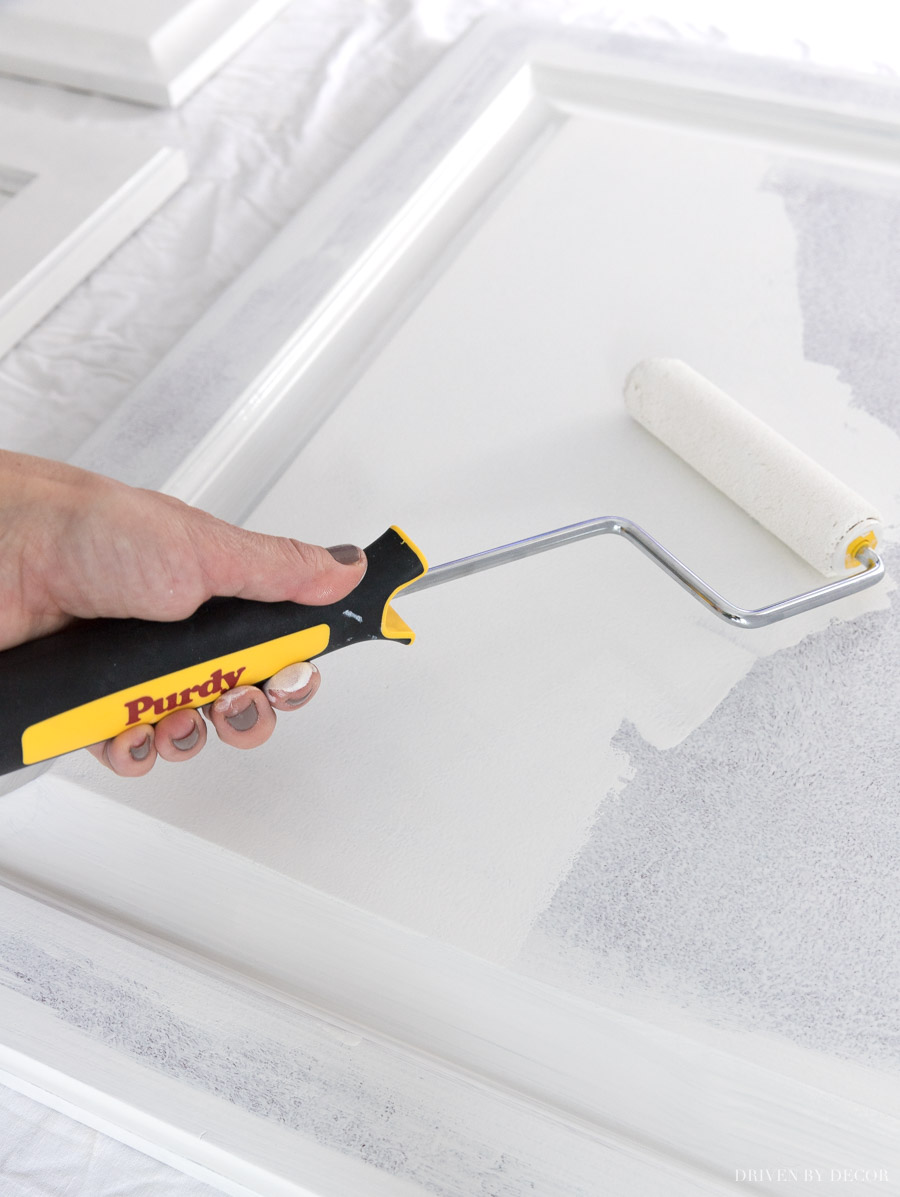
    Super helpful step by step to painting a bathroom vanity!

    Along with painting both sides of your vanity doors and drawers, remember to paint the frame of your bathroom vanity too.

    Step 7: Lightly Sand and Repeat

    Once you have a coat of paint on the vanity frame and both the front and back of the vanity doors and everything is thoroughly dry, lightly sand all of your painted surfaces and repeat the process with a second coat of paint.

    Step 8: Reinstall Your Cabinet Doors & Drawers

    After your last coat of paint, give your doors and drawers at a day or two to dry before reinstalling them on your vanity. If you’re adding new hardware, drill the new holes for it before reinstalling your doors and drawers, and then add your new hardware at the end:
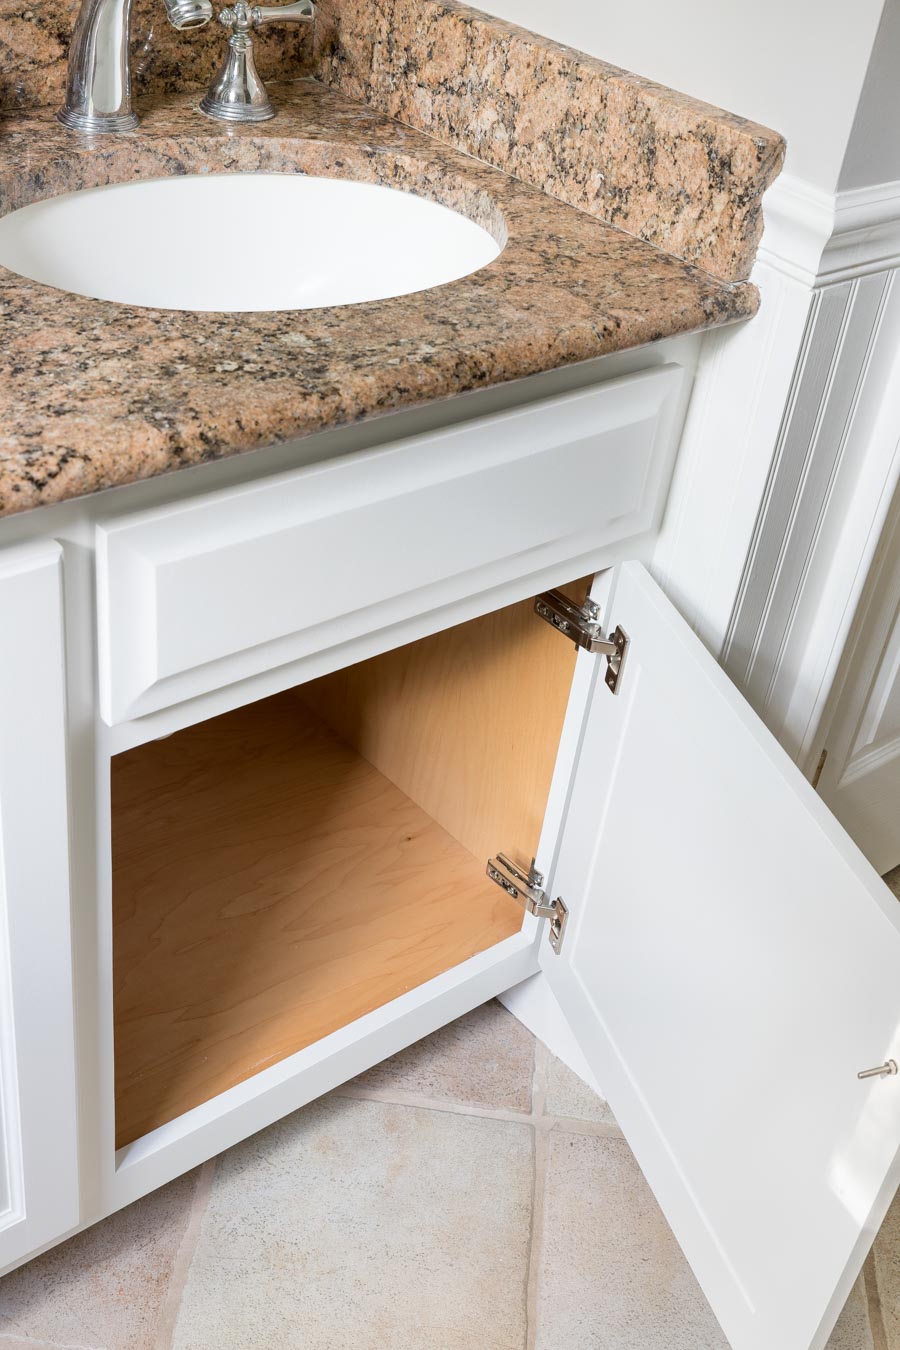
    I'm so doing this! A great step by step for painting your bathroom vanity!

    Also reinstall any accessories that attach to them. The faux drawer panels under each sink in my daughters’ bathroom have small tilt out trays that hold their toothbrush and toothpaste so those needed to be reattached:
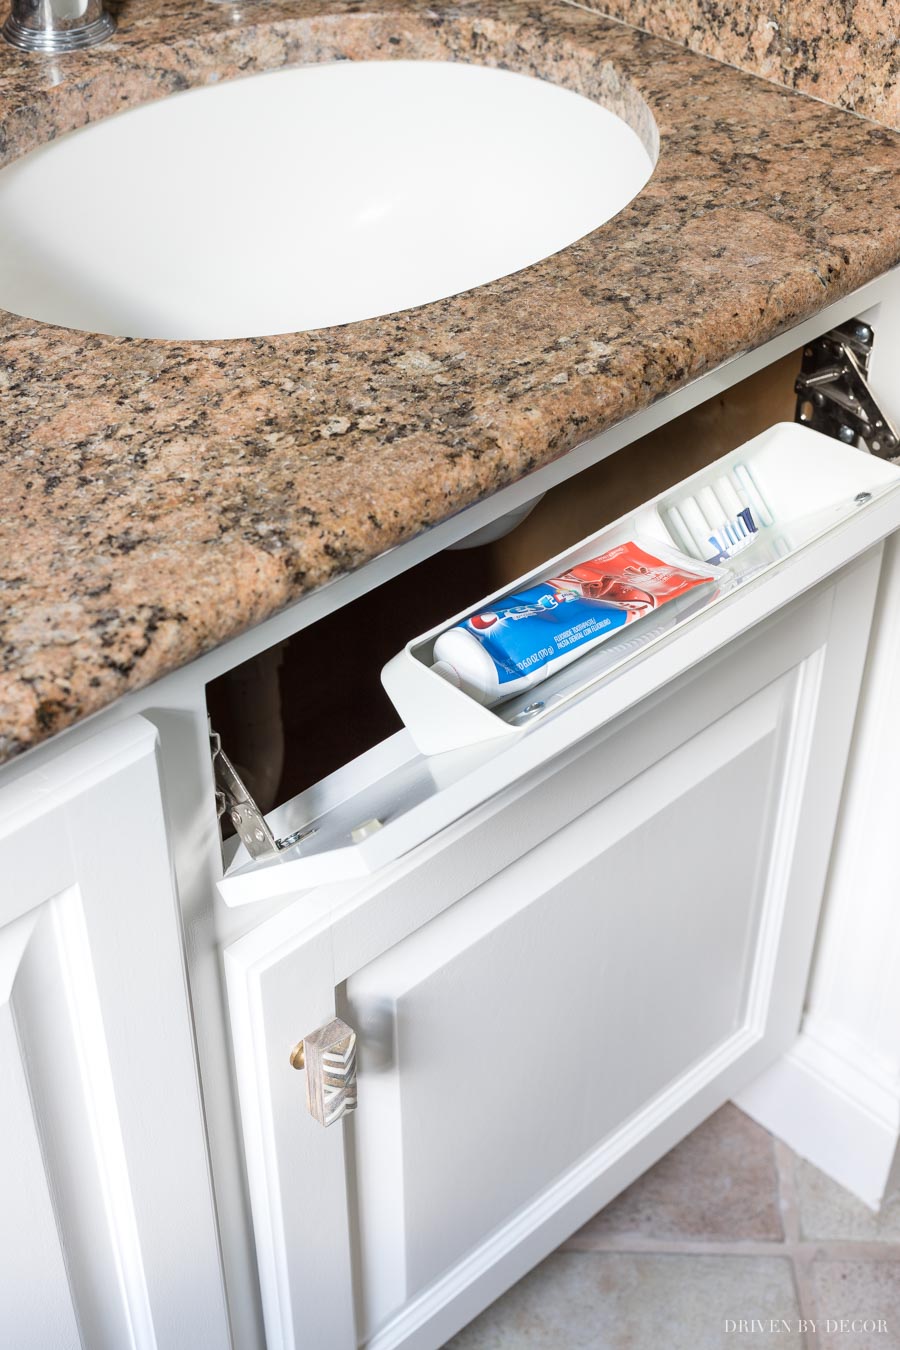
    Love this little caddy for a toothbrush and toothpaste in this bathroom vanity!

    And the large door in the middle that looks like a cabinet is actually attached to a pull out hamper so I had to reattach the newly painted door front to it:
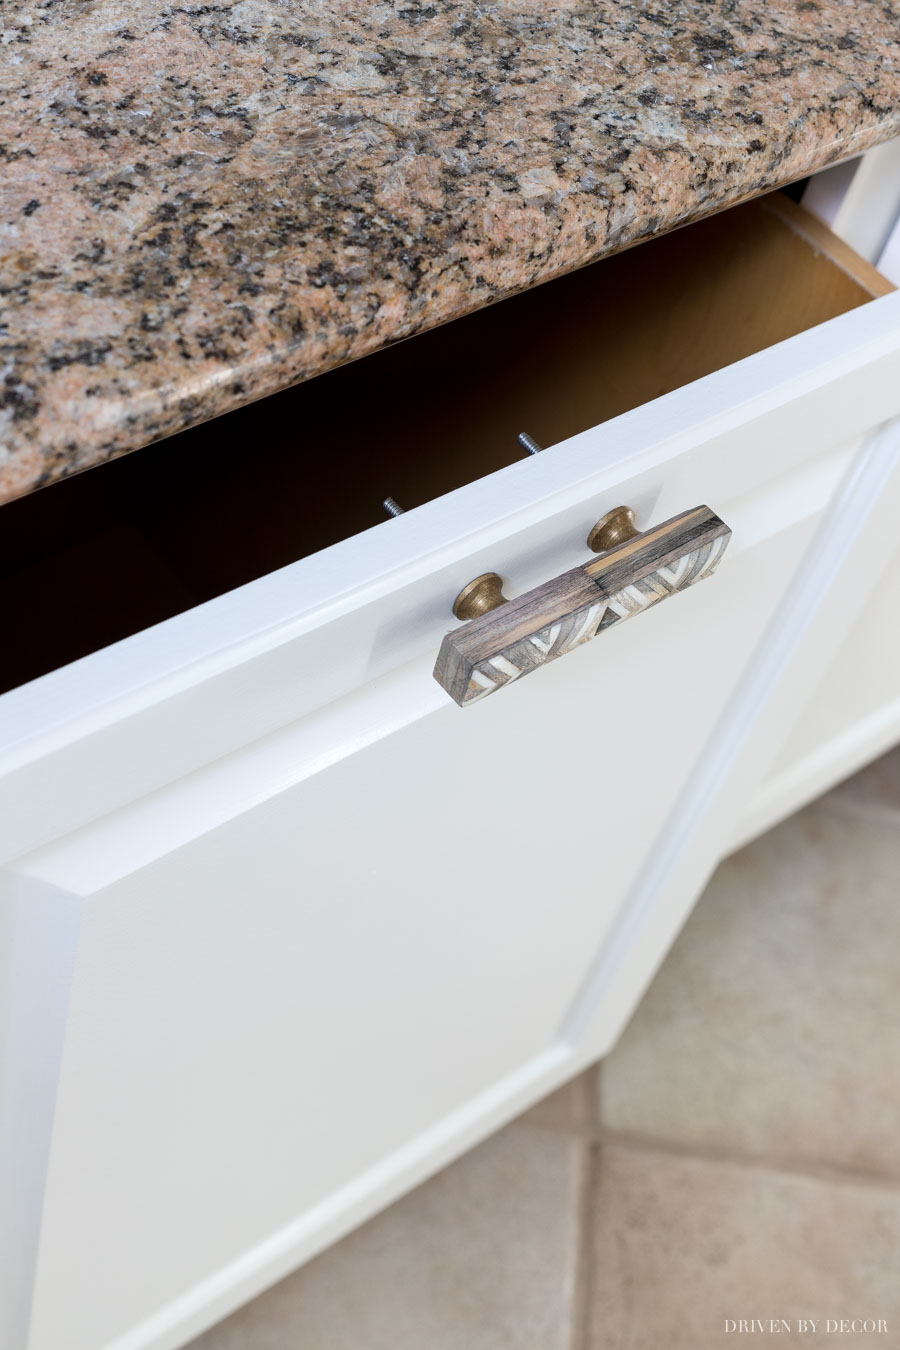
    Love the idea of a pull-out hamper in a bathroom vanity! So smart!

    It can take a week or two for paint to 100% cure so treat your vanity with a little extra TLC for the first few weeks, immediately wiping off anything that gets on it. Oh and don’t forget to marvel at what a difference a few hours of DIYing made to your bathroom:

    Painting our bathroom vanity made SUCH a difference! Come see the before and after!

    I kept myself on a tight budget for this bathroom makeover so didn’t make any more costly changes like replacing the mirror or lighting but I did make two other inexpensive changes that made a big difference. The first is that I swapped out the dated glass shades on the light above the mirror for {these more streamlined shades}. I was surprised by what a difference it made!
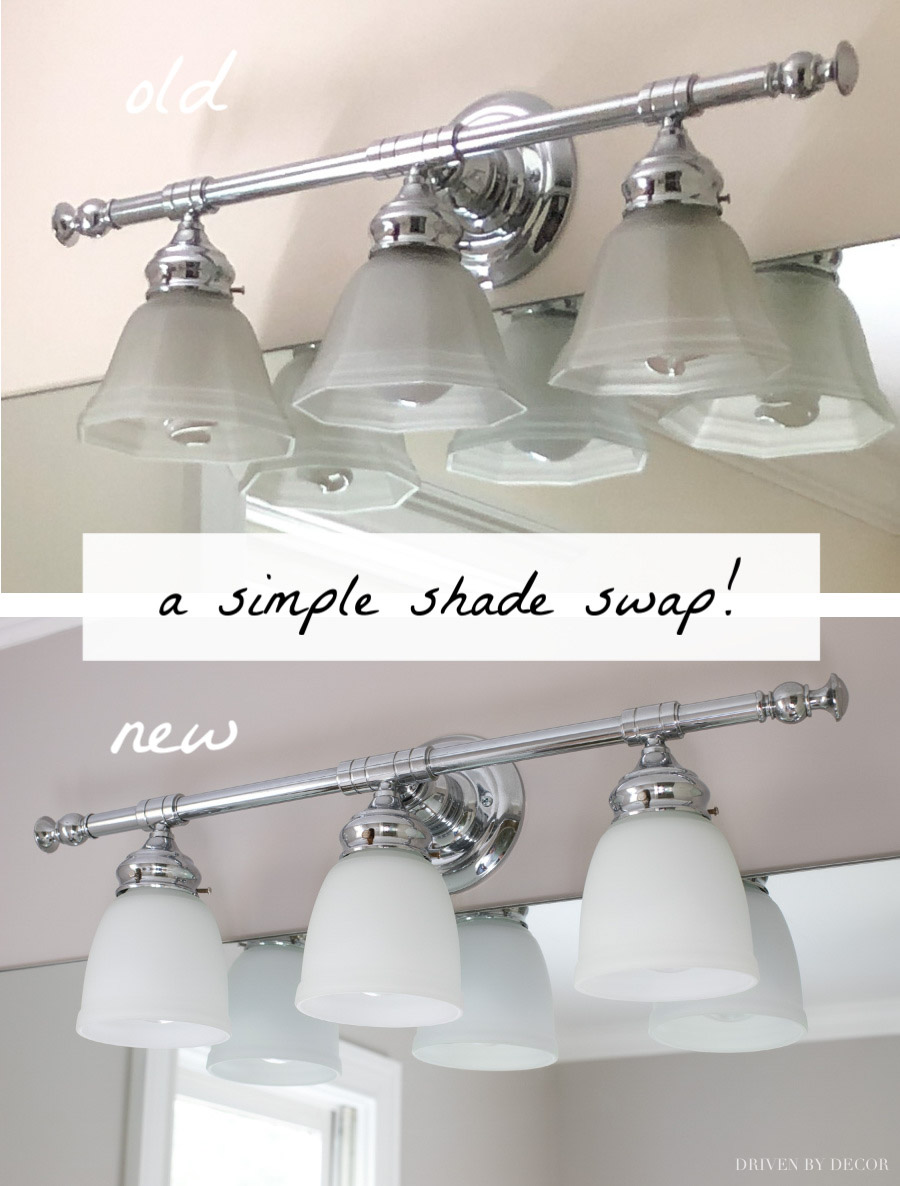
    It's amazing how much of an update a simple swap of shades can make!!

    I also painted the bathroom walls – they were previously a light yellow which didn’t work with the colors of the granite vanity top at all. I chose Sherwin-Williams Emerald Interior Latex paint in Alpaca (Matte finish) which is a very light greige that complements the granite and the floors so much better!

    The tools I used for painting the walls are {this 2″ Purdy XL Glide brush} and {this ⅜″ nap Purdy White Dove roller} (which is what I’ve used for every wall I’ve ever painted) on {this Purdy Revolution 9″ Frame}:
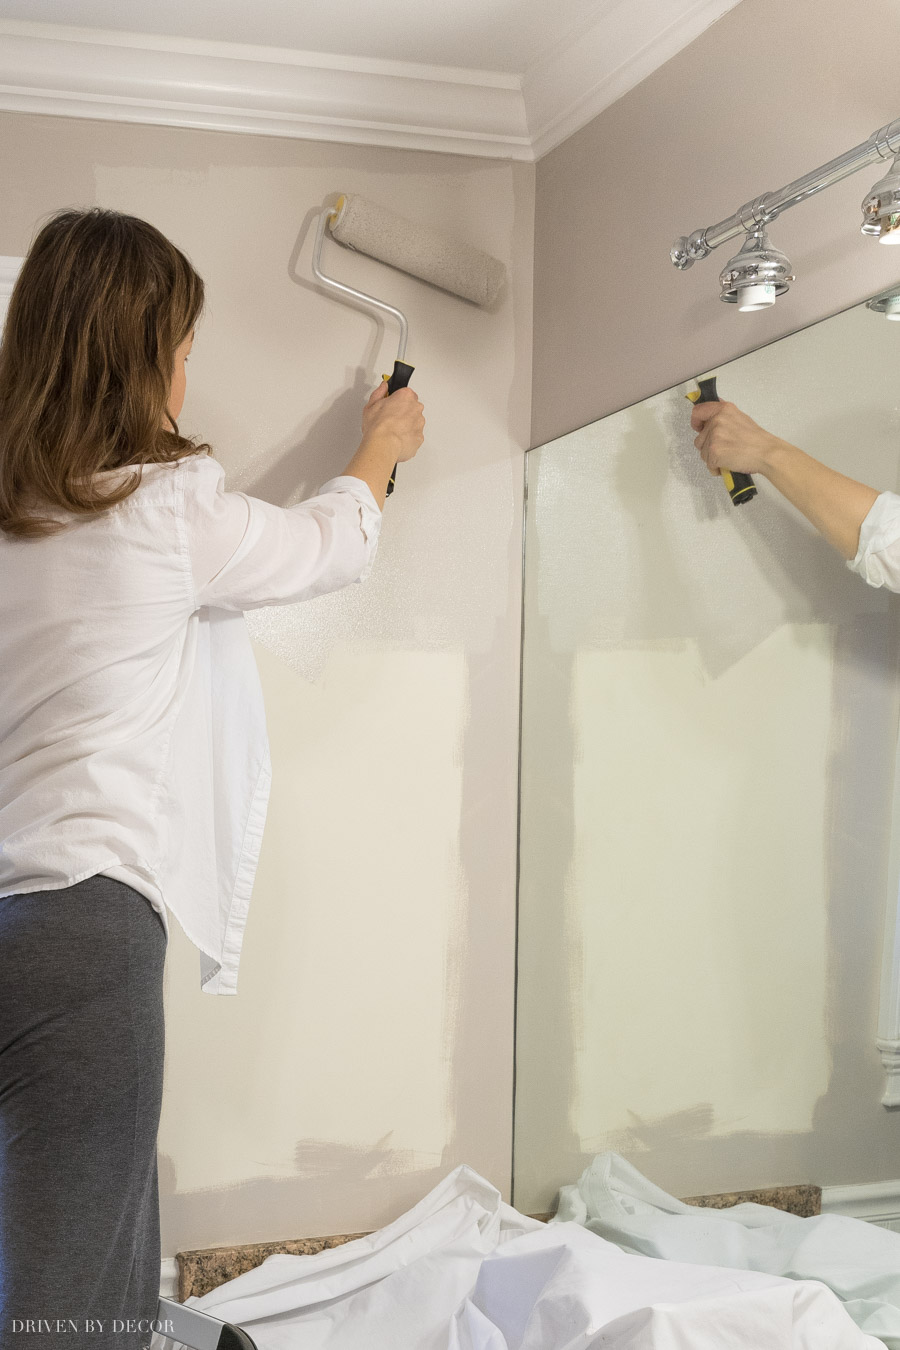
    I painted our bathroom walls Sherwin-Williams Alpaca - such a great paint color!

    And with that, we’re done! Each step in painting our bathroom vanity took under an hour (I could actually coat one side of my cabinet doors in only about 20 minutes) so I’d estimate that the total time I spent working on this project was about 5-6 hours spread out over a week. I hope that including so many details will make this a clear, easy to follow project that you now feel confident tackling!

    Thanks as always for stopping by the blog and be sure to share your bathroom vanity transformation photos with me – I’d love to see them!

    Soon you’ll be ready to tackle another project! Check out {this post on how to refinish a table} for a step by step on getting the job done!

    • Share
    • Email

    ✉️FREE EMAIL SERIES ✉️

    5 Secrets to Reinventing Your Home on a Budget

    Simple tips to instantly transform five rooms in your home!

    Reader Interactions

    Comments

      Leave a Reply Cancel reply

      Your email address will not be published. Required fields are marked *

      This site uses Akismet to reduce spam. Learn how your comment data is processed.

    1. Coco says

      November 07, 2019 at 12:47 pm

      Looks Wonderful! I so appreciate your step by step tutorials. This is one reason why I follow you. You are an inspiration! Thank you.

      Reply
      • Kris Jarrett says

        November 09, 2019 at 8:28 pm

        That’s so nice to hear! Glad you found it helpful! XO

        Reply
    2. Rebecca says

      November 07, 2019 at 12:50 pm

      what color and brand of paint did you use on the cabinets? It looks great.

      Reply
      • Kris Jarrett says

        November 09, 2019 at 8:29 pm

        You can find all the details in step 6! Thanks for your kind words!

        Reply
    3. Elle says

      November 07, 2019 at 1:34 pm

      Thank you for this very comprehensive guide and all the photos. It is great that you included the time it took to paint the vanity. You make this seem like a do-able project! The results are very nice.

      Reply
      • Kris Jarrett says

        November 09, 2019 at 8:30 pm

        Thank you so much Elle! I’m so glad you found my post helpful!

        Reply
    4. Barbara says

      November 07, 2019 at 1:52 pm

      Simply beautiful and simple. Will save for my main bath paint project in February.
      Barbara

      Reply
      • Kris Jarrett says

        November 09, 2019 at 8:31 pm

        Thank you! And good luck with your project!

        Reply
    5. JM says

      November 07, 2019 at 2:05 pm

      Beautiful! Timing of this post is amazing. I am starting at my kitchen cabinets with a small budget.

      Reply
      • Kris Jarrett says

        November 09, 2019 at 8:31 pm

        Oh good! Good luck with it!

        Reply
    6. Lizzy Leff says

      November 07, 2019 at 2:09 pm

      What a difference! SO much better. Great job!

      Reply
      • Kris Jarrett says

        November 09, 2019 at 8:32 pm

        Thank you Lizzy!

        Reply
    7. Michele M / Finch Rest says

      November 07, 2019 at 2:52 pm

      WOWWW! What a huge huge difference this made! I love your changes! Well done, Kris.

      I wish I had more energy and stamina – my cabinets need it so badly.
      Wanna come to Columbus and let me hire you? ♥♥♥

      Bet your girls are so happy!

      Reply
      • Kris Jarrett says

        November 09, 2019 at 8:33 pm

        Ha! I actually do know someone in your area who has a cabinet painting business – check out Jenny at Evolution of Style blog!

        Reply
        • GG says

          November 22, 2020 at 3:42 pm

          Do you know anyone in Cleveland Ohio ?😊

          Reply
      • Susan G Northcutt says

        December 18, 2022 at 3:30 pm

        im 67 and im working on mind one step at a time. Doors are off everything is cleaned and sanded going to prime tomorrow and gray chalk gel paint.

        Reply
    8. jean says

      November 07, 2019 at 4:07 pm

      Kris,
      You did a wonderful before and after tutorial!!! I love how you explain every step you do. It really helps when you are a rookie at painting furniture. I just love your blog site and look forward to your emails and info on where to buy products. You are soooo good at blogging and your post is soooo informative!!!! Thanks so much Kris,
      your blog friend,
      jean

      Reply
      • Kris Jarrett says

        November 09, 2019 at 8:33 pm

        Jean your comment made my day – so sweet! Thank you!

        Reply
    9. Jennifer Tichacek says

      November 07, 2019 at 4:16 pm

      I have shades just like your old ones — where did you find the new ones? I really like them and intend to buy them. I’m surprised you didn’t provide a link!

      Reply
      • Kris Jarrett says

        November 09, 2019 at 8:37 pm

        I didn’t have a Source List at the end like I usually done because I bought nothing for this project EXCEPT I forgot about those shades! I found them on Amazon – the exact ones are linked on my Shop page here: https://www.drivenbydecor.com/shop/

        Reply
        • Joy says

          August 19, 2020 at 12:50 am

          Aww bummer I can find the lamp shade from the link you posted. How do you know the size or are they standard? Thanks and can’t wait to try the Purdy roller for my vanity!

          Reply
    10. Jennifer A Tichacek says

      November 07, 2019 at 4:29 pm

      Just found the globes by clicking “Shop My House & My Favorite Finds!” Thanks so much for such a fantastic idea. I had already purchased a new fixture to install but now all I have to do is replace the globes!

      Reply
      • Kris Jarrett says

        November 09, 2019 at 8:37 pm

        It made a bigger difference than I expected!!

        Reply
    11. Kelley says

      November 07, 2019 at 4:54 pm

      Kris, this made all the difference in the world! I’ve always been too scared to attempt cabinets but you make it look doable! Thank you for sharing- I may just have to tackle ours!

      Reply
      • Kris Jarrett says

        November 09, 2019 at 8:38 pm

        Thanks Kelley! You can totally do this!!

        Reply
      • Marianne says

        May 14, 2021 at 5:11 am

        Hi, I’m glad I saw this as I was about to start stripping my bathroom vanity of the glossy finish but trying to figure out how to manage the strong odor from the stripper. One question: my drawer panels above the doors do not open at all. They are just for looks and appear to be glued in place. Do you think I need to remove them as well? I’m afraid I won’t be able to get them back in place after priming and painting. Thanks in advance!

        Reply
    12. Mary K Wilburn says

      November 07, 2019 at 5:44 pm

      This is so amazing Kris! What a transformation and a savings! I get so inspired by your projects and fabulous tutorials but then I think I’m biting off more than I can chew! What do the painters tripods look like and are they Purdy as well? You are truly so talented and a fabulous blogger!

      Reply
      • Kris Jarrett says

        November 09, 2019 at 8:40 pm

        I should have included a good pic of those! If you look at the second pic under Step 4 you can spy them – they’re just little plastic triangular pods that you can get at hardware/home improvement stores. I use four under each cabinet door. I really appreciate your sweet words!

        Reply
    13. Catherine Mishoe says

      November 07, 2019 at 5:57 pm

      Love your blog and all your fab ideas… I also swaped lighting shades, painted my mirror & walls – what a difference !
      Thanks for your inspirations and awesome ideas !!

      Reply
      • Kris Jarrett says

        November 09, 2019 at 8:41 pm

        Thank you Catherine!!

        Reply
    14. Judy says

      November 07, 2019 at 6:16 pm

      Thanks so much , Kris. I really should write oftener to tell you how much I appreciate your blog and your many talents. The painting tutorial was fantastic!

      Reply
      • Kris Jarrett says

        November 09, 2019 at 8:42 pm

        I appreciate that so much Judy – thank you!!

        Reply
    15. Cathy says

      November 07, 2019 at 7:45 pm

      Thank you! I think I’m ready to tackle my bathrooms!

      Reply
      • Kris Jarrett says

        November 09, 2019 at 8:42 pm

        I’m so glad this post gave you the confidence to do it! Good luck – you’ve got this!

        Reply
    16. Gail Storti says

      November 07, 2019 at 10:11 pm

      Kris, you did a wonderful job, her bathroom looks so fresh and updated. Isn’t it wonderful what some paint can little changes can do? Purdue brushes are the only brushes I use. I have a whole collection and they are the best for all my painting projects.

      Reply
      • Kris Jarrett says

        November 09, 2019 at 8:44 pm

        Thank you! I too am always surprised by what a huge difference a little bit of paint can make!

        Reply
    17. Karen B. says

      November 07, 2019 at 10:24 pm

      What a huge improvement. You always do such a thorough job. Whoever buys your Connecticut house is going to be thrilled with all of the upgrades.
      xo,
      Karen

      Reply
      • Kris Jarrett says

        November 09, 2019 at 8:45 pm

        Thank you Karen!!

        Reply
    18. Lizzie says

      November 07, 2019 at 10:40 pm

      Seriously awesome step by step guide- thank you! I have been wanting to do this for my mom ‘s bathroom for awhile but was overwhelmed- now I am motivated!

      Reply
      • Kris Jarrett says

        November 09, 2019 at 8:45 pm

        Thanks Lizzie – I’m so glad you found it helpful!

        Reply
    19. Carol says

      November 08, 2019 at 3:30 am

      The bathroom is beautiful. What a difference painting makes. Where did you het the replacement light fixture glass? I didnt know they were available. Very fun.

      Reply
      • Kris Jarrett says

        November 09, 2019 at 8:46 pm

        Thanks Carol! I got them on Amazon – the exact ones are linked on my Shop page here: https://www.drivenbydecor.com/shop/

        Reply
    20. Mayte says

      November 08, 2019 at 4:11 am

      I love how you have left, it is beautiful and, with your tutorial, it seems easy, good job!

      Reply
      • Kris Jarrett says

        November 09, 2019 at 8:47 pm

        Thank you so much!

        Reply
    21. Lisa says

      November 08, 2019 at 5:56 am

      Looks great, and a heads up when I did all my cabinets I used a flock roller. It’s so much better than the nap rollers. If you ever do anymore I’d look into it. The finish result is so much better

      Reply
      • Kris Jarrett says

        November 09, 2019 at 8:49 pm

        Thanks Lisa! I’ve used that type of roller before and love the smooth finish but always got tiny bubbles when using foam rollers so found this one works better for me!

        Reply
    22. Beverly B says

      November 08, 2019 at 6:45 am

      Nice, easy tutorial. Thank you.

      Reply
      • Kris Jarrett says

        November 09, 2019 at 8:49 pm

        Thanks – I’m glad you found it helpful!

        Reply
    23. Jean Santosuosso says

      November 08, 2019 at 11:23 am

      Thank you for the painting tips … you’ve covered all the things I’ve been “wondering” about!!

      Reply
      • Kris Jarrett says

        November 09, 2019 at 8:50 pm

        I’m so glad – thanks Jean!

        Reply
    24. Fran says

      November 08, 2019 at 11:33 am

      So very helpful Kris! I love your “how to” blogs because you are so detailed. Makes it easier to duplicate. The space turned out great!

      Reply
      • Kris Jarrett says

        November 09, 2019 at 8:51 pm

        Thank you Fran – I always like as many details as possible when doing projects so try to include whatever I can! So glad you find it helpful!

        Reply
    25. Dian Owens says

      November 08, 2019 at 7:20 pm

      Paint has always been my favorite budget friendly redecorating tool. I totally agree on using quality paint, brushes and rollers. You tutorial is to the point and easy to understand. The vanity, walls and light fixtures look great!

      Reply
      • Kris Jarrett says

        November 09, 2019 at 8:52 pm

        Thank you so much!

        Reply
    26. Lee says

      November 09, 2019 at 9:31 am

      This tutorial will really come in handy, as I’ve been procrastinating my own bathroom vanity. Can you tell us where you found that great hardware

      Reply
      • Kris Jarrett says

        November 09, 2019 at 8:53 pm

        I’m glad you found it helpful! I bought the hardware from Anthropologie over a year ago when it was being clearanced out so unfortunately it’s no longer available 🙁

        Reply
    27. Debbie Barber says

      November 12, 2019 at 10:37 am

      The new bathroom looks amazing! You have inspired me to try something similar with our tired, old outdated bathroom. I love the new hardware, are the pulls available online?

      Reply
      • Kris Jarrett says

        January 31, 2020 at 1:15 pm

        They were from Anthropologie but unfortunately are no longer available!

        Reply
    28. Liz Serpa says

      November 12, 2019 at 10:54 am

      Kris it really looks great, but my question is why you didn’t opt for chalk paint? I’ve used it many times and when you do, you don’t have the prep work of sanding, etc. I looked at your finish product and wondered if you plan on putting a frame (easy to make) around your mirror to give it a custom look.

      Reply
      • Kris Jarrett says

        January 31, 2020 at 1:18 pm

        Hi Liz! I’ve used chalk paint on several furniture pieces and it’s worked great but in doing some research on using it when it’s going to be exposed to water and a lot of use and abuse, some people have said it didn’t hold up very well. So I decided to go the tried and true route – takes a little longer but I know if will work in the long run! And as far as the mirror frame, I thought of doing it but the sinks are so close to the edges of the vanity that it would take away from some of the above the sink mirror space that my girls use so I’ll likely leave it as-is.

        Reply
    29. Kimberly says

      January 22, 2020 at 1:23 pm

      This has truly inspired me to redo my girls’ bathroom starting now! One question, how much paint did you need to do the vanity?

      Reply
      • Kris Jarrett says

        January 28, 2020 at 12:47 pm

        I was able to get mine done using just a quart of paint!

        Reply
    30. Ali says

      February 22, 2020 at 12:49 pm

      Shows how small projects can have a huge impact! Love it!

      Reply
    31. Marian says

      March 31, 2020 at 10:36 pm

      Great tutorial… It gave me the confidence I needed and followed everything step by step. I wished I knew that it would only take less than 2 quarts to complete FOUR vanities! Would’ve saved a lot of money.
      Also I don’t think the roller was necessary. It seemed to put too much paint on. The one and a half inch brush was perfect and left a better finish! Thanks for all the other tips!

      Reply
    32. Maggie says

      April 05, 2020 at 1:37 pm

      Thank you for such great details! It looks beautiful.

      Reply
    33. Devin says

      April 05, 2020 at 5:09 pm

      How much paint did you use for this project?

      Reply
    34. Heather Marchant says

      April 15, 2020 at 11:27 am

      Hi, Love your tutorial. It looks great. Can you share with me where you got your cabinet knobs from, I LOVE them!

      Reply
    35. Paula Pentoney says

      April 15, 2020 at 2:15 pm

      Love the way the vanity came out! Thanks for all of your details snd helpful tips. Beautiful home! ?

      Reply
    36. April Brady says

      April 15, 2020 at 2:18 pm

      Hi. Did you not use a poly on top the the coats of paint?

      Reply
    37. Alison says

      April 18, 2020 at 5:43 pm

      Where are the knobs from? They are so cute!

      Reply
    38. Pat Farruggia says

      April 18, 2020 at 11:39 pm

      I am redoing my bathroom, and wash room would love any input that you have to help me.Can you use chalk paint to paint old cabinets in your wash room. I am trying to give it that rustic look.

      Reply
    39. Teresa Sullivan says

      April 28, 2020 at 2:38 pm

      The bathroom looks great! Where did you get the hardware?

      Reply
      • Kris Jarrett says

        May 07, 2020 at 10:10 pm

        It’s from Anthropologie but I got it several months back – I don’t think it’s available any more unfortunately!

        Reply
    40. Lauren says

      May 03, 2020 at 10:13 pm

      Thank you so much for this tutorial, it’s so helpful! We just bought a new house and have some vanities for paint. When do you recommend to use chalk paint versus regular latex paint? Do both hold up equally well in high humidity? I need something super durable because I have two young boys. Thank you!

      Reply
      • Kris Jarrett says

        May 06, 2020 at 11:04 pm

        I love chalk paint for certain things but wouldn’t recommend it for a bathroom vanity – it doesn’t hold up to the humidity as well.

        Reply
    41. Jenna Cautin says

      May 06, 2020 at 5:00 pm

      Thank you for the thorough instructions! I painting by bathroom vanity on Sunday! I went to put the doors on today and just touching the paint with my finger nail brought it up leaving a wood colored nick! Any ideas?

      Reply
      • Kris Jarrett says

        May 06, 2020 at 10:40 pm

        Depending on what paint you used, the time to full cure can be a few days or even a few weeks so I would take extra care with them for several days. But if you prepped and primed well it shouldn’t do that – mine still look like new after months of abuse from my kids!

        Reply
    42. Judy says

      May 07, 2020 at 11:57 am

      Kris, what a difference the paint made. It truly looks like a new bathroom. Even the floor looks better up against the white vanity.
      One thought: the screws holding the hardware are too long. Afraid your daughter may catch a finger reaching in the drawers.

      Reply
      • Kris Jarrett says

        May 07, 2020 at 10:04 pm

        You have a good eye and are so right! I couldn’t find the tool I use to cut off stems from knobs at the time of my post but rest assured, they were shortened not too long after 🙂

        Reply
    43. Heidi says

      May 09, 2020 at 6:36 pm

      have you considered painting or using contact paper on your countertop. Or painting your floor tiles? Would make a big difference and would be a great post!

      Reply
    44. Mandy says

      May 11, 2020 at 7:59 pm

      Where did you get your vanity top? I really like your colors and I would like to try and do it in my master bathroom.

      Reply
    45. Christine Clark says

      June 02, 2020 at 10:14 pm

      What grit sandpaper did you use on the primer?

      Reply
    46. Mandy says

      July 10, 2020 at 3:37 pm

      How much paint did you need to cover the a cabinet that size? Will one quart be sufficient or should i get a gallon?

      Reply
    47. Shannon says

      July 11, 2020 at 10:36 am

      Thank you for sharing this! Your instructions were so helpful during our bathroom remodel!

      Reply
    48. Trish says

      July 23, 2020 at 10:07 am

      It’s amazing what a little paint can do! I just finished doing this exact update in both our master bath and our kids’ bath. They look like totally different rooms now. We changed out everything from faucets to lighting to hardware to paint colors and linens. I used your guest bath and master bath photos for a ton of my inspiration! Love your blog and your insta feed!

      Reply
    49. Nobahle says

      July 27, 2020 at 11:30 am

      Eager to get more ideas. Superb

      Reply
    50. Deanna Titzler says

      August 06, 2020 at 10:48 am

      Thanks for the details! Very helpful. You mention painters tripods, but I didn’t notice those in the pictures. Can you share what they look like and how they were used? Thanks!

      Reply
    51. Lil says

      August 09, 2020 at 5:47 pm

      Brilliant tutorial, exactly what I needed

      Reply
    52. Carol H says

      August 19, 2020 at 7:53 am

      Yay!! So glad I saw your post! We are right now doing upgrade to our “Tuscan/Med” master bathroom. We have the same cherry like cabinets but dual, both with tall/wall cabinets on each side. We have the bossy granite and all travertine floors/showers/walls. I picked Alabaster for the walls and cabinets and trim and making the travertine the color in the room with the bossy granite. I am taking your advice and can’t wait to start!! This made my day today!!

      Reply
    53. lindsay says

      September 29, 2020 at 10:52 am

      This is SO HELPFUL KRIS! I’ve been gathering my supplies and getting ready to do my bathroom cabinets. Question for you – which liquid deglosser and sanding sponge do you use / recommend?

      Reply
    54. Michelle says

      October 03, 2020 at 2:22 am

      Lovely!!! Could you please link your new knobs? I love them!!

      Reply
    55. Ahmad says

      October 19, 2020 at 11:30 am

      This such a wonderful improvement! I have a similar wooden vanity that I am looking to renovate and this inspired me. Awesome to see how you got the girls involved in the project as well!

      Reply
    56. Jessica says

      October 21, 2020 at 11:03 pm

      This is so helpful! Also- where are the sheets/quit/bed cover from on the day bed in your bonus room?! I’ve been looking for something like that!

      Reply
    57. Lori O'Hare says

      October 22, 2020 at 4:57 am

      Thank you

      Reply
    58. Cel Leone says

      November 02, 2020 at 7:05 am

      I did not see that you caulked the outside front of the doors where the molding meets the flat part of the door. Yet the finish product has no gaps. I’ve watched a number of videos where they spray paint the doors and caulking was necessary. Is it just a difference between the thickness of the paint layers?

      Reply
    59. Amber says

      December 02, 2020 at 11:30 pm

      This looks amazing! I’m going to try this same look in my bathroom. How much paint did you use for your cabinets? Would a quart be enough? Thanks!

      Reply
    60. Dave Hesseldenz says

      December 12, 2020 at 11:35 pm

      Thank you. You gave me a push to go ahead and take on the project. I will hope mine is as nice as yours.

      Reply
    61. Anonymous says

      December 27, 2020 at 8:08 pm

      LOVE it!! Exactly what I needed guidance on for my bathroom re-vamps, so thank you! You should check out trimming your mirrors with cheap trim. Lots of ideas out there and can apply with hot glue or silicone caulk so they are removable! On my project list 🙂

      Reply
    62. Brenda Tustin says

      January 16, 2021 at 7:41 pm

      How do you paint laminate bathroom doors

      Reply
    63. Christine says

      January 22, 2021 at 1:17 pm

      I have the same exact marble top on my handmade vanity (made by previous owners)! I don’t LOVE it and it makes my extremely pink/brown bathroom more drab. I will be painting the vanity black and getting a white marble countertop vinyl stick & peel for my new black/white themed bathroom. Hopefully I can paint it as smoothly and aesthetically pleasing as you got yours!

      Reply
    64. Iris Day says

      February 04, 2021 at 10:36 am

      Wow. That came out beautiful. Thank you for all the tips and especially about using correct brushes and rollers. I bet your daughter loves her new bathroom. Did you make the tilt out under sink drawers or was the vanity already built that way? Such a cool utilization of normally unused space.

      Iris

      Reply
      • Kris Jarrett says

        February 05, 2021 at 11:11 am

        Thank you! The vanity was actually already built that way – it really is a great feature that I’ve never had in a vanity before!

        Reply
    65. SAMANTHA LARSEN says

      February 07, 2021 at 8:02 pm

      Hi. It looks beautiful!
      If my bathroom cabinets are already white (but I want to freshen them up with a brighter white, do I still need to sand and prime all that ? Can I just roll on some fresh white paint?

      Reply
      • Kris Jarrett says

        February 07, 2021 at 8:46 pm

        Yes unfortunately you’d want to still sand and prime or the new paint might not adhere to the existing paint.

        Reply
    66. Denise Wood says

      February 13, 2021 at 5:58 pm

      Amazing Kris! You have inspired me to tackle my laundry room. My cabinets are painted light blue, and I’d like to paint them white. Would the process be the same?

      Reply
      • Kris Jarrett says

        February 13, 2021 at 10:19 pm

        So glad you got some inspiration from this post! Yes, you’d follow the same steps for your laundry room – good luck!

        Reply
    67. Brigid says

      February 21, 2021 at 2:00 pm

      Thank you so much for this detailed post! I’m using all the supplies you’ve recommended to paint my vanity but was wondering if I need to wash the paint brush in any special way once I am finished with the primer before I paint with the emerald paint?

      Thank you!

      Reply
      • Kris Jarrett says

        February 21, 2021 at 4:27 pm

        Hi Brigid – assuming you use a water-based primer like either of the two I recommended, just rinse your brush with water really well to get all of the primer off before using it to paint with.

        Reply
    68. Anthony Holbrook says

      February 25, 2021 at 7:12 pm

      I have a honey oak vanity. The finish has quite a bit of texture. I have been told that the texture will always show. Will I be able to have a smooth paint job on it or will the texture still show?

      Reply
      • Kris Jarrett says

        February 25, 2021 at 8:02 pm

        If you’re able to sand them until they’re smooth then it will be smooth after painting but if you’re starting with a textured surface, the texture will show through the paint.

        Reply
    69. Ron Holtz says

      March 23, 2021 at 7:58 pm

      Your cabinets look great. Nice job. I have done our main bath cabinets and am now in the process of doing the master bath cabinets. I have to say, great minds think alike because all of the steps you outlined are exactly what I did and it came out beautiful. My wife even thought so! We changed out hardware and will be changing light fixtures too. It’s amazing what a couple hundred dollars will do for a bathroom makeover. I also built a frame around the main bath mirror and painted it the same color as the cabinets. Awesome look. Thanks for the info here.

      Reply
    70. Kevin says

      March 27, 2021 at 9:02 am

      Looks great and thank you for your thoughtful approach to describing the steps you did. Very easy to follow, I just finished my vanity thanks to you. Another nice update on a budget is a frame around mirrors like yours. I’m sure some can diy it, but we bought some from mirror mate and they look great and really make the space look nice.

      Reply
    71. Lisa says

      March 27, 2021 at 12:44 pm

      Help! Almost completed the project…exactly as described, using the same products. Was drilling holes for new pulls on last (only) drawer and the paint peeled off the entire drawer front-trying to attach pic but can’t . What did I do wrong??

      Reply
      • Kris Jarrett says

        March 27, 2021 at 8:22 pm

        Lisa did you use a bonding primer like I mentioned or just a general paint primer? If you used a bonding primer, sanded, and allowed for adequate dry time between coats, you shouldn’t have that issue.

        Reply
    72. MAI NHU says

      March 30, 2021 at 1:18 pm

      How long do you let the cabinet door to dry before you paint the other side?
      Thanks

      Reply
      • Kris Jarrett says

        March 30, 2021 at 9:25 pm

        It depends on the exact paint you use and the temperature/humidity but I let mine dry overnight (you might want to wait 24 hours in a humid environment) before flipping them to paint the other side.

        Reply
    73. Stacy says

      April 01, 2021 at 10:33 am

      I painted my bathroom vanity when we moved into our new home and it made a world of difference! Love the light shade swap-out…such a huge improvement. Thanks for sharing.

      Reply
    74. Stephanie says

      April 14, 2021 at 6:41 pm

      Excellent tutorial! I followed step-by-step, and my two master bath vanities turned out beautifully! I ended up having to do three coats on the brushed areas (I probably didn’t have enough paint on the brush), but that was minor. I don’t think I would have gotten such great results without your guidance; thank you!

      Reply
    75. Mimi says

      April 17, 2021 at 2:44 pm

      Kris, thank you so much for your detailed instructions for this “new kid on the block” @painting! Because of you, I’m now in the process of painting my bathroom cabinets (white!)..Ive found your tips SO helpful! I’ll be so proud I’m sure of this accomplishment because of you!

      Reply
    76. LaShawn says

      April 22, 2021 at 5:31 pm

      Do you have to use an individual primer or can you use a paint with a primer?

      Reply
      • Kris Jarrett says

        April 23, 2021 at 12:55 pm

        You definitely want to use a separate binding primer followed by paint. The 2-1 paint with primer won’t give you the adhesion you need for painting furniture…

        Reply
    77. Sue Harris says

      April 28, 2021 at 4:07 pm

      Thank you so much for your help. We’re taking it slow and trying to get it right. I am so glad I read this it was extremely helpful

      Reply
    78. Jan Thompson says

      May 25, 2021 at 7:12 pm

      I really like your instructions and recommendations! I want to paint the small bathroom cabinet in our Spanish style home. The bathroom is the only room that doesn’t go with the style of the house. It has white and tan tile and the cabinet is painted white but in desperate need of a refresh, and I want to rustic it up a bit without having to change the tile. I want to paint the cabinet the tan color of the tile but add a dark brown glazing over it to give it a more rustic look. I would then have to add a clear coat on it, correct? I’ve never painted cabinets before so I’m a beginner and would appreciate any advice!

      Reply
      • Kris Jarrett says

        May 25, 2021 at 10:45 pm

        Hi Jan – your house sounds lovely! I haven’t experimented with glazes on furniture or cabinetry so I’m not sure about topping it with a clear coat. If you’re just painting and are using a high quality paint, you don’t need to finish with a clear coat but you can if you think they’re going to really be taking a beating. Good luck!

        Reply
    79. Nancy says

      May 27, 2021 at 1:41 pm

      Thanks so much for the details. I am in the middle of painting an ugly built in desk and bookshelves in our large stair landing. The walls are Aesthetic White and I painted the desk Soft White. It was so glaring! white, I’m redoing it with Aesthetic White. I don’t love it either, looks dingy in the corners and shadows of the bookshelf. Aesthetic White was a compromise, I wanted Alabaster. And I forgot the label the doors and drawers, I know better too.
      I just keep telling myself it’s all an adventure.
      I really appreciate your blog, it’s a lovely combination of common sense and beauty.

      Reply
    80. Liz says

      June 11, 2021 at 2:34 pm

      I just finished painting our ugly old bathroom vanity and it made such a huge difference!! I really appreciated the level of detail in your blog post. I followed it to the letter. Mine didn’t come out perfectly — it was my first attempt at a project like this — but it is so much better. Thanks!!

      Reply
    81. Judy says

      June 17, 2021 at 5:20 pm

      Outstanding tutorial and just what I needed to get motivated to paint a vanity ! I am gathering my materials and tools but before beginning, I’d like to know how your has held up since you posted in March?

      Reply
    82. Carole Caldwell says

      June 28, 2021 at 3:17 pm

      Your step by step instructions were just what I needed to begin my painting project to give my laundry room walls and cabinets a face lift. Thank you.

      Reply
    83. Angel says

      July 04, 2021 at 11:54 am

      I was wondering about replacing because of color and then it hit me wait ink can repaint them and I stumbled on your blog… seems easy enough. I have a question though how did you remove and replace the stuck drawers that go under the sinks ?

      Reply
      • Kris Jarrett says

        July 04, 2021 at 5:36 pm

        The drawer fronts under our sinks weren’t actually glued in place – they were on hinges so that they can pivot out to hold some toiletries. If yours are the typical drawer fronts that are immobile, you’d need to just paint them in place.

        Reply
    84. Anita says

      July 26, 2021 at 4:14 pm

      A very beautiful transformation and was clearly just what I needed. I have exact same cabinets in master bath. Wondered you did not use sealer. And reason? Awesome job! Thanks for sharing.

      Reply
    85. Stevie says

      July 31, 2021 at 8:23 pm

      Love this DIY! I’ve got to update a second bathroom and it has an older wooden vanity . I thought about replacing it but it’s good quality compared to what’s sold now ( chipboard). What it needs is to be refreshed like yours! Great tips Thanks for sharing !

      Reply
    86. Jen says

      November 23, 2021 at 6:58 am

      Loved this makeover! Equally loved the warm paint color on the bathroom WALL. What was it? Thank you!!

      Reply
    87. Amanda Shaver says

      December 02, 2021 at 9:00 pm

      Loved this!!! Im a beginner in this remodel world so i have a question:
      Did you use the primer then the Emerald Premium and then the Alabaster color? I`m a little confuse in this step! Thank you so much!!!

      Reply
    88. emily says

      March 20, 2022 at 2:58 pm

      very informative post 🙂 I moved into an older home and because of the huge cost now of new bathroom vanities (plus made of cheap materials) I am planning on painting mine and replacing the top with a quartz top. Only issue is my vanity is probably only 31″ high and friends have told me I should get a new taller one. I am rather tall myself but frankly didn’t realize mine was short. Am I crazy to renovate it?

      Reply
    89. Tara says

      March 06, 2023 at 11:25 am

      Hi. Thank you for posting this. Did you also repaint the beadboard and trim to match the cabinet color?

      Reply
    90. Laura A. Peterson says

      December 16, 2023 at 1:17 pm

      I Googled how to paint a bathroom vanity and this was at the top of the results. Thank you after reading this article I don’t find the task of painting our 2 vanities impossible for me to accomplish. Very detailed instructions. Wish me luck!

      Reply
    91. Cassidy Ng says

      January 22, 2024 at 1:47 am

      This is so helpful, thank you! Also, where did you get that great wallpaper design?

      Reply
      • Kris Jarrett says

        January 23, 2024 at 11:17 pm

        Glad it was helpful! The wallpaper is from Serena & Lily here (commissionable link): https://rstyle.me/+9cqUCmMCZ0hp9TyOMAPklA

        Reply
    92. Anonymous says

      February 01, 2024 at 9:32 am

      i never comment but this was the most perfect “how to” article i’ve ever read. i appreciate all the links and step by step info.well organized and presented!

      Reply
    93. Michelle says

      February 01, 2024 at 10:31 am

      Did you consider swapping out the mirror as well? Personally I like large mirrors in bathrooms but seems the trend lately is to have a framed mirror (or two)! Curious as to your thoughts on bothering with it. Love the new look by the way 🙂

      Reply
    94. Rose says

      February 22, 2024 at 5:05 pm

      Thank you so much for this awesome tutorial! The instructions were clear and detailed and I’m so excited about my freshly painted bathroom vanity! 🙂

      Reply
    95. Christen Colon says

      June 19, 2024 at 9:07 am

      So pretty and fresh!! The knobs/pulls though, where are they from? Gorgeous. We’re moving to the coast and I love your style girl!

      Reply
      • Kris Jarrett says

        June 29, 2024 at 12:44 pm

        Thank you! Those were from Anthropologie but unfortunately they no longer carry them 🙁 Good luck with your move!

        Reply
    96. Patricia says

      August 01, 2024 at 11:17 am

      Kris,

      I always look forward to your e-mails. The information in your e-mail could not have come at a more appropriate time for me, I have bathroom cabinets that need attention. As soon as the weather starts to cool down that will be my next project. Thank you.

      Patricia

      Reply
    97. Alex says

      November 14, 2024 at 2:40 pm

      This is incredible! The room looks so different than when you started. I never would have thought about simply replacing the glass shades on the lights. I have a new light fixture picked out, but if I can save money and just change those out, I’m all for that! I was wondering, how has the paint held up with any moisture? That’s the biggest thing I’m worried about when painting my bathroom vanity. Thanks for sharing!

      Reply
    98. Marysa says

      April 27, 2025 at 3:20 pm

      This looks so good! I have a cherry vanity that is very similar to yours that I would like to paint gray, although now that I read your tutorial, I really like the white! Our bathroom has a similar color countertop as well, so I am inspired!

      The bathroom is very small with no natural light, so I really feel like the lighter the better. This looks wonderful and you did a great job; I am impressed how great it looks without any noticeable brush strokes etc. The sheen of the paint is just right as well.

      Reply

    Primary Sidebar

    ✉️FREE EMAIL SERIES ✉️

    5 Secrets to Reinventing Your Home on a Budget

    Simple tips to instantly transform five rooms in your home!

    Meet Kris

    Photo of Kris Jarrett

    Follow Me

    • Facebook
    • Instagram
    • Pinterest
    All images on DBD are copyrighted and taken by me unless otherwise noted. If you'd like to use any of my images, please request their use via my Contact page.

    I am a participant in several affiliate advertising programs (including the Amazon Associates program) and earn fees from qualifying purchases. For more information, see my full disclosure statement {here}.

    To view my privacy policy, go {here}.

    Copyright © 2025 · Driven by Decor