Making a beautiful tassel is easy with this simple step by step DIY tutorial!
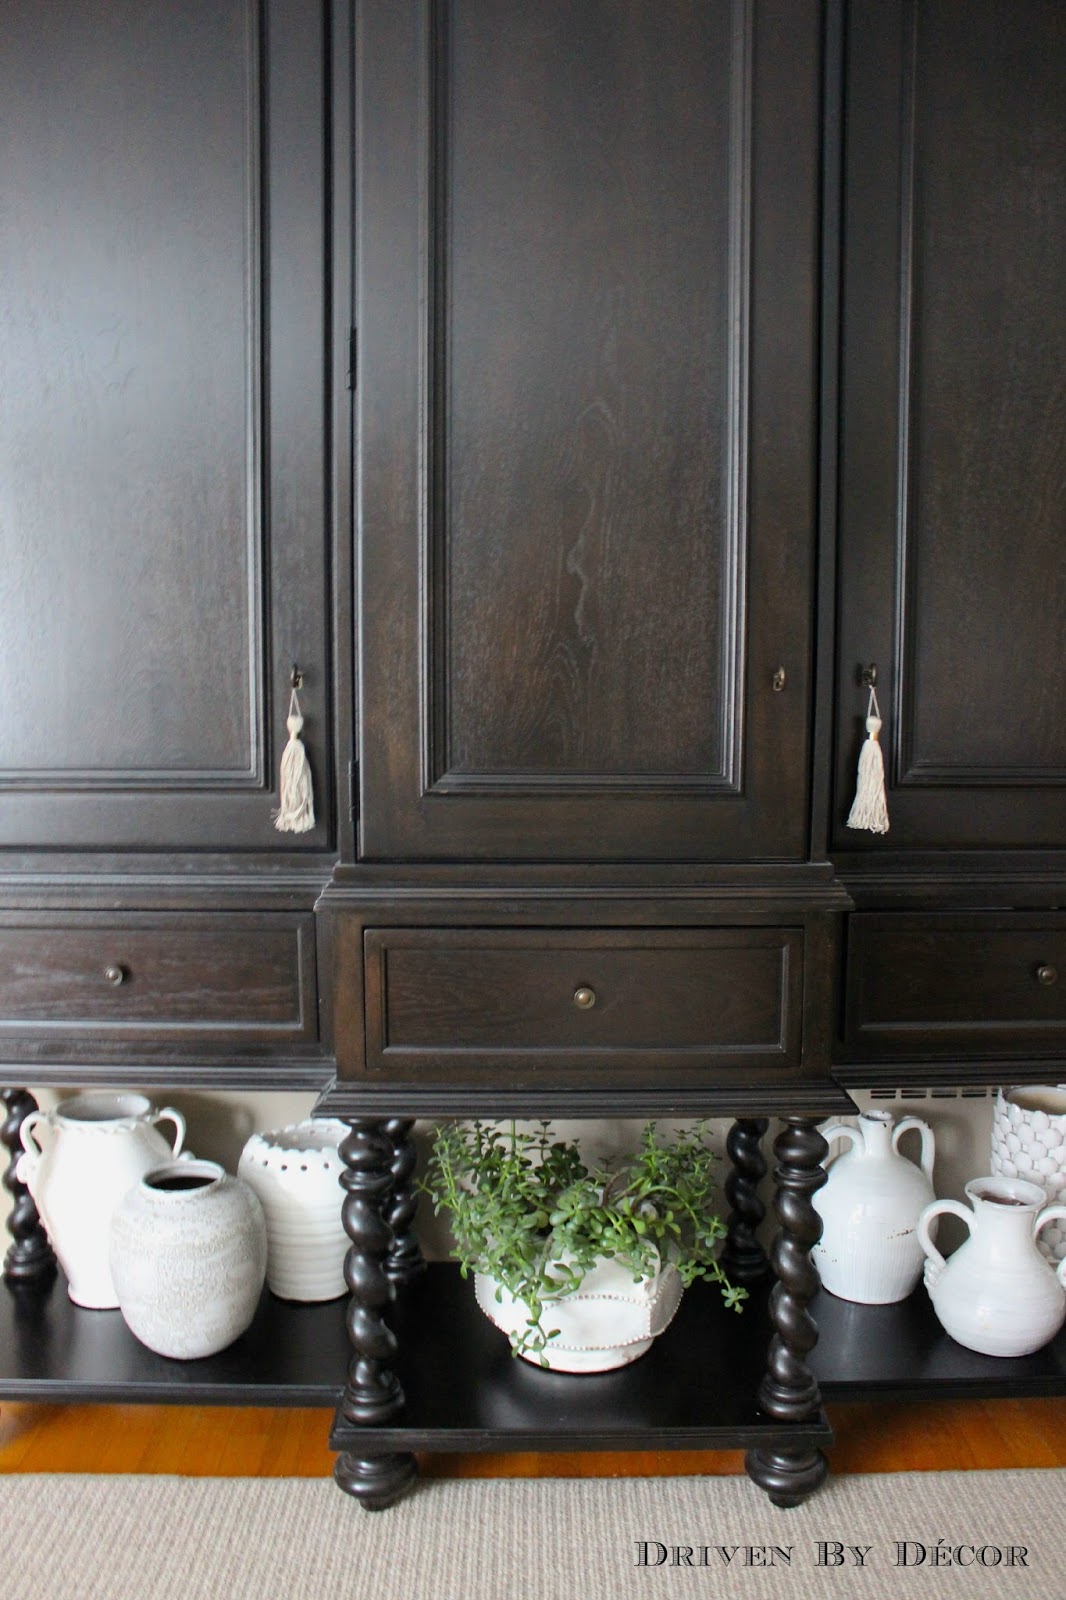
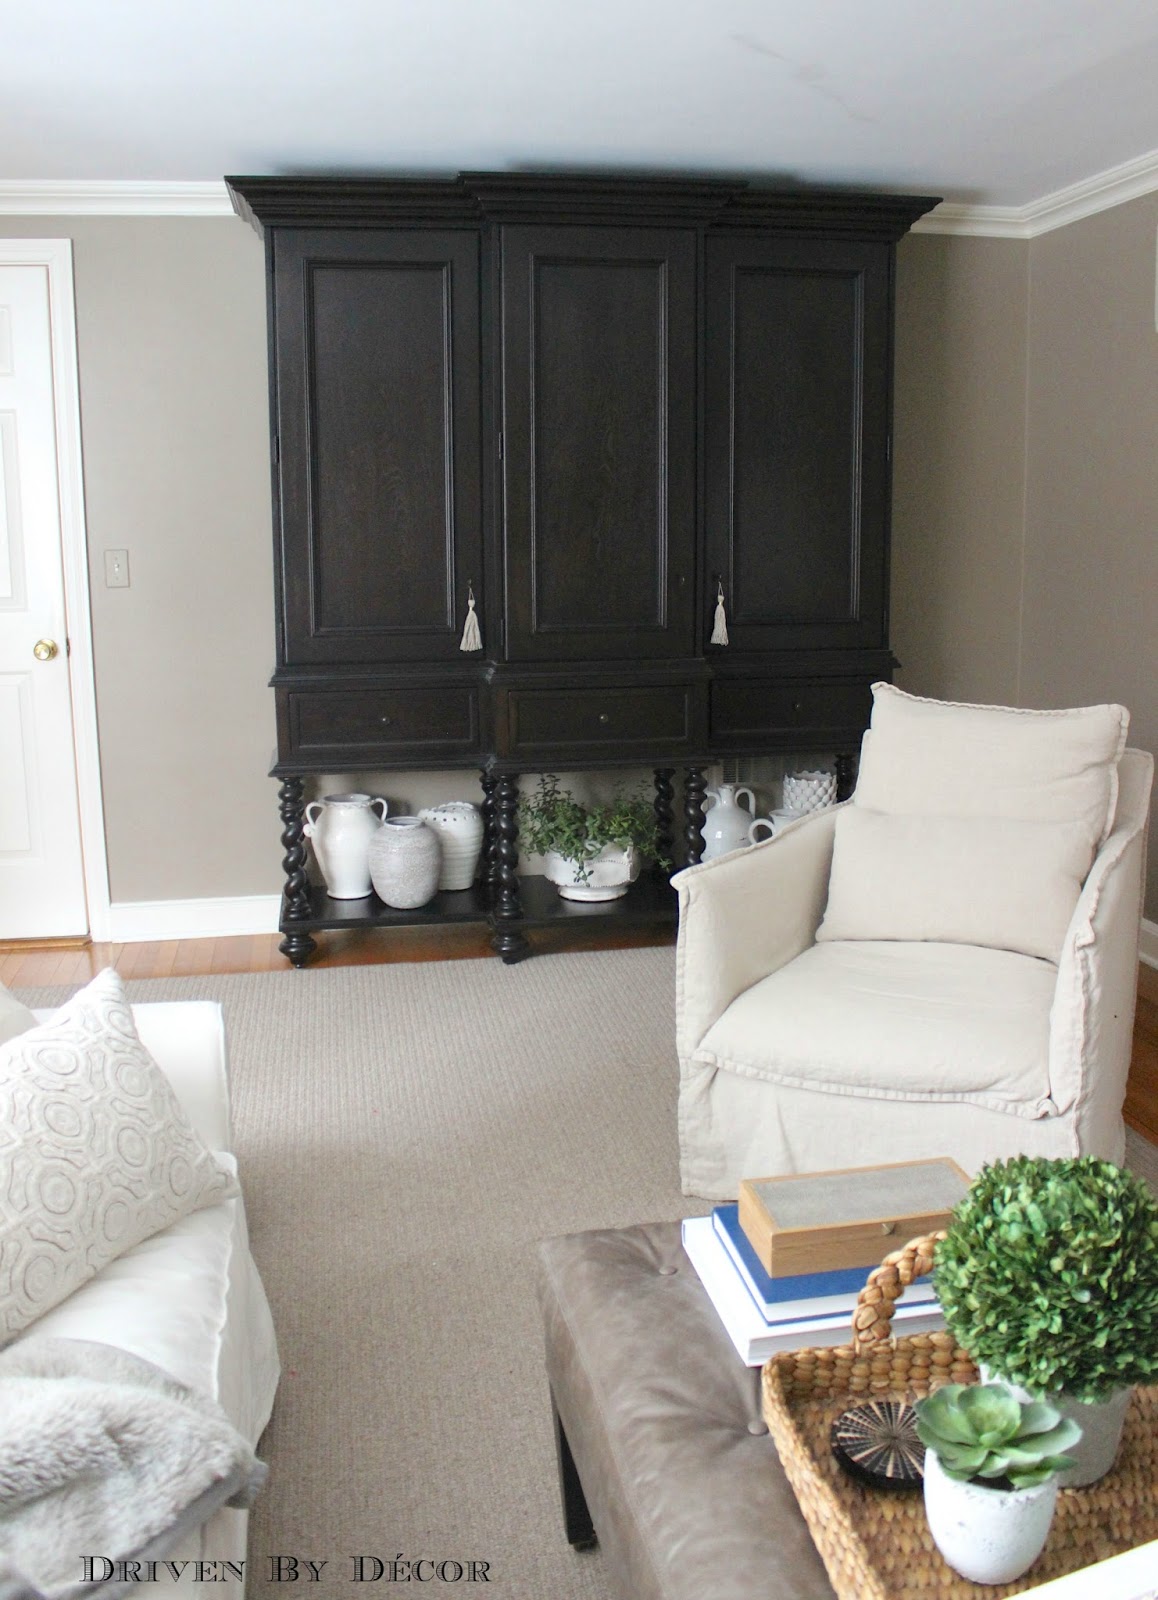
One of the details that I love most about my living room armoire is that the upper cabinet knobs are actually metal keys inserted into little keyholes. They aren’t very noticeable unless you’re get up close so I thought it would be fun to add a tassel to the keys to make it stand out. Since all of the pre-made tassels that I found looked like they belonged in the house of a cute little old lady who loves doilies and fake flowers, I figured out how to make my own! It was simple – I’ll walk you through how to make a tassel step by step!

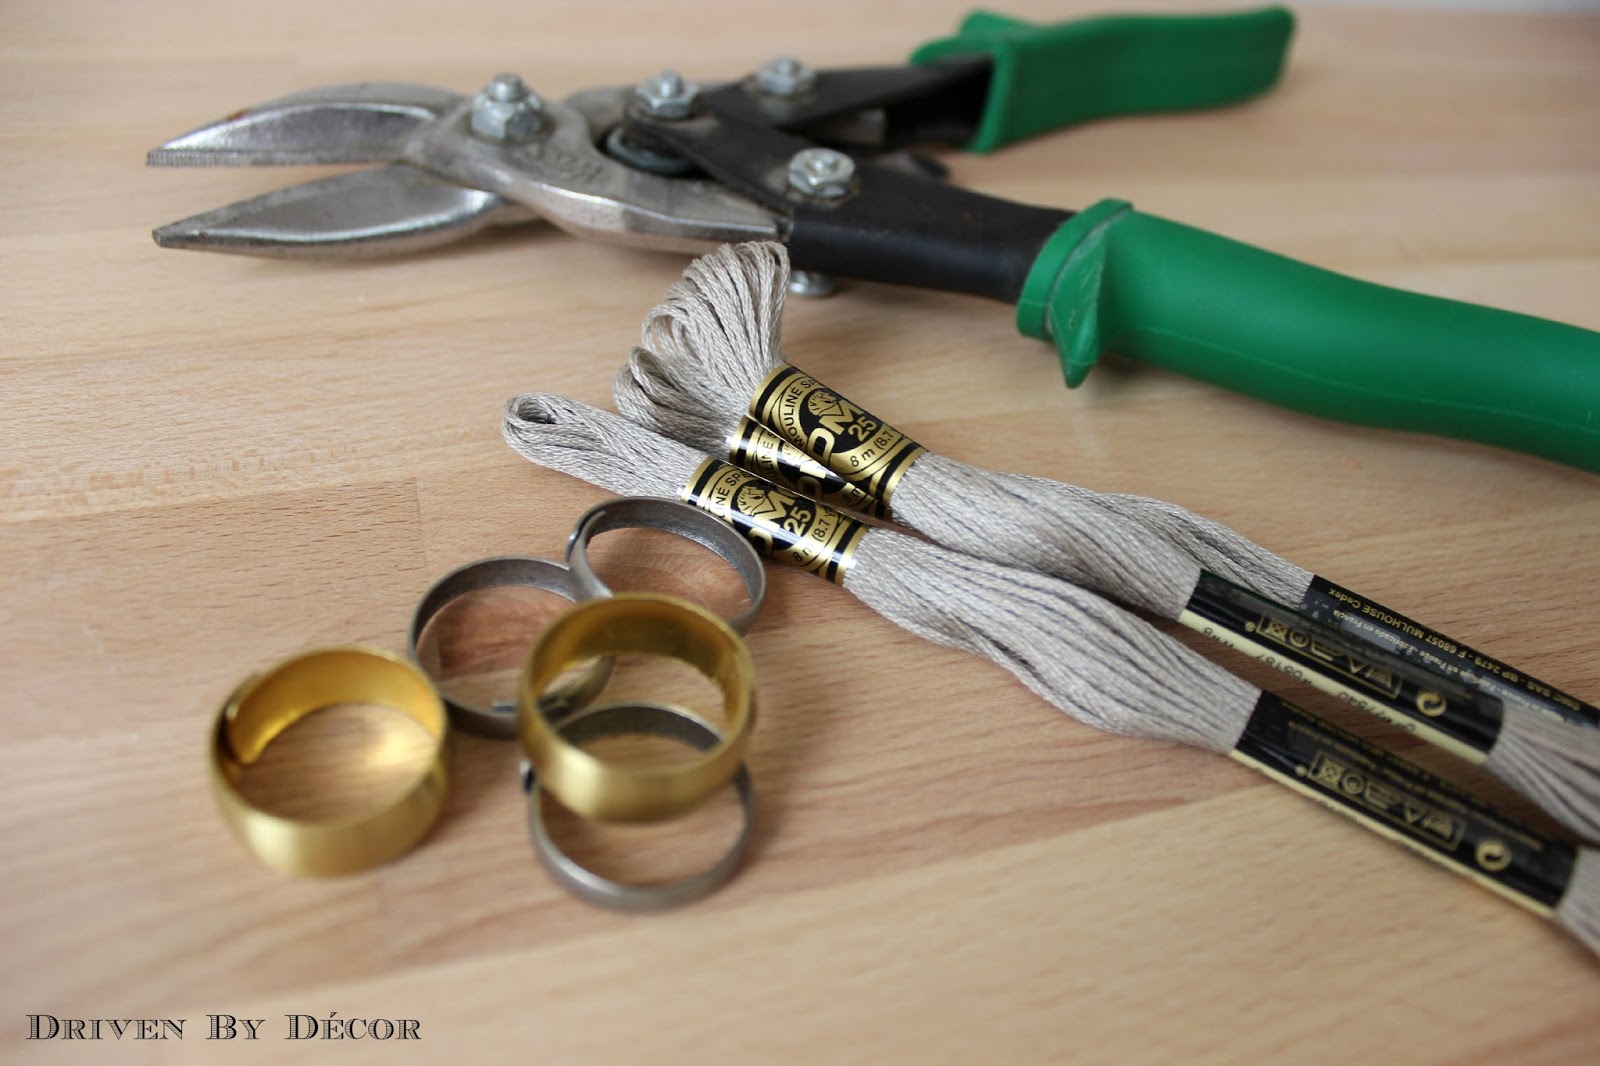
Step 1: Gather Your Supplies
I chose embroidery floss for making my tassels because there are tons of colors to choose from, it’s cheap, and half the work in making a tassel is already done because it comes bundled in even loops. I made each tassel with three 99 cent packs of embroidery floss, an adjustable metal ring (if you don’t want the metal accent, you can skip it!), and a wire cutter ({this wire cutter} is a highly rated inexpensive option) if you’re going with the metal band.
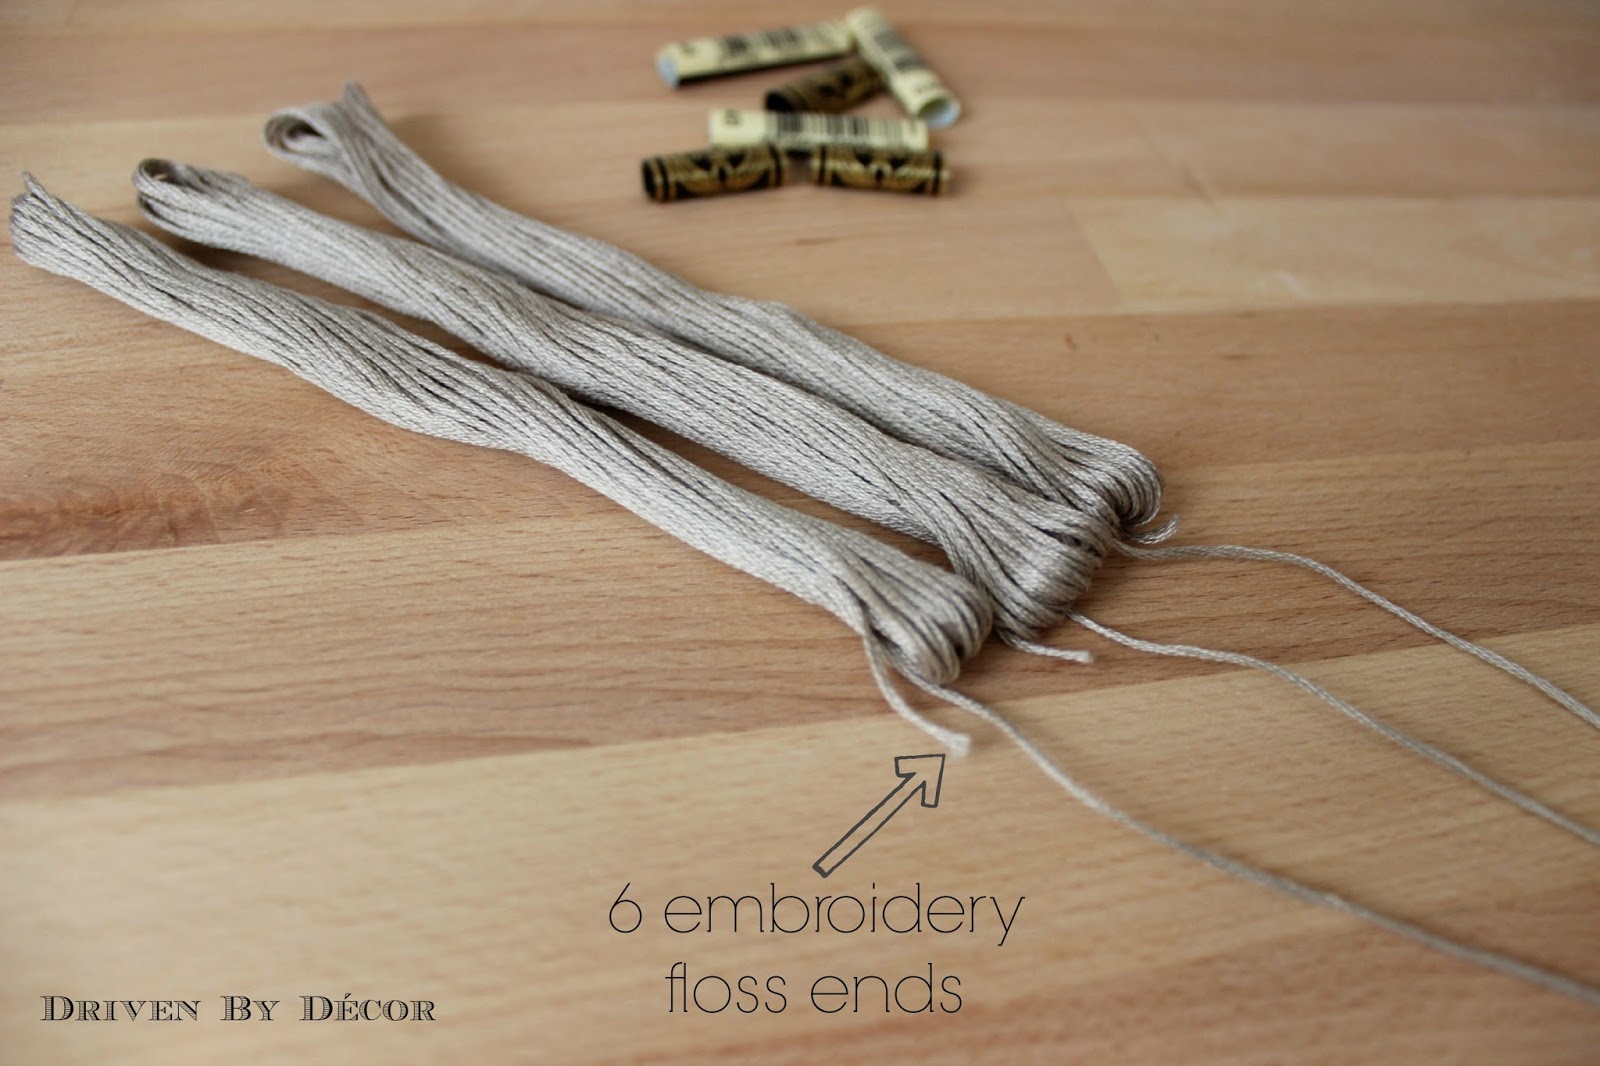
Step 2: Cut Your Embroidery Floss
Take the paper sleeves off the embroidery floss and cut about two yards of floss off of one of the packs – set it aside to use later. Line up the three flosses and put all six of the loose ends toward the bottom. Cut off the three long loose ends to make them about even with the short ones.
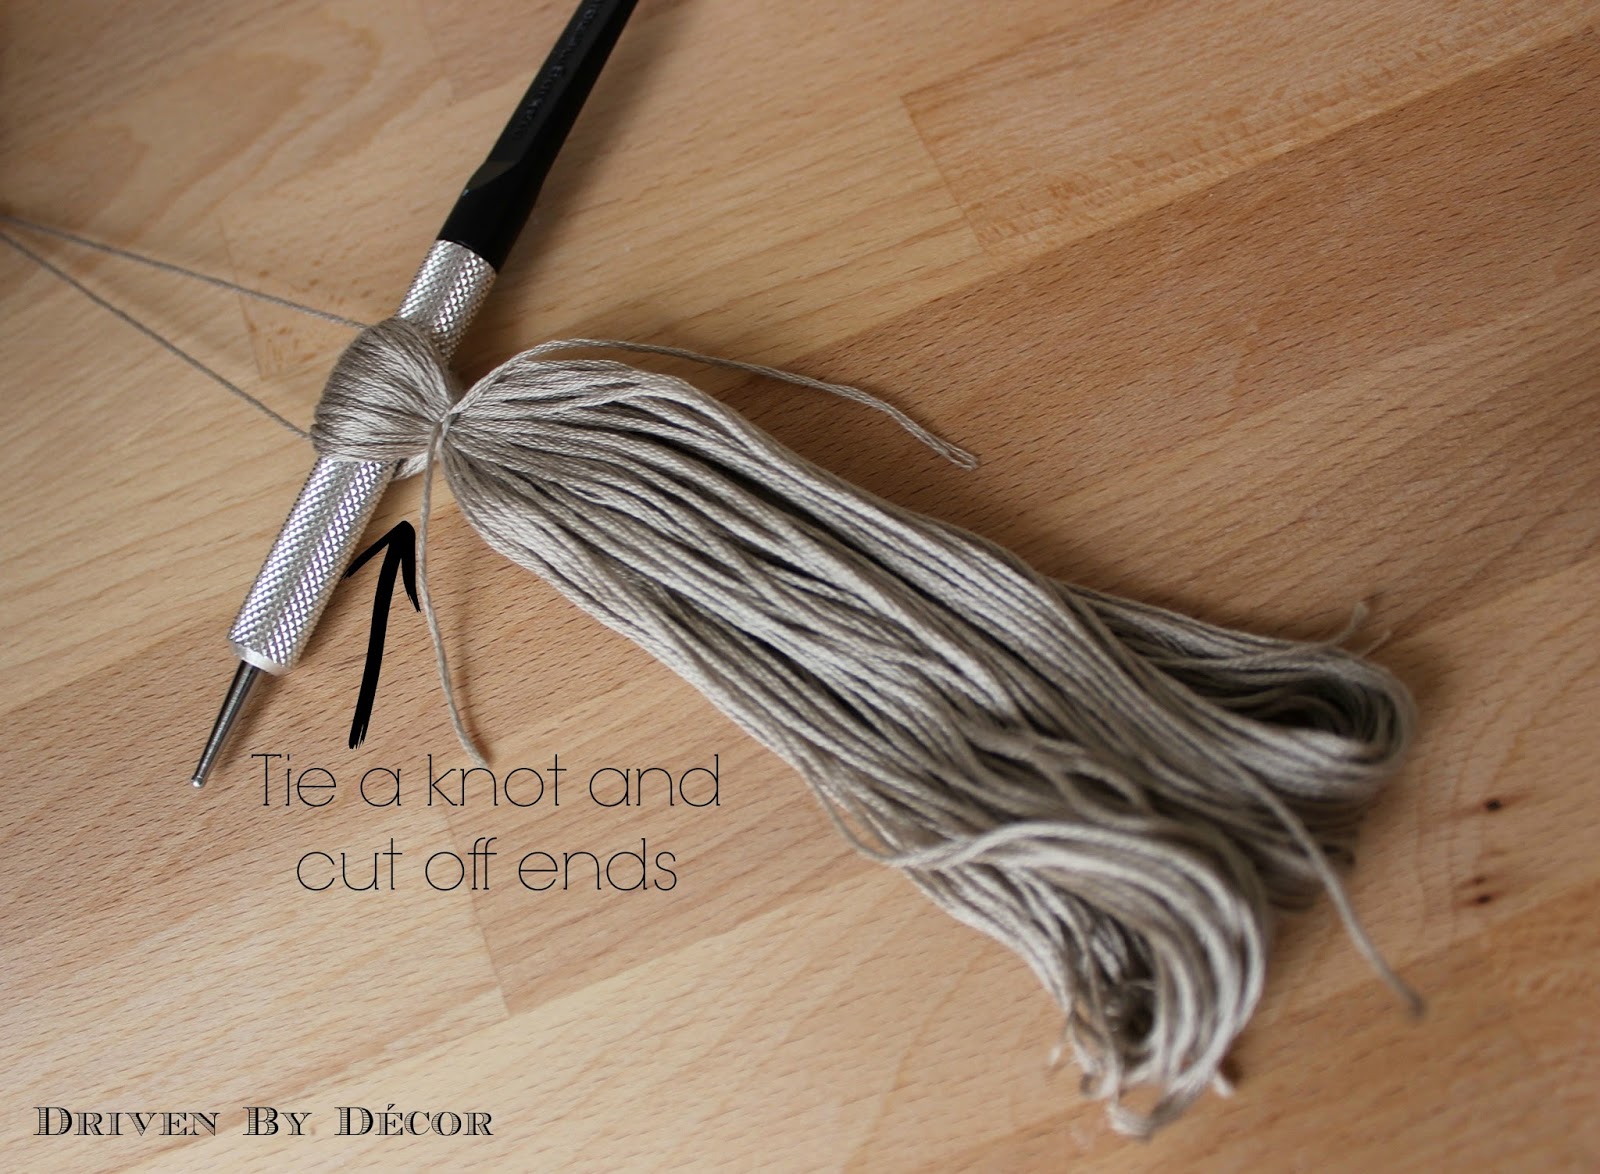
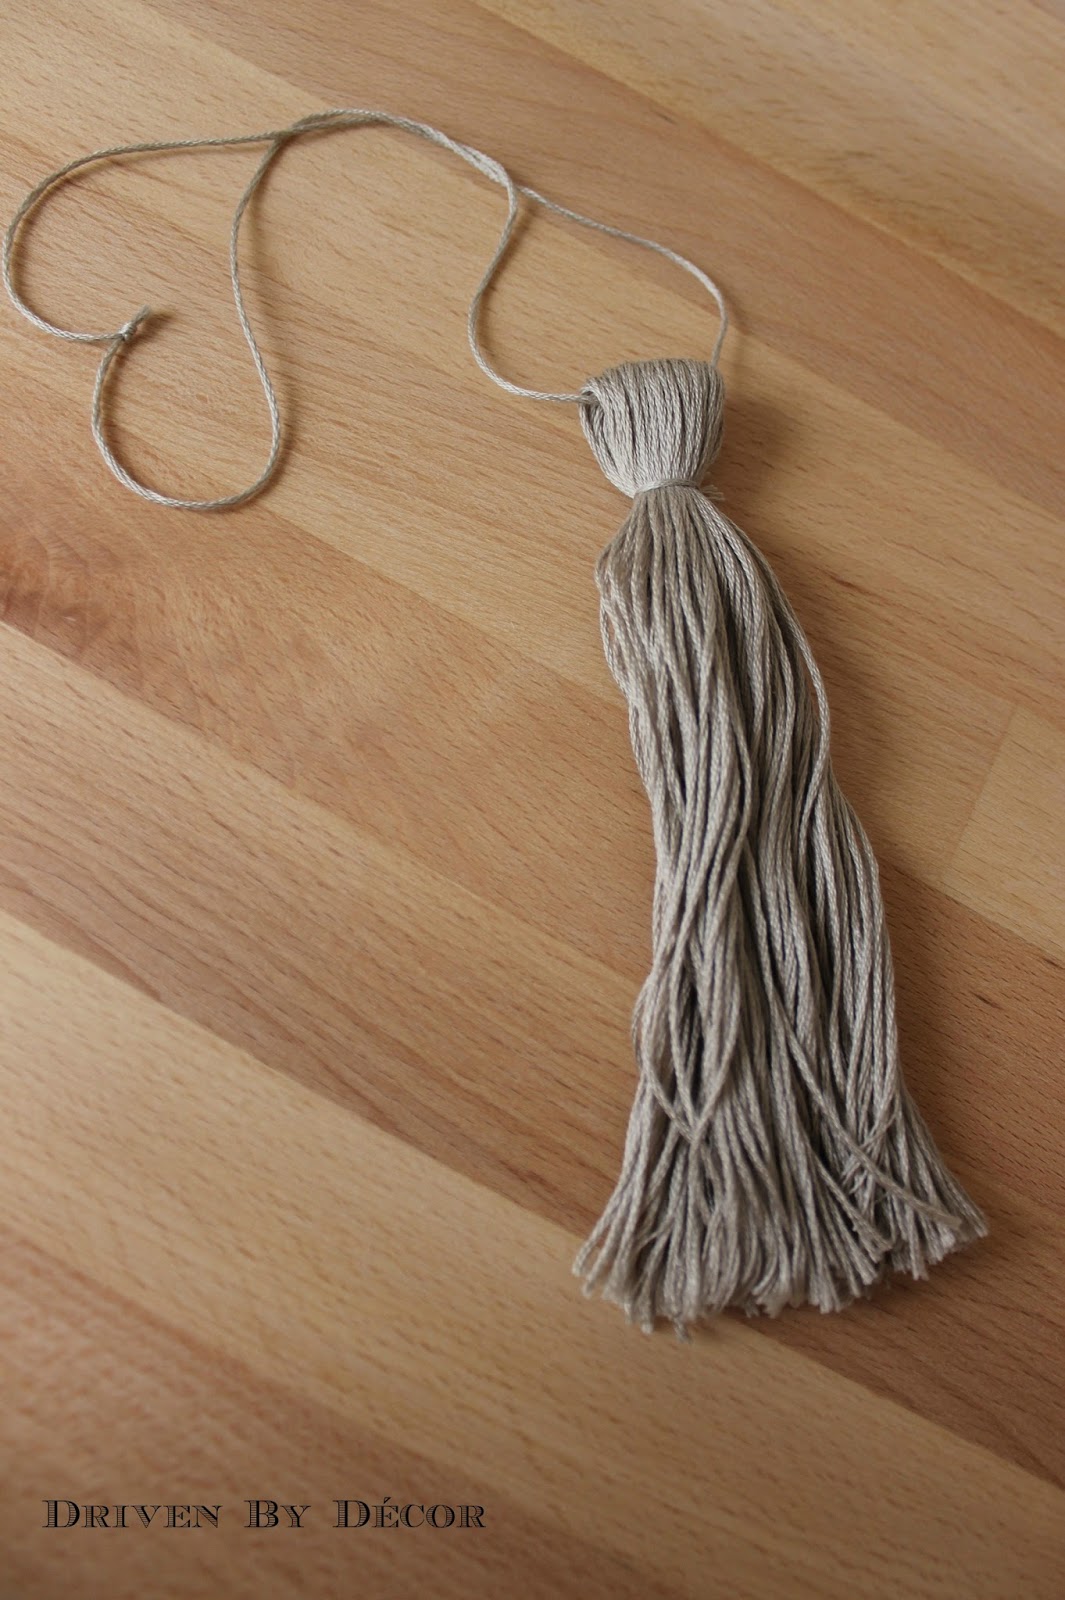
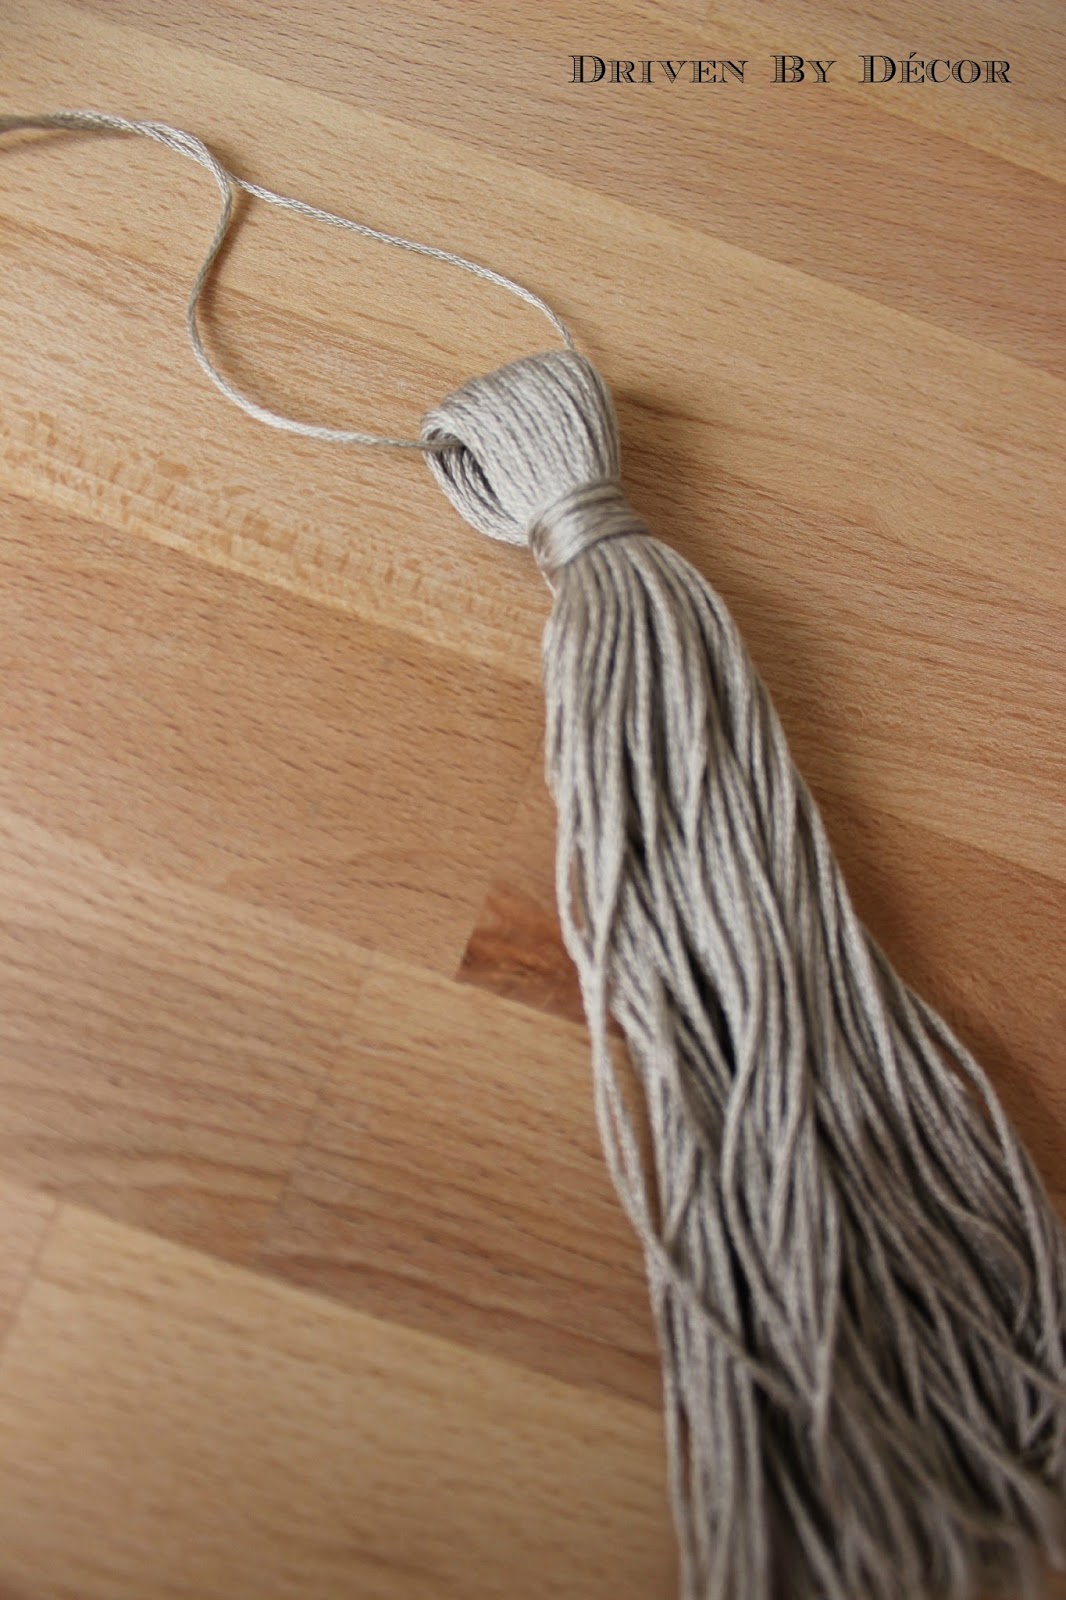
Step 3: Create Your Tassel Hanger
Next, find something that’s a bit fatter than a pencil (I used a scrapbooking tool but you can use a wooden spoon, skinny magic marker, etc.) and stick it through the loops of floss at the top. Then cut off a piece of floss (about 18″) from the two yard piece you set aside and run it though the top loops, tie it in a knot, and cut off the excess at the top of the knot to create the tassel hanger. You can always shorten the length of the hanger later if needed.

Step 4: Create the Tassel Top
While pulling the tassel hanger taut, use a small piece of embroidery floss to tie a knot as shown. Cut off the extra floss close to the knot.
Want to save this post?
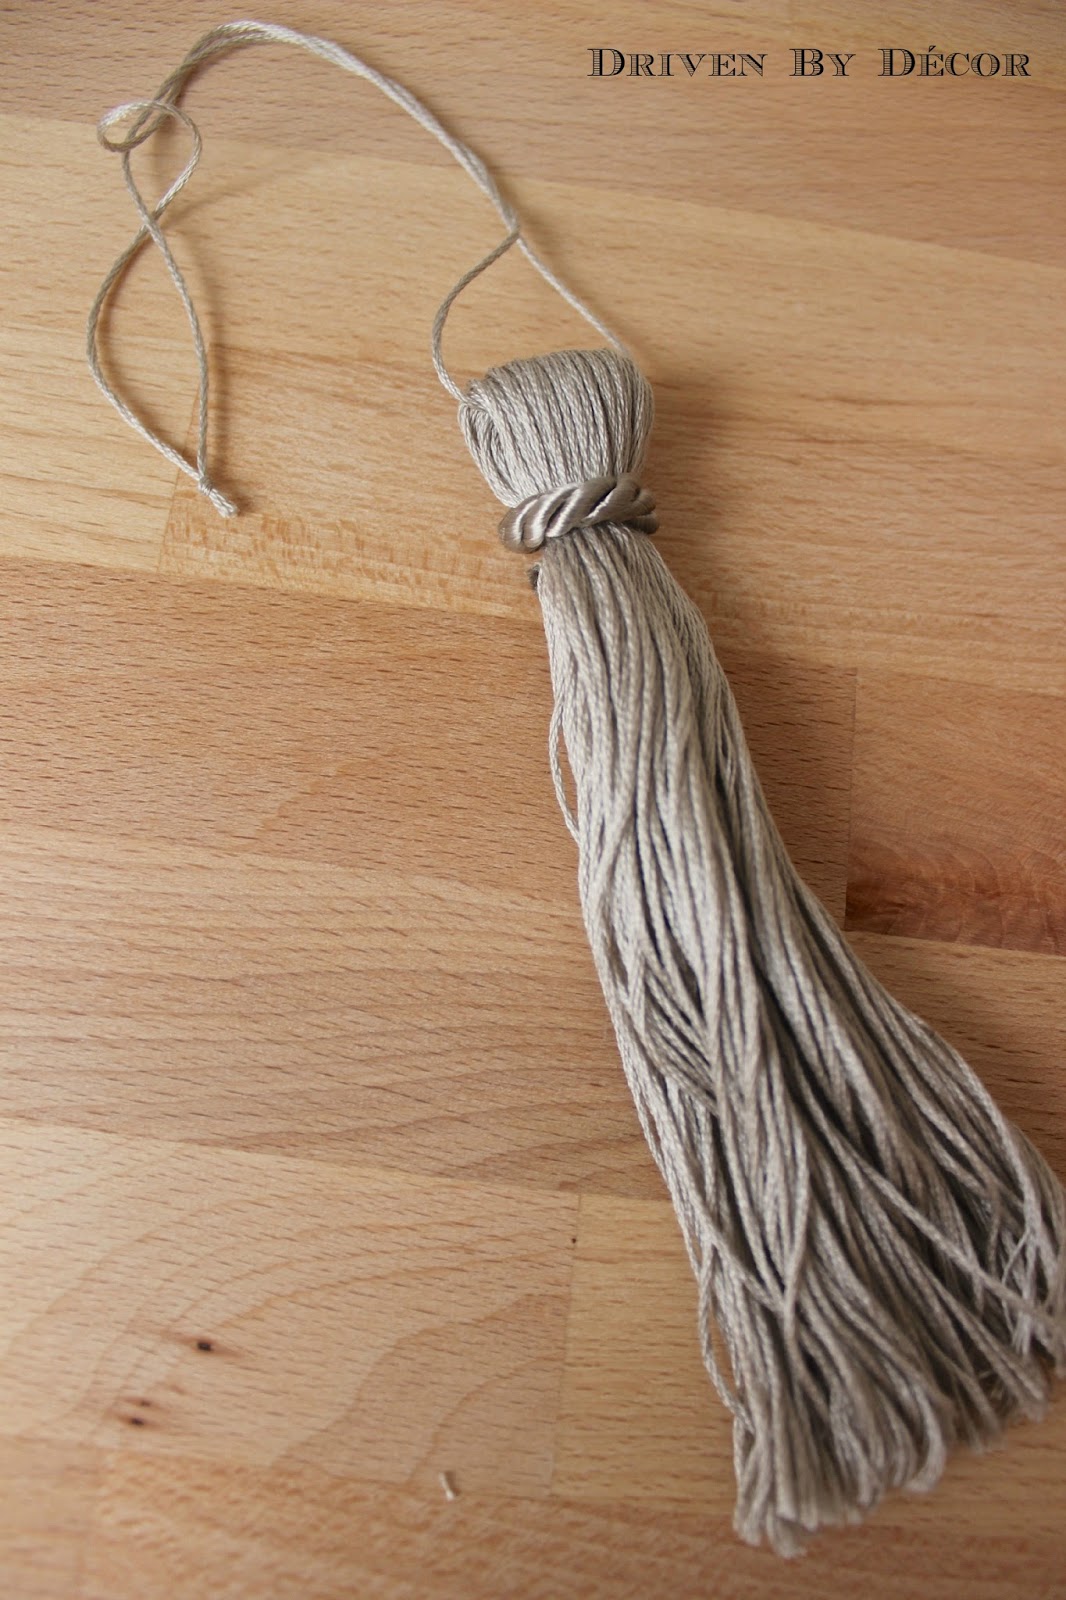
Step 5: Finish off the Bottom of the Tassel
Remove your round tool from the top loops and then snip the loop at the bottom with scissors:
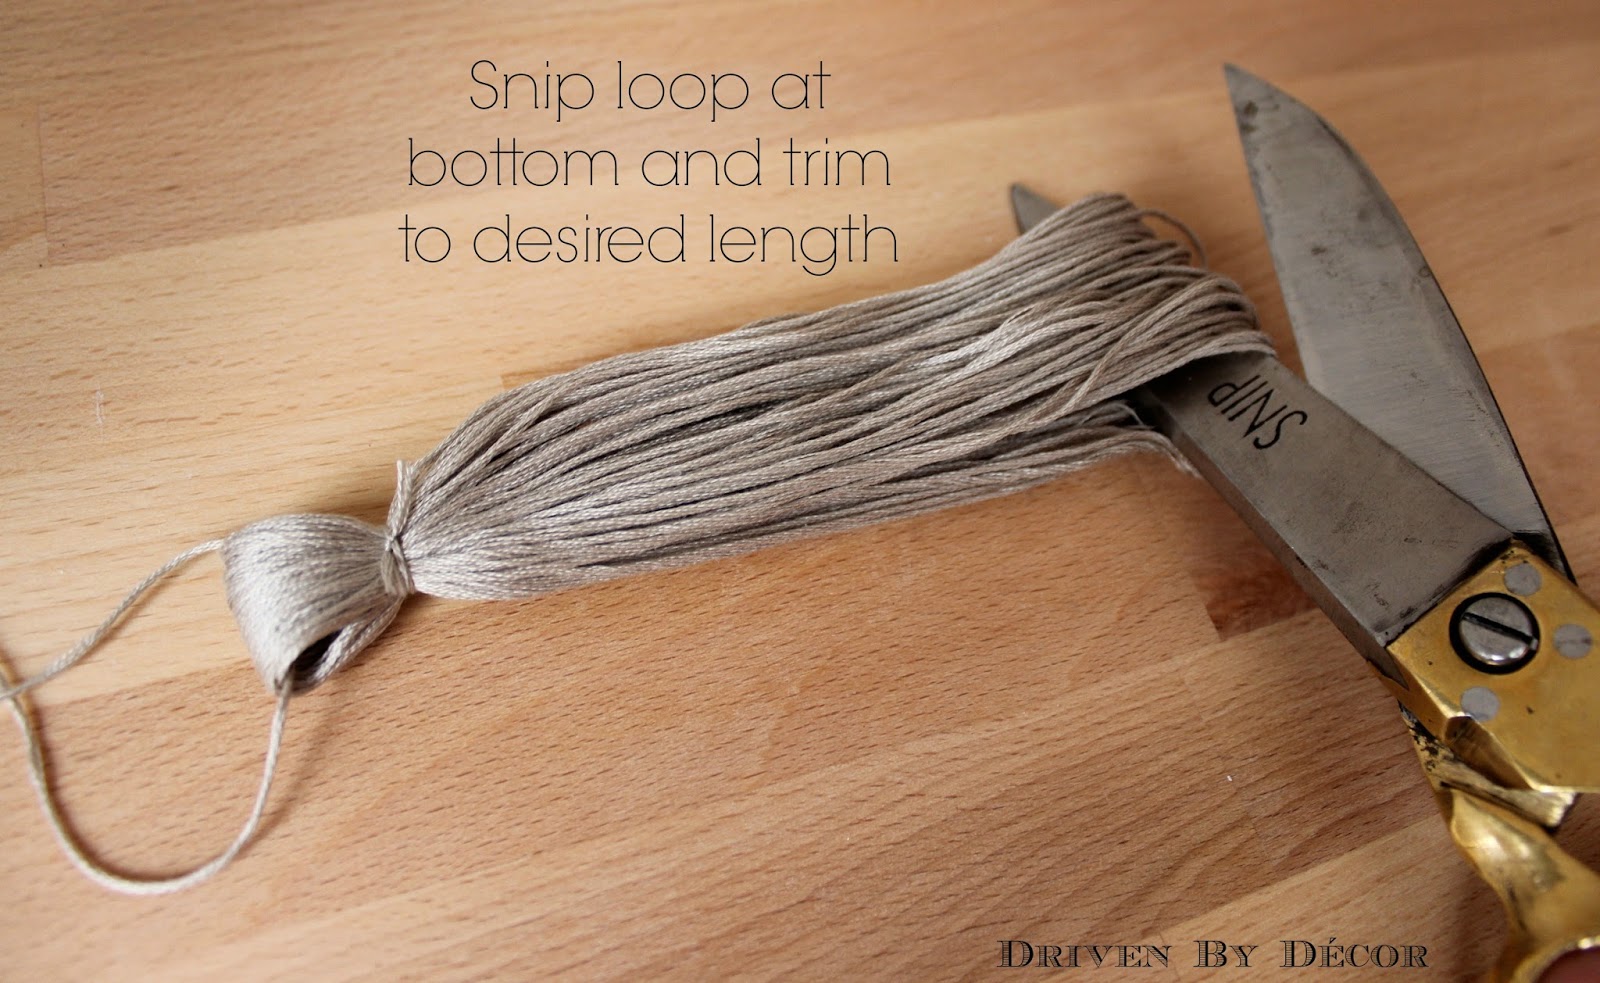
Trim the bottom to the length that you want your tassel to be:
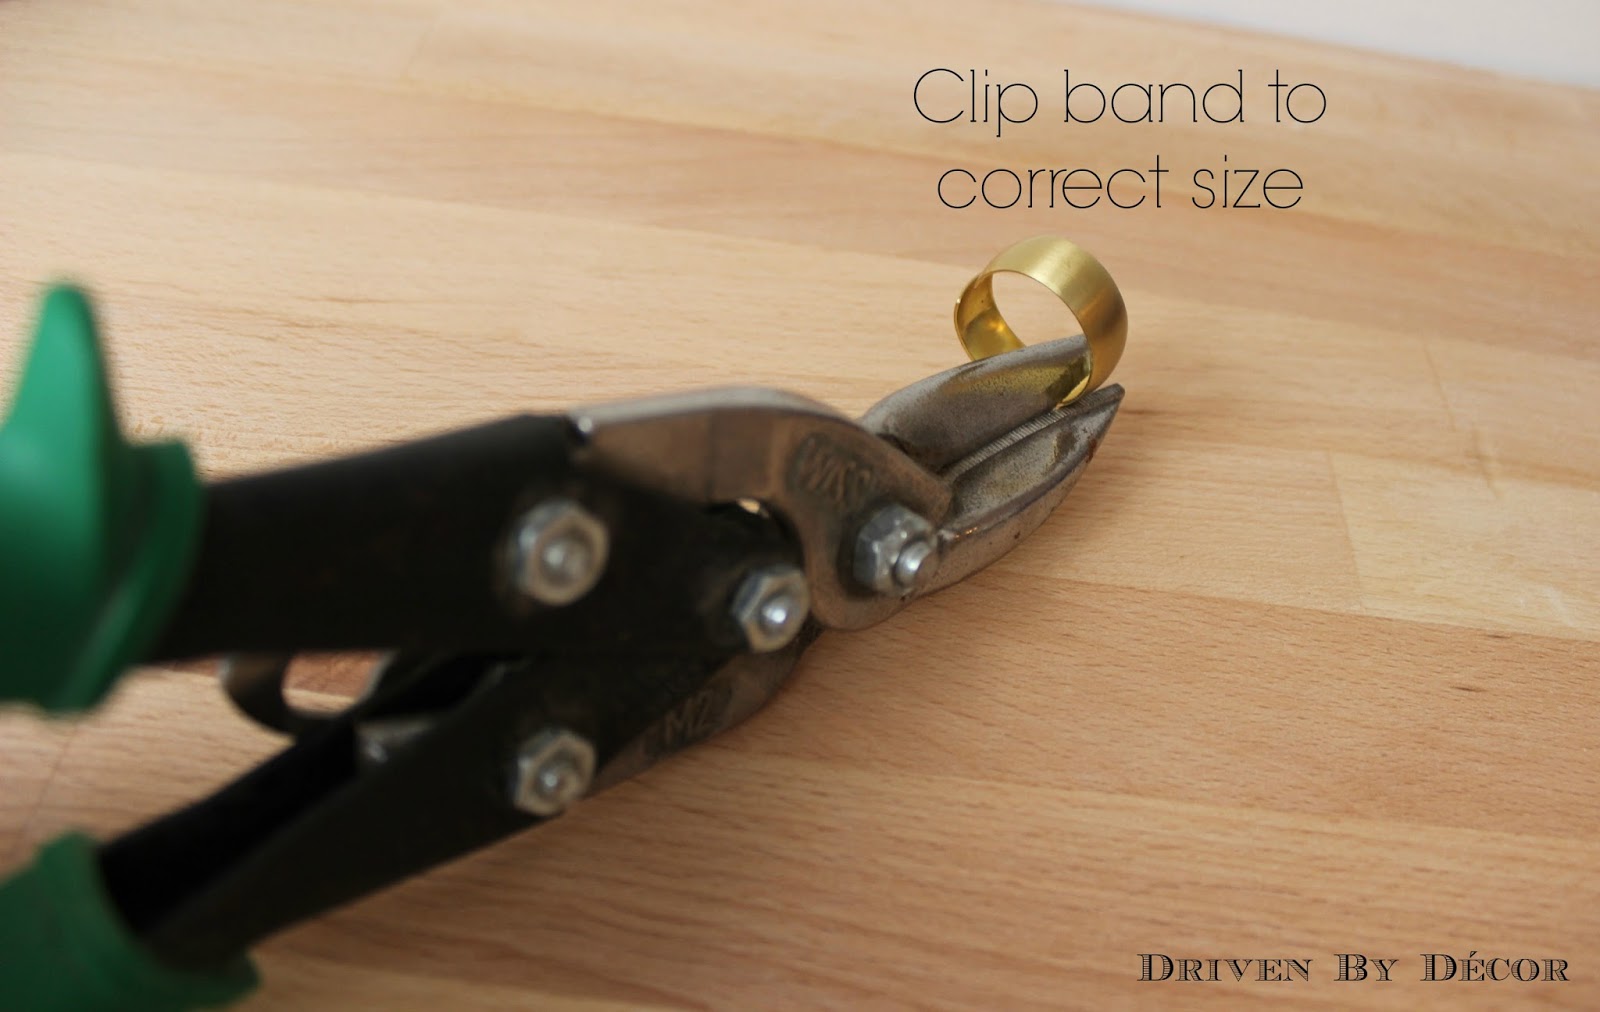
Step 6: Wrap the Metal Band Around It
The only adjustable rings that I could find were a bit large, so I used wire cutters to cut a little over an inch off of the band before bending it around the tassel. Beware – once you cut the band, the cut edge will be sharp so handle carefully! If you have little ones who may be messing with your tassels, I would recommend filing the sharp end.
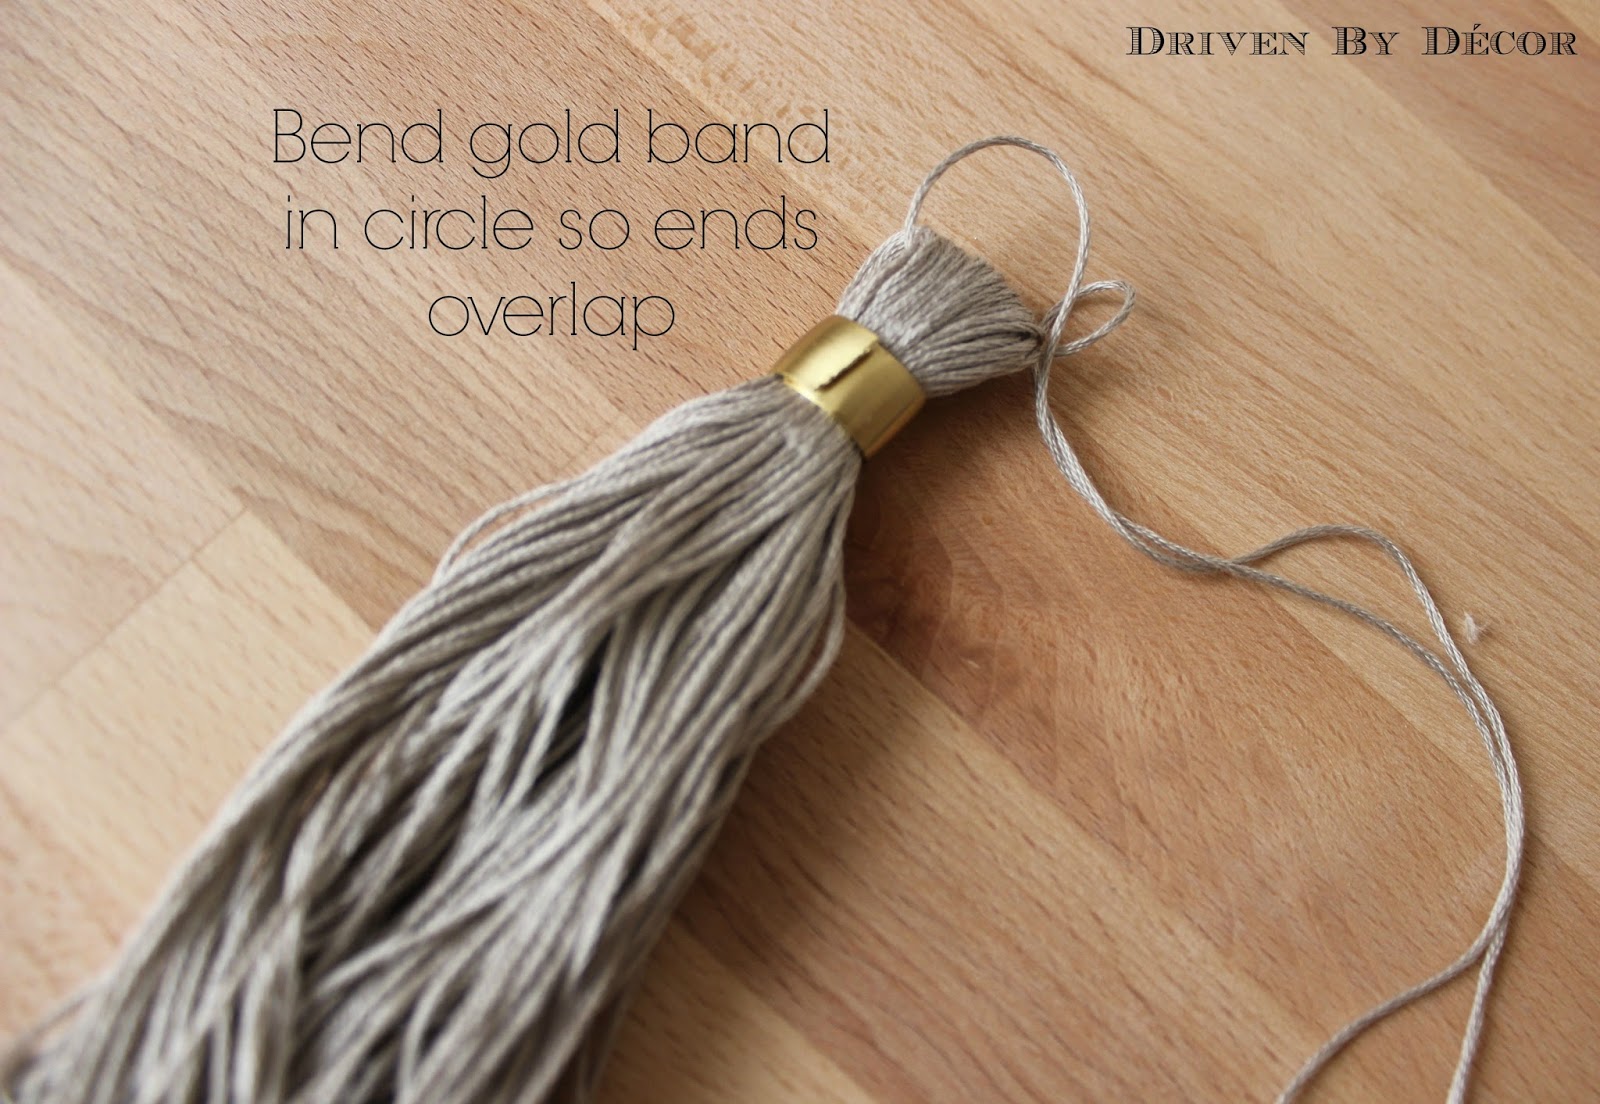
Finally, bend the adjustable ring in a circle around the tassel so that the ends overlap in the back (bend the cut end around the tassel first and then bend the finished end over top of it).
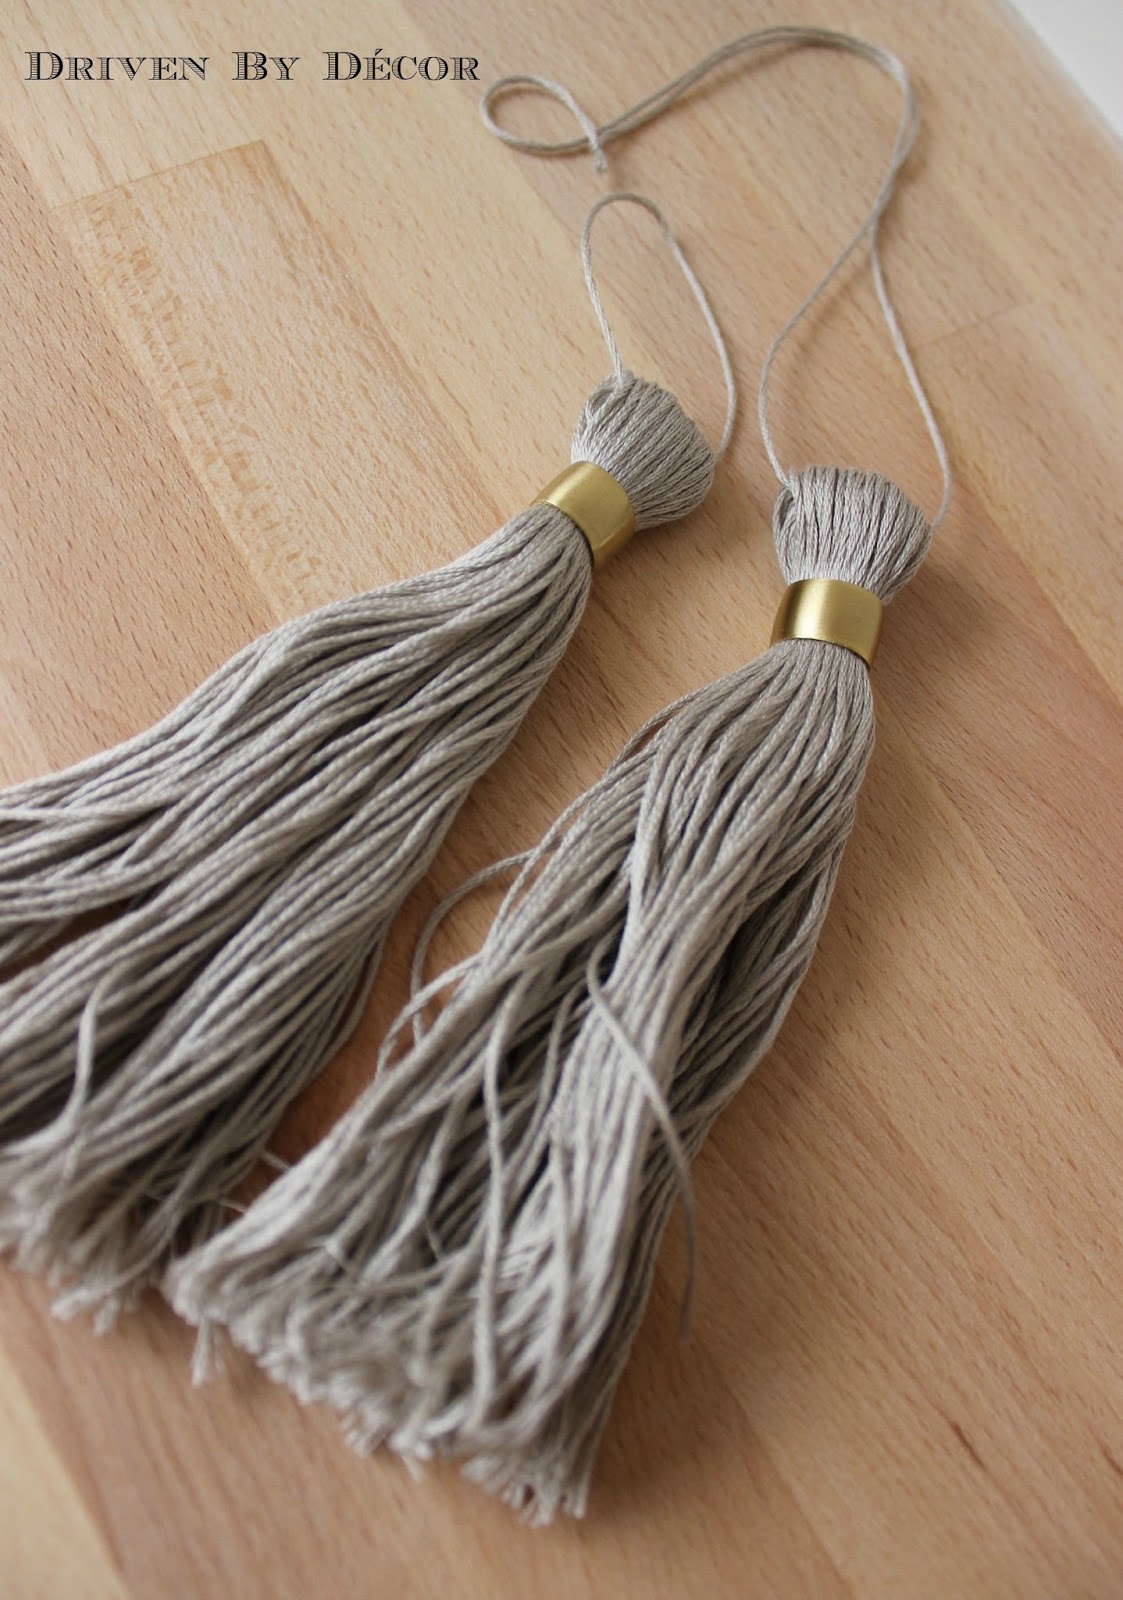
or find a fun piece of cord or trim to wrap around it:
 I love the little added touch of whimsy it brings to my china chest:


Debby says
Love tassels and your instructions are the best I’ve seen. I tried making them out of cotton yarn and they are too big. Thank you
Vel Criste says
Fabulous again! Love the simplicity of your projects Kris!
Becky {This Is Happiness} says
Love that piece too…especially the open bottom on it. Your tassels are perfect…not cute old ladyish at all 🙂
Carla @ Inside Home Living says
They do look really cute and finish it off!
Elizabeth @ The Little Black Door says
I love it! So easy even I could do it. 🙂 And I love that piece. Thank god it fit!
Linda {Calling it Home} says
That is the easiest tassel tutorial I have seen. I love the color against the dark piece of furniture. I can’t imagine what you would have done if it did not fit into your room. Such a pretty piece of furniture.
Crissy @ House of Marlowe says
I wouldn’t part with that piece either! Is it painted black on the inside too? Love your clever and pretty tassels.
Kris @ Driven by Décor says
Thanks so much Crissy! It’s actually a dark espresso stain and the inside is the same as well. Definitely my favorite furniture find ever!
pam {simple details} says
The perfect detail!! I love the contrast and your white pottery below. Oh my gosh, I bet you were beside yourself thinking it may not fit – whew!!
Lisa @ Shine Your Light says
Kris, that is an absolutely gorgeous piece of furniture – I love it!
The tassels are such a pretty detail and such a great idea to use embroidery thread!
therelishedroost says
Love it, what a fun idea, you are so creative!!
Tattered Treasures - Danelle says
Cute, cute, cute!!! That added a little bling to your cabinet. I’m the same way. There are a few pieces I will NEVER get rid of or never paint, and one is my oak antique china hutch that is probably about 150 years old. It is the really pretty OLD oak! Thanks for sharing.