
• Skip to primary navigation
  • Skip to main content
  • Skip to primary sidebar
  • Home
  • Home Tour
    • Master Bathroom
    • Kitchen
    • Kitchen Eat-In Area
    • Family Room
    • Living Room
    • Home Office
    • Laundry Room
    • Master Bedroom
    • Craft Room
    • Dining Room
    • Garage
    • Guest Room
    • Guest Bathroom
    • Patio
    • Powder Room
    • Teen Blue & White Bedroom
    • Teen Boho Chic Bedroom
  • Projects
    • Room Remodels
    • DIY Projects
    • Decorating Tips
    • Cleaning
    • Organizing
  • Subscribe
  • Shop My Faves
  • Instagram
  • About
    • Contact
    • Meet Kris
    • FAQs
    • Media
    • Disclosure
    • Privacy Policy

Driven by Decor logo

menu icon
go to homepage
subscribe
search icon
Homepage link
  • Home
  • Home Tour
    • Master Bathroom
    • Kitchen
    • Kitchen Eat-In Area
    • Family Room
    • Living Room
    • Home Office
    • Laundry Room
    • Master Bedroom
    • Craft Room
    • Dining Room
    • Garage
    • Guest Room
    • Guest Bathroom
    • Patio
    • Powder Room
    • Teen Blue & White Bedroom
    • Teen Boho Chic Bedroom
  • Projects
    • Room Remodels
    • DIY Projects
    • Decorating Tips
    • Cleaning
    • Organizing
  • Subscribe
  • Shop My Faves
  • Instagram
  • About
    • Contact
    • Meet Kris
    • FAQs
    • Media
    • Disclosure
    • Privacy Policy
    • Facebook
    • Instagram
    • Pinterest
  • ×

    Updated: Apr 15, 2020 by Kris Jarrett

    A Simple DIY Cabinet Update With Pergo

    So my friends, it’s official. One room in our house is D. O. N. E. done! It’s our dining room and the last item that I crossed off of my to-do list was lining the back of our built-in china cabinet:


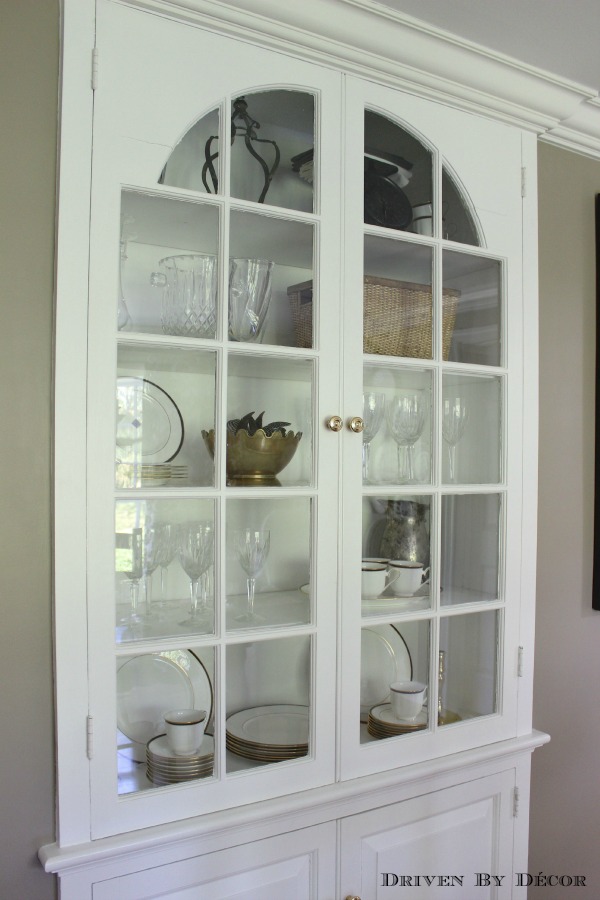
    As you can see from the “before” pic below, our china cabinet is very simple, has some New England charm, and didn’t necessarily need to have anything done to it. But the crystal and white china stored inside faded into the white background and I wanted to add a backdrop that would allow them to stand out more while also adding some warmth and decorative interest to our room. 
    I’d been planning this little project for months and was originally going to use barnwood to line the cabinet back. I found a great barnwood source, spent over an hour going through all of the wood to pick out my pieces, and then had the guy total my cost up only to find that it was going to cost over $200. So I left empty-handed.

    Want to save this post?

    We'll email this post to you, so you can come back to it later!

    I considered other materials, including pallet wood, wood panelling, and grasscloth wallpaper but ended up with something totally different – I’ll show you what I used and what I did with it! (post includes affiliate links – see my full disclosure statement {here}) I ended up going with this:
    Yep, Pergo. I fell in love with the tones of the Grey Yew Pergo (samples are available in Home Depot stores but it is an online-only product found {here}) and one $53 case was enough to cover my entire cabinet back.
    Installation was pretty simple. We cut each Pergo board to the width of the cabinet and then added four strips of double-sided Duck Tape (bought on Amazon {here}) to the back. (You could also use Liquid Nails or some other type of glue adhesive but I wanted to use something that would cause less damage if I chose to remove the Pergo in the future)
    The first board was placed at the bottom of the cabinet and then we worked our way up from there. The Pergo boards interlock with each other so there are no visible gaps between the boards (sorry for the grainy iPhone pic!):
    The final board needed to be ripped lengthwise as well as being cut widthwise to fit the remaining space. I’m really happy with how it turned out:
     
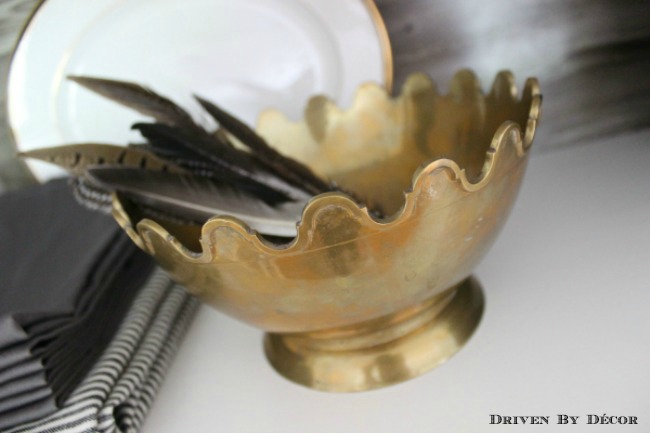
     I love this scalloped gold bowl!
     

    I also changed out the small brass knobs on the glass cabinet doors to 8″ oil-rubbed bronze pulls (Restoration Hardware Lugarno pulls):

    The dining room finally feels complete! (To see images of the rest of the space, see {here})

    It’s about time that I finished off at least one room – can you believe that we moved into our house a year ago as of next week? 

    • Share
    • Email

    ✉️FREE EMAIL SERIES ✉️

    5 Secrets to Reinventing Your Home on a Budget

    Simple tips to instantly transform five rooms in your home!

    Reader Interactions

    Comments

      Leave a Reply Cancel reply

      Your email address will not be published. Required fields are marked *

      This site uses Akismet to reduce spam. Learn how your comment data is processed.

    1. pam {simple details} says

      June 11, 2014 at 10:22 am

      Perfection, my friend!! I love the textured look, and your china and gold accessories really come to life, such a beautiful backdrop for your awesome styling! You need a dinner party! 🙂

      Reply
    2. Lisa @ Fern Creek Cottage says

      June 11, 2014 at 10:20 am

      Loooooove it!! It adds texture to the room and makes your white dishes pop! It really ties in nicely with your chairs too!

      Reply
    3. Burlap Luxe says

      June 11, 2014 at 10:07 am

      Love the outcome. I too look for materials that finish a design style! I backed a unit with outdoor siding T1-11 then painted and distressed it, loved the effect it gave a kitchen cabinet.
      Your piece has the right dramatic rightness!

      Xx
      Dore

      Reply
    4. cindy hattersley design says

      June 11, 2014 at 9:59 am

      I love a great piece of barnwood but I think your selection is much more sophisticated and fitting for your lovely cupboard. Love it!

      Reply
    5. Erika Williams says

      June 11, 2014 at 9:59 am

      What an AMAZING idea! Love!

      Reply
      • Kris @ Driven by Décor says

        June 11, 2014 at 9:22 pm

        You’re so sweet Erika – thank you!

        Reply
    6. marty (A Stroll Thru Life) says

      June 11, 2014 at 9:56 am

      I love this idea. It definitely adds tons of charm to the cabinet. Very pretty.

      Reply
    7. Anonymous says

      June 11, 2014 at 9:37 am

      What a great idea….

      Reply
    8. therelishedroost says

      June 11, 2014 at 9:09 am

      The dining room looks fantastic you must love it!

      Reply
    9. Calypso In The Country says

      June 11, 2014 at 8:41 am

      LOVE it! Such a cute idea and it adds so much depth to the cabinet.
      -Shelley

      Reply
    10. jennifer says

      June 11, 2014 at 8:19 am

      Very clever! It makes your china really stand out.

      Reply
      • Kris @ Driven by Décor says

        June 11, 2014 at 9:19 pm

        It may have been more cheap than clever but I’m happy with how it turned out 🙂 Thanks Jennifer!

        Reply
    11. Kim @ Savvy Southern Style says

      June 11, 2014 at 8:19 am

      Wow, Kris, I love that. You are one smart cookie for thinking of using the Pergo.

      Reply
    12. 3kidzmama says

      June 11, 2014 at 8:06 am

      It’s beautiful and creative.

      Reply
    13. Kathleen says

      June 11, 2014 at 7:58 am

      What a great idea! Very creative and beautiful!

      Reply
      • Kris @ Driven by Décor says

        June 11, 2014 at 9:16 pm

        Thank you Kathleen!

        Reply
    14. Simply LKJ says

      June 11, 2014 at 7:55 am

      What a fantastic idea! I love the new look, especially the new handles.

      Reply
    15. Carrie Davis says

      June 11, 2014 at 7:55 am

      simply beautiful

      Reply
      • Kris @ Driven by Décor says

        June 11, 2014 at 9:14 pm

        Thanks so much Carrie!

        Reply
    16. Cassie @ Primitive & Proper says

      June 11, 2014 at 7:14 am

      i LOVE this idea! it looks sooooo good!

      Reply
    Newer Comments »

    Primary Sidebar

    ✉️FREE EMAIL SERIES ✉️

    5 Secrets to Reinventing Your Home on a Budget

    Simple tips to instantly transform five rooms in your home!

    Meet Kris

    Photo of Kris Jarrett

    Follow Me

    • Facebook
    • Instagram
    • Pinterest
    All images on DBD are copyrighted and taken by me unless otherwise noted. If you'd like to use any of my images, please request their use via my Contact page.

    I am a participant in several affiliate advertising programs (including the Amazon Associates program) and earn fees from qualifying purchases. For more information, see my full disclosure statement {here}.

    To view my privacy policy, go {here}.

    Copyright © 2026 · Driven by Decor | Privacy Policy