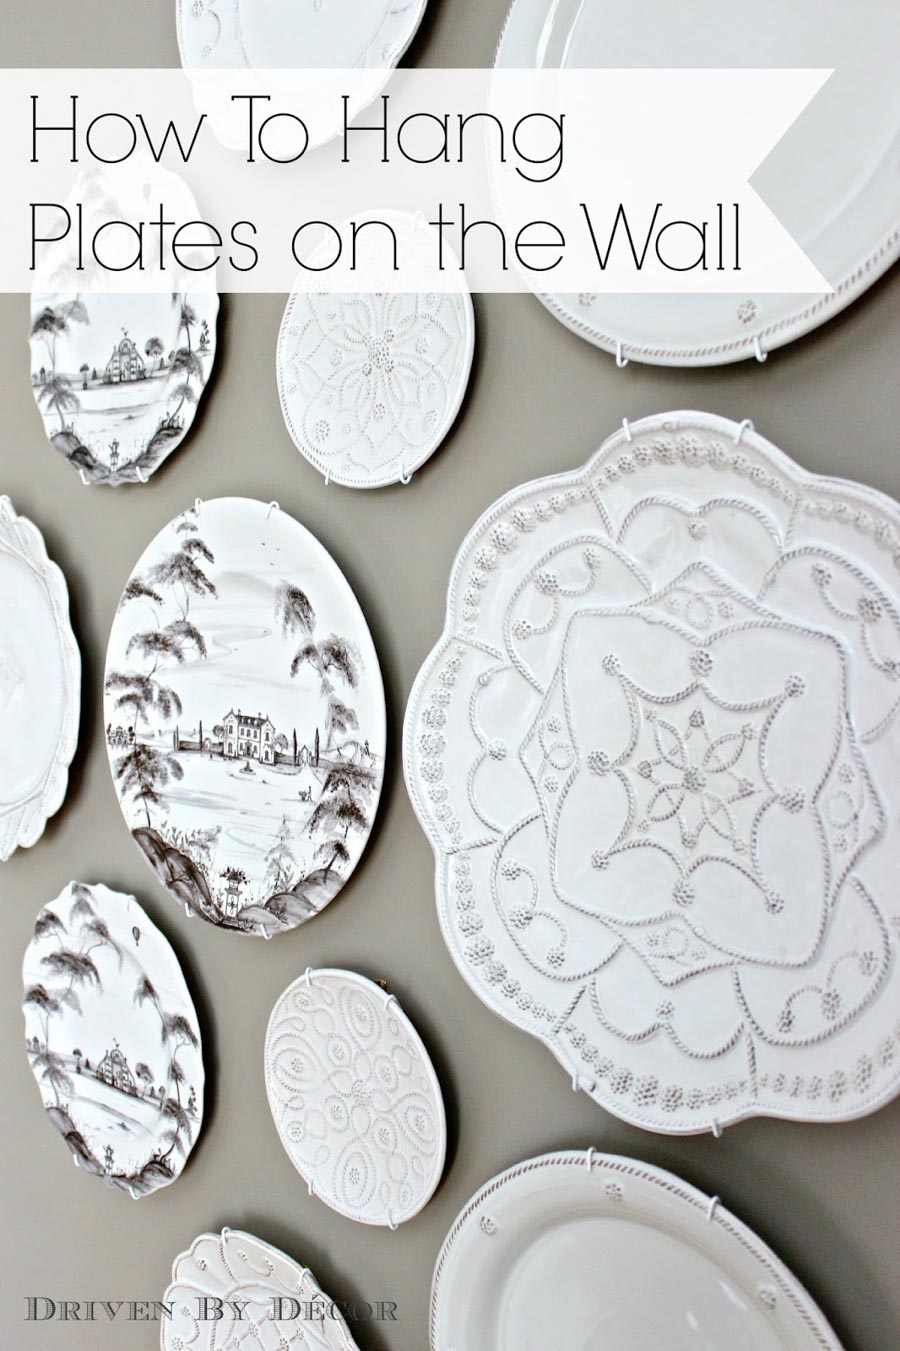
Want to know how to hang plates on the wall? I’m sharing my tips & tricks and the plate hangers that I used to get the job done right!
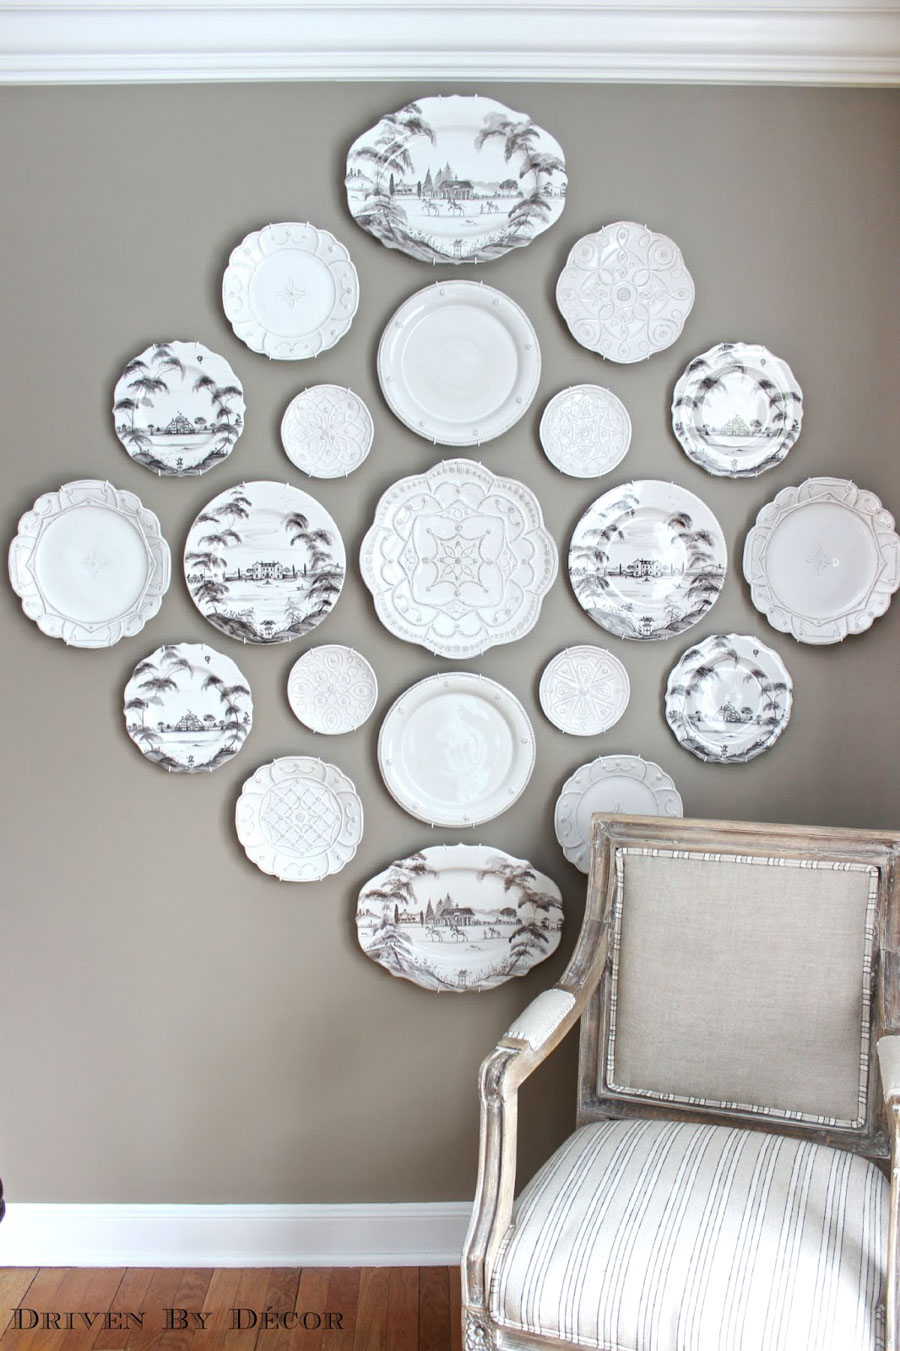
For months I kept my beautiful new plates sitting in a cabinet where they weren’t used or seen. And the big bare wall in my dining room? It stayed bare. Because honestly the whole idea of designing and hanging a decorative plate wall intimidated me. But I finally took the leap and hauled my plates out of the cabinet and hung them up on our dining room wall:
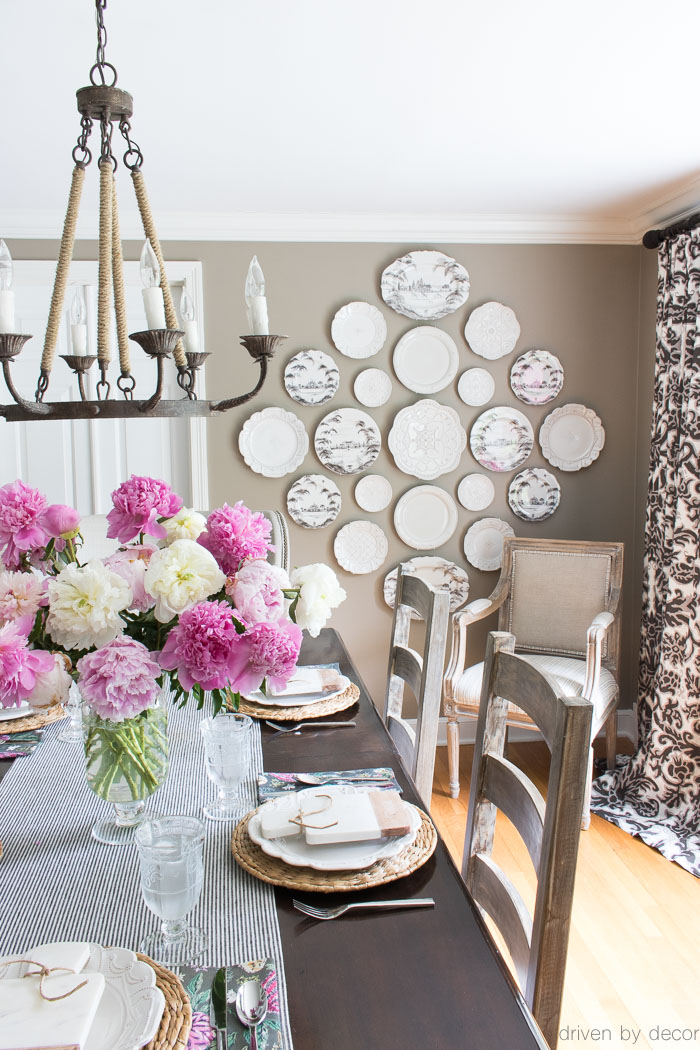
It turned out to be one of my favorite dining room wall decor ideas! The trickiest part was figuring out the how-tos of hanging the plates so I thought I’d share what worked best for me, what’s worked for others, and why you may want to choose one method of hanging plates over the other (post includes commissionable links; for more information, see my full disclosure statement {here}).
Step 1: Figure Out How You Want to Arrange Your Plates
Take all the plates that you’re thinking about using in your plate wall and lay them out on the floor. If you have space constraints for the wall that they’ll be hanging on, it helps to put some painter’s tape on the floor to mark the max width and height that you have to work with. Arrange and rearrange until you figure out a design that you love!
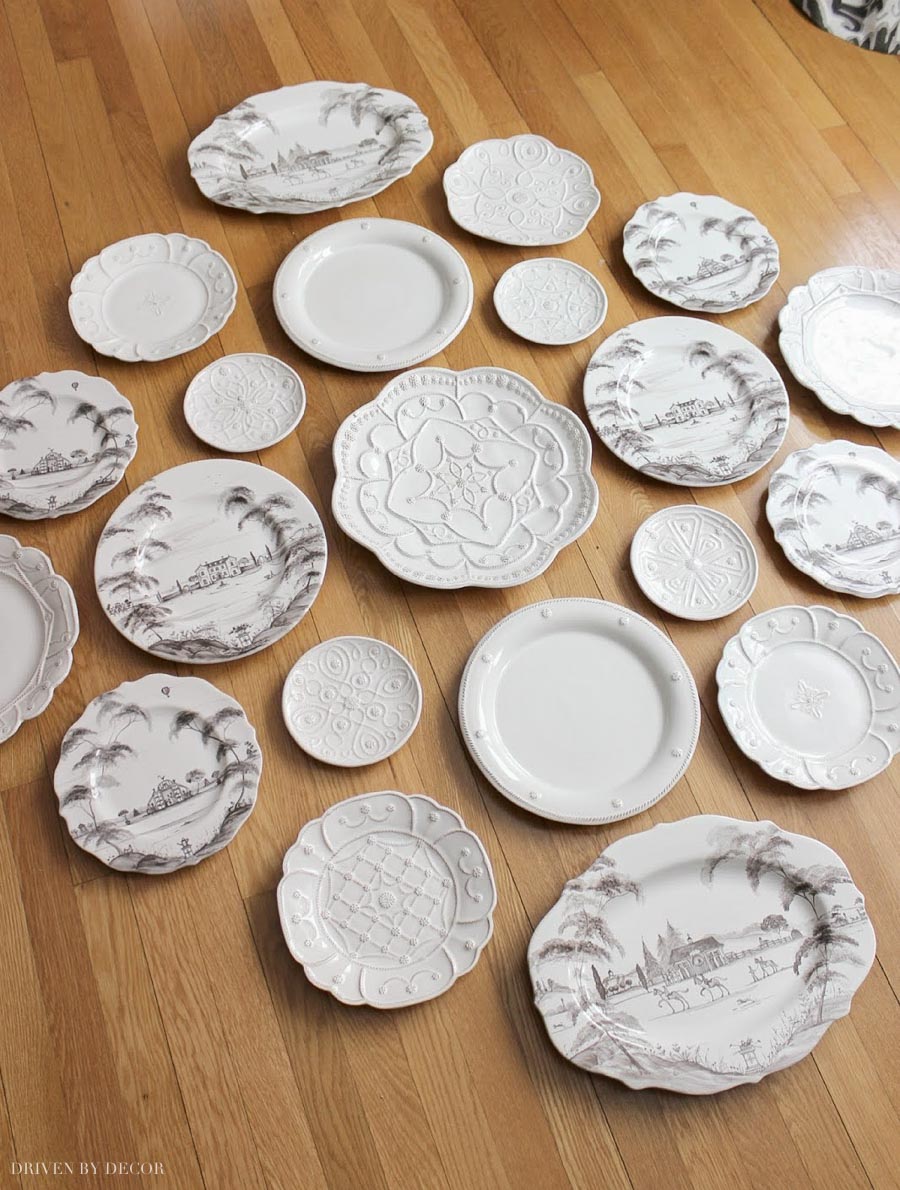
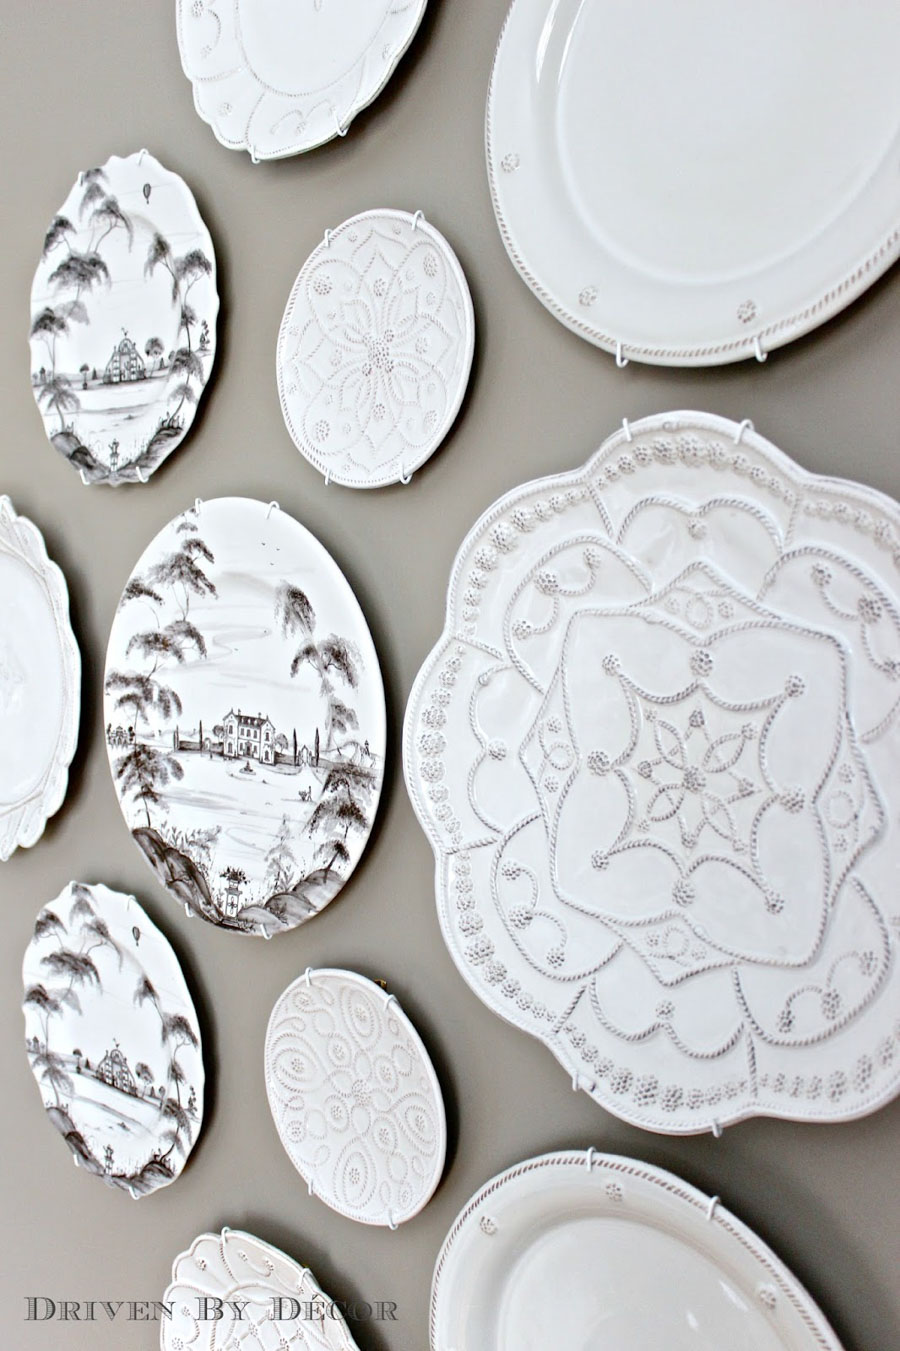
All of my plates are from Juliska – the ones with the printed scenes are from their Country Estate collection in Flint color that you can find {here}. I also have two of {these dinner plates} from their Berry & Thread collection, and multiple different sized plates from their Jardins du Monde collection {here}. The center platter is the Jardins du Monde grande charger that is no longer available but can sometimes be found on eBay {here}.
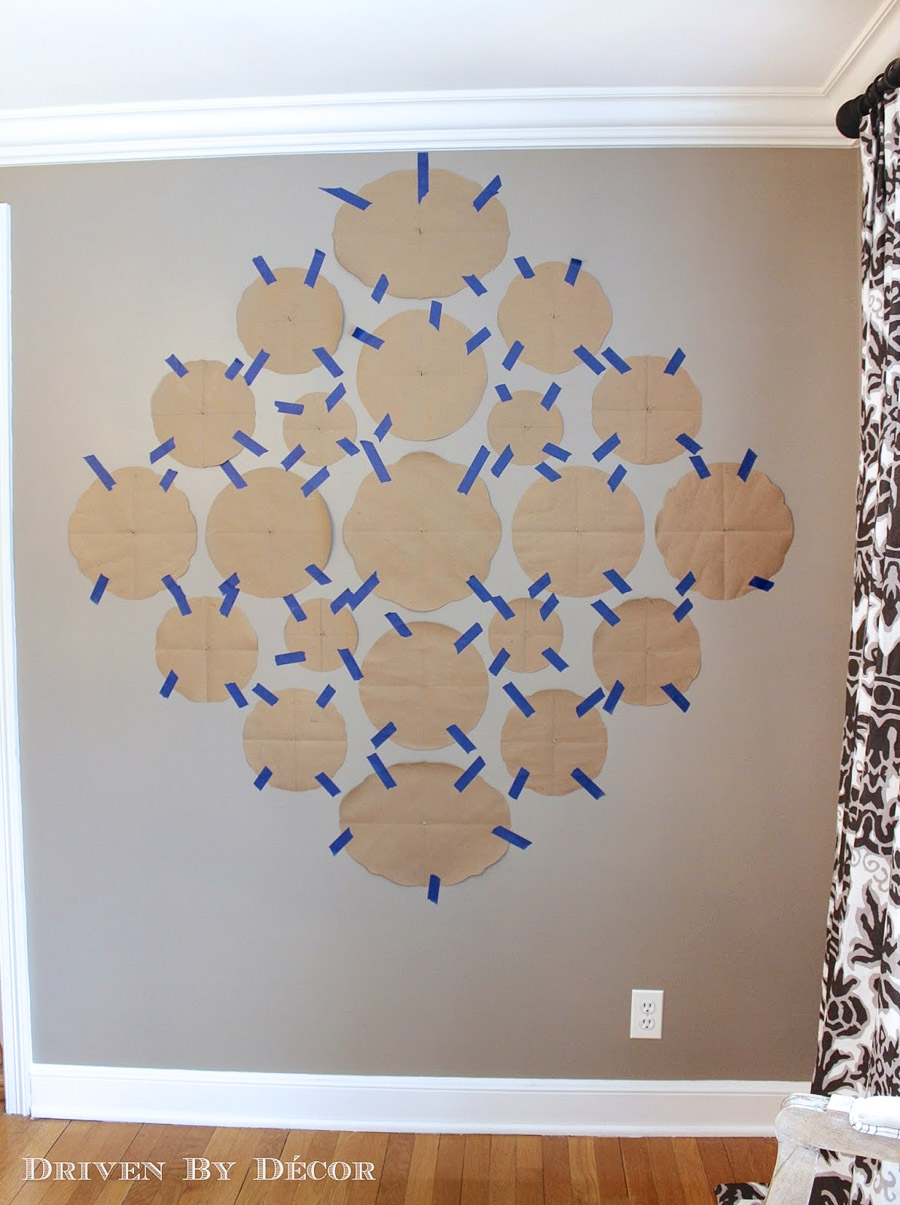
Step 2: Trace Each Plate on Paper
I wanted to see the arrangement up on the wall before nailing in 20+ hangers and realizing that I should have shifted it up or down or changed some plates around so I traced the plates on kraft paper and cut each of them out. Once each plate was cut out, I drew both a horizontal and vertical line through the center of each paper plate, which helped me line them up evenly on the wall using a level.
I wish I was a girl who could just wing it and not worry if things don’t line up quite right but I know myself enough to know that it would bug me if the arrangement was visibly “off”!
Step 3: Tape Your Templates to the Wall
Once I had my plate templates arranged and level on the wall, I taped them to the wall to make sure they wouldn’t fall down overnight (I was doing my hanging the next day). And then when I was getting my girls their breakfast the next morning, I heard a rustling in the dining room and found them in a heap on the floor. Nooo!
I had used Delicate Surfaces painter’s tape and it didn’t hold. Ugh. Lesson learned. I redid the arrangement but this time used regular painter’s tape and put a tiny nail through the center of each plate just to be extra sure we didn’t have a repeat incident.
Step 4: Figure Out the Best Plate Hangers for You and Hang Them Up!
My original plan was to hang my plates using {these} Disc Hangers, which are adhesive discs that you adhere to the back of your plates. The advantages of the Disc Hangers are that they allow your plates to hang flat against the wall and they are invisible once you hang them. Unfortunately, I realized that most of my plates have a raised pattern on the back – definitely not a good surface for adhering a flat Disc Hanger.
The other disadvantages of the Disc Hangers are that you can’t easily remove them to use the plates. I wanted to be able to take some of the platters off of my wall to use them for serving food at parties every now and then and the Disc Hangers wouldn’t allow me to do that.
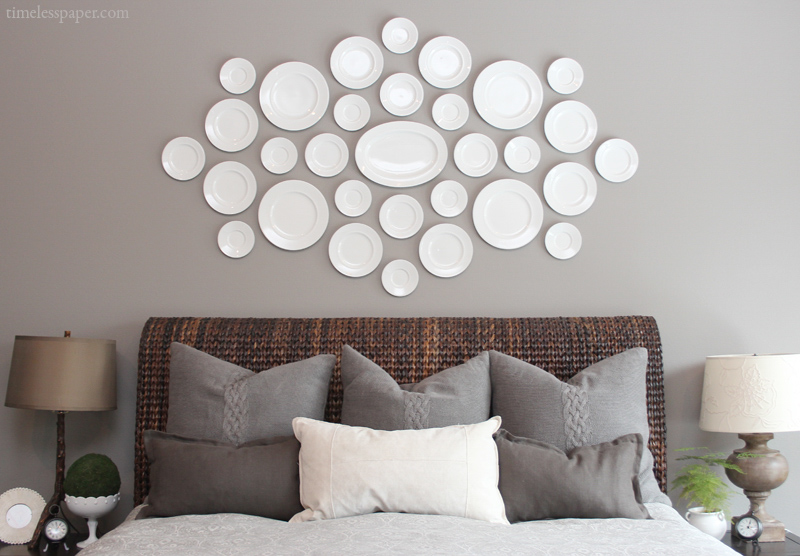
Also, according to the reviews, some people have had issues with their plates falling off the wall when using them. But there are others who have used them with beautiful results (and no broken plates!) such as Emily of Timeless Paper who used them to hang this gorgeous plate wall over her bed (don’t you love it?!):
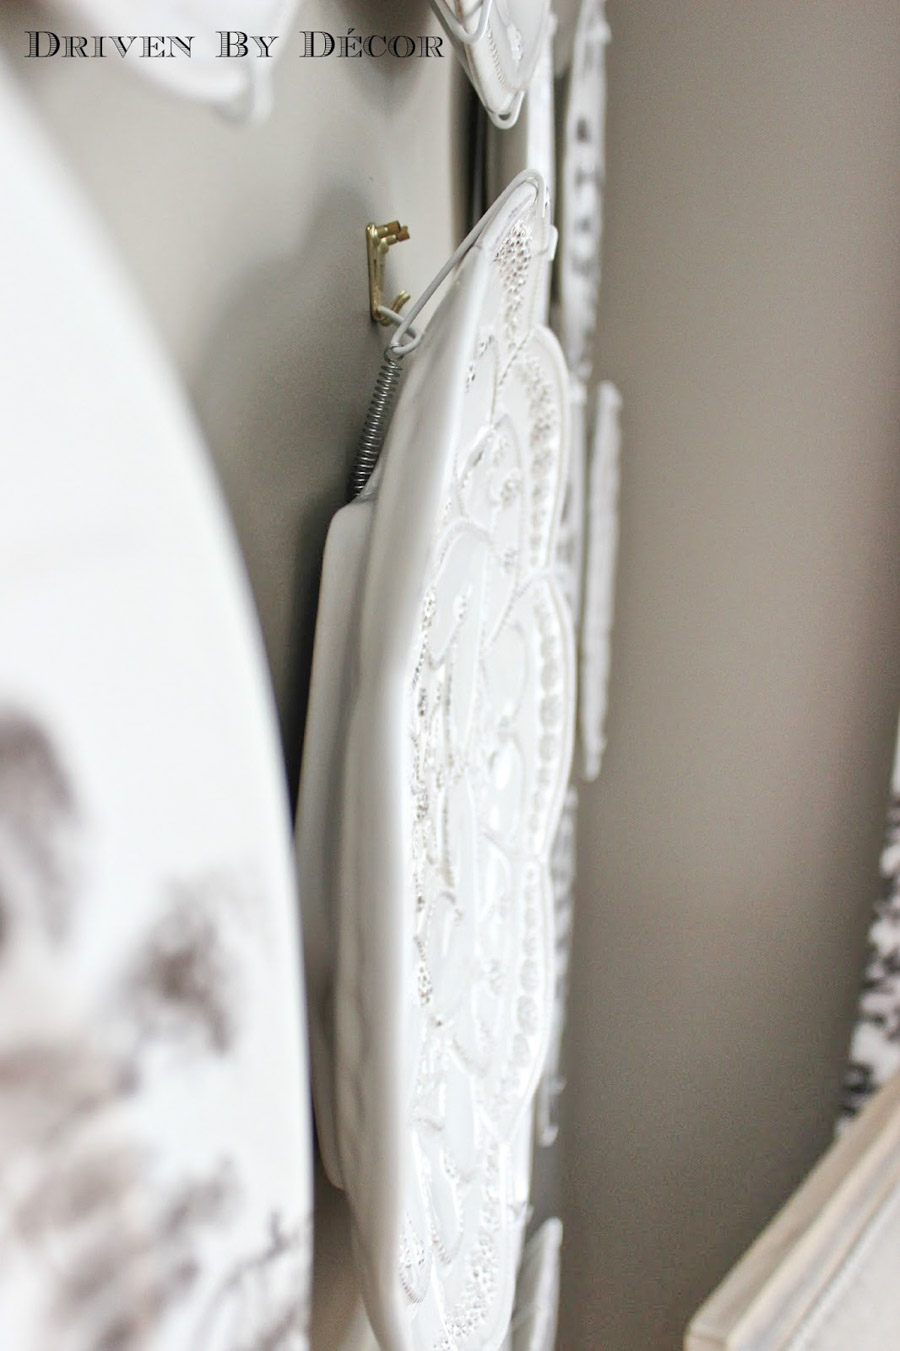
Since the Disc Hangers weren’t going to work for me, I ended up hanging my plates using Tripar’s white vinyl coated plate hangers found {here}. Beware that they do “run small” – my 9″ plates did not fit the 7″-9″ hanger size – I had to use the 10″-14″ size.
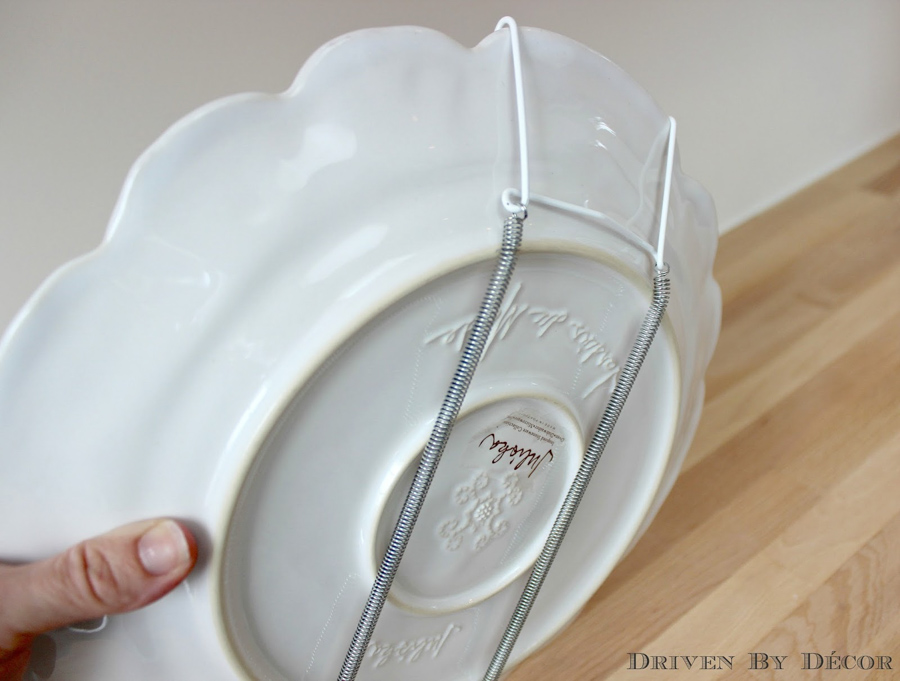
Since they are vinyl coated, they won’t scratch the plates like plain wire hangers can and I love that when you use this type of plate hanger, you can easily remove the plates from the wall and use them. The key to working with these hangers is to bend the top of the hanger so that your plate will lay flat on the wall once hung.
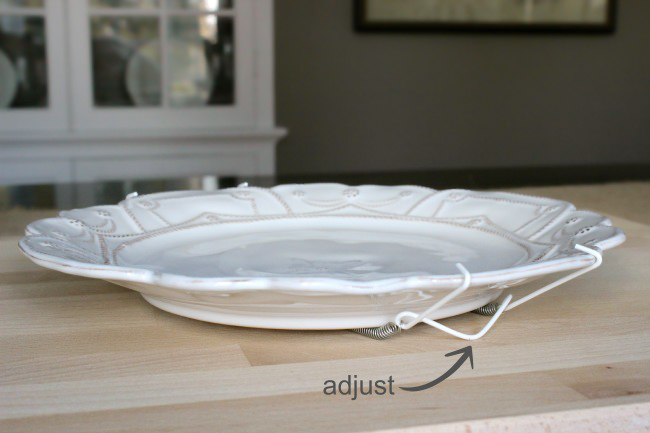
The best way to do this is to first attach the plate hanger to the plate and lie the plate on a flat surface. The top of the hanger should (barely) touch the flat surface that your plate is lying on. If it doesn’t, take the hanger off the plate, bend it, and place it back on to see if it’s where you need it to be.
Once all of your plates have hangers, it’s time to get them up on the wall! I used {these OOK picture hooks}. To figure out where to hang them, hook your OOK hook onto the wire hanger that is attached to your plate and measure the distance from the top of the plate down to where the nail will go into the OOK hook. Transfer this measurement to your plate template and gently tap the OOK hook nail in just a bit.
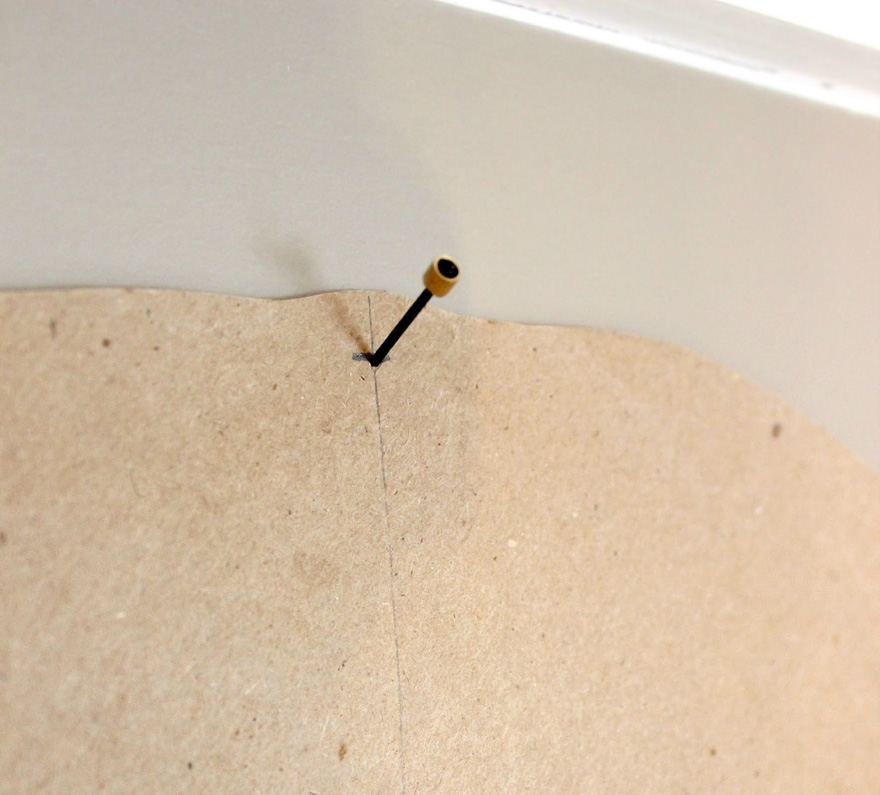
Then remove the template from the wall, put the nail through the OOK hook, and hammer it in at the same spot that you tapped it into moments ago. Now hang your plate!
Repeat.
Our plate wall is definitely my favorite thing about our dining room! You can take a tour to check the entire space out including a bunch of fun “before” and “after” pics (it wasn’t too pretty when we moved in) {here}! Also check out my post with tips on decorating your dining room.


Clover burgess says
Thanks! When I hung them the coil extended and the hook just lifted off the top of the plate.
Suggestions, please!
Clover
Kris Jarrett says
Some plate hangers are cheap and do that but good ones like the ones I linked do not. If you’re using the ones I linked and having those issues, it’s because the plate hangers are too large for the plates – you’d need to go down a size!
Anonymous says
What brand of hangers are used in the above pictures? I can’t find coated hangers on any of the sites I’ve looked at
Kris Jarrett says
The post has a direct link to the exact hangers in it.
Trisha says
Absolutely gorgeous! Just found when researching what to use to hang plates. Thanks for sharing!
Crystal says
Was this all in drywall? And the OOK picture hooks can handle the heavy plates? I have two trays I’m not worried about hanging- one is wooden and the other is metal- but I have a beautiful big blue “turkey” platter I’d like to hang. I think my walls might be plaster. Any advice on working with a plaster wall (or can you point me in the right direction for such advice)? I’d love to have “functional” art in my tiny kitchen but I’m terrified of my blue platter falling to the floor and breaking 🙁
Kris Jarrett says
Hi Crystal,
Yes this was all in drywall but we have plaster in other parts of the house and the OOK hooks have held really well in those walls too! Once you put it into the wall, you should be able to easily tell if it’s in there well and will hold the weight of your platter. I haven’t lost a single plate yet (fingers crossed)!
Carol Shaw says
Love your plate wall have been planning to do one for a while but could never find the right information of how to build one. Thanks for the great tips.
Kris Jarrett says
Thank you so much! I’m glad you found it helpful!
Keri says
I love this! What a gorgeous result. I am “that girl” that likes to take short cuts and then pays for it later when things don’t line up. Going through this entire process would probably kill me, but I have been planning to hang a platter on my dining room wall at the house we are renovating, and I wasn’t sold on the sticky hangers because I use the platter pretty frequently. I should be able to manage one or two without losing my mind, right? 😉
As far as a timeline goes, my house will be done someday…ha! I am definitely saving this for future reference and inspiration. For now I will have to dream and keep chugging along with basic household function. 🙂 Thanks for such a great post!
Kris Jarrett says
Ha! You can do this! 🙂 It honestly didn’t take nearly as long as I expected and the hangers I use are great – never have a problem with them holding the plates and I take the platters down from time to time to use them which works beautifully! Good luck!
Chasity Clifton says
LOVE this!! Do you know if Tripar makes hangers larger than the 10-14″? I have a few plates 10-11″ I’m looking to hang. Thank you!
Kris Jarrett says
Hi Chasity – unfortunately I’m not sure. Sorry I can’t help. Good luck with your project!
Carol says
Looks amazing. I’ve been putting off doing a gallery wall of my grandkids, but I am intimidated as well. Don’t really know where to being. Love the plate hangers, but oh so many holes. That also makes me nervous. ????
Kris Jarrett says
Just jump in and do it – you’ll be so glad you did! 🙂 And thanks for letting me know that that link goes to the wrong place – Emily doesn’t have a blog anymore so I took out that part about visiting it.
Peggy Summitt says
Just wanted to give a heads up to anyone that is planning to do this with those adhesive plate hangers …. I used them on plates in my breakfast room and they all fell off the wall and broke In a million pieces…I did it exactly according to directions but they did not hold…hoping the ones I did in my dining room will hold now.
Kris Jarrett says
Oh no! That’s terrible! That’s why I went with the plate hangers – I just didn’t trust the adhesive ones! Thanks for letting us know (just wish it hadn’t happened to you).
Susan says
Thanks for sending me the info on instagram. I’m bookmarking the page to refer to as I progress on my plate hanging.
Kris Jarrett says
Glad you found it! Good luck with yours!