Want to know how to paint a front door so it looks like a pro did it? I’m sharing the step by step in this post!
When we bought our house in NC, I put painting our front doors near the top of my long home project to-do list. They were a bright light blue that was cheery but not my style and the color didn’t look the best with our home’s brick color either. I wanted to stick with a paint color that was still fairly light but a bit more subdued and landed on Benjamin Moore’s Boothbay Gray – it’s a light gray with just a touch of blue. I’m so happy with how it turned out!
Today I’m sharing the “before” and “after” of my door painting project plus an easy step by step of how I got the job done so you can do yours too! (post includes affiliate links; full disclosure statement available {here})
Let’s kick things off with a pic of what our front doors used to look like:

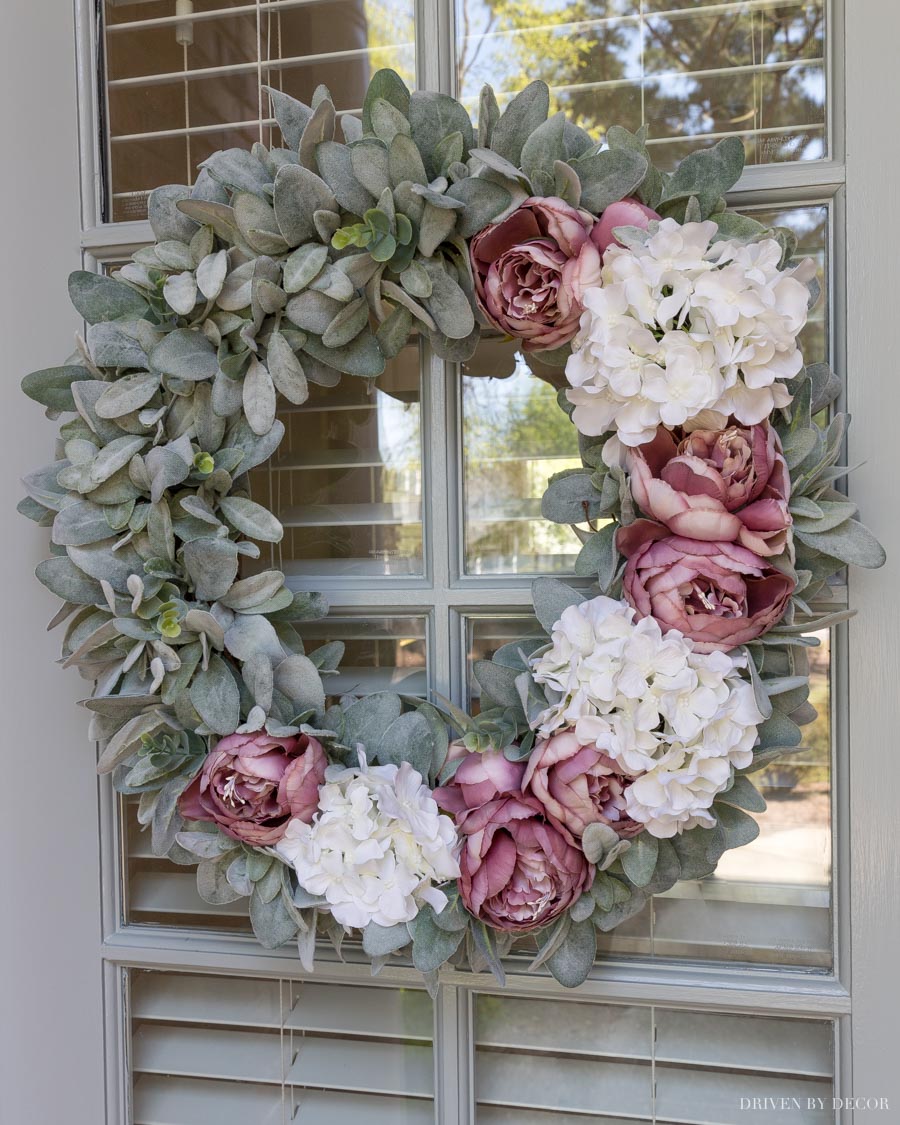
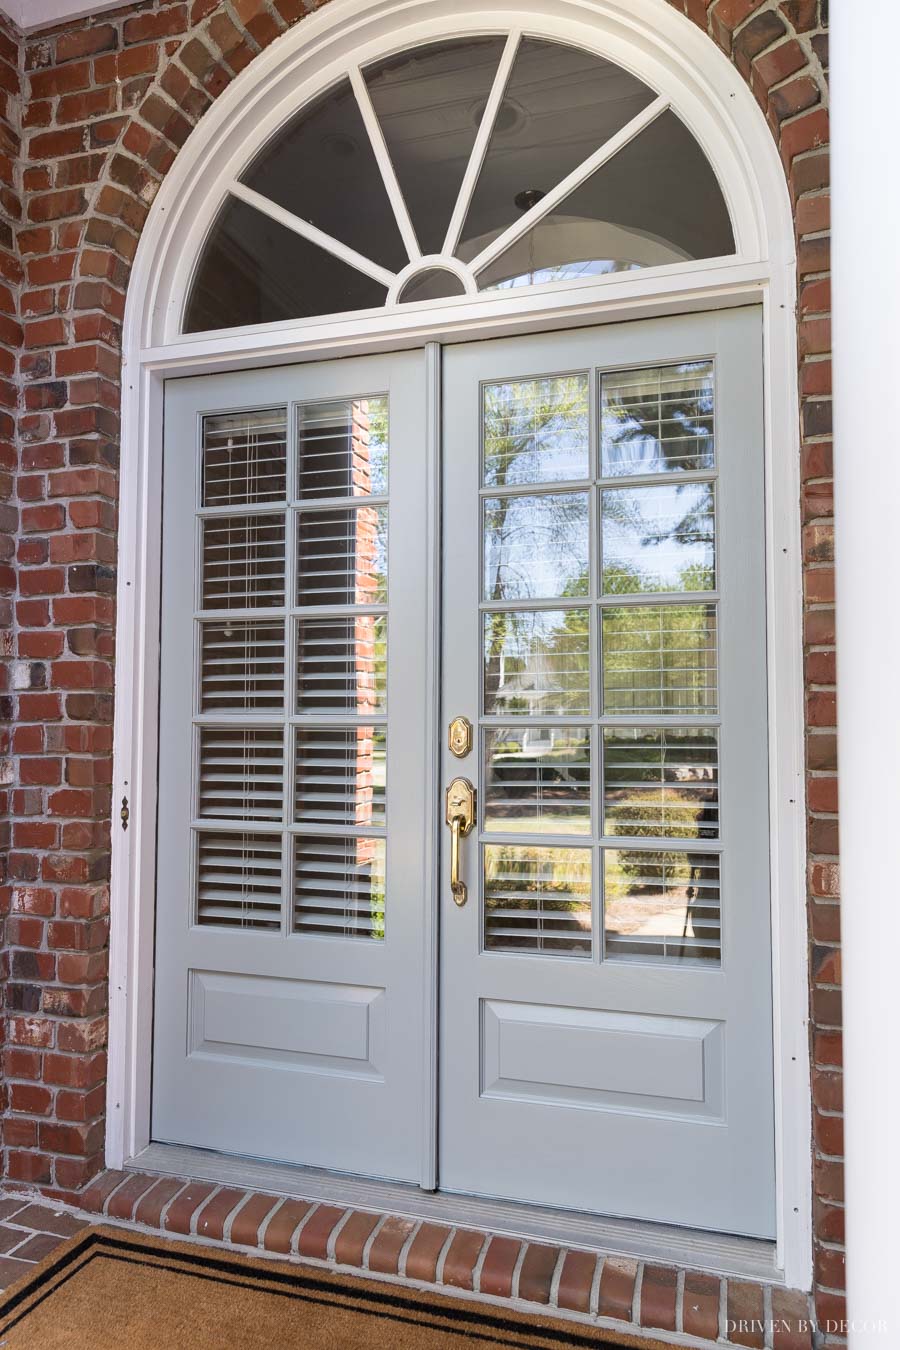
After painting our front doors and adding a pair of spring wreaths, this is the “after”:
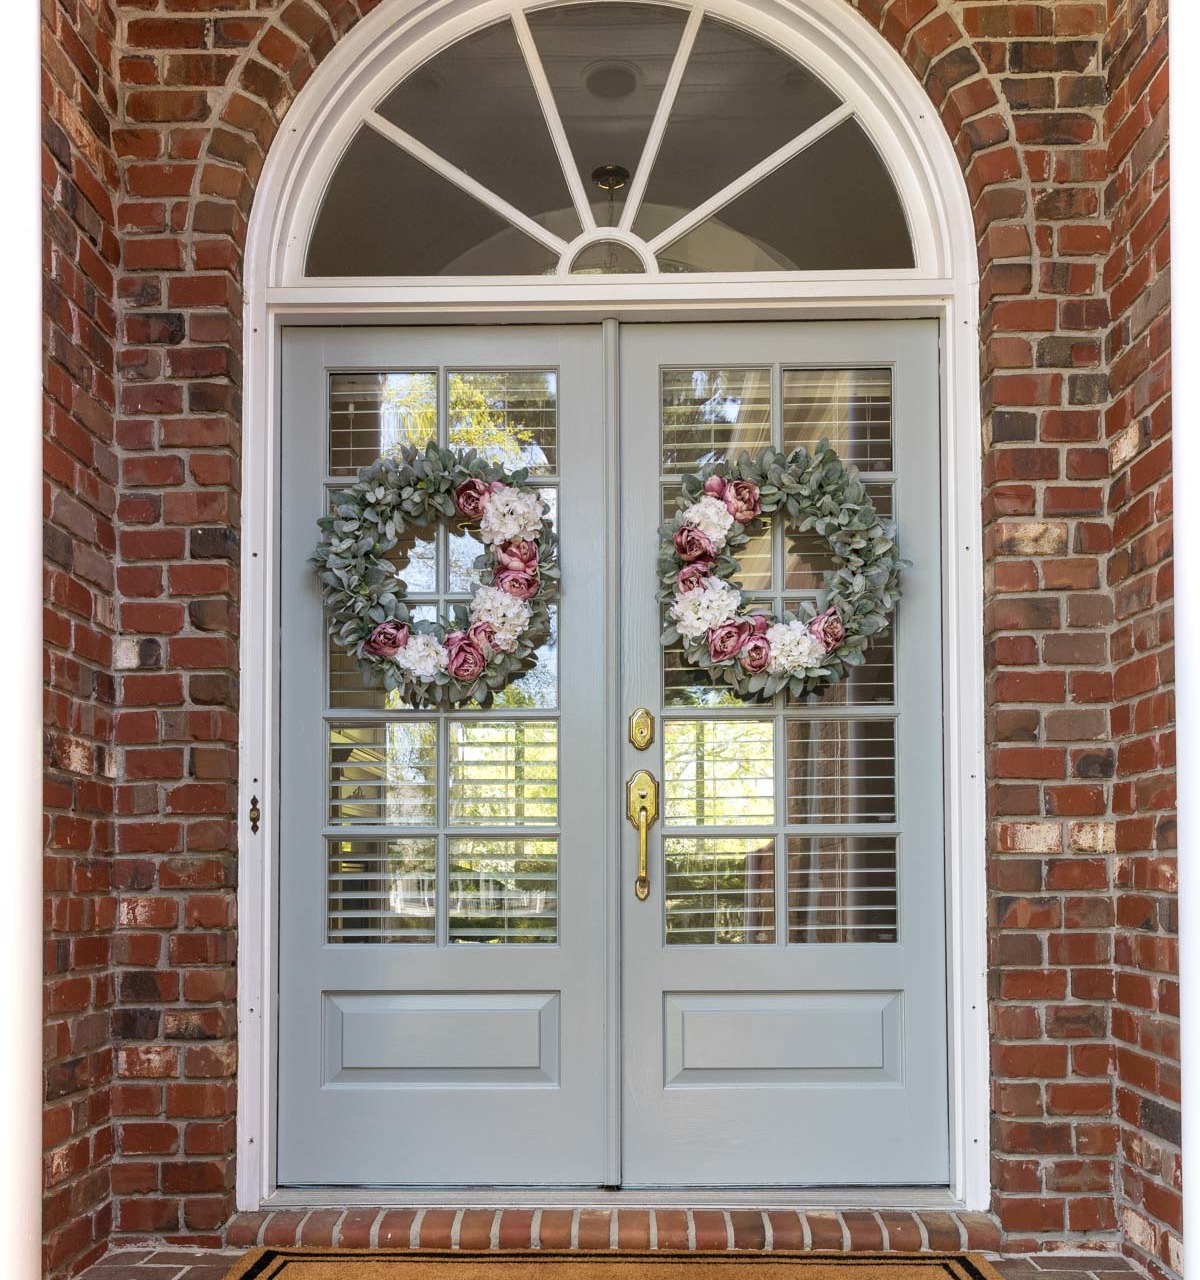
I’m loving the new paint color and the spring wreaths c/o Style the Seasons really bring them alive:
My paint color, Boothbay Gray, is definitely a gray when you see it up close:
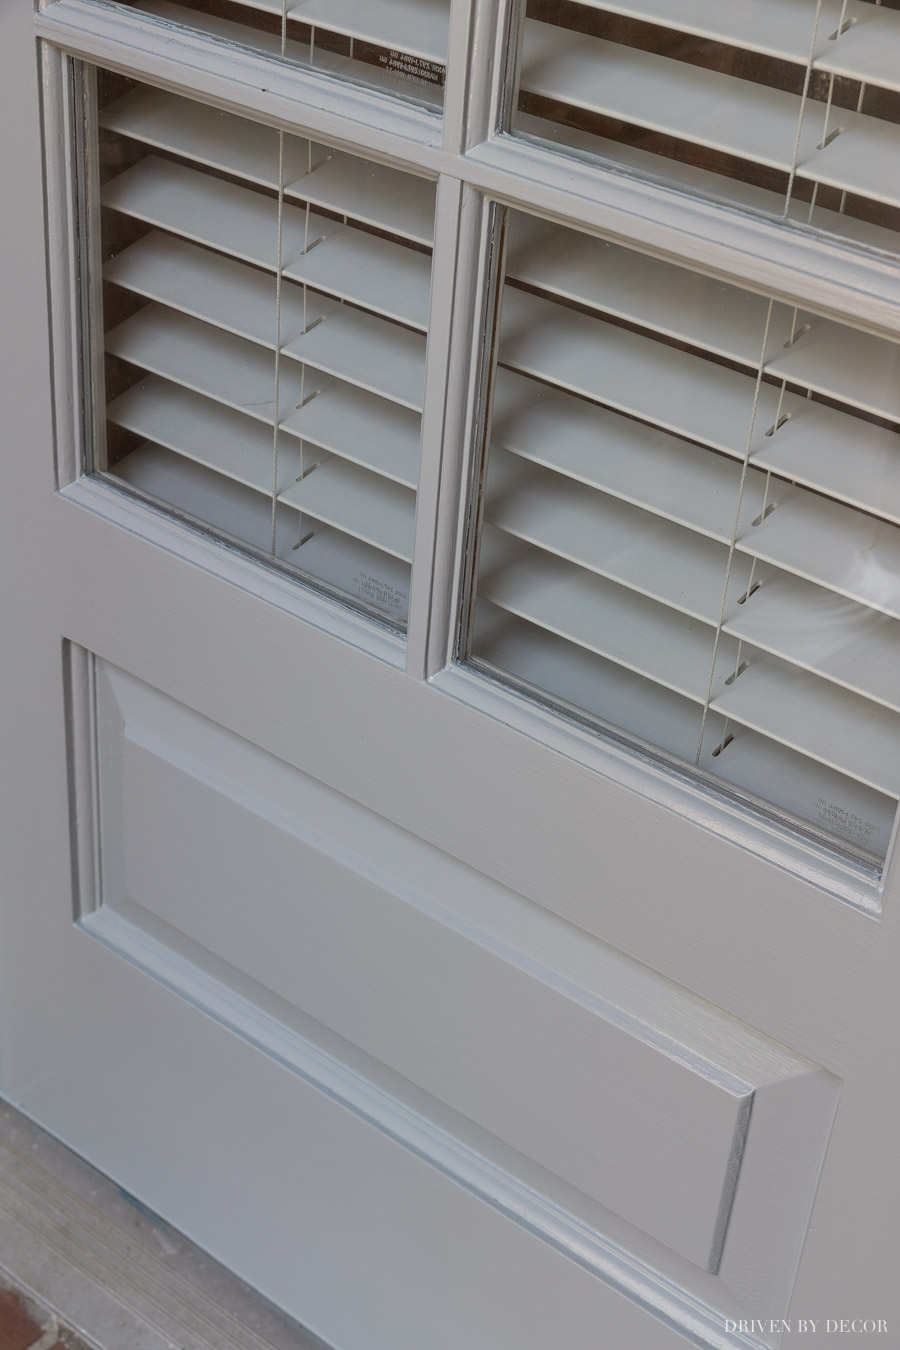
But you can see blue/green tones in it, especially from farther away when the sun is shining on it. It’s one of the prettiest colors I’ve painted with!
The other little upgrade I added to this space is a new doormat since the old one was sized for a single door – it’s a simple design that I can use year-round:
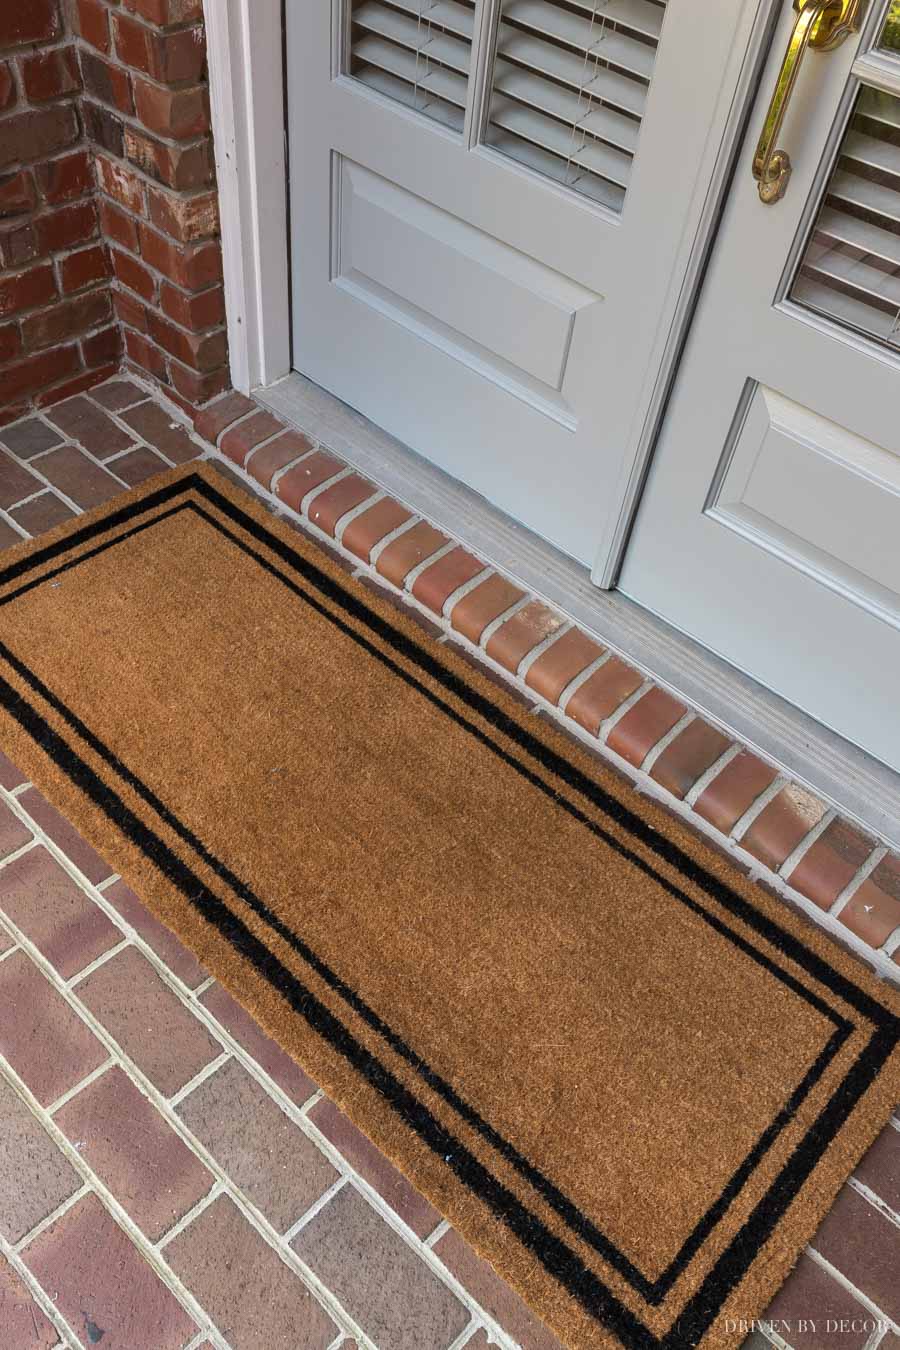
My exact doormat is currently out of stock but check out {this similar one} if you need an extra long one too!
Even if you don’t have much painting experience, painting your front door is a DIY you can successfully tackle! I’m going to share the step by step of how to get the job done! Let’s start by making sure you get the right paint for the job…
1. Figure Out Whether You’ll Need To Prime Your Doors
Gathering your supplies for the job begins with figuring out what type of paint is already on your doors (latex or oil-based) because that will determine if you need to paint a coat of primer on your door first. To determine the paint type, dampen a rag with some rubbing alcohol and rub it back and forth over your door. If the paint color comes off on your rag, it’s latex and if it doesn’t, it’s oil-based paint. When I rubbed my dampened rag on our blue doors, it looked like this:
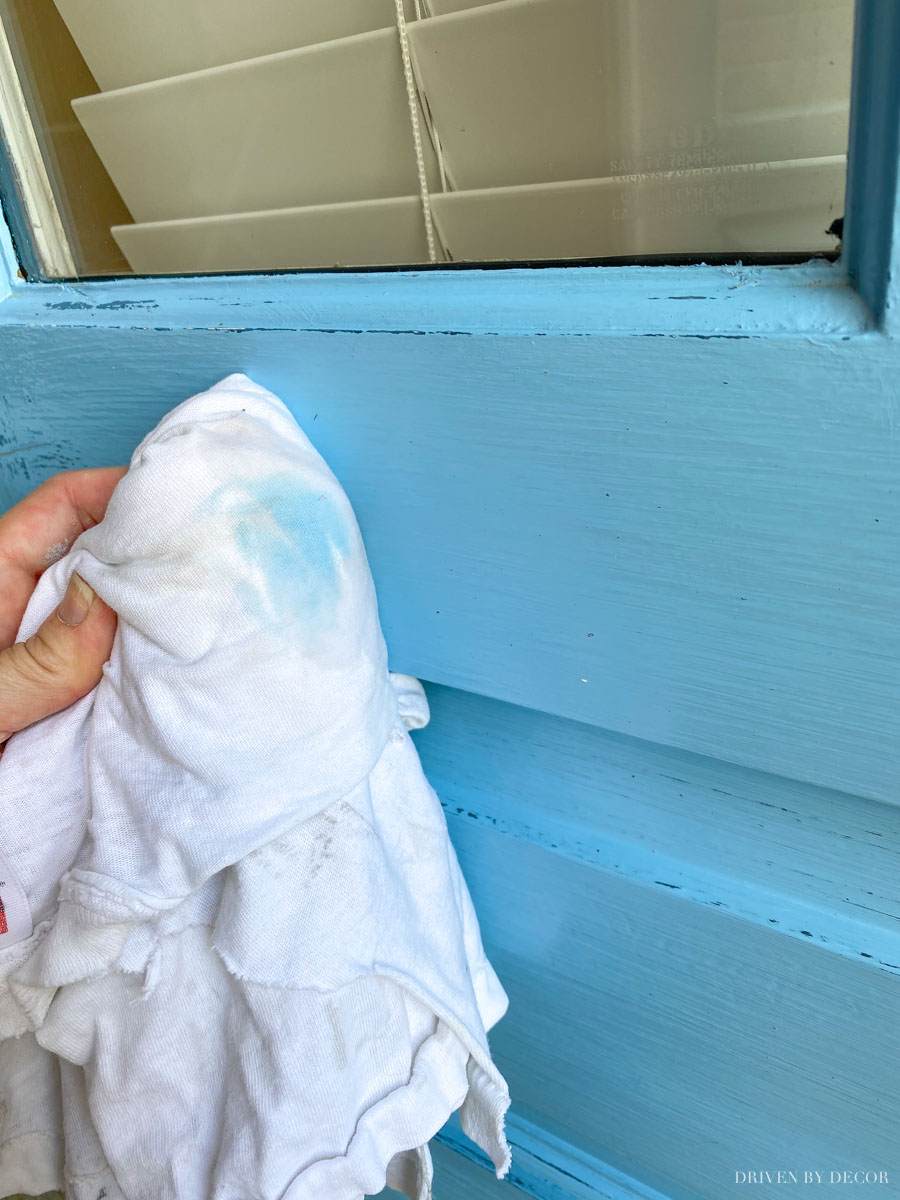
which means that the current paint on our door is latex. Yay! (it’s the easiest option of the two)
You will need to paint a coat of primer on your doors as the first step if:
- You are painting a new, unprimed door
- You are using a standard latex paint on a door that was previously painted with an oil-based paint.
- You are painting a dark door a much lighter color (for example, painting a black door white)
You don’t need to prime if:
- You are working with a new, pre-primed door
- You are using latex paint on a door that was previously painted with latex paint (this was my situation)
- You are using Benjamin Moore Advance Exterior paint over a previously painted door – this paint can be used over either latex or oil-based paint and is awesome for not leaving roller or brush marks but it has a long dry time so you would have to wait a long time for it to dry before closing your door (usually only ok for people with storm doors) and wait 16 hours before recoating.
2. Gather the Rest of Your Supplies
In addition to your latex paint (be sure you get exterior paint- one quart is plenty; semi gloss is the most commonly used sheen) and your primer (if needed), the other supplies to have on hand are:
Paintbrush – {this 2″ angled brush} is my favorite
A wide putty or taping knife such as {this one}
Sandpaper – 150 grit and 220 grit
Canvas or plastic drop cloth to protect your floor/porch (I use {these} that you can wash and reuse)
Filler if your door has dents or gashes you want to fix (I use {this wood filler} for wood doors and {this putty} for metal doors)
Roll of painter’s tape such as {this one}
Utility knife such as {this one}
A narrow putty knife such as {this one} if your door has any glass panes
A few rags/cloths
A pre-paint cleaner such as TSP or {this Krud Kutter}
Optional:
Sanding block such as {this one} to make sanding easier & quicker
Mini 4″ woven paint roller with ¼″ nap such as {these rollers} or 4″ foam rollers such as {these rollers}
Roller handle for 4″ rollers such as {this one}
Mini roller tray like {this one}
3. Clean & Sand Your Doors
It’s time for the prep work! Start by thoroughly cleaning the dirt and grime off of your door. There are a lot of different cleaners you can use – I use Krud Kutter Pre-paint Cleaner available {here}. After cleaning, wipe your door dry and allow it to thoroughly dry before proceeding.
Want to save this post?
Now it’s time to sand. If your door has any gashes or scrapes you want to fix, apply filler (I use {this wood filler} for wood doors and {this putty} for metal doors) and sand smooth. Also sand any raised areas with 150 grit sandpaper. Then use 220 grit sandpaper to lightly sand your entire door (wrapping the sand paper around a sanding block can make it go faster on the flat parts!).
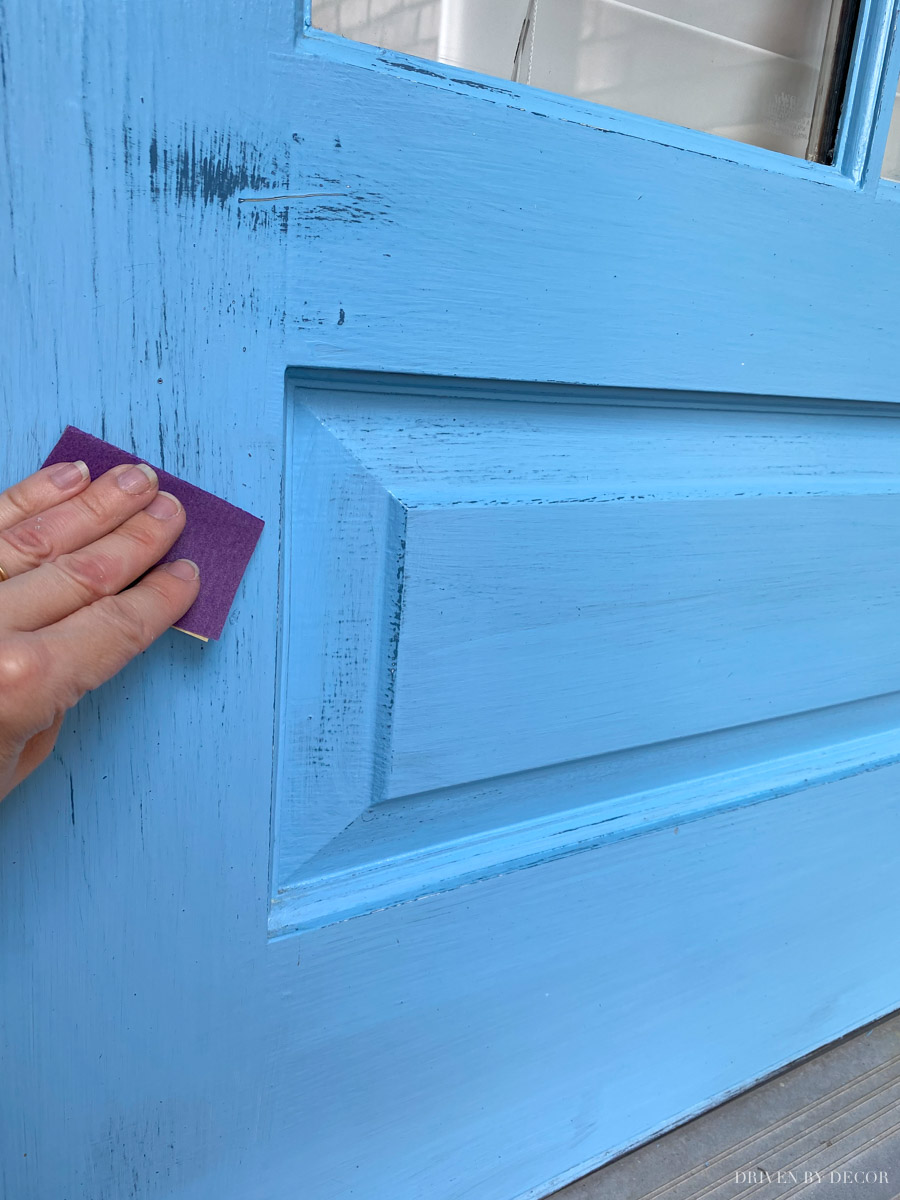
Use a clean rag to thoroughly wipe all sanding residue off your door.
Note: If your door was previously painted prior to the ’80s, it could be lead paint which you wouldn’t want to sand without appropriate precautions so be sure to test for lead paint if that’s a possibility
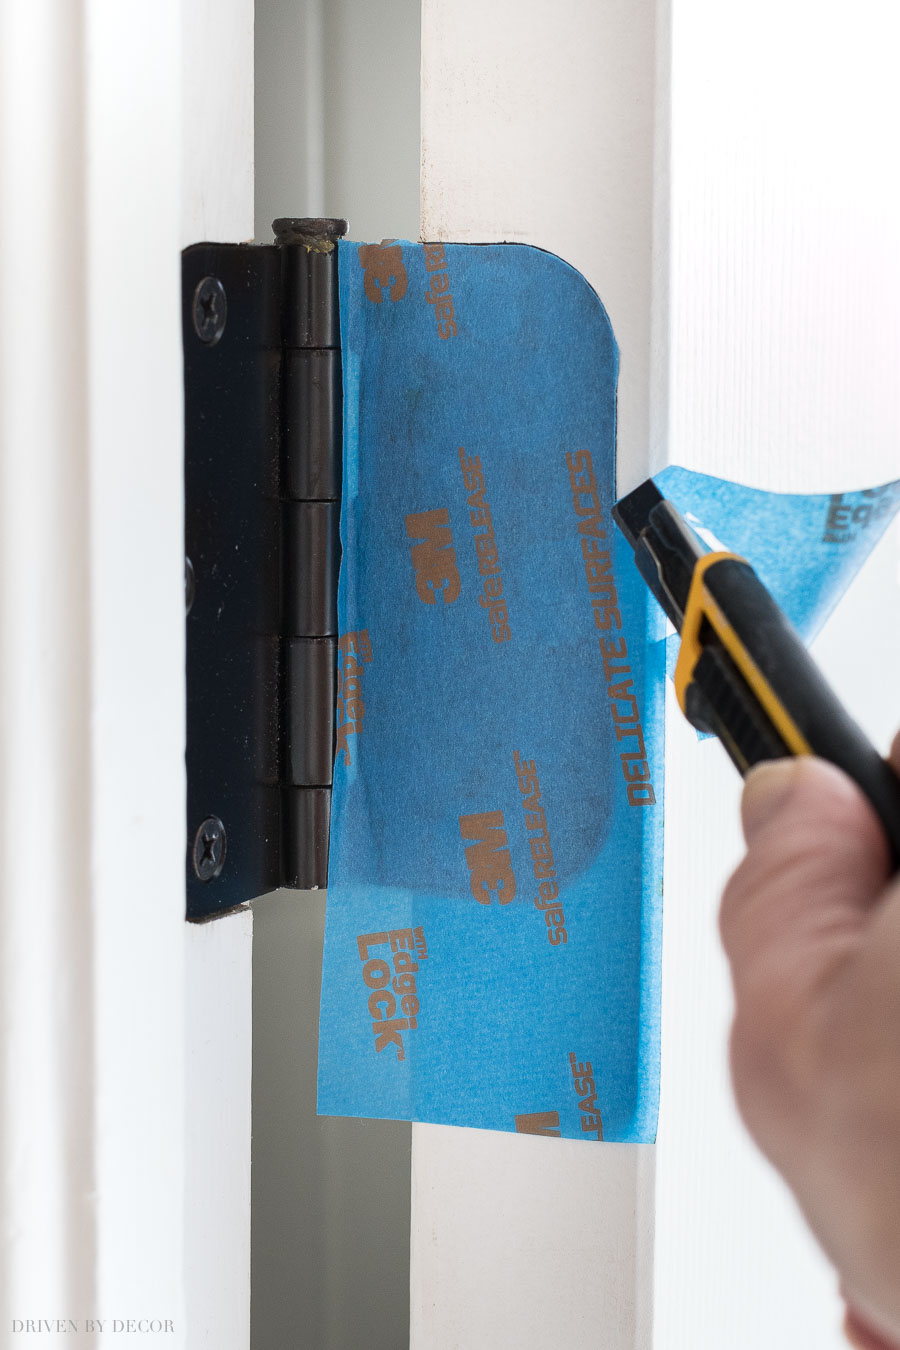
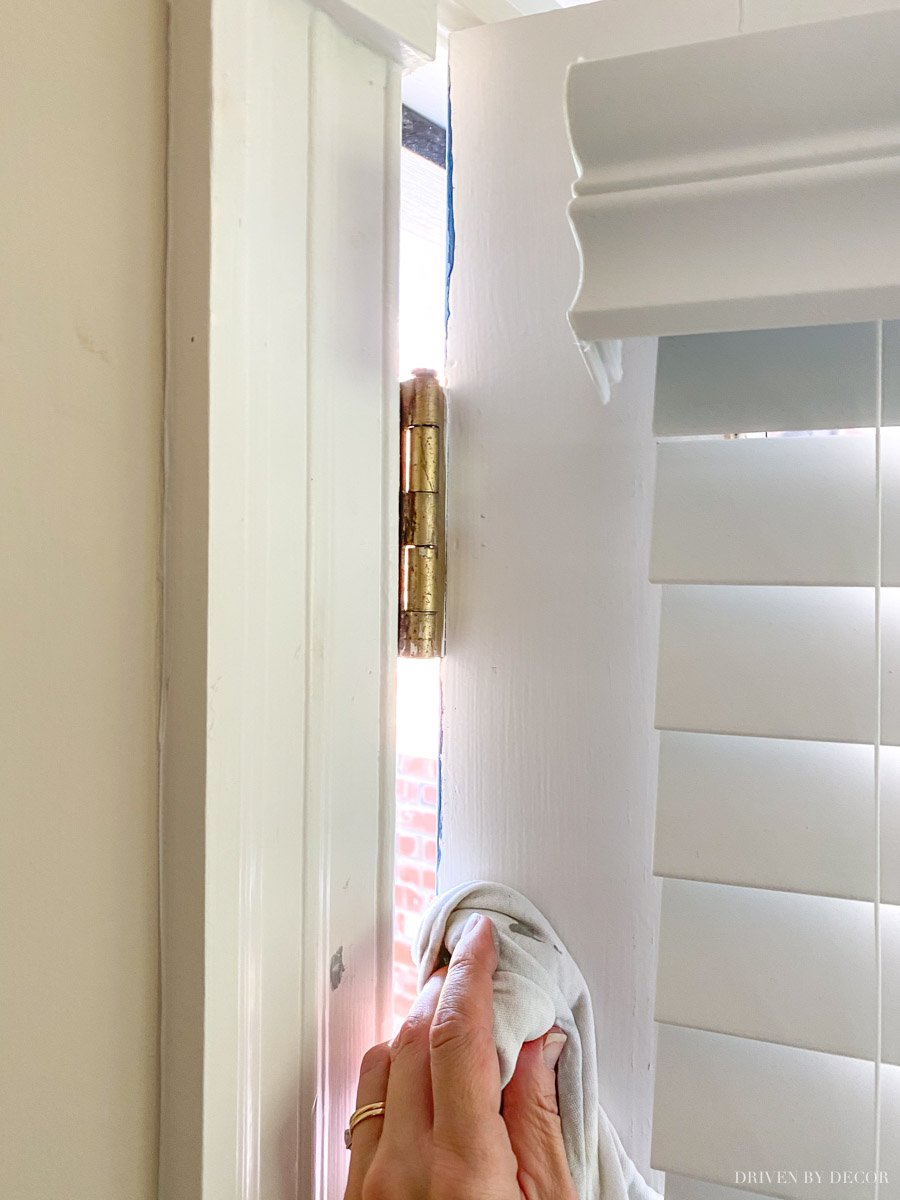
4. Protect Your Door Hardware
You don’t want to get paint on your door hardware so unless you have a really steady hand for painting around it, protect it by either removing it or outlining it with painter’s tape:

You may also want to cover your hinges with painter’s tap to protect them (I didn’t just because they’re in bad shape and I’ll be replacing them when I replace the door hardware). A trick that I’ve used on interior doors is to cover the hinge with tape and then use a utility knife to cut off excess around the edges:
5. Paint Your First Coat Starting with the Edges
Whether your first coat is a primer or your door paint (determined back in step 1!) it’s time to get at it! Start with the outside edges of the door – you can either use a mini roller or a brush:
If you get any paint on the front of the door while doing this, that’s no biggie since you’ll be painting it anyway – just don’t leave any paint globs (run your brush over any globs on the front to thin/feather them out).
Halfway through painting the door edge and again at the end, I go to the back side of the door and use a damp rag to wipe off any extra paint that might have made it’s way onto the back of the door:
As you can see from the globs of blue paint that are there, obviously the painter before me skipped this step 🙁
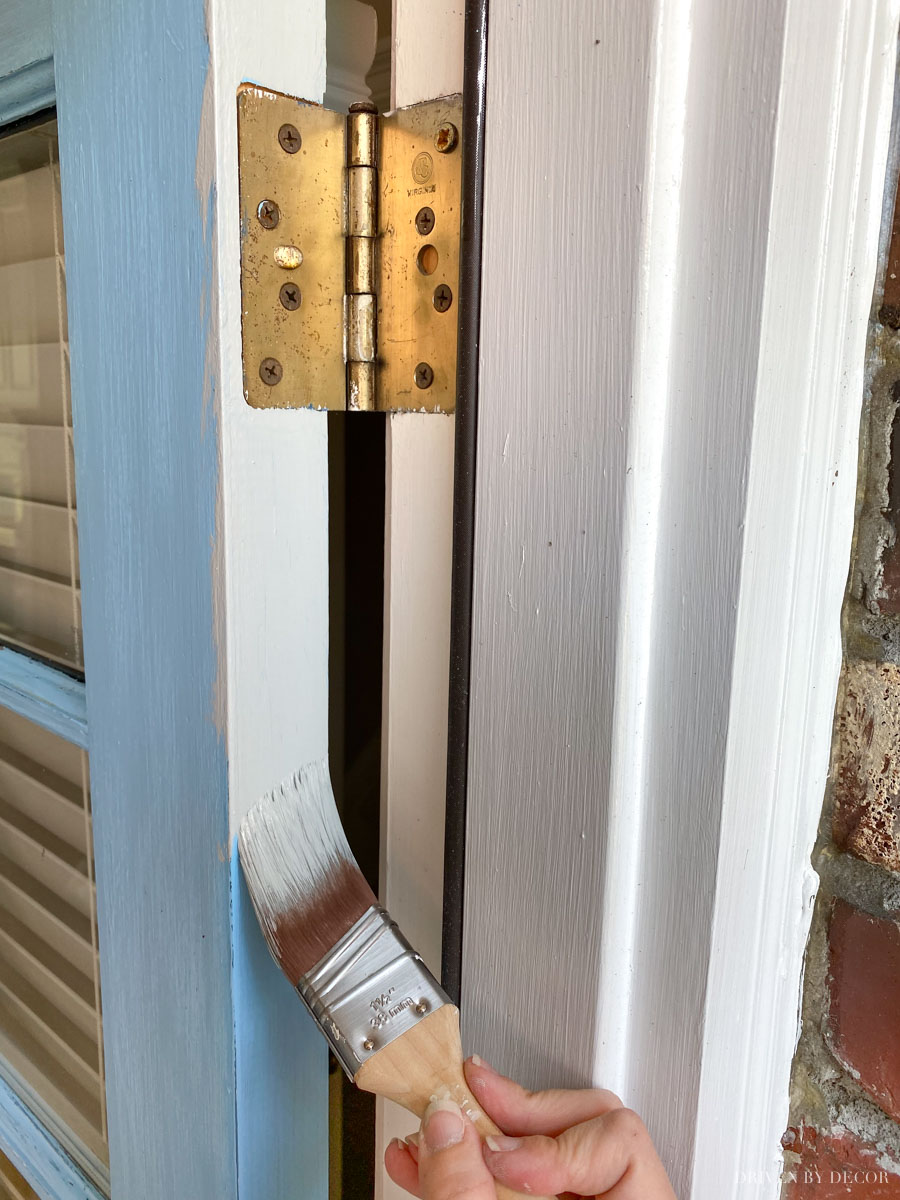
For the inside edge of your door, you might have a seal running down the center of it like mine does – you do not want to get paint on (it will stiffen the seal so it doesn’t work as well). Put a wide putty or tapping knife in between the edge you’re painting and the seal to protect it and keep moving the knife down as you move down the door’s edge with your paint brush:
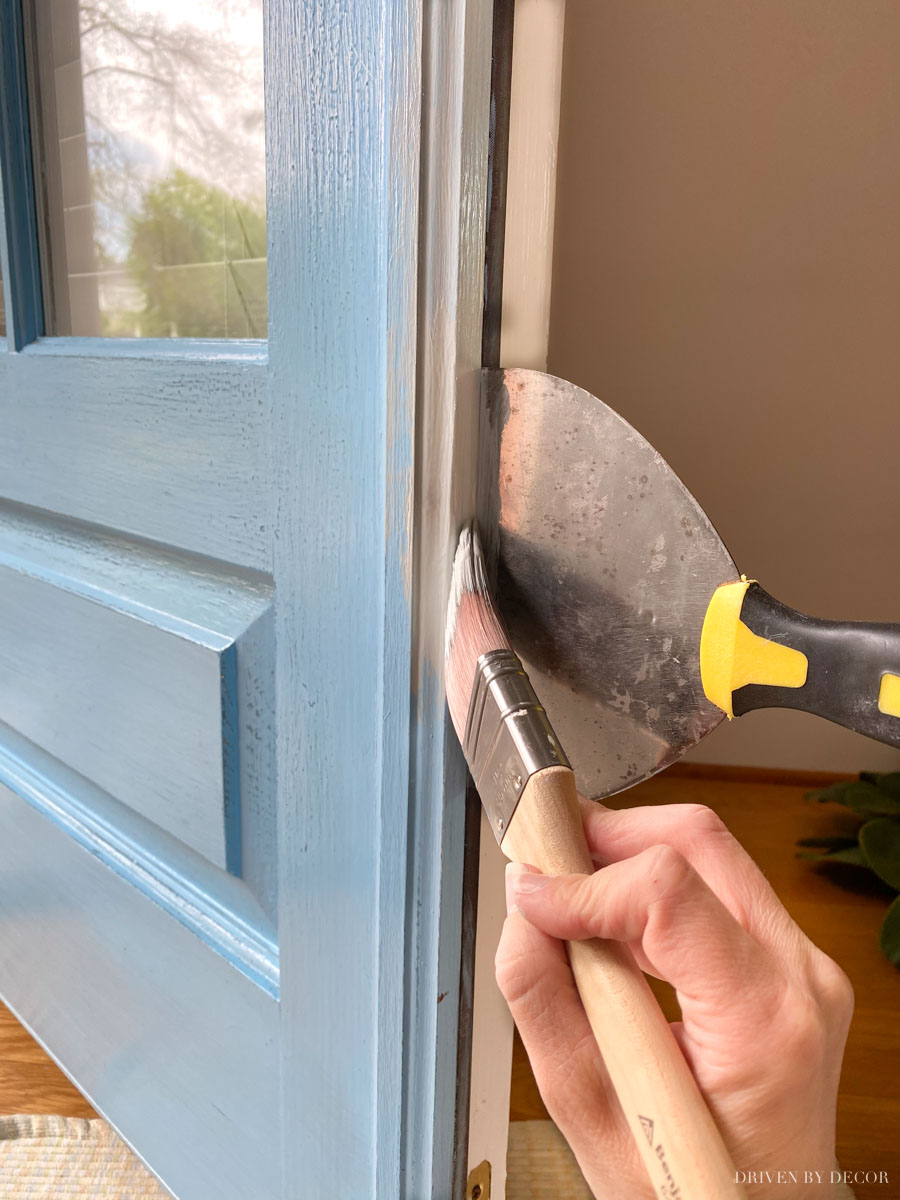
When you’re done, wipe the paint off your putty knife with a damp rag.
6. First Coat the Rest of Your Door in This Order
If you have a typical six panel door without any glass panes, I paint it in the same order that I do an interior door (see my post about how to paint an interior door {here}) – I created this graphic to make it easy:
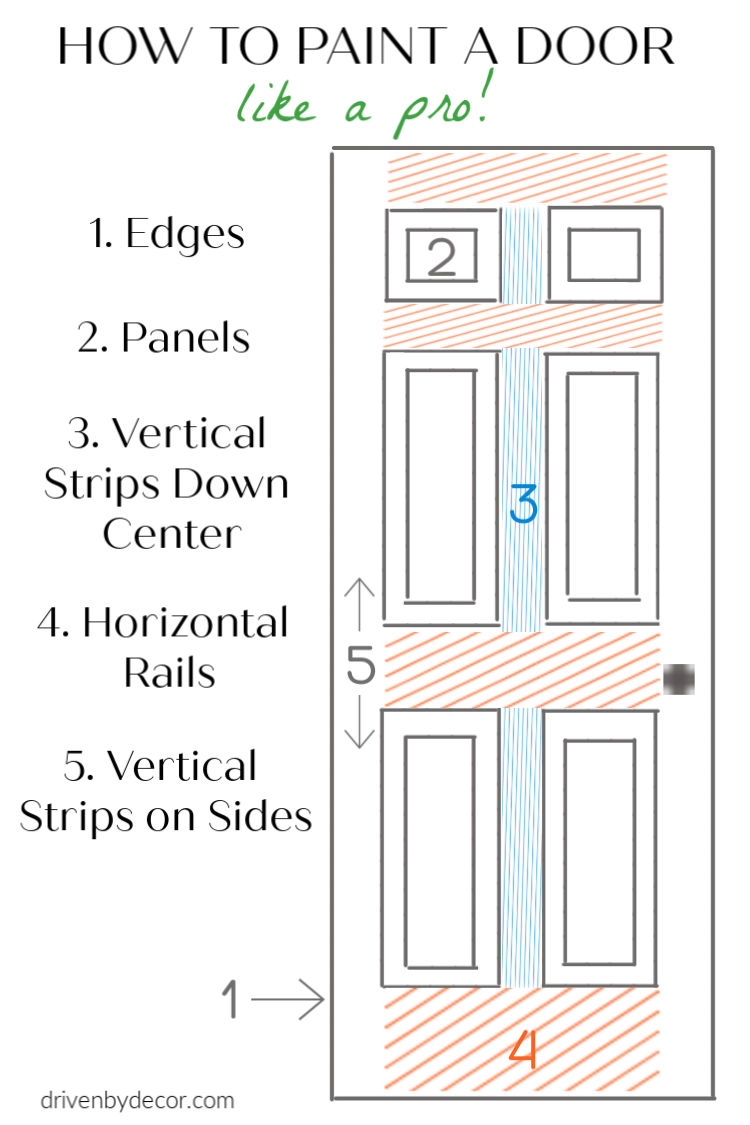
You can paint the entire door with your paint brush or use a combination of a paint and mini roller, using the paint brush on any molding or panels and the mini roller on the flat areas. For a standard paneled door I typically use the paint brush/roller combo because it’s quicker and you get a smoother finish.
My door was a little different than a standard six panel door so I did the whole thing with a paint brush. I painted everything in the same order as above except I saved the window panes for last. If you also have window panes, there are two options for keeping paint from getting on the glass. One is to cover your windows with painter’s tape like this:

The other option if you have a steady painting hand is to paint the panes without using painter’s tape, trying your best not to get paint on the glass…
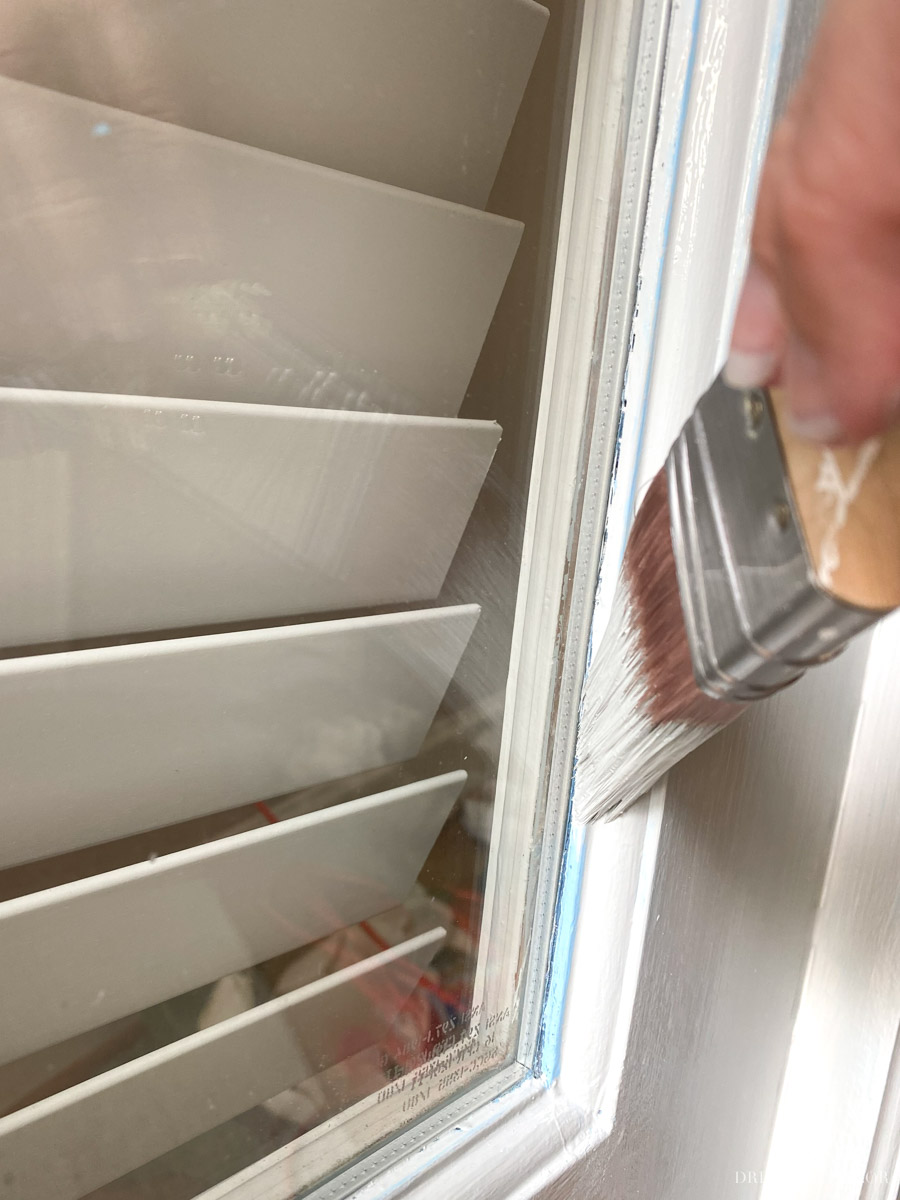
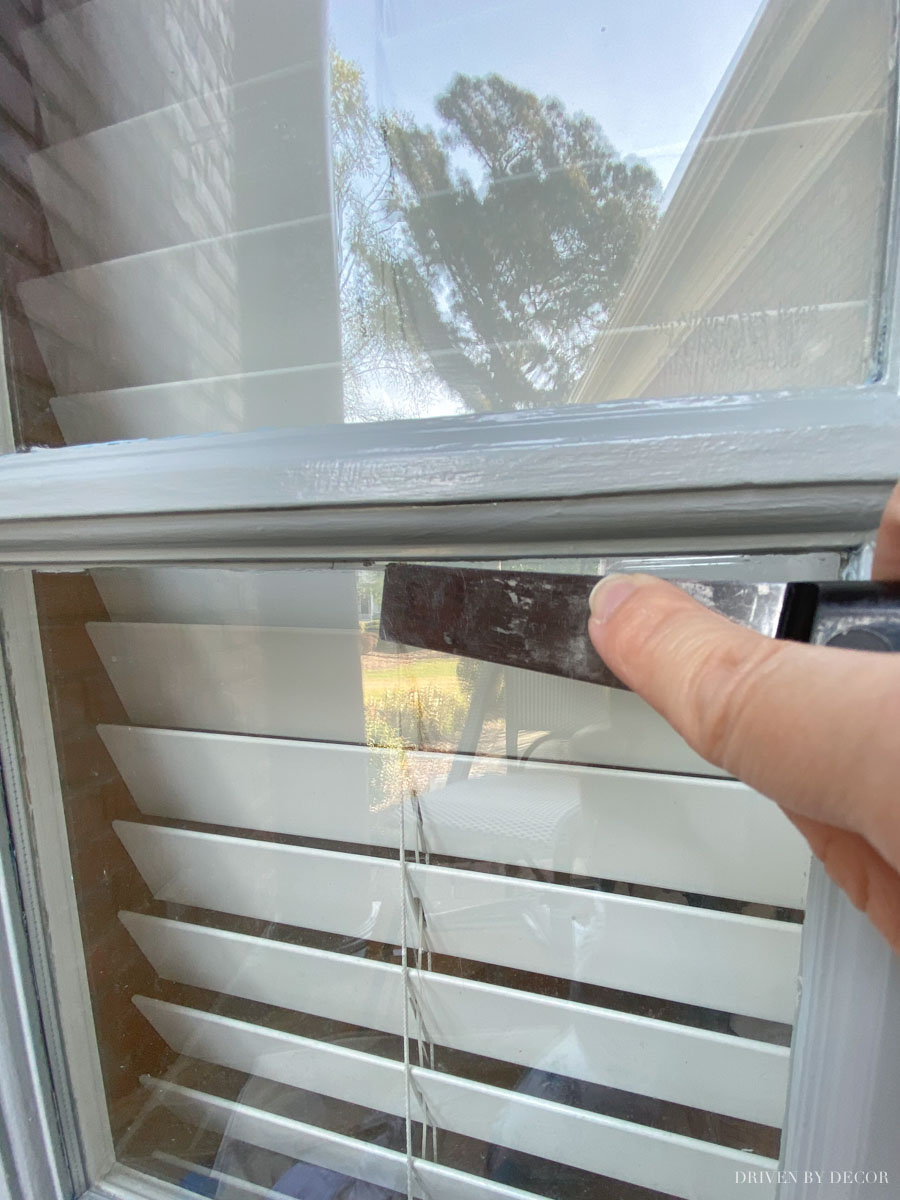
but not worrying too much if you do because it’s fairly easy to scrape off once dry. I simply take a narrow putty knife to get the job done (you could also use a razor blade):
You can go either route but I recommend taping if you’re a new painter or if you’re doing a primer coat since primer is made to stick to surfaces well and will be harder to scrape off.
7. Repeat For a Total of 2-3 Coats
Here’s what my door looked like after the first coat on the left door – such an improvement!

Typically two coats of your new front door paint color is the magic number. If you’re using a primer as your first coat, you’ll probably end up doing three (one coat of primer, two coats of paint). Be sure to allow the recommended dry time between coats, keeping your door cracked open for several hours once you’re done.
You also need to remove any painter’s tape protecting hardware and/or hinges. Pull your tape off slowly and gently – if you go too fast it can pull off some of your new paint! If needed you can use your utility knife to gently cut where the tape meets the paint so it comes off cleanly.
After applying two coats of paint to both of my doors, scraping off excess paint on the glass panes, and removing the painter’s tape, our doors are done! I’m so happy with their new look!
I hope you all found this to be helpful! Let me know if you have any other questions or decide to give this DIY a go. If you’re looking for other DIY projects to tackle, check out some of my other DIY projects {here}. Also, please share with us if you have a front door paint color that you love – it always helps to hear about colors that are tried and true winners!
XO,


Jody says
Nicely done and super tutorial. I love your style and can’t wait to see your Wilmy house progress! PS I’m in Wilmington too. Welcome!
Martha Barreiro says
Really enjoyed all your great painting tips and the photos on how to were great too! I am in the process of picking colors for our home exterior and I wanted to go all white. However, I can’t decided what color to paint the front door to complement the all white Spanish style exterior. Our front door has a glass and iron insert and the entrance has arched stone columns. I also have shutters that I would have to pick a paint color. Any advice would be greatly appreciate!
Thanks
Martha