Have you ever wanted to add curtains to a room but are daunted by the task of measuring for them? I’ve got you covered! In this complete guide for how to measure for curtains, I’ll walk you through it step by step so you get the perfect fit. I’ve created a printable measuring worksheet too! (post includes affiliate links; full disclosure statement available {here})
The steps I’m sharing are the same ones that I used when measuring for {these pinch pleat curtains} that I recently added. I knew that curtains would add a lot to this bedroom, but once I got them hung, I realized that I’d underestimated just how much they would elevate the look of it:
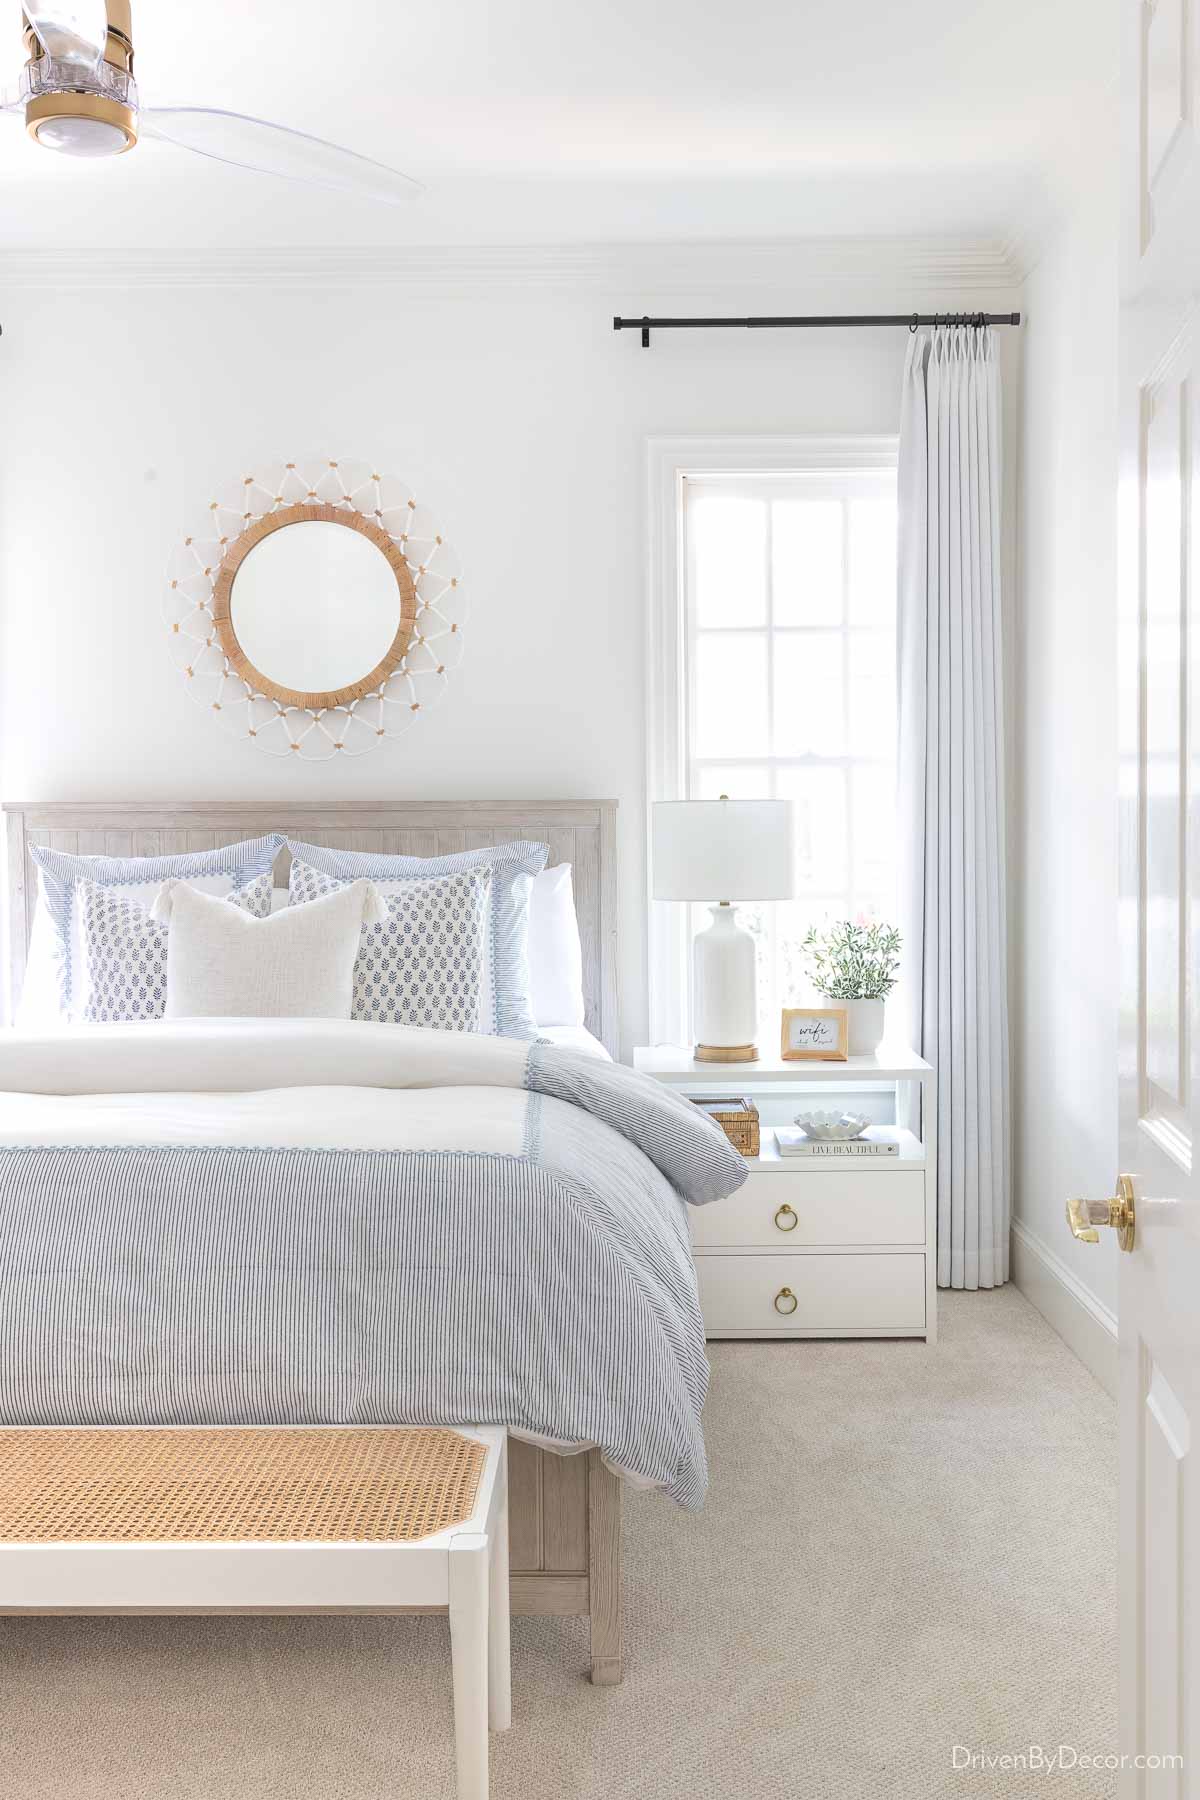
Sources: Ceiling fan | Beadboard bed (weathered white) | Round mirror | Embroidered stripe duvet cover | Blue and white pillows – no longer available | White tassel pillow | Cane bench | Nightstand | White Lamp (similar) | Cane box | Ruffle bowl
I ordered my pinch pleat drapes with the memory training option. The pleats stay perfect from top to bottom no matter how many times you open and close them! Mine are blackout lined in the snow white color, which is a bright white (the beige white is another great white that has more warmth to it).
I hung my drapes with {these telescoping rods} and {these curtain rings} and added {this glide tape} on top so they glide smoothly back and forth. Get more info on my go-to curtains and rods in my post on how high to hang curtains!
And with that, let’s get started by figuring out the width of your new curtains. Grab a steel tape measure, ladder, pencil, and {this free printable worksheet} that I created,
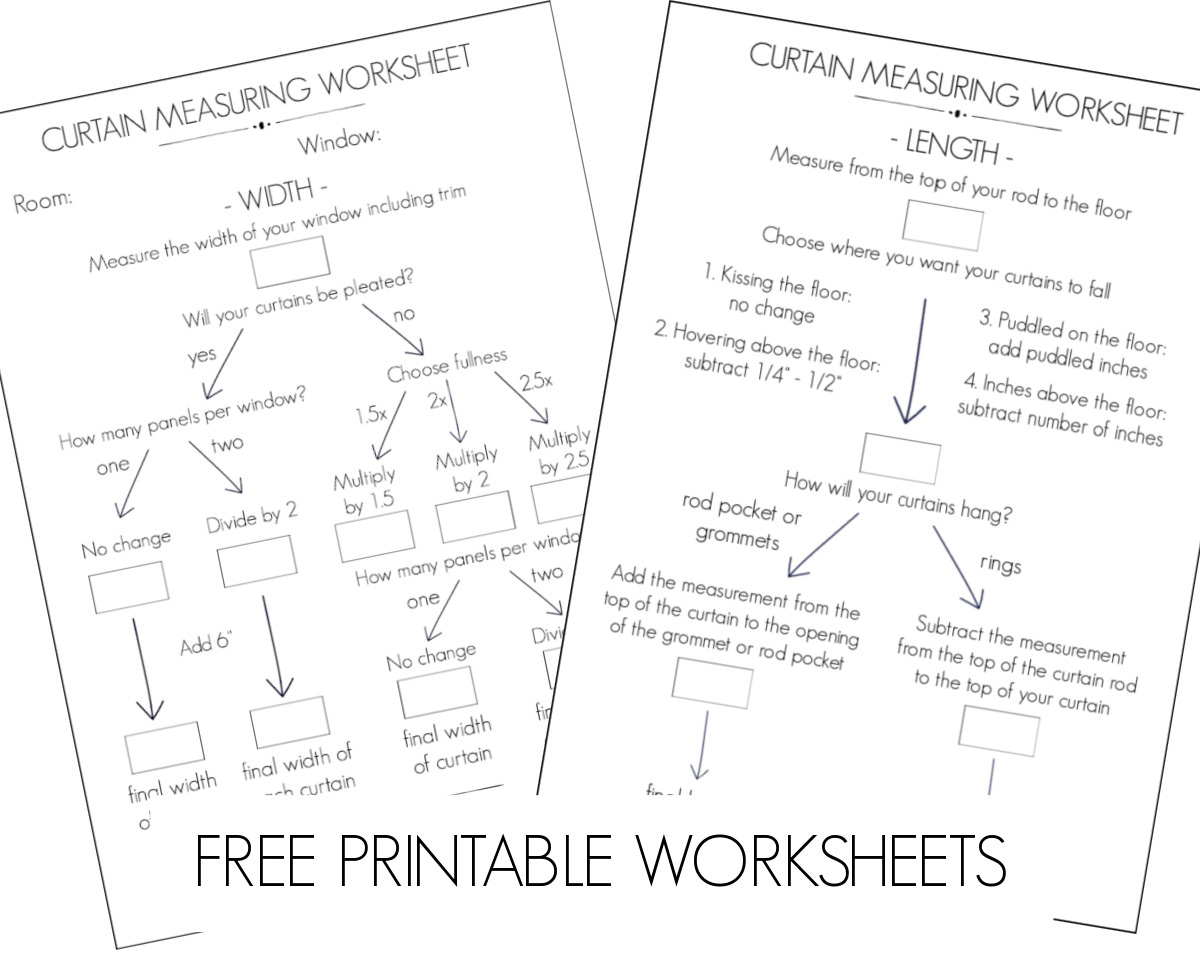
and let’s get measuring!
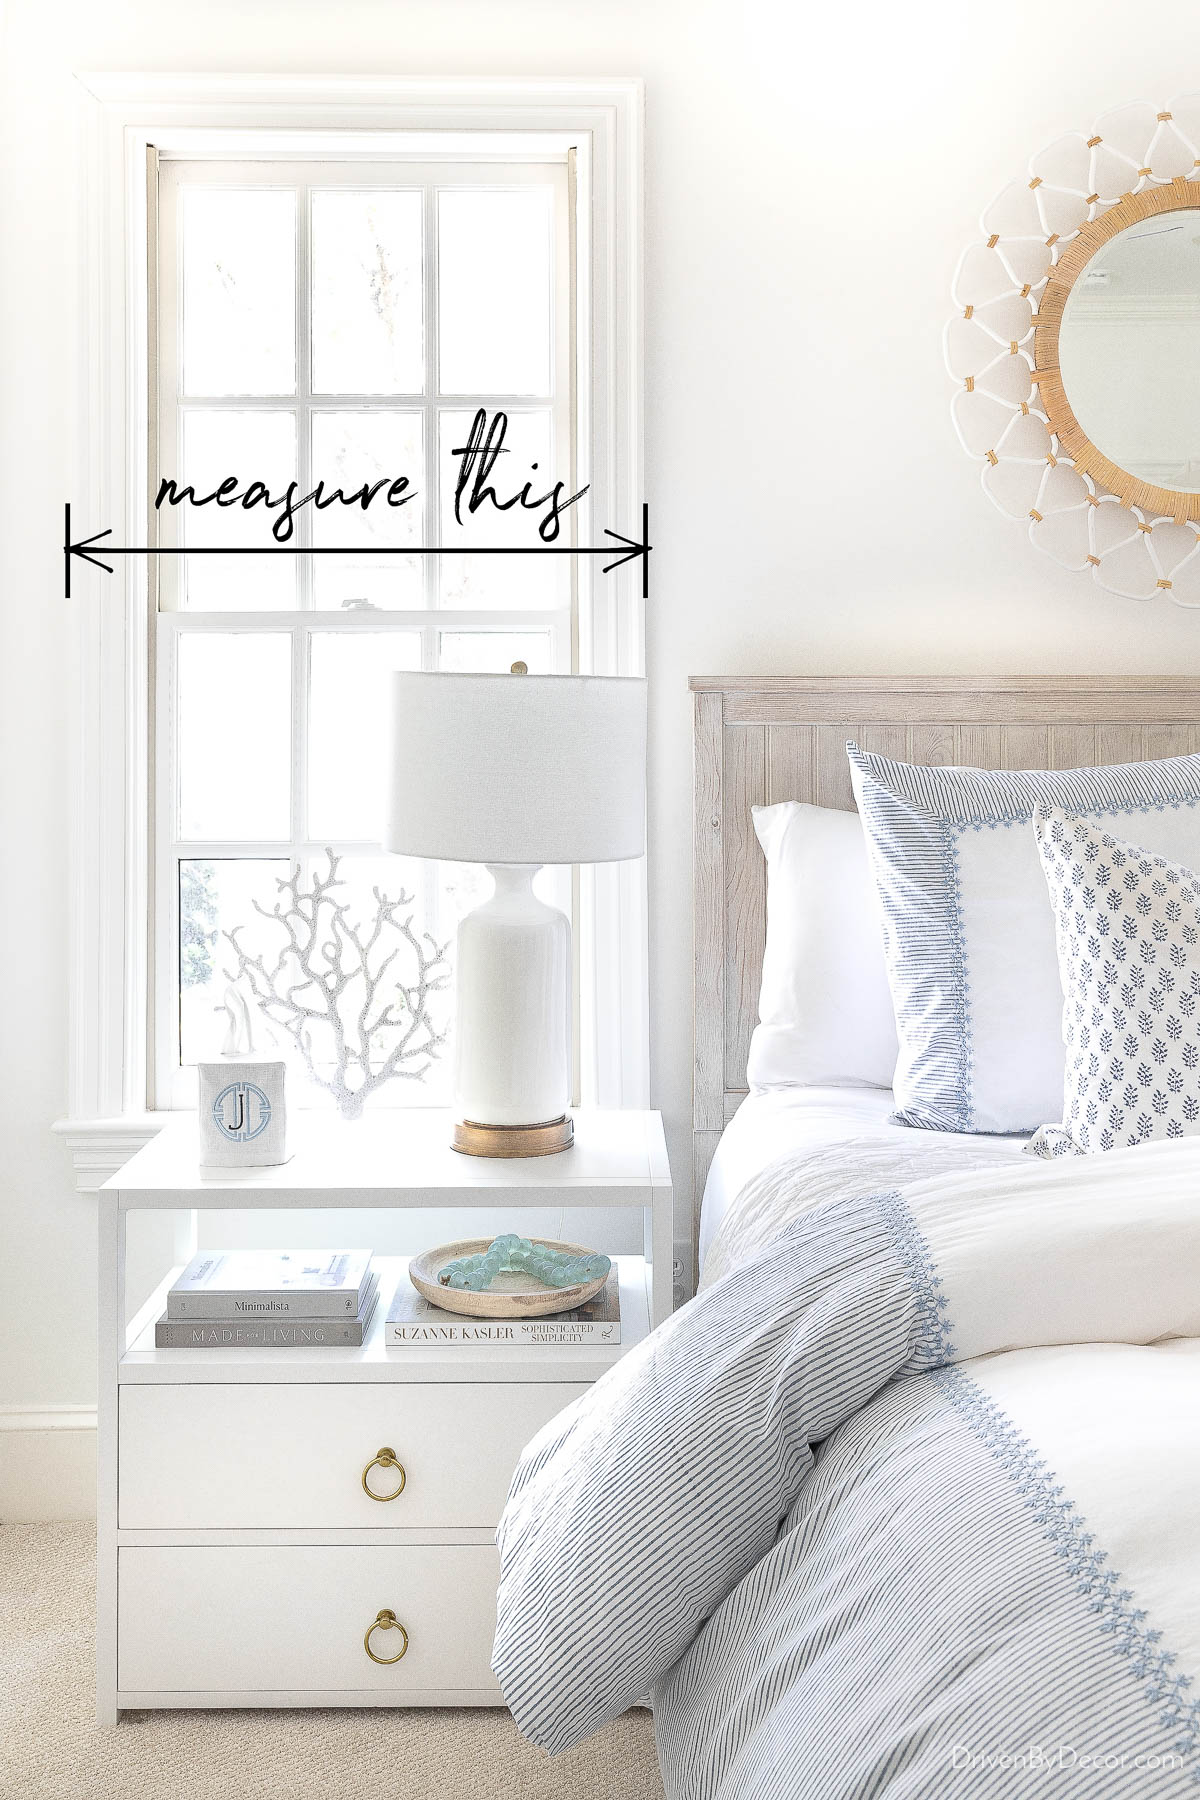
1. Measure Your Window Width
The first step in measuring for your new curtains is to measure the width of the window they’ll be covering. Include the window casing (trim around window) in this measurement:
From here, determining your final curtain width depends on whether you’re ordering pleated curtains like the pinch pleat curtains I recently hung or if you’re ordering non-pleated curtains with a rod pocket, grommet, or ring top like {these linen curtains} in our primary bedroom:
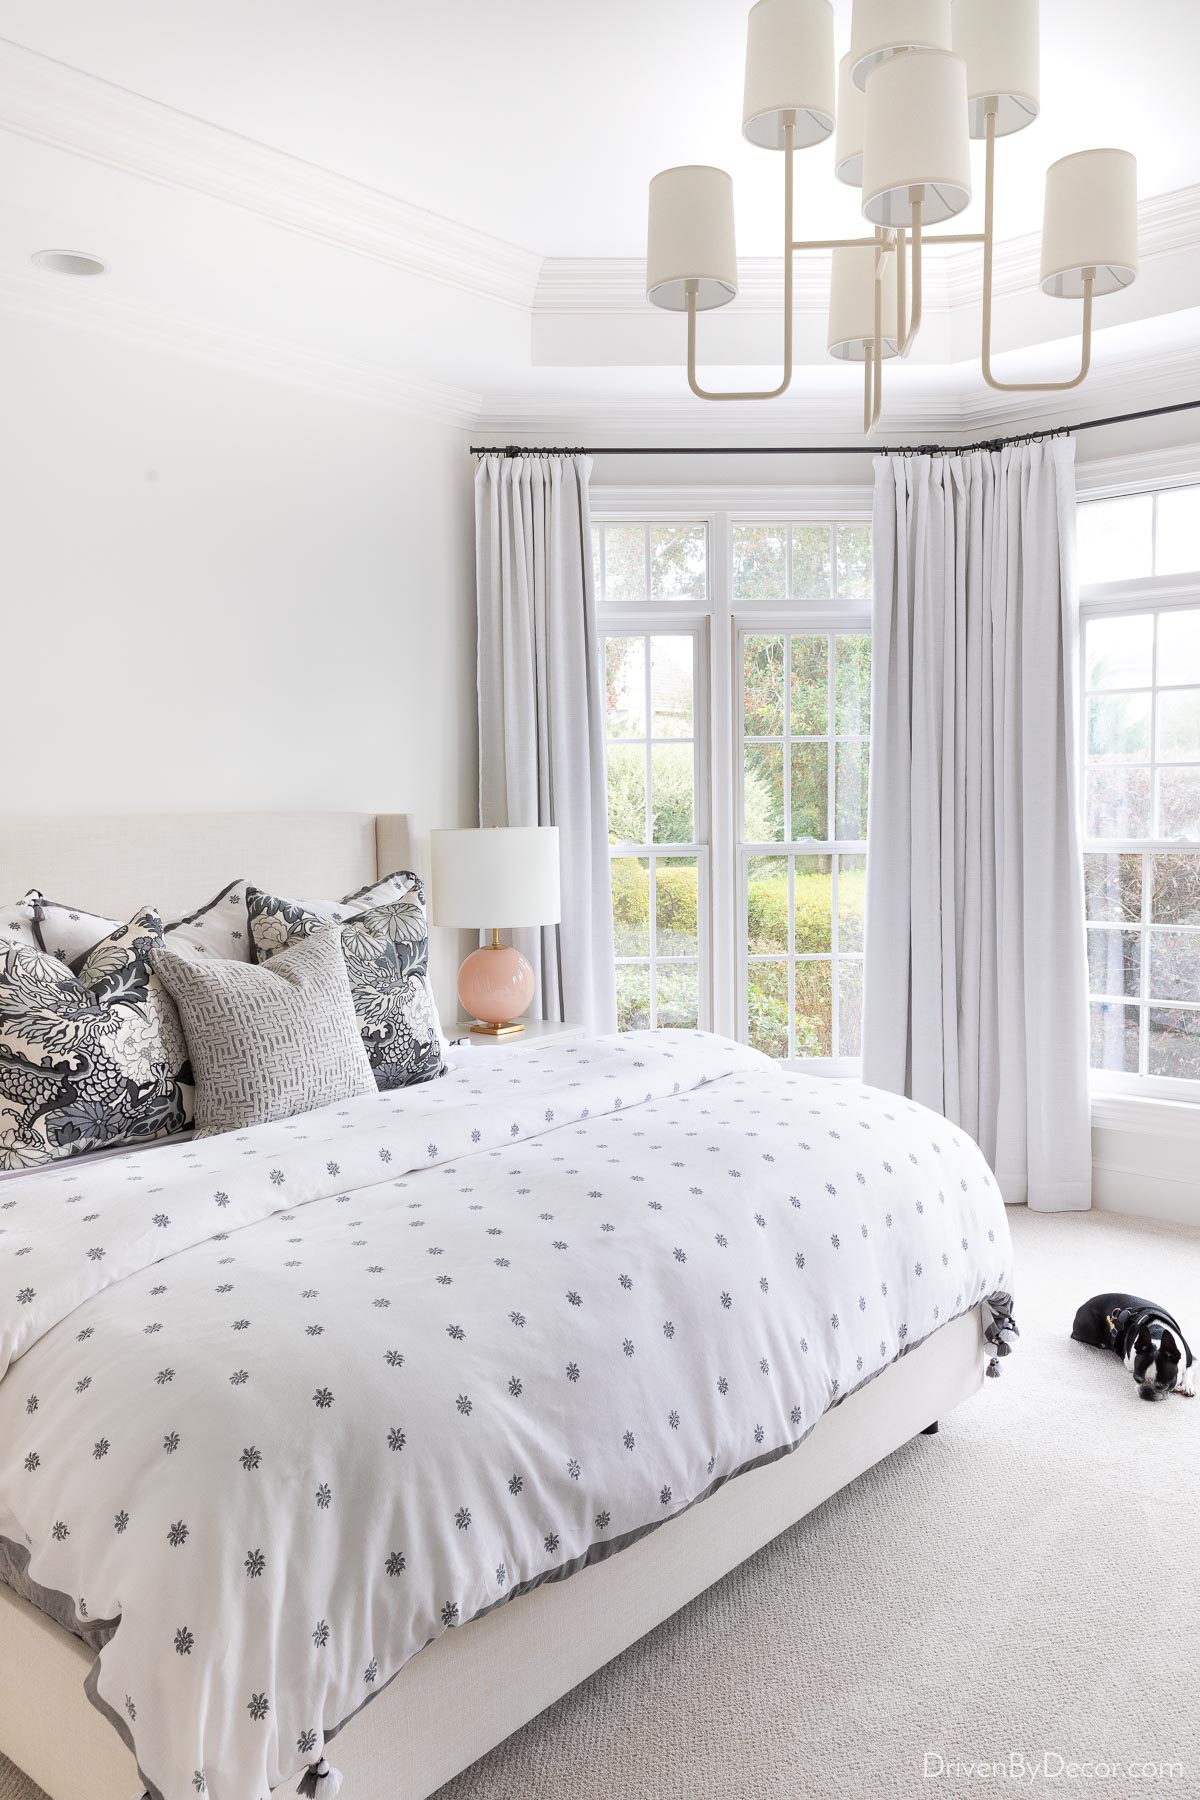
Sources: Upholstered bed (Zuma white fabric) |Nightstands | Blush table lamps | Gray dragon pillow covers | Other bedding – no longer available | Chandelier
Why does it matter whether they’re pleated or not? Pleated curtains take a lot of extra width of material to make the pleats, so the fullness is in a sense “built in”.
- If you’re covering a window with a single pleated curtain like I did, simply add 6″ to your window width measurement to get the final width of your curtain panel. You can now skip to step 4 to determine curtain length.
- If you’re covering a window with a pair of pleated curtains, divide your window width measurement in half and add 6″ to get the final width of each curtain panel. You can now skip to step 4 to determine curtain length.
If you’re ordering a non-pleated curtain such as a rod pocket, grommet, or ring top, move on to step 2.
2. Decide on Desired Fullness
For non-pleated curtains, the total width of your curtains should be 1.5 – 2.5 times the width of your window. Otherwise, they will look skimpy and cheap. Curtains that are 1.5 times the width of the window will look more minimalistic and streamlined, whereas curtains that are 2.5 times the width of the window will look fuller and more high-end.
Personally, I aim for curtains that are about two times the width of the window. To me, it’s the perfect happy medium of looking nice and full but not being so full that they cover too much of the window when pulled back:

Tip! If you’re ordering ready-made curtains that come in just a few width options instead of custom curtains, choose the width that falls closest to your desired fullness in the 1.5-2.5x range.
The only time I choose curtains that are about 1.5 times the width of the window is when I have limited stack back space. Stack back space is the amount of wall space on the side of the window that the curtains will take up when they’re fully open.
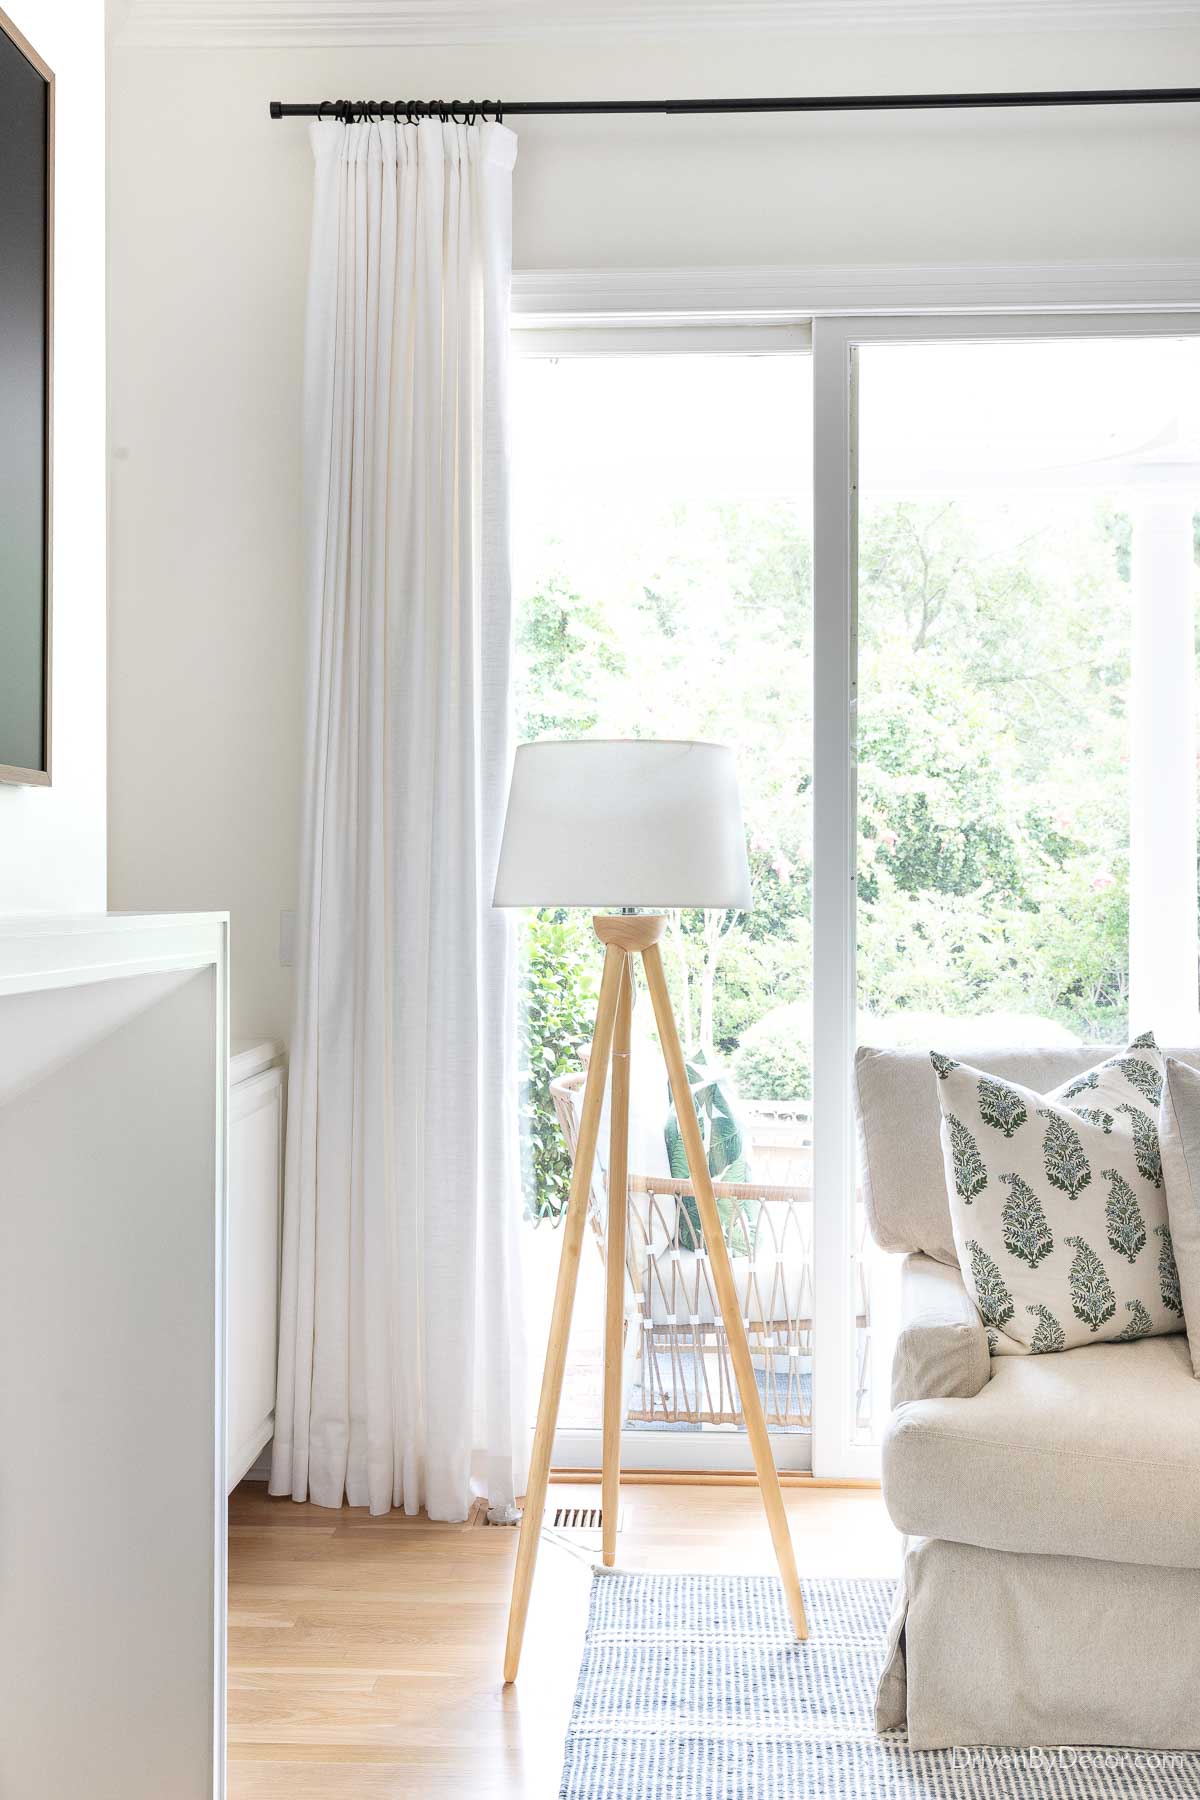
Our family room curtains are a good example. The curtains I installed on the left side of our large glass sliders don’t have much space to stack back away from the window because of the proximity of our cabinets flanking the fireplace:

so I ordered them at 1.5 times the slider width:
3. Do Final Width Calculations
Now that you’ve decided on the fullness of your non-pleated curtains, let’s do some simple math! To get your final curtain width, multiply your window width measurement by your desired fullness. For example, if your window width is 36″ and you want maximum fullness of 2.5 times the width, your total curtain width would be 36″ x 2.5 = 90″.
If you’re covering the window with a single curtain, you’d order it at 90″ wide. If you’re covering the window with a pair of curtains, you’d divide that number in half and order each curtain panel at 45″ wide.
Now let’s move on to figuring out the length of your curtains…
4. Decide on the Height of Your Curtain Rod
One of the biggest mistakes that people make when installing curtains is hanging their curtain rod too low. Hanging your rod closer to the ceiling adds a feeling of height, making your ceilings seem taller.
Common advice is to hang your rod as close to the ceiling as possible. Personally, when there’s a large amount of wall space between the top of the window and the ceiling, I think hanging them that far up looks odd. My recommendation is to hang your curtain rod ½ to ⅔ of the distance between the top of your window trim and your ceiling (or crown molding, if you have it).
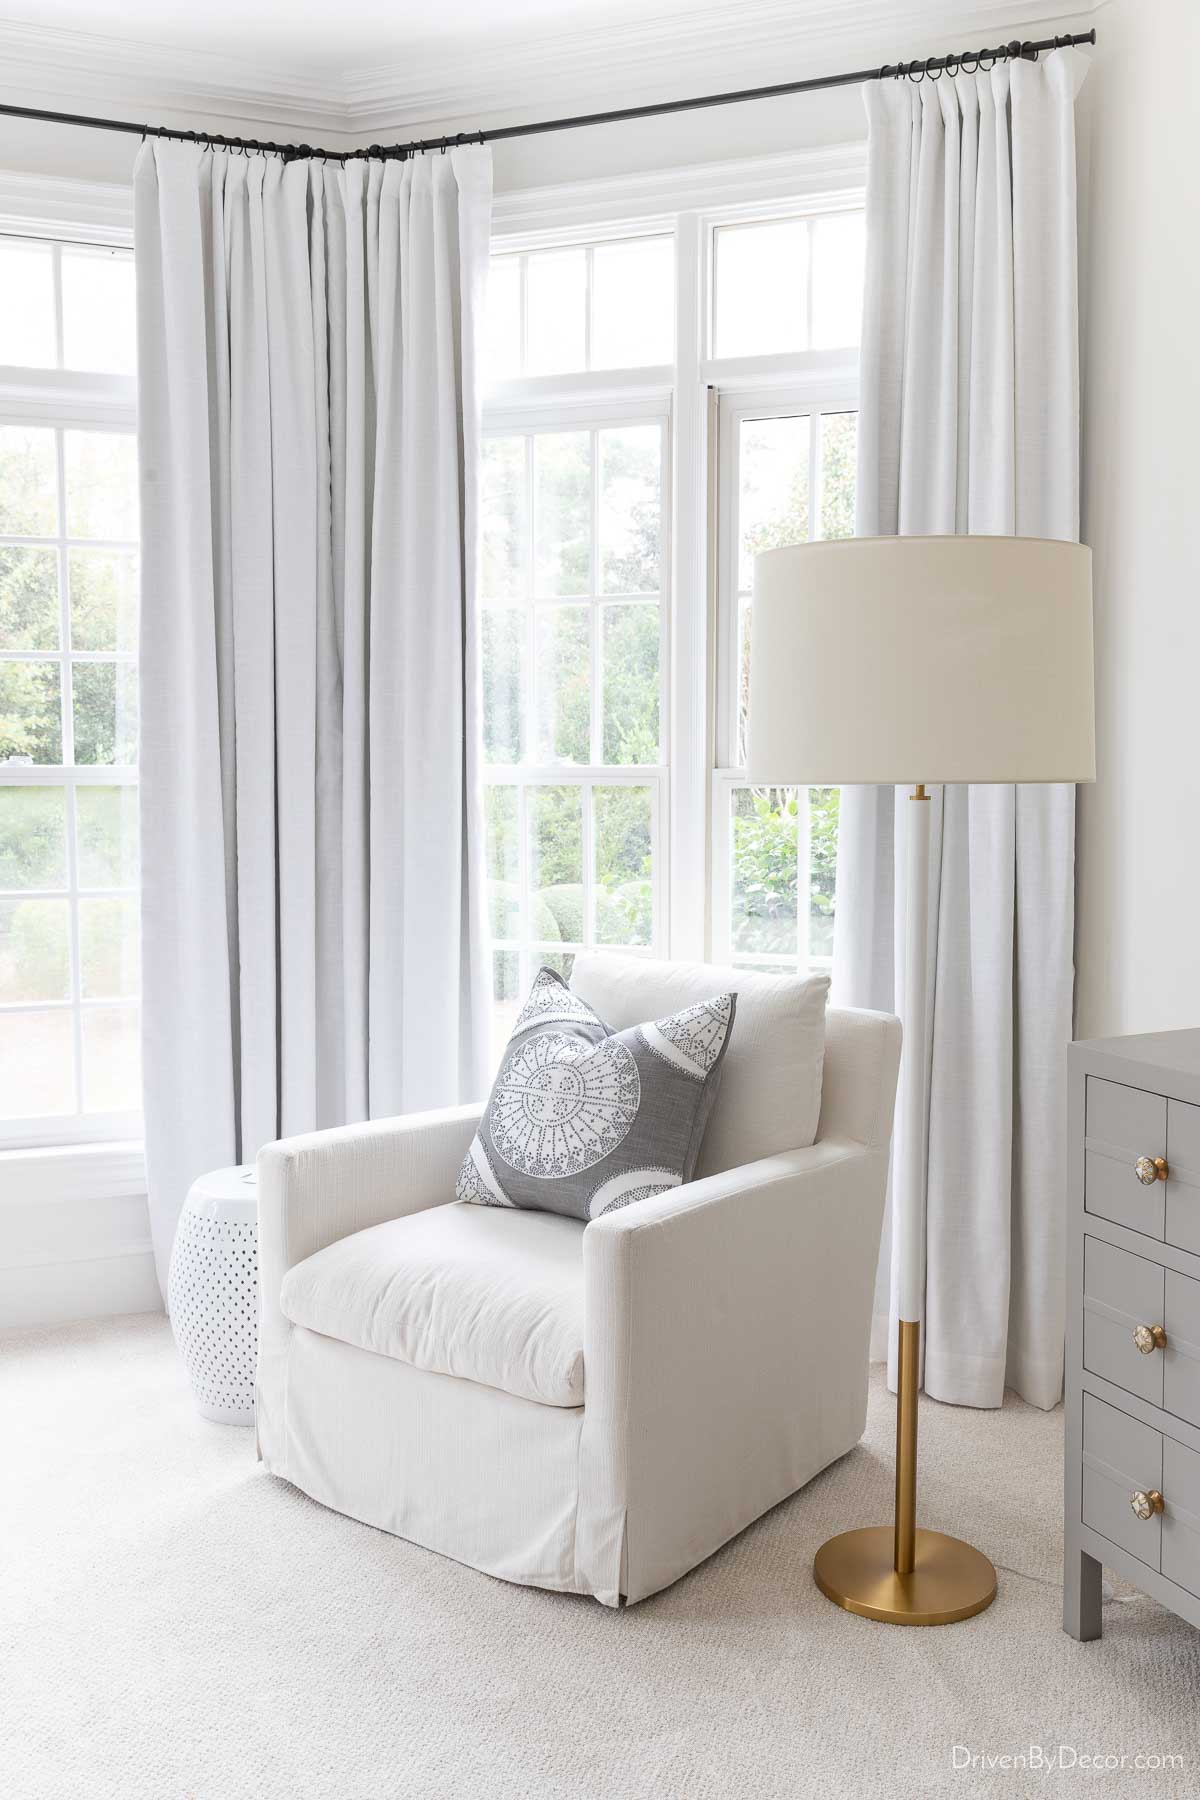
Room sources: Upholstered chair | Floor lamp
I share more details on rod height plus several photo examples in my post on how high to hang curtains. Check it out if you want more info to help you decide on the height of your curtain rod.
Tip! If you’re installing new curtain rods with your curtains, wait to install your rod until AFTER your curtains arrive so you can get the height just right!
5. Measure From Your Rod to the Floor
Next, measure the distance from the top of your curtain rod (or, if not yet installed, measure from where you plan to hang it) to the floor. Take this measurement on both sides of the window, as sometimes there is a slight difference in height.
Want to save this post?
6. Decide Where You Want Your Curtains to End
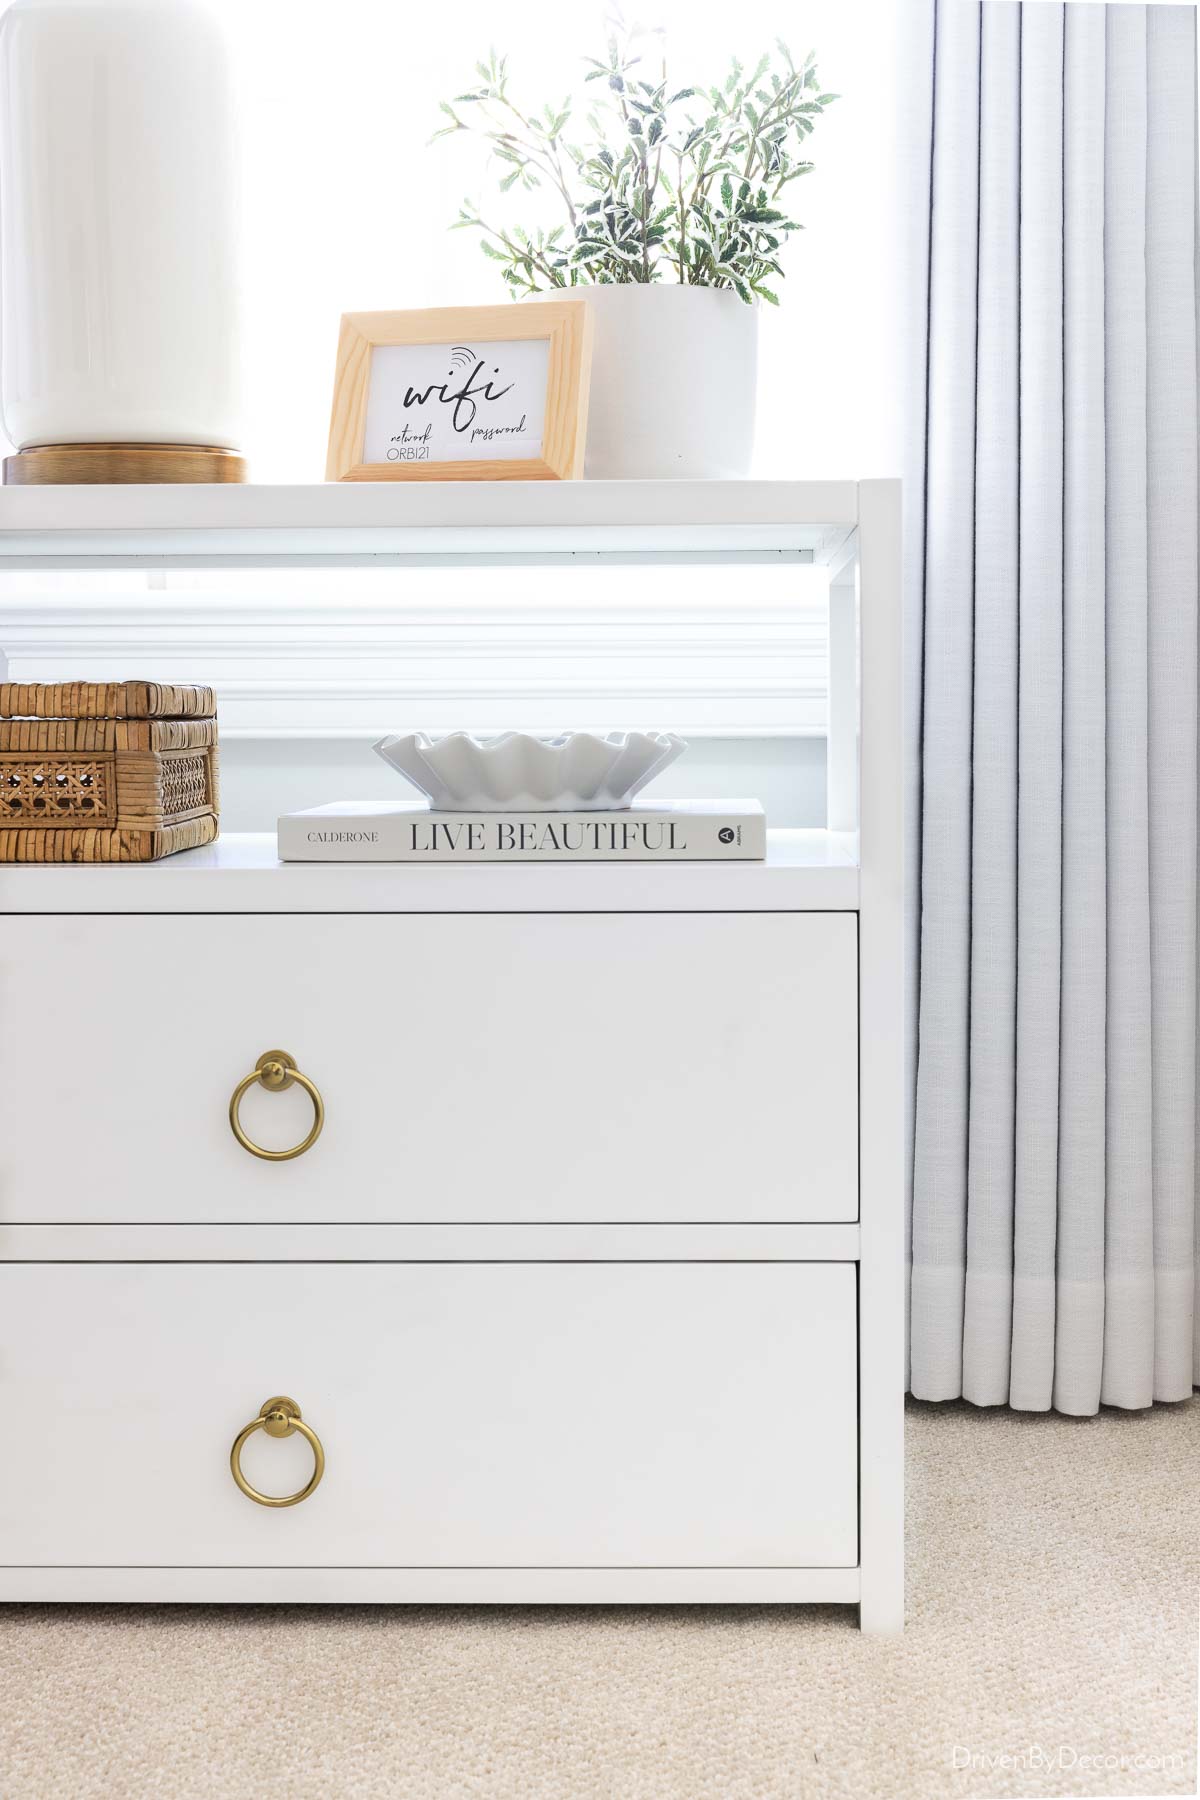
Next, decide where you want your curtains to end in relation to the floor. I personally prefer the bottom of my curtains to kiss the floor or hover ¼″ – ½″ above it:
You could also choose for your curtains to puddle on the floor for a more dramatic look, but be aware that puddled drapes tend to be dust collectors. Another option is to hang your curtains so that they fall several inches above the floor. This high water pants look isn’t my favorite, but in some cases it’s necessary if you have an obstacle like electric baseboard heaters.
Once you’ve decided where you want your curtains to end, adjust your rod to floor measurement by:
- Kissing the floor – no change
- Hovering ¼″ – ½″ above the floor – subtract ¼″ – ½″
- Puddling on the floor – add the number of inches of puddling you want
- Several inches above the floor – subtract the number of inches you want them above the floor
7. Adjust Your Measurements Based on Curtain Type
The final piece of info you’ll need to take into account when ordering curtains relates to the type of curtains you’re ordering. For rod pocket and grommet curtains such as {these antique grommet curtains}, add the measurement from the top of the curtain to the opening of the grommet or rod pocket to get your final length measurement:
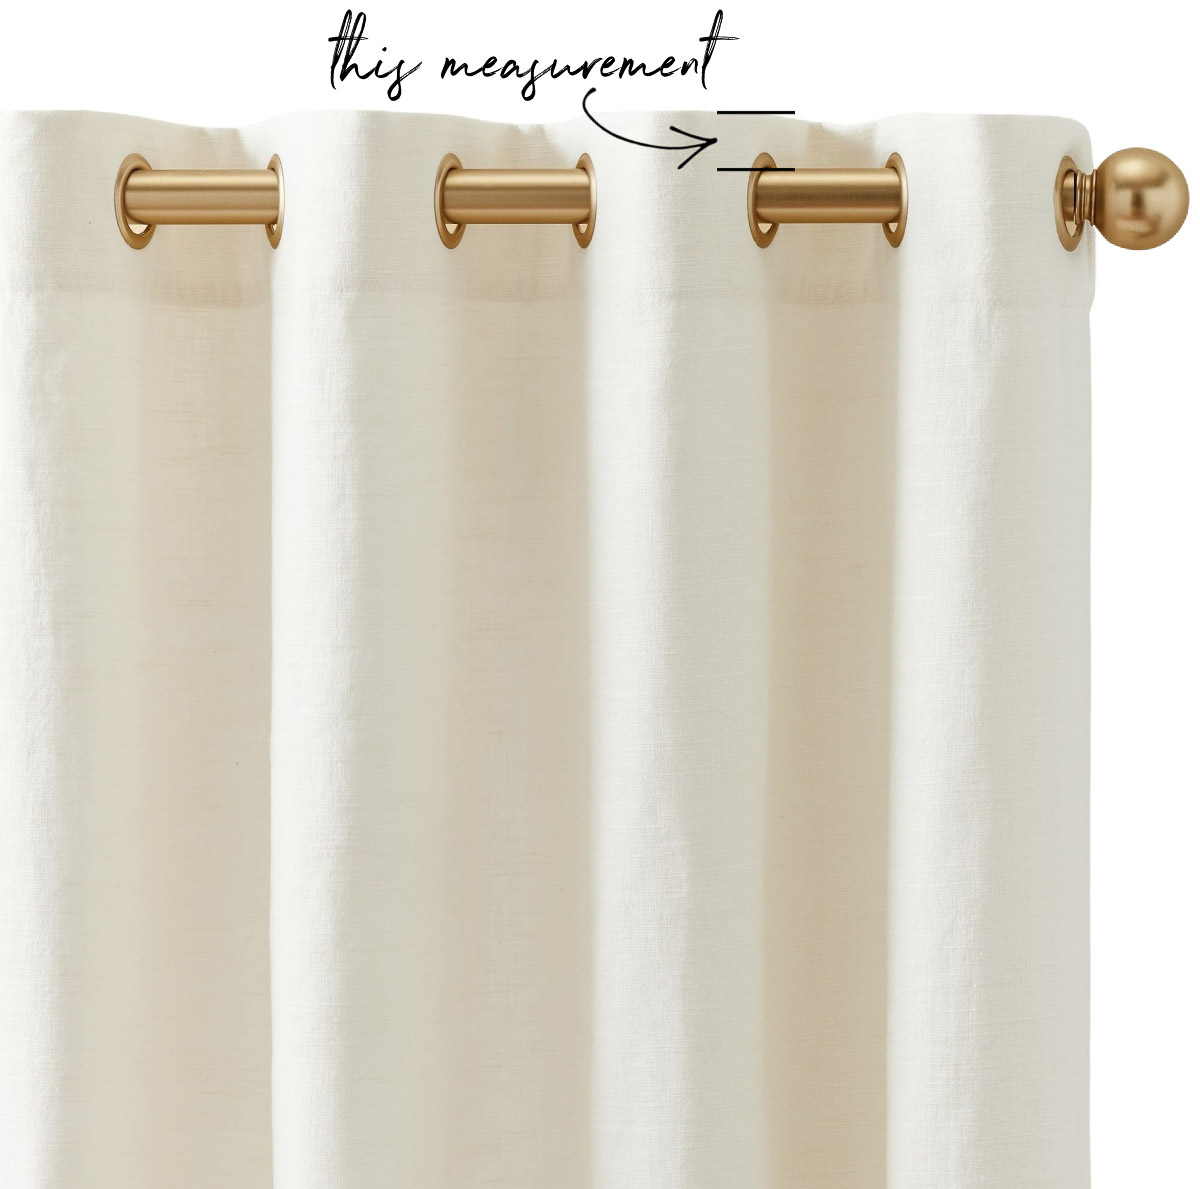
Some sellers note this measurement in the product listing, but in other cases, you may have to make your best estimate.
For curtains hung on rings, subtract the measurement from the top of the curtain rod to the top of your curtains to get your final length measurement
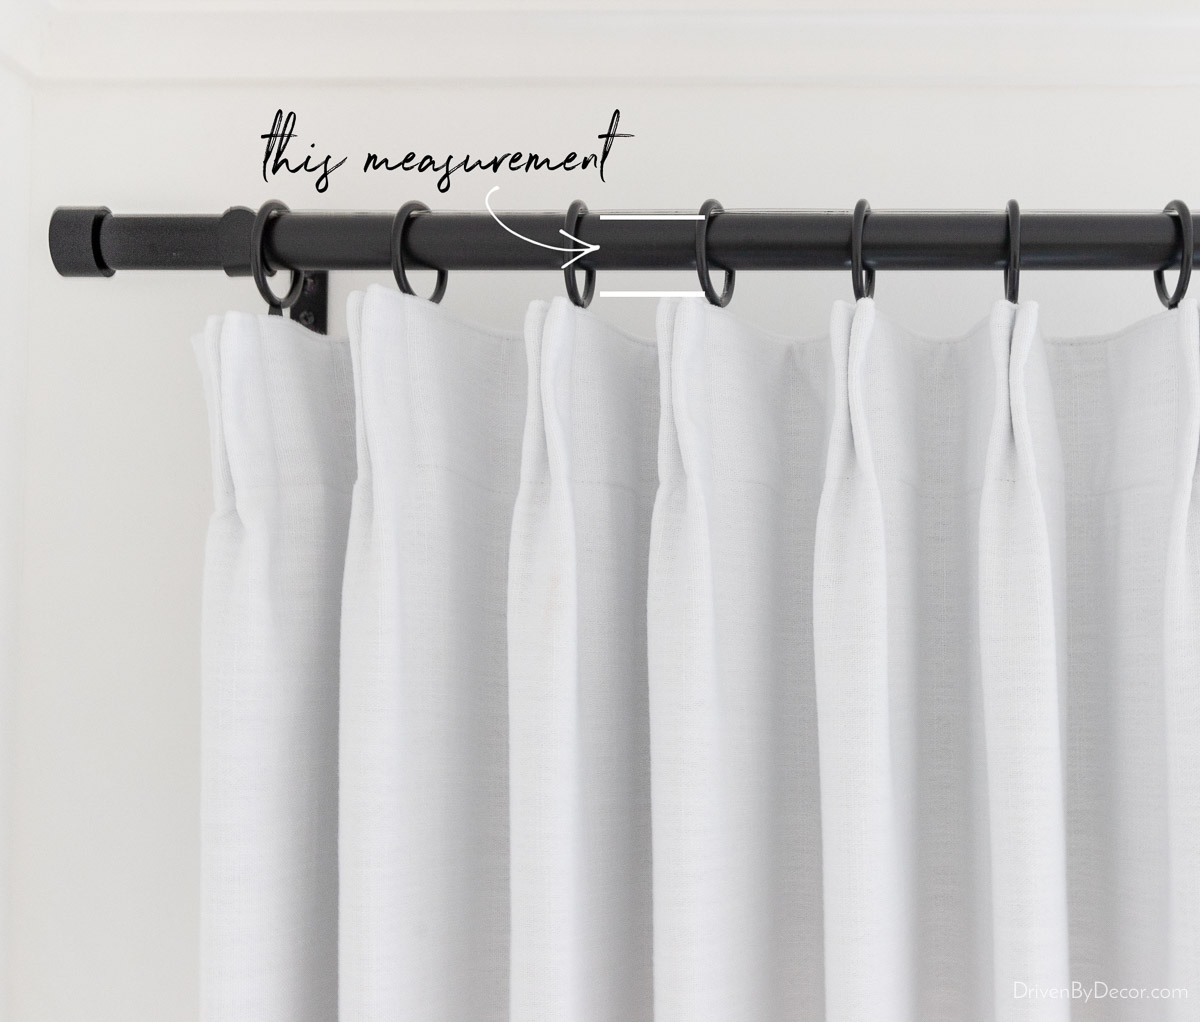
How can you figure out this measurement before you even have your curtains? The inner diameter of your rings + ½″ is a good ballpark figure.
Tip! If you’re ordering ready-made curtains that come in just a few length options, choose the length that falls closest to the final measurement you’ve arrived at. You can make adjustments to the height of your rod or hem curtains that are too long if needed.
Curtain Hanging Tips
When it comes to hanging curtains, there are a few tips to keep in mind to ensure a polished, high-end look. For one, as mentioned earlier, it’s best to wait on hanging your rods until after your curtains have arrived, if possible. You’ll be able to adjust the height of the rod as needed for your drapes to end at your ideal distance from the floor.
Another important tip is to steam your curtains before hanging them! Steaming curtains relaxes the fabric, adding length as the wrinkles are released. If you hang your curtains at the perfect height and then steam after hanging, you’ll end up with curtains that look too long.
Also, if you have curtains that you might machine wash in the future, it’s a good idea to wash them before installing them in case they shrink at all. Otherwise, if they shrink when you wash them for the first time months later, they’ll be too short and you’ll have to adjust your curtain rods.
Lastly, if you’re deciding between two different curtain lengths and are unsure which is best, always choose the longer length. You can have too-long curtains hemmed (or do it yourself with iron-on hemming tape) but there’s not much you can do about too-short curtains if adjusting the rod height isn’t enough to fix it.
I hope you found this post helpful if you’re looking to add curtains to your home! Be sure to Pin an image or two from this post so it will be easy to find if you need it in the future 😊. Enjoy the rest of your weekend!


Kim says
After much searching, you are the only person to explain how to measure the length of curtains depending on the curtain type (e.g., grommet, rings). Thank you!!!
debra phillips says
I needed this and you make it doable from a novice. thank you Kris!