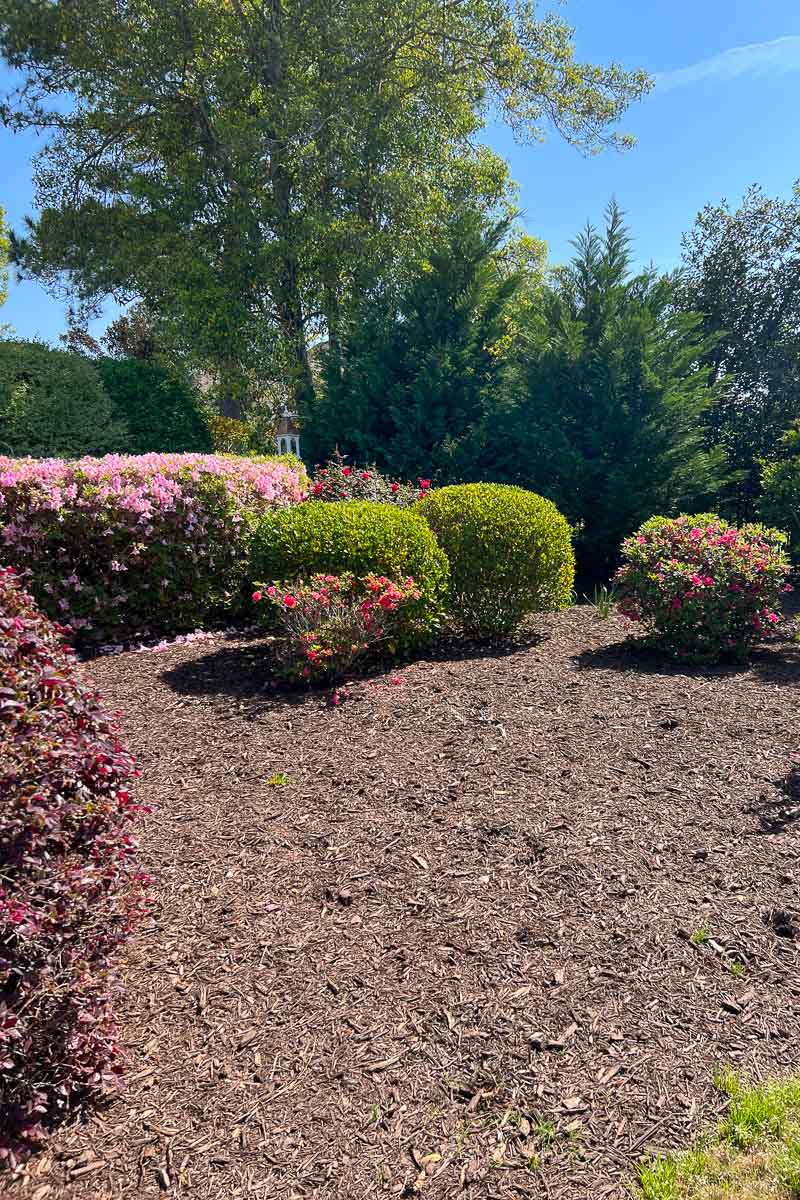
Adding a small raised garden bed to our backyard was on my ever-growing to-do list since moving in. While most of our backyard is well landscaped, in our side mulch bed there’s a large, awkwardly bare area that’s the perfect spot for a garden:
I decided on a raised garden vs. an in-ground garden for a variety of reasons. For one, I live in a coastal area where the quality of soil for gardening is fairly poor. I also love that raised garden beds offer better drainage than traditional gardens, weed control is easier, and there’s less strain on your back and knees. Another advantage of raised gardens is that they provide an opportunity to extend the growing season due to the elevated design of the beds, which allows for soil warming and earlier planting.
I wanted to start small by building an inexpensive raised garden bed with the option to expand from there if my first few seasons of gardening go well 🤞🏻. Today I’m sharing the 6 inexpensive raised garden bed ideas I considered, starting with the simple solution that I went with. (post includes affiliate links; full disclosure statement available {here})
1. Planter Wall Block Raised Garden
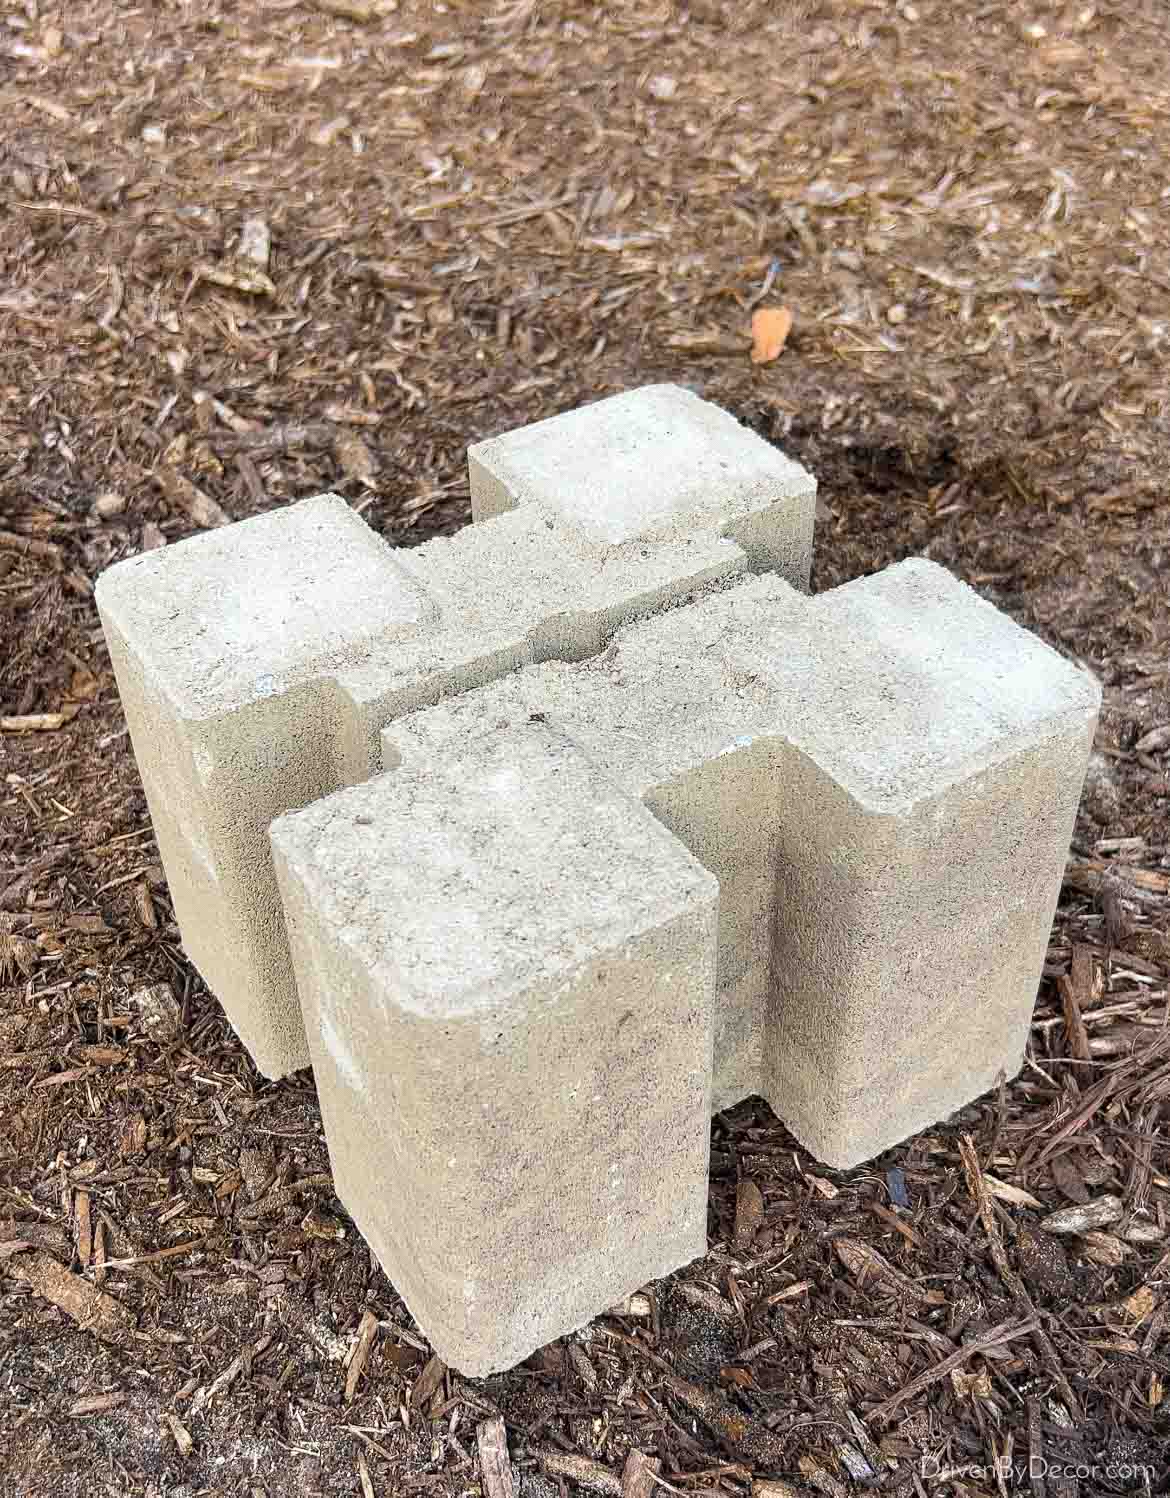
Building a raised garden using planter wall blocks couldn’t be simpler. After leveling out the ground, you place {these retaining wall blocks} in the four corners of your garden (installed with the open hole in the middle facing up):
Then slide 2 x 6 wood boards (cut to your desired length) into the notches of the blocks to create the first layer of your garden bed:
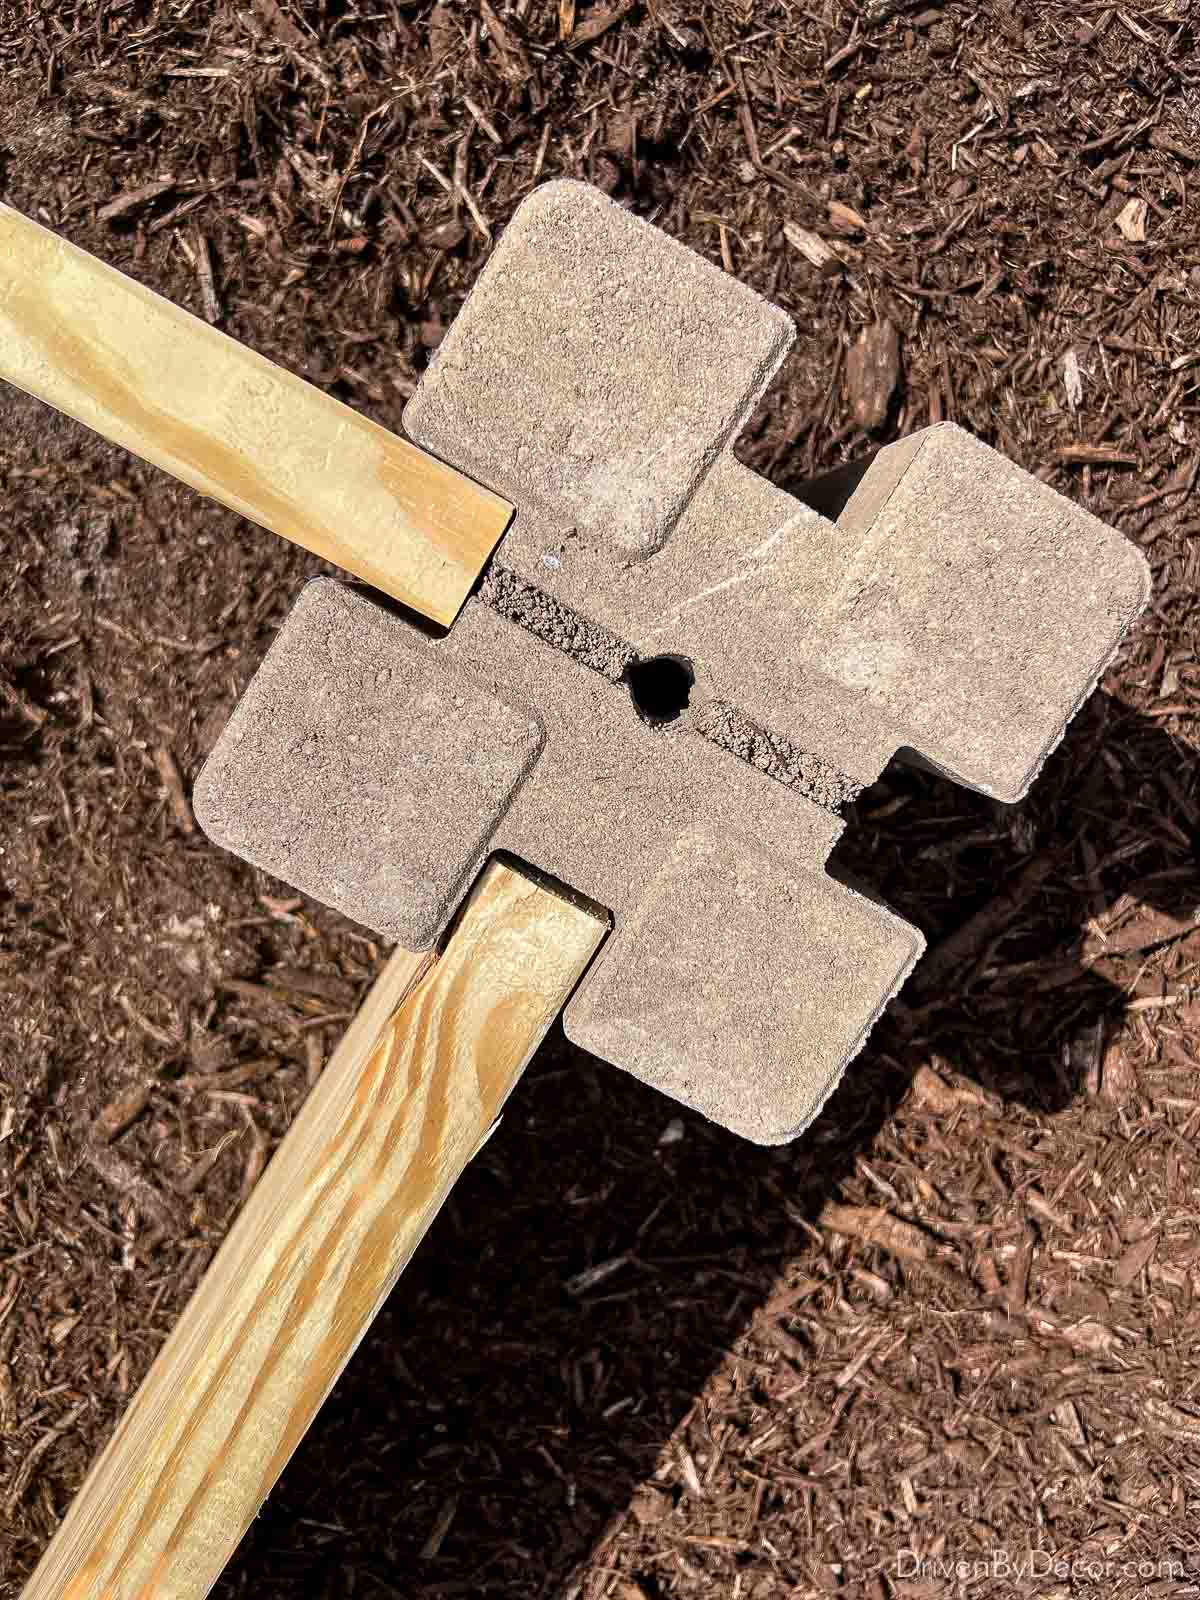
I bought four of {these 2 x 6 x 8 southern yellow pine boards} from Lowes and had them cut each 8′ long board into two pieces – one that was 3.5′ (for the ends of my bed) and one that was 4.5′ (for the sides of my bed). They will do this for free!
Cedar and redwood are great choices for a raised garden because they’re naturally rot resistant and long-lasting, but they’re also quite expensive. Pine is your best inexpensive option, but untreated pine won’t last nearly as long (likely 3-5 years). You can increase its longevity by treating it with a eco-friendly waterproofer like {this Eco-Advance sealer} that you apply with a sprayer.
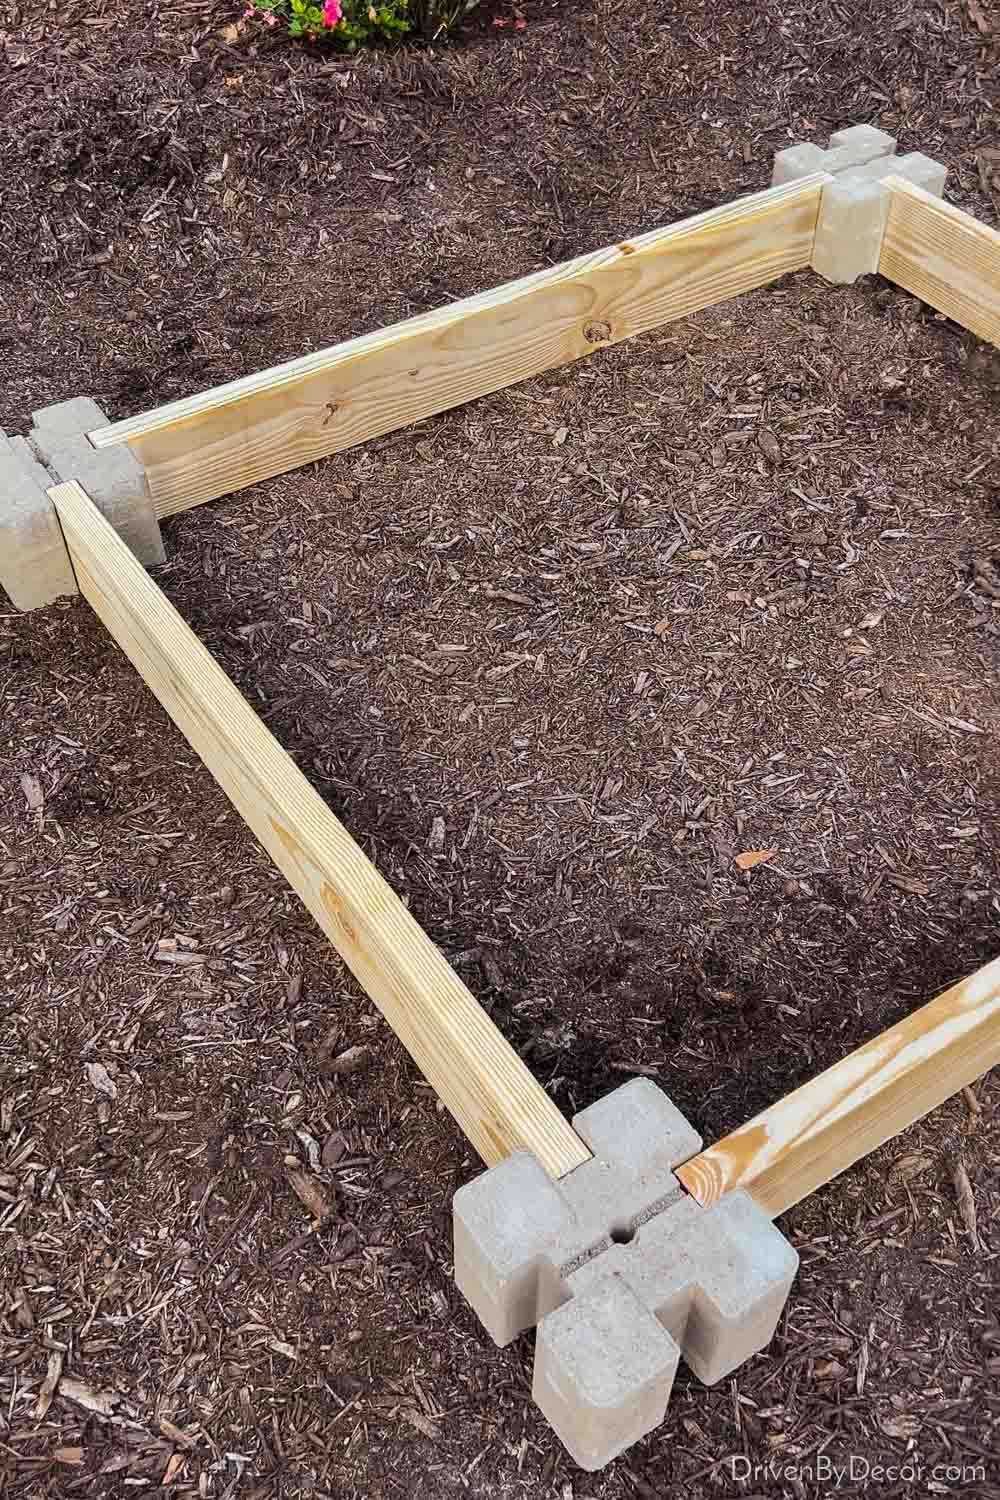
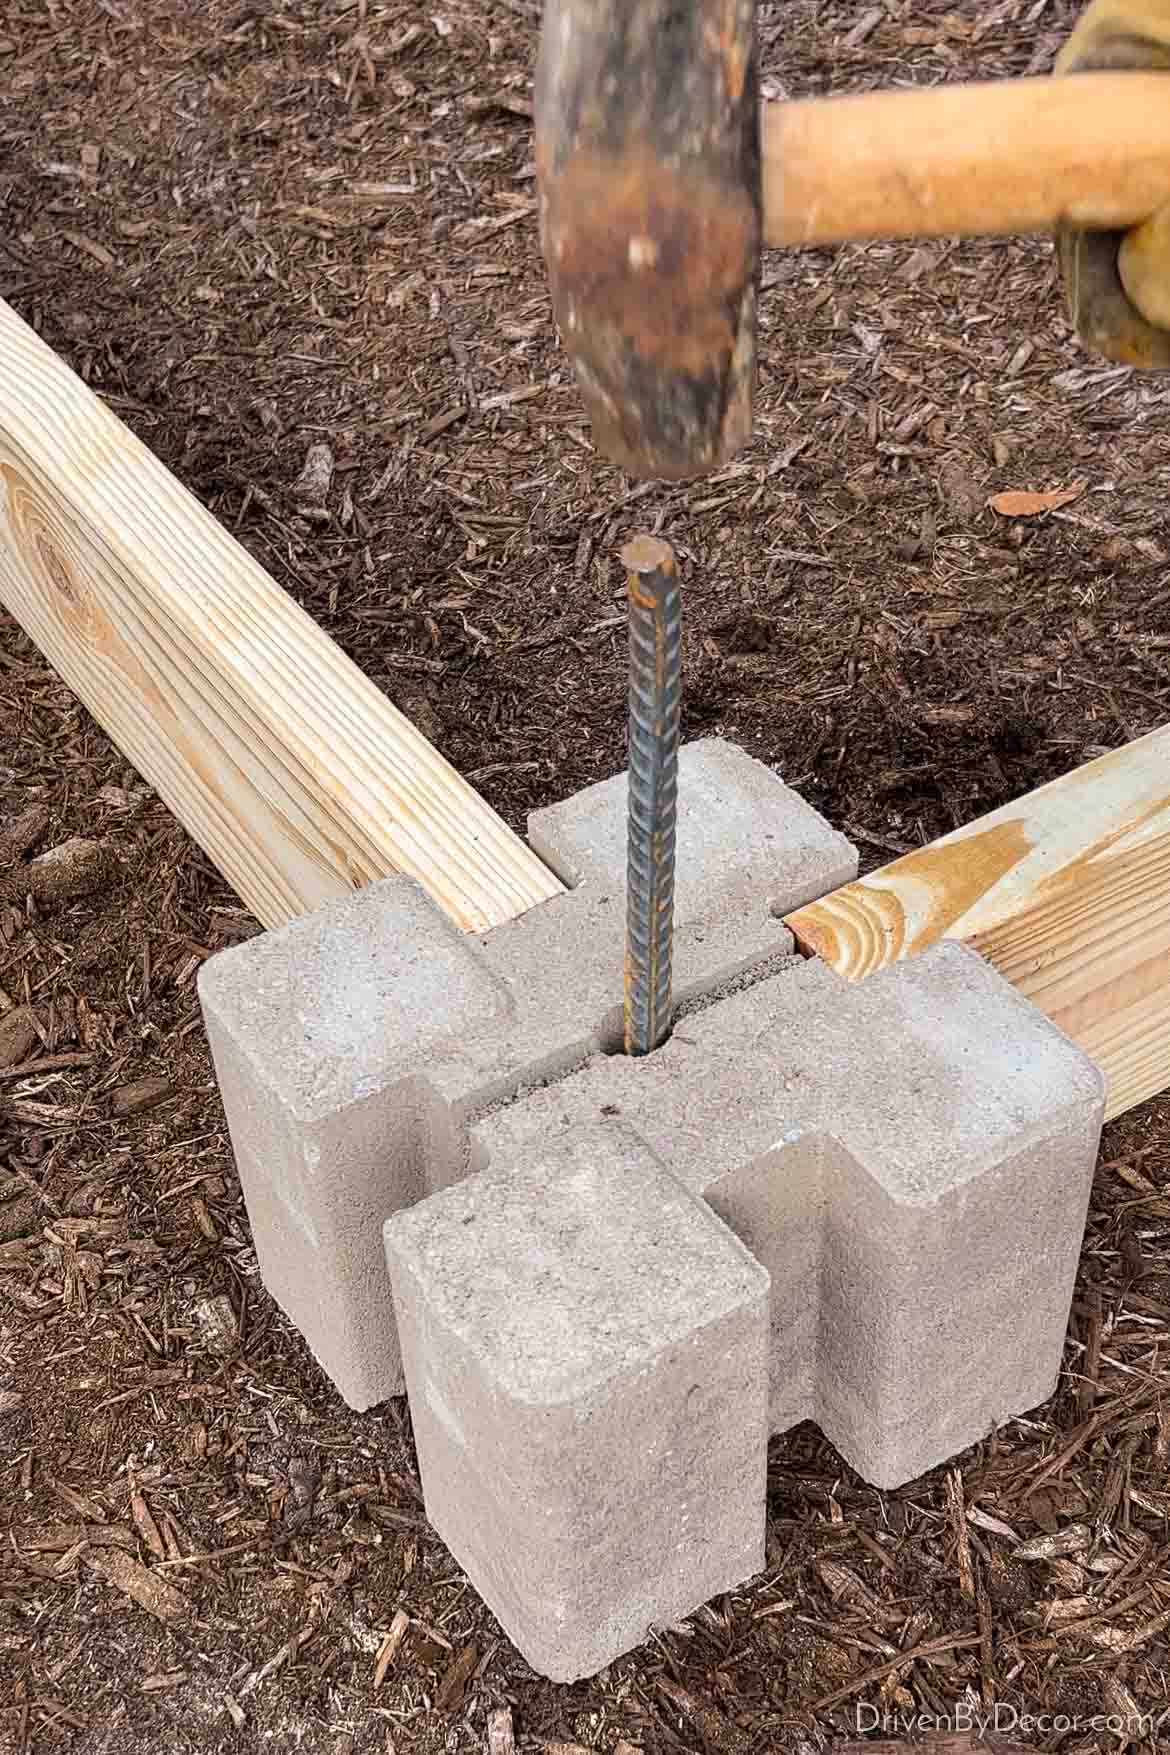
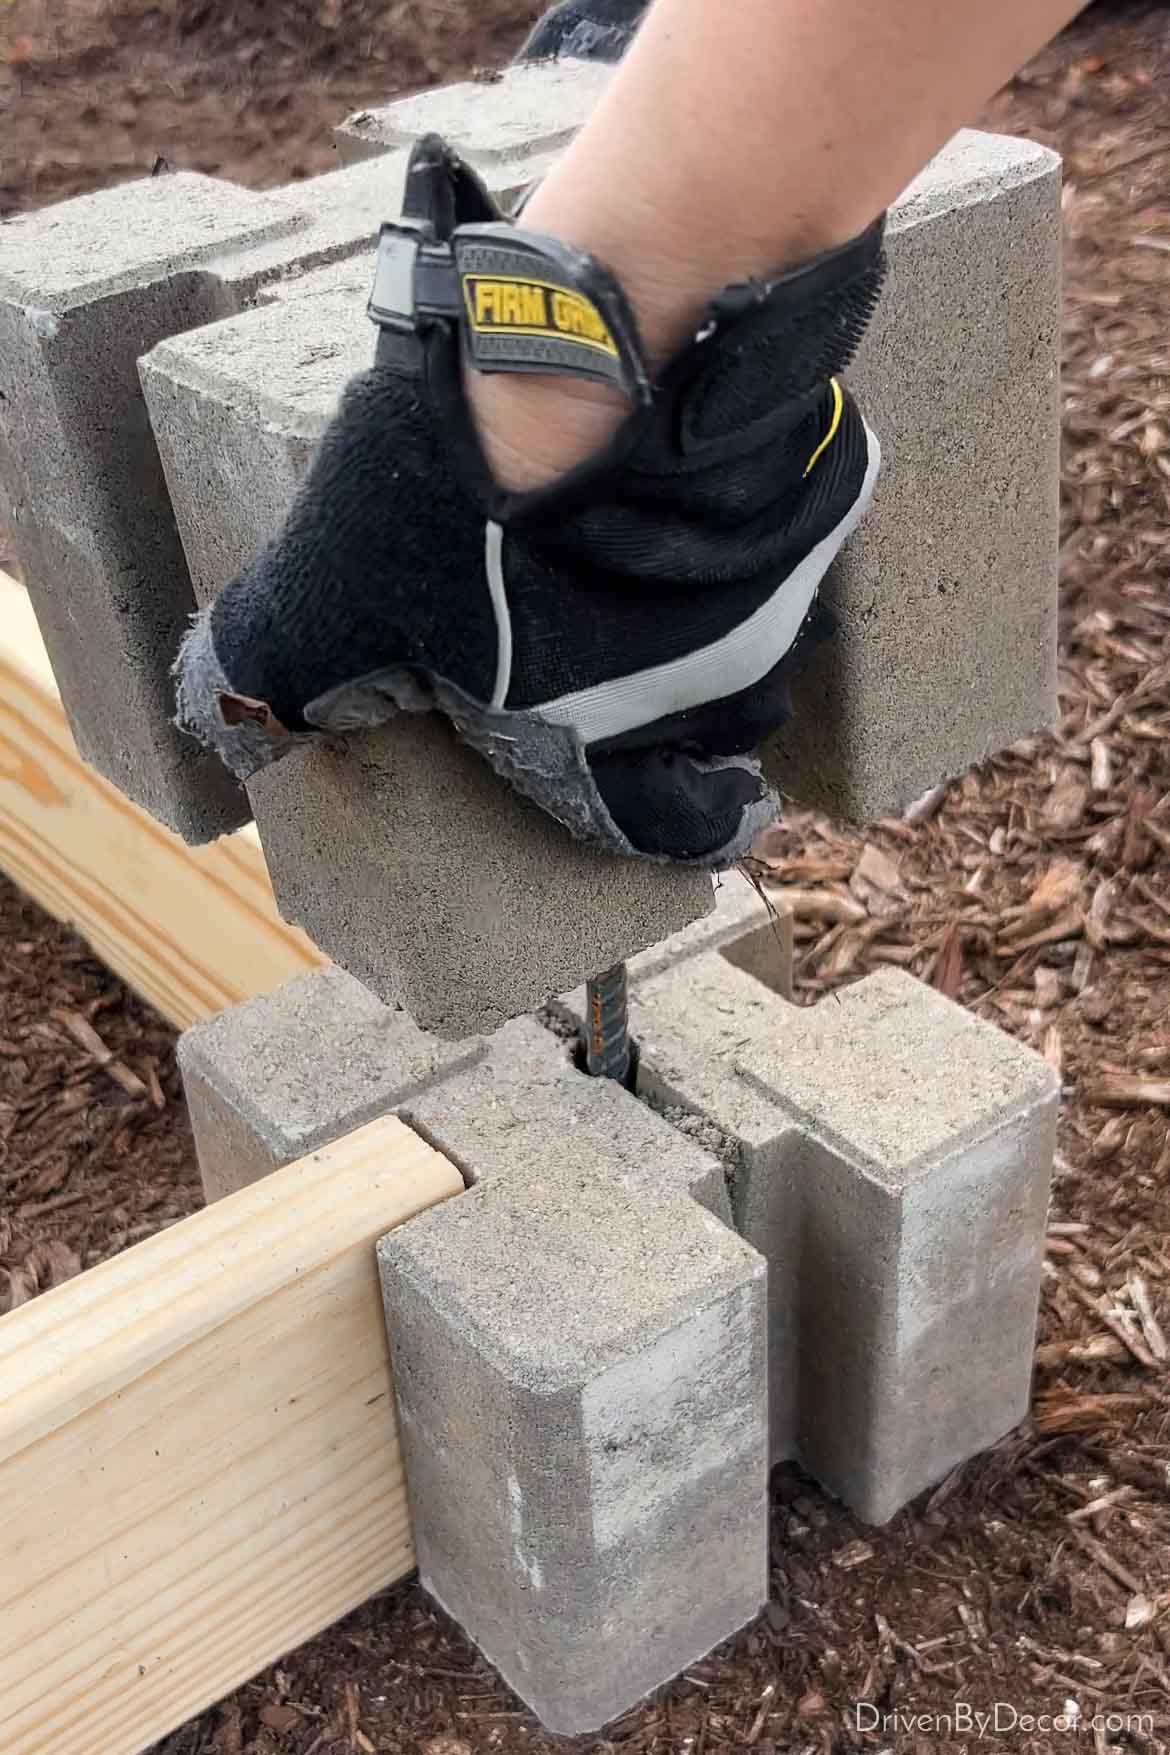
Now that your corner blocks & boards are in place, adjust your blocks as needed to ensure that your bed is square (a good way to check this is to see if the measurements of the two diagonals of the bed are equal). Then lock your corner blocks into place by hammering rebar (I used {this 18″ rebar}) through the center hole into the ground, leaving about 4-5″ of rebar showing above the block:
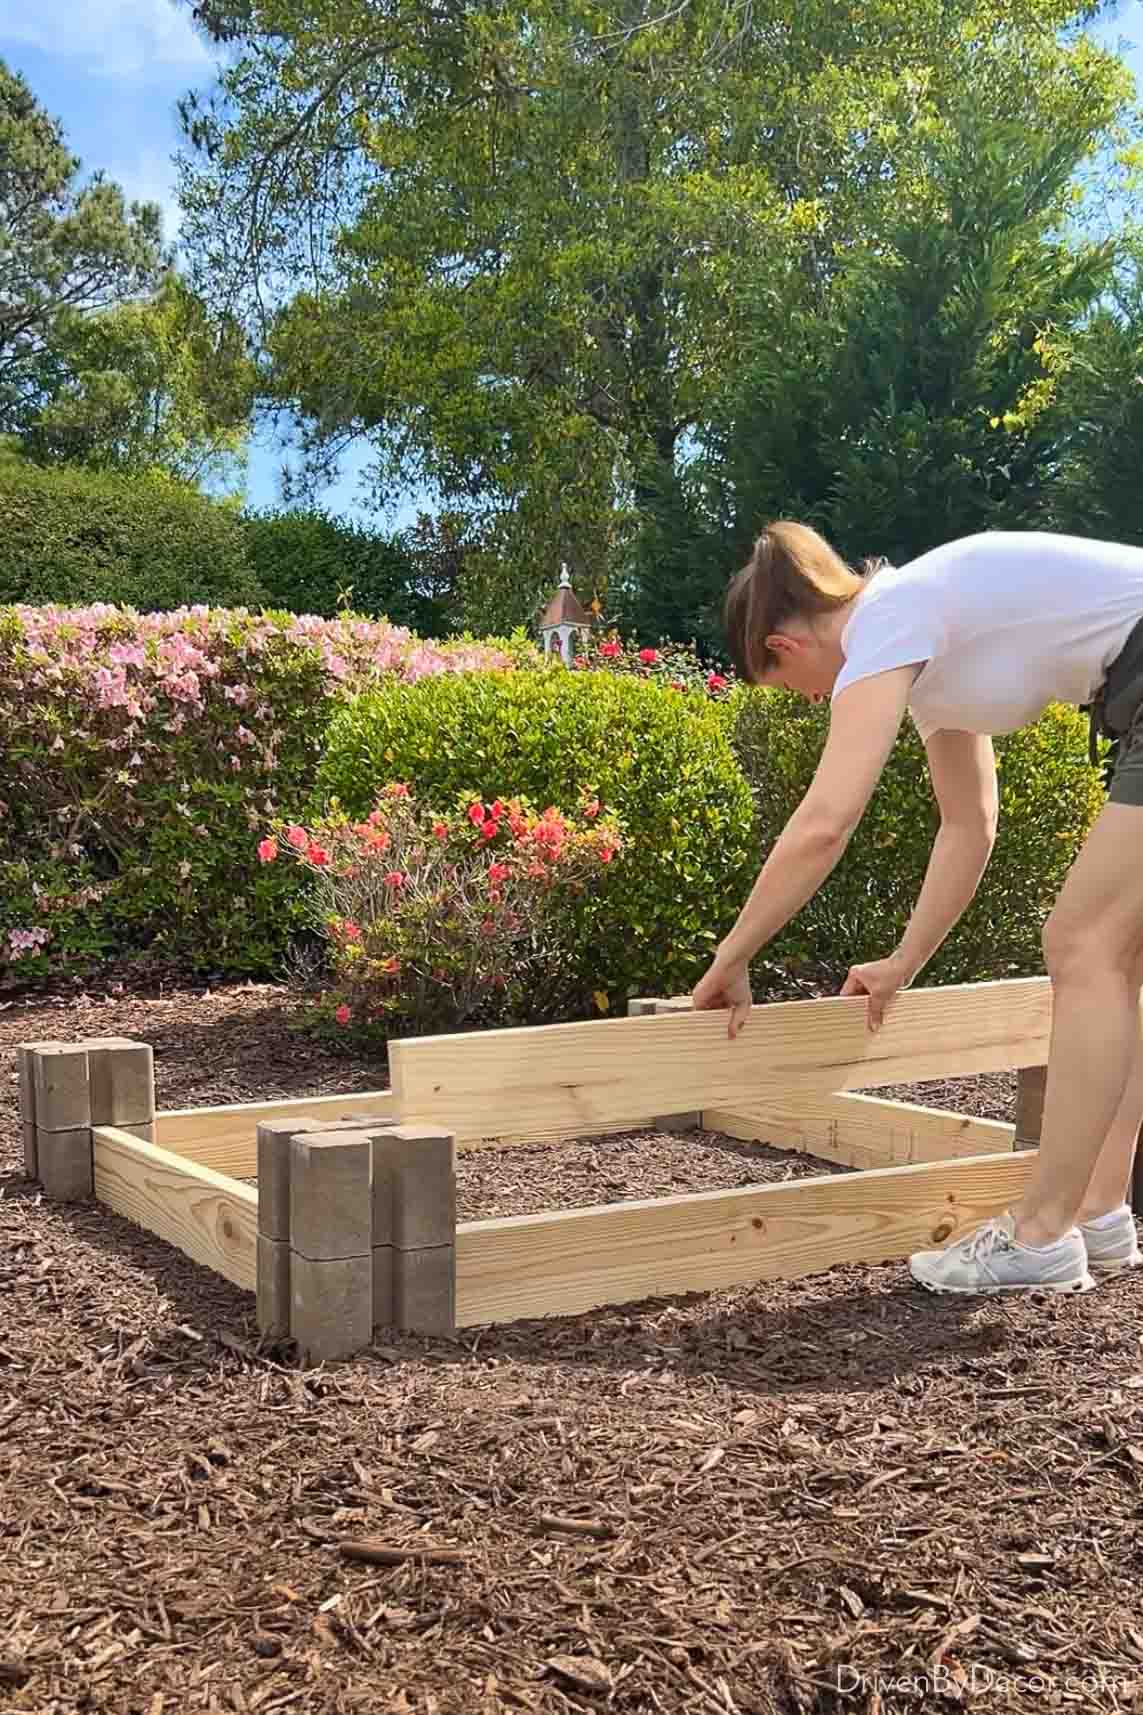
Now you’re ready for the second layer! Simply place another layer of blocks on the corners (this time, with the open hole in the middle of the blocks facing down):
and add your second layer of 2 x 6 boards:
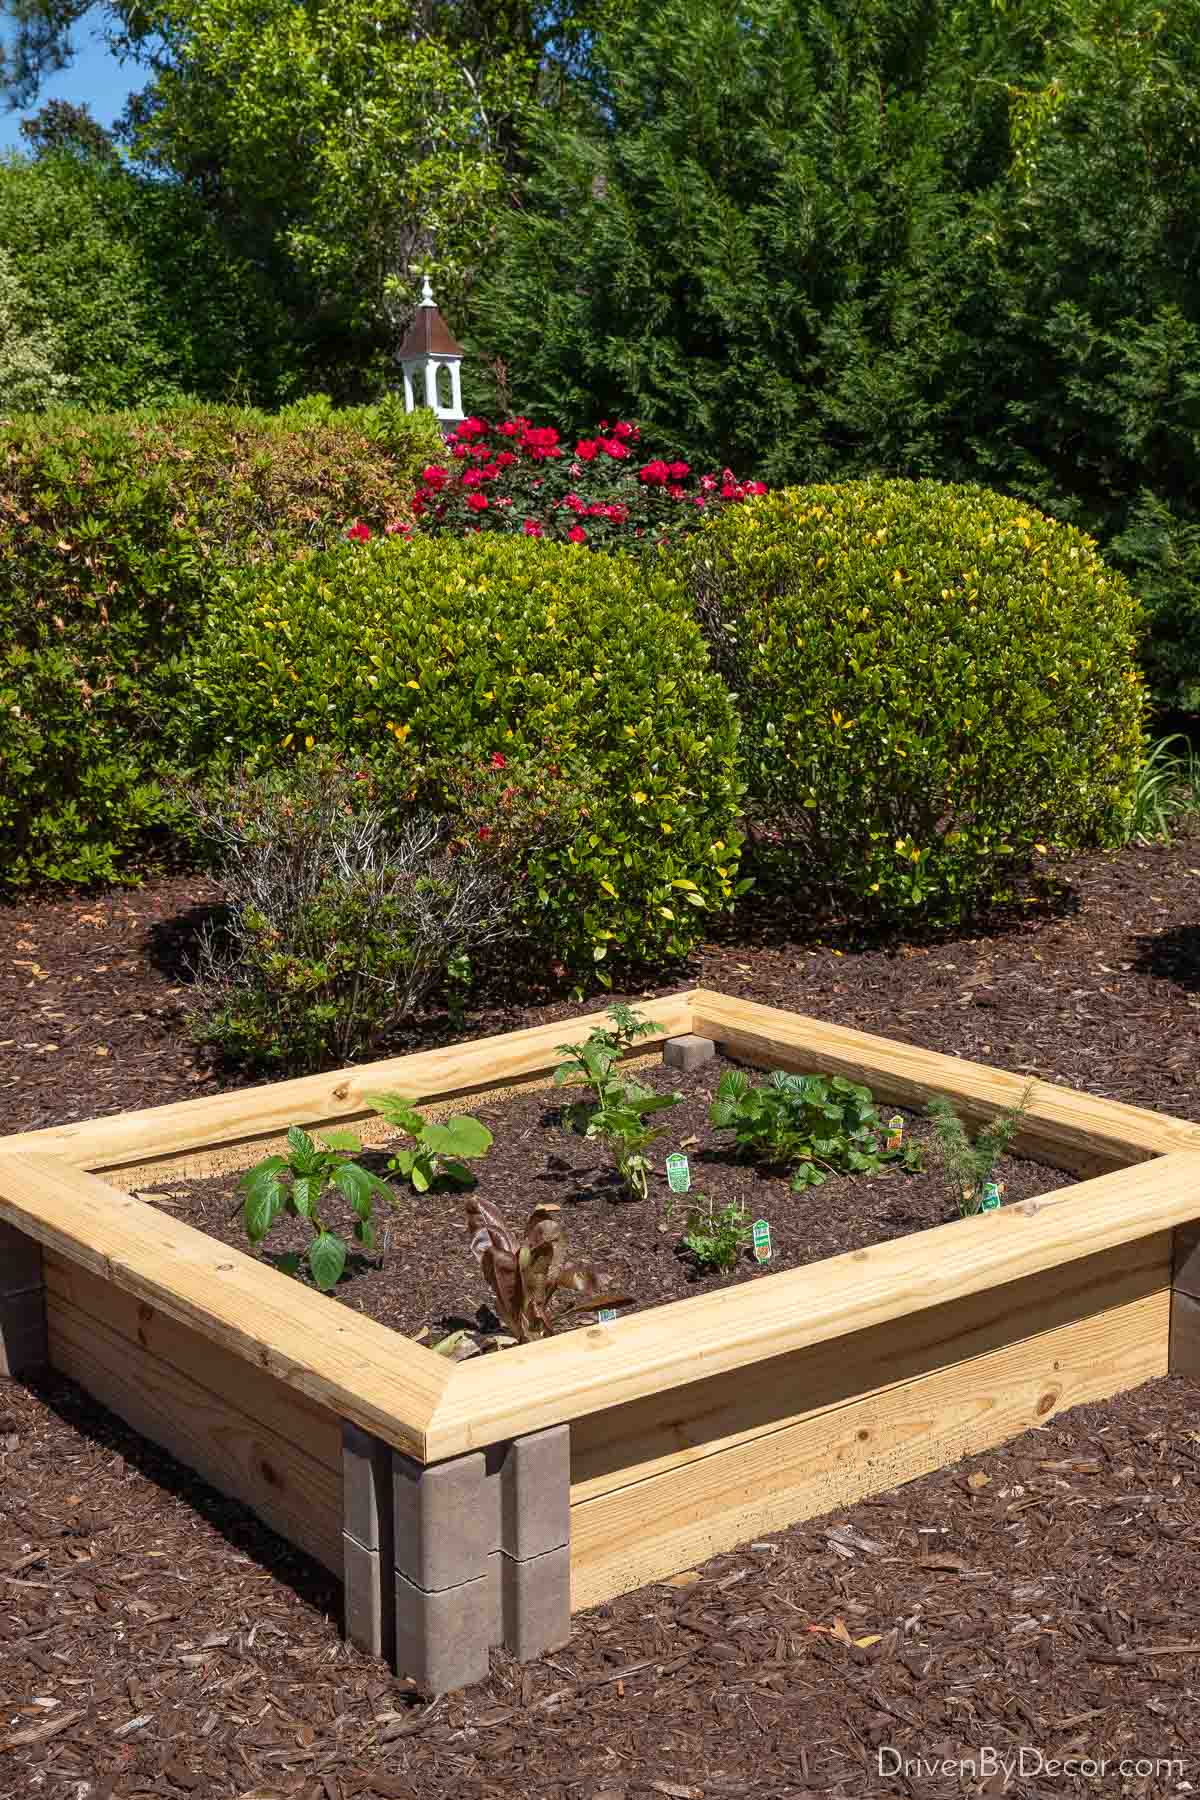
That’s it! It took me less than an hour to put together and required no power tools since Lowe’s cut the boards for me. The price was right too – under $75 for the 8 blocks, 4 eight foot pine boards, and 4 pieces of rebar. 🙌🏻
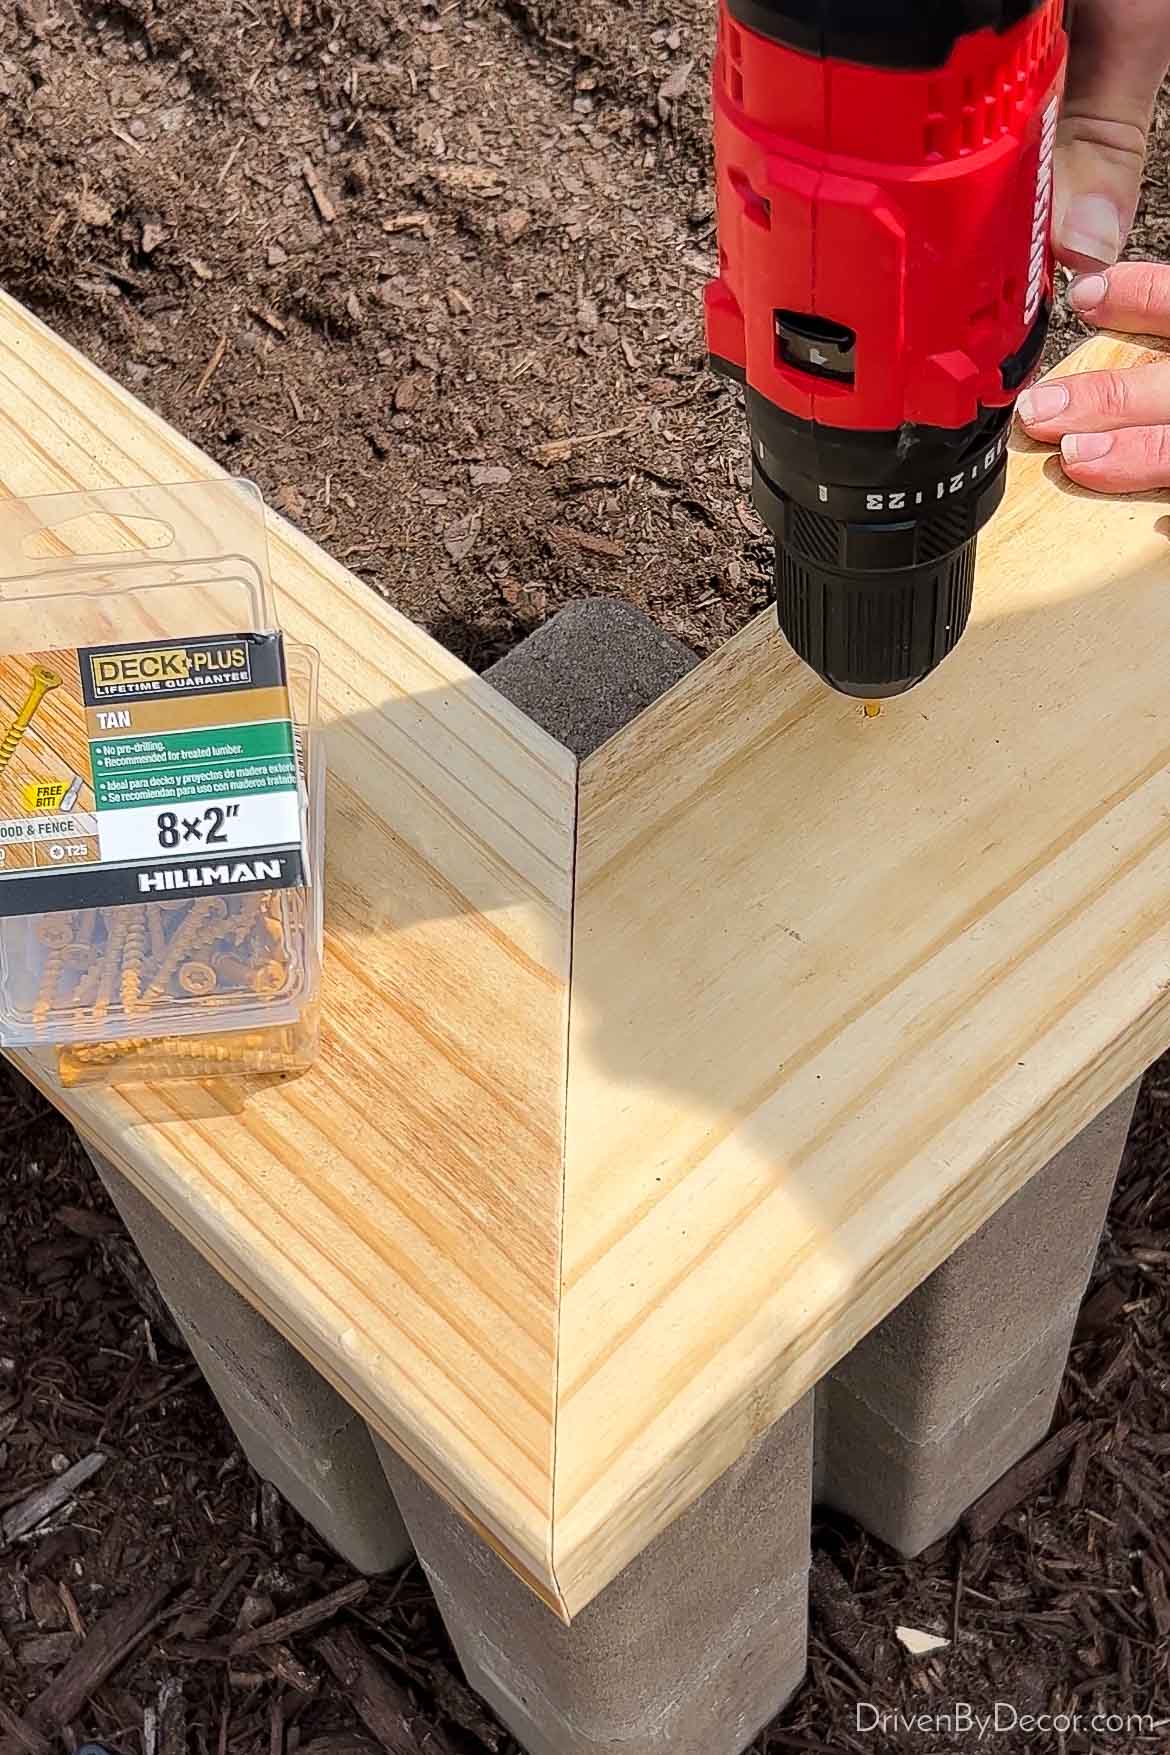
I decided to take my project one step further (totally optional!) and added four boards to the top to create a cap. While you can create a wood cap with straight cut boards, I made use of our miter saw to miter cut the corners of mine:
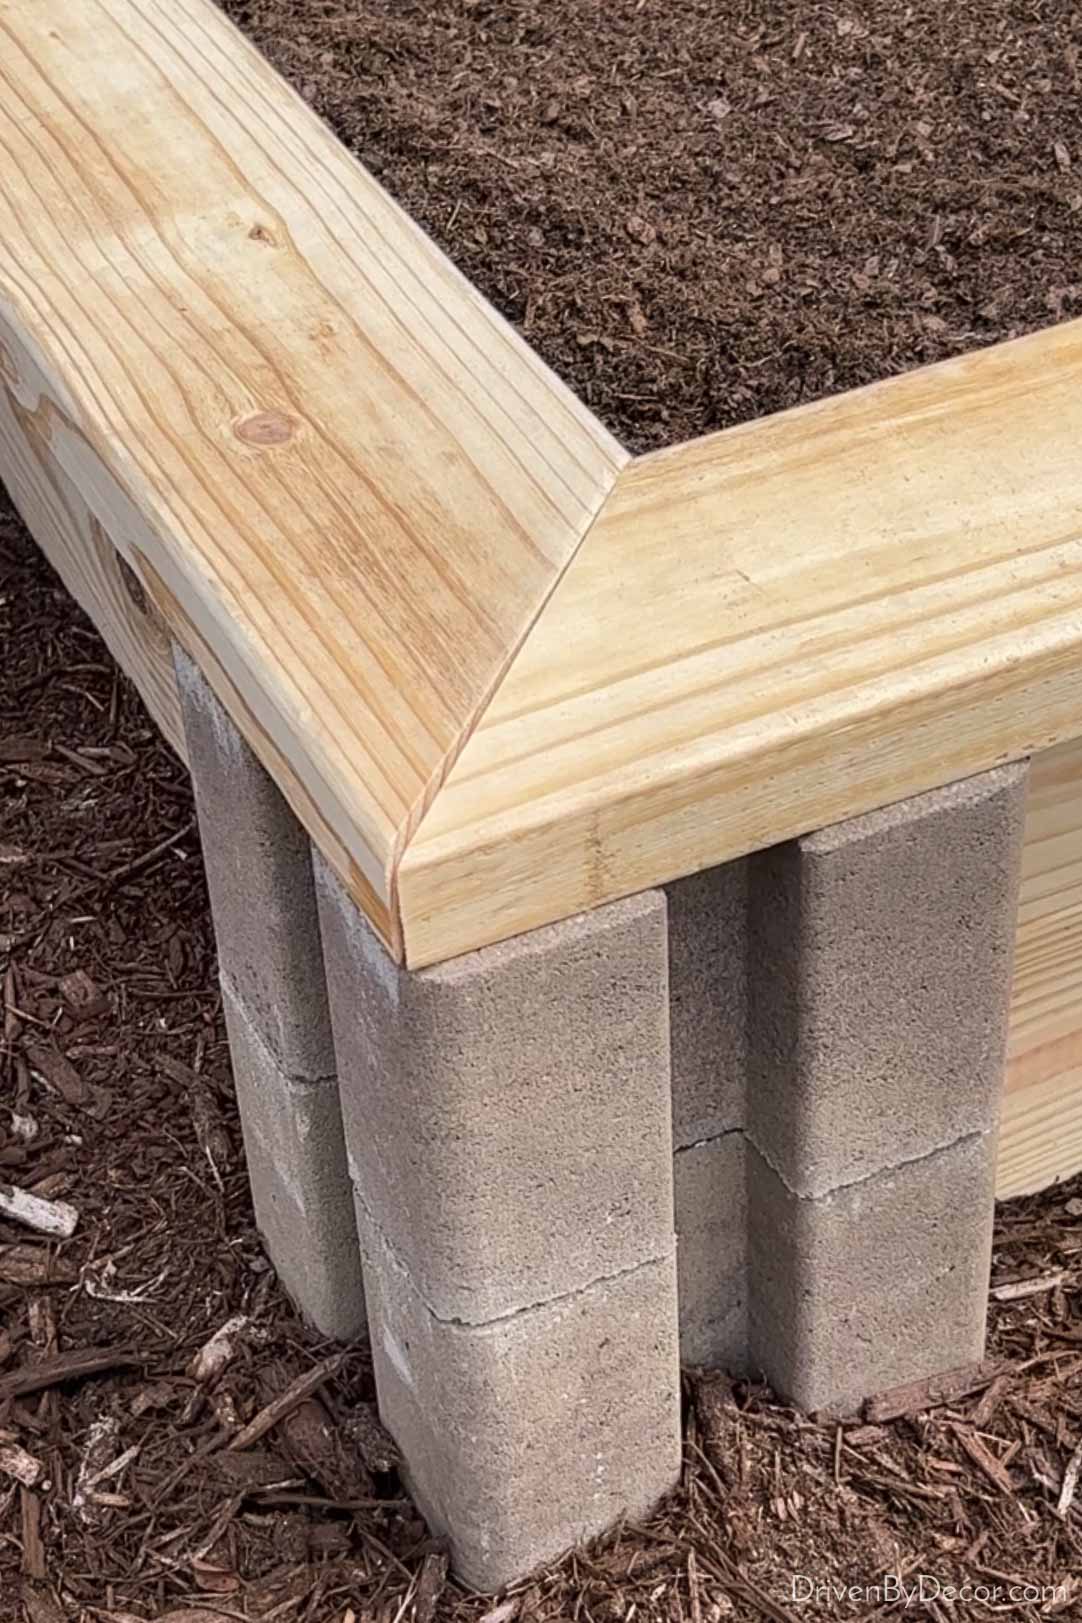
I used {these deck screws} to attach the wood cap to the boards beneath it, and I also put a screw through each corner to hold it tightly together:
After filling my new raised garden with {this raised bed soil} (or you can find the organic version {here}), I planted squash, string beans, cherry tomatoes, strawberries, lettuce, and some herbs. I’m excited to watch it all grow!
Tip: You can place on online order on Lowes.com for everything you need and they’ll gather it together for easy pickup – it’s a big time saver!
One of the reasons that I chose this option for creating an inexpensive raised garden bed is that I was able to customize the size of the bed to create one that’s perfect for my space. I also love that I could very easily expand the size of my bed in the future by adding another pair of blocks + wood boards on one or both ends.
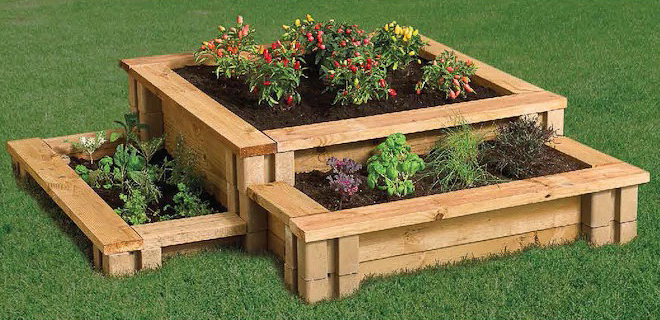
If you have a large garden area, you can even create a more elaborate tiered bed such as this one that was created with various heights of blocks:
Let’s move on to some other inexpensive raised garden bed ideas that I considered…
2. Galvanized Planters
When it comes to creating an inexpensive raised garden bed, galvanized steel containers are another great option. Not only are they affordable, but you can find them in a wide variety of sizes, from simple oval galvanized tubs like {this one}
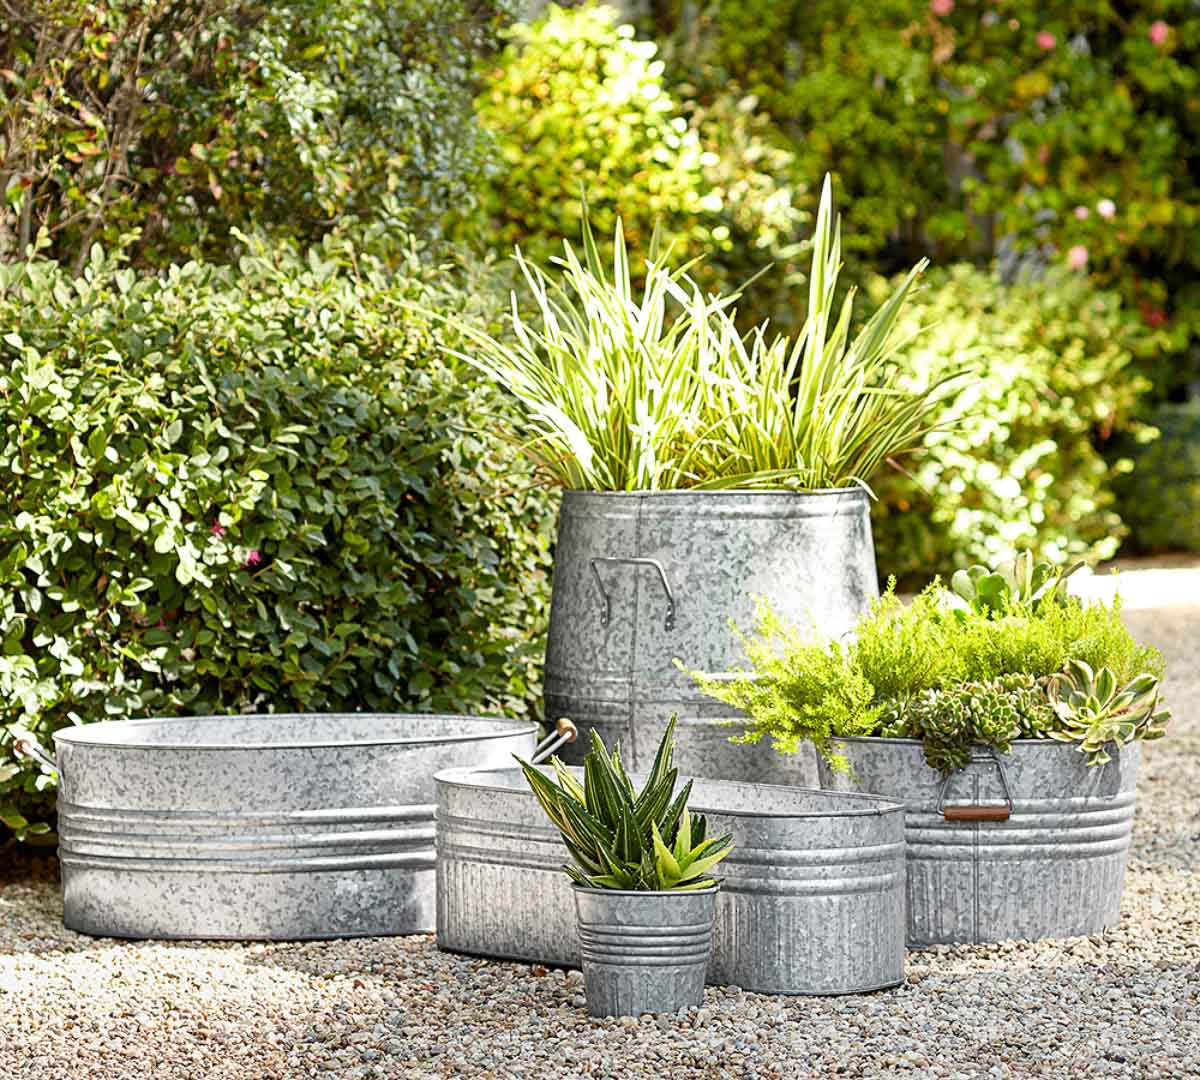
to oversized galvanized raised garden beds like {these} which come in several color options and can be configured in a number of ways:
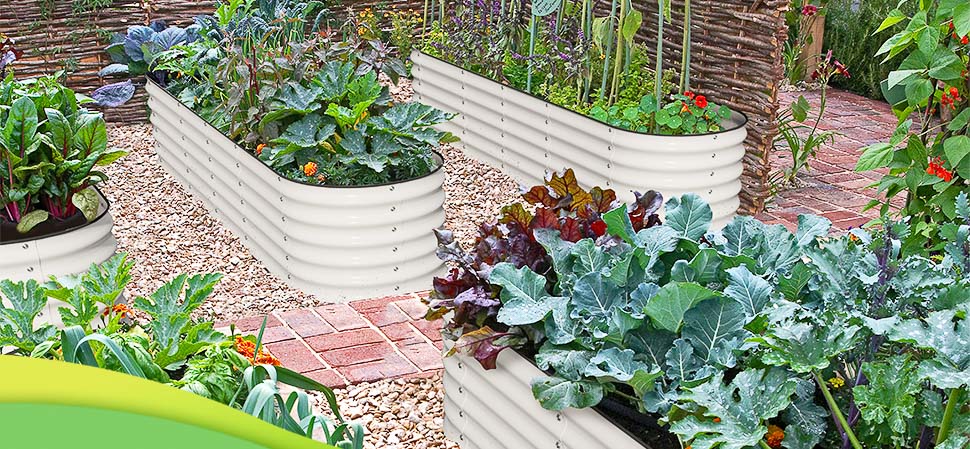
One of the advantages of galvanized planters is that they won’t rot or degrade, so can have a lifespan of 20+ years with minimal maintenance. If your galvanized planter has a bottom (some of the larger ones don’t), be sure to drill a few holes in the bottom before filling it to allow for drainage.
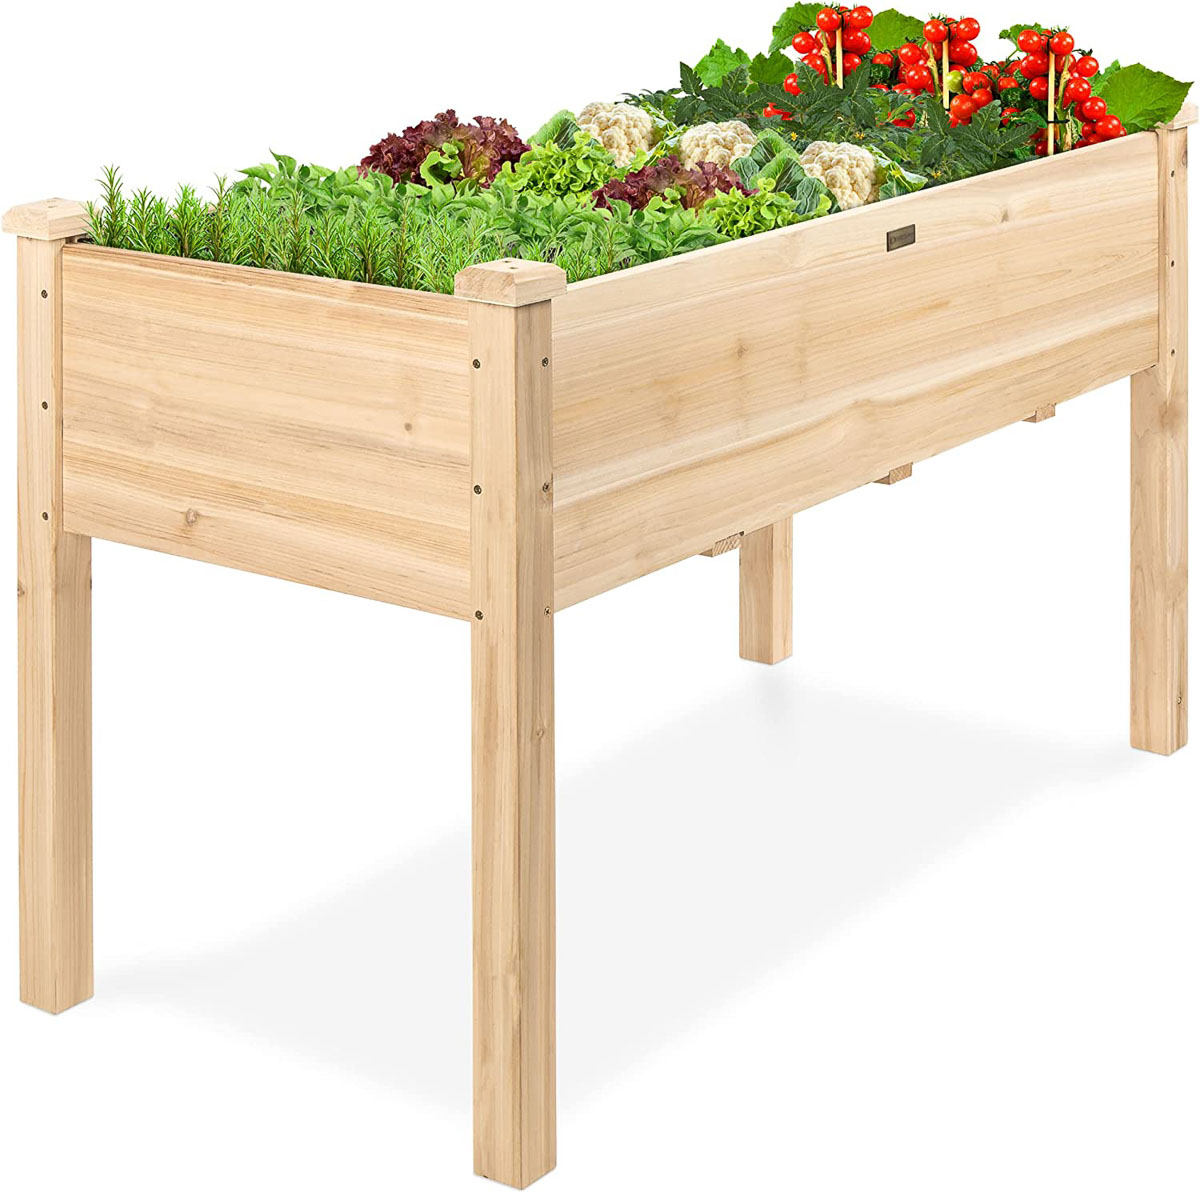
3. Elevated Wood Planter Boxes
For the build of our forever home, I love the idea of incorporating some elevated planter boxes into the design of our backyard. They allow you to garden without bending down, which is especially nice for someone who is older or has limited mobility. One example is {this 48″ elevated cedar planter box} that’s under $100:
4. Wall Mounted Hanging Planters
A few weeks back, I shared the wall of plants that I added to our back porch using {these hanging planters} and {these brick hangers}:
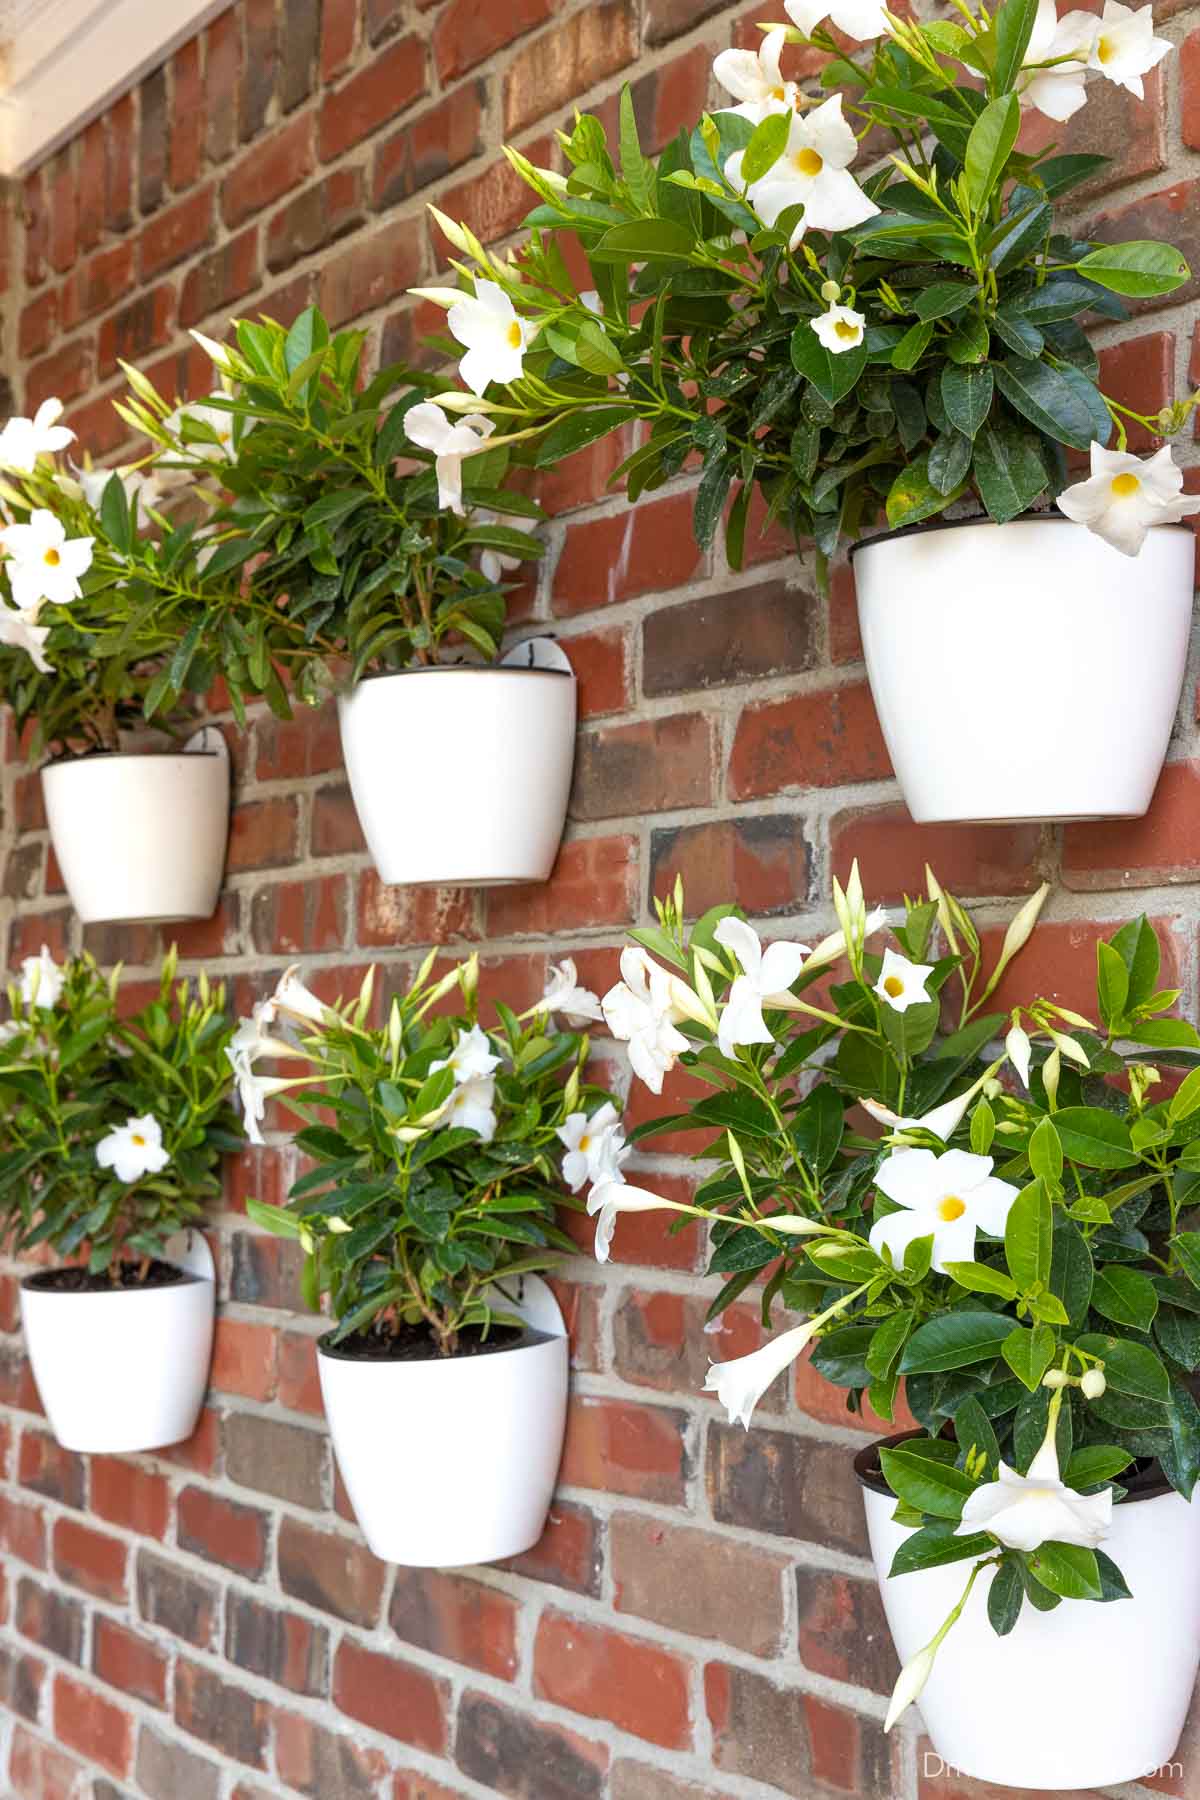
You could use the same or similar hanging planters for herbs and vegetables that can grow in shallow containers like lettuce, radishes, basil, and chives. It’s the simplest of my inexpensive raised garden bed ideas! Get more details on my plant wall and the rest of my outdoor space in my post about back porch ideas on a budget.
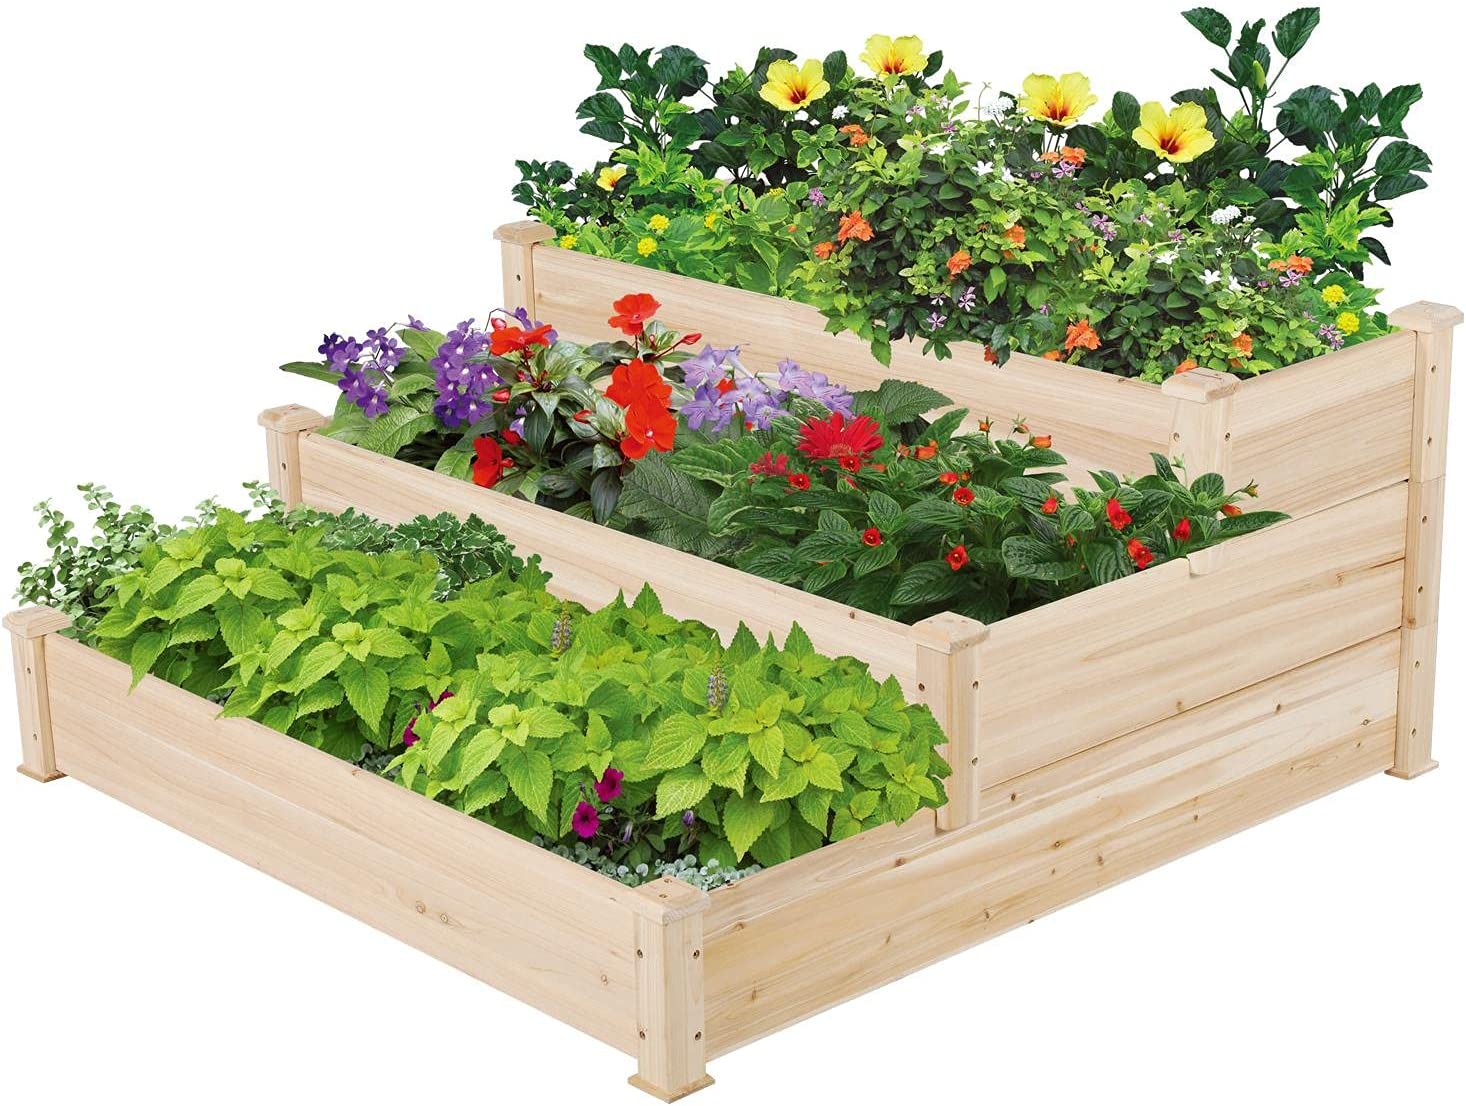
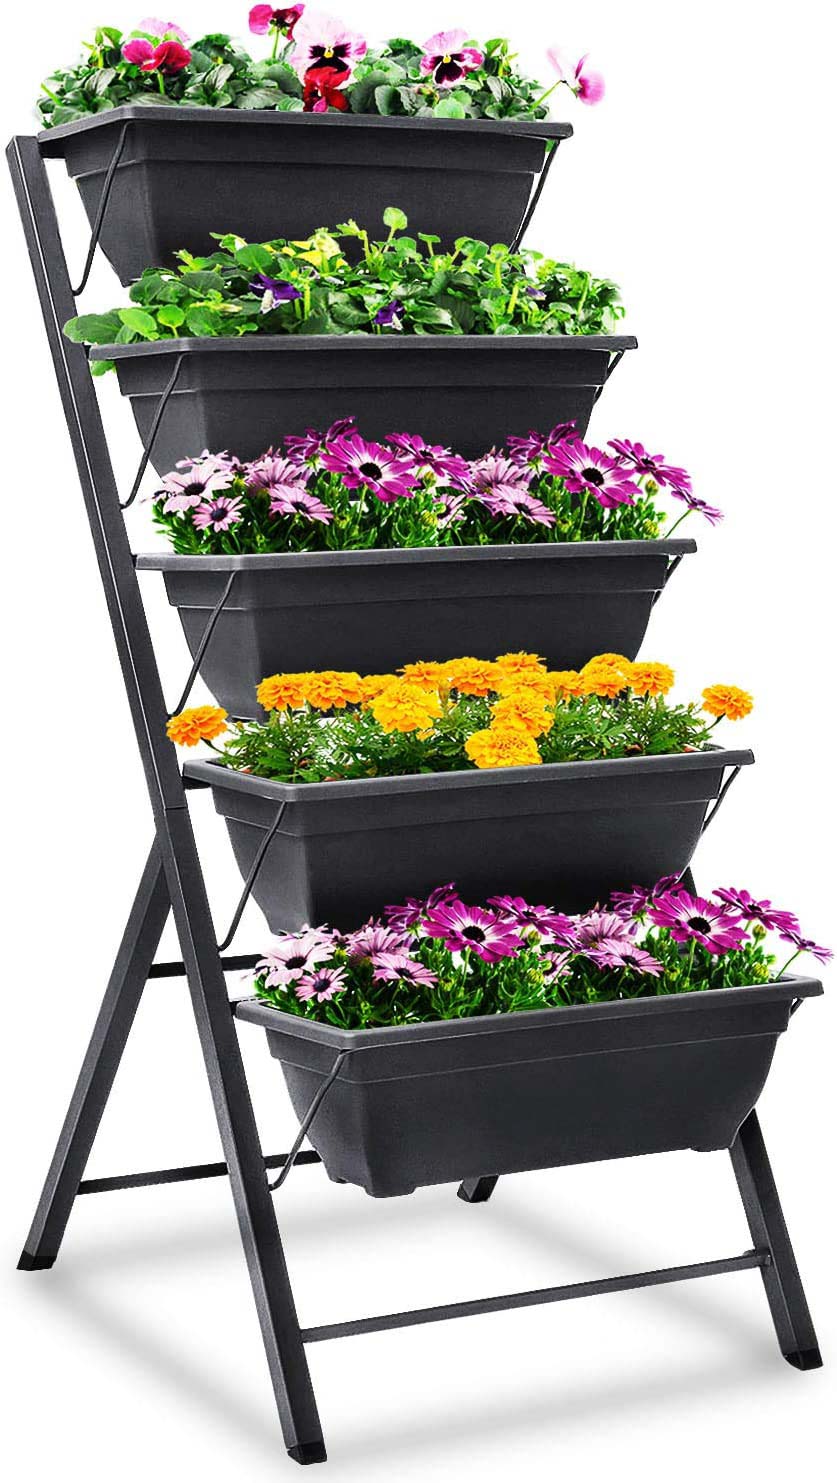
5. Tiered Vertical Garden Bed
Other options for going vertical with your gardening include a tiered vertical garden bed like {this one} that consists of a series of several small beds:
6. Repurpose a Bathtub, Pallets, or Pavers
I’ve seen a lot of beautiful raised garden beds that are created on the cheap by using repurposed items. If you have a pile of bricks, blocks, or pavers that are left over from a construction project, use them to build a raised garden bed! Have an old freestanding bathtub? It can be creatively repurposed as a planter too. There are also a ton of DIY options for building raised planters with pallets (just make sure that the pallet wood is heat-treated rather than chemically treated).
I hope this gives you the inspiration you were looking for to create your own garden too! Enjoy the rest of your weekend!


Jason Assenmacher says
How long were the boards used to create the cap tops?
Ruff Roland says
Très bonne idée ces blocs de mur de soutènement, mais introuvable en France
Sabrina Quairoli says
Great options! I used the first one with the concrete corners and made a two tier double garden with a divider wooden platform between for my down spout.