After hating its location on our kitchen counters, our microwave is now in our island! I’m sharing details on the built-in shelving we added to the end of our island to make it happen!
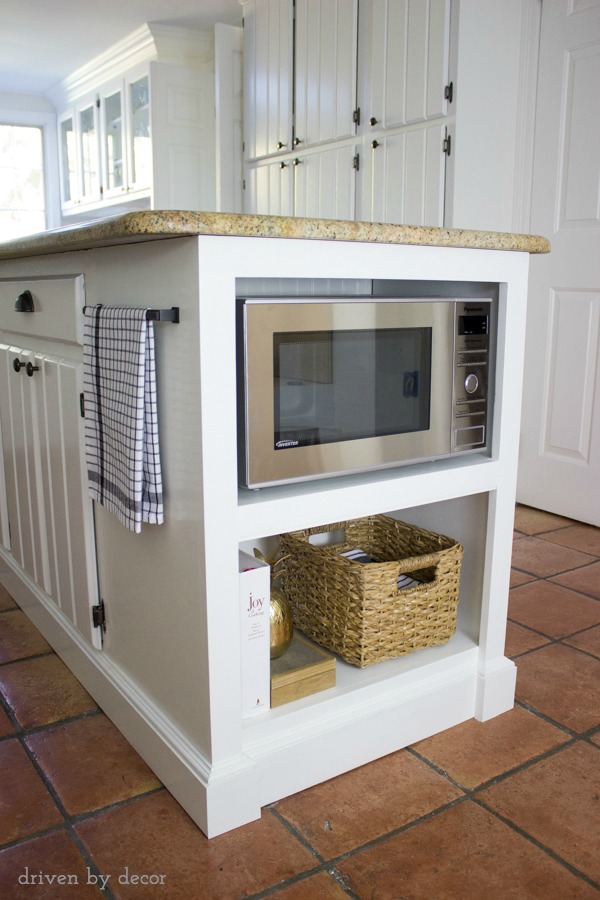
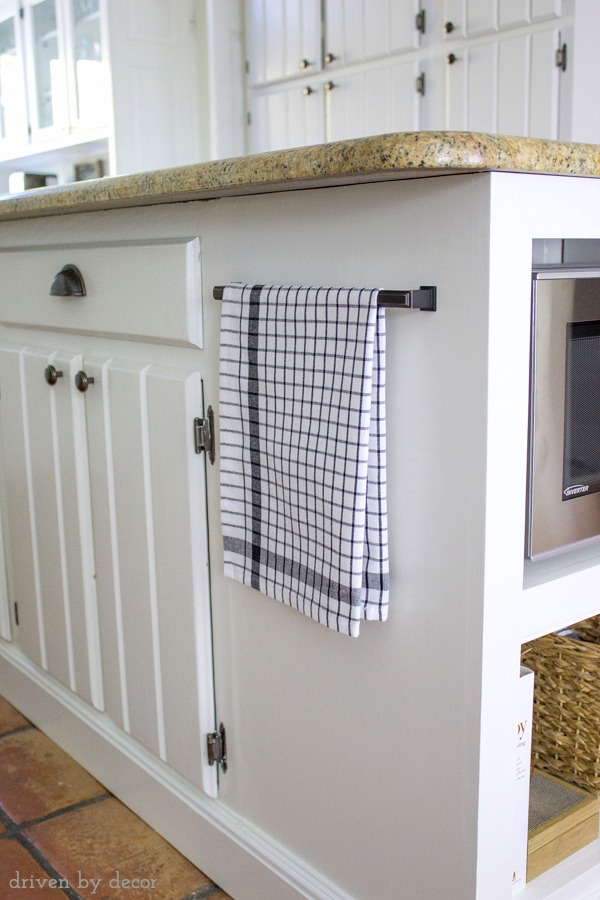
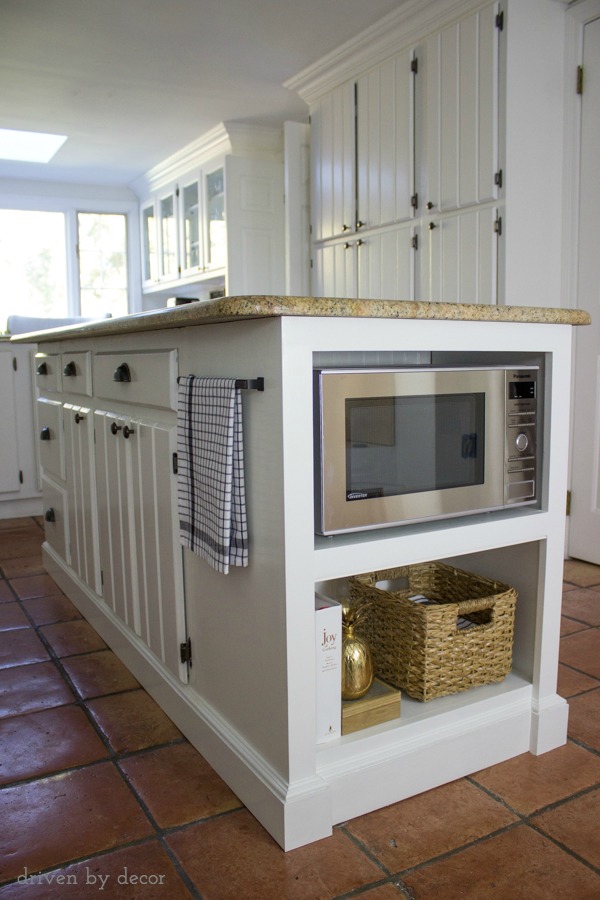
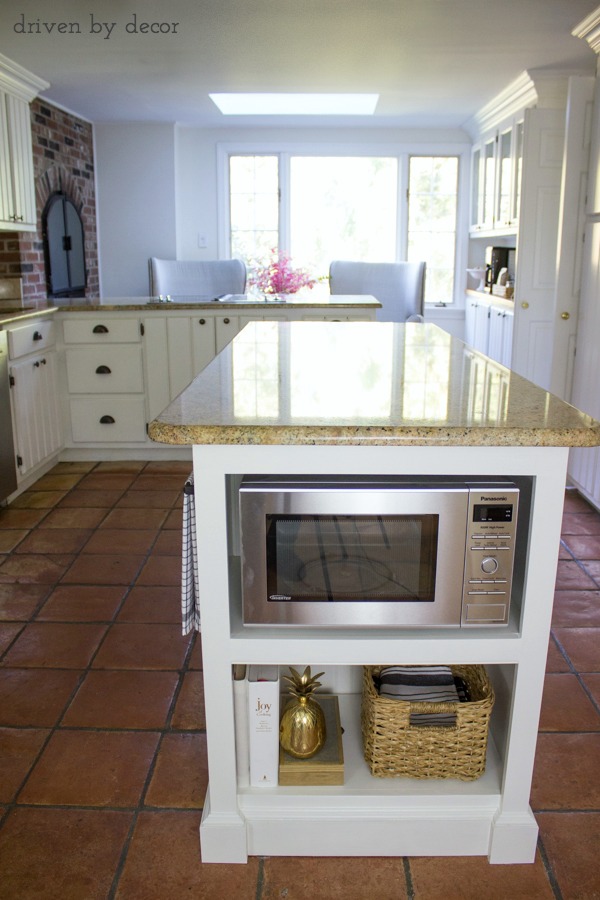
Our kitchen island project is a wrap! There’ll be no more bumping elbows with the microwave while I’m doing dishes because our microwave is finally off the countertop and on it’s own little built-in shelf on the end of our island:
Before the remodel, our island had this kinda awkward overhang where the previous owners kept a single stool. We placed a stool there for the first several months after moving in but found that it was such a tight space that no one in our family ever chose to sit there.
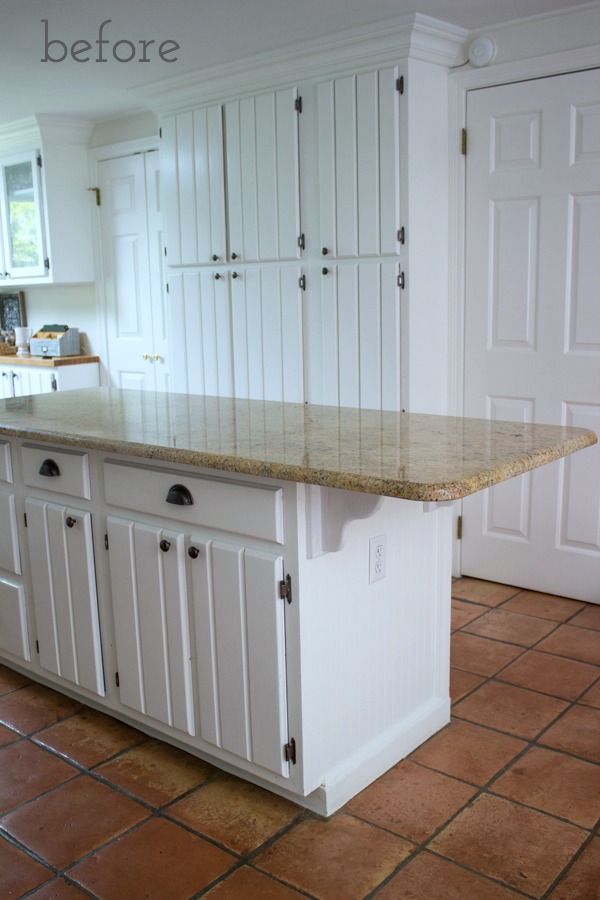
Then came the idea to create a built-in shelf for the microwave in that spot because that sucker was using up all sorts of precious countertop space next to the kitchen sink. I’ll show you what we did! (post includes affiliate links – see my full disclosure statement {here})
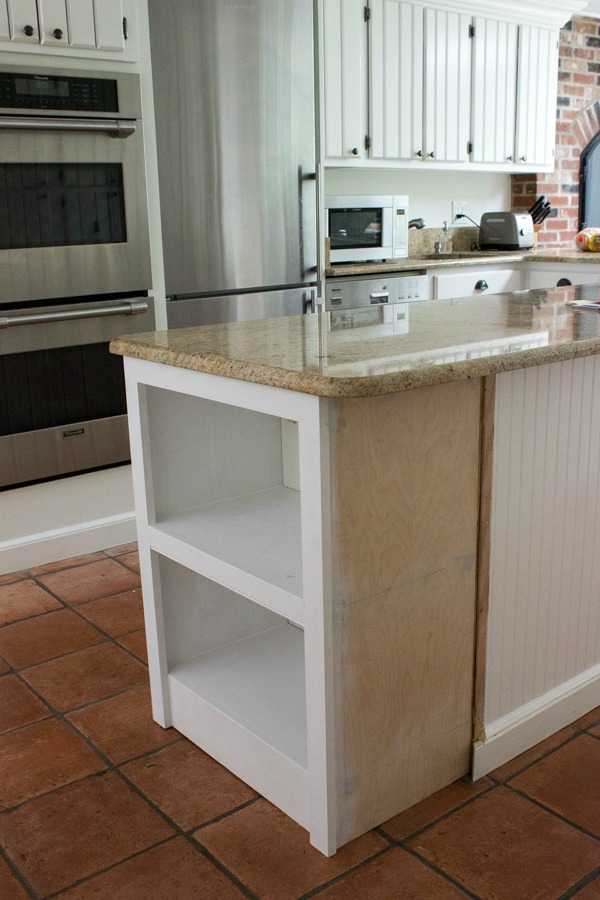
First we added a simple framed box with shelving to the end of the island (and by “we” I mean my awesome contractor who took my design and brought it to life):
Then we added more beadboard on the back of the island and ran new baseboard around the entire base of the island to give it a unified look. I finished the project up by caulking and painting the “new” island and then simply added a few cookbooks and a basket for dishtowels on the bottom shelf and placed our new microwave on the top shelf. We had to buy a new, smaller microwave that fit the width of our island and and ended up with {this small but mighty microwave} that we’ve been really happy with for the short time we’ve been using it.
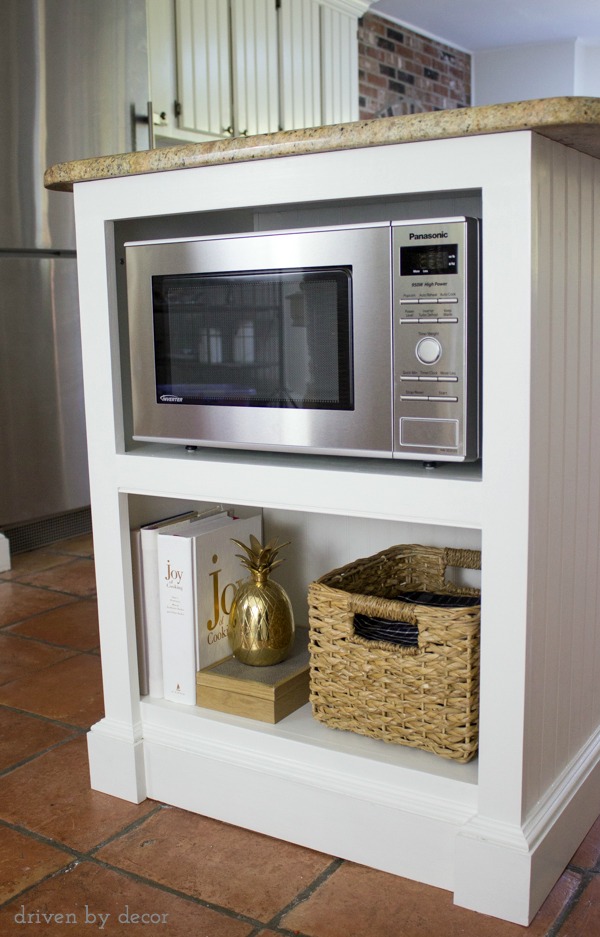
On the front of the island, I was going to install a faux cabinet door but then decided that might end up looking kind of goofy so I added a 12″ bar to the space instead. Even though it holds my dishtowel, it actually isn’t a towel bar – since typical towel bars all jutted out too far, I used a 12″ cabinet/appliance pull instead. Finding an inexpensive one was no small feat (long pulls are typically $100 and up) but I ended up finding {this large venetian bronze appliance pull} that had great reviews and a great price.
Want to save this post?
So if you’re keeping track, we’ve got one kitchen project down and two to go! Project #2 is our kitchen bench seat which I still need to upholster and project #3 is finding chairs to create a little seating area at the end of our kitchen near the fireplace. I actually moved our dining room end chairs into the space over the weekend just to see how they would look and was surprised at how “at home” they look there!

But… they also look great in the dining room so I’m not sure if these babies are going to stay or go back to the spot that they came from. I do love having this little area to hang out in over a cup of coffee (and it turned out to be the perfect spot for a vase of colorful fall branches that I found on a walk over the weekend!).

I’ll see you guys back here on Thursday with an update on my modern coastal bedroom makeover. Oh, and if you want to see the progress on our fireplace (I’m soooo happy with how it’s looking!), check out my Instagram post from last night {here}!
XO,


Mark Talamantes says
Do you have the dimensions of the bookshelf by chance?
Cynthia says
maybe a stupid question but where do you plug in the microwave on the island
Cathy Bilello Kosior says
Looks great! What are the dimensions and capacity of the microwave? I am trying to determine whether or not I could replace a wine rack which is under my island with a microwave shelf?
Abigail says
I love this idea!!!! How deep did they make this shelf?
Kris Jarrett says
I would say tat the best depth depends on your microwave measurements. I added about two inches to the depth measurement of my microwave (also allowing space for the cord to get plugged in behind it!).
Colette Lefebvre says
We are in the process of renovating our kitchen which will include inserting our microwave into the new island. Trying to find information online whether there could be airflow issues. Does it heat up the inside cabinets or are there are lingering smells?? Thanks!
Kris Jarrett says
Most microwaves have specifications of how much space they need on each side for air flow so I’d look at the online manuals. We haven’t had any issues at all with heat or smells with ours.
Haneen says
Genius!!
Kris Jarrett says
Haneen – you’re too sweet! Thank you!
Veronica Griffin says
Hi Kris,
I just saw this post. My husband and I are renovating our home and I love this idea you have. How did you figure out where to connect the microwave within the island?
Kris Jarrett says
We were actually really lucky on this one – we had a preexisting outlet on that side of the island so we actually didn’t have to do anything electrical when we added on the storage shelf.
Allison says
I would love an update on how this is going! Are you still loving the microwave placement? We are building a home and considering putting the microwave on the end of the island, but the commitment scares me, ha!
Kris Jarrett says
Hi Allison! We’re still really happy with our decision to put the microwave in the island. I’ll be honest in saying that my husband and I both preferred having it at counterheight in terms of being a bit easier to access BUT the trade off of having more counterspace very much outweighs that preference. My husband especially was really wary of having the microwave down low but he’s totally good with it now that we’ve done it!
Cara says
Wow, Kris, this turned out wonderfully–seamless! Thank you for sharing–it gives me courage that I could do something similar.