Painting my daughters’ bathroom vanity is something that has been on my to-do list for YEARS but somehow other projects always took priority, keeping it from ever getting done. With our master bathroom addition currently in progress, my girls’ bathroom was the lone untouched bathroom in the house. I finally decided to bump this project to the top of the to-do list and knock it out before my oldest daughter comes home from college for the holidays. I’m now kicking myself for not having done it years ago because it made such a huge difference to the look and feel of the space! By using the right paint and painting tools, you’d honestly never know that it was a DIY rather than a job I hired out to have professionally done. (post includes affiliate links; full disclosure statement available {here})
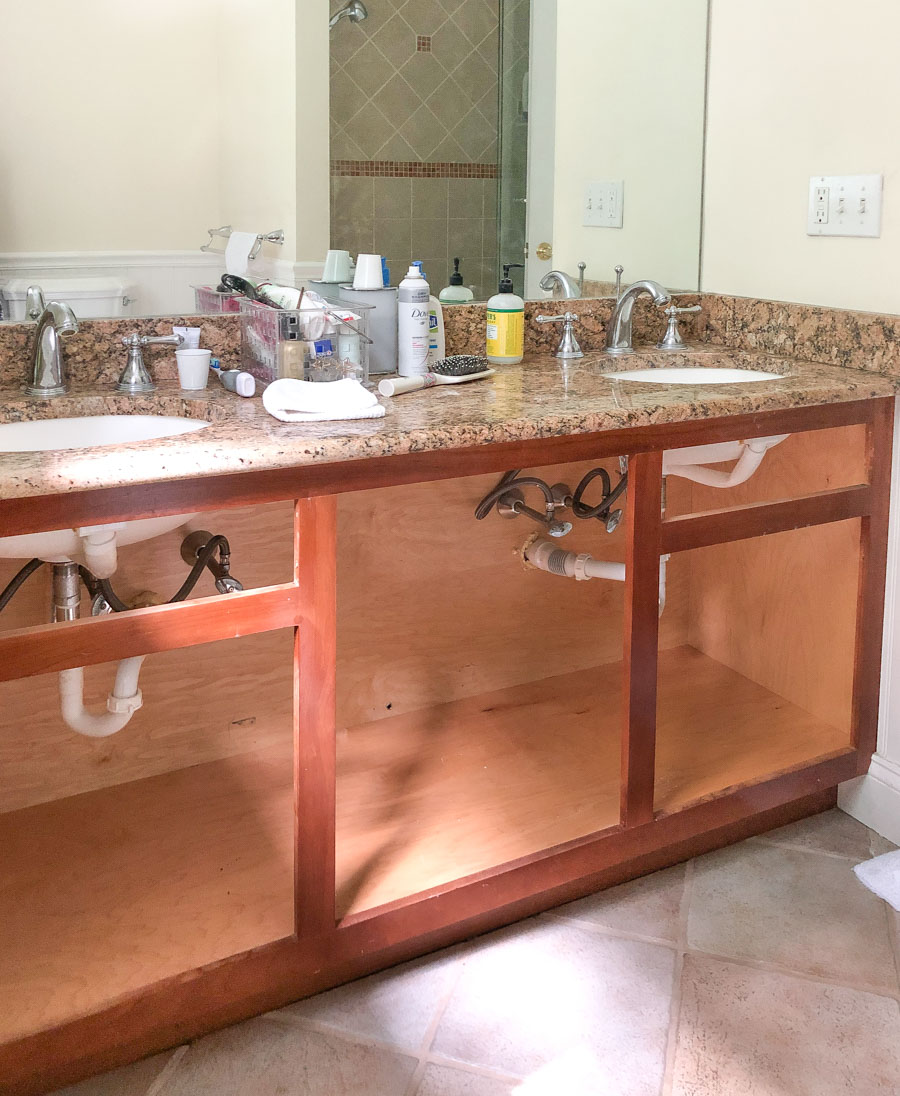
Here’s what my girls’ bathroom vanity has looked like for the past six years:
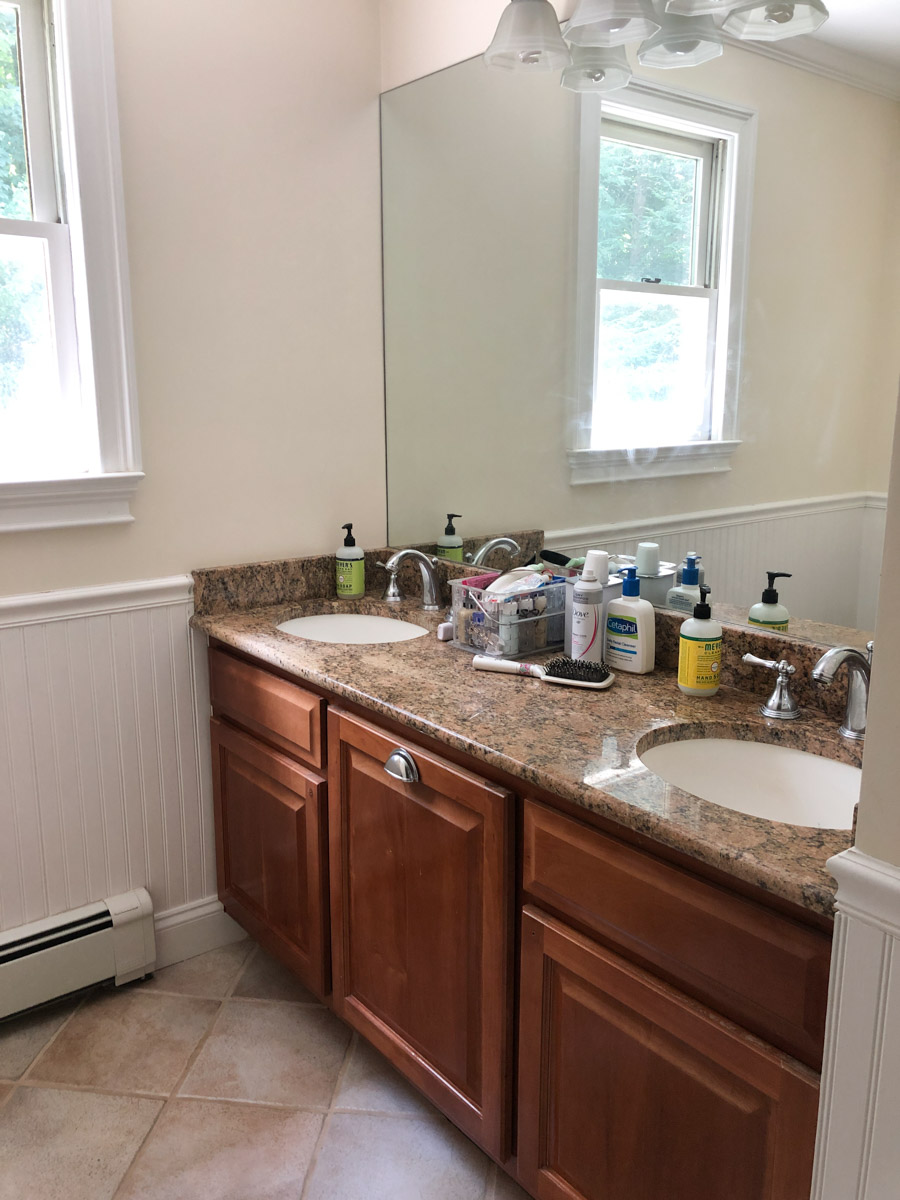
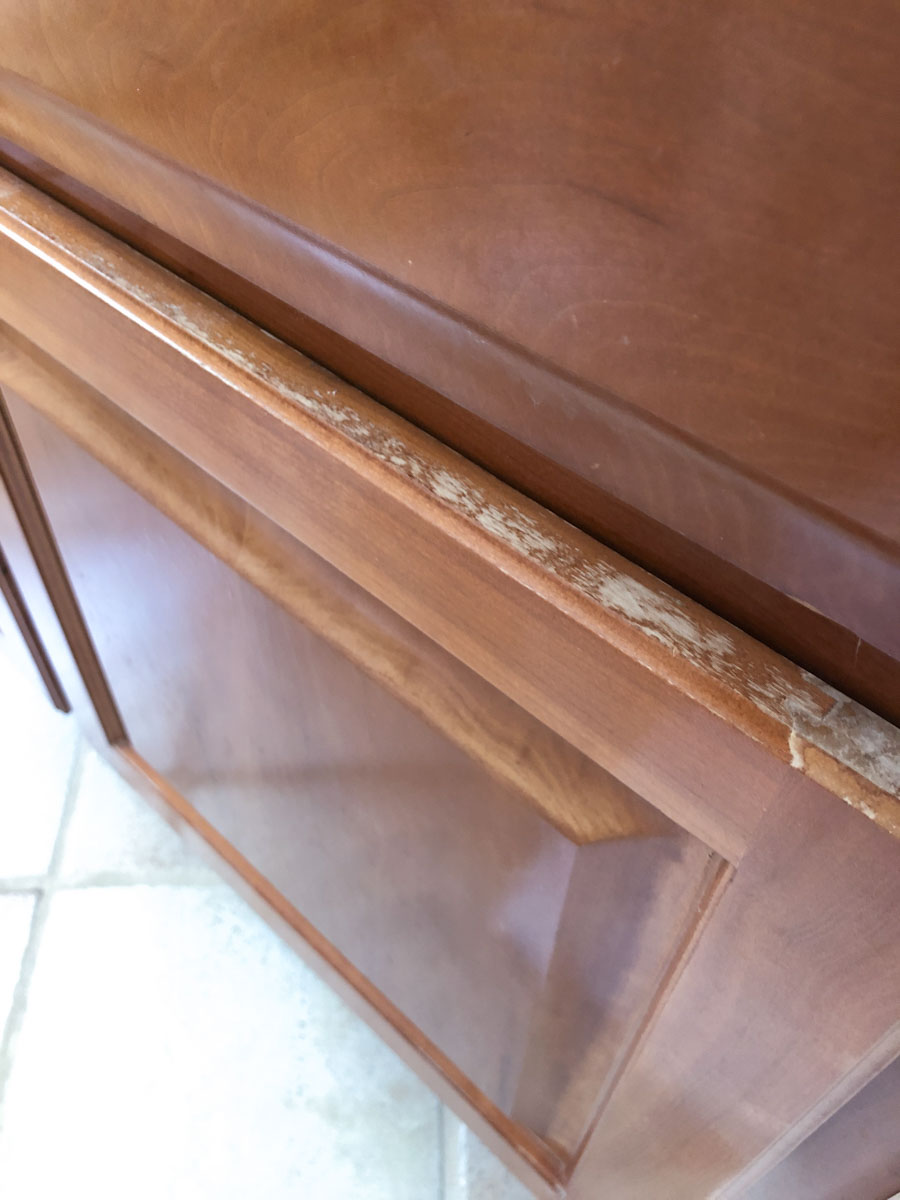
From a distance, it doesn’t look too terrible but the dark cabinets in combination with the dark countertops gave the room a really gloomy feel. And closer up you can see that the cabinet doors were a hot mess with a lot of wear and tear from previous owners:
With only a quart of paint, the right tools, and a little DIY action, say hello to my newly painted, brighter and lighter girls’ bathroom!
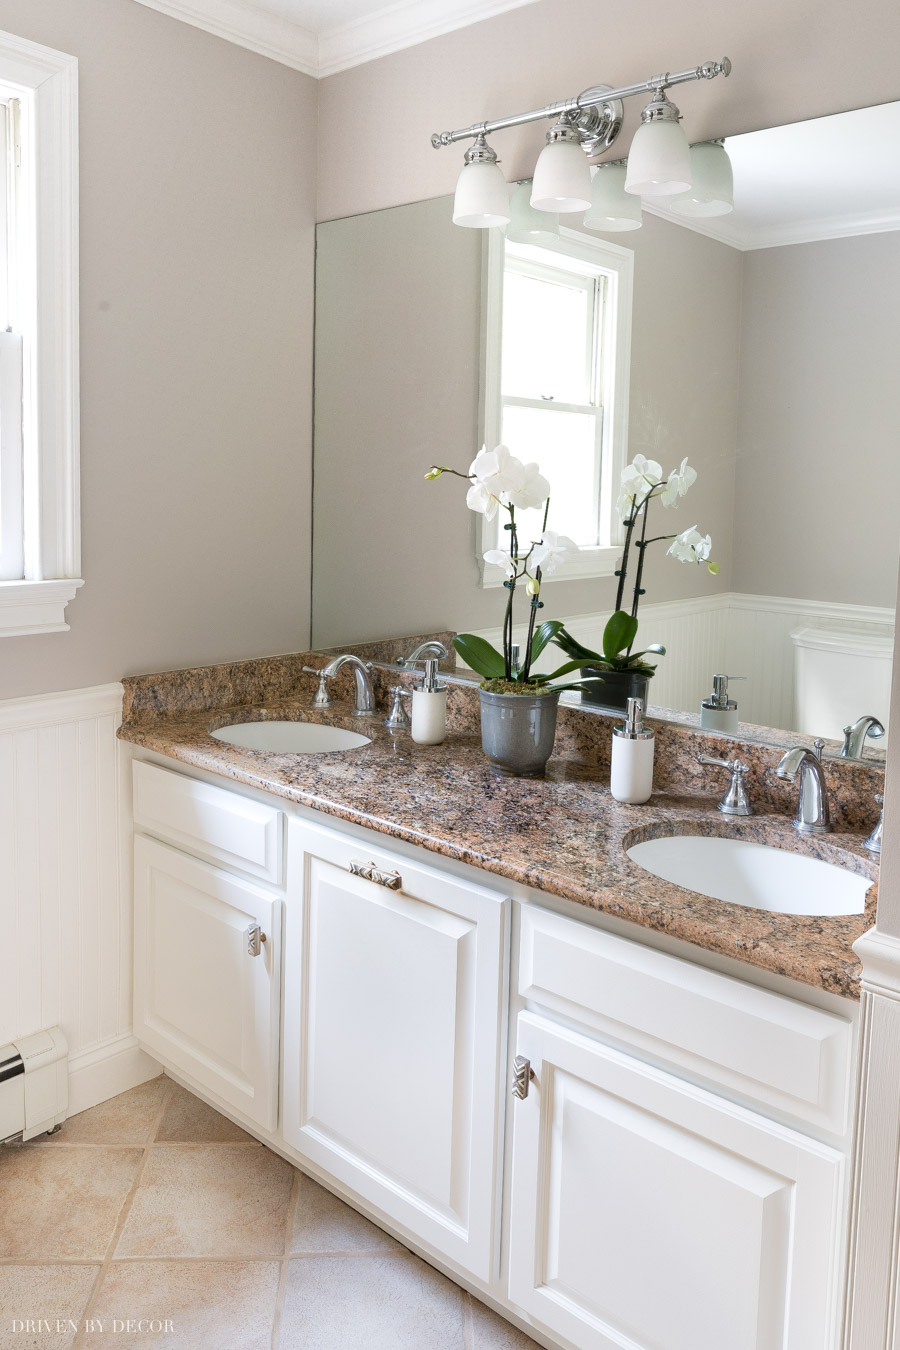
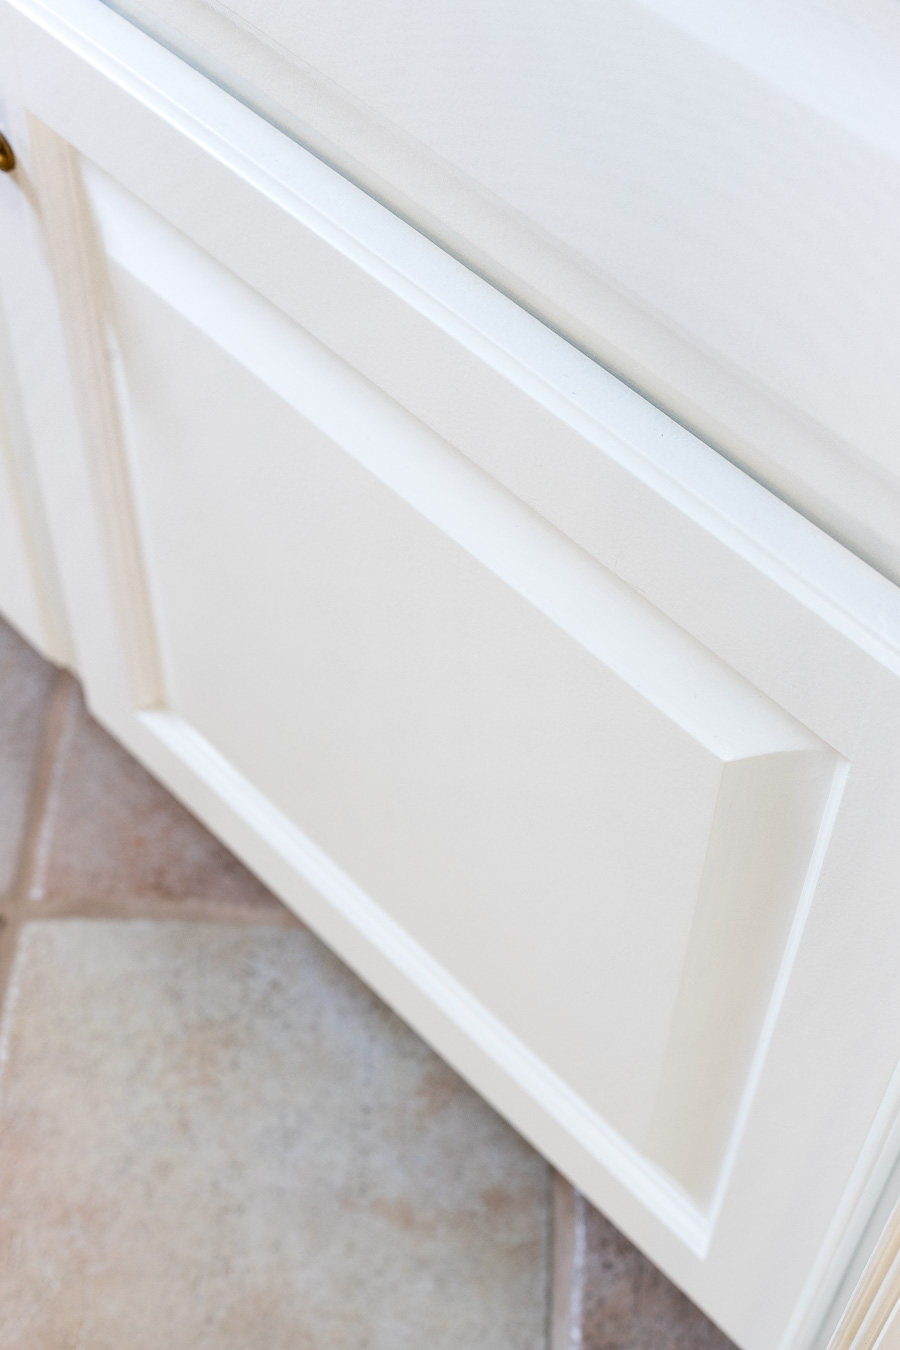
I’m thrilled with how it turned out – the vanity truly looks brand new:
While it might seem like an intimidating project, with the right tools and know-how, it’s one that even a beginner DIYer can do. If it’s a project you’ve considered tackling, this post will give you the step by step how-to to get it done! Let’s go…
Step 1: Remove Vanity Doors & Drawers
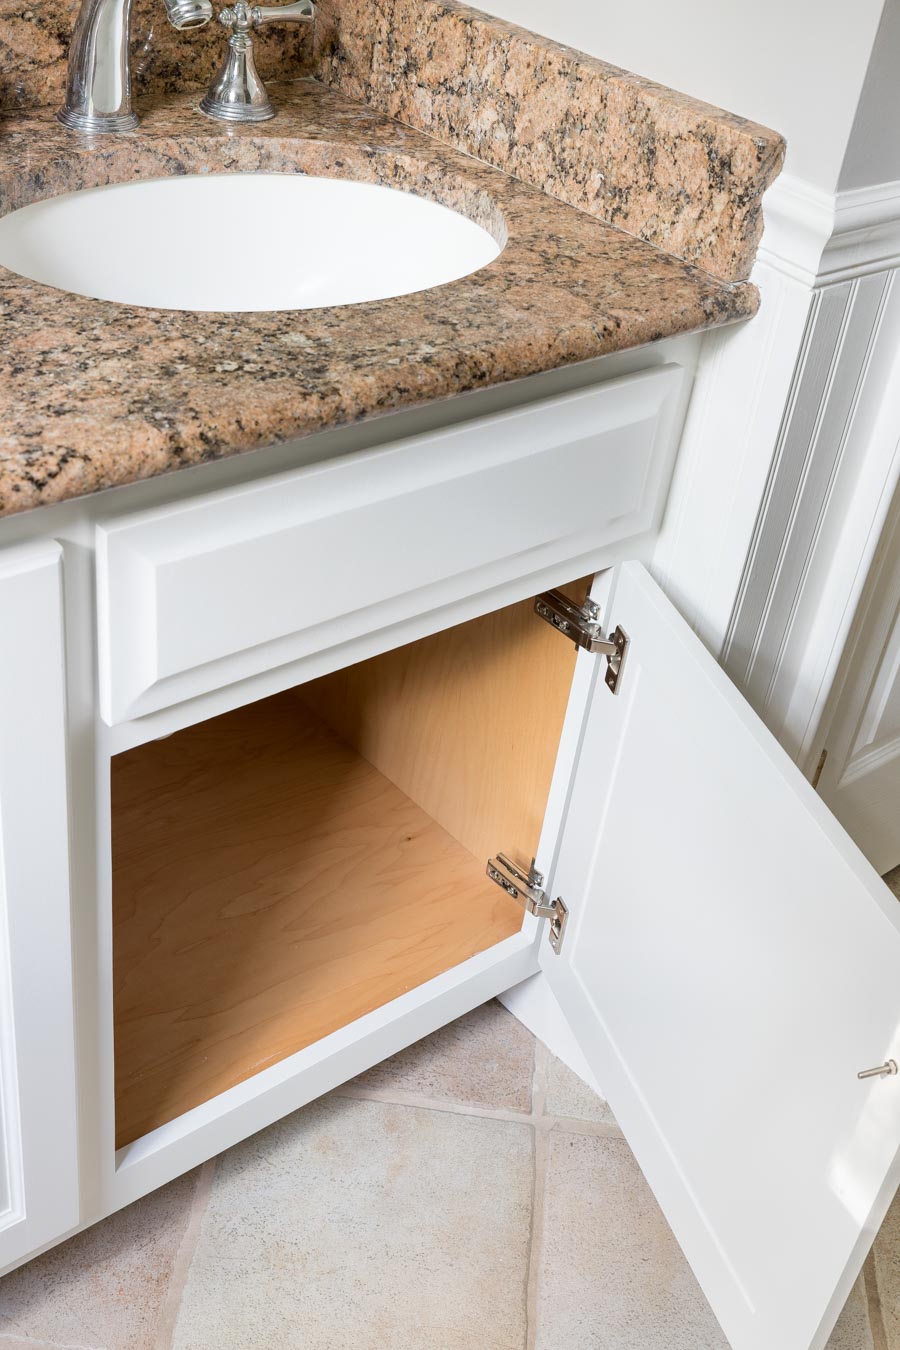
The first step is to remove your vanity’s doors and drawers along with any hardware so that all that’s left is the frame:
Be sure to take photos or notes and label the hardware that you remove so you know what goes back on where when it’s time to put your vanity back together.
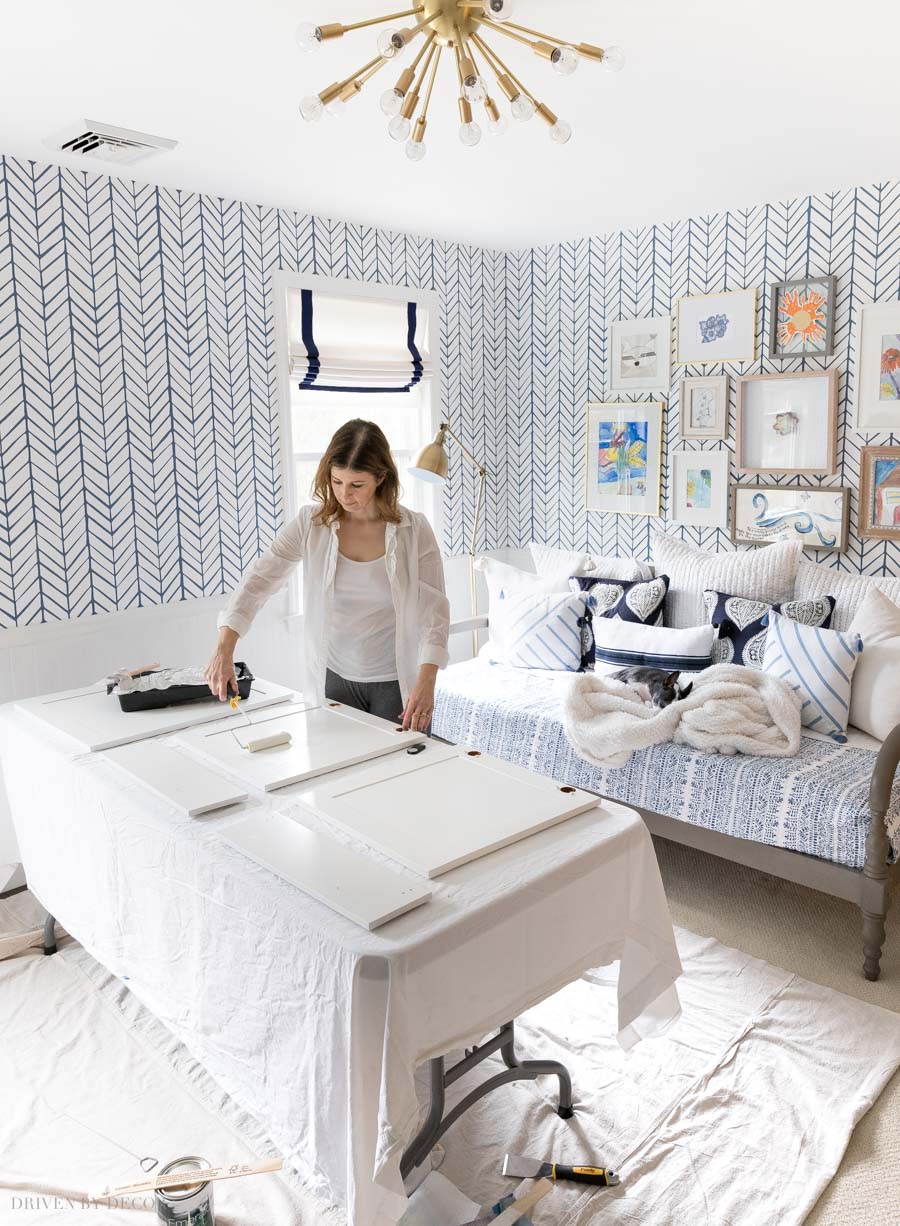
Step 2: Set Up a Painting Station
A lot of people paint in their basement or their garage but unless there’s a ton of sanding involved, I prefer to set up shop somewhere that I have good natural light and a TV 🙂 (I don’t mind painting one bit if I can binge-watch Netflix while doing it!). My go-to spot is our bonus room at the top of the stairs since there’s a large open area to use. I put a dropcloth on the floor and set up a folding table covered with a second drop cloth to lay all of the cabinet doors and drawer fronts on.
Step 3: Clean All Surfaces You’re Painting
Preparation is key and it begins with cleaning all of the surfaces that you’re going to paint. Even if your cabinet doors don’t look dirty, you might be surprised by what you get off of them with a good cleaning! There are various products you can use but I use a small amount of no-rinse TSP substitute like {this one}. Using a clean cloth dampened with the solution, give all of the vanity surfaces a good scrub (don’t forget gloves and eye protection).
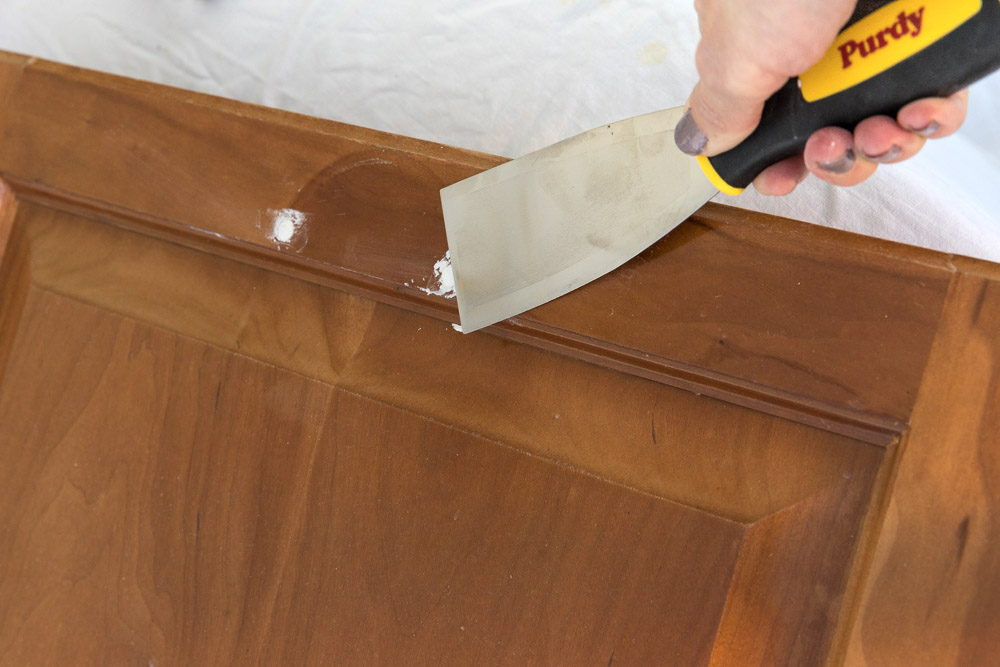
Step 4: Fill Holes & Scratches and Sand
If you’re going to be changing out your cabinet hardware and the new hardware will be in a different location than the old, now’s the time to fill the old holes. I used {this white wood filler} and {this 2″ Purdy flexible putty knife} to push the wood filler down into the holes on both sides and remove the excess filler:
If your cabinets have any nicks or scratches, fill those too. Once the wood filler has dried, sand your filled holes, nicks, and scratches smooth:
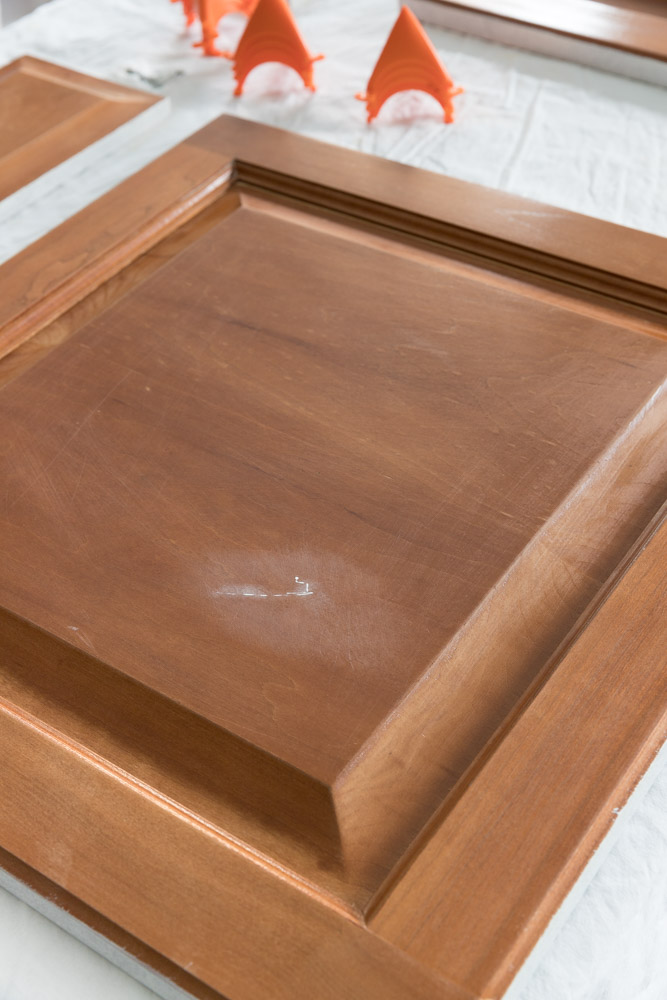
You’ll sometimes find that hardware holes require a second layer of wood filler to sand completely smooth. Also lightly sand (I use 220 grit sandpaper) all of the surfaces that you’re going to paint including the vanity frame, doors, and drawers. Sanding is an important step for helping your primer & paint adhere, especially when your cabinets have a glossy top-coat like mine did:
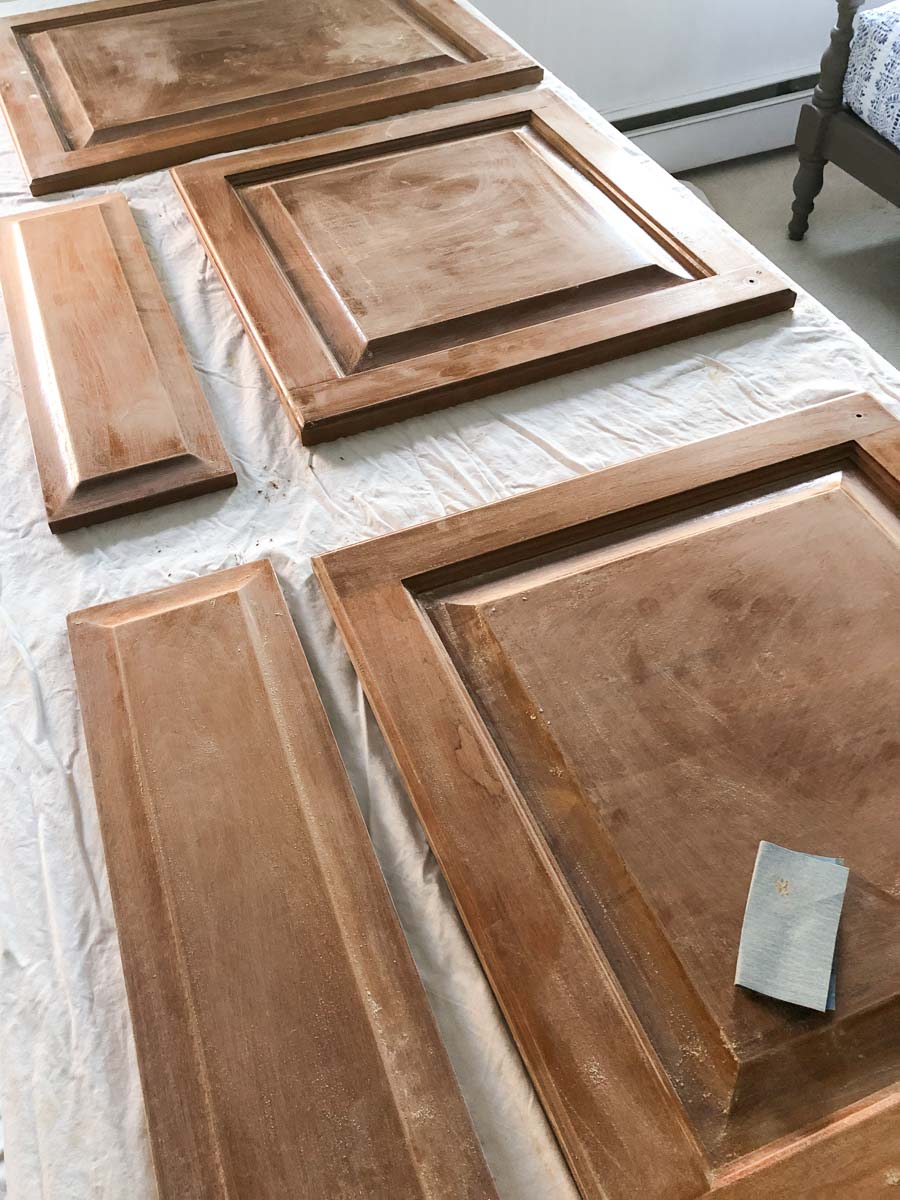
After everything is sanded, vacuum off the sanding dust and wipe all of the surfaces down with a clean microfiber cloth. I finish off my prep by wiping all of the surfaces down with a liquid deglosser like {this one} which both cleans off any remaining dust particles and is extra assurance that you’ll get good adhesion of primer and paint.
Step 5: Brush & Roll on a Bonding Primer
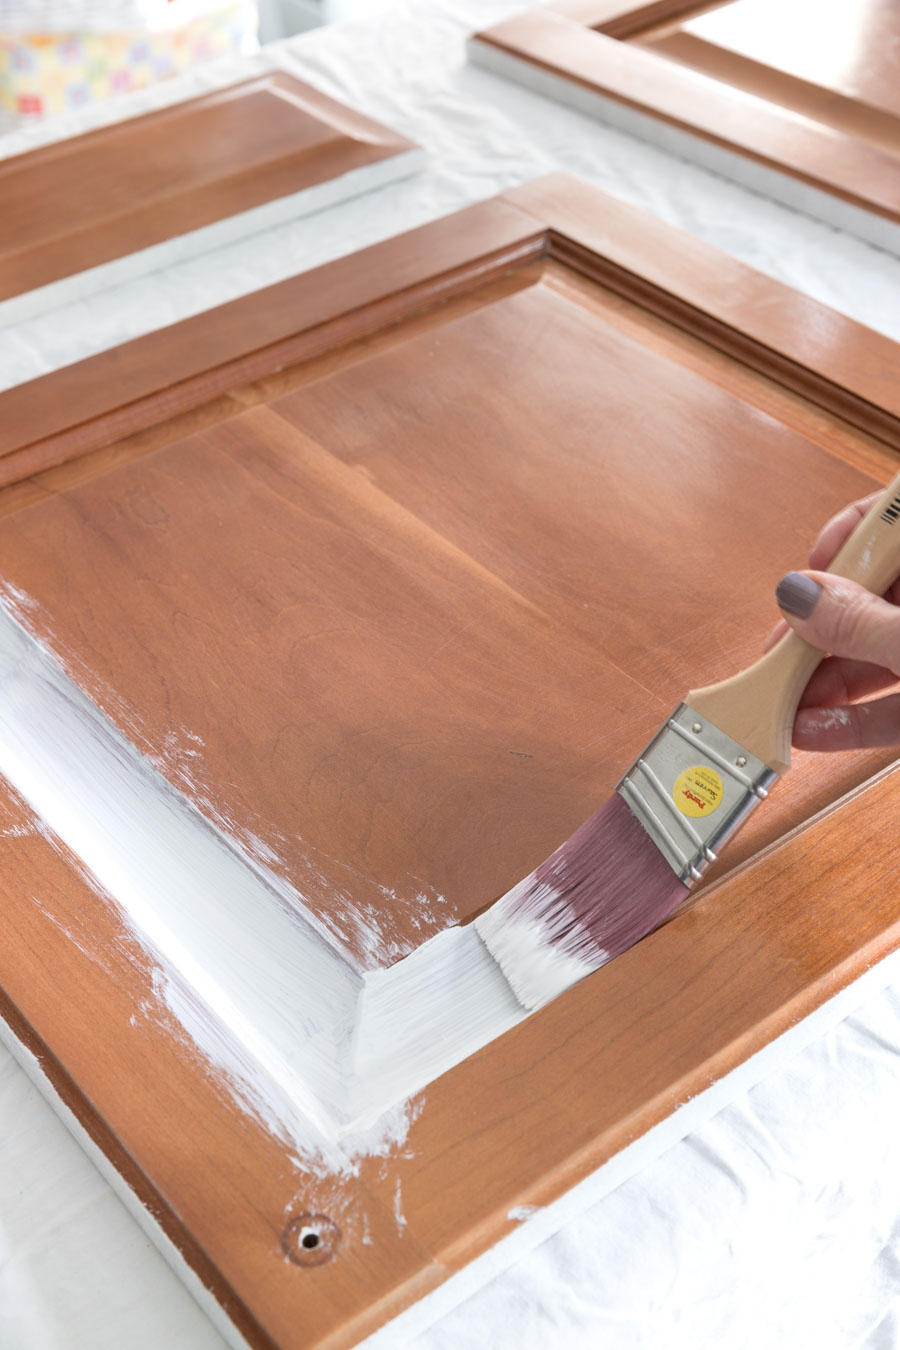
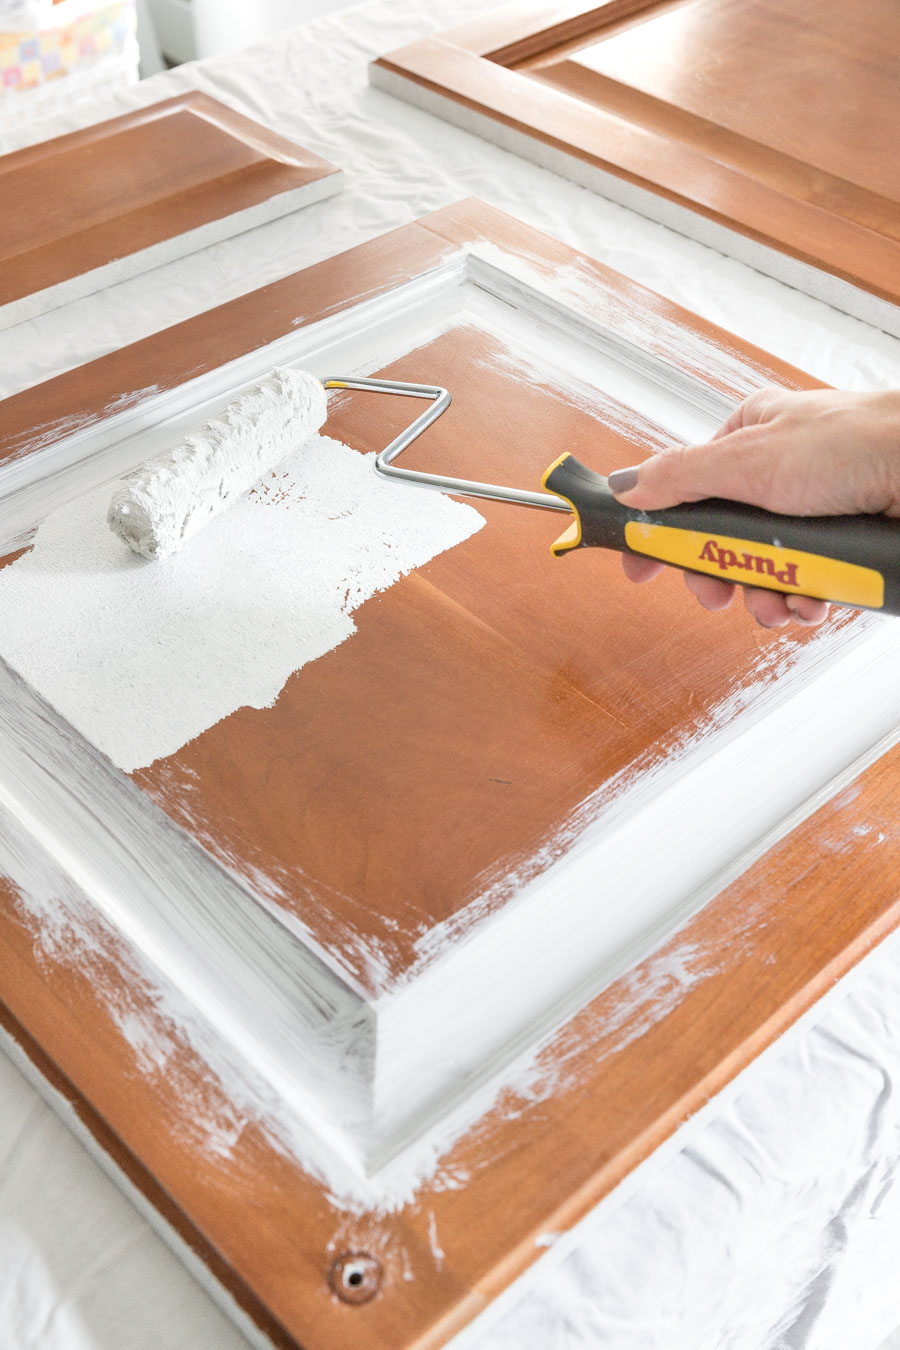
The next step is to brush and roll on the bonding primer. Since my bathroom vanity was previously stained and coated with a glossy polyurethane, I chose Sherwin-Williams Extreme Bond Primer which is made for adhering to hard to stick surfaces. It truly sticks to anything – I highly recommend it! {This STIX primer} is another one I’ve used several times that’s a great choice! I start by rolling the backs and edges of the vanity doors with the doors sitting on top of four {these plastic painter’s tripods} to raise them up off the table I’m painting on. Once thoroughly dry, I flip the doors over to paint the front, using a combination of a paint brush and roller.
Having the right tools makes all the difference for this step and every other step in this project. If you’re guilty of spending days figuring out paint colors but then grab the closest paint brush and roller on the shelf to apply it, rethink that the next time you have a painting project. Investing in high-quality tools will keep you from getting the excessive brush marks and lint that come from using cheaper products and can ruin your final finish. Ever since I took a painting class with Jeff as newlyweds and we were told that Purdy has the best brushes and rollers, it’s what I’ve always used – I still have and use some Purdy brushes that I bought over 20 years ago:
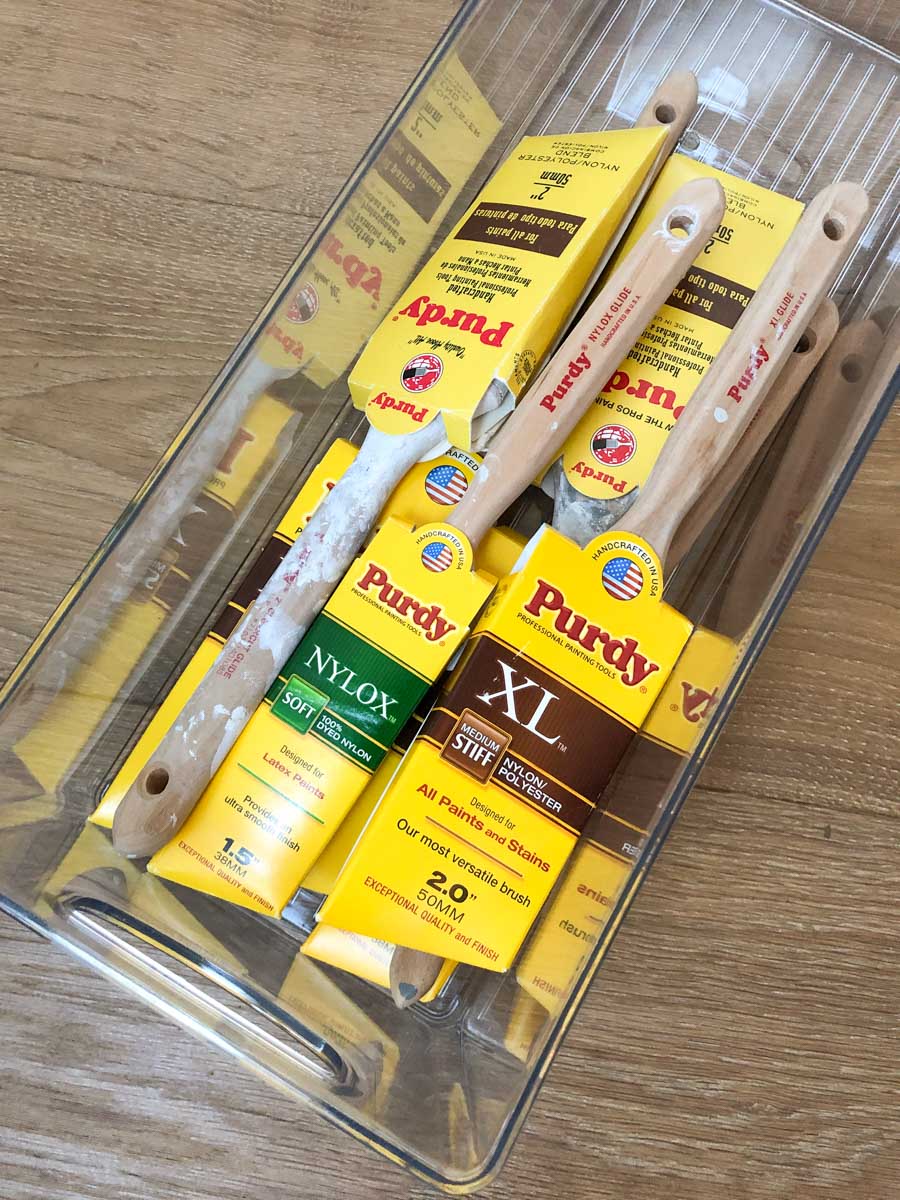
For priming, I started with {this Purdy 1.5″ Nylox Glide brush}, brushing the primer into all non-flat areas of the door:
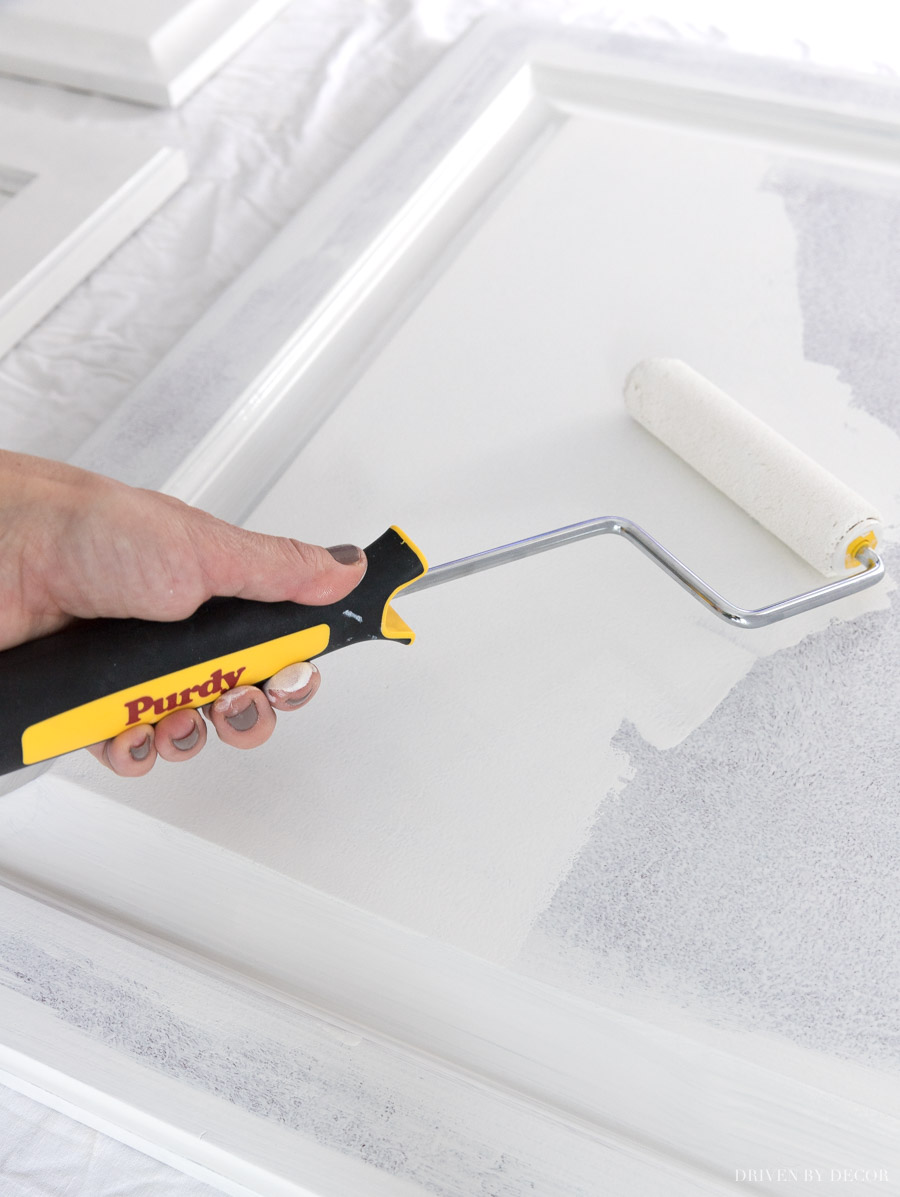
Then I immediately rolled all flat surfaces with {this ¼″ nap Purdy White Dove Mini Roller} on {this Jumbo Mini Roller Frame} using a mini roller tray like {this} (Note: be sure to use a ¼″ nap roller instead of a ⅜″ nap roller – you’ll get a smoother finish!):
Want to save this post?
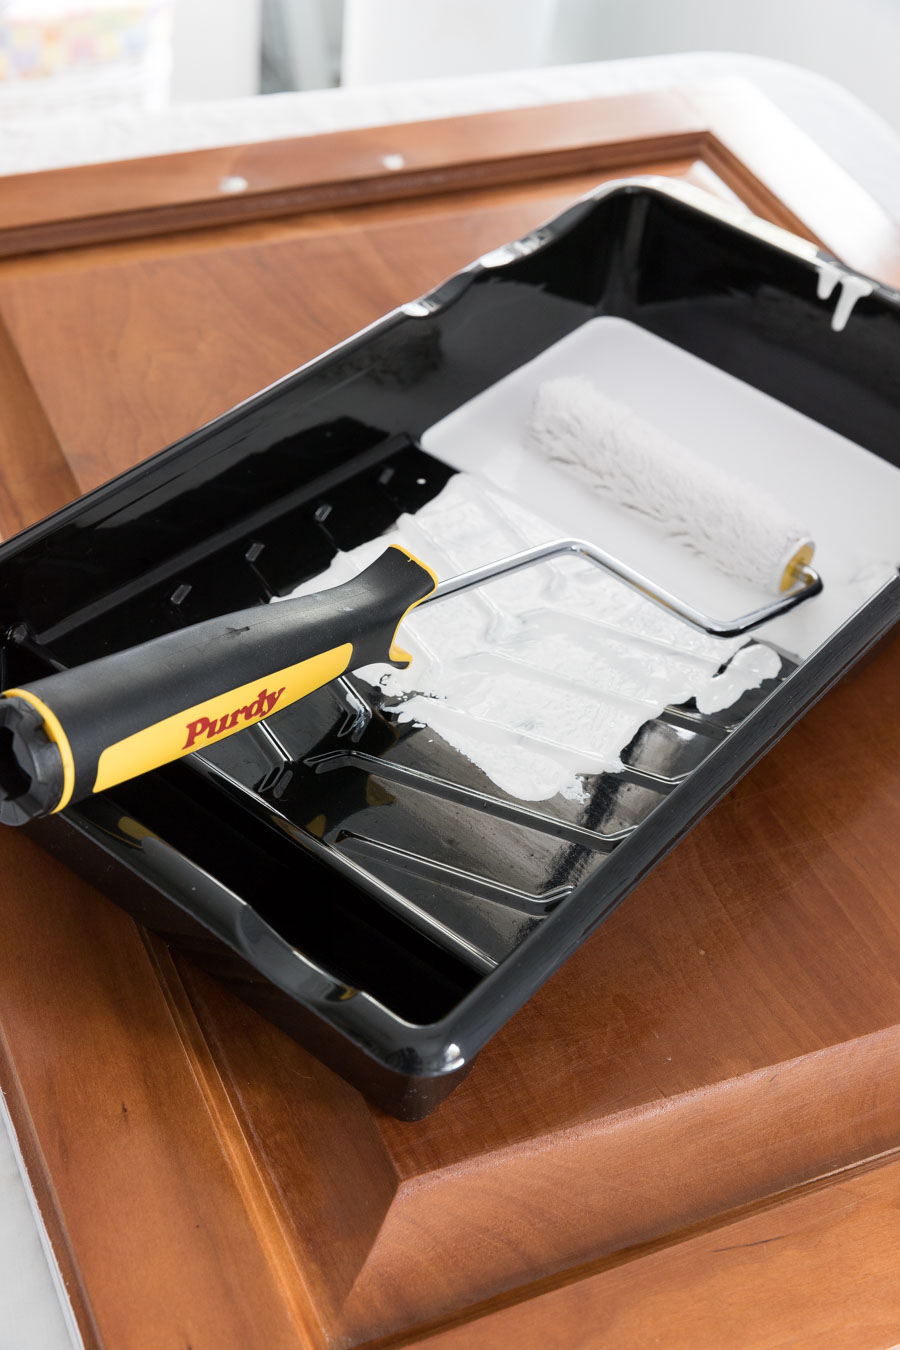
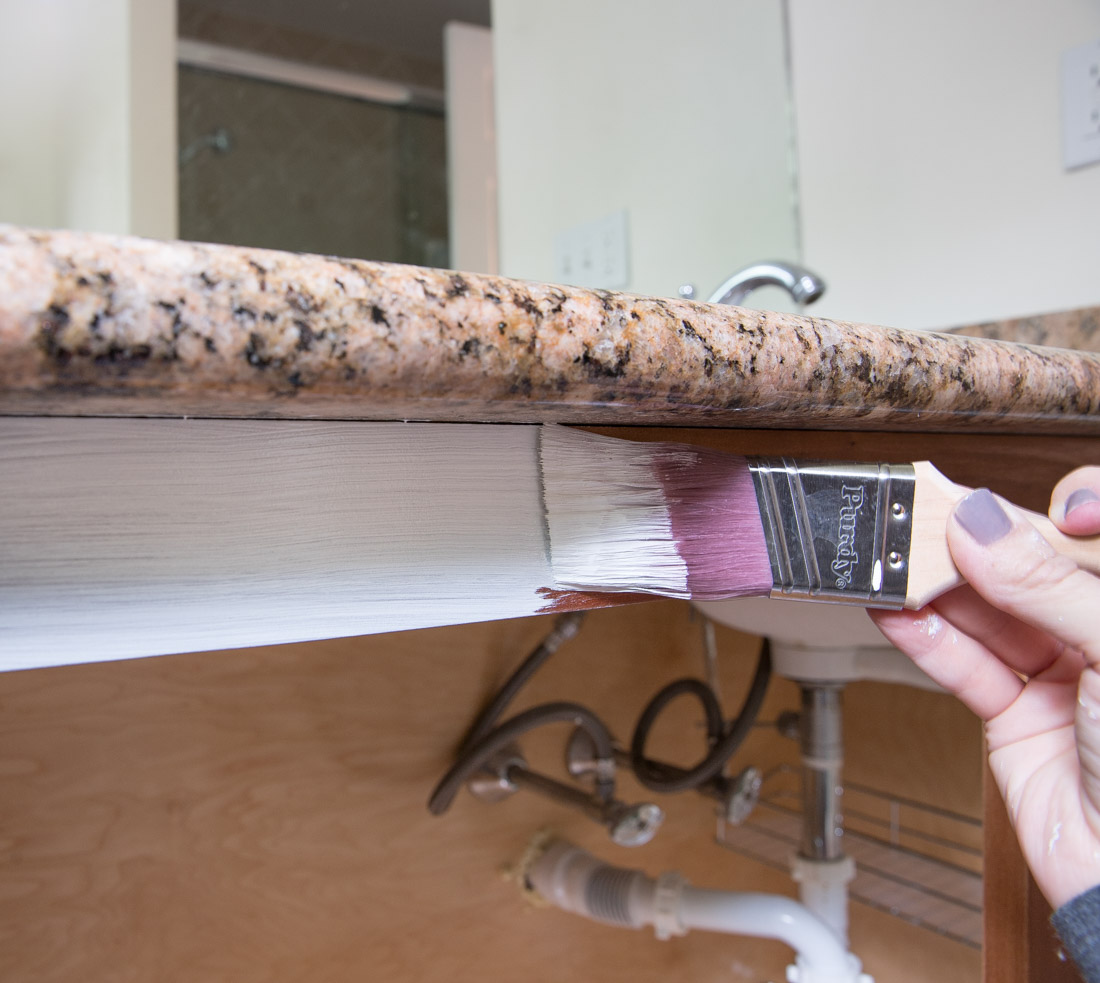
While you don’t need to rush going from brushing to rolling, you’ll get the best results if you do them back to back before the brushed paint dries. And don’t forget to primer the vanity frame too:
Step 6: Paint!
After letting your primed door fronts dry overnight, lightly sand all of your primed surfaces (I like to use a sanding sponge like {this one} for this) and remove sanding dust with a microfiber cloth or tack cloth like {this}. Then it’s time for paint! Just like with the primer, start by rolling the paint on the back and edges of the vanity doors and drawers. Once they’re thoroughly dry, flip them over and use the combination of a paint brush and roller on the front just like you did with the primer. The key to getting an ultra smooth finish is to use the right paint, brush, and roller for the job.
For paint, I used Sherwin-Williams Emerald Urethane Trim Enamel in Semi-gloss which provides the durable surface you want for a bathroom vanity. I chose Alabaster for my paint color which is a white with just a touch of warmth (quick tip: when choosing a white paint color, use a cool white if your vanity top has cool colors in it and a warm white if your vanity top has warm colors). I used the same combination of the Purdy 1.5″ Nylox Glide brush:
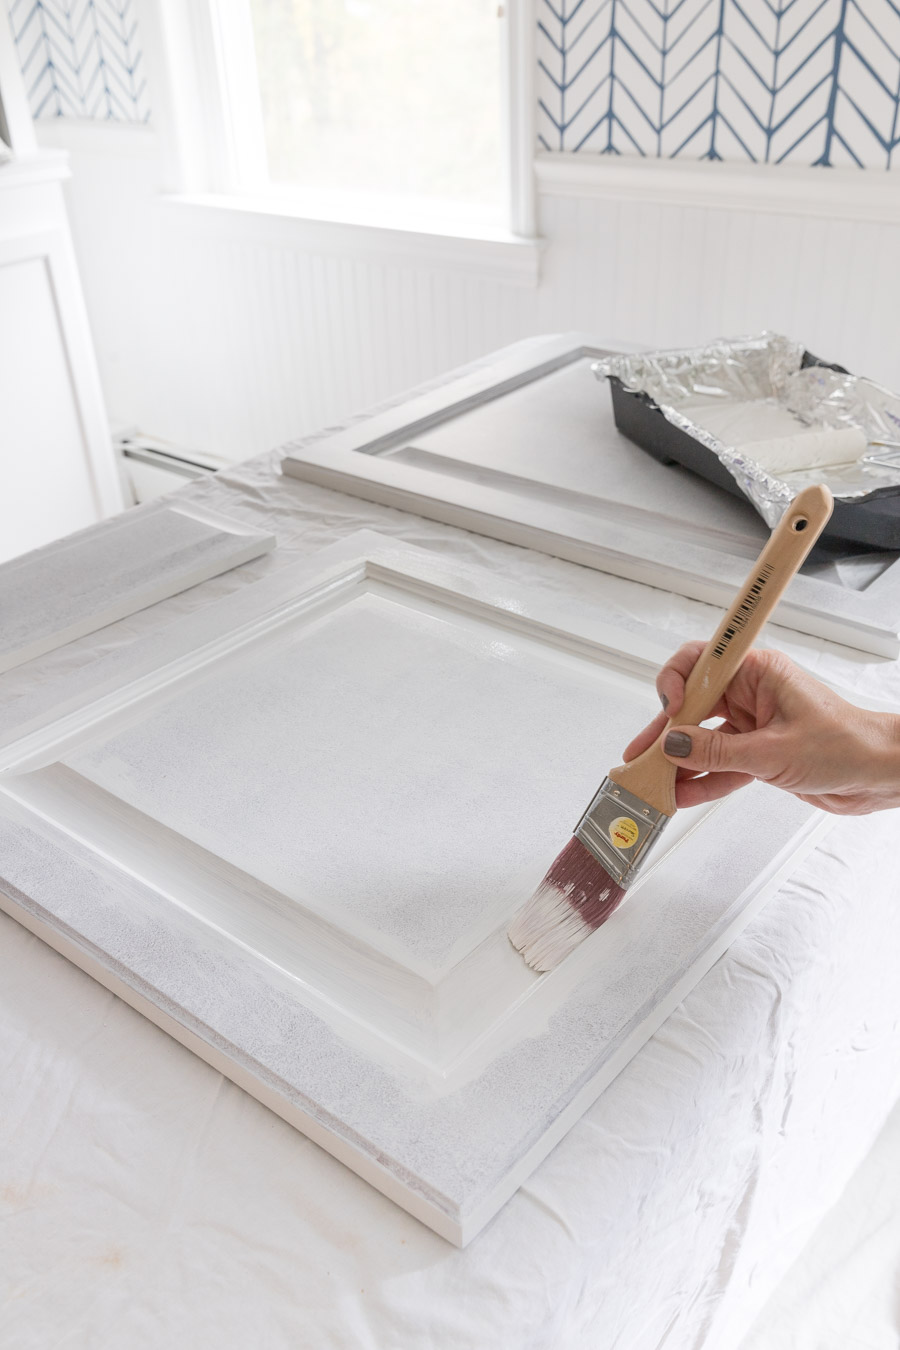
with a ¼″ nap mini roller as I did when priming. The combination of this Purdy paint brush and mini roller results in a beautiful, ultra smooth finish:
Along with painting both sides of your vanity doors and drawers, remember to paint the frame of your bathroom vanity too.
Step 7: Lightly Sand and Repeat
Once you have a coat of paint on the vanity frame and both the front and back of the vanity doors and everything is thoroughly dry, lightly sand all of your painted surfaces and repeat the process with a second coat of paint.
Step 8: Reinstall Your Cabinet Doors & Drawers
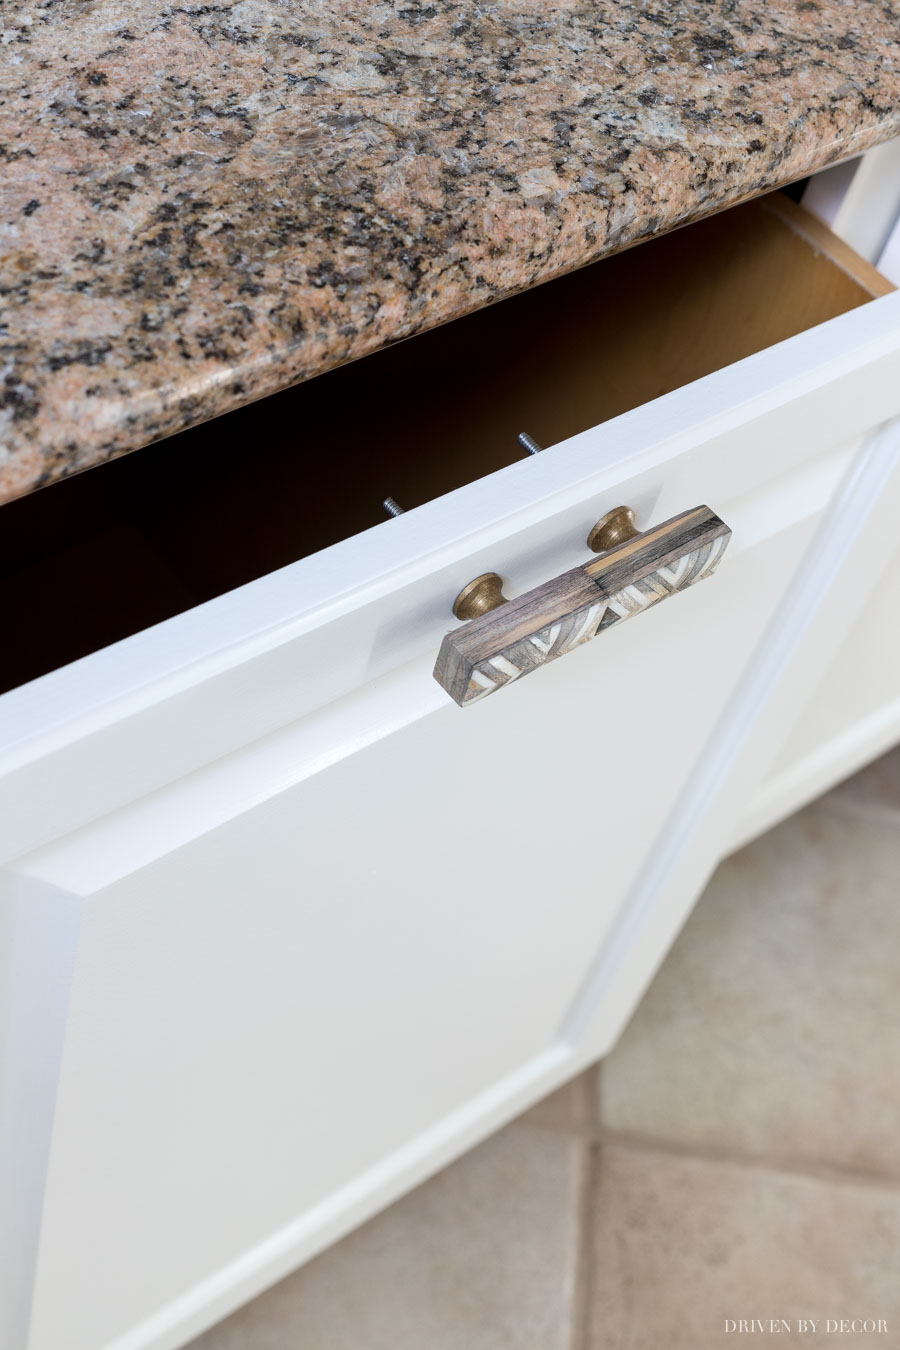
After your last coat of paint, give your doors and drawers at a day or two to dry before reinstalling them on your vanity. If you’re adding new hardware, drill the new holes for it before reinstalling your doors and drawers, and then add your new hardware at the end:
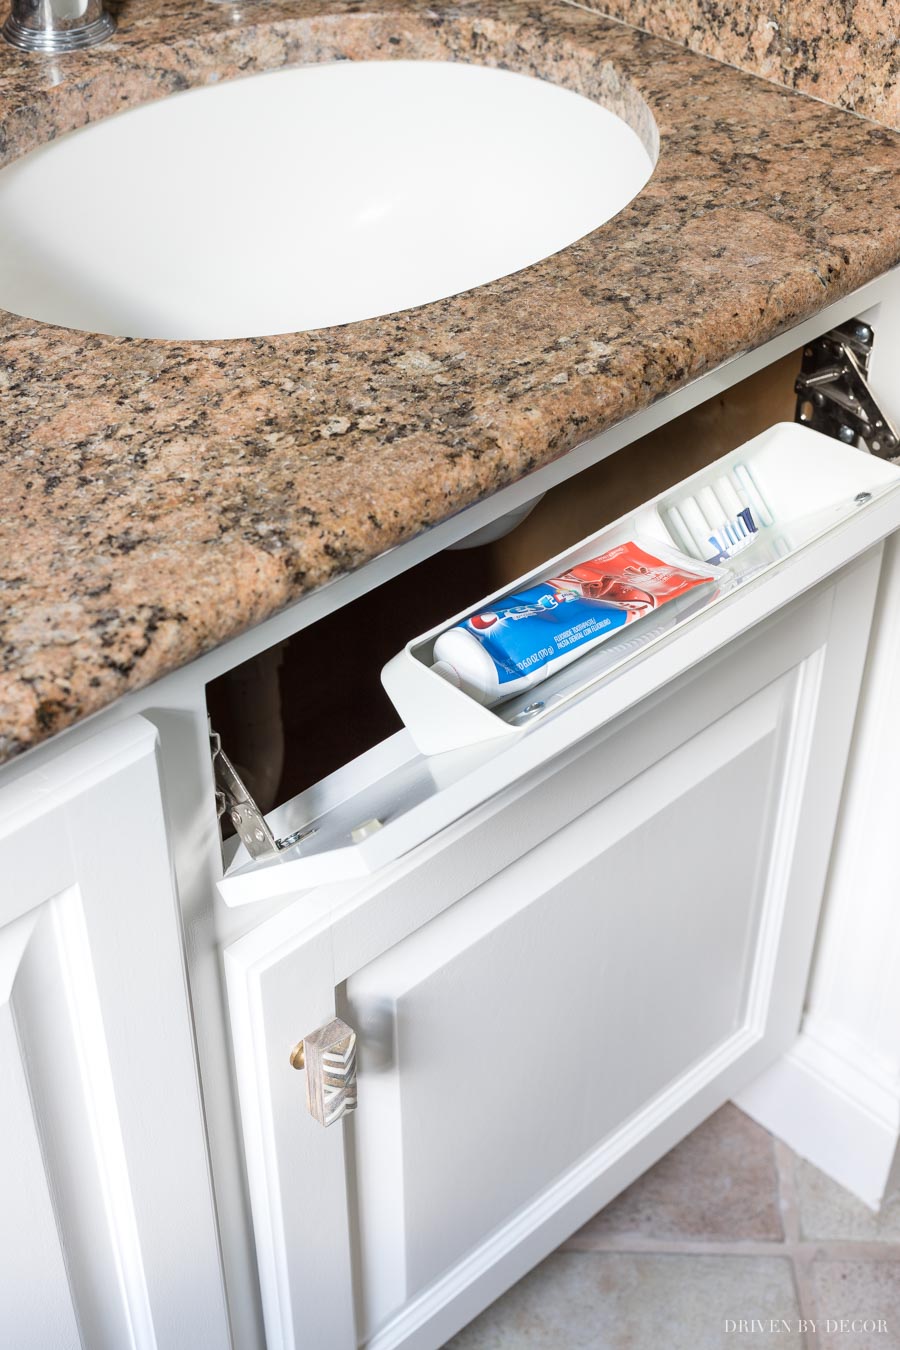
Also reinstall any accessories that attach to them. The faux drawer panels under each sink in my daughters’ bathroom have small tilt out trays that hold their toothbrush and toothpaste so those needed to be reattached:
And the large door in the middle that looks like a cabinet is actually attached to a pull out hamper so I had to reattach the newly painted door front to it:
It can take a week or two for paint to 100% cure so treat your vanity with a little extra TLC for the first few weeks, immediately wiping off anything that gets on it. Oh and don’t forget to marvel at what a difference a few hours of DIYing made to your bathroom:
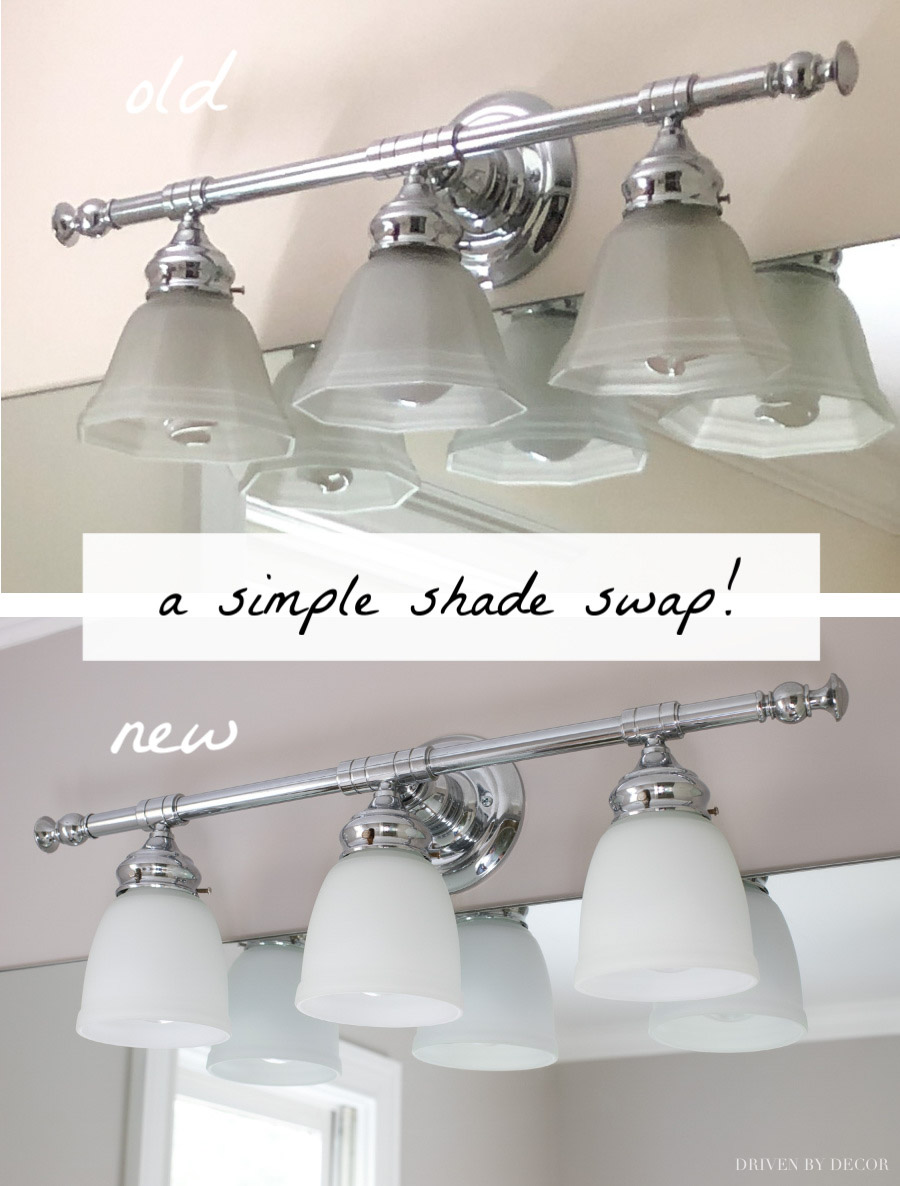
I kept myself on a tight budget for this bathroom makeover so didn’t make any more costly changes like replacing the mirror or lighting but I did make two other inexpensive changes that made a big difference. The first is that I swapped out the dated glass shades on the light above the mirror for {these more streamlined shades}. I was surprised by what a difference it made!
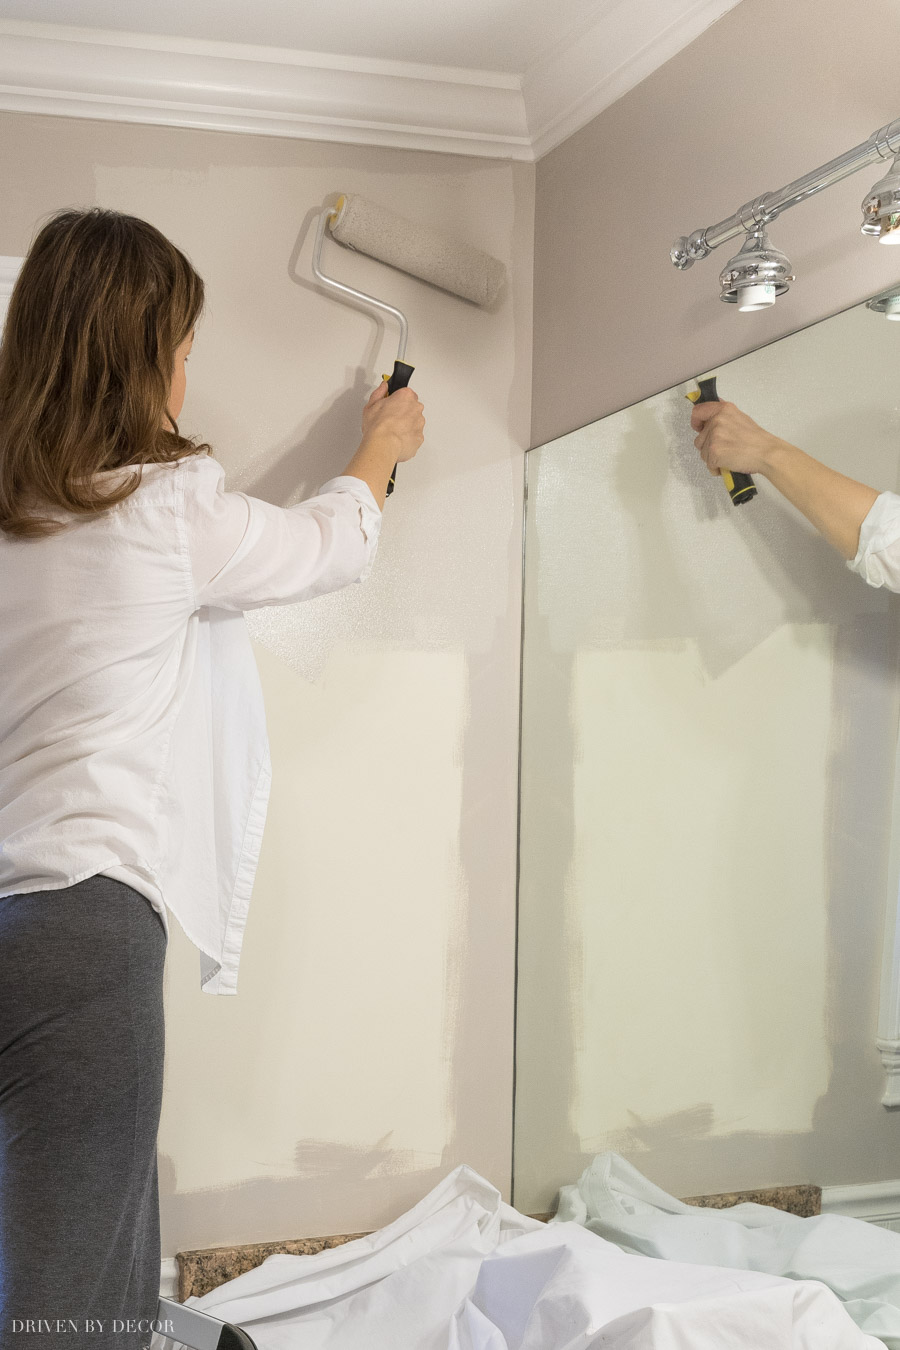
I also painted the bathroom walls – they were previously a light yellow which didn’t work with the colors of the granite vanity top at all. I chose Sherwin-Williams Emerald Interior Latex paint in Alpaca (Matte finish) which is a very light greige that complements the granite and the floors so much better!
The tools I used for painting the walls are {this 2″ Purdy XL Glide brush} and {this ⅜″ nap Purdy White Dove roller} (which is what I’ve used for every wall I’ve ever painted) on {this Purdy Revolution 9″ Frame}:
And with that, we’re done! Each step in painting our bathroom vanity took under an hour (I could actually coat one side of my cabinet doors in only about 20 minutes) so I’d estimate that the total time I spent working on this project was about 5-6 hours spread out over a week. I hope that including so many details will make this a clear, easy to follow project that you now feel confident tackling!
Thanks as always for stopping by the blog and be sure to share your bathroom vanity transformation photos with me – I’d love to see them!
Soon you’ll be ready to tackle another project! Check out {this post on how to refinish a table} for a step by step on getting the job done!


Liz says
I just finished painting our ugly old bathroom vanity and it made such a huge difference!! I really appreciated the level of detail in your blog post. I followed it to the letter. Mine didn’t come out perfectly — it was my first attempt at a project like this — but it is so much better. Thanks!!
Nancy says
Thanks so much for the details. I am in the middle of painting an ugly built in desk and bookshelves in our large stair landing. The walls are Aesthetic White and I painted the desk Soft White. It was so glaring! white, I’m redoing it with Aesthetic White. I don’t love it either, looks dingy in the corners and shadows of the bookshelf. Aesthetic White was a compromise, I wanted Alabaster. And I forgot the label the doors and drawers, I know better too.
I just keep telling myself it’s all an adventure.
I really appreciate your blog, it’s a lovely combination of common sense and beauty.
Jan Thompson says
I really like your instructions and recommendations! I want to paint the small bathroom cabinet in our Spanish style home. The bathroom is the only room that doesn’t go with the style of the house. It has white and tan tile and the cabinet is painted white but in desperate need of a refresh, and I want to rustic it up a bit without having to change the tile. I want to paint the cabinet the tan color of the tile but add a dark brown glazing over it to give it a more rustic look. I would then have to add a clear coat on it, correct? I’ve never painted cabinets before so I’m a beginner and would appreciate any advice!
Kris Jarrett says
Hi Jan – your house sounds lovely! I haven’t experimented with glazes on furniture or cabinetry so I’m not sure about topping it with a clear coat. If you’re just painting and are using a high quality paint, you don’t need to finish with a clear coat but you can if you think they’re going to really be taking a beating. Good luck!
Sue Harris says
Thank you so much for your help. We’re taking it slow and trying to get it right. I am so glad I read this it was extremely helpful
LaShawn says
Do you have to use an individual primer or can you use a paint with a primer?
Kris Jarrett says
You definitely want to use a separate binding primer followed by paint. The 2-1 paint with primer won’t give you the adhesion you need for painting furniture…
Mimi says
Kris, thank you so much for your detailed instructions for this “new kid on the block” @painting! Because of you, I’m now in the process of painting my bathroom cabinets (white!)..Ive found your tips SO helpful! I’ll be so proud I’m sure of this accomplishment because of you!
Stephanie says
Excellent tutorial! I followed step-by-step, and my two master bath vanities turned out beautifully! I ended up having to do three coats on the brushed areas (I probably didn’t have enough paint on the brush), but that was minor. I don’t think I would have gotten such great results without your guidance; thank you!
Stacy says
I painted my bathroom vanity when we moved into our new home and it made a world of difference! Love the light shade swap-out…such a huge improvement. Thanks for sharing.
MAI NHU says
How long do you let the cabinet door to dry before you paint the other side?
Thanks
Kris Jarrett says
It depends on the exact paint you use and the temperature/humidity but I let mine dry overnight (you might want to wait 24 hours in a humid environment) before flipping them to paint the other side.
Lisa says
Help! Almost completed the project…exactly as described, using the same products. Was drilling holes for new pulls on last (only) drawer and the paint peeled off the entire drawer front-trying to attach pic but can’t . What did I do wrong??
Kris Jarrett says
Lisa did you use a bonding primer like I mentioned or just a general paint primer? If you used a bonding primer, sanded, and allowed for adequate dry time between coats, you shouldn’t have that issue.
Kevin says
Looks great and thank you for your thoughtful approach to describing the steps you did. Very easy to follow, I just finished my vanity thanks to you. Another nice update on a budget is a frame around mirrors like yours. I’m sure some can diy it, but we bought some from mirror mate and they look great and really make the space look nice.
Ron Holtz says
Your cabinets look great. Nice job. I have done our main bath cabinets and am now in the process of doing the master bath cabinets. I have to say, great minds think alike because all of the steps you outlined are exactly what I did and it came out beautiful. My wife even thought so! We changed out hardware and will be changing light fixtures too. It’s amazing what a couple hundred dollars will do for a bathroom makeover. I also built a frame around the main bath mirror and painted it the same color as the cabinets. Awesome look. Thanks for the info here.
Anthony Holbrook says
I have a honey oak vanity. The finish has quite a bit of texture. I have been told that the texture will always show. Will I be able to have a smooth paint job on it or will the texture still show?
Kris Jarrett says
If you’re able to sand them until they’re smooth then it will be smooth after painting but if you’re starting with a textured surface, the texture will show through the paint.
Brigid says
Thank you so much for this detailed post! I’m using all the supplies you’ve recommended to paint my vanity but was wondering if I need to wash the paint brush in any special way once I am finished with the primer before I paint with the emerald paint?
Thank you!
Kris Jarrett says
Hi Brigid – assuming you use a water-based primer like either of the two I recommended, just rinse your brush with water really well to get all of the primer off before using it to paint with.
Denise Wood says
Amazing Kris! You have inspired me to tackle my laundry room. My cabinets are painted light blue, and I’d like to paint them white. Would the process be the same?
Kris Jarrett says
So glad you got some inspiration from this post! Yes, you’d follow the same steps for your laundry room – good luck!
SAMANTHA LARSEN says
Hi. It looks beautiful!
If my bathroom cabinets are already white (but I want to freshen them up with a brighter white, do I still need to sand and prime all that ? Can I just roll on some fresh white paint?
Kris Jarrett says
Yes unfortunately you’d want to still sand and prime or the new paint might not adhere to the existing paint.