Have you ever heard of Rub ‘n Buff? If you have cabinet knobs, picture frames, mirrors, or any other decorative piece that has a pretty design but ugly finish, it’s a product you need to know about!
Today I’m sharing more about this long-time favorite product and showing you the different Rub ‘n Buff colors to help you choose the best one for your project. Plus I’m sharing tips on using Rub ‘n Buff and project ideas that are perfect for it. Let’s get to it… (post includes commissionable links; for more information, see my full disclosure statement {here})
What is Rub ‘n Buff?
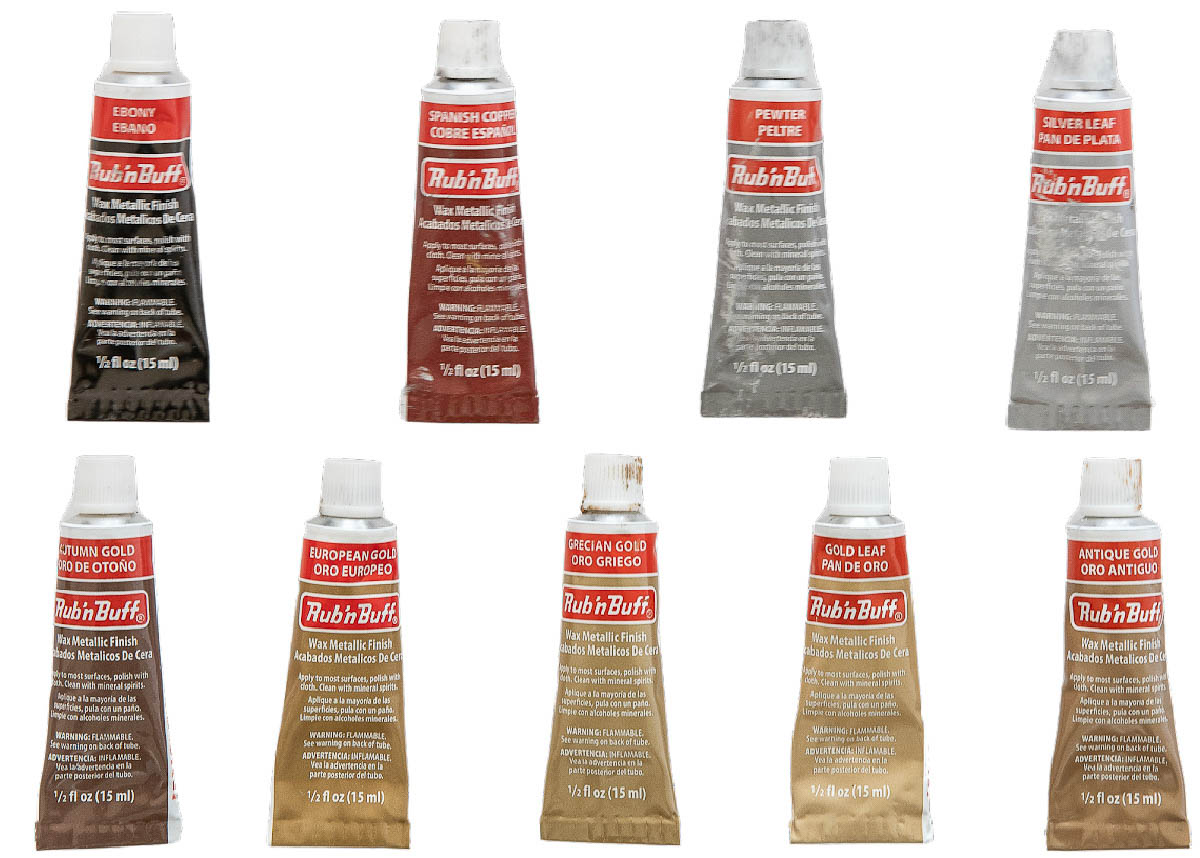
Rub ‘n Buff is metallic-finish paste made with Carnauba waxes, fine metallic powders, & pigments. Just as you’d expect from the name, using it involves rubbing the paste on and then buffing it to create a luster finish. It comes in small tubes (a little goes a long way!) in a variety of colors:
How Do You Use Rub ‘n Buff?
Rub ‘n Buff can be used on most metal, wood, ceramic, and painted surfaces. I’ve tried it on a ton of things and the only surface I had issues with was a slick metal surface because it didn’t adhere well. So for slick surfaces, I’d recommend spot testing it first in an inconspicuous place if possible.
In most cases, the only preparation you’ll need for using Rub ‘n Buff is to make sure the surface of the item you’re using it on is clean and dry. Grimy metal surfaces can be wiped down with mineral spirits to thoroughly clean them. For slick, nonporous surfaces, I recommend lightly sanding with a high grit sandpaper to help with adhesion.
To apply, put a small dab of Rub ‘n Buff on your finger (I use a disposable thin glove) or a clean cloth (old t-shirts pieces work great) and rub the paste on your item evenly in small circular motions. You want a thin, smooth, even coat – don’t leave any globs.
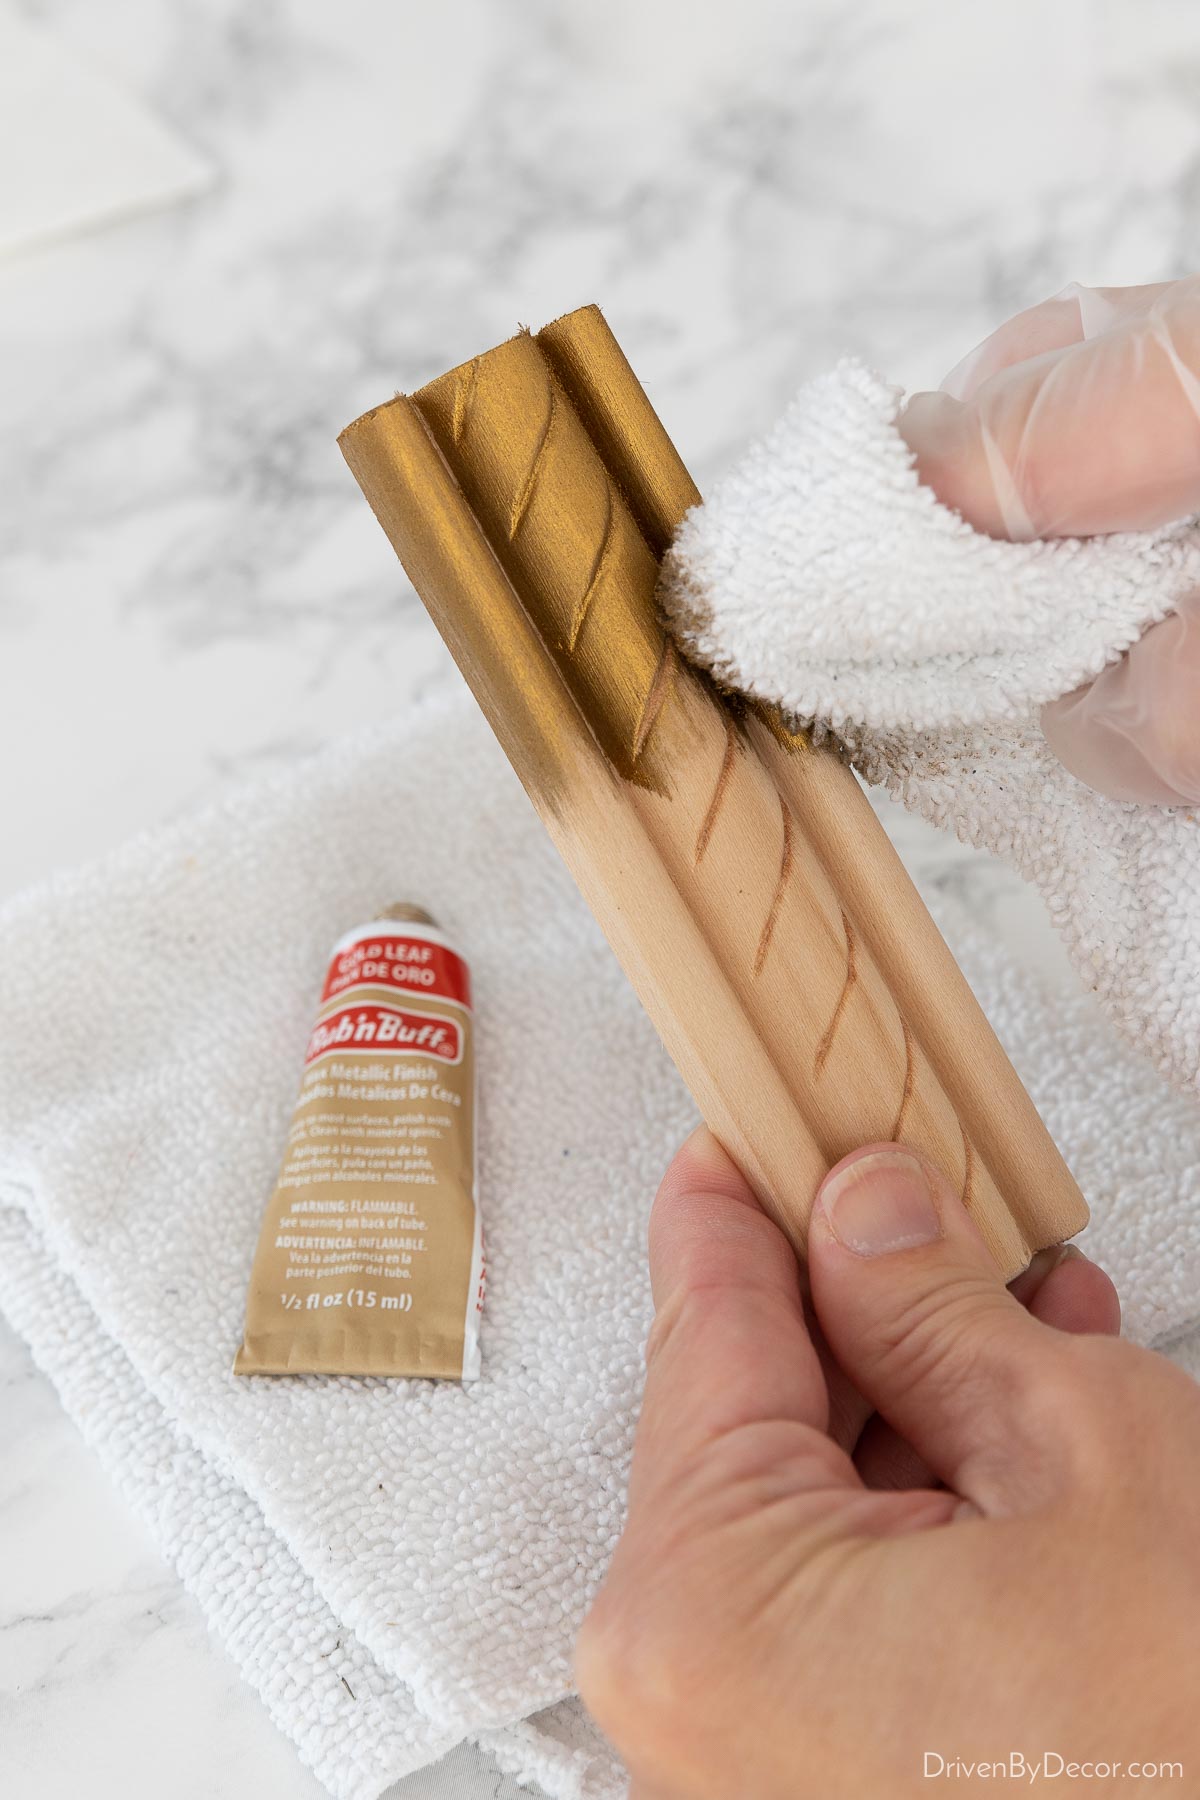
Once it’s fully dry (it dries quickly but I typically wait an hour or two to be safe), buff with a clean cloth to even out the finish and make it shine. The more you buff, the shinier it will be. Some materials might require a second coat if you want full coverage, especially those with a slick surface. I usually wait a day before applying a second coat so the first coat has time to fully harden.
If you have any excess Rub ‘n Buff on the piece you’re working on or got the Rub ‘n Buff anywhere you don’t want it, wipe it off immediately since it will be much harder to remove once dry. If you got Rub ‘n Buff on your hands, warm water & soap will remove most of it. Nail polish remover or mineral spirits can be used to remove any stubborn stains.
What are the Different Rub ‘n Buff Colors?
It’s hard to get a good idea of how the different Rub ‘n Buff colors compare to each other from the small manufacturer’s images so I applied each color to a piece of decorative wood trim to share with you. The Rub ‘n Buff colors that I use the most are the golds. These include (from left to right below) autumn gold (which is more of a light copper color than gold), European gold (a dark champagne-toned gold), Grecian gold (a yellowy gold), gold leaf (a bright, midtone gold), and antique gold (a light, subtle gold):
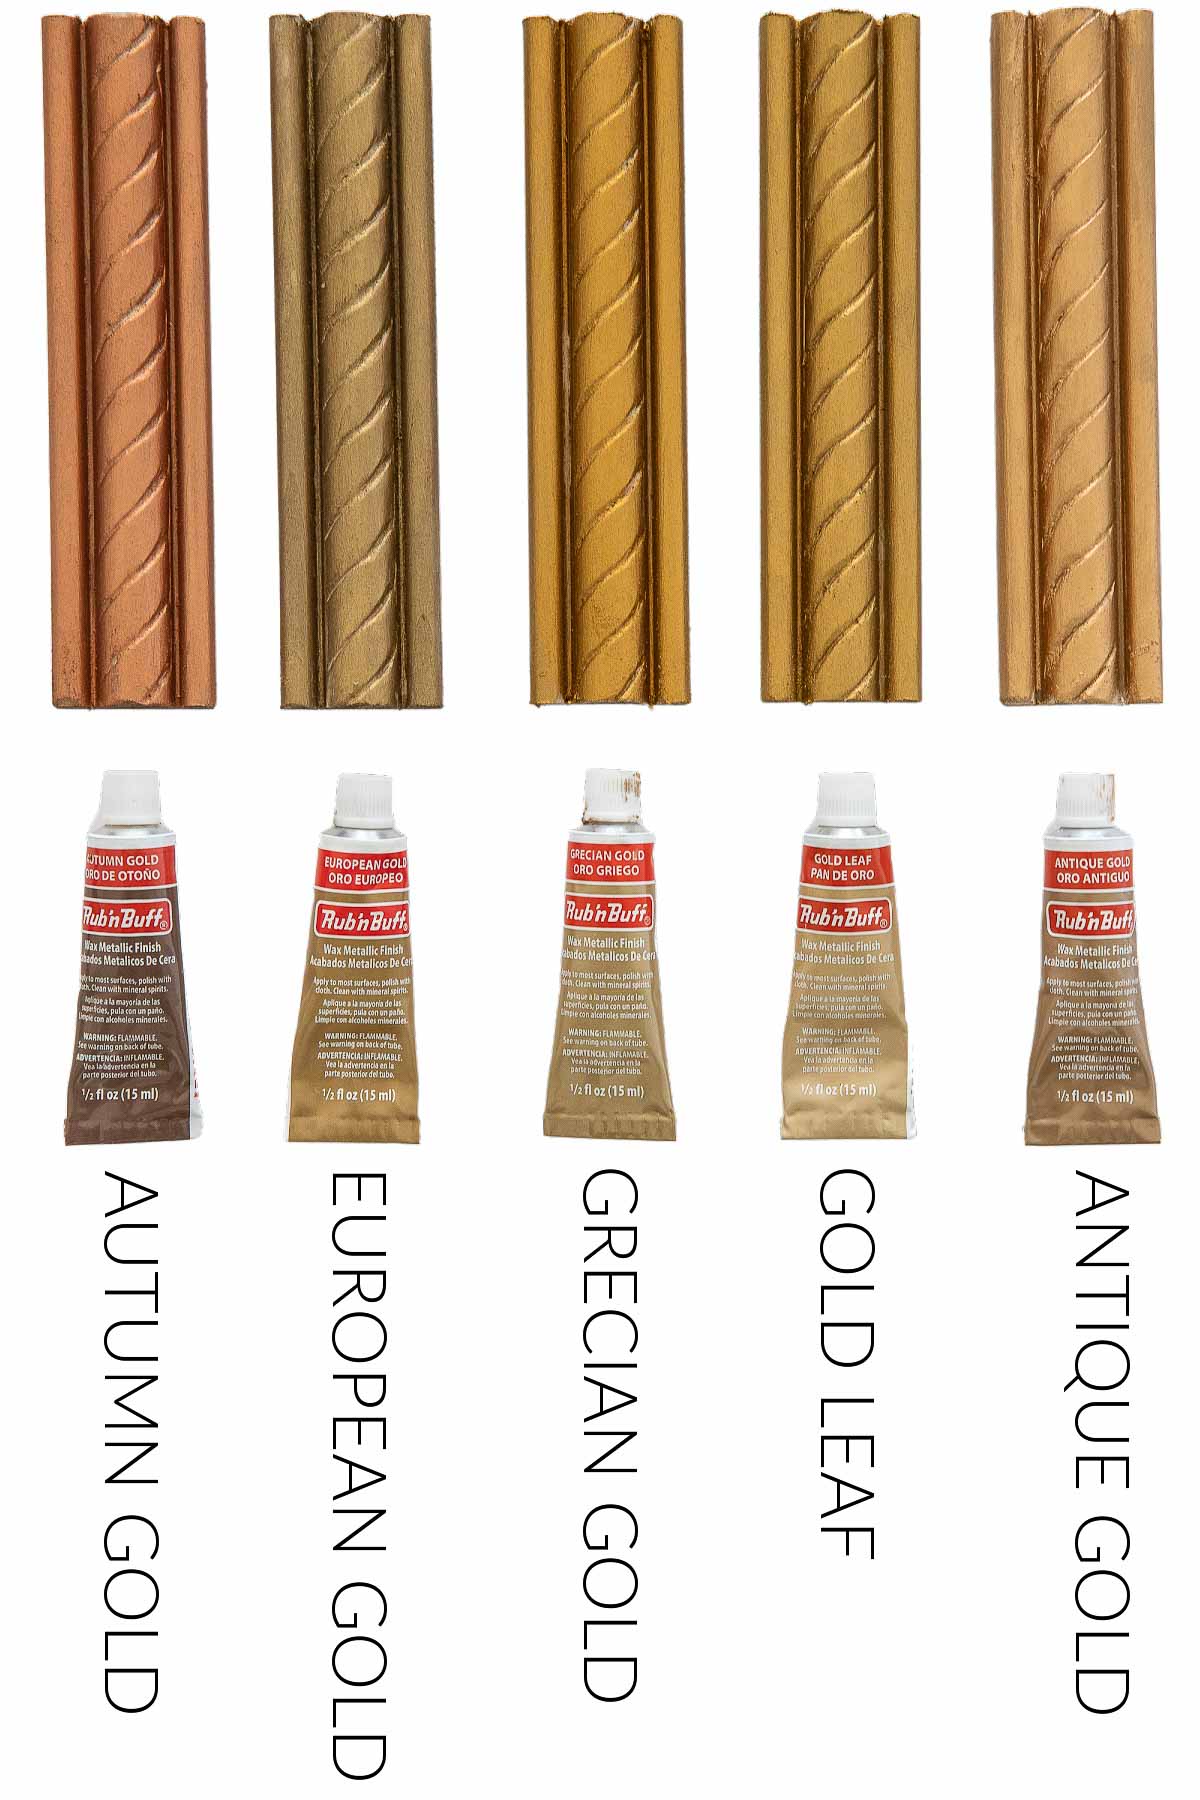
Gold leaf and antique gold are my favorites of the five. You can buy any of these golds individually {here} or as a pack of all five {here}.
The other four Rub ‘n Buff colors (from left to right below) include ebony (a dark black), Spanish coffee (brown with a touch of copper), pewter (a dark silver), and silver leaf (a light silver):
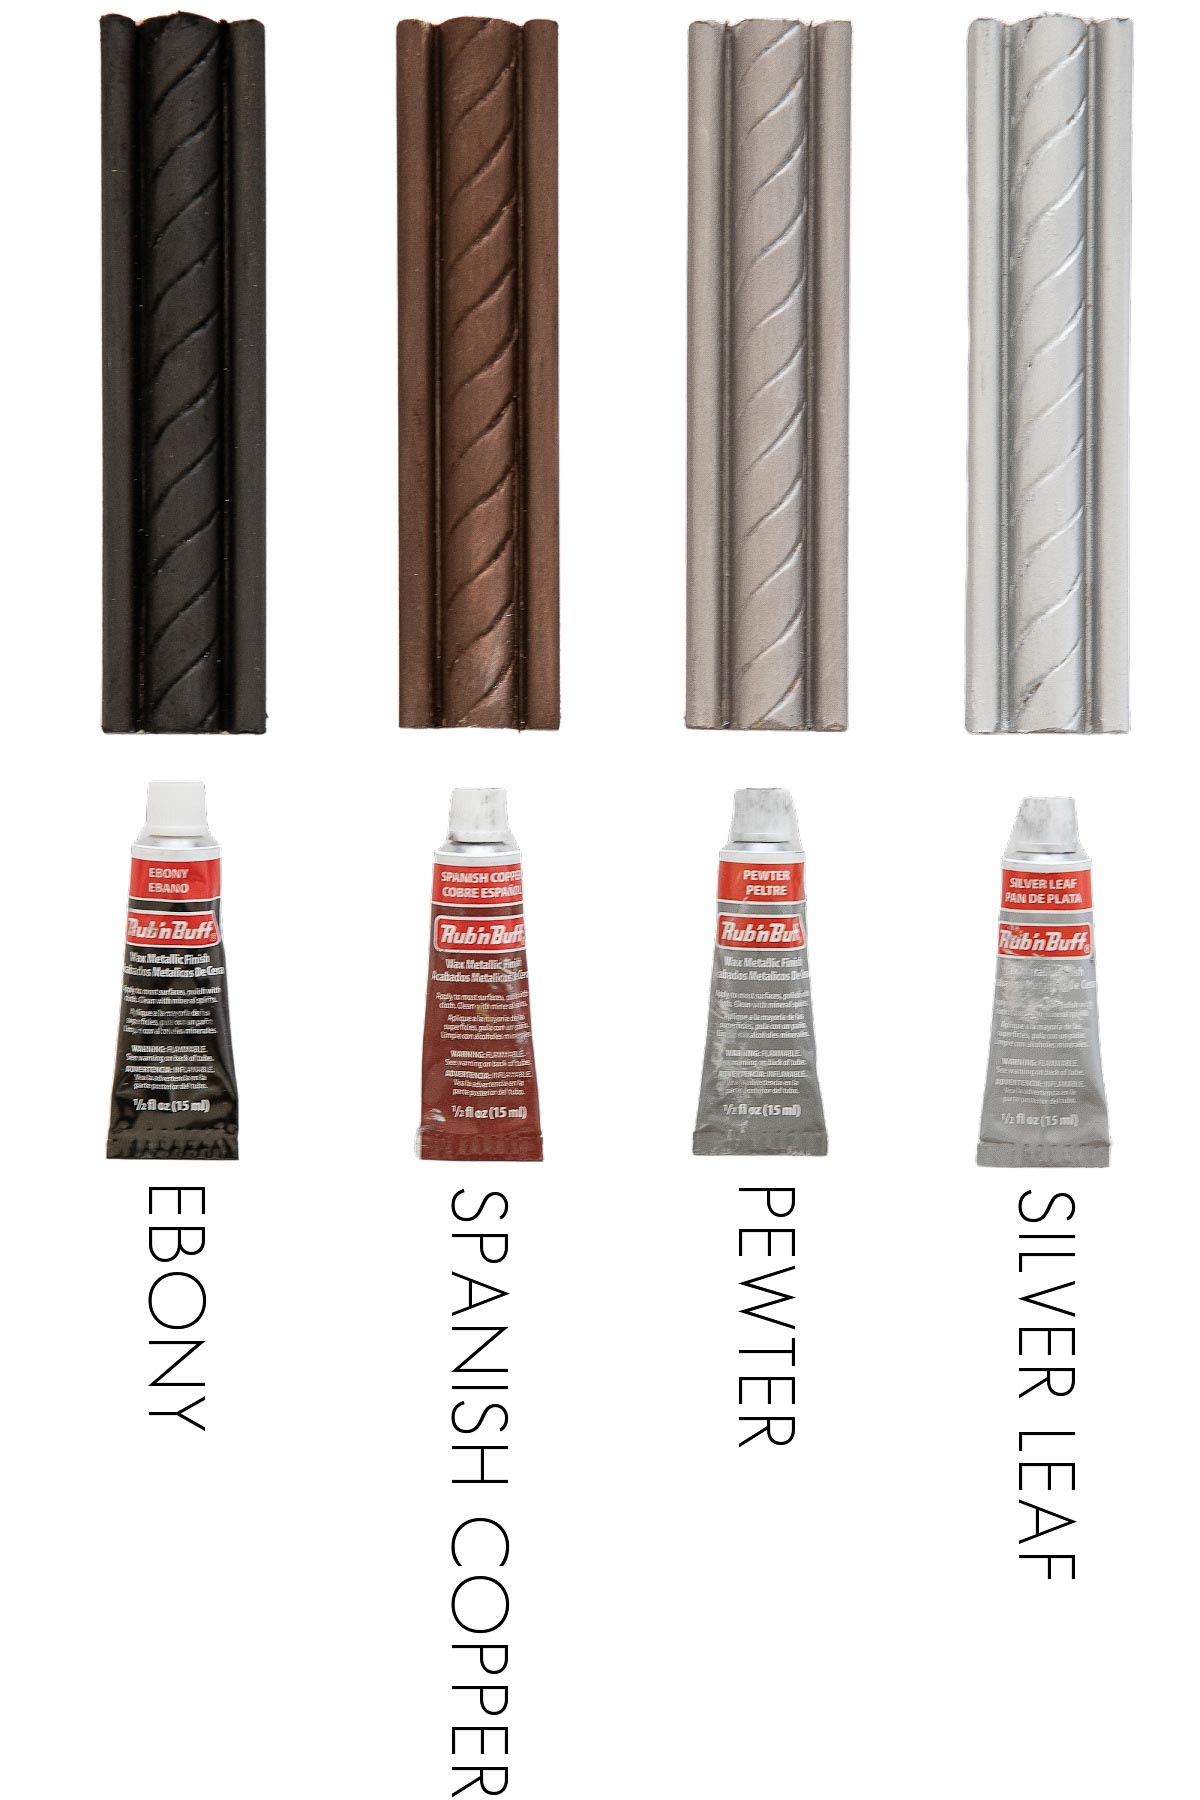
You can buy ebony Rub ‘n Buff {here}, Spanish copper Rub ‘n Buff {here}, pewter Rub ‘n Buff {here}, and silver leaf Rub ‘n Buff {here}. Or you can get all four of my favorite colors (gold leaf, antique gold, ebony, & silver leaf) in a 4-pack {here}.
What Are Some Uses for Rub ‘n Buff?
One of the most common uses for Rub ‘n Buff is to change up the finish of cabinet or drawer hardware. For example, I used Rub ‘n Buff in the gold leaf color to change the finish of these drawer pulls from a dark metal to a pretty gold in a matter of minutes:
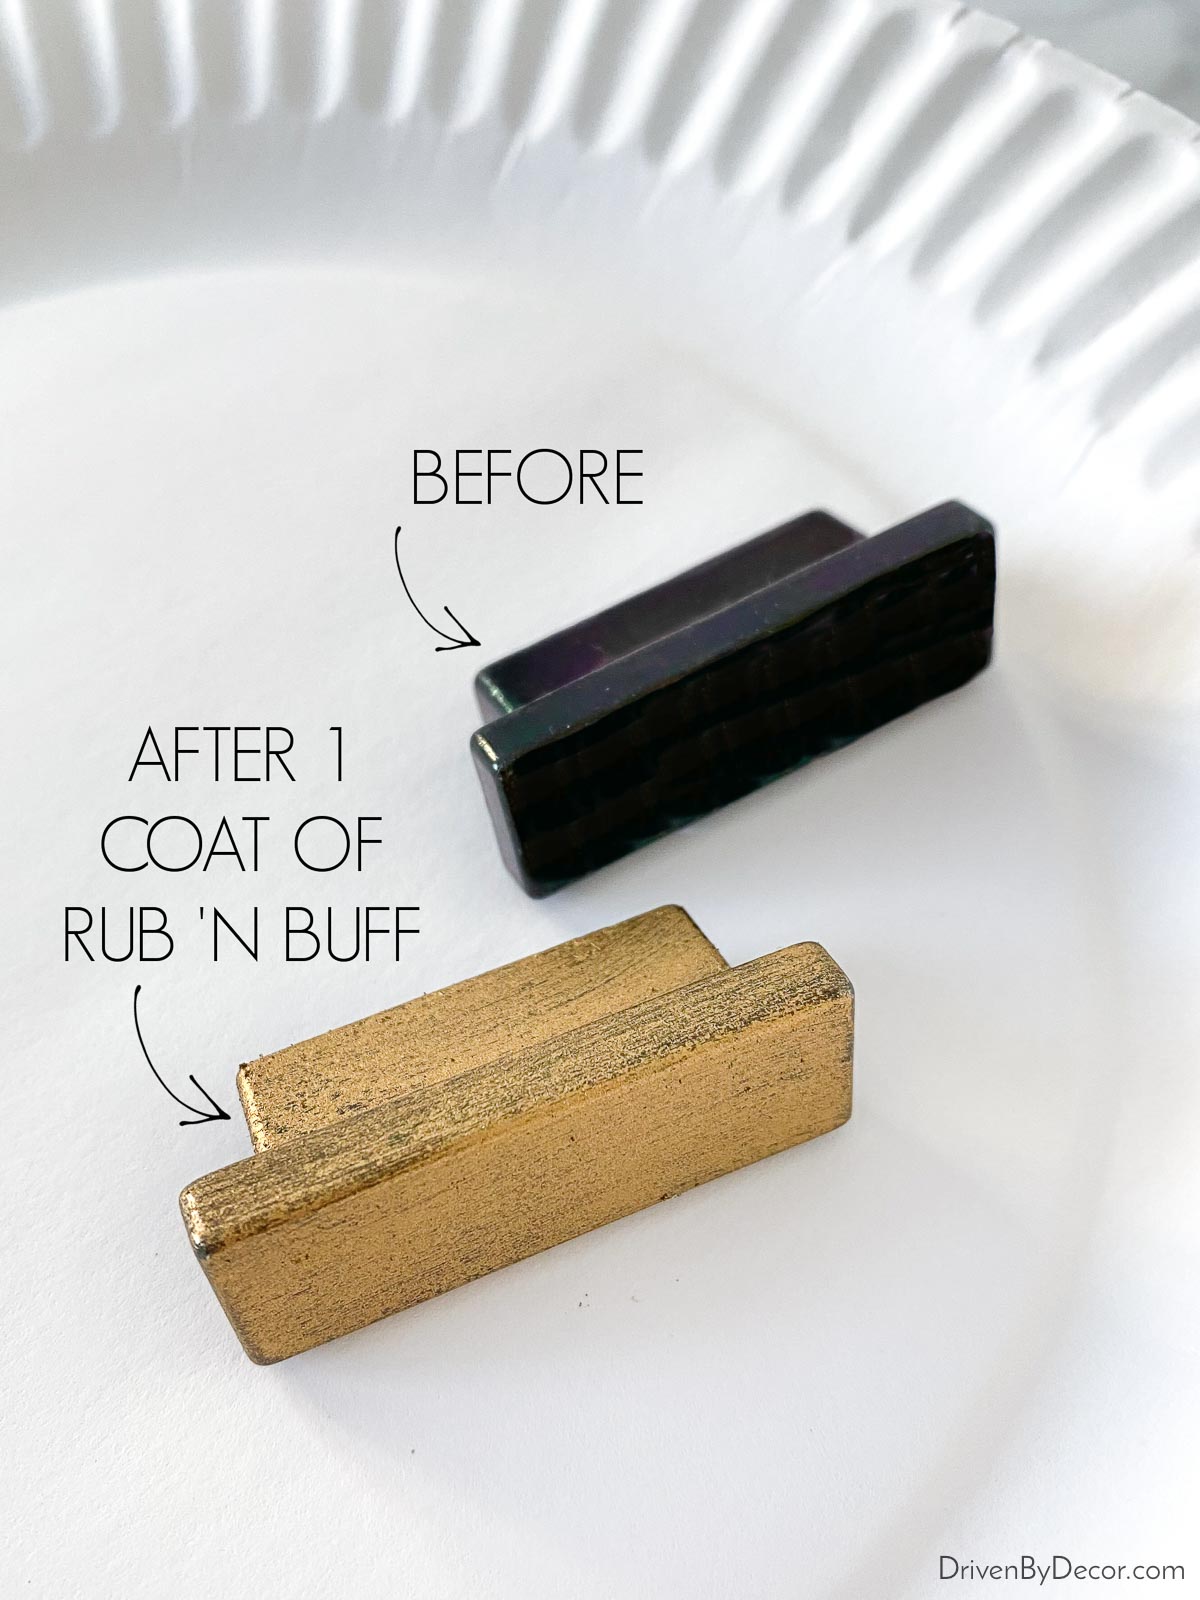
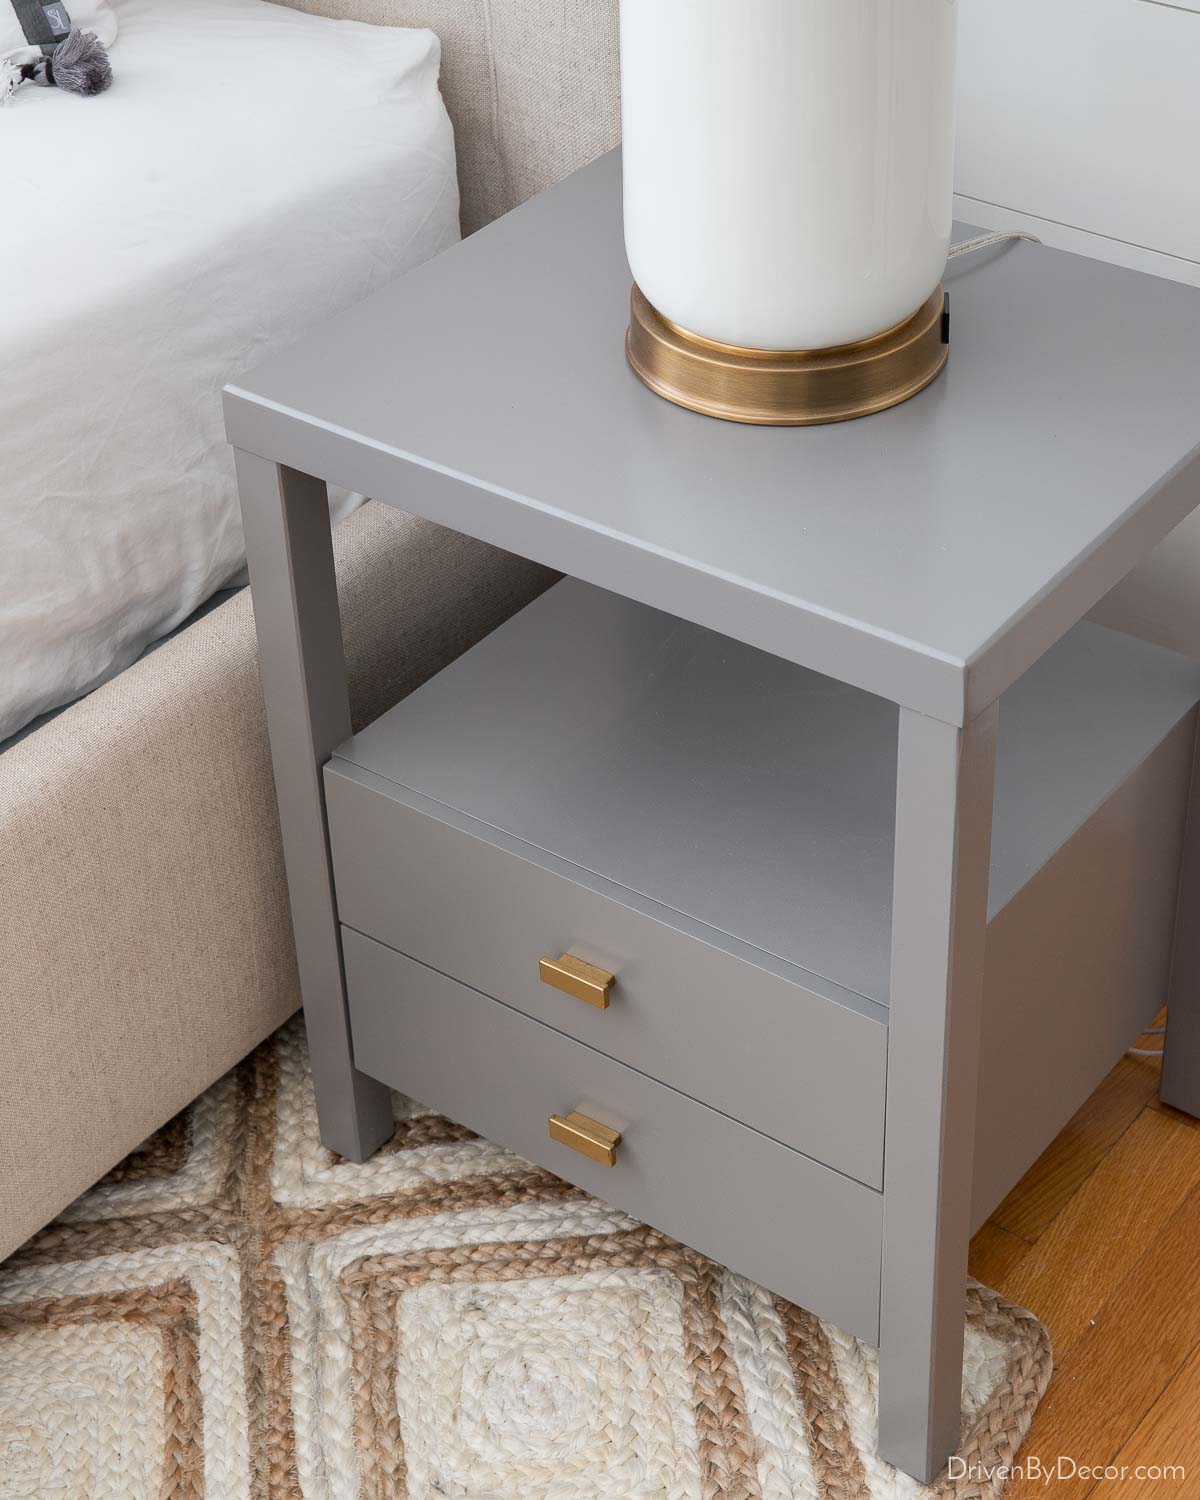
I applied just a single light coat of Rub ‘n Buff so some of the darker color would still show through but if you wanted your hardware to be uniformly gold, you’d simply need to apply a second coat. My newly gold knobs gave {this gray nightstand} a whole new look:
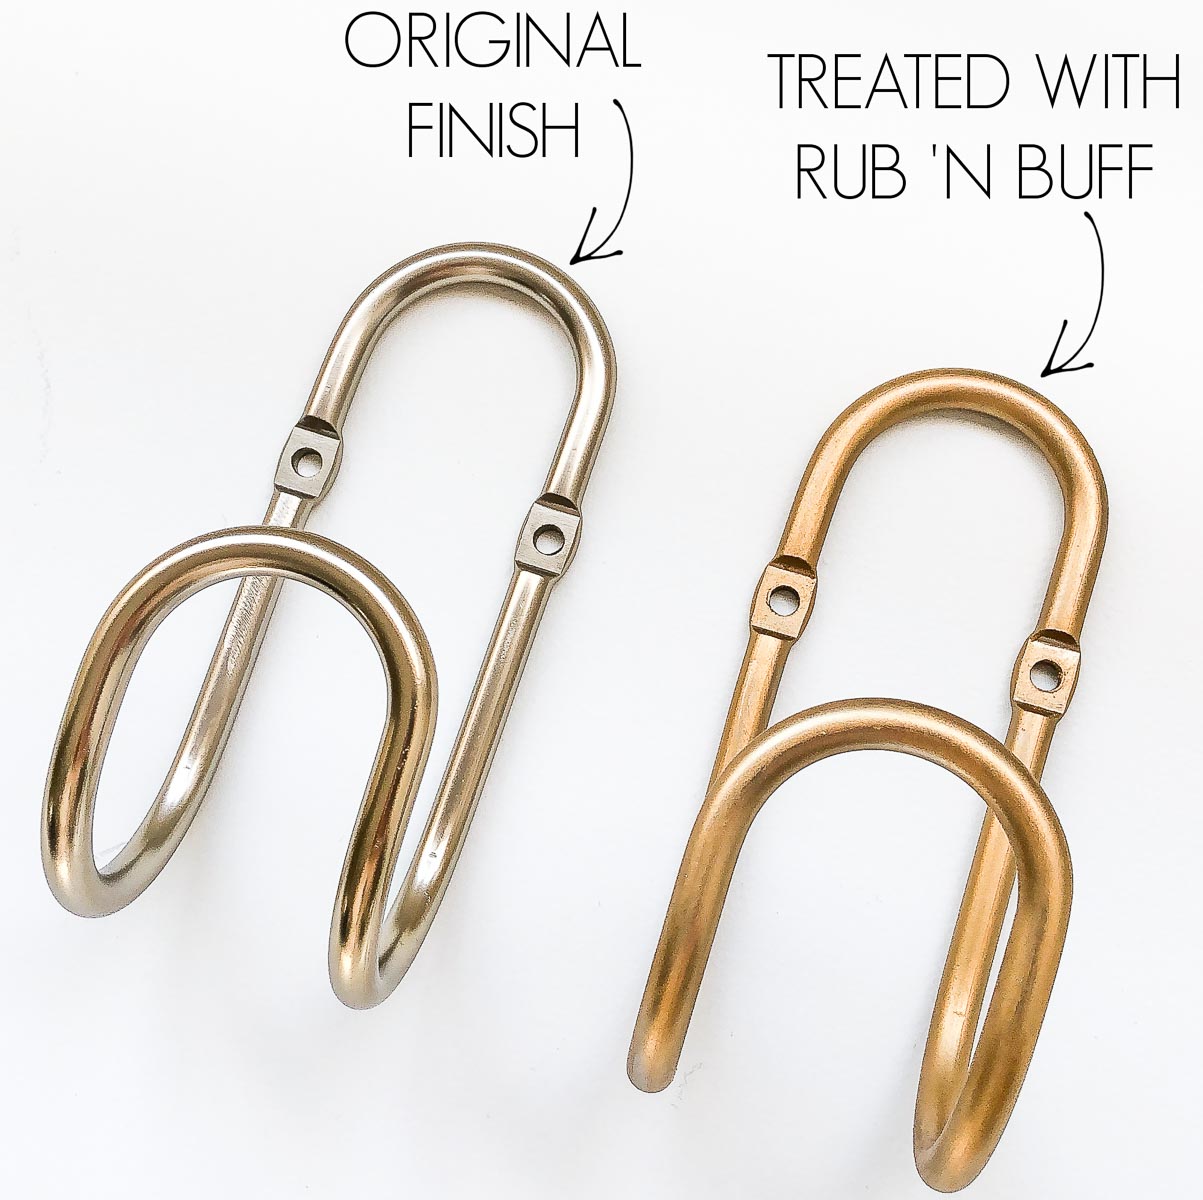
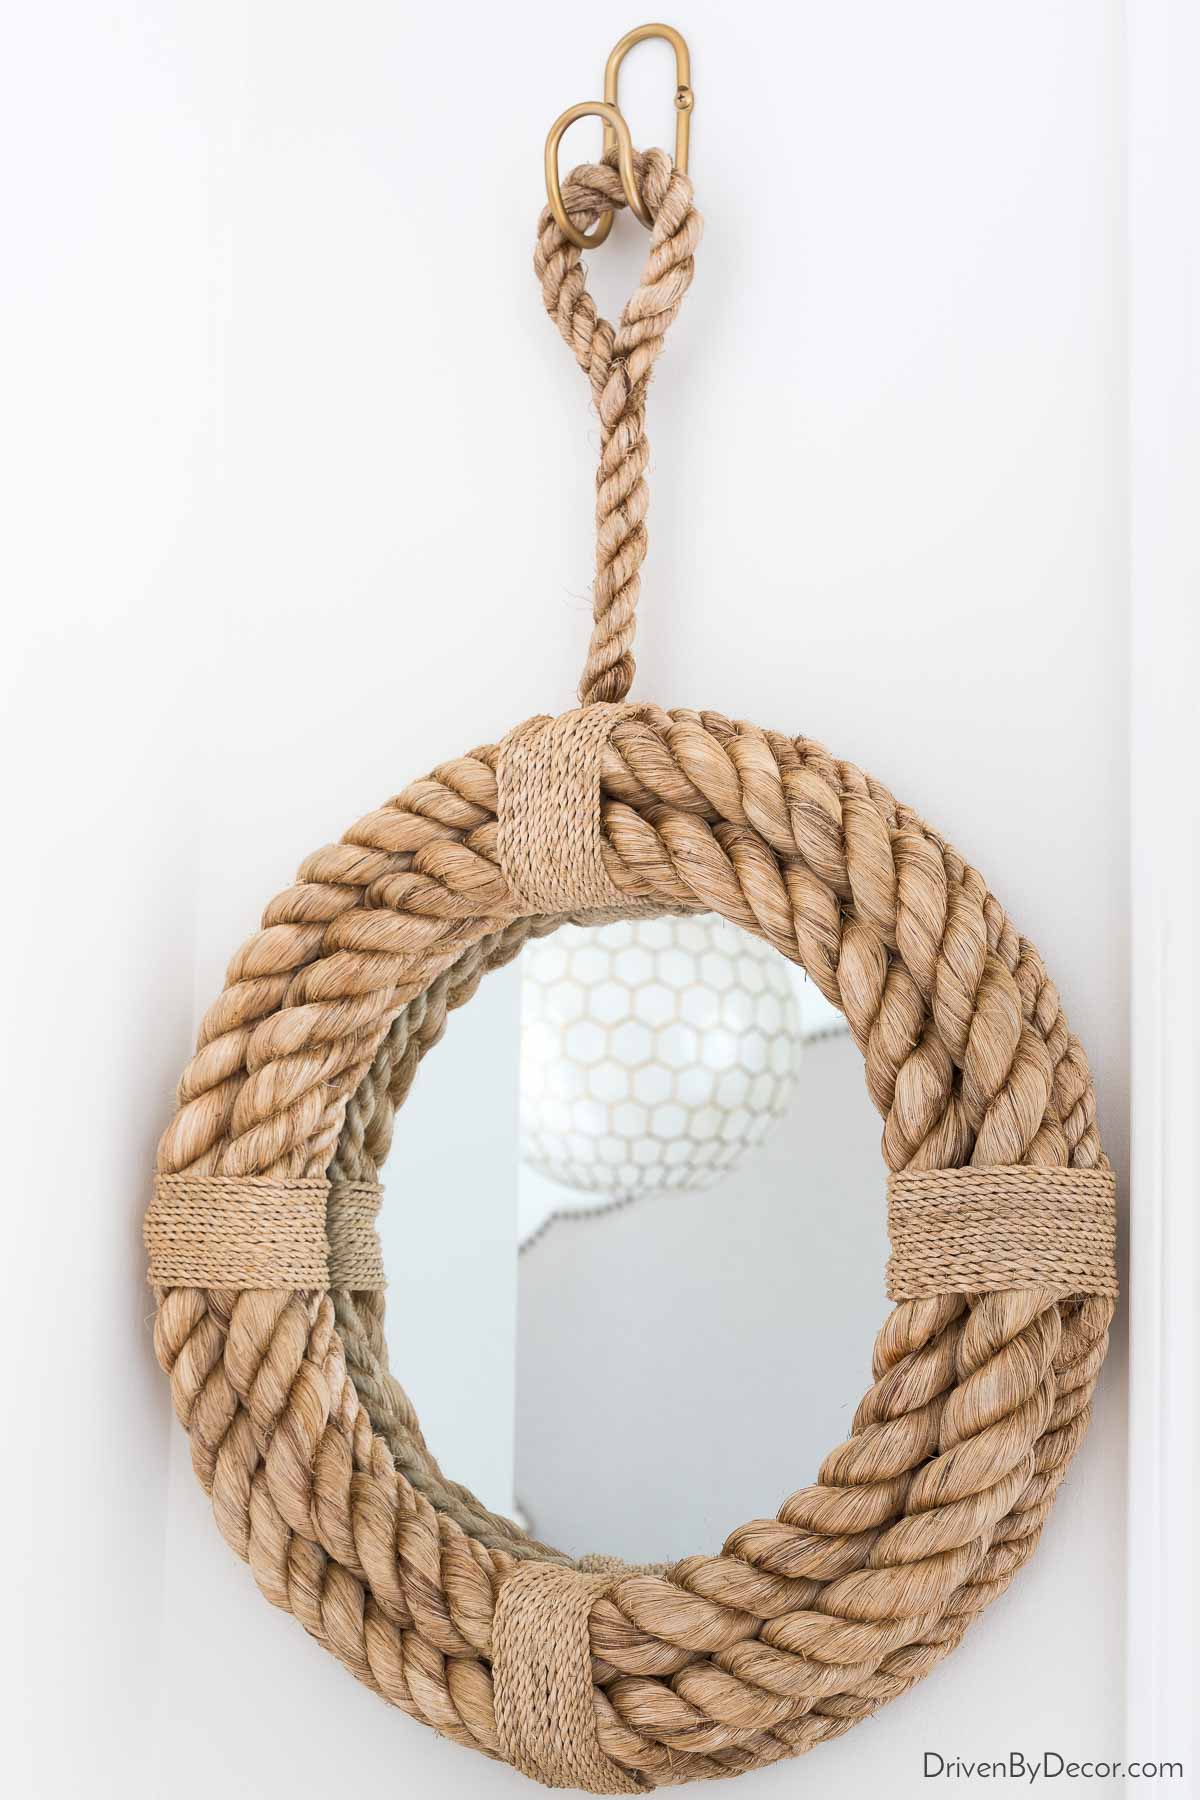
In addition to knobs and pulls, I’ve also used Rub ‘n Buff to change the finish of hooks including this loop wall hook:
that I used to hang this round rope mirror on the wall:
Another great use for Rub ‘n Buff is to change the finish of art & mirror frames like I did with {this round mirror} above the dresser in our bedroom. It was originally a bronze finish but I used the gold leaf color to change it to this:
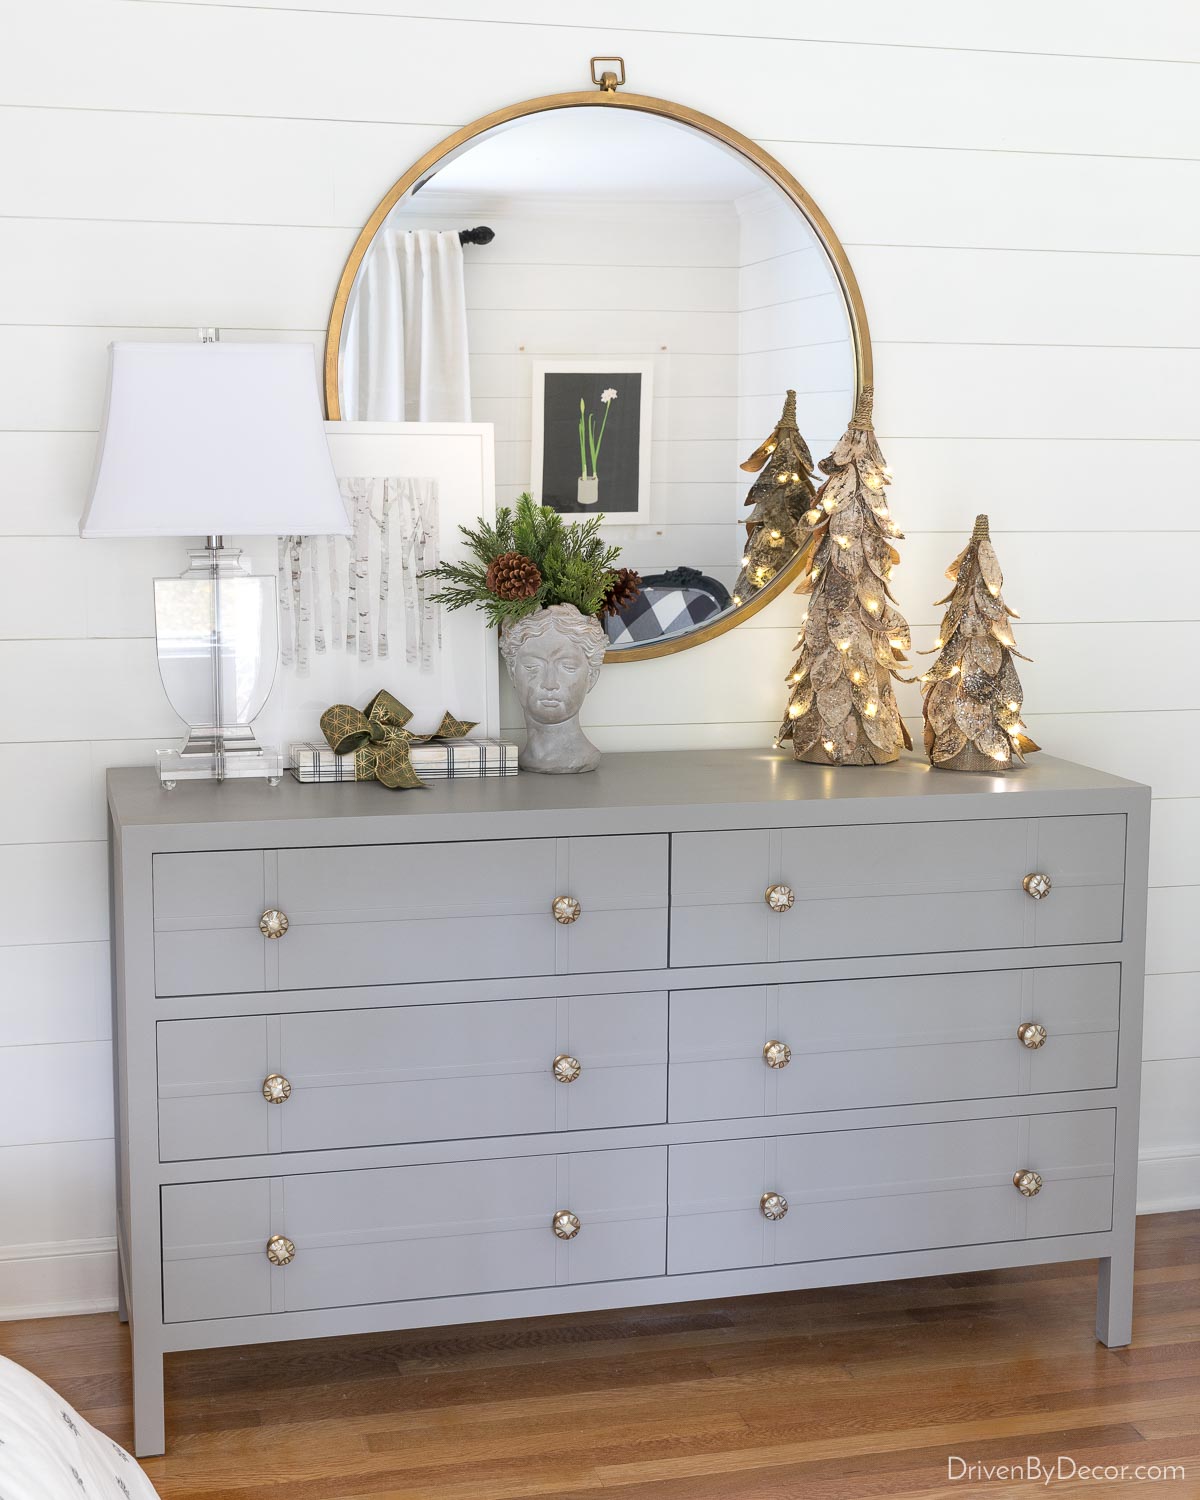
Sources: Dresser (it’s an old piece that I painted Worsted) | Dresser knobs | Mirror | Acrylic lamp | Birch Woods framed art print | Bust planter (large)
I didn’t even take the mirror off the wall to do it! I simply placed a large piece of kraft paper underneath the mirror so I didn’t get any Rub ‘n Buff on the wall when applying it. Other common uses for Rub ‘n Buff include changing the finish on door knobs & hinges, curtain rods, and light fixtures.
Will Rub ‘n Buff Come Off Over Time?
Once Rub ‘n Buff is completely dry, it won’t come off on your hands when touching a piece you used it on. When used on a mirror, frame, light fixture, or other piece that’s not handled frequently, you shouldn’t ever have issues with the finish wearing off. If it’s on a high-touch piece such as a doorknob or cabinet/drawer knob or pull, it may eventually (after months or years) show signs of wear with daily use. Fortunately, applying a new coat of Rub ‘n Buff will get it back to looking shiny and new again.
I hope this has been helpful to any Rub ‘n Buff newbies who are considering giving it a go! And for those of you who have tried Rub ‘n Buff before, share your favorite color and favorite use for it in the comments. Enjoy the rest of your weekend!


Alicia says
Does it require a final top layer of laquer to help it set more if im using the rub n buff on a slicker metal like zinc?
Joanna says
Thank you for this post! Do you know if you can easily blend two Rub N Buff colors? I need to change a satin gold light fixture to dark bronze (think West Elm dark bronze), so I was thinking of adding the tiniest bit of ebony to Spanish copper. Would love any suggestions you have! Thanks!!
Donna Budai says
I have an early 1900’s desk clock that’s brass plated but a lot of the brass plating has rubbed off. It’s not worth much so I’m trying to refurbish it. Which shade of Rub and Buff would look the most like brass? Gold Leaf?
Kris Jarrett says
Hi Donna! It really depends on the shade of brass. I’d say that Gold Leaf and Grecian Gold are the closest to a bright brass while Antique Gold is closest to brass that has aged over time.