

If you’re looking to add white subway tile with gray grout to a kitchen, bathroom, or other space in your home, this post’s for you! I’m sharing my tips for testing grout colors and my favorite gray grouts!
Since sharing our kitchen remodel before and after, I’ve had so many people asking about the gray grout that I used that I realized I wasn’t the only one who struggled with which gray grout would work best with my kitchen’s white subway tile. “Struggle” is kind of laughable for something as silly as choosing a grout color but your grout choice can make a night and day difference in your final tile job so I wanted to make sure not to mess this choice up!
I was surprised not to find hardly any “real life” images of white subway tile with gray grout where the grout color was given so I decided to share how I chose my grout along with some pics of my favorite gray grouts combined with white subway tile.
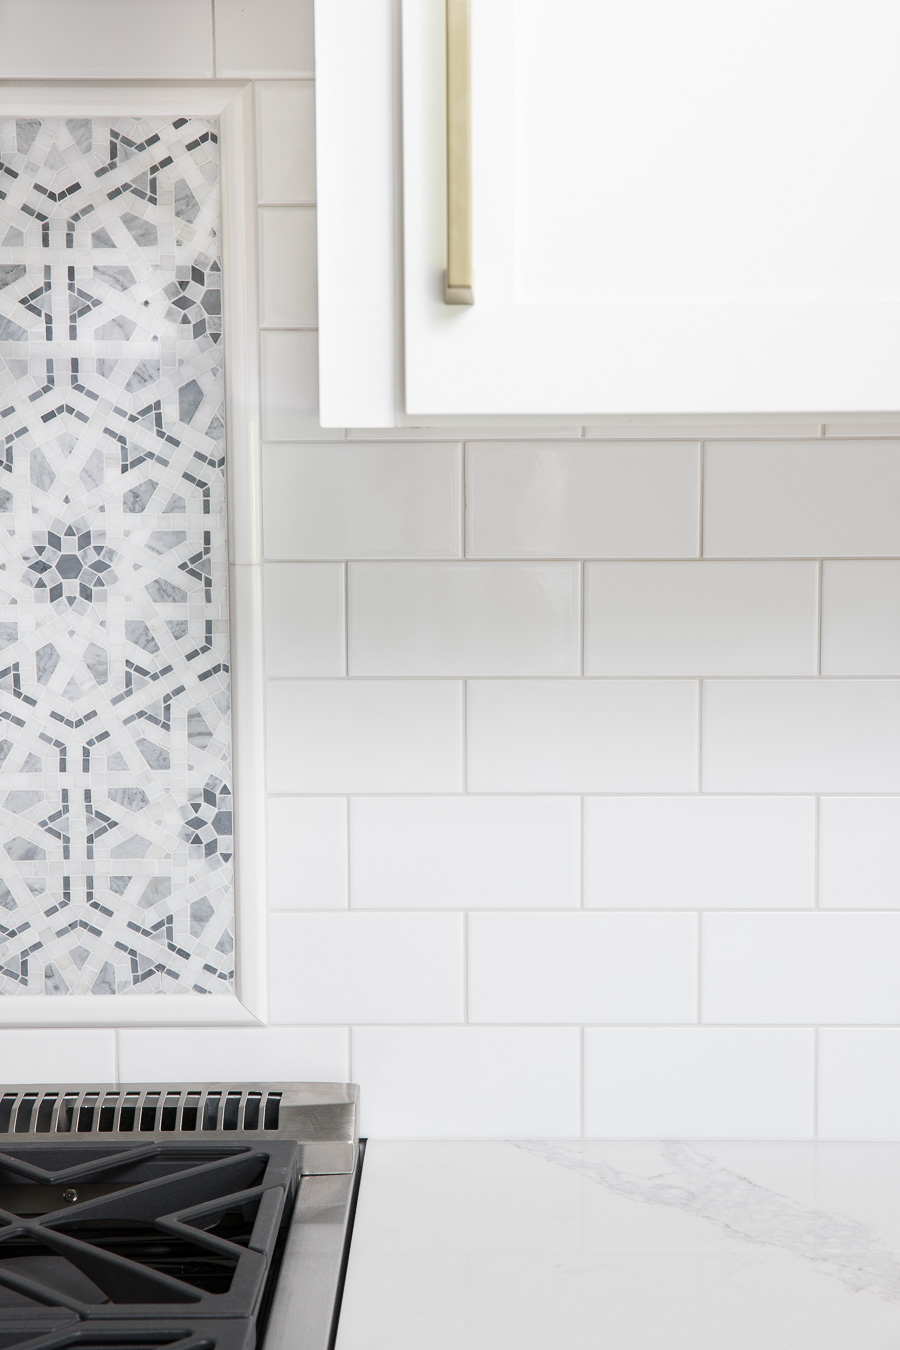
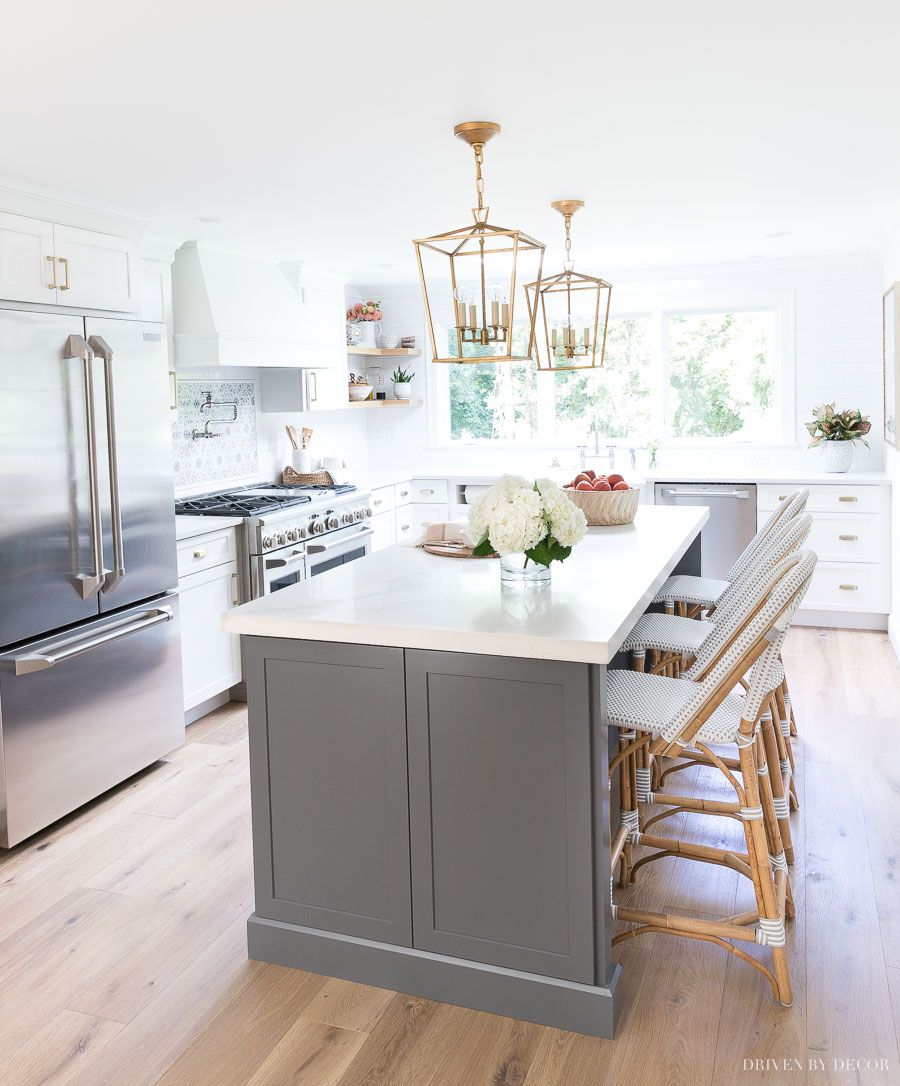
First off, here’s a look at the gray grout I chose – I went with a light gray option called Frost. This pic shows how the white subway tile and gray grout look in both shadowed spaces (underneath the upper cabinet and to the left of it) and in a more sunny spot close to the countertop:
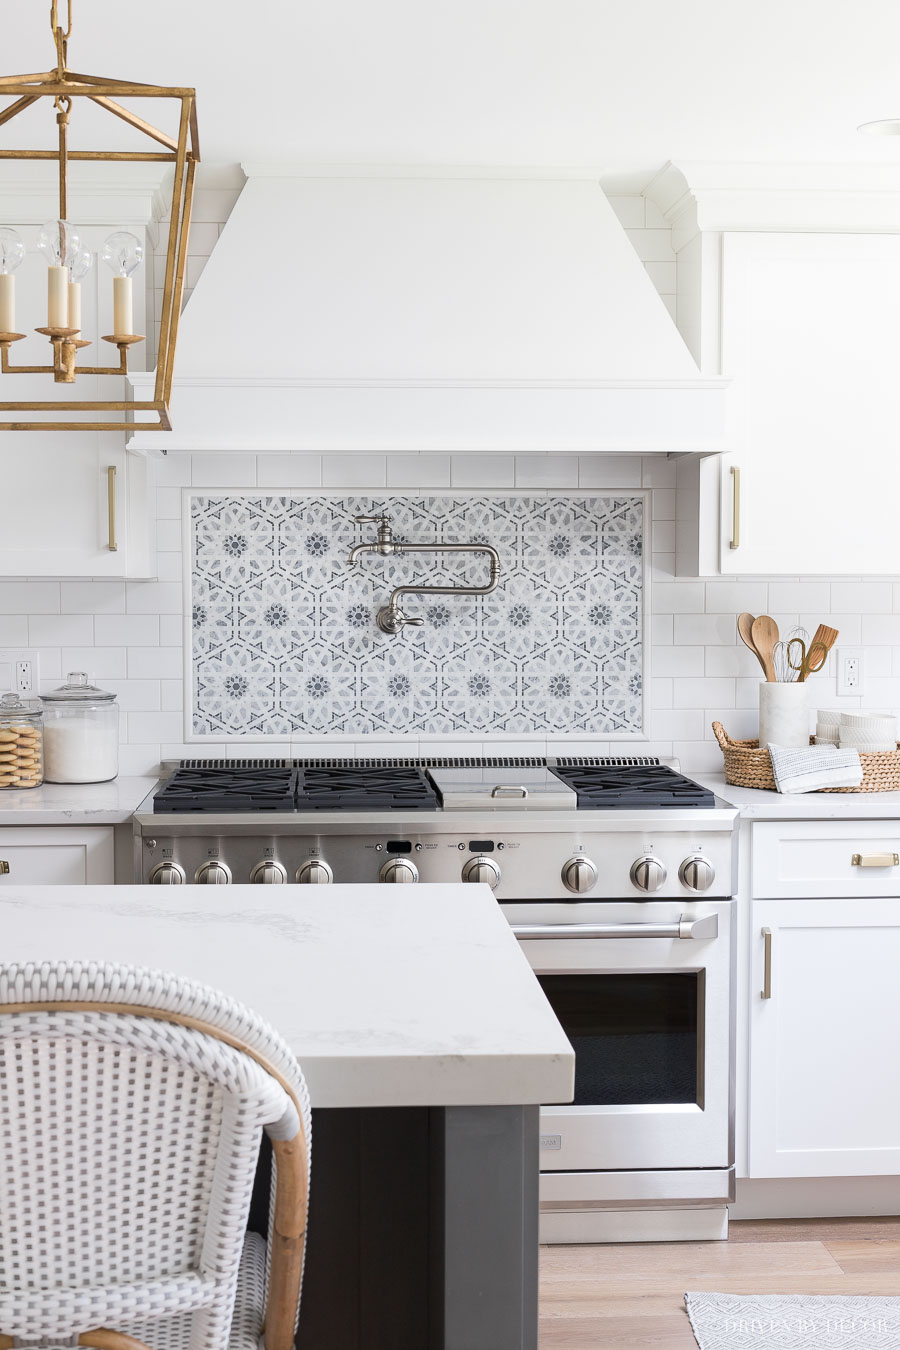
I used the same grout for the Walker Zanger Villa D Oro mosaic behind my kitchen range:
It’s also the same grout color that we used with the marble tile in the shower of our bathroom remodel. Our tile guys said Mapei Frost was their go-to for grouting marble tile and I can see why – it’s a choice I was really happy with!
I wish I could say that my decision for the tile in our kitchen was as easy as looking at a color chart and saying “that’s the one” but oh my gosh, there are SO MANY gray grout options and since I wanted to choose the best one for my space, I did some legwork to make sure I got it right. Here are some things that I found helpful to do (affiliate links included in post – full disclosure available {here}):
Narrow Down Your Options with Grout Color Sticks and By Walking the Tile Aisles
Start off by talking to your tiler (unless you’re DIYing it) about his/her recommendations and viewing the grout sample sticks that they typically have. The sample sticks are typically plastic replicas and not the true grout so while I’ve found them to be helpful in narrowing down my options, they’re not always helpful in making final decisions since the real grout can differ a bit in appearance.
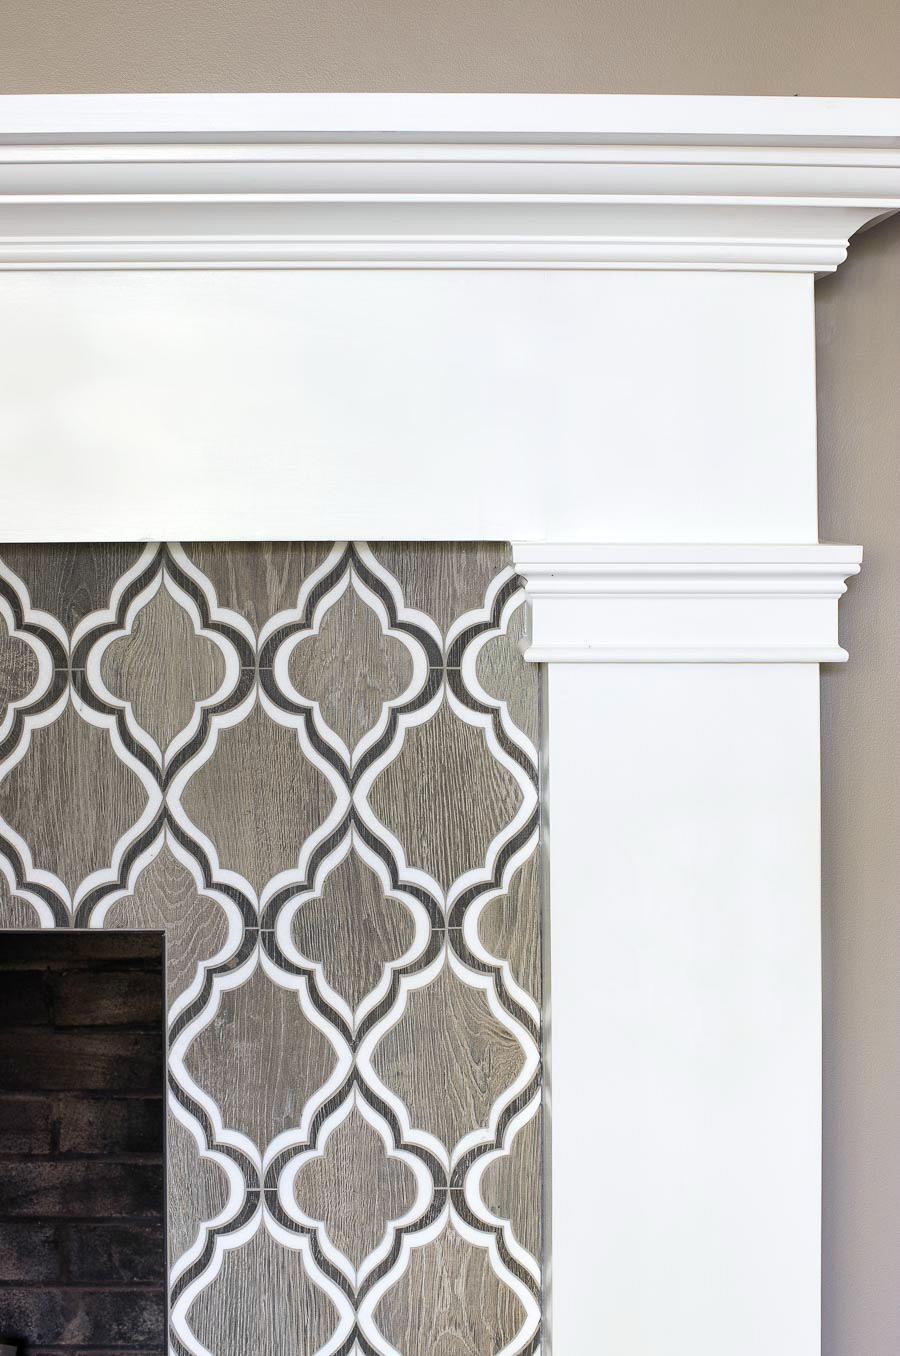
Tilers see all different grout and tile combinations so they have valuable experience to add to your decision but also remember that your taste might not be exactly the same as theirs. For example, my tiler was adamant about the grout color that would work best with my fireplace tile but I went with something different (Polyblend Natural Gray) and am 100% happy with my decision.
So get their input but make sure your final decision is what YOU will like best, not them. After narrowing it down to a few options, walk the aisles of stores that showcase grouted tile – I walked around Lowe’s where they show all sorts of different tiles with different grouts (and the grout colors are labeled!) to see some “real life” samples. Floor & Decor also has lots of grouted tile examples in their stores. Just be aware that the same grout will look quite different depending upon the color of tile surrounding it and the lighting.
Make Sample Boards
I was able to narrow my grout choice down to two gray grout options but hadn’t ruled out the possibility of just using white grout either so I made sample boards with all three grout options (I also made samples boards of two other grays I liked so I could share them with you!). Luckily subway tile is inexpensive so I made sample boards with full tiles but if your tile is more pricey, you could cut tiles in half and grout in between them so you don’t use as many (an inexpensive tile cutter like {this} works well for that).
The grout itself isn’t exactly cheap, but spending $50 on grout now to get it right is well worth it in my opinion – it’s a drop in the bucket compared to the cost of what you put into the rest of a kitchen reno! Choose sanded or unsanded grout depending upon the width you choose for your grout lines – mine were going to be 1/16″ (the most narrow you typically go) so that meant unsanded grout. Here’s how I made my sample boards:
Use a Glue Gun to Glue Your Tiles on a Board
I snagged a plywood remnant from our renovation and used {this glue gun} to glue my tiles onto the board. You could use a different type of adhesive including the mastic adhesive used for tile or liquid nails, but the glue gun dries instantly so you can make your sample board quickly. Just be sure to put each tile in place on your board immediately after you put the hot glue on the back before it dries!
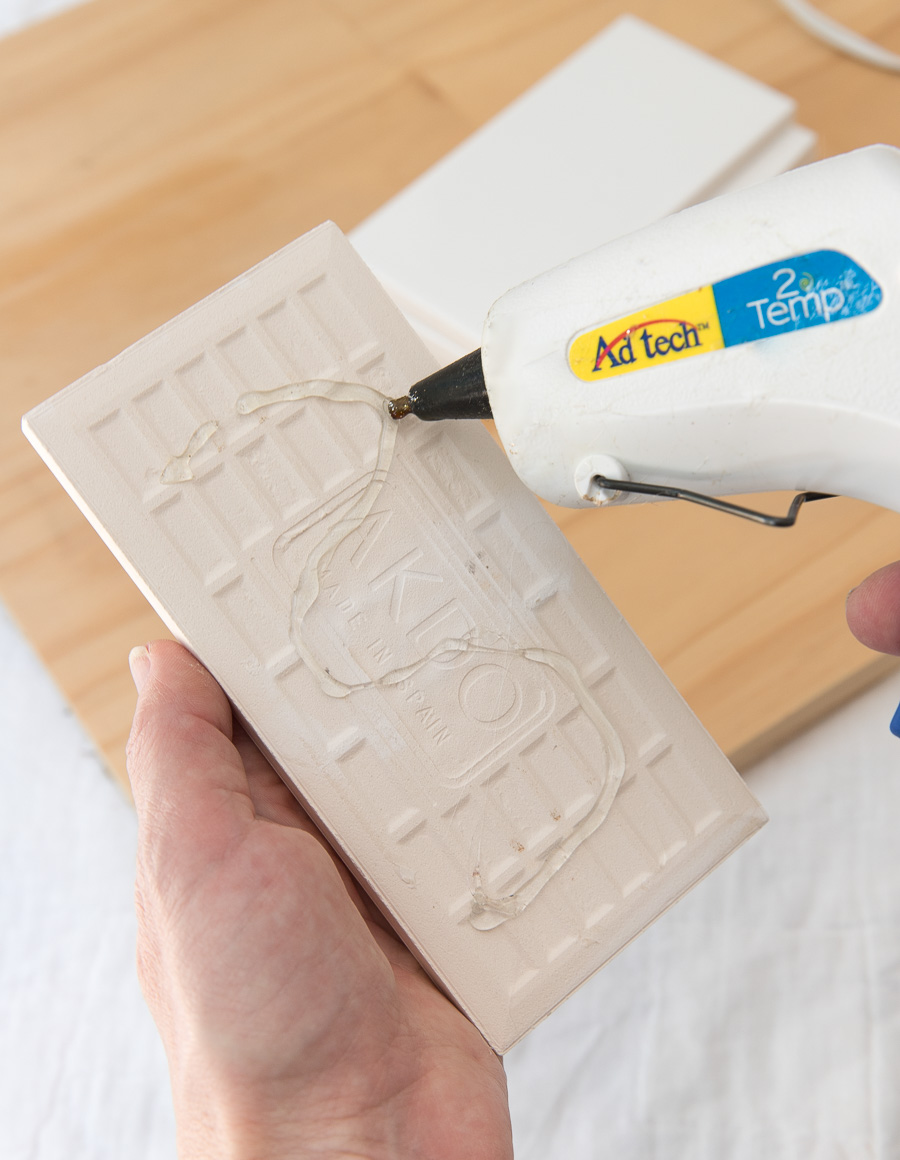
I glued down four tiles for each sample. If you have tile spacers, you can use them to get the same distance between your tiles as you’ll have on your walls (mine are 1/16″ spacers like {these}) but they’re not worth buying just for the sample boards – you can do the same thing with a ruler if you don’t have a tiler to snag a few from.
Mix Up Your Grout Using the Directions on the Bag
You can buy premixed grout but since the bagged grout is cheaper, I went with that. Using a disposable bowl and plastic spoon, I poured some of the grout mix into the bowl and added a little bit of water at a time until it got to the right consistency (you want it well blended but not runny). Read the directions on the grout bag – let it sit for a few minutes after mixing if the directions state to do that like mine did.
Then trowel it onto your tile, pressing it into the gaps. I happened to have a little trowel but a putty knife would work just fine for this too!
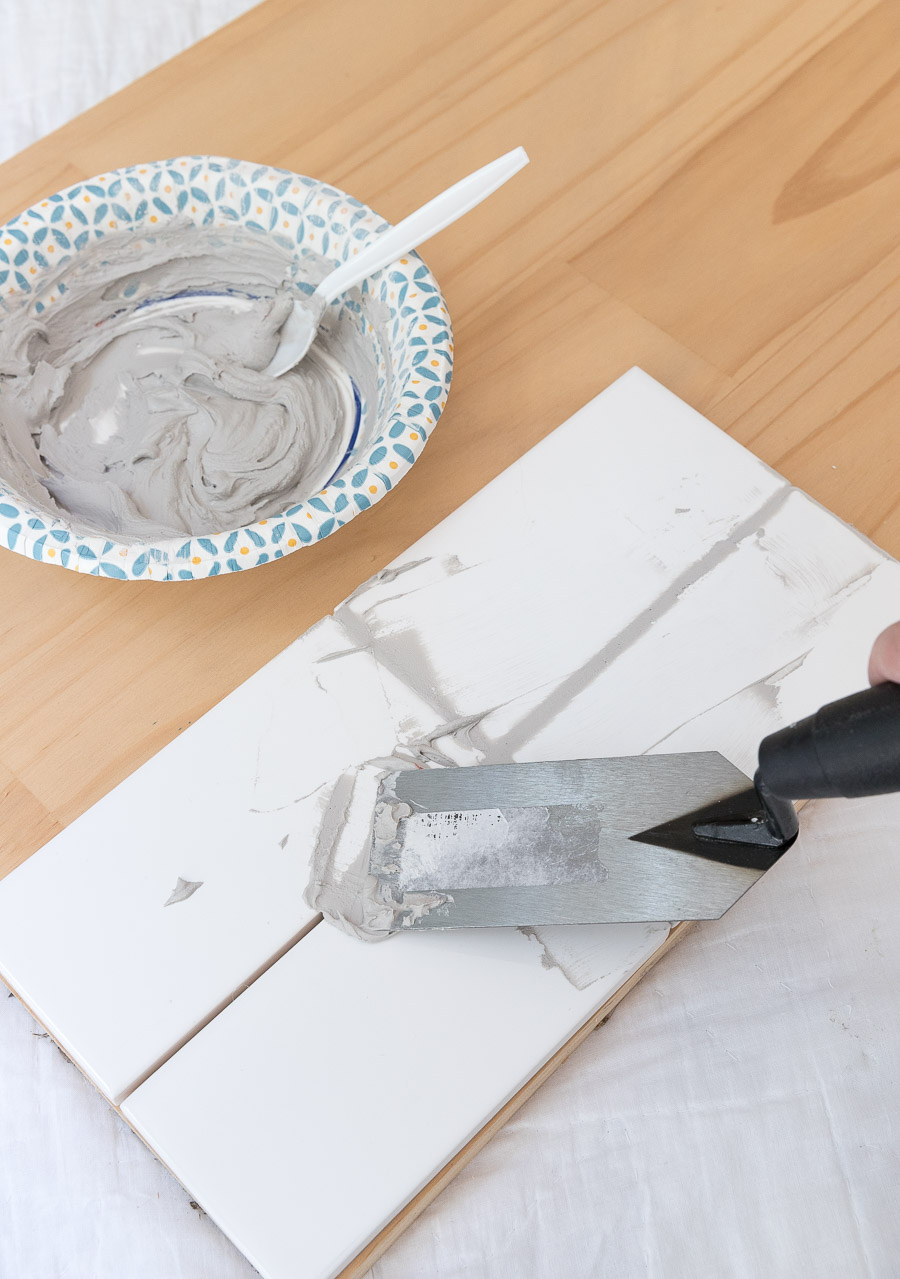
Once you’re done, remove the excess with your trowel/putty knife (no need to get it all – just the bulk of it!) and let it sit for a several minutes according to your grout instructions.
Use a Damp Sponge to Clean the Tile and Get Smooth Grout Lines
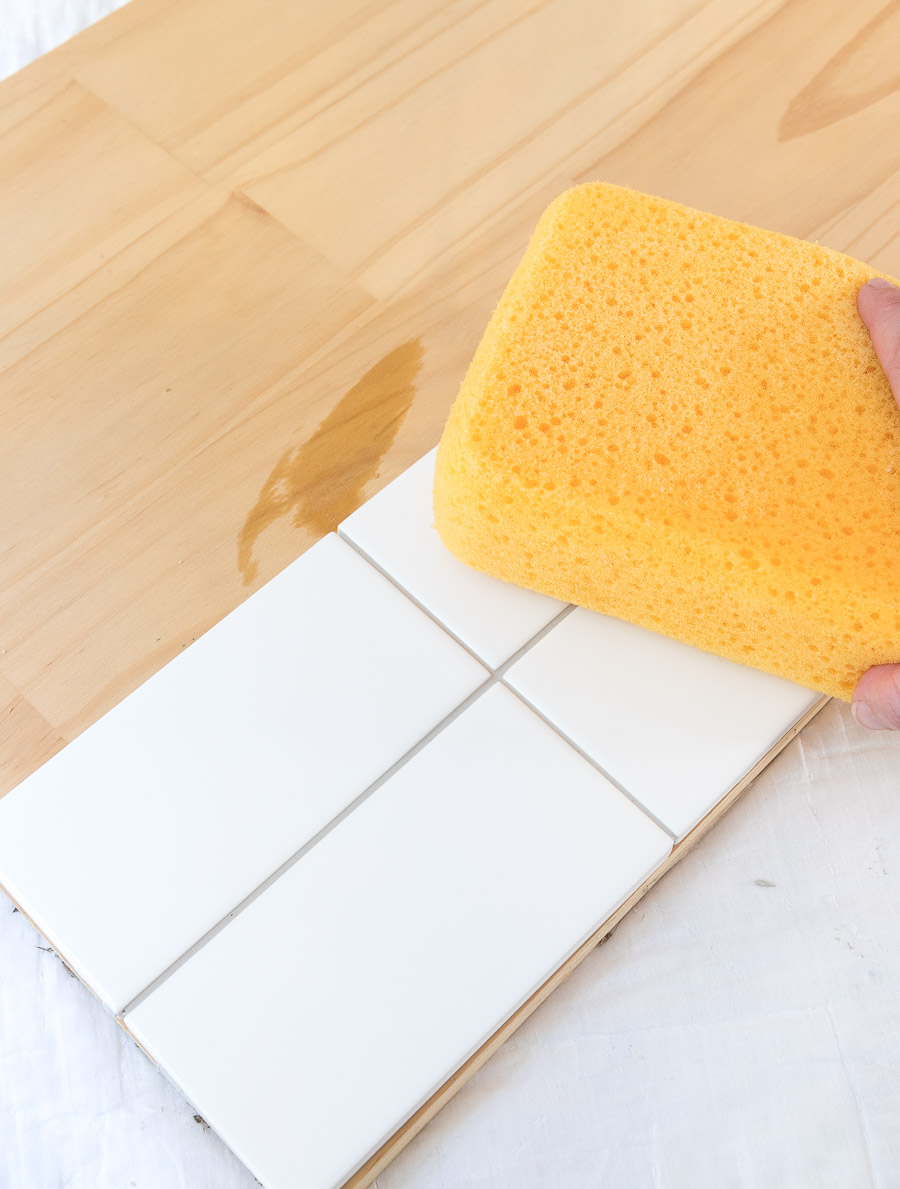
After you’ve let it sit for the time recommended on your grout bag, use a slightly damp sponge (wring out all excess water) to clean off your tiles and wipe over your grout lines to remove excess and make them smooth. You can also just use a paper towel for this!
Let it Dry
This last step is huge. The color will change quite a bit as it dries (it will lighten) so don’t make any decisions about grout color until it’s totally dry, which could be overnight. The image above shows what Frost grout looked like wet and the image below (Frost is at the top) shows how much lighter it is when dry:
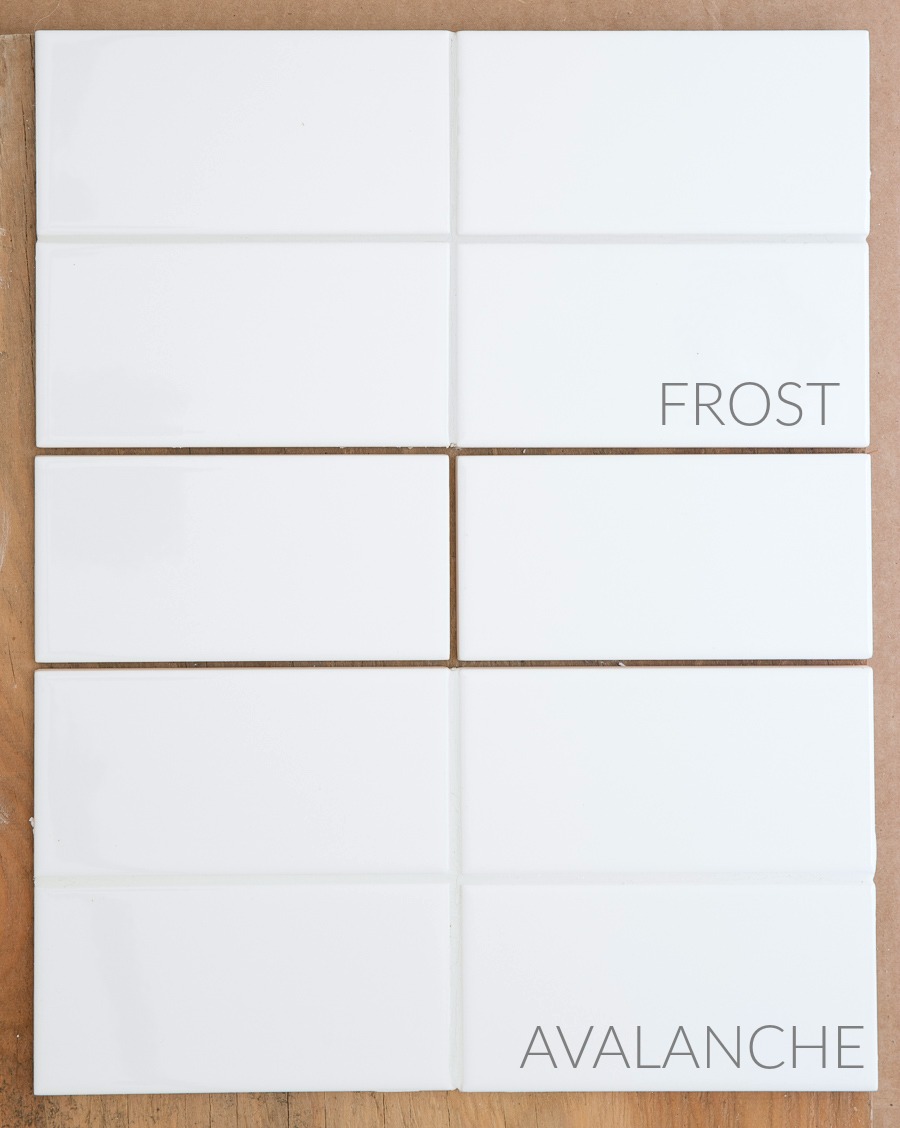
As you can see, when it’s dry, Mapei’s Frost is a super light grays (I show it here compared to Avalanche, which is a soft white) which you might not expect from the appearance of the grout when you mix it.
Favorite Gray Grouts
Once I made my sample boards and put my mosaic up next to them, the choice for my own kitchen was obvious. I wanted my mosaic to be the star of the show so I went with the lightest gray. But I did love several of the darker grays that I sampled too and would likely have chosen one of them if I had all subway tile with no mosaic. Here’s a comparison of how the different grays I sampled looked against the white subway tile (the image is Pinnable for you to save for a later project when you might need it!):
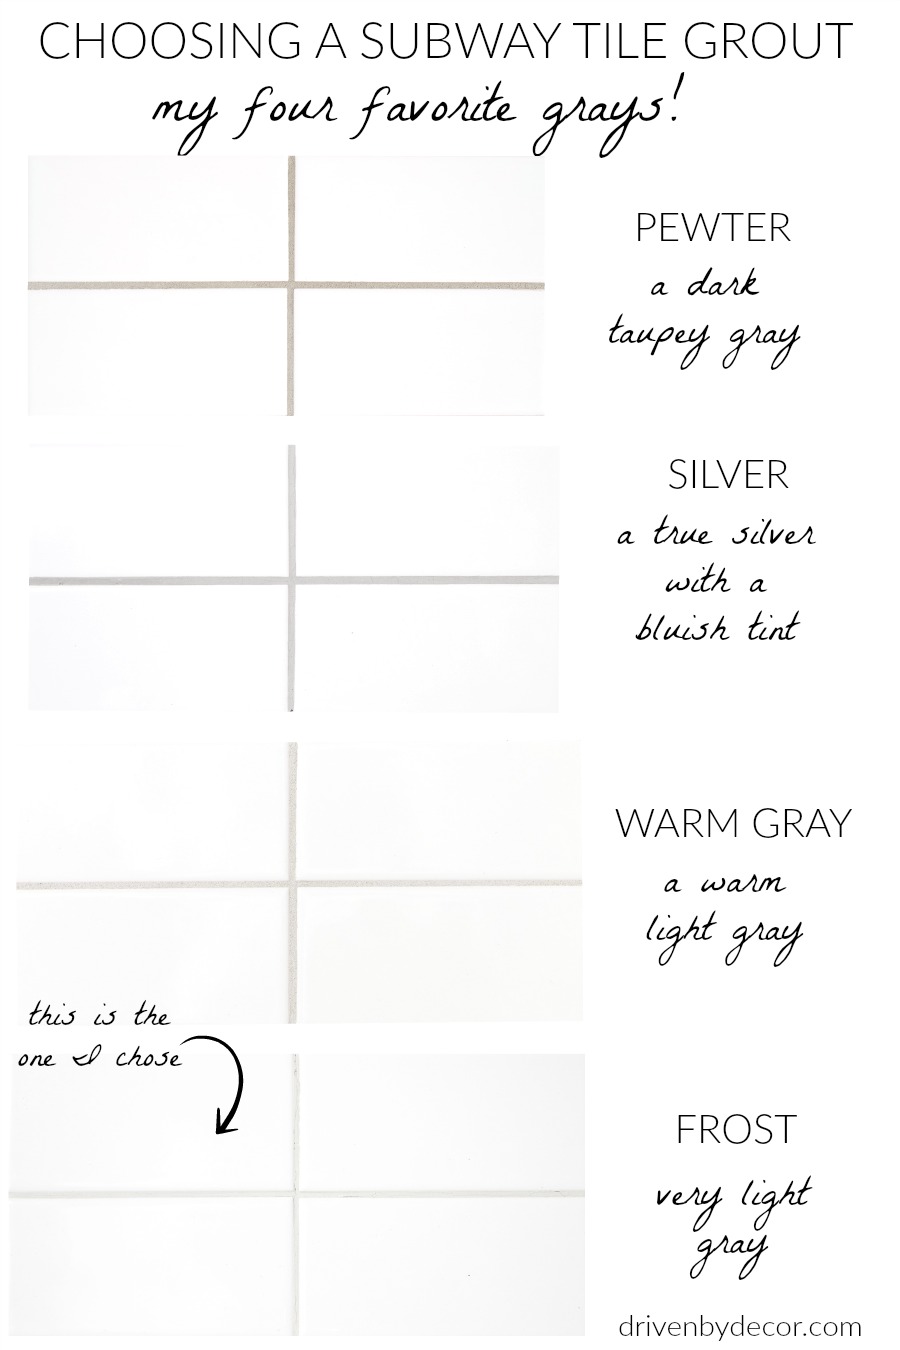
All of these are Mapei Keracolor grout – the same named grout might look totally different in a different brand so only use this as a guide to this specific brand! You can buy Mapei grout at Lowe’s or Floor & Decor. If you want to go for a darker gray, check out Mapei’s Gray, Timberwolf, Iron, & Pearl Gray.
After Grouting, Seal It!
And one last thing I wanted to be sure to mention – definitely make sure your grout is sealed after your tile job is done! {This} impregnator penetrating sealer is more expensive than others but is the one that’s been recommended as the best by every tile guy I’ve ever worked with.
Want to see more details of our kitchen? You can find the complete “before” and “after” & source links on our kitchen before and after post!
Thanks as always for stopping by!



Deb says
Your post is what I’ve been looking for as I’ve been trying to choose between Frost and Avalanche grout for my matte white subway tile being installed next week. Thanks every so much! And my gut said Frost and your pics and comments have confirmed my choice!
Kris Jarrett says
I’m so glad you found it helpful!!
Sue Gignac says
Hi Deb-I put white subway in my shower and deciding between frost and avalanche. I don’t want the pattern of the tile to pop out and am torn between these two colours. What did you decide? And do you like what you did?
Sue
Ashley says
Can you tell me where you found floral mosaic backsplash?! Gorgeous!!!
Kris Jarrett says
Sure there are more pics and a link to the tile in my kitchen reveal post here: https://www.drivenbydecor.com/gray-white-kitchen-remodel/
Nicole Hardy says
This is fantastic! We are getting ready for a kitchen remodel and I was struggling with grout color and this is exactly what I’m looking for! I also love the cabinetry and color of the island. Beautiful kitchen!!!
Kelly says
Where did you get your white subway?
Kris Jarrett says
It’s AKDO brand in Cloud!
Lisa Contreras says
I am so excited to have found you! Your style is perfection. I am going to paint my living room and kitchen soon and want to use grays. What is your favorite gray for living and kitchen walls?
Thanks so much for your help.
Kris Jarrett says
Thank you so much! The right gray really depends on the space but Agreeable Gray and Repose Gray are both good ones to try!
Sara says
I pinned this post lat month when deciding on gray grout for my shower walls which will be white subway. So helpful to see the side by sides! My contractor is telling me that 3/16 is best for grout line size – what is your opinion on this – what size did you use here? I feel like if it’s a thick grout line I might actually want to do white so it’s not so noticeable. Such a dumb thing to get so obsessed with, but oh well! Thanks for any advice!!
Kris Jarrett says
I think that the less grout you have, the better – especially in the shower because it can be such a pain in the butt to clean! My tile person said that they do 1/16″ grout lines for pretty much everyone now. One exception is if you have handmade tile with variation in tile size – then you do usually need to go with a larger grout line size.
Bianca De says
Your kitchen is already looking amazing. Waiting for the final reveal!!! I love the white painted cabinets.
Kris Jarrett says
Thank you so much!
classic casual home says
This is just gorgeous!
Kris Jarrett says
Thank you! XOXO
Karen says
I have just finished bathroom renovations on (2) baths and was told with the newer grouts such as Mapie (power grouts) that sealing them was not needed.
Could you share any research or info you have on that?
Kris Jarrett says
Hi Karen! I know that Mapei has different types of grout – there are some grouts that supposedly have a sealant already mixed in. I’m sure there are differences in opinion from person to person but my tile guy said he always recommends sealing no matter what grout you use.
Bree says
Kris it’s looking absolutely amazing and thank you for the tips on choosing grout! I’m sure that will come in handily for me soon:)! Xoxo
Kris Jarrett says
Thanks Bree! Can’t wait to see things get cooking on your house!
Faith Thomas says
What color white paint did you use on your cabinets? Thanks for the info!
Kris Jarrett says
Hi Faith – I actually just chose the stock white color that our cabinets were available in. You can read all of the details in this post: https://www.drivenbydecor.com/how-choose-kitchen-cabinets-style-color-finish-design/
Annie says
Divine! I had wanted white cabinets with white subway tile, but my cabinets ended up having a yellow undertone, so I went with a light gray subway tile, and yes the grout decision took a while, but ultimately I matched the grout with the tile for a seamless look. Had I been able to do white with white, I would have LOVED the look you chose!
I can’t wait to see more!
Kris Jarrett says
Whites are so tricky aren’t they?! Sounds like you figured out the perfect solution!
Karen B. says
Kris,
I wish I had had your wonderful idea for determining grout color when we redid our kitchen (in our former house). I wanted a concrete colored grey grout. The day our replacement tile contractor was to do our grout, I left instructions for the basic grout and the color, when I came home he had put in grout that resembled a dusty rose color! I burst into tears—fortunately he removed the wet grout and came back the next day to finish the job in the color I had indicated! 🙂
I can hardly wait to see your finished kitchen. The sneak peaks make it look amazing.
Karen
Kris Jarrett says
OMG! I can only imagine how your heart dropped when you saw that! Thank goodness it was still wet when you found it and were able to get it changed out. I hate when I can’t be here when contractors are working because stuff like that always happens to me 🙂
Tamara says
Kris I am loving your kitchen so far and cannot wait for the reveal! I love this post because my subway has white grout and I’ve always regretted that decision! I am looking into staining our grout grey – I have no idea how hard or laborious that is, but I know it will be worth it! Thank you for sharing and thank you for the inspiration! Can’t wait to see this entire space! xox
Kris Jarrett says
Thank you Tam! I used a grout stain on our guest room floor tile grout and it worked well (but is super tedious!)
Pam says
Love your kitchen. What is the name if the tile you used as a decoration above the stove
Kris Jarrett says
Hi Pam – thank you! The mosaic tile is by Walker Zanger. There are more details in this post: https://www.drivenbydecor.com/gray-white-kitchen-remodel/
Barb says
Hi Kris
It’s been a wonderful journey to watch the kitchen be born!!
I, too, am doing a white subway tile kitchen back splash but I am finding the numerous white tiles to be daunting!
Where did you end up purchasing the white tiles— not sure if I want glazed, crackled, beveled, 3 x 6, 3 x 8,… how did you decide?!?!
Kris Jarrett says
There are definitely a TON of options! I just went for the classic 3 x 6 size glossy white ceramic tile – mine are AKDO brand that I got through a local tile dealer! Hope that helps!
Elizabeth says
Do not get crackled -my husband was using an ink pin to mark some of the tiles before Installation and the ink bled through the cracks into the tile- the lady at Dal tile told me the cracklings goes all the way through the glazing and this can happen
Carla says
Kris it’s just beautiful! Can’t wait to see the final reveal. I tend to always go with a really light grey grout when doing white subways too!
Kris Jarrett says
Thank you so much Carla!
Carol Heartfelt Whimsies says
Absolutely amazing, Kris!! I honestly can’t wait to see the full reveal after you “style it up”!!!
Kris Jarrett says
Thanks Carol! It’s coming super soon!