

If you’re looking to add white subway tile with gray grout to a kitchen, bathroom, or other space in your home, this post’s for you! I’m sharing my tips for testing grout colors and my favorite gray grouts!
Since sharing our kitchen remodel before and after, I’ve had so many people asking about the gray grout that I used that I realized I wasn’t the only one who struggled with which gray grout would work best with my kitchen’s white subway tile. “Struggle” is kind of laughable for something as silly as choosing a grout color but your grout choice can make a night and day difference in your final tile job so I wanted to make sure not to mess this choice up!
I was surprised not to find hardly any “real life” images of white subway tile with gray grout where the grout color was given so I decided to share how I chose my grout along with some pics of my favorite gray grouts combined with white subway tile.
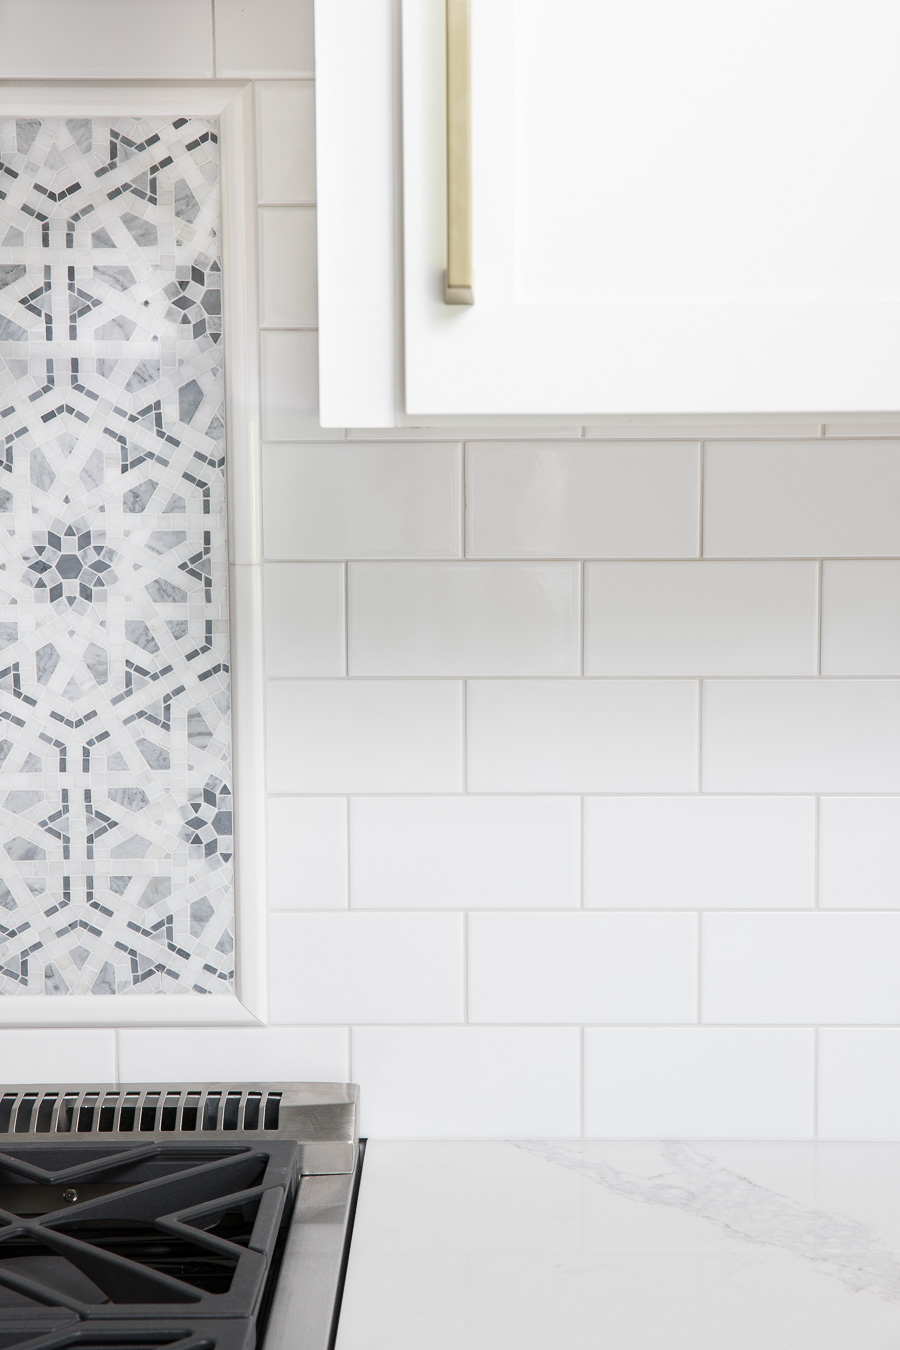
First off, here’s a look at the gray grout I chose – I went with a light gray option called Frost. This pic shows how the white subway tile and gray grout look in both shadowed spaces (underneath the upper cabinet and to the left of it) and in a more sunny spot close to the countertop:
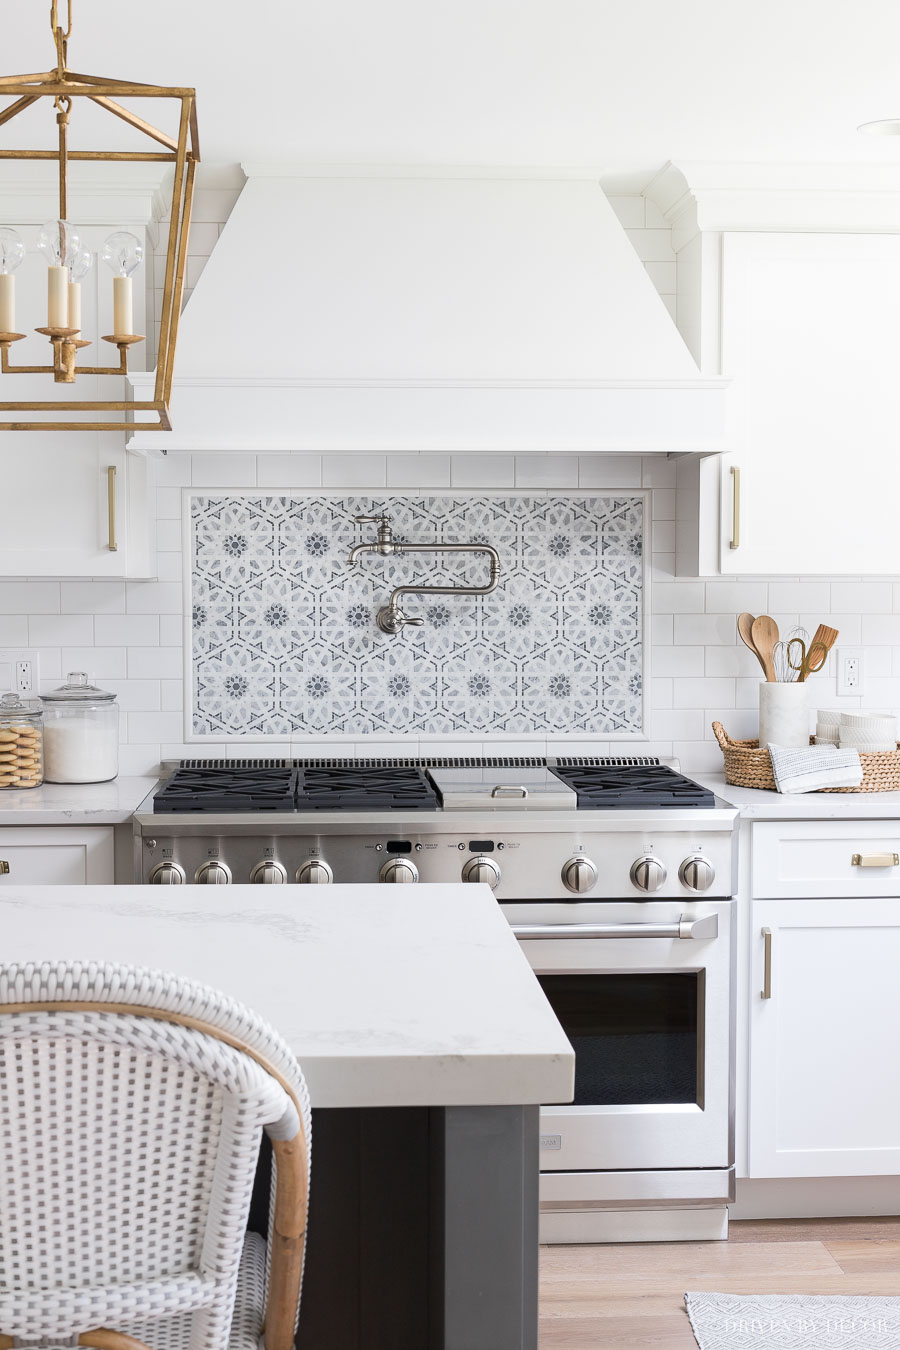
I used the same grout for the Walker Zanger Villa D Oro mosaic behind my kitchen range:
It’s also the same grout color that we used with the marble tile in the shower of our bathroom remodel. Our tile guys said Mapei Frost was their go-to for grouting marble tile and I can see why – it’s a choice I was really happy with!
I wish I could say that my decision for the tile in our kitchen was as easy as looking at a color chart and saying “that’s the one” but oh my gosh, there are SO MANY gray grout options and since I wanted to choose the best one for my space, I did some legwork to make sure I got it right. Here are some things that I found helpful to do (affiliate links included in post – full disclosure available {here}):
Narrow Down Your Options with Grout Color Sticks and By Walking the Tile Aisles
Start off by talking to your tiler (unless you’re DIYing it) about his/her recommendations and viewing the grout sample sticks that they typically have. The sample sticks are typically plastic replicas and not the true grout so while I’ve found them to be helpful in narrowing down my options, they’re not always helpful in making final decisions since the real grout can differ a bit in appearance.
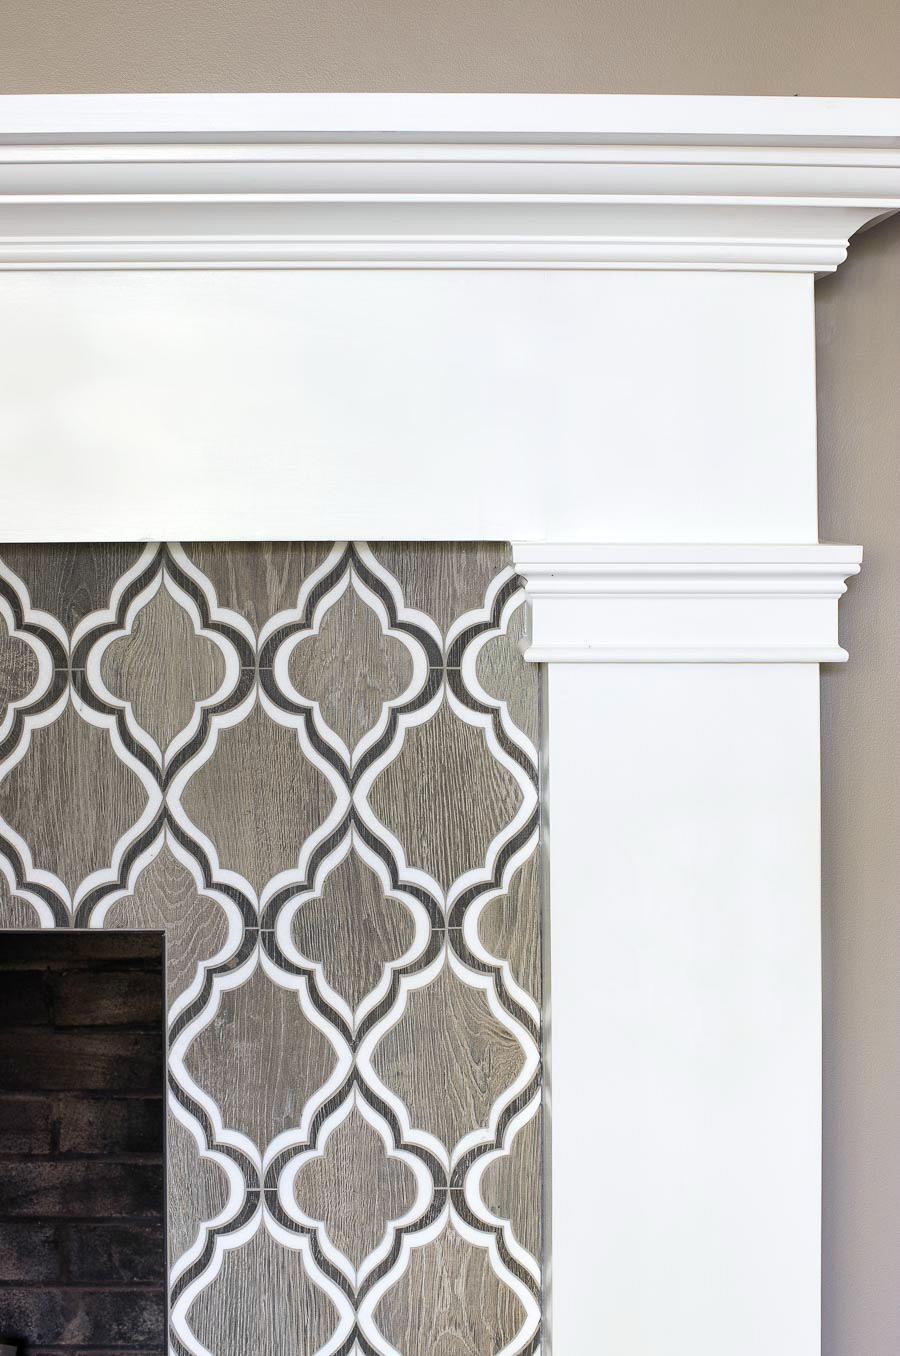
Tilers see all different grout and tile combinations so they have valuable experience to add to your decision but also remember that your taste might not be exactly the same as theirs. For example, my tiler was adamant about the grout color that would work best with my fireplace tile but I went with something different (Polyblend Natural Gray) and am 100% happy with my decision.
So get their input but make sure your final decision is what YOU will like best, not them. After narrowing it down to a few options, walk the aisles of stores that showcase grouted tile – I walked around Lowe’s where they show all sorts of different tiles with different grouts (and the grout colors are labeled!) to see some “real life” samples. Floor & Decor also has lots of grouted tile examples in their stores. Just be aware that the same grout will look quite different depending upon the color of tile surrounding it and the lighting.
Make Sample Boards
I was able to narrow my grout choice down to two gray grout options but hadn’t ruled out the possibility of just using white grout either so I made sample boards with all three grout options (I also made samples boards of two other grays I liked so I could share them with you!). Luckily subway tile is inexpensive so I made sample boards with full tiles but if your tile is more pricey, you could cut tiles in half and grout in between them so you don’t use as many (an inexpensive tile cutter like {this} works well for that).
The grout itself isn’t exactly cheap, but spending $50 on grout now to get it right is well worth it in my opinion – it’s a drop in the bucket compared to the cost of what you put into the rest of a kitchen reno! Choose sanded or unsanded grout depending upon the width you choose for your grout lines – mine were going to be 1/16″ (the most narrow you typically go) so that meant unsanded grout. Here’s how I made my sample boards:
Use a Glue Gun to Glue Your Tiles on a Board
I snagged a plywood remnant from our renovation and used {this glue gun} to glue my tiles onto the board. You could use a different type of adhesive including the mastic adhesive used for tile or liquid nails, but the glue gun dries instantly so you can make your sample board quickly. Just be sure to put each tile in place on your board immediately after you put the hot glue on the back before it dries!
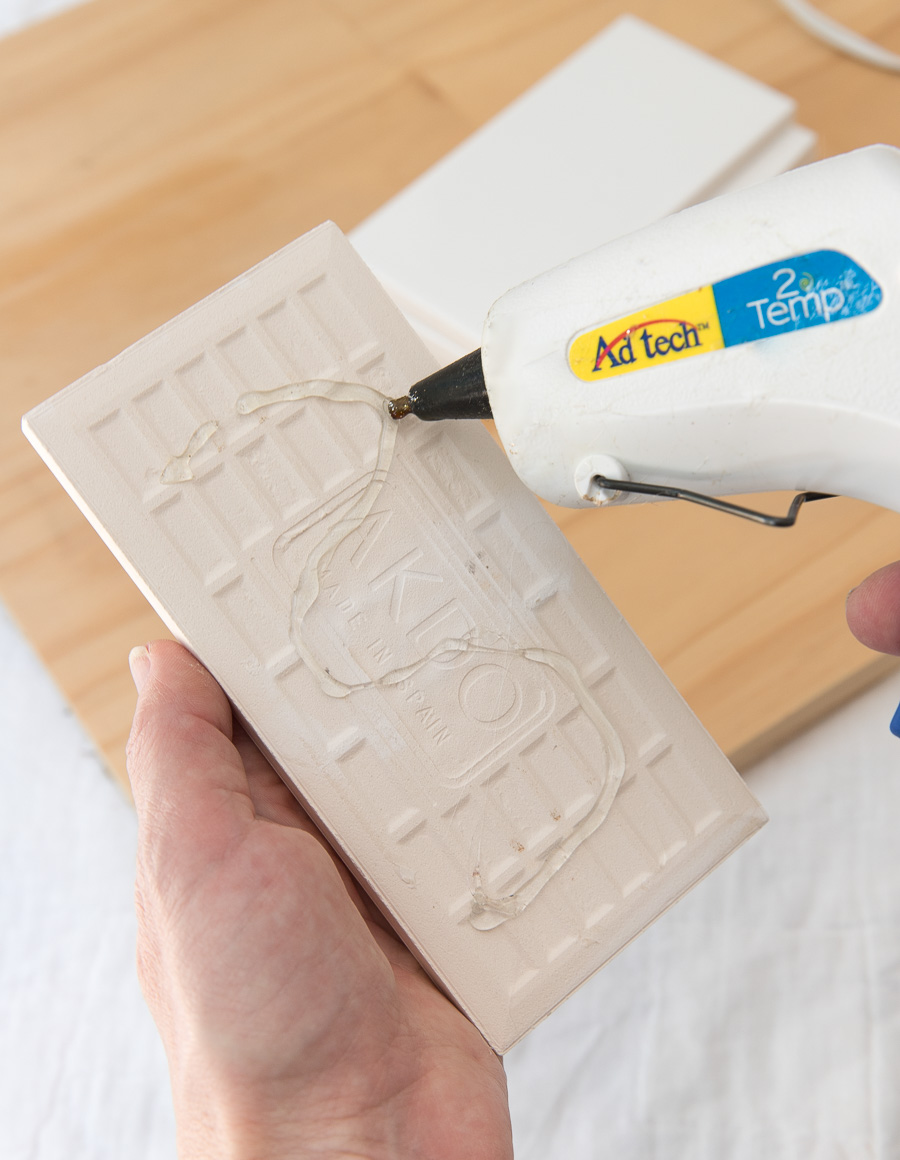
I glued down four tiles for each sample. If you have tile spacers, you can use them to get the same distance between your tiles as you’ll have on your walls (mine are 1/16″ spacers like {these}) but they’re not worth buying just for the sample boards – you can do the same thing with a ruler if you don’t have a tiler to snag a few from.
Mix Up Your Grout Using the Directions on the Bag
You can buy premixed grout but since the bagged grout is cheaper, I went with that. Using a disposable bowl and plastic spoon, I poured some of the grout mix into the bowl and added a little bit of water at a time until it got to the right consistency (you want it well blended but not runny). Read the directions on the grout bag – let it sit for a few minutes after mixing if the directions state to do that like mine did.
Then trowel it onto your tile, pressing it into the gaps. I happened to have a little trowel but a putty knife would work just fine for this too!
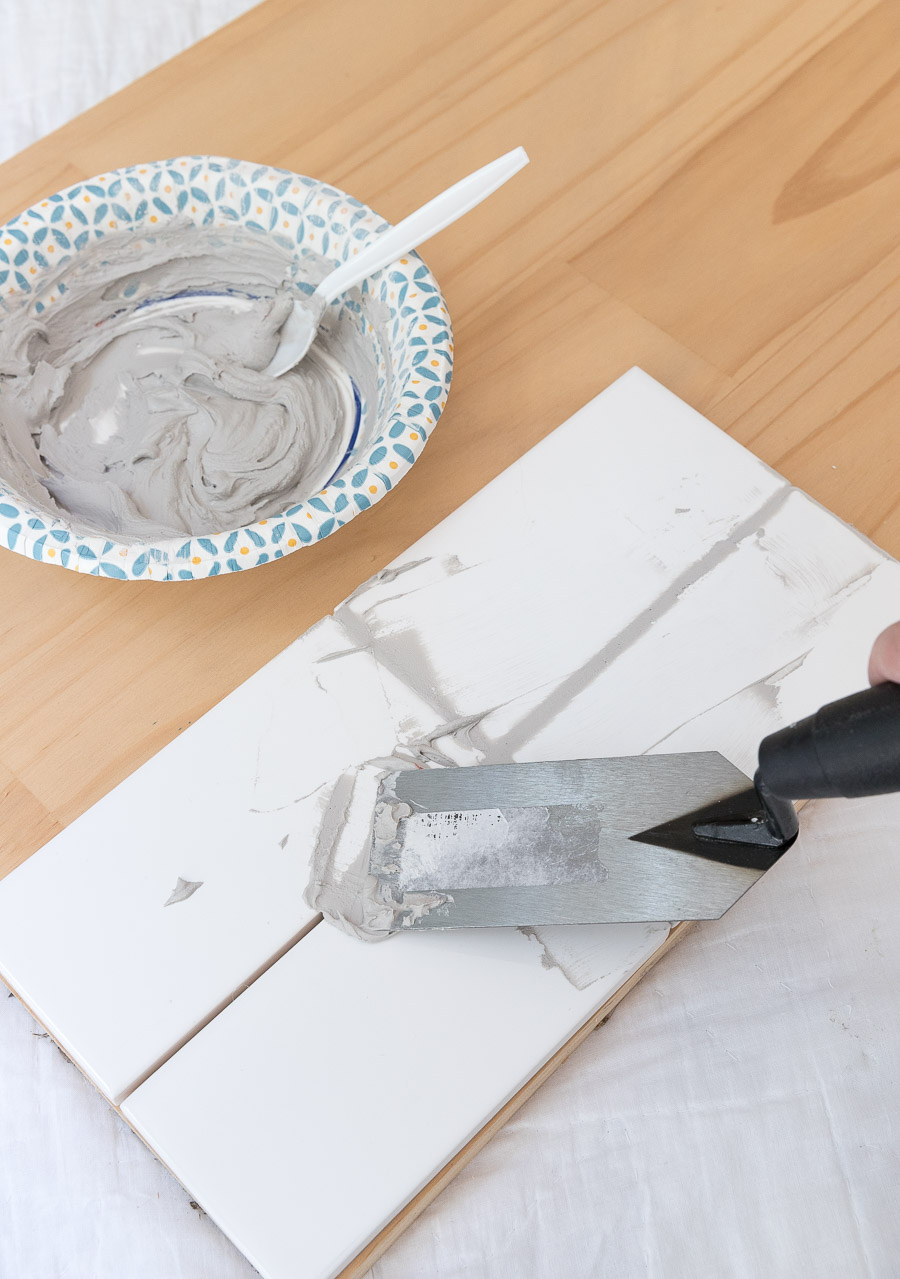
Once you’re done, remove the excess with your trowel/putty knife (no need to get it all – just the bulk of it!) and let it sit for a several minutes according to your grout instructions.
Use a Damp Sponge to Clean the Tile and Get Smooth Grout Lines
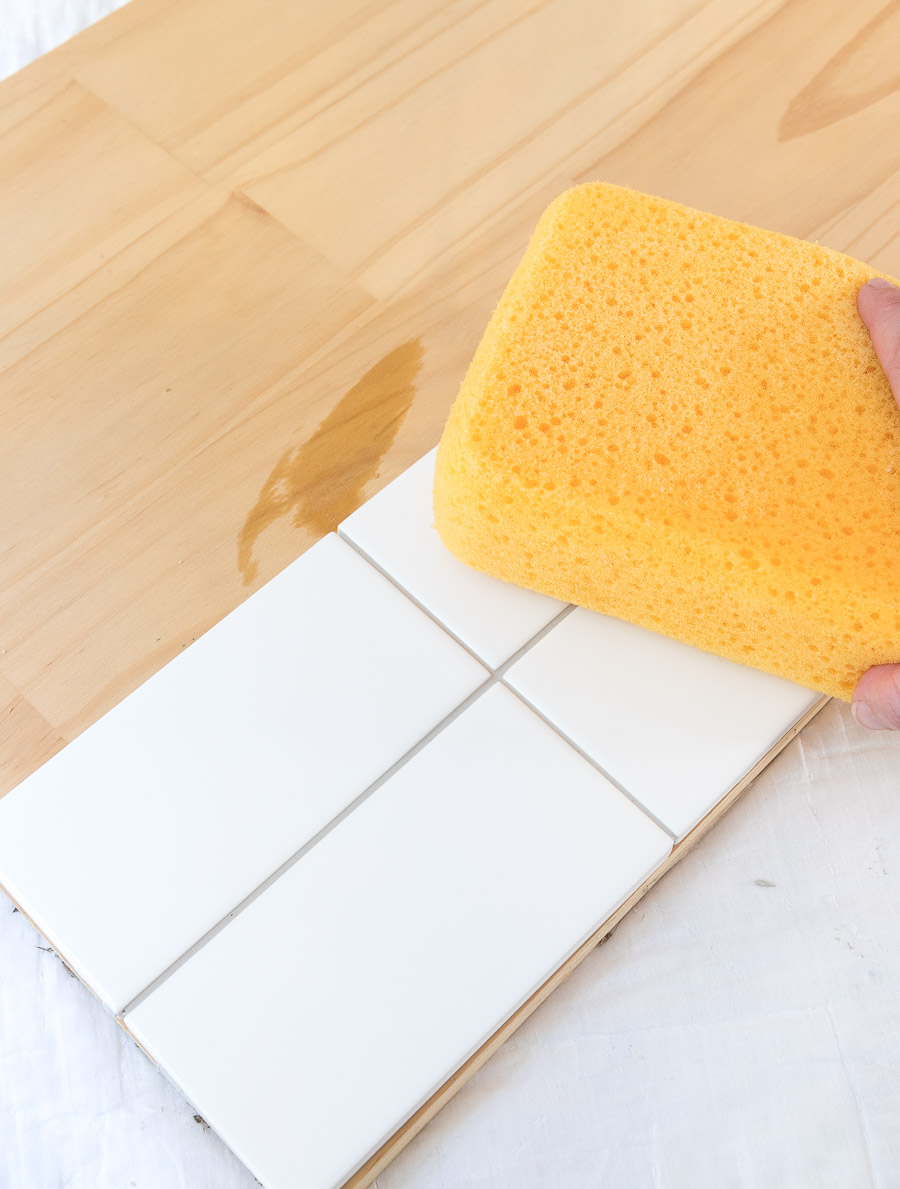
After you’ve let it sit for the time recommended on your grout bag, use a slightly damp sponge (wring out all excess water) to clean off your tiles and wipe over your grout lines to remove excess and make them smooth. You can also just use a paper towel for this!
Let it Dry
This last step is huge. The color will change quite a bit as it dries (it will lighten) so don’t make any decisions about grout color until it’s totally dry, which could be overnight. The image above shows what Frost grout looked like wet and the image below (Frost is at the top) shows how much lighter it is when dry:
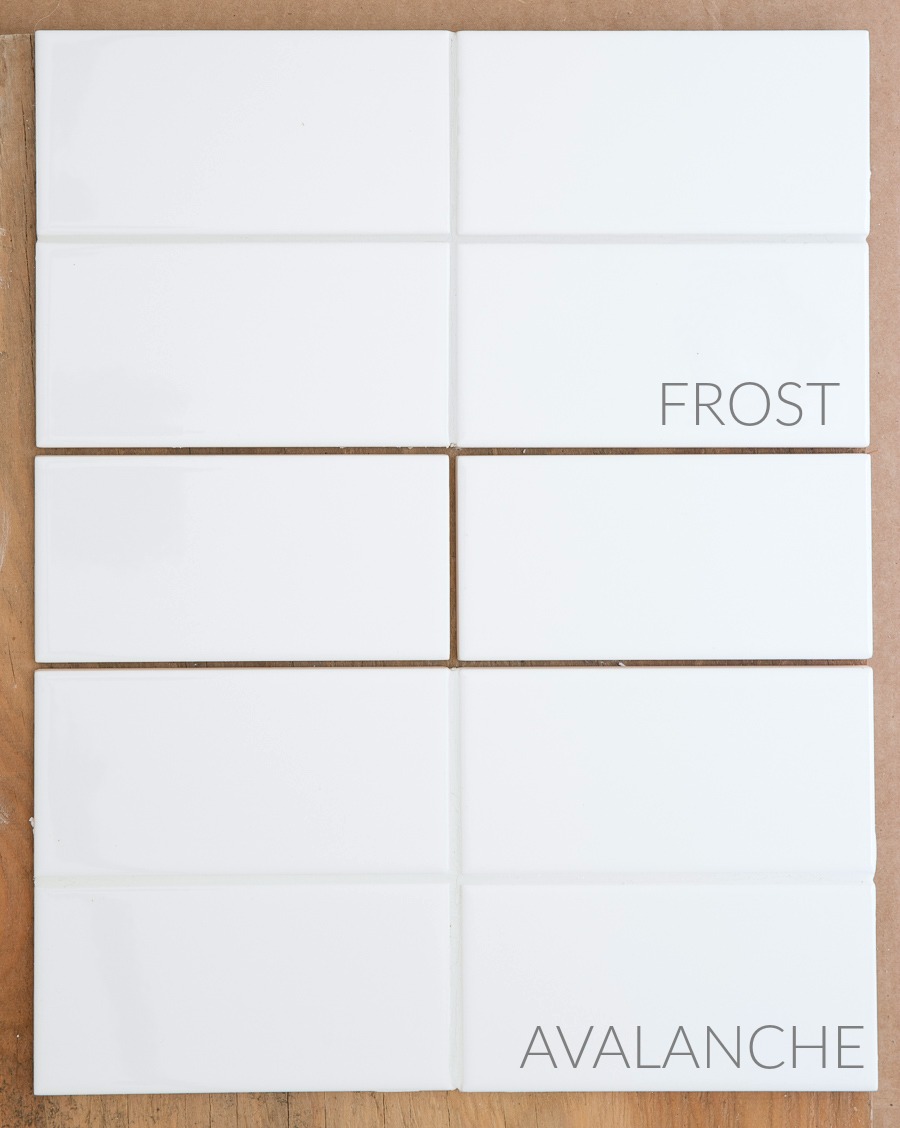
As you can see, when it’s dry, Mapei’s Frost is a super light grays (I show it here compared to Avalanche, which is a soft white) which you might not expect from the appearance of the grout when you mix it.
Favorite Gray Grouts
Once I made my sample boards and put my mosaic up next to them, the choice for my own kitchen was obvious. I wanted my mosaic to be the star of the show so I went with the lightest gray. But I did love several of the darker grays that I sampled too and would likely have chosen one of them if I had all subway tile with no mosaic. Here’s a comparison of how the different grays I sampled looked against the white subway tile (the image is Pinnable for you to save for a later project when you might need it!):
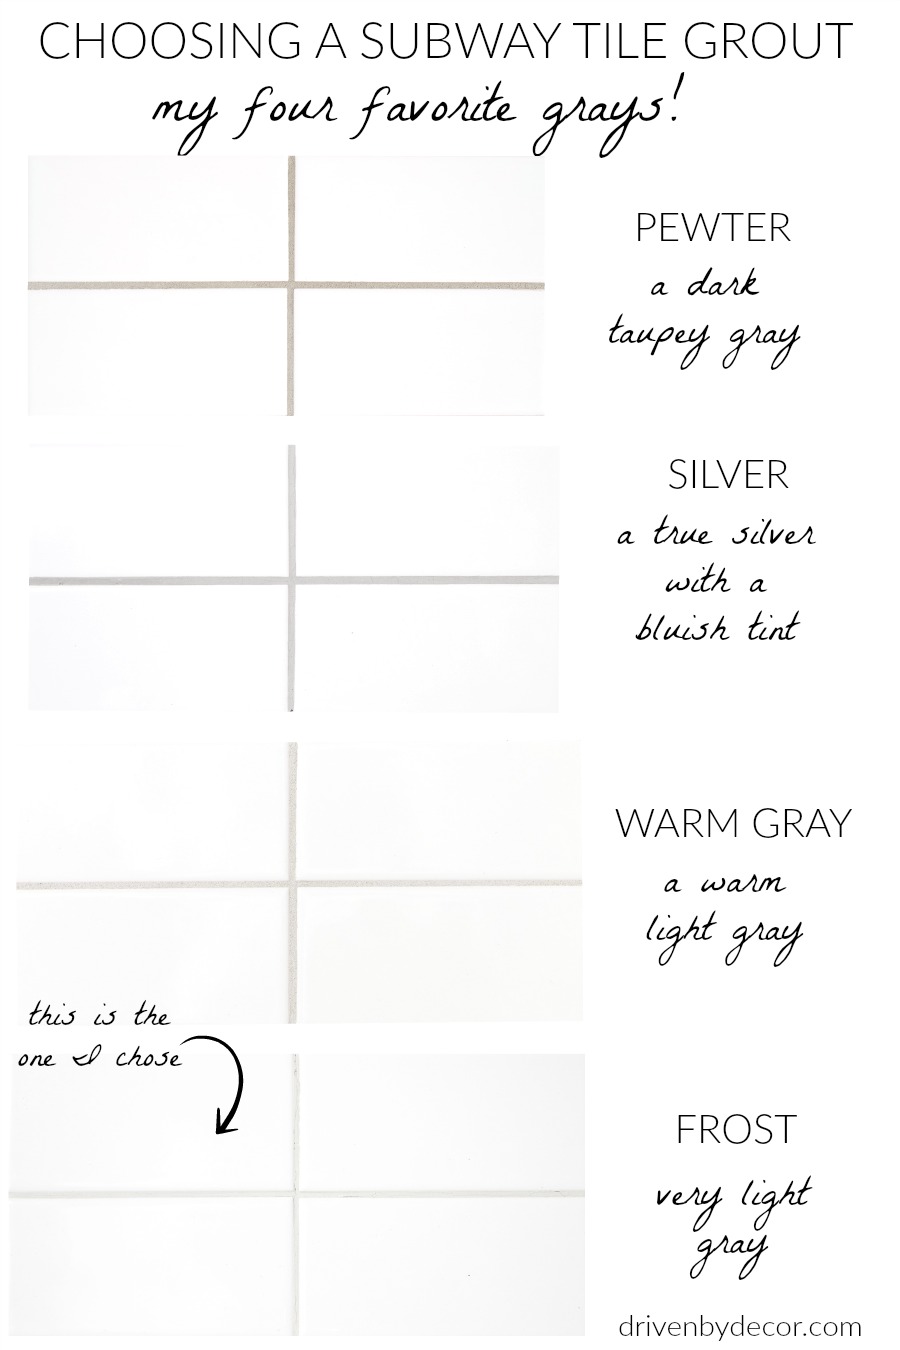
All of these are Mapei Keracolor grout – the same named grout might look totally different in a different brand so only use this as a guide to this specific brand! You can buy Mapei grout at Lowe’s or Floor & Decor. If you want to go for a darker gray, check out Mapei’s Gray, Timberwolf, Iron, & Pearl Gray.
After Grouting, Seal It!
And one last thing I wanted to be sure to mention – definitely make sure your grout is sealed after your tile job is done! {This} impregnator penetrating sealer is more expensive than others but is the one that’s been recommended as the best by every tile guy I’ve ever worked with.
Want to see more details of our kitchen? You can find the complete “before” and “after” & source links on our kitchen before and after post!
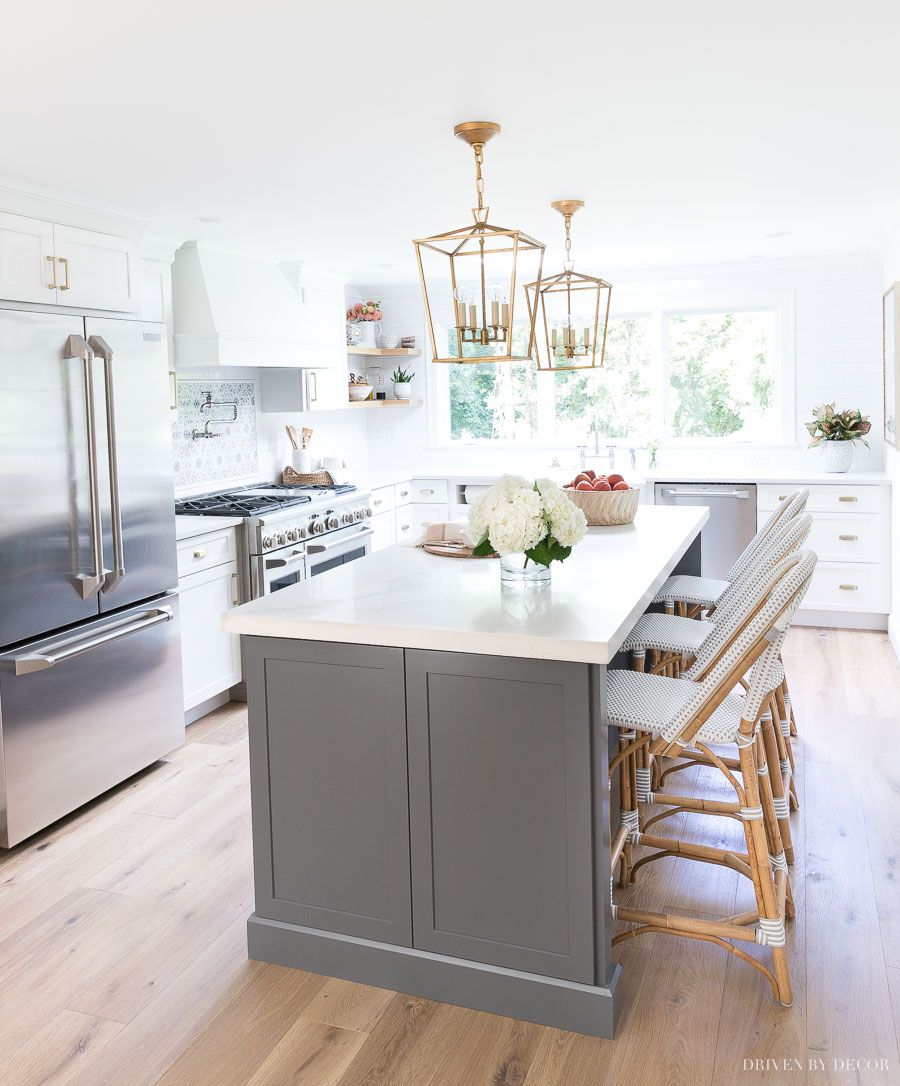
Thanks as always for stopping by!



Dawn Fite says
Thanks for sharing this, because I have been agonizing over whether or not I made the right grout choice. I chose frost to go with my white subway tiles. I wanted something not white, but light enough to just show off the pattern of the tiles, but not be overwhelmingly dark or compete with the granite, etc. I am still waiting to see how it turns out in our home, but I feel much better being able to see a real example. Your kitchen is beautiful!
Michelle says
I love your kitchen soo much, I am mimicking it as much as possible! I found your eye candy you used behind the stovetop at a local store here in Tampa and it is even more gorgeous in person. I see white and marble pieces throughout the mosaic. What made you decide to do a white subway vs. a marble subway or others? I’m having a hard time since mine will be going up to the ceiling and around a window in one section. I worry the white may be too much white?
Kris Jarrett says
Thanks for your sweet words! You could definitely use marble with it but I already Caesarstone countertops that mimic marble so I thought that doing a marble backsplash too would be a bit much. Also the white subway tile is a lot less expensive and let’s the mosaic take center stage 🙂
Rere says
Love the tile you used over your stove. Can you share what it is? Thanks!
Kris Jarrett says
Sure it’s Walker Zanger’s Villa D Oro found here: https://www.walkerzanger.com/stone-mosaic-waterjet/villa-d-oro.html
michelle says
hello! great article — I am doing white arabesque tile for our kitchen and am so stuck between avalanche or frost caulk/grout! My countertop is fantasy brown (which has a bit of movement in it) so I am concerned about contrast in my tile conflicting. My gut tells me do more of a white on white, clean look as that’s the look I was envisioning (ie maybe avalanche with the white tile?) as may give it just a slight contrast but not overbearing. But the frost color is pretty & light too….any thoughts are so appreciated!
Kris Jarrett says
I would definitely go with avalanche – I’m familiar with that granite and it’s really busy so I’d keep your backsplash simple and with low contrast!
Sara says
This was really helpful! thank you for the tips.
Serge Aubin says
love it! where did you get the range backsplash feature tile? do you have the name/brand.
Eileen says
This article was so helpful in picking out light grey grout!!
Thx eileen
David says
I love “Frost” but cannot find it. Do you have a link? Home Depot does not carry any grout called “Frost” what is the brand?
Janette says
Hello!
Love your post. I am remodeling my bathroom and am going crazy trying to figure out grouts and floors, vanities and lighting. I live in a Brooklyn. I have a standard apartment bathroom with a window by the shower – doing herringbone long rectangle white subway tile in the shower and the outside 4′ walls with classic subway style (using same long rectangle tile). I wanted to put on the floor Carrera marble mosaic hexagon with some hints of marble gray coloring, but mostly white – until I found out that it requires additional maintenance and will likely loose its luster within 5 years. So I am back to looking at tiles — porcelain or ceramic apparently are best options — looking for a similar 3″ hexagon. Then there is the grout . . . After looking at your options . . . would you think that the warm gray should be used in the shower with the herringbone style and on the floor? And use the Frost for the 4′ outside walls? Or should I use the light gray on the floor? Any suggestions are so welcome! With my sincere thank you . . .
Janette says
By the way . . . the shower area – I was referring to the walls, as there is a tub . . .
Lindsay says
This is a super random question but what did you use for the edges of your subway tile?
Your kitchen is GORGOUS!!!!!!
Cynara says
Beautiful! I love the idea of a light gray grout. I also love the backsplash over your stove! Is it framed in a white tile?
Michel Defays says
Thank you for your post. As a backsplash installer (that’s ALL I do), I must agree with you that pale grey is indeed the most popular grout colour for standard 3×6 white subway tile.
Five years ago, mosaic on mesh was the most popular option for a backsplash accounting four about 75% of installations. Today (2020) it is reversed to about 75% subway tiles with the classic flat white 3×6 subway as the primary choice of both home owners and kitchen designer. Why? It is timeless, never goes out of style and blends with just about any kitchen style, not to mention that a white horizontal backsplash makes the kitchen look larger as opposed to a dark tile.
White grout on white tiles makes the whole backsplash look like a big white blur for a distance. A discrete grout will define the shape of the tiles without being overpowering. Think about red or green grout on white subway tiles. What do you see and look at first? Obviously the grout.
“Vapour Grey” and “bone” grout colours both fit the bill. One is white with a hint of grey, and the other with a hint of beige. The choice is determined by the overall colour scheme of the kitchen in the case or white tiles, or the colour of the tiles.
As an installer, I like to show customers what the real grout actually looks like on the tile. The best and easiest way to achieve this is to lay down a few tiles in the chosen pattern (i.e. brick style, stacked or herringbone) with the proper spacing (usually 1/16″) then fill the lines with grout powder smoothened with my finger. Being dry, the powder will give the homeowner the exact look of the grout once installed after drying for 24 hours. No fuss, no mess. I usually show them two or three choices on the same test layout.
Most installers will have many leftover grout bags from previous jobs to make this feasable.
BTW 1: always use only unsanded grout, especially if you pick glass tiles.
BTW 2: use 1/16 spacers throughout, except in the bottom line where 1/8 is better to resist cracking.
BTW 3: Mapei type 1 is most suitable for gluing 99% of backsplashes and Flextile unsanded is best for grouting.
Best regards,
Michel, Toronto.
Sue Gignac says
Hi Michel
do you also agree for showers a 3 x 12 white matte subway looks good in say Mapei frost. Since you are an installer, I want the tiles to look soft and pretty and not see the pattern of the tile if the grout is too much, if that makes sense. Thoughts? My floor tile is a light grey with a bit of white in it.
Lisa says
Hello. I love the gray color of your island!! Could you tell me the color please?
Kris Jarrett says
It’s Moonstone which is a pre-finished color the cabinets came in (more details here: https://www.drivenbydecor.com/how-choose-kitchen-cabinets-style-color-finish-design/). It’s similar to BM Charcoal Slate.
Janet says
Your kitchen is beautiful!!! I’m doing a similar mosaic over the range and am just about to test the Frost and the Avalanche with the white field tile. Did you really use the frost colored grout in the Walker Zanger mosaic as well? The tile store and our tiler are telling me to use only white in the mosaic. Its so hard to see in your picture, but it does look much whiter than the grout in your tile. Can you confirm what you used there?
Kris Jarrett says
I used Frost for everything including the mosaic!
Mary says
I chose frost with my subway because of this post and it is perfect ! Thank you!
Kathy O'Donnell says
This was very helpful to me. Thank you