Want to know how to make paper rosettes? It’s easy! I’ll show you, step by step!
My daughter’s room had a big bare wall above her new dresser and I was looking for something fun to fill it up that wouldn’t cost a lot of money. I decided on a grouping of paper rosettes and am so happy with how they turned out. Making the rosettes is easy and they’re such a fun, inexpensive way to dress up walls in kids rooms or to use as decorations for birthday celebrations. Today I’m sharing exactly how to make paper rosettes so you can easily make your own! (post includes affiliate links; full disclosure statement available {here})


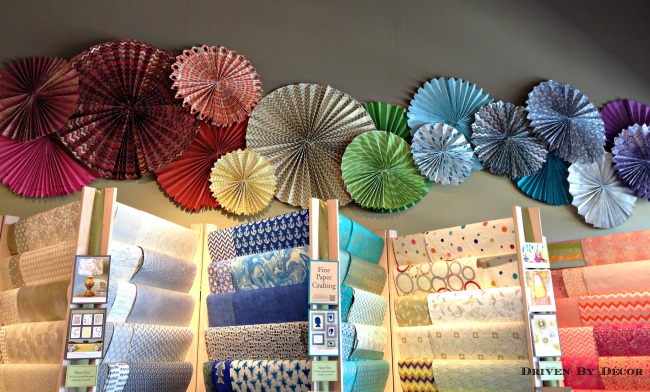
I got the idea for making the rosettes for my daughter’s room from this colorful, fun display at Paper Source – I loved the idea of being able to choose papers in the colors and patterns that you love instead of being limited to the selection of ready-made paper rosettes:

You can make your paper rosettes from rolls of wrapping paper or sheets of decorative paper like they carry at The Paper Source (they have so many amazing ones to choose from!). Decide on how many inches you want the diameter of your rosette to be – this will be the number of inches wide to cut your paper. For the length of your paper, it depends upon how full you want your rosette to be, but usually about 2 ½ to 3 times the width of the paper works well. It’s better to err on the side of your paper being too long – you can always shorten it later.
If you’re using wrapping paper, simply cut one big sheet to the width and length that you have decided on. But if you’re using sheets of decorative paper, unless you’re making a small rosette, one sheet won’t be long enough so you’ll have to glue/tape two sheets together. The final rosette looks best if you make your two sheets the same length (i.e. each sheet is half of your final length).
For example, I was making a 14″ wide rosette so I needed a sheet that was 14″ wide by about 36″ long. My paper wasn’t 36″ long so I took two sheets of wrapping paper and cut them both to 14″ x 18″. Once I glue them together, it will make a 14″ x 36″ long piece.

One word of advice when cutting your paper – if it has a pattern, your rosette will look best if you cut off the pattern at the same point on the left hand side as you do on the right hand side since the two edges will come together in the end:

Now for the folding – it’s done accordion-style (like when you make paper fans), folding the paper along it’s width (short side). With the patterned side of the paper down, fold up about ½″ – ¾″ of it, and create a sharp fold by pressing down along the edge.

Then flip the paper over and make another same-sized fold. Keep flipping and making folds until you reach the end of your paper. Be careful that you’re not making your folds bigger as you work your way down the paper. You’ll want your last fold on your sheet of paper to face down (like on the right side of the pic below). If it faces up, cut off a single fold so that it faces down.

If you are working with two sheets of paper instead of one long sheet from a roll of wrapping paper, you’ll now want to do the same thing with your second sheet except you’ll place this sheet patterned side up to start your folding:

Now you’ll overlap your two sheets and attach them together – I originally tried double stick tape to do this but it didn’t hold well so I ended up using ZIPS clear adhesive lines. They are like Glue Dots but are lines instead of dots – they’re super sticky and hold really well.
Run an adhesive line all the way down the length of the end fold on one sheet and adhere it to the end fold from the other sheet,

creating one continuous sheet with accordion folds:

Then simply gather the folds tightly together, turn the rosette over so that the patterned side is down, and tie the accordion folds in the center with embroidery floss or doubled thread:

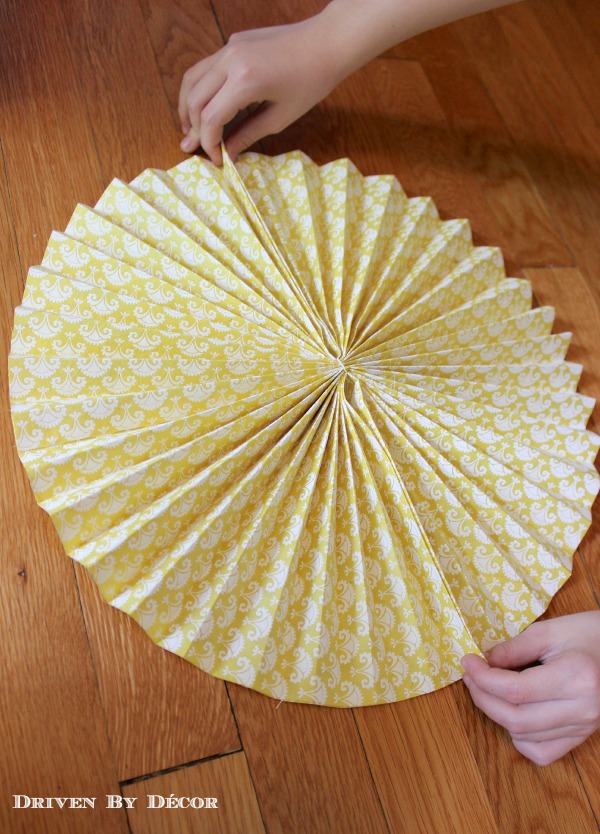
Now flip it over and pull the ends together on both side to see how you like the look of your rosette.

If it is too full, cut the tie you just made in the middle, cut off an equal amount of paper from both ends of your accordioned paper, and retie. Then use the ZIPS lines or tape to adhere the two paper edges to one another to create your final paper rosette.

To hang the rosettes, I simply nailed small hooks into the wall and slid the hook under the tie at the middle of the rosette:

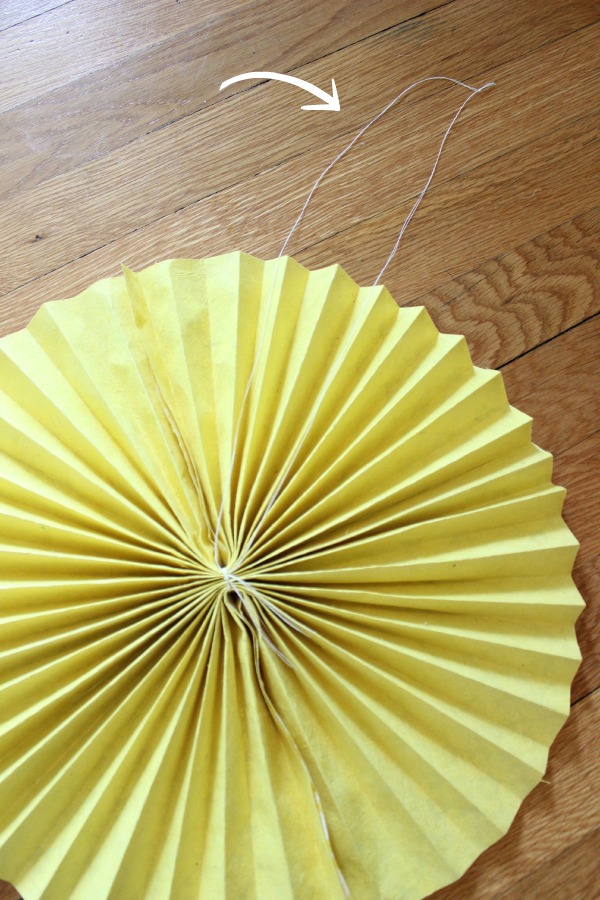
If you’re layering paper rosettes like I did, sometimes the center of the rosette is going to be layered over another rosette so you won’t be able to attach it to a hook there. In this situation, create a loop with thread or embroidery floss that is tied to the back center of the rosette:

Then attach the looped thread to a hanger above the spot where you’d like your rosette to go. Adjust the length of the loop as needed to adjust the height of your rosette.

Easy to make, fun to look at, and so much less expensive than pretty much any other type of artwork. I spent about $50 on the papers for my rosettes and had quite a bit left over for wrapping gifts. I love that if your kiddo gets bored of the rosettes in a year or two, there’s no guilt in getting rid of them and doing something new!

I hope you all found this post to be helpful! You can check out some of my other DIY projects {here} and other kids room decorating ideas {here}.


