Looking for gallery wall ideas? I’m sharing tips for creating the perfect art wall along with the “before” and “after” reveal of my own!
(post includes affiliate links – full disclosure statement available {here})
Creating a gallery wall can definitely be a bit intimidating. But when you break it down, it’s totally doable (even for the novice decorator!). Today I’m sharing several gallery wall ideas and the tips you need to create them.
1. Create an Eclectic Gallery Wall of Art & Objects
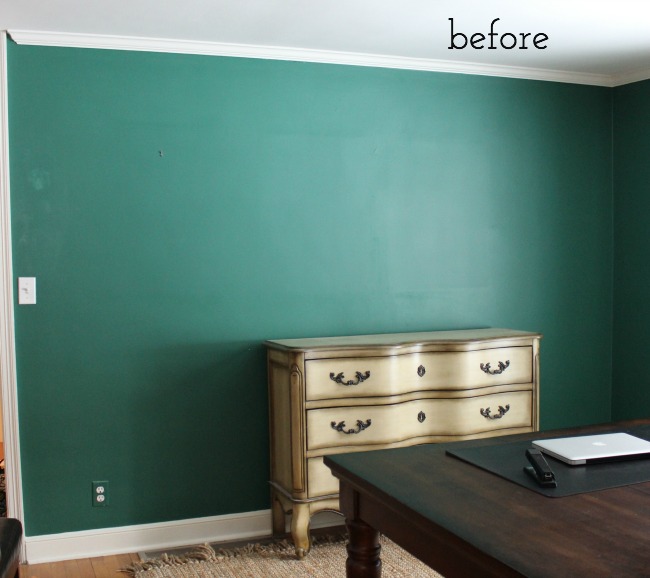
The first gallery wall that I ever created was in our home office. When we first moved into our home, it was simply a big blank green wall:
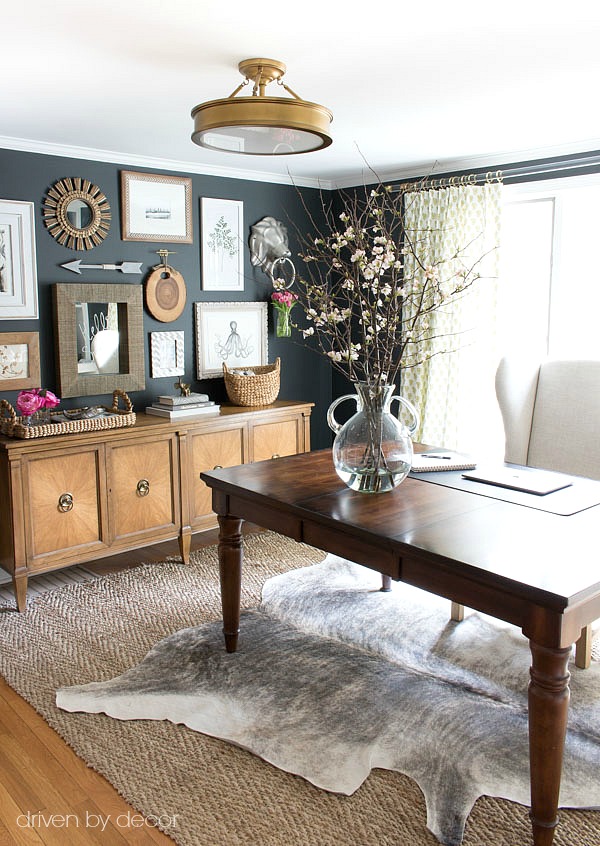
And this is how it looked after I transformed it with an eclectic gallery wall (after painting the walls Benjamin Moore Nightfall):
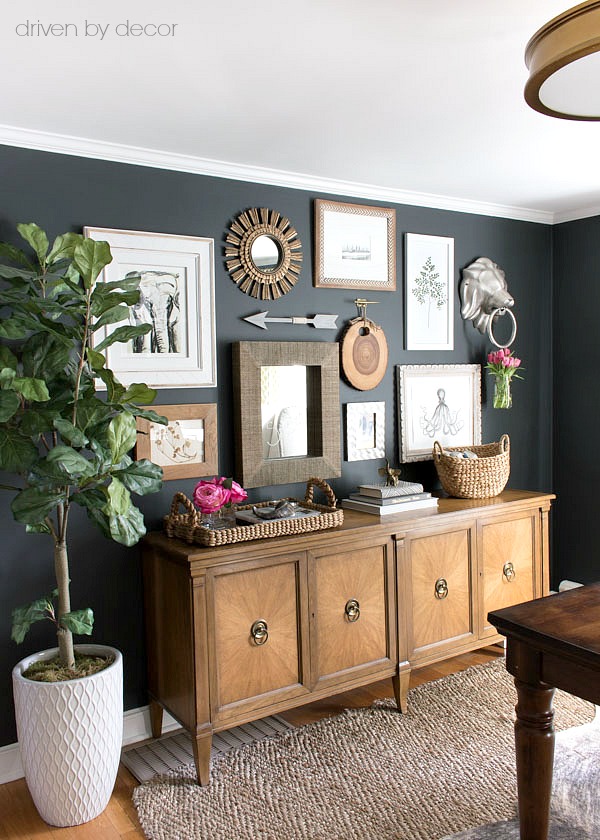
Sources: Elephant print | Sunburst mirror | Faux fiddle leaf fig tree (similar) | Other sources are HomeGoods or thrifted finds
Eclectic gallery walls are fun to create because in addition to framed art, you can use your creativity and add a variety of other things you love! For example, I included an oversized lion head door knocker simply because I thought it was a fun find. And the hanging tree slice? It’s actually a cutting board from HomeGoods:
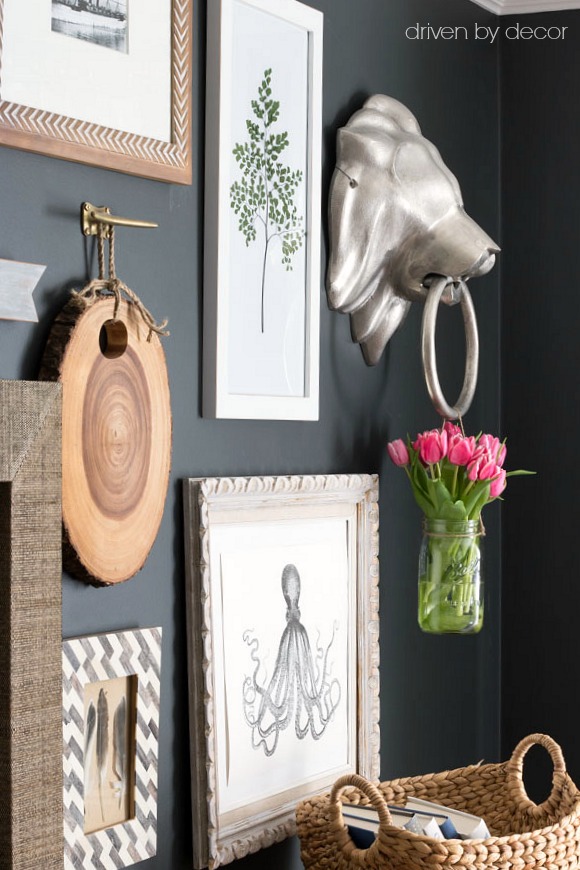
You can also use a mix of frame sizes, colors, and designs for your framed art. I’ve found some great unique frames at thrift stores and flea markets, including the ornate frame around my octopus print which was a $3 flea market find. Your artwork doesn’t have to be expensive either. You can find very reasonably art prints online at Minted {here} and low cost printables on Etsy {here}. Or just go out into your own backyard and find some beautiful leaves or feathers to frame.
When creating any type of gallery wall, one of my biggest tips is to plan it out on the floor before putting any holes in the wall. Simply clear some floor space and tape off the amount of space that you’re working with for your gallery wall. Then play around with the arrangement of your pieces over a few days before deciding where to place everything.
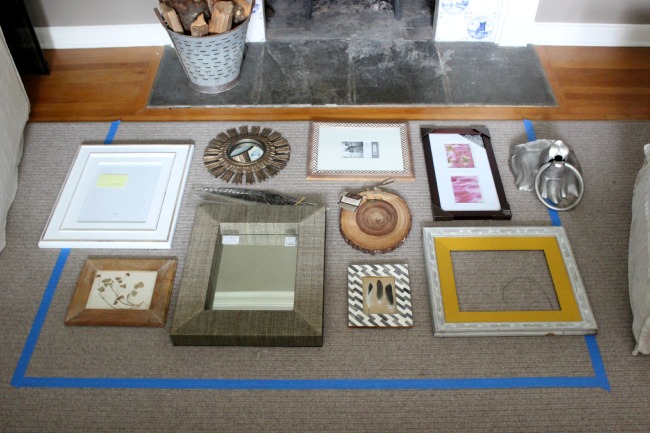
Don’t get stuck on spacing! Eclectic gallery walls should not only have eclectic pieces but also eclectic spacing. About 2-3″ between pieces is a great place to start but then play with your pieces and move them around until they look right to your eye.
Need help arranging your art? See my post on gallery wall layouts for ten templates you can steal for your own!
You might find that the most eye pleasing arrangement involves eliminating a couple of pieces or hunting for a specific size piece or two to fill any gaps. Once you’ve decided on your final arrangement, cut pieces of kraft paper in the shape/size of your art and tape them on the wall so you can tweak the layout in its final space before hanging your art. You’ll save yourself from filling lots of extra nail holes!
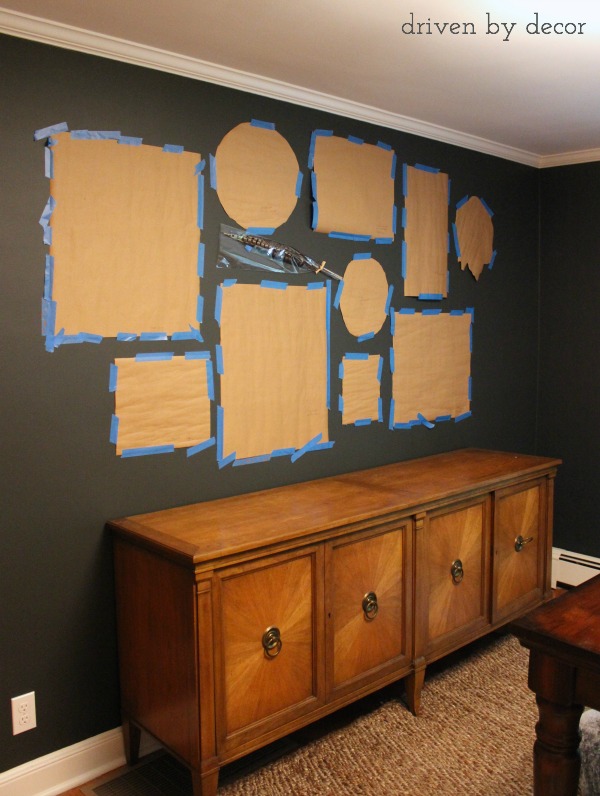
Then all you have left to do is hang everything up!
2. Create a Gallery Wall of Kids Art
Another gallery wall idea is to let your kids’ (or your nieces, nephews, grandkids…) art take center stage! I did this over the daybed on our upstairs landing and was so happy with how it turned out:
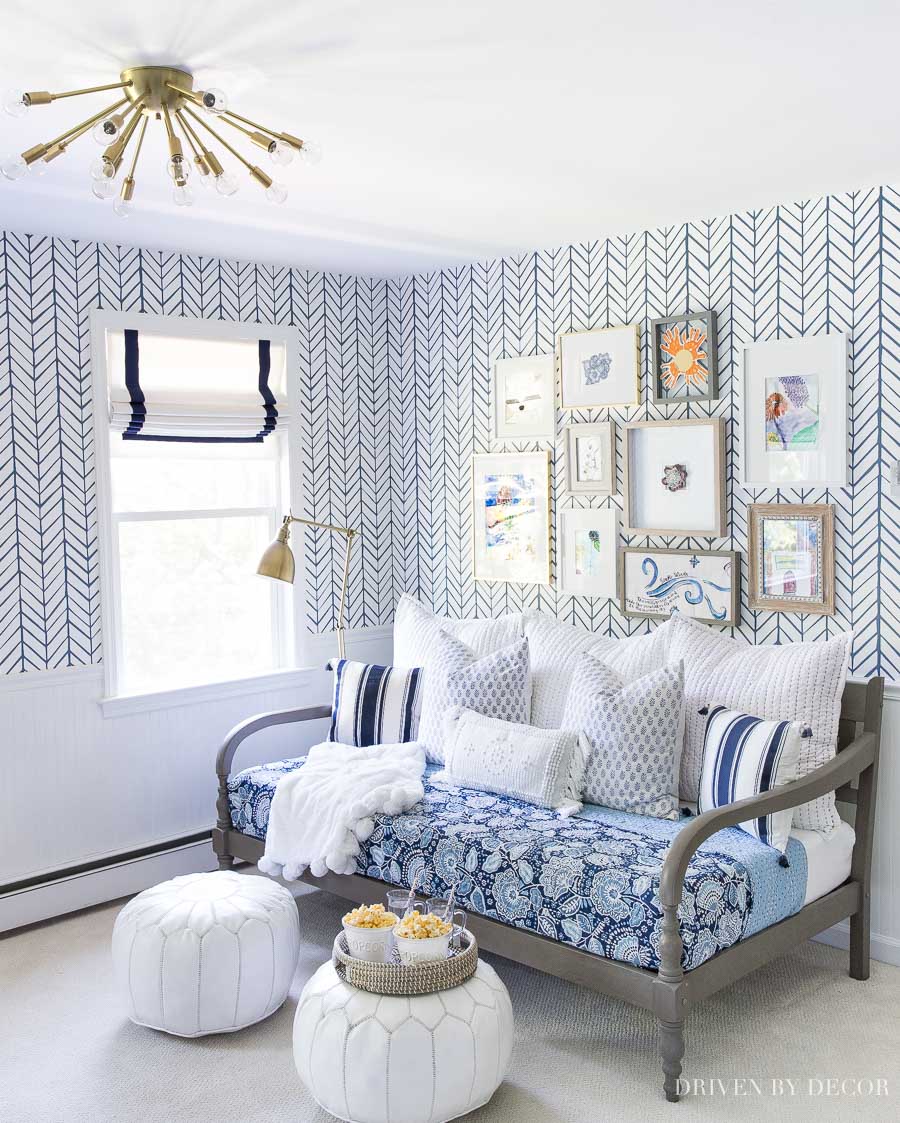
I framed art that my girls had created throughout their years in school, including some elementary school pieces. One of the art pieces I wanted to use was too large for the frame that I had so instead of cutting down their original artwork, I made a color copy of it and reduce the size of the image too: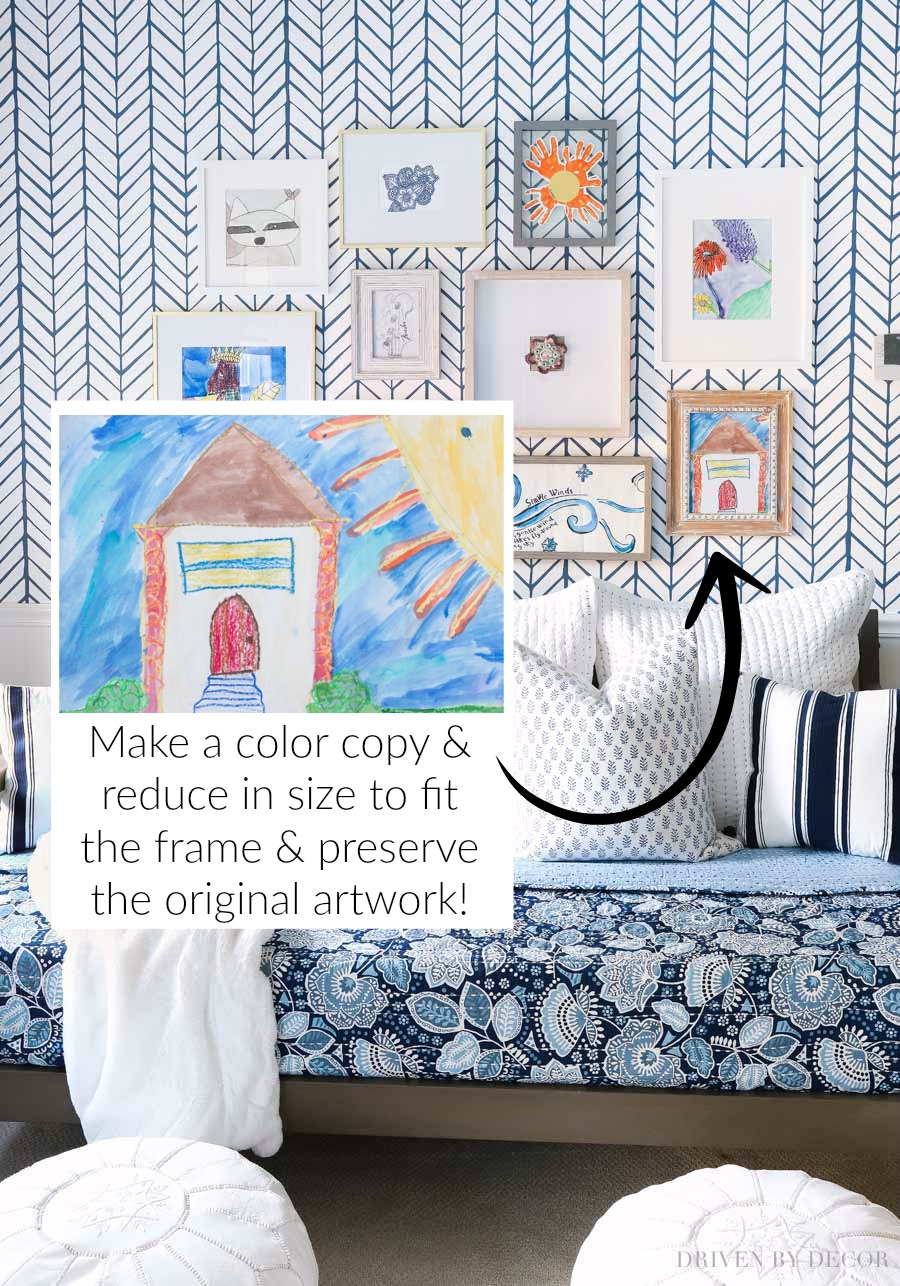
I planned out this gallery wall in the same way as my eclectic gallery wall, by laying everything out on the floor and rearranging it until I found an arrangement I loved:
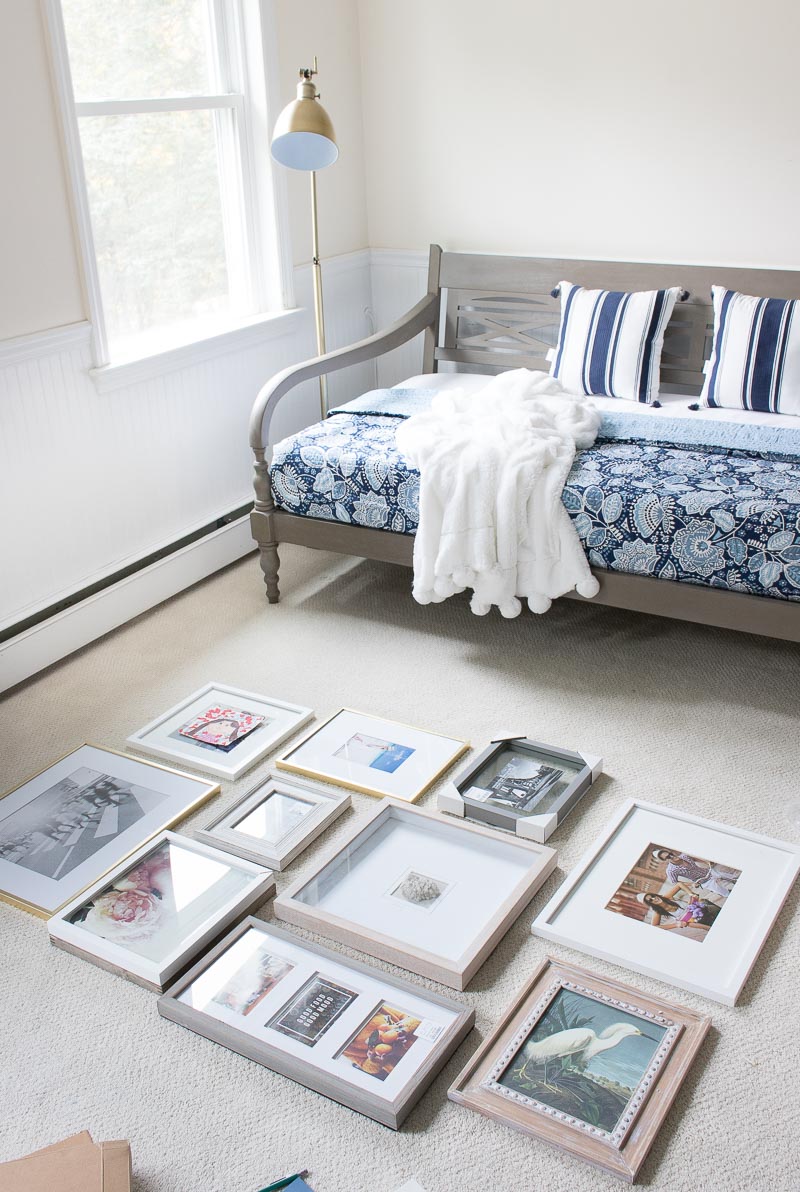
3. Create a Gallery Wall in a Grid Pattern
If you’re still intimidated by the idea of creating a gallery wall, this simple gallery wall idea might be the one for you! Simply frame art prints in identically sized frames and hang them at an equal distance from one another in a grid-like pattern. This is exactly what I did on our family room TV wall:
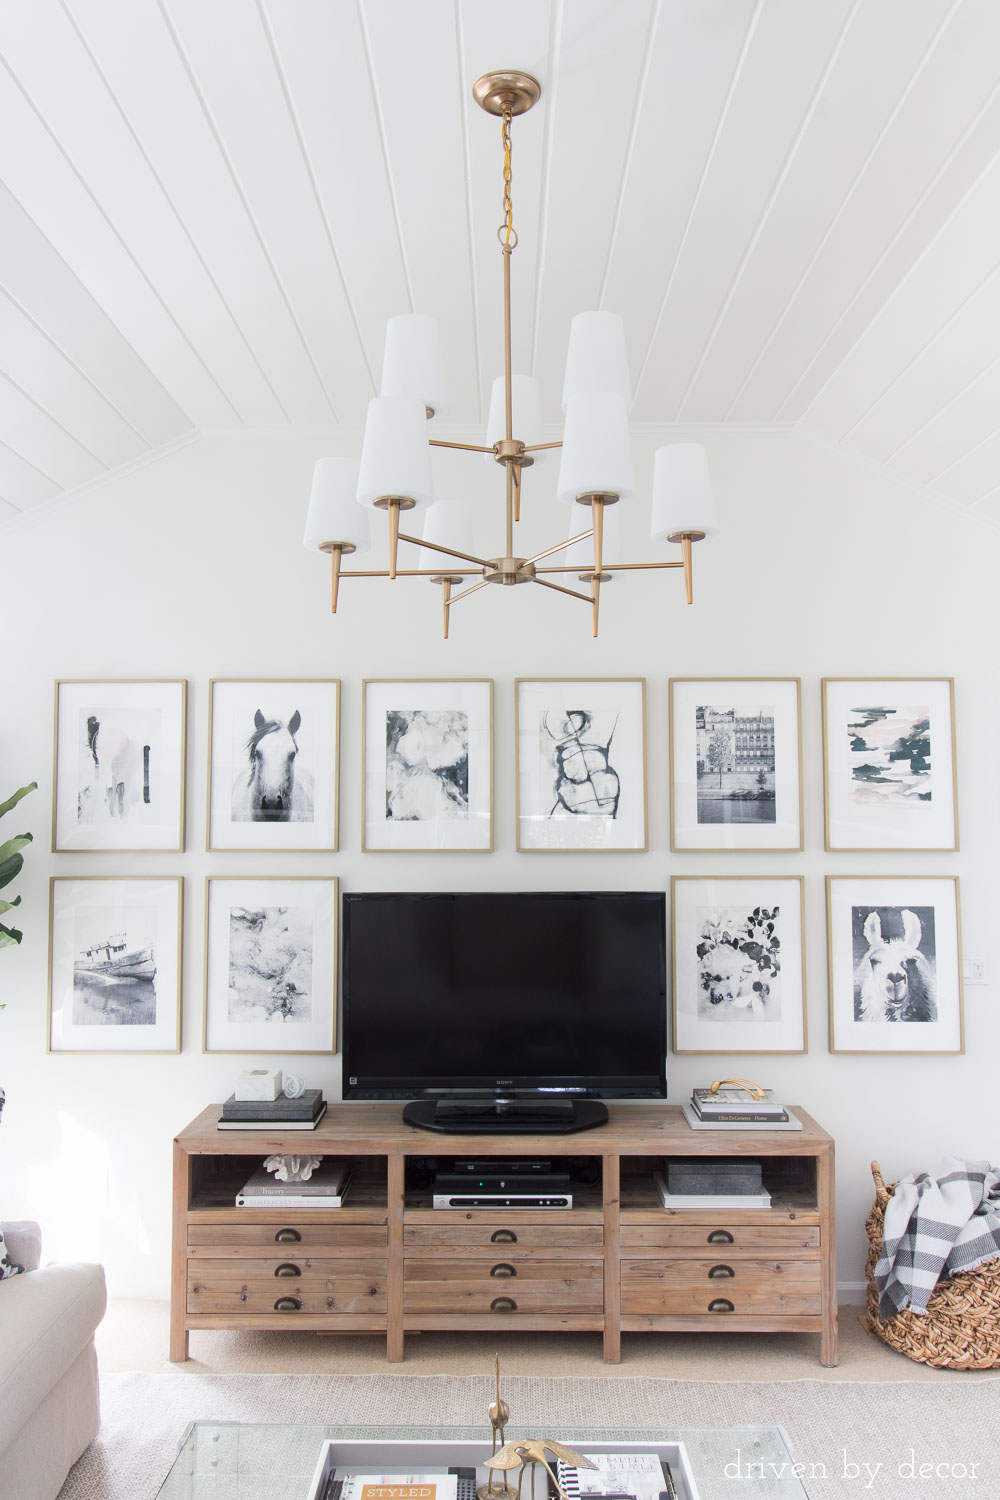
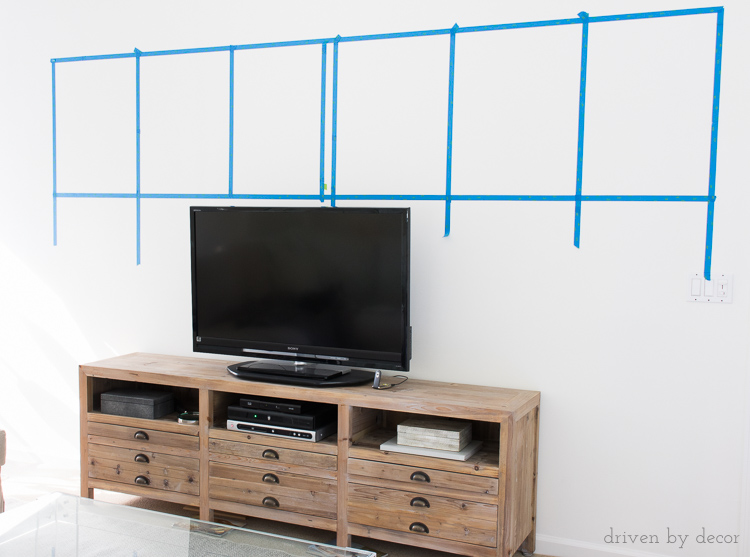
Since everything needs to be lined up and evenly spaced for a grid gallery wall, a laser level like {this one} is key (if you’re a gadget person, check out other cool gadgets on Amazon {here}). To plan this gallery wall, I had Jeff hold the laser level while I adhered painter’s tape to the wall along the line of the laser beam. It only took about 20 mins for me to tape out this entire gallery wall:
The prep work was so worth it because my gallery wall was totally level:
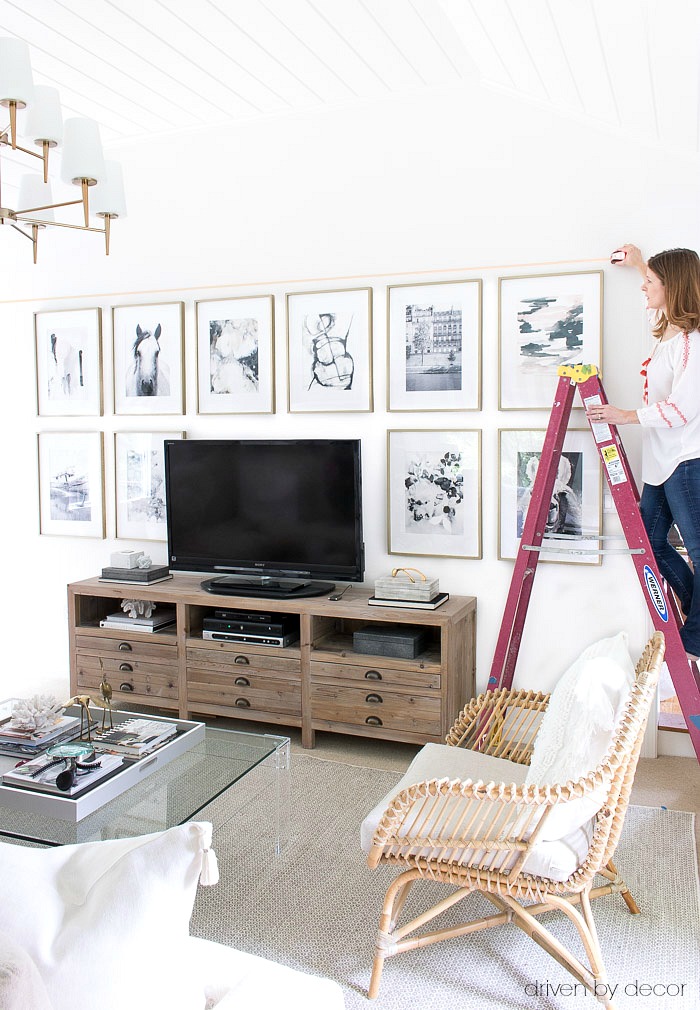
You can see more about the art wall around my TV along with more pics of our family room makeover {here}!
I hope that this post has given you some inspiration to create a gallery wall of your own!


