Gallery walls are a gorgeous way to gather your favorite photographs, art pieces, and prints together for a cohesive look. Creating one may seem intimidating, but you don’t need to be a professional designer to create a stunning gallery wall. With these 10 gallery wall layouts and a few tried and true tips, you’ll soon be creating a stunning display that adds personality and style to your home. (post includes affiliate links; full disclosure statement available {here})
1. The Classic Grid Gallery Wall Layout
The simplest of all gallery wall layouts is the classic grid with a series of equally sized frames arranged in a symmetrical grid pattern. It’s a clean and polished look that can be customized to fit any style or space. An example is {this set of 6 20″ x 24″ burlwood frames} that make a beautiful gallery wall hung over a console or a bed:
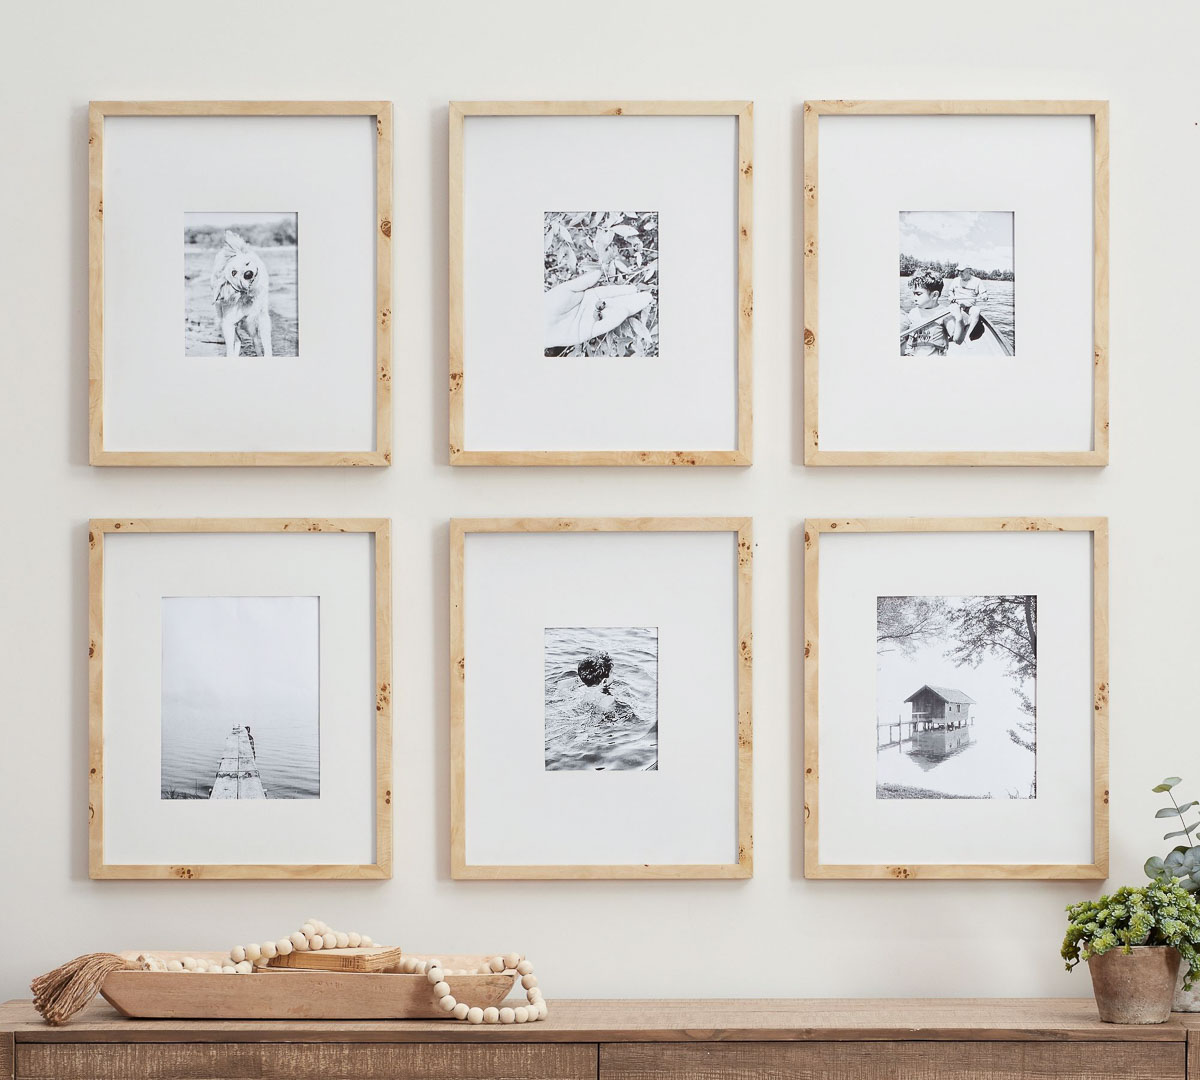
It can be beautiful on a bare wall too with a grid of 9 or 12 frames, depending on the frame size and wall height.
I hung a classic grid gallery wall around the TV in the family room of our previous home and loved how much style it added to our space:
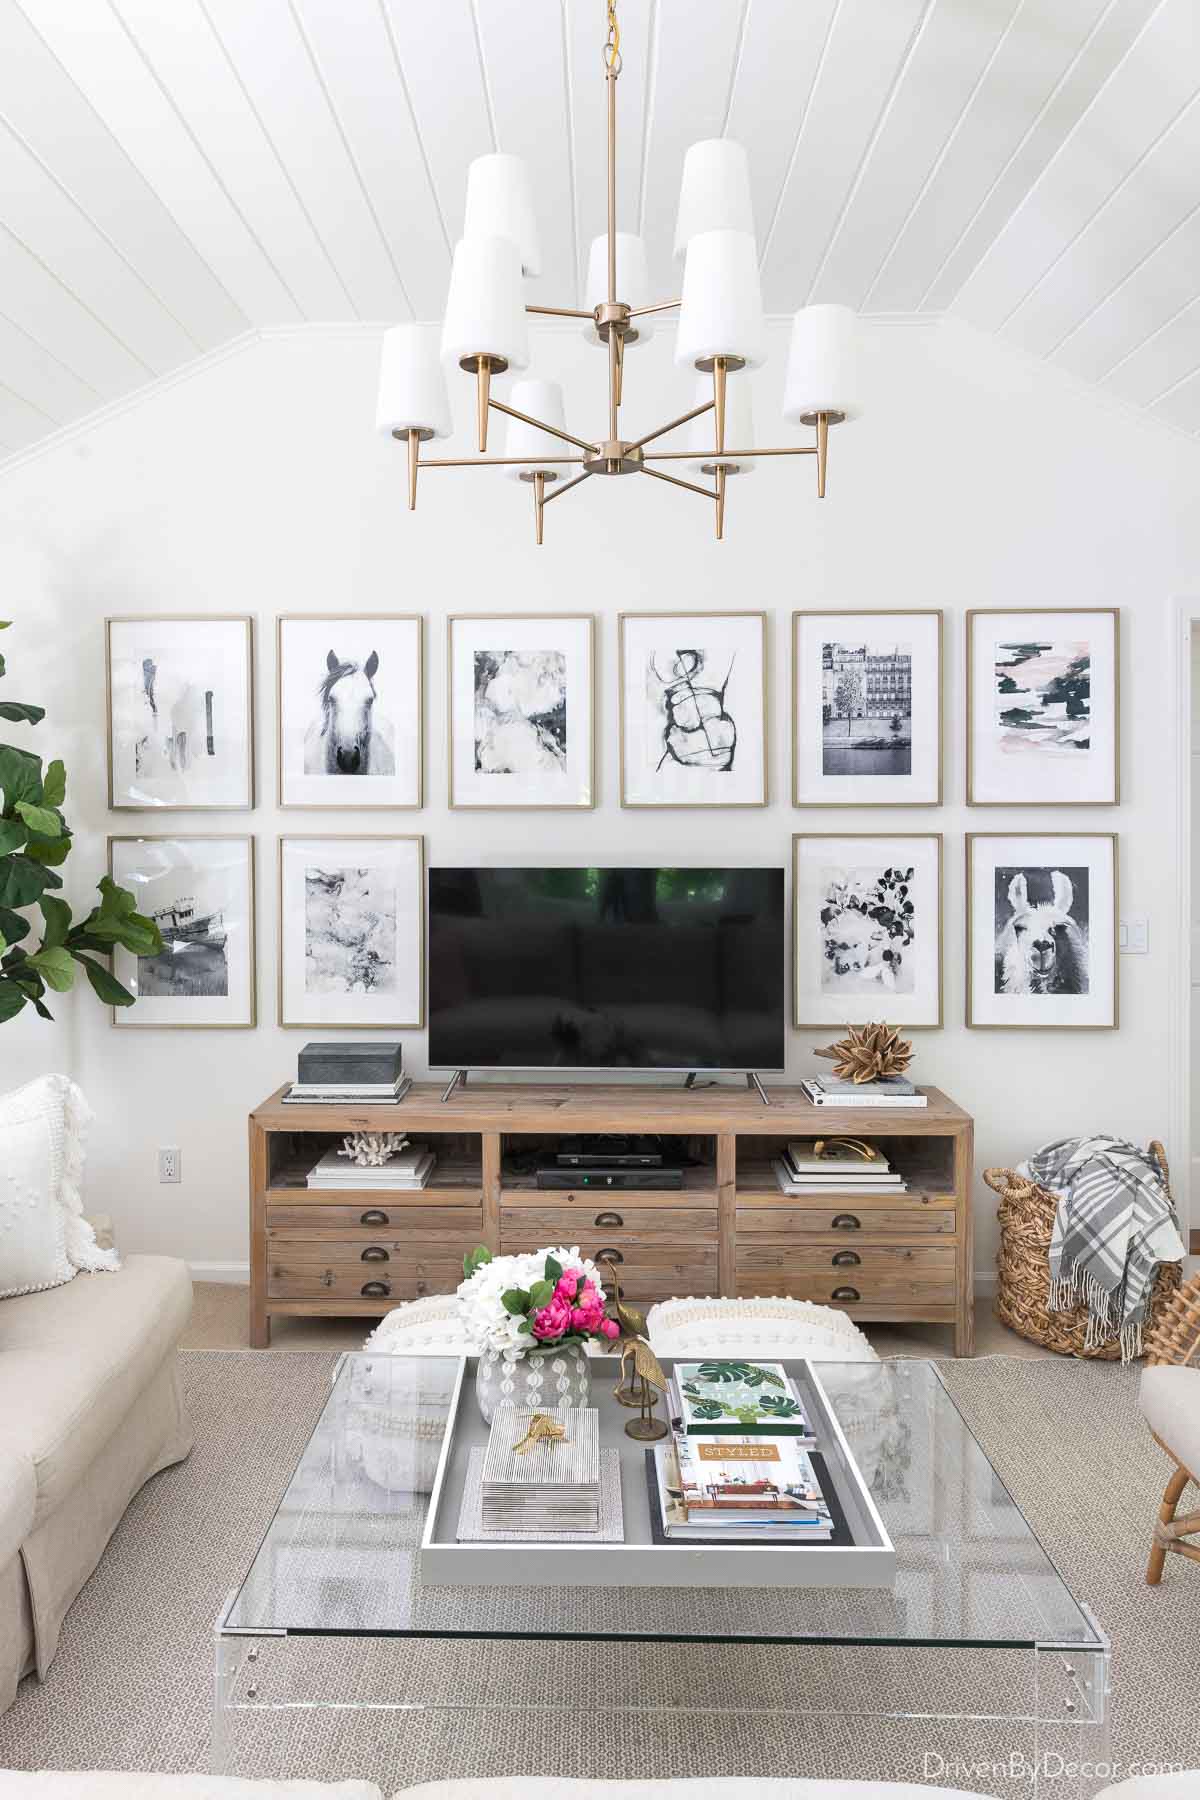
Sources: TV console (similar) | Chandelier (satin bronze) | Faux fiddle leaf fig tree | Rug | Pair of floor poufs | Acrylic coffee table (similar) | Coffee table tray (28″ square)
I chose a series of 18″ x 24″ black and white prints with identical mats and frames to give my gallery wall a cohesive look that wasn’t distracting when watching TV. My prints and matte brass frames are all from Minted but you can also find similar brass frames {here}. For more details about our family room, see my post on family room ideas from our “before” & “after” makeover.
2. The Modern Grid Gallery Wall
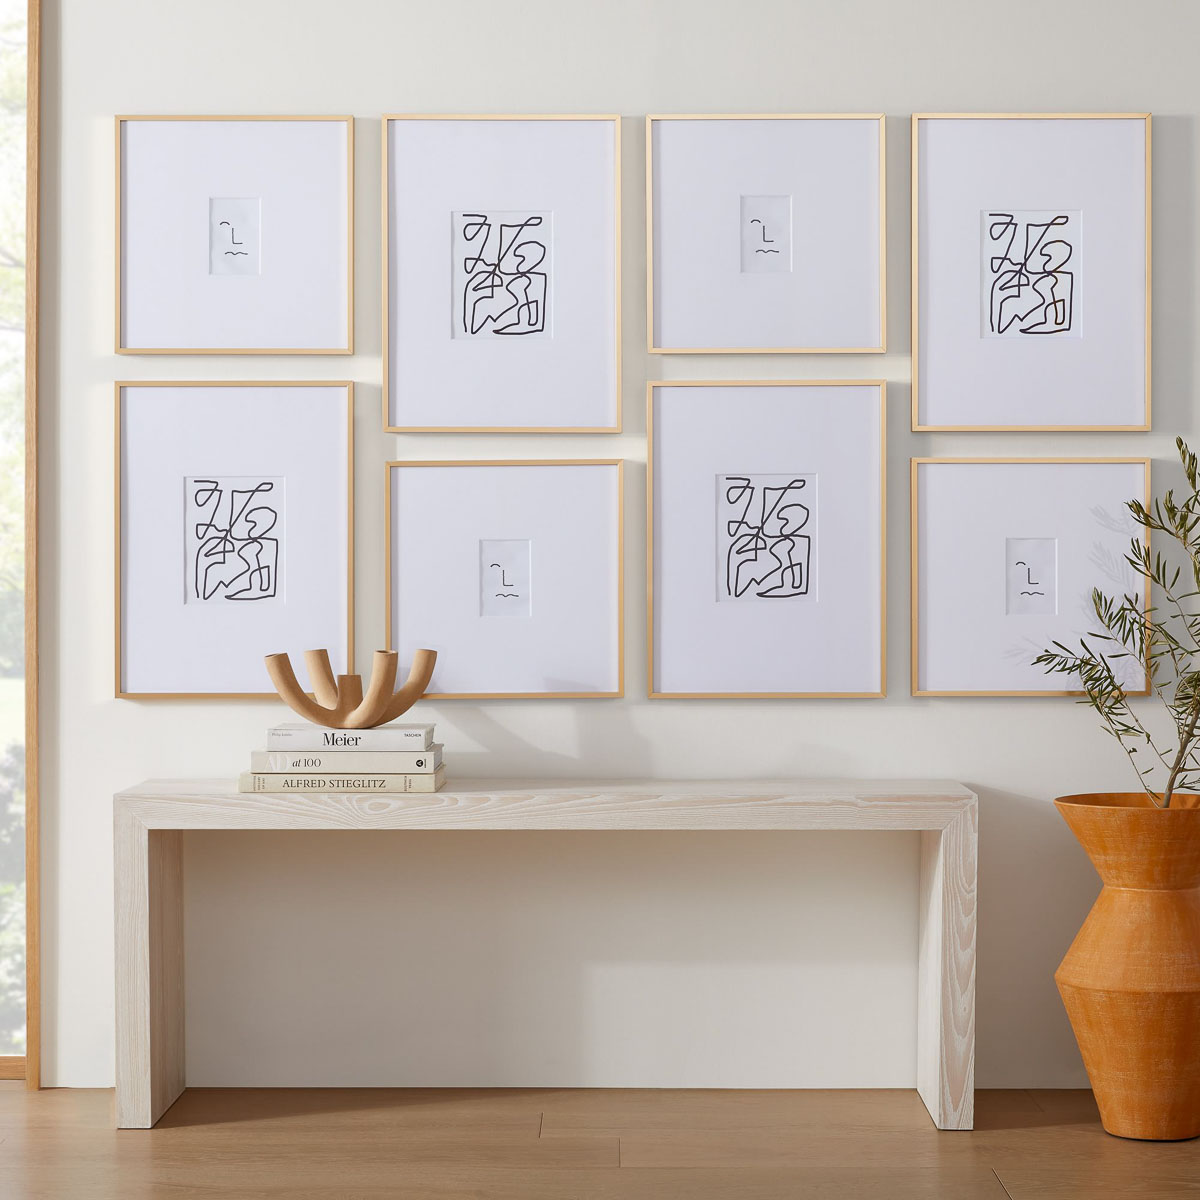
If you prefer a slightly more contemporary look, the modern grid gallery wall layout is a great option. Like the classic grid layout, it involves using an identical style of frames with consistent spacing between the frames. What’s different is that a variety of frame sizes are used.
A beautiful example is the arrangement of {this set of 8 frames} over a console, with a mix of four 18″ x 18″ frames and four 18″ x 24″ frames:
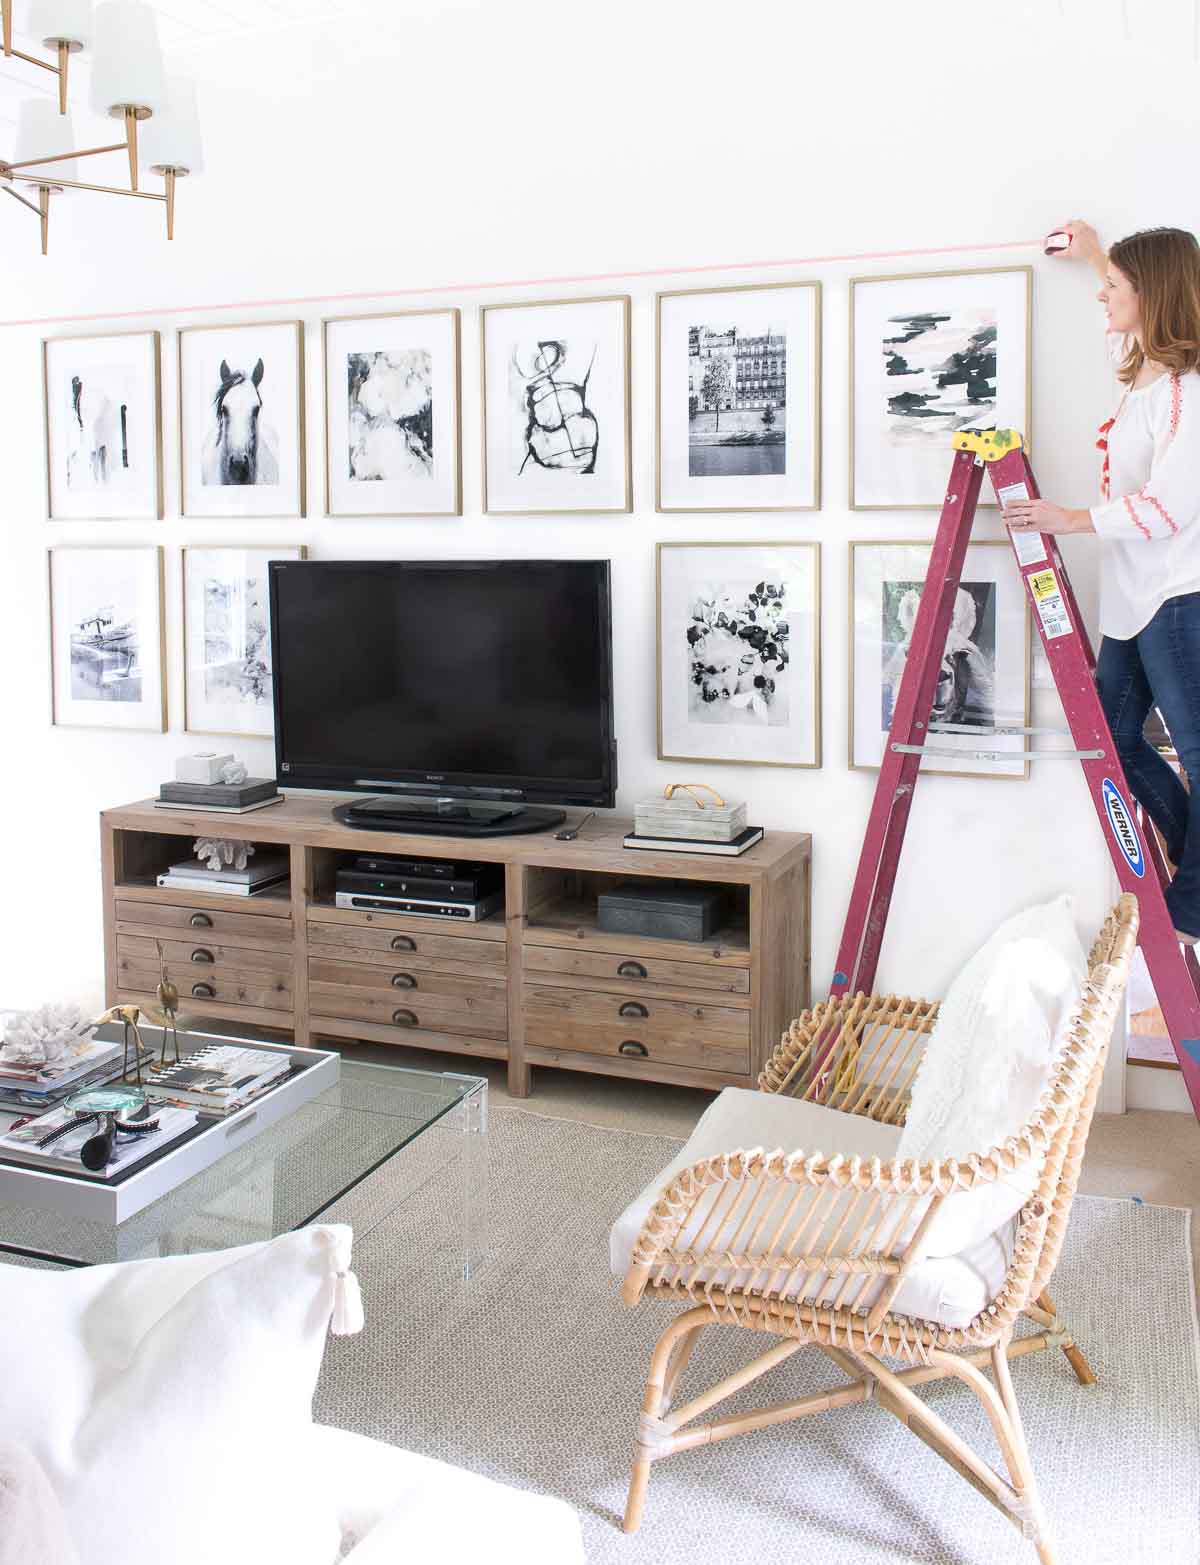
Because of the symmetry of both classic and modern grid gallery walls, a laser level such as {this one} is a huge help in hanging your framed art.
3. The Staircase Gallery Wall
Creating a gallery wall along a staircase is the perfect way to transform a blank staircase wall into a statement-maker. This layout creates a dramatic, eye-catching effect with the framed art following the angle of the stairs. This layout from Minted is a beautifully executed gallery wall along a short staircase:
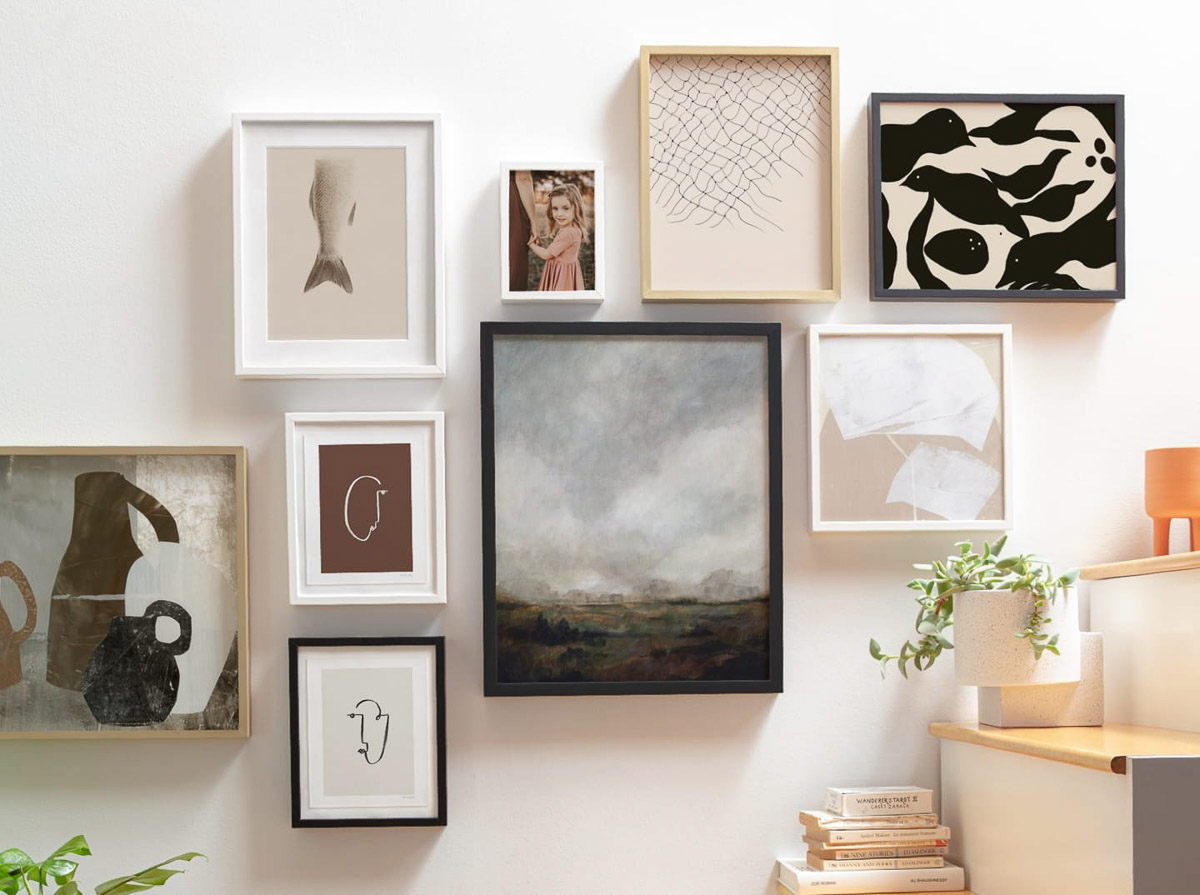
that could be repeated 2-3 times for longer staircases. These are the sizes of the frames if you want to recreate the look in your own home:
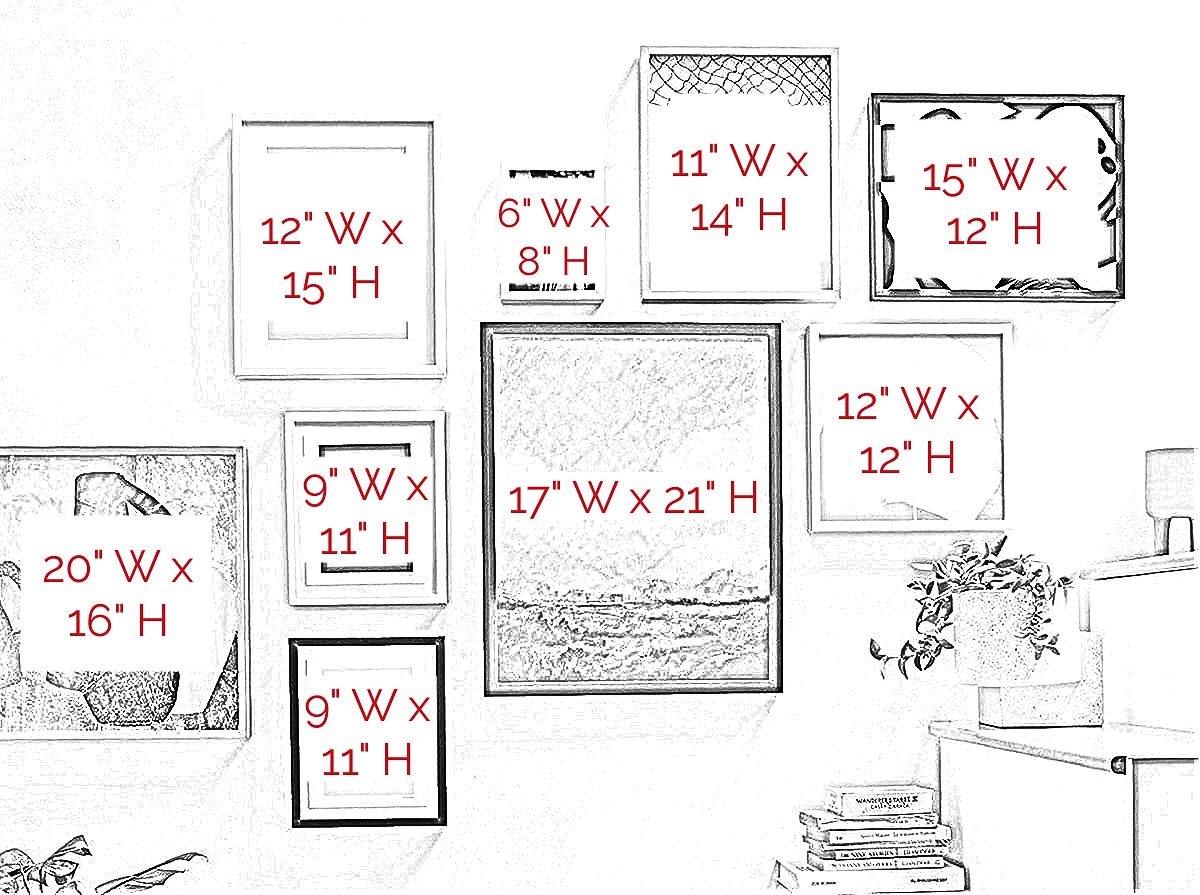
You can get links to all of the prints used and details on framing on Minted’s site {here}.
4. The Monochromatic Gallery Wall Layout
If you’re looking to create a gallery wall with a cohesive and calming feel, a monochromatic gallery wall layout is perfect for you. This style involves using art pieces that are all the same color or similar shades within the same color family, such as this gallery wall with art from Ballard Designs in various shades of green:
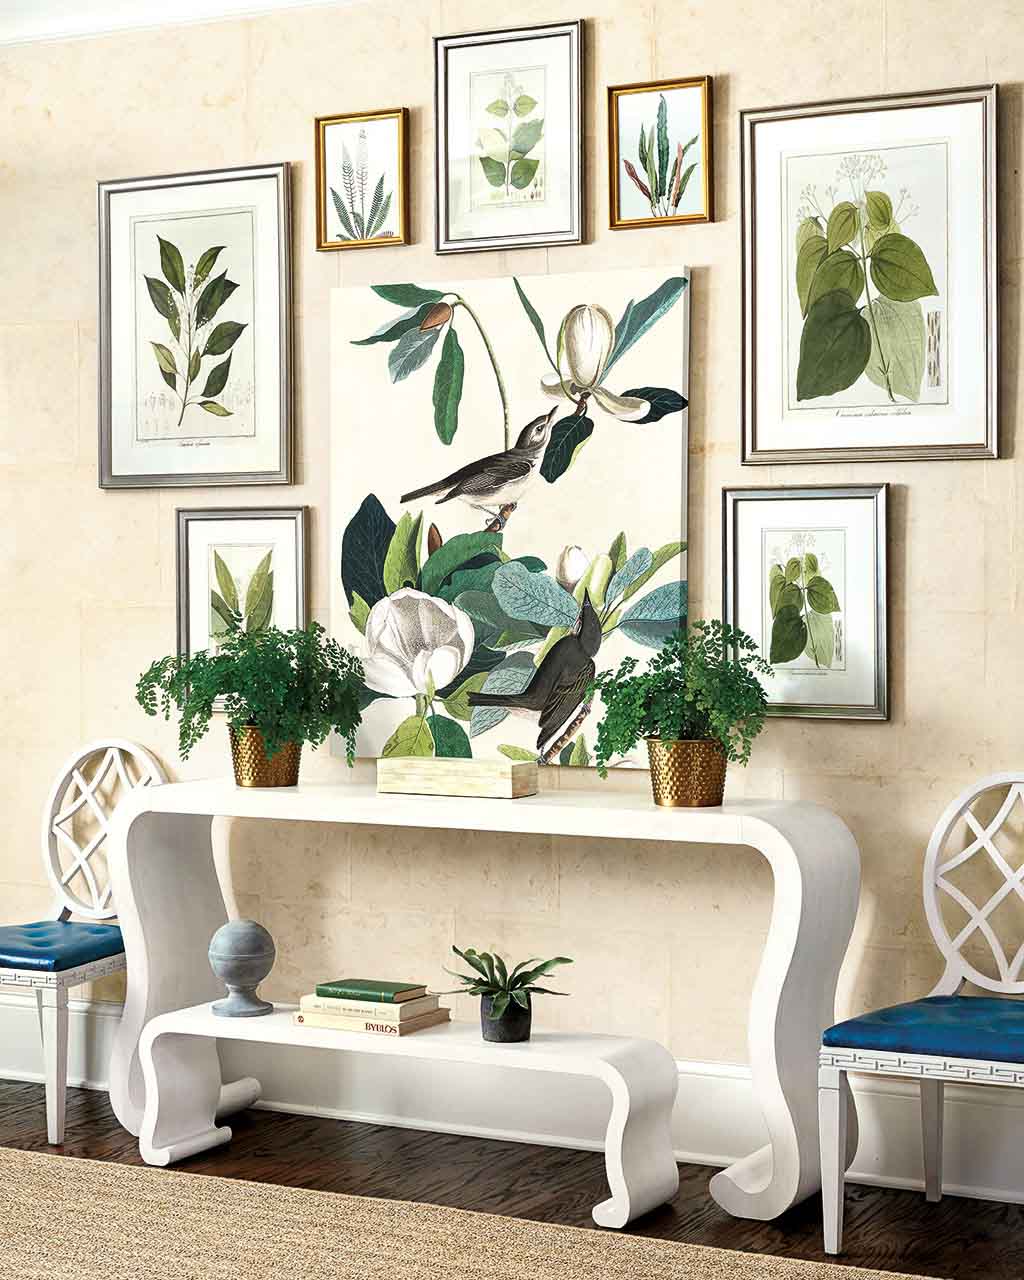
Or for a more modern look, stick with black and white artwork in black and white frames. I love how they incorporated some acrylic frames into this monochromatic gallery wall for a higher-end look:
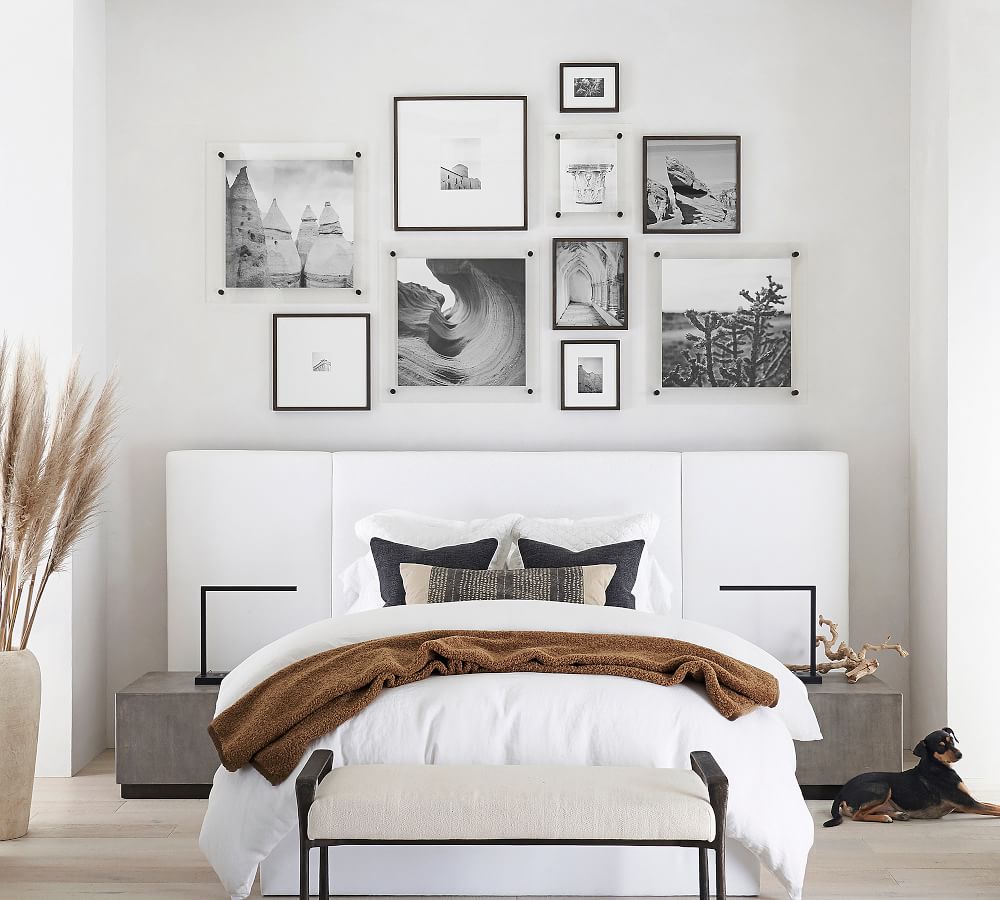
You can shop these space, including the frames, furniture, and accessories, on Pottery Barn {here}. These are the approximate sizes of the framed artwork if you want to recreate the look:
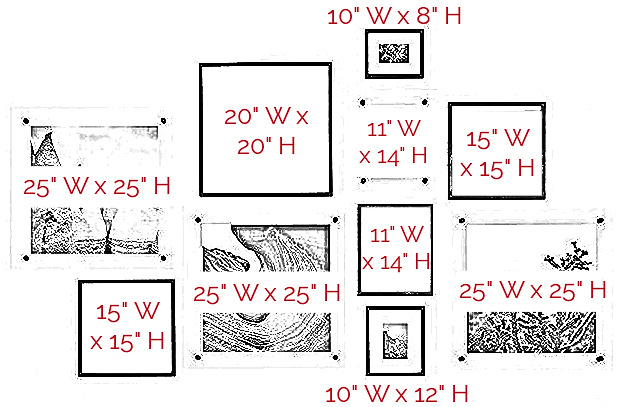
5. The Ledge Shelf Gallery Wall
The ledge shelf gallery wall is a creative way to display your favorite art pieces and allows for easy changes and rearrangements. I love that it gives you the freedom to update your gallery wall as often as you like without needing to patch and paint holes. In this gallery wall, two rows of ledge shelves (using three of {these shelves from Ballard Designs} in each row) house multiple large-scale pieces of framed art over a long console table:
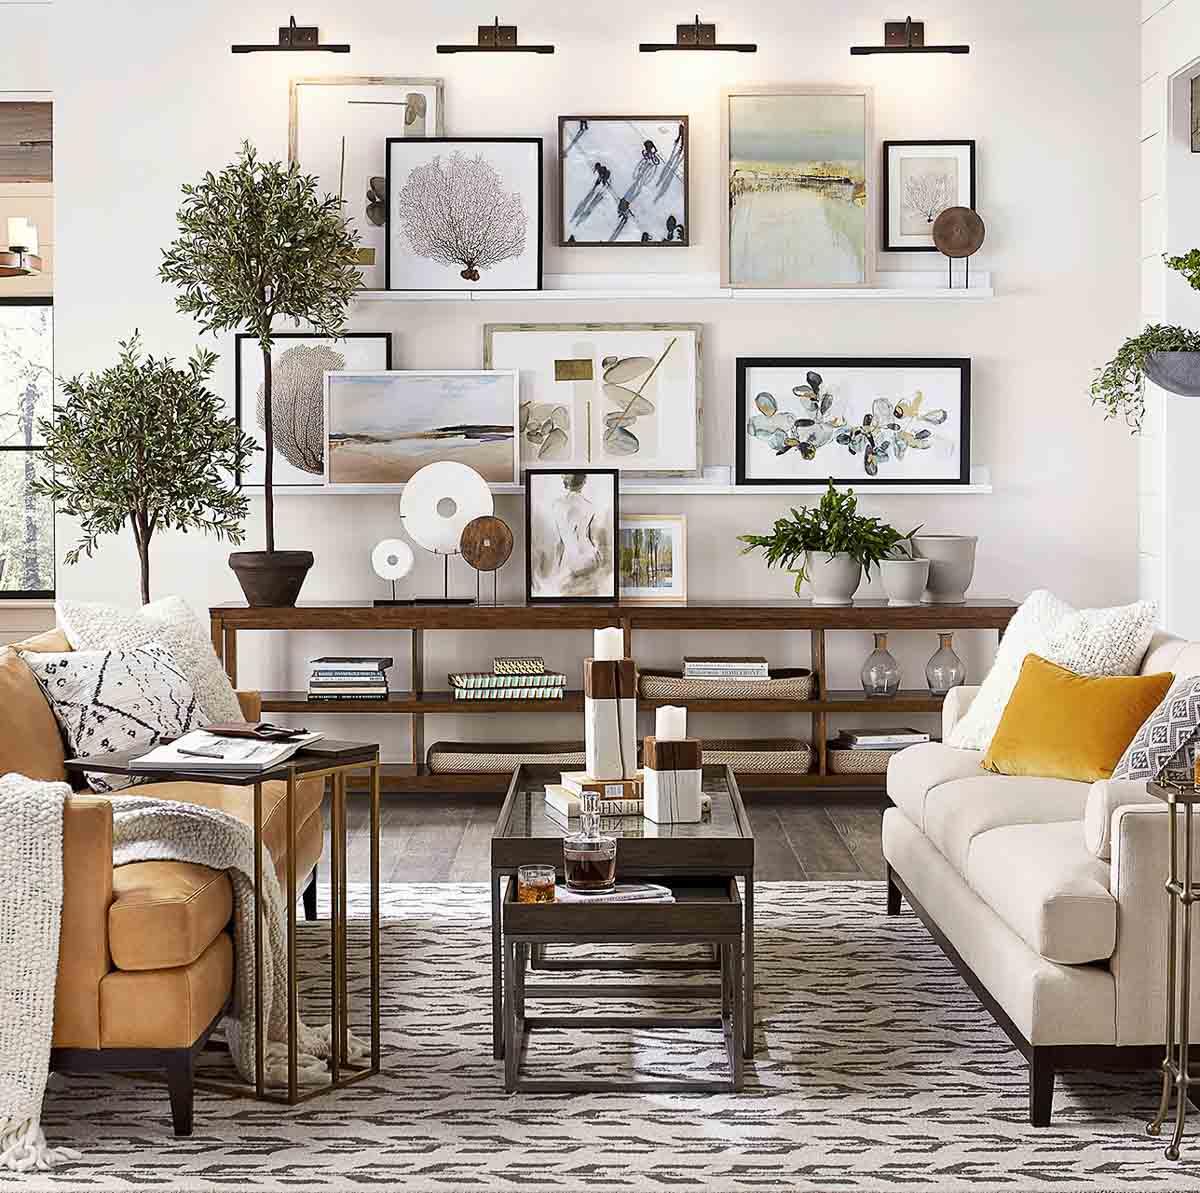
The key to making ledge shelf gallery wall work is to (1) choose a mix of frame sizes so that the height of the artwork varies from frame to frame and (2) overlap some of the artwork.
6. The Asymmetrical Trio Gallery Wall
Gallery walls don’t need to be huge! You can create a gallery wall with as little as three pieces. A small bare wall is perfect for a gallery wall with an asymmetrically arranged trio of art pieces. With this style of gallery wall, select three pieces that complement each other in terms of color, theme, or style. When arranging them on your wall, aim for a balanced but not symmetrical look. An example is the asymmetrical trio I hung in our breakfast nook in our previous home:
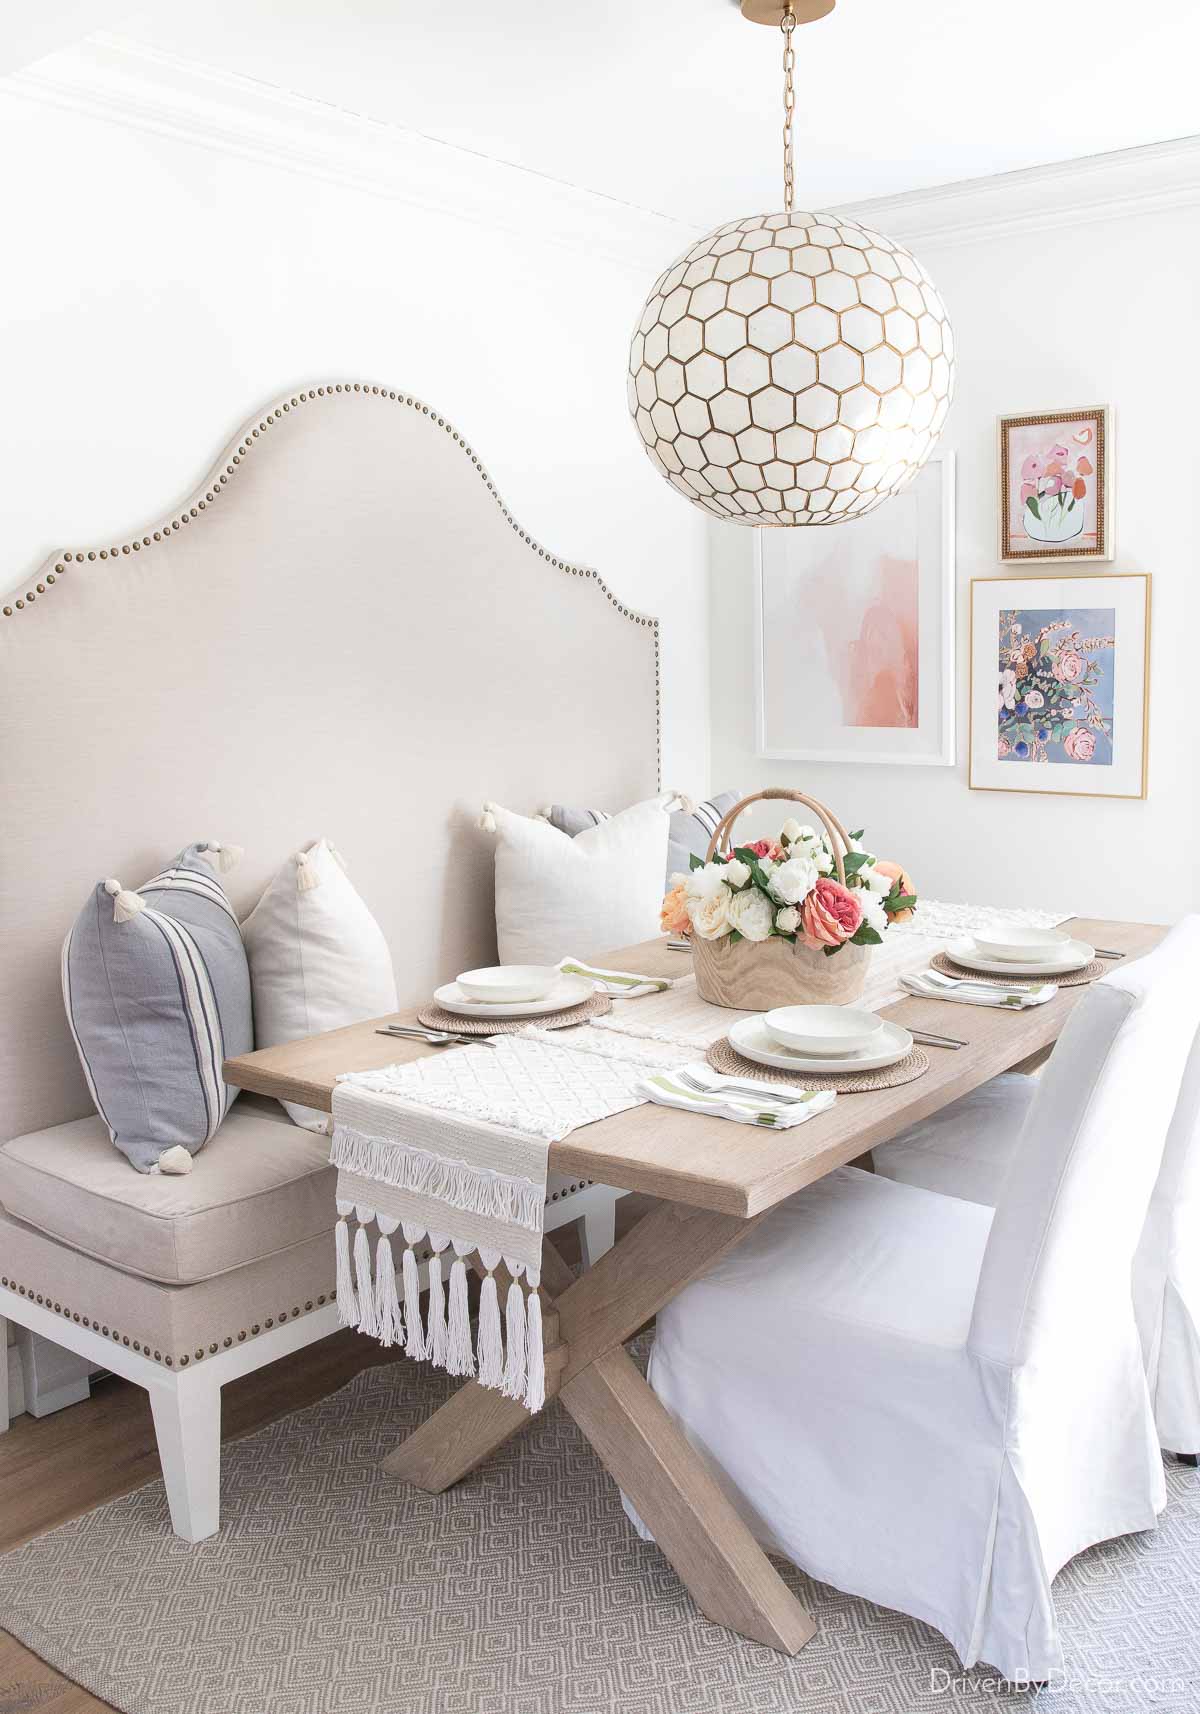
Sources: Dining table | Capiz pendant (22.5″) | Geometric gray rug | DIY banquette seating | Slipcovered dining chairs (similar)
The trio is anchored by {this blush abstract art} that’s a 20″ x 28″ print framed to 23″ x 31″. Flanking it are {this blue floral art} that’s a 14″ x 17″ print framed to 18″ x 21″ and {this pink floral art} that’s 11″ x 14″:
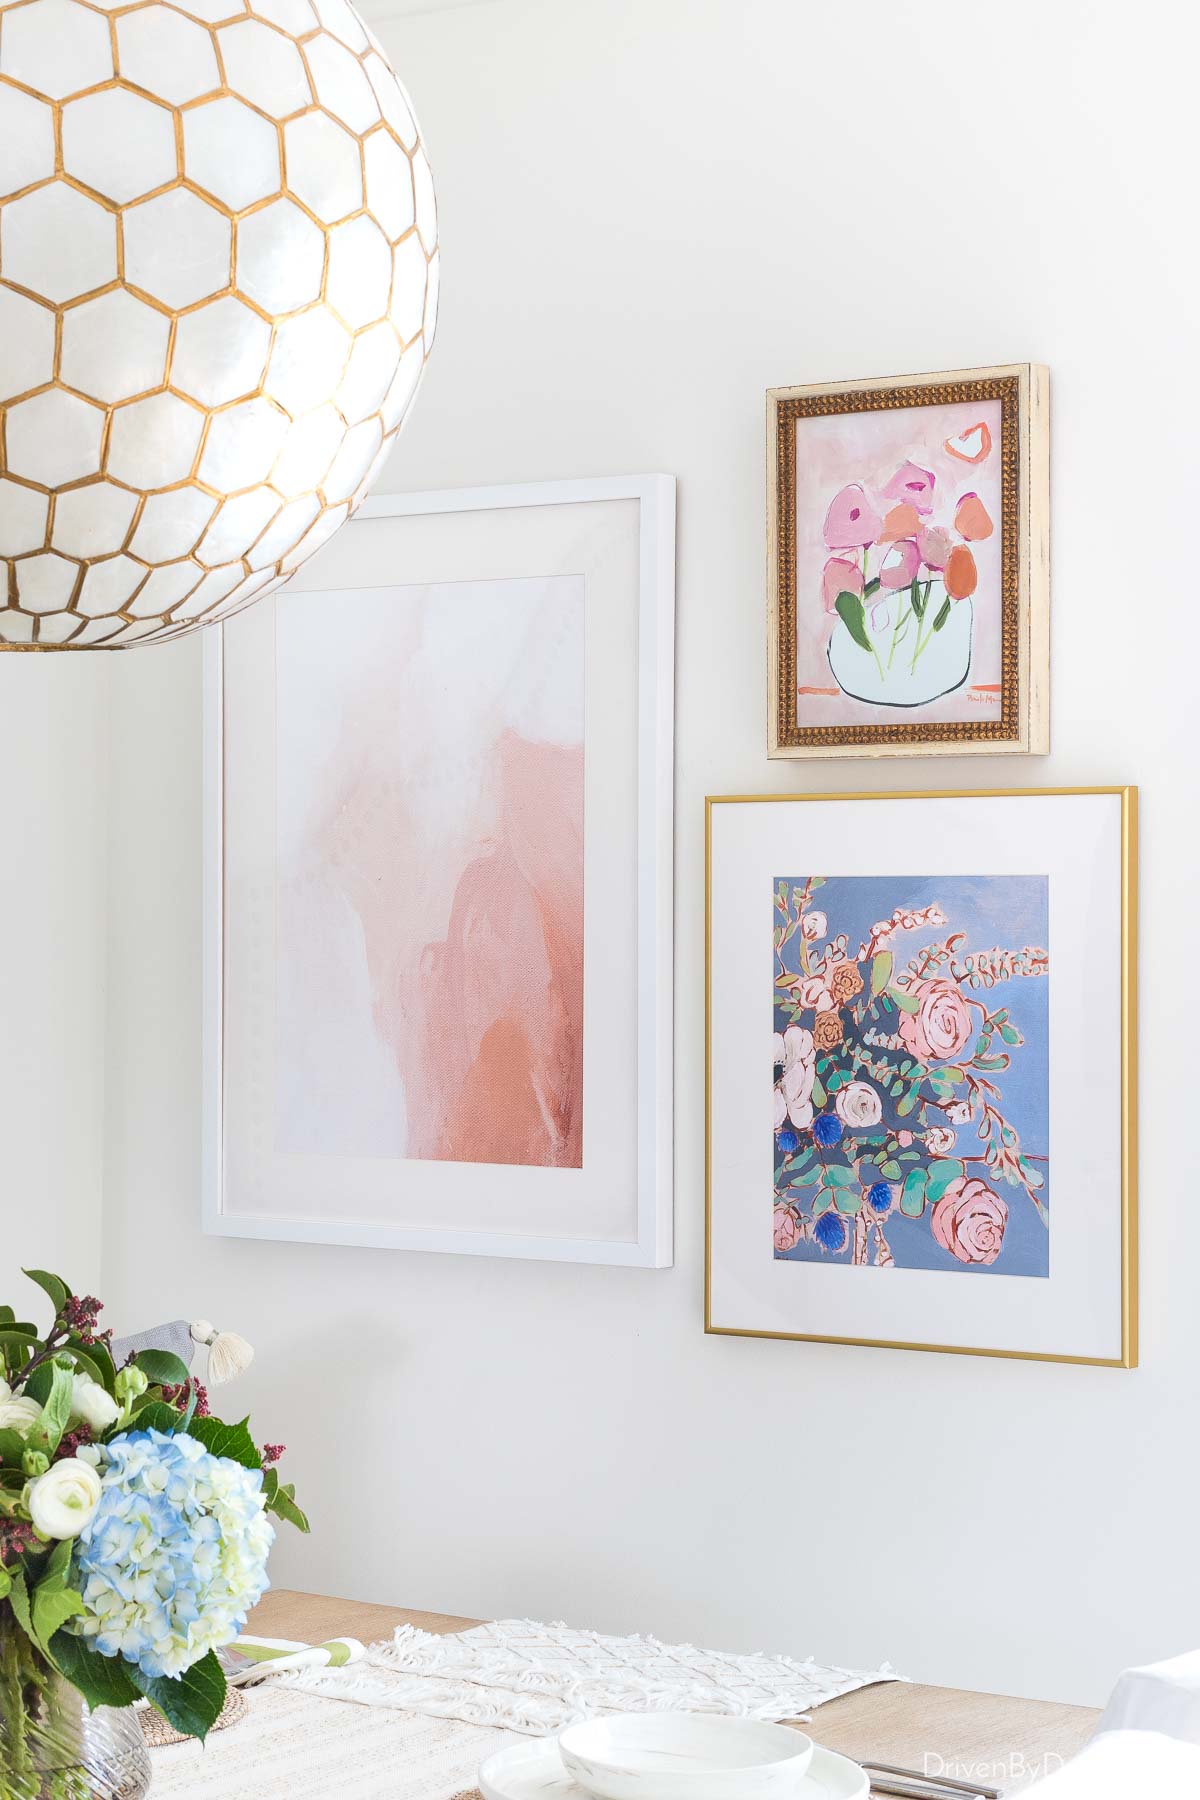
Two other spaces in your home where an asymmetrical trio is likely to work well are a reading nook or a small bathroom.
7. The Eclectic Mix Gallery Wall
If you love a collected look, a gallery wall with an eclectic mix might be perfect in your home. This layout is all about mixing and matching different types and styles of artwork to create a cohesive, yet playful look. You can include paintings, prints, photographs, sculptures, textiles, or any other type of artwork that speaks to you. Anything is fair game with a mix of shapes, frame sizes and types, and colors being used together to create visual interest.
I created an eclectic mix gallery wall over the credenza in our office in our previous home using a combination of framed art prints, mirrors, and sculptural pieces:
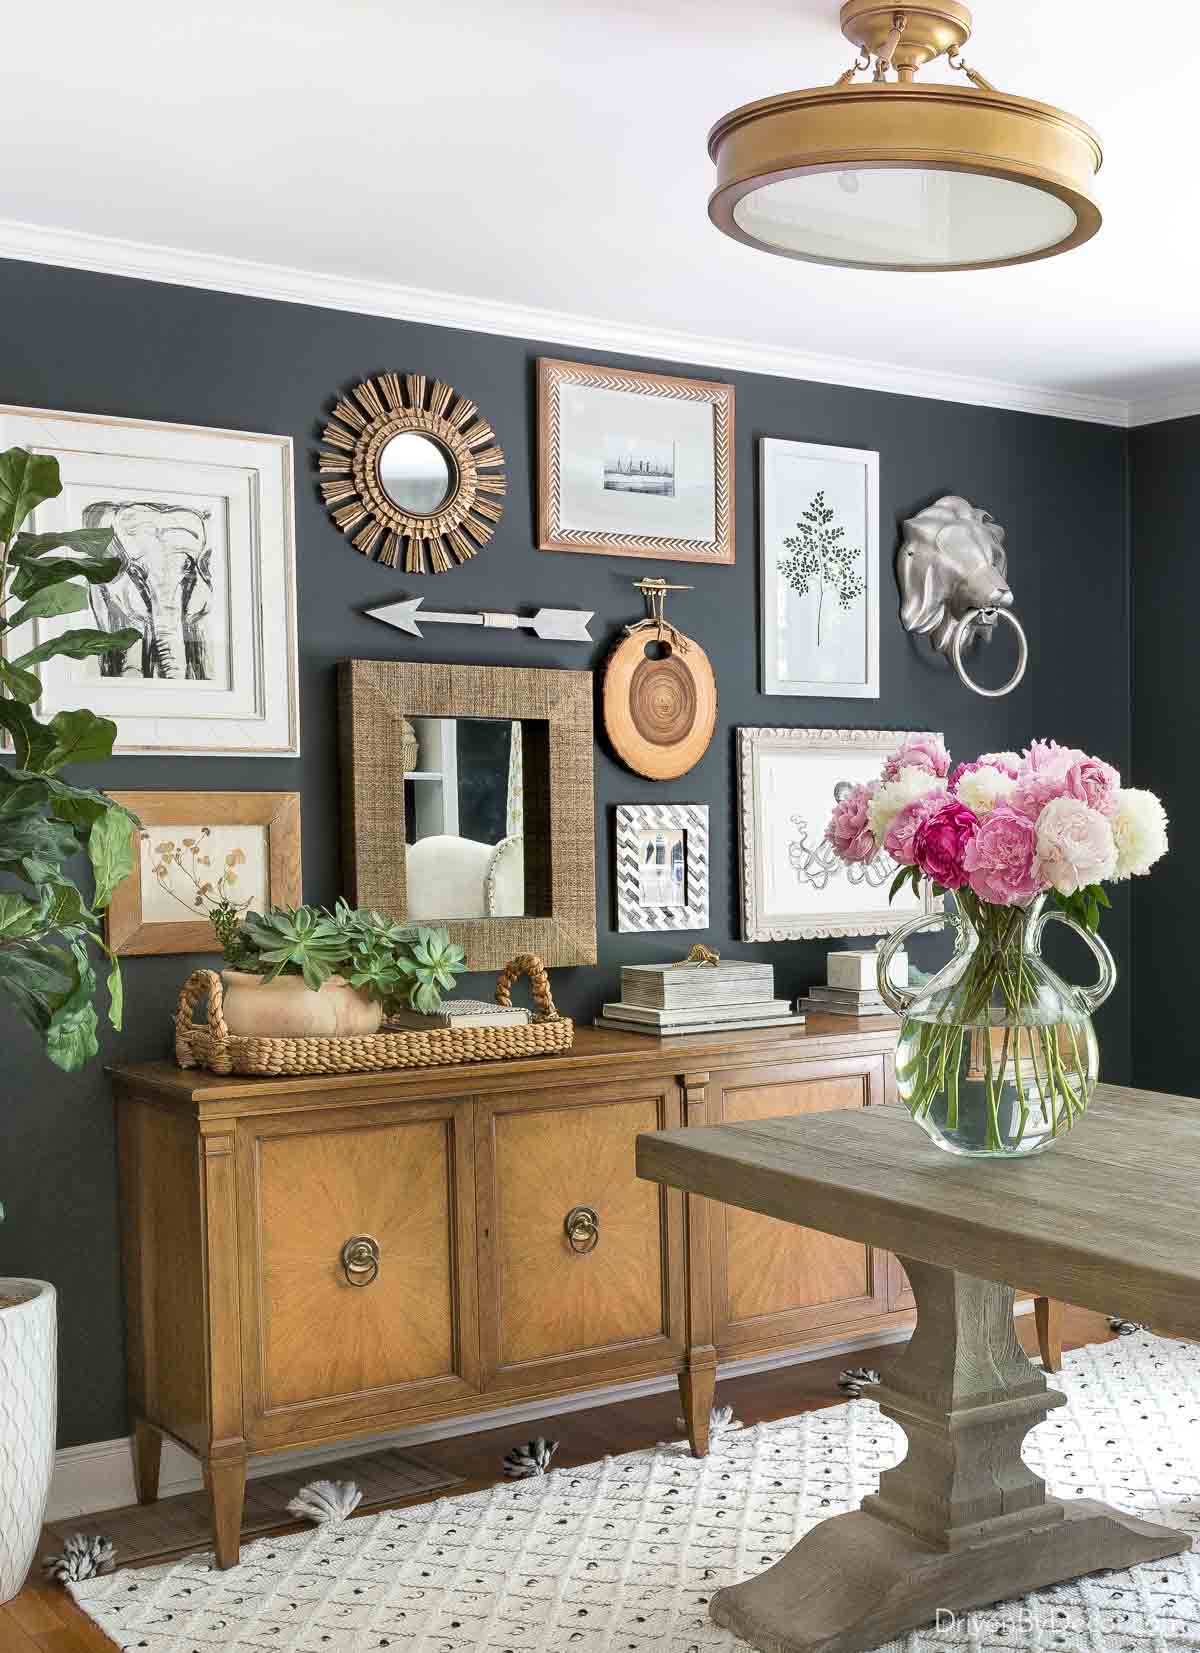
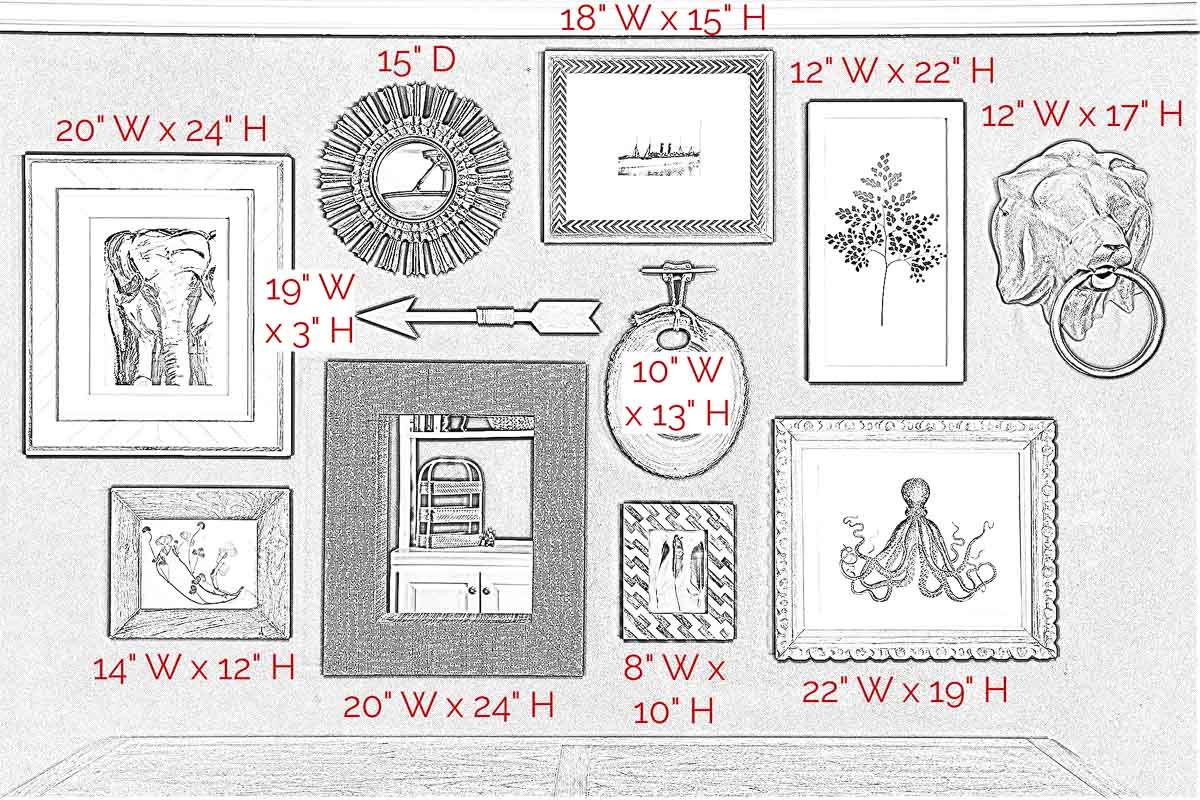
The art included flea market finds, sentimental pieces (such as the framed photo of the ship that my grandparents immigrated to the US on), DIY art (such as the framed feathers), and a few new pieces (including the lion head door knocker). The black walls (painted Benjamin Moore Nightfall) made each art piece pop! These are the sizes of art used if you’d like to recreate a similar look:
8. The Vertical Stack Gallery Wall Layout
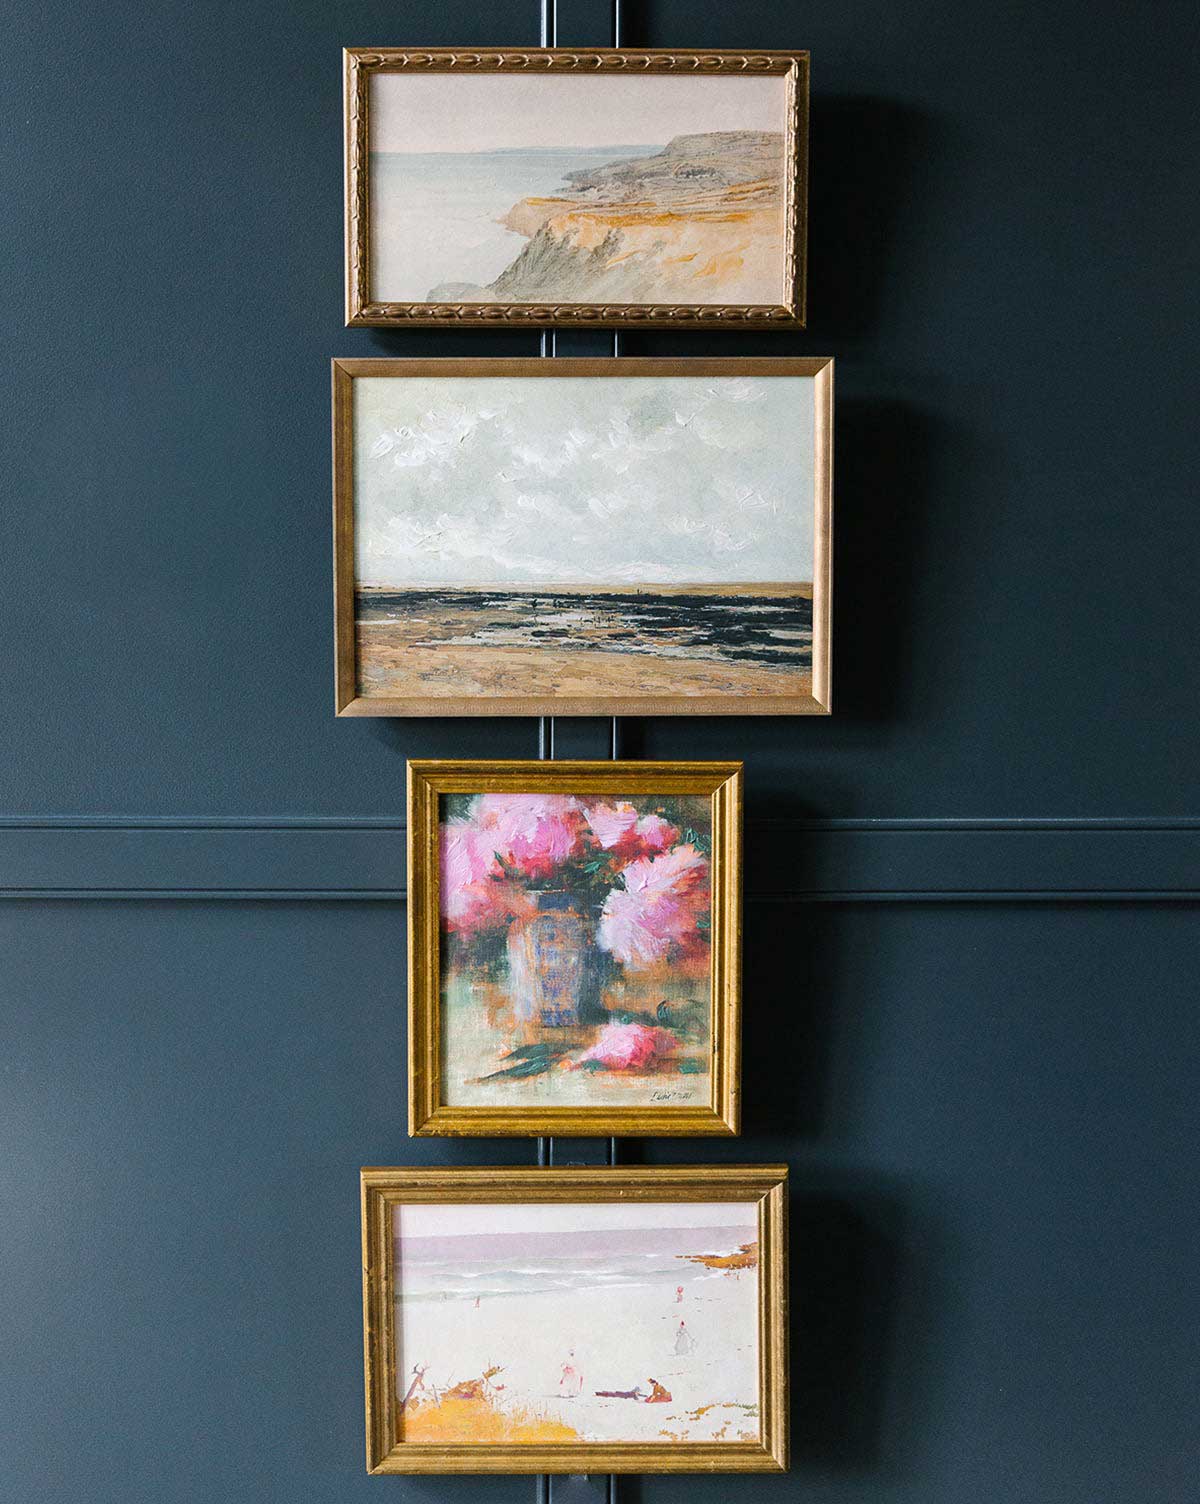
The Vertical Stack Gallery Wall Layout is a great option for adding art to an area that has much more vertical than horizontal space. It involves stacking a series of differently sized art pieces one above another, with each piece centered in the middle. It can be especially eye catching if your vertical stack is centered on a piece of molding, as seen {here} in this gallery wall of four art pieces by Studio McGee:
9. The Layered Gallery Wall Layout
One of my favorite gallery wall layouts involves a layered look with art pieces overlapping one another. It can be something very simple, such as this gallery wall where five framed prints are hung on the wall and a sixth piece is sitting on the buffet, overlapping one of the framed art pieces:
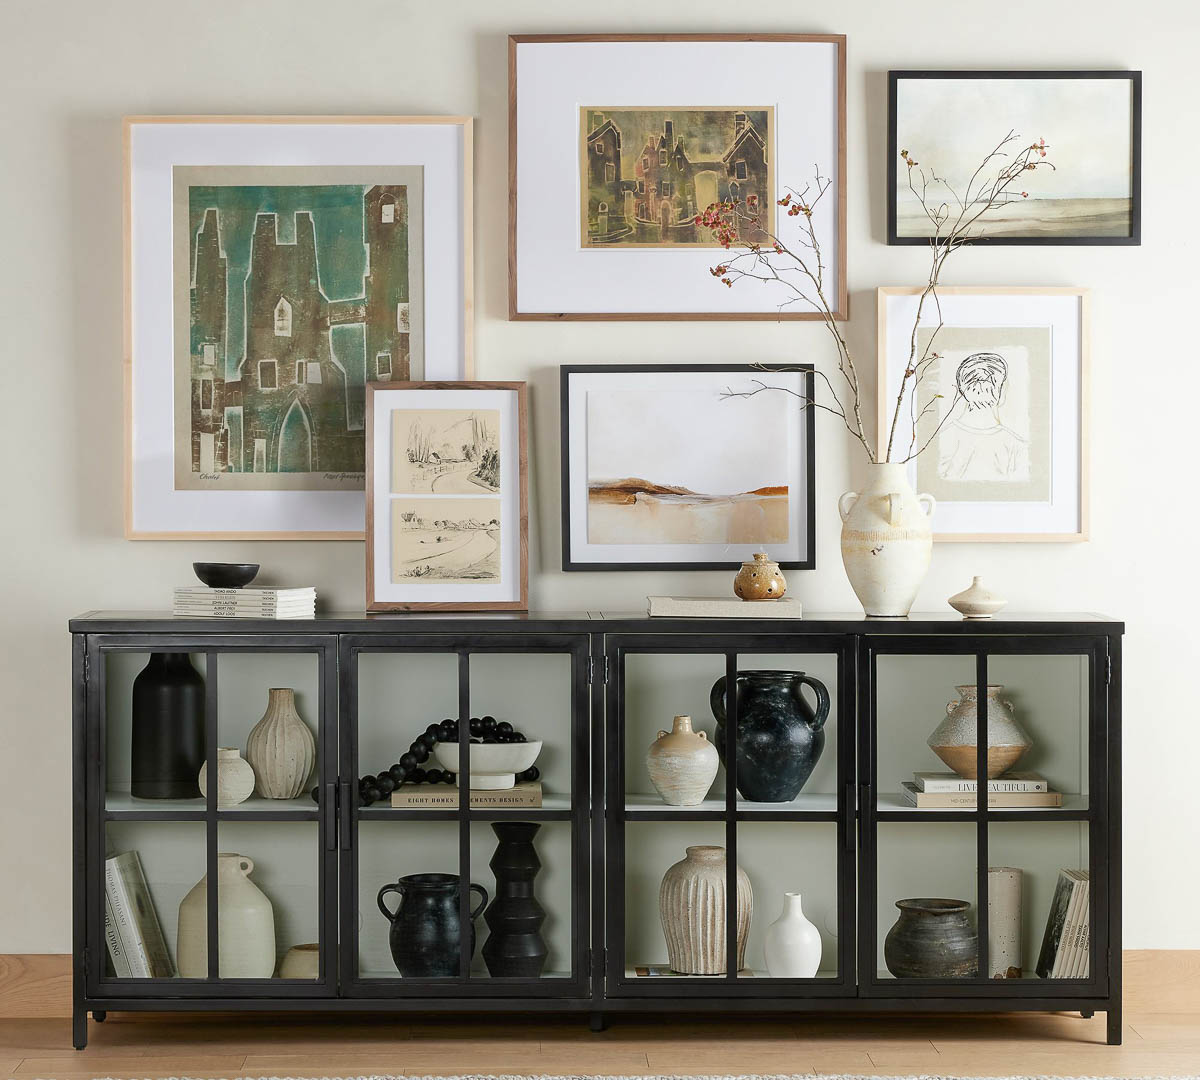
If you take a minute to envision what this gallery wall would look like without that extra layered piece, you can see what a difference it makes in adding interest to the design. Pottery Barn offers all six pieces as a set or sold individually {here} and has a listing for the black buffet {here}.
You can also achieve a layered look by strategically layering objects in front of your artwork that’s hung on the wall. One of my favorite examples is the beautiful arrangement of art in {this living room}:
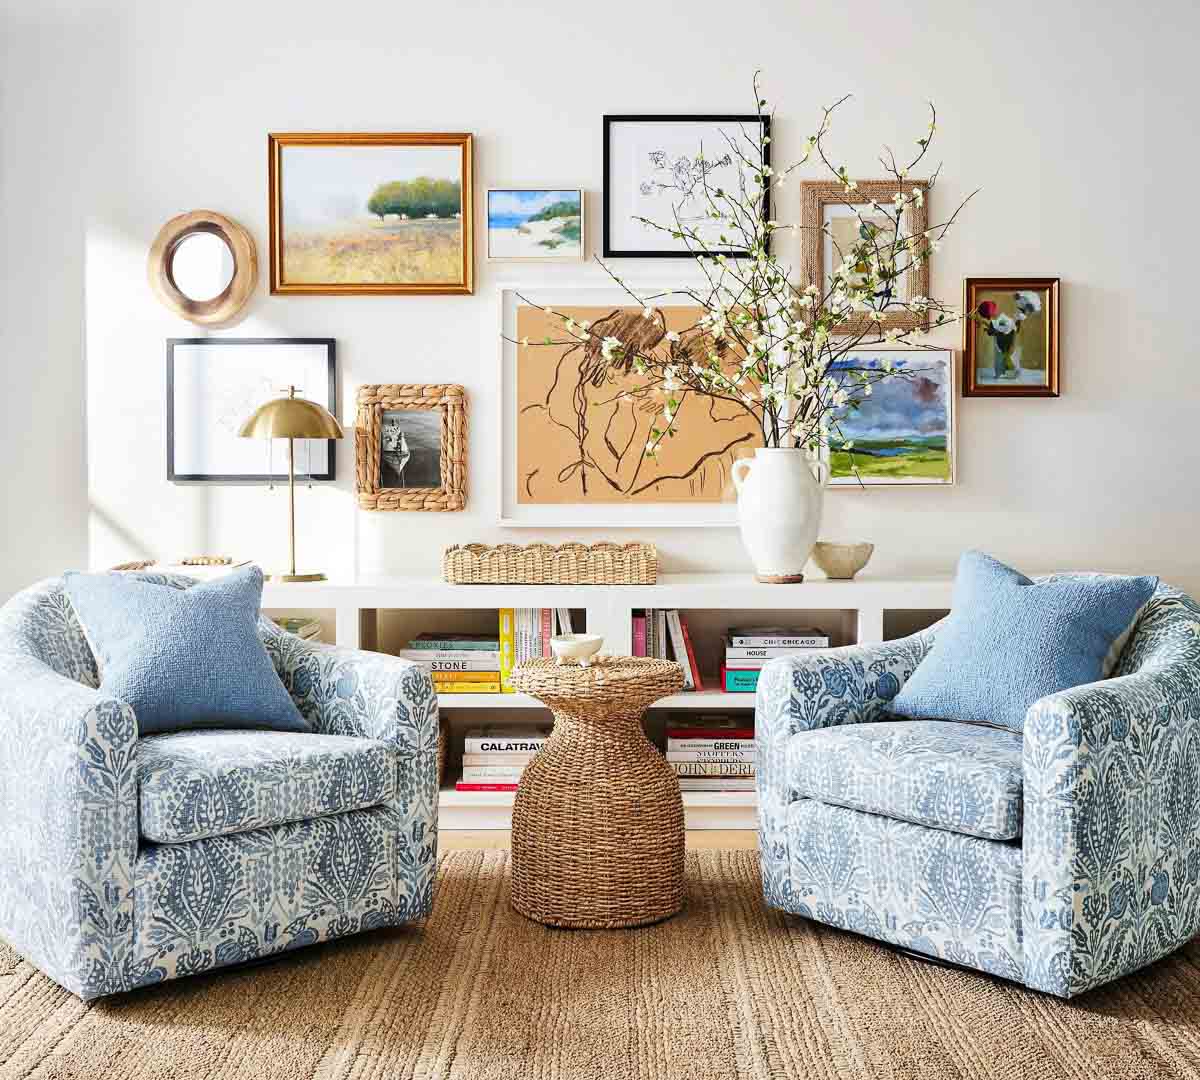
The lamp, scalloped tray, and vase of large branching flowers on the console in front of the art hung on the wall combine to create an absolutely gorgeous layered look. These are the approximate sizes of art pieces used if you want to recreate the look in your own home:
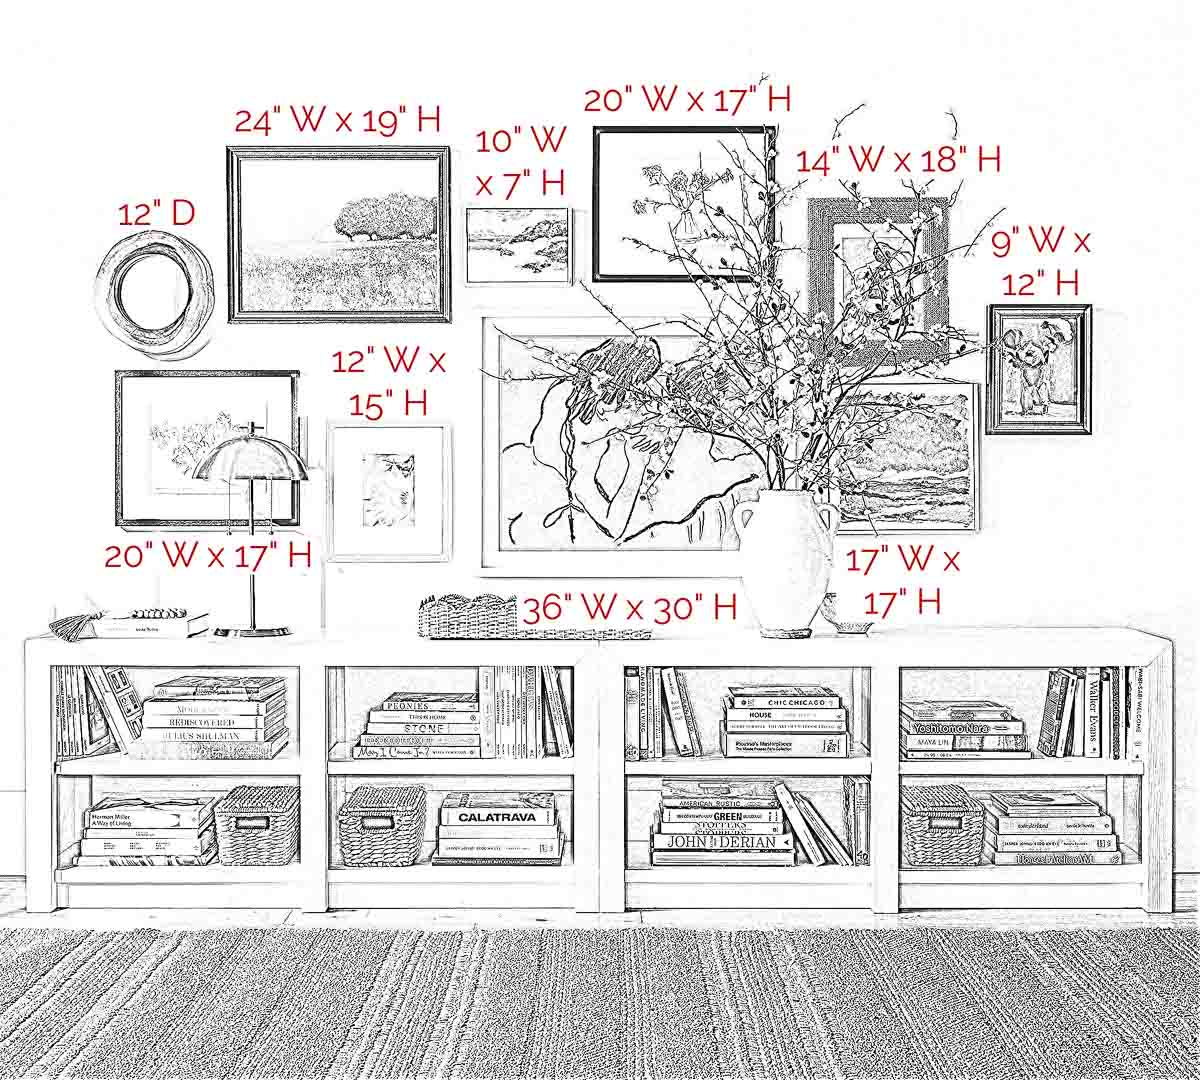
10. The Big Statement Gallery Wall
And last (but definitely not least) is the big statement gallery wall. This is the most difficult one to pull off, but it’s also the most impactful. This type of gallery wall is ideal for larger spaces such as living rooms or larger dining rooms. To anchor your statement gallery wall, start with a larger piece in the center and then build around it, as was done with the large woven wall basket in {this living room}:
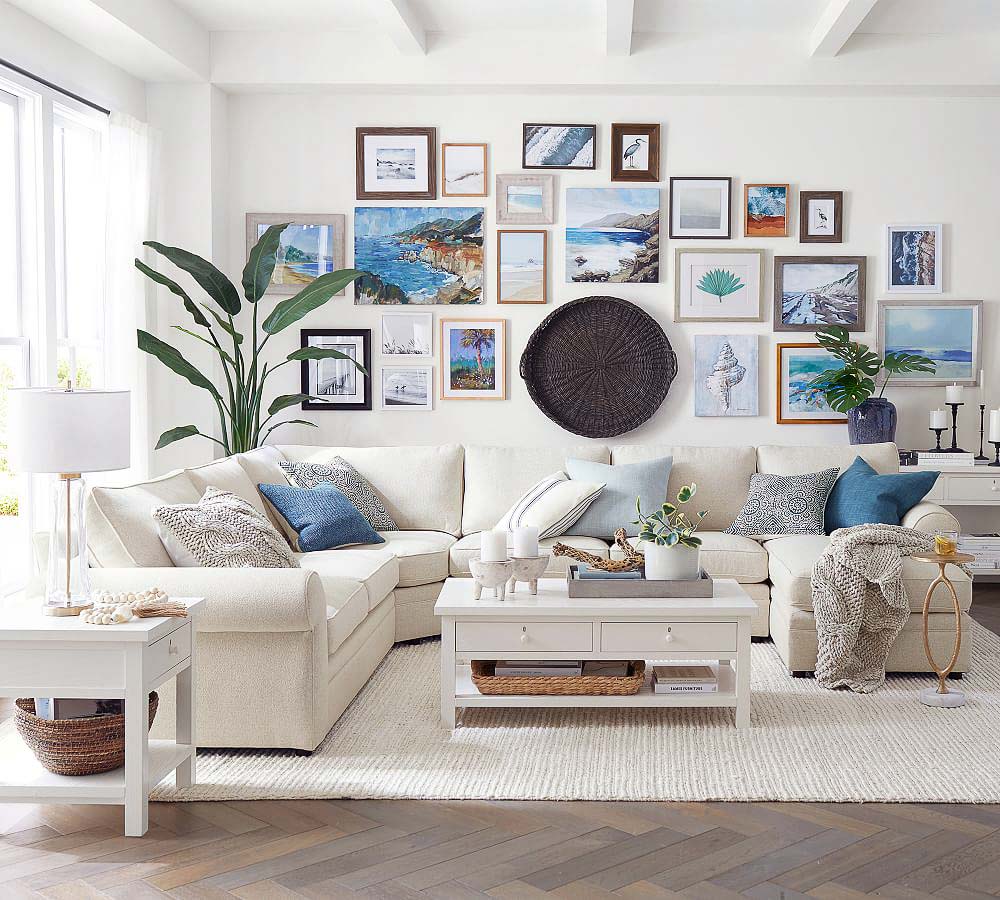
These are the approximate sizes of the art pieces if you want to recreate the look:
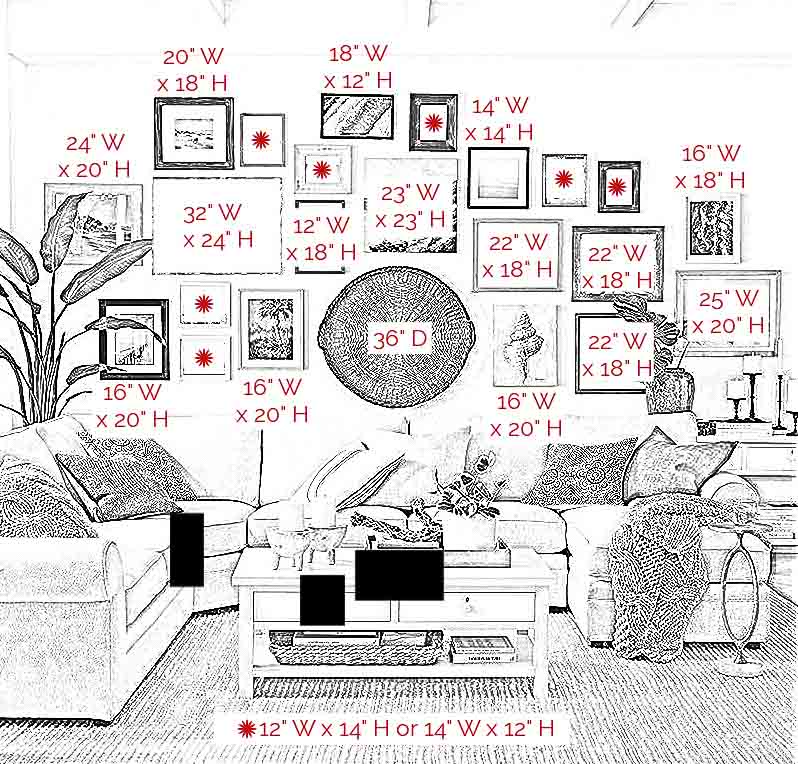
Now that you’ve seen all 10 gallery wall layout options, your possibilities are endless. You can mix and match layouts, textures, and sizes, and add in personal touches to make it unique to your space. Don’t be intimidated; just jump in, get creative, and have fun transforming your space! Here are two simple tips to help you along the way:
1. Use the Floor to Figure Out Your Art Arrangement
Lay all of your art pieces out on the floor and play around with them until you find an arrangement that works. Sometimes you’ll find that taking away a piece or adding another piece or two in a specific size will give you that just-right arrangement. This is exactly what I did when creating the gallery wall of my girls’ artwork above the daybed in our previous home. This arrangement that I figured out on the floor:
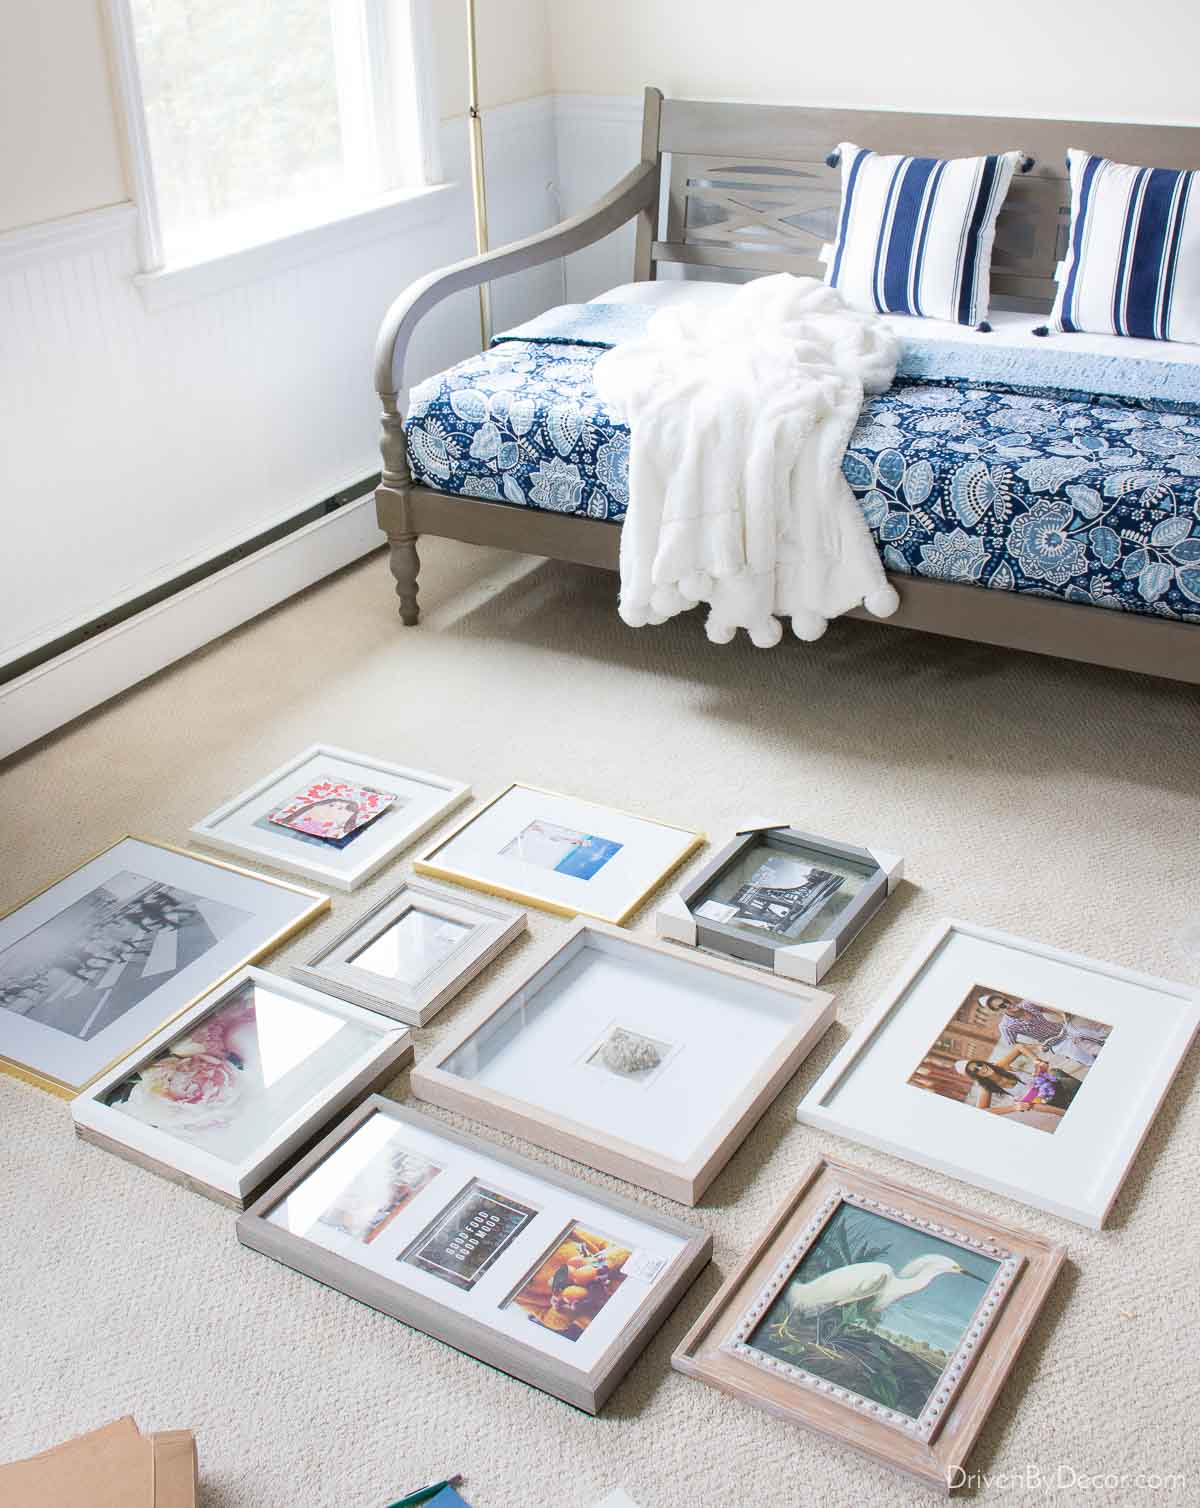
turned into this arrangement on the wall:
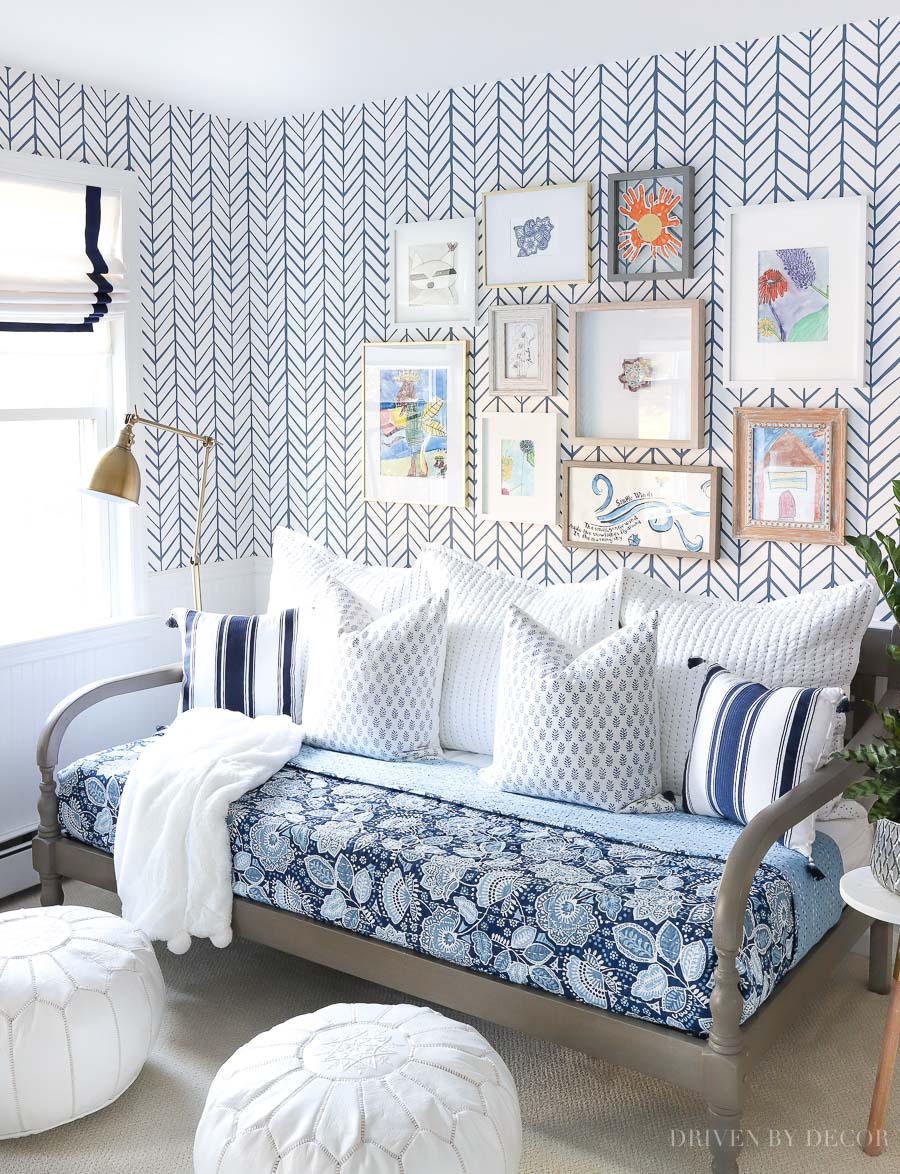
Sources: Herringbone wallpaper (color: denim) | Daybed | White quilted Euro shams w/navy stitch (similar) | Blue & white block print pillow covers | Cozy pom pom throw (similar) | Roman shades | White Moroccan leather poufs
I typically space my gallery wall art pieces about 3″ apart so that’s a good place to start when planning your arrangement. However, it’s not a hard-and-fast rule. Unless you’re creating a grid gallery wall, some art pieces can be closer together and others farther apart, depending on what looks right to your eye.
2. Use Kraft Paper to Help With Hanging
To take your art arrangement from the floor to the wall with no extra holes in the wall, tape up traced templates of your art (a roll of wide kraft paper works great for this) until you get it just right. I did this in our breakfast nook with the asymmetrical trio of art:
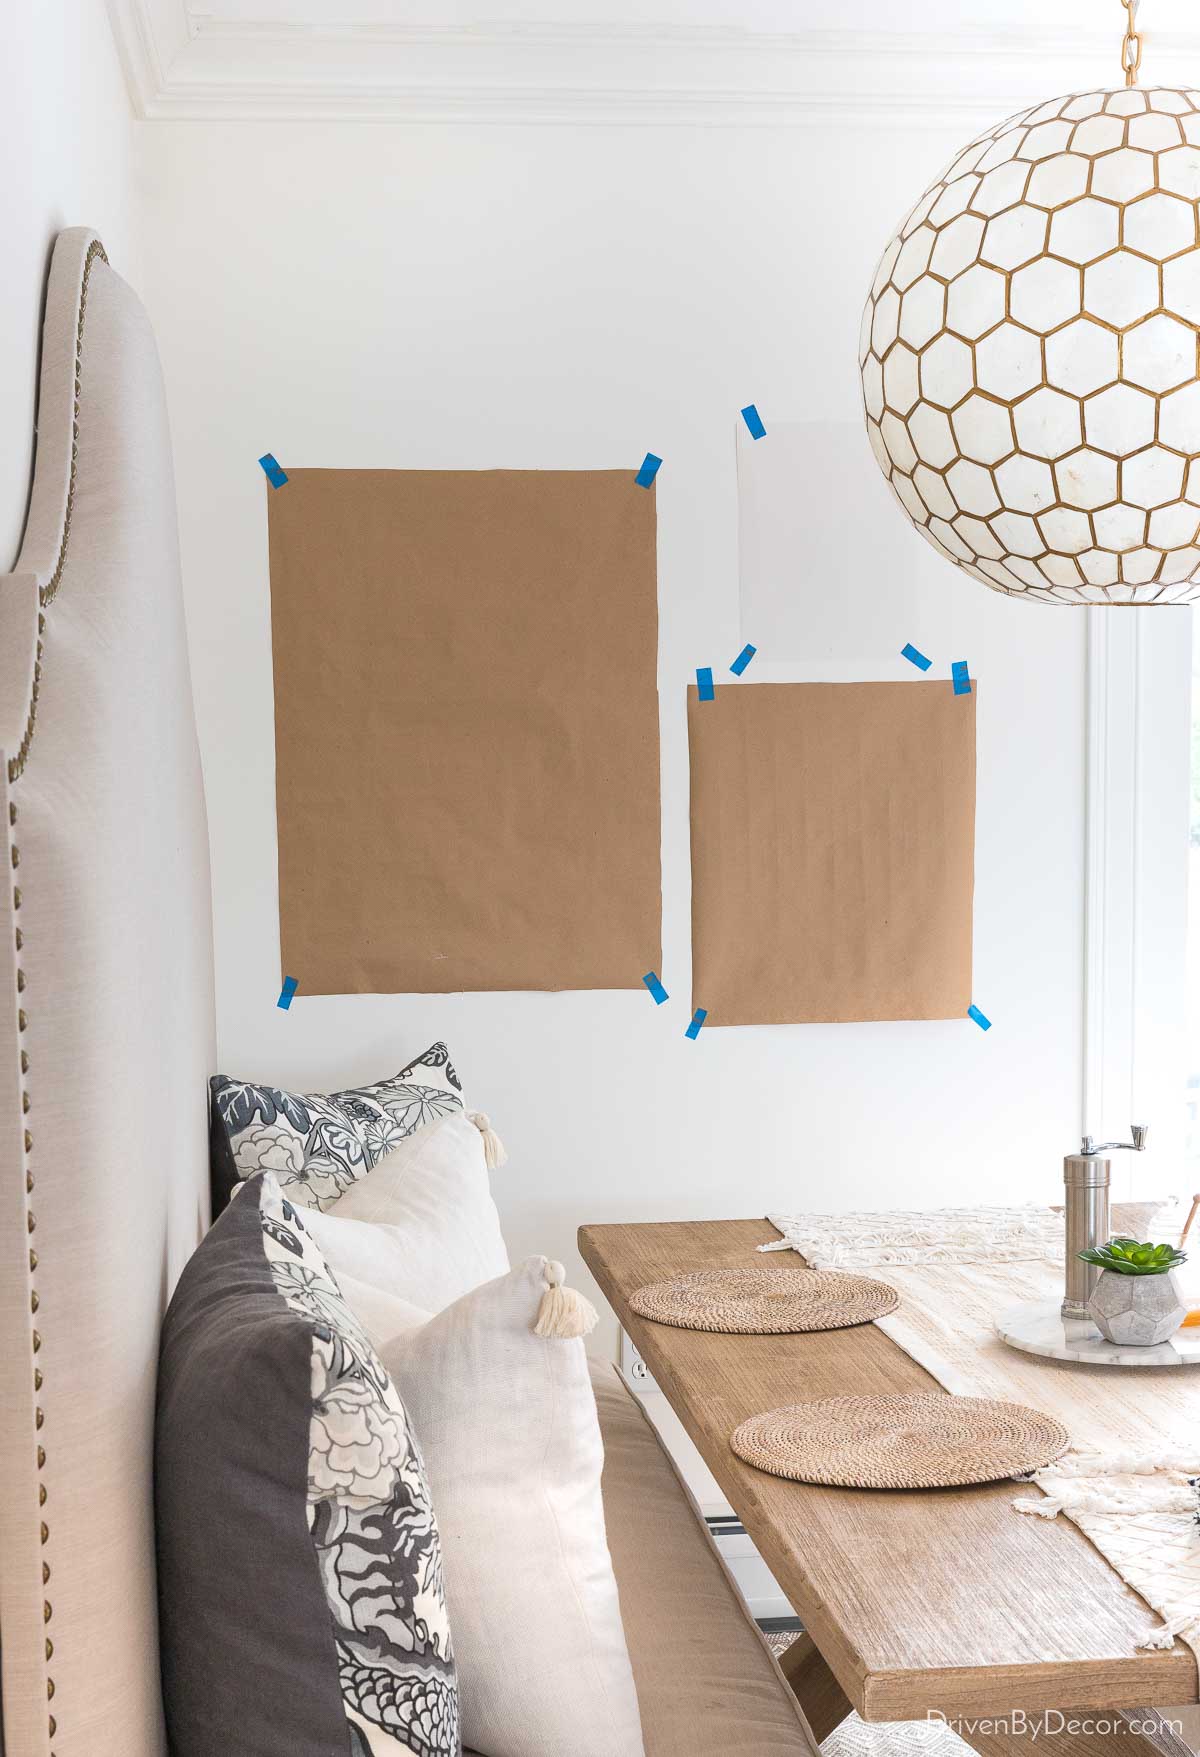
It takes a little more time on the front end but saves you time overall because you’ll never have to worry about patching and painting holes due to messing up when hanging your art on the first try. I also love that I can use the kraft paper templates to mark my centerpoint and where to hammer my nail, so I don’t have any pencil marks on the wall. You can nail through the kraft paper and then just tear it away. See my post on how high to hang pictures for tips on getting your artwork height right.
I’ll wrap up this post with one final option if you want to make gallery wall creation SUPER simple! Framebridge has a variety of gallery walls to choose from {here} where you can upload your digital photos and preview your full design. Then they’ll custom frame each photo and ship your framed photos to you along with a life-size template to tape to the wall for no-fail hanging.
I hope you got some inspiration from today’s post! As always, I appreciate you stopping by!


