I love the look of flocked Christmas trees with the appearance of a light dusting of snow and have thought about getting a new flocked tree for our family room for years. But the tree we already have is a beauty and the perfect size for our room so it didn’t seem worthwhile. Then I realized that I could get that snow-covered look without the expense of a new tree by flocking the Christmas tree I already had so this year I went for it! It was so easy – today I’m sharing the step by step of how to flock a Christmas tree in case you’d like to try it too! (post includes affiliate links – full disclosure statement available {here})
Let’s kick things off with the step by step of what to do and then I’ll answer some common questions and show you my finished tree (I got it all decorated up after I was done flocking it!)…
Step 1: Gather Your Supplies
The supplies that you’ll need to flock your Christmas trees are pretty minimal: flocking powder (I used a 2 pound bag of {this snow flocking powder}), fine mesh kitchen strainers (I used {this set of four strainers}), a spray bottle of water (you can get glass spray bottles with silicone sleeves similar to mine {here} but any spray bottle will work), and a bowl to rest your strainer in:
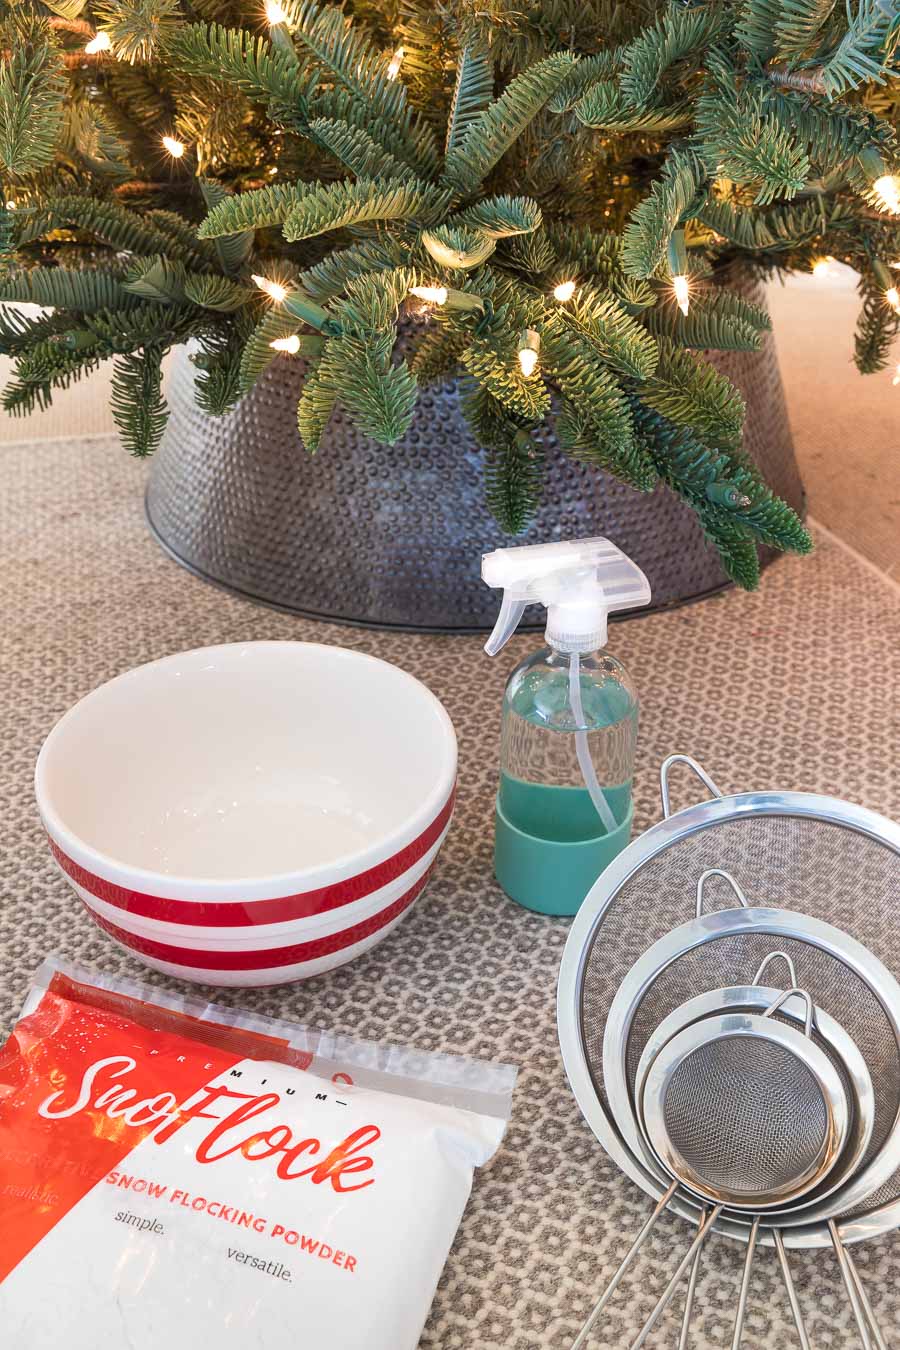
The snow flocking powder sells out early every year so snag it soon if you’re thinking about trying it! If you’re going to be flocking your tree indoors, you’ll also want some thin plastic drop cloths (I used {these}) and painter’s tape to protect your walls and floor. Also grab a step stool, a mask, and a pitcher of water for spray bottle refills.
Step 2: Assemble & Fluff Your Tree
Flocking can be done on both faux and fresh trees. If you’re flocking a faux tree, assemble it and fluff it like you always should before decorating to make it more full looking. By fluffing I mean fanning out the branches and individual tips so that they go in multiple directions (they tend to be flattened after storage). Here’s what our tree looked like once it was set up and fluffed – it’s a really pretty tree as-is so I was crossing my fingers that I’d love it all the more once I was done:

Step 3: Protect Your Walls & Floor with Plastic If Flocking Indoors
It’s actually recommended that you flock your tree outdoors so if you follow my lead on this one, you’re doing so at your own risk 🙂 I decided to flock indoors because it was a cold and windy day when I wanted to get this done plus I figured that disassembling it outside and reassembling it in our family room would be a pain. I protected the walls, surrounding furniture, floor, and Christmas tree collar with plastic so I could flock it in place:

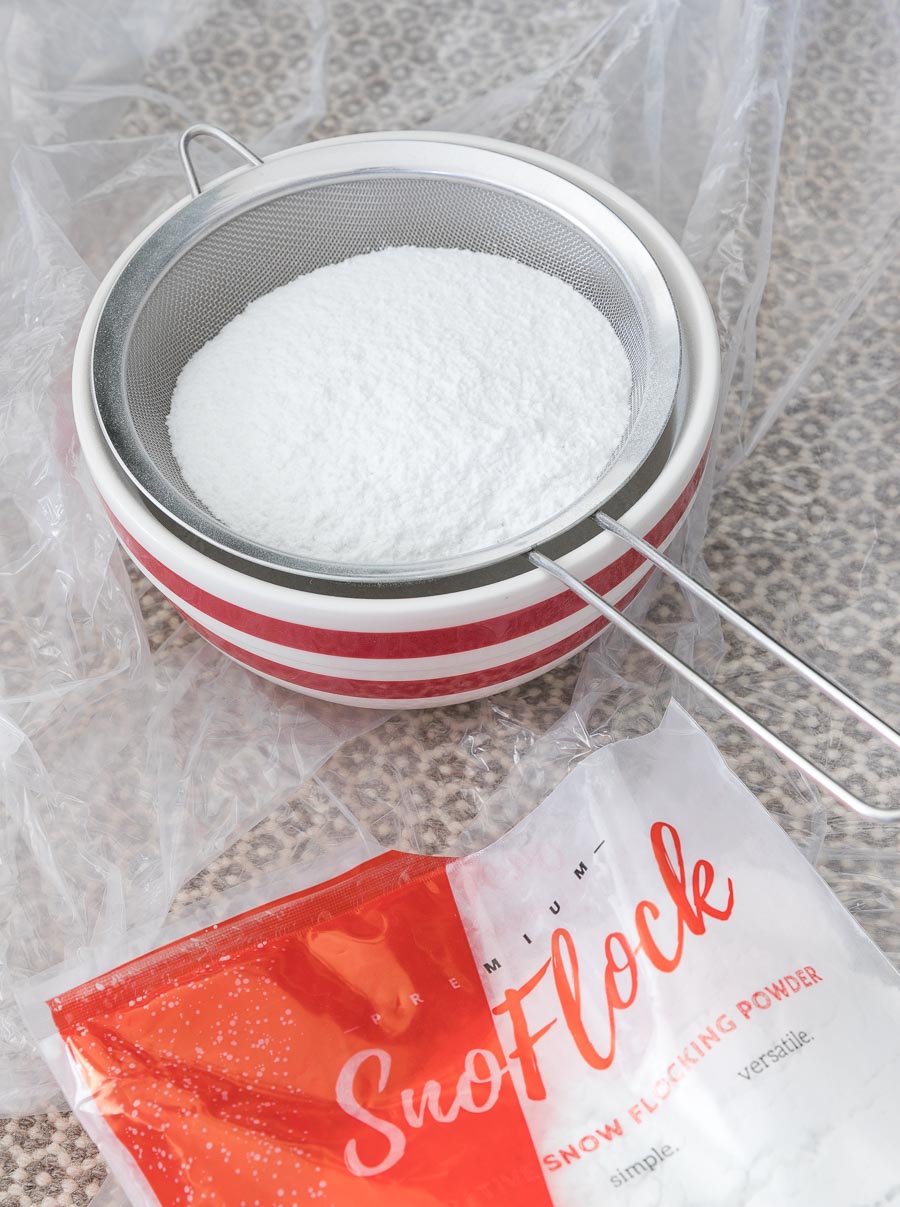
Step 4: Fill a Large Strainer with Flocking Powder & Spray the First Area of Your Tree
With your strainer over a bowl to catch any extra powder that comes through, fill it half full with flocking powder:
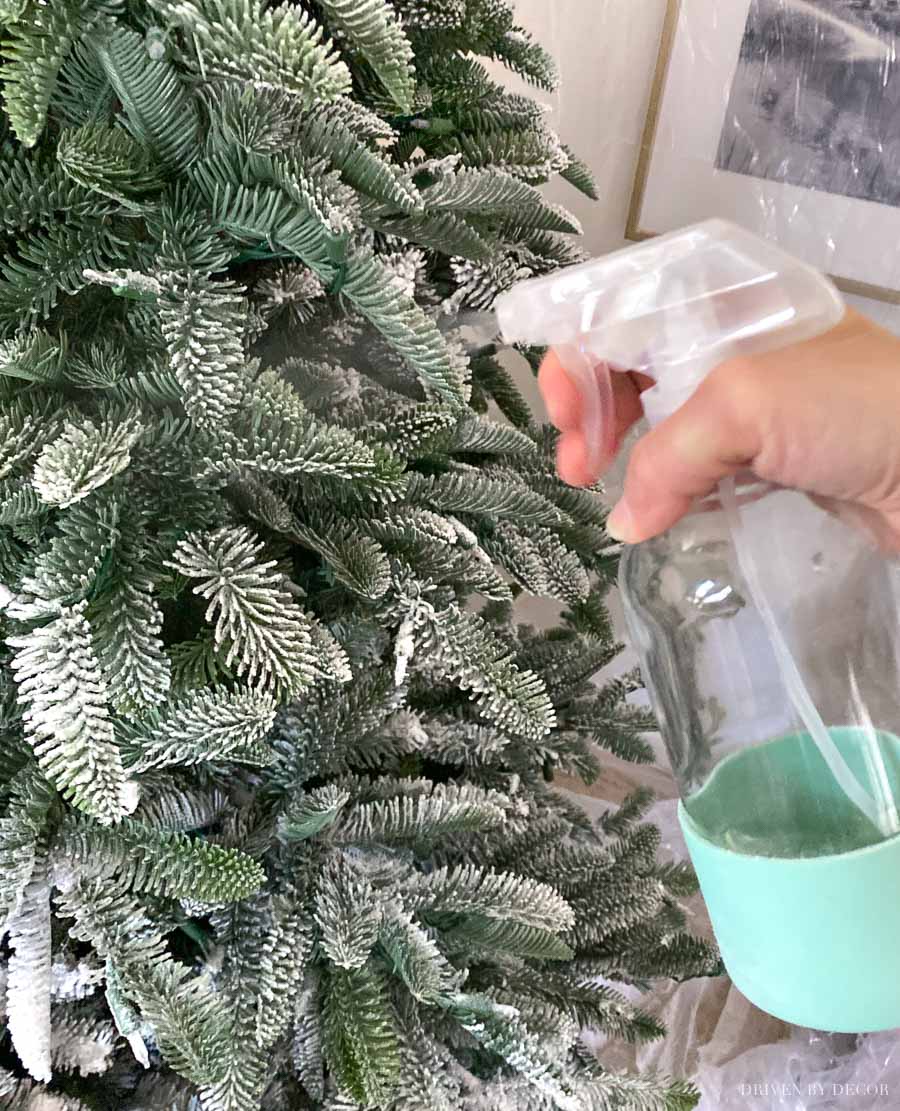
Then starting at the top of your tree, mist the branches in the area where you’re going to begin flocking (I found that it worked best to flock one large section at a time instead of the whole tree). The branches should be damp but not dripping.
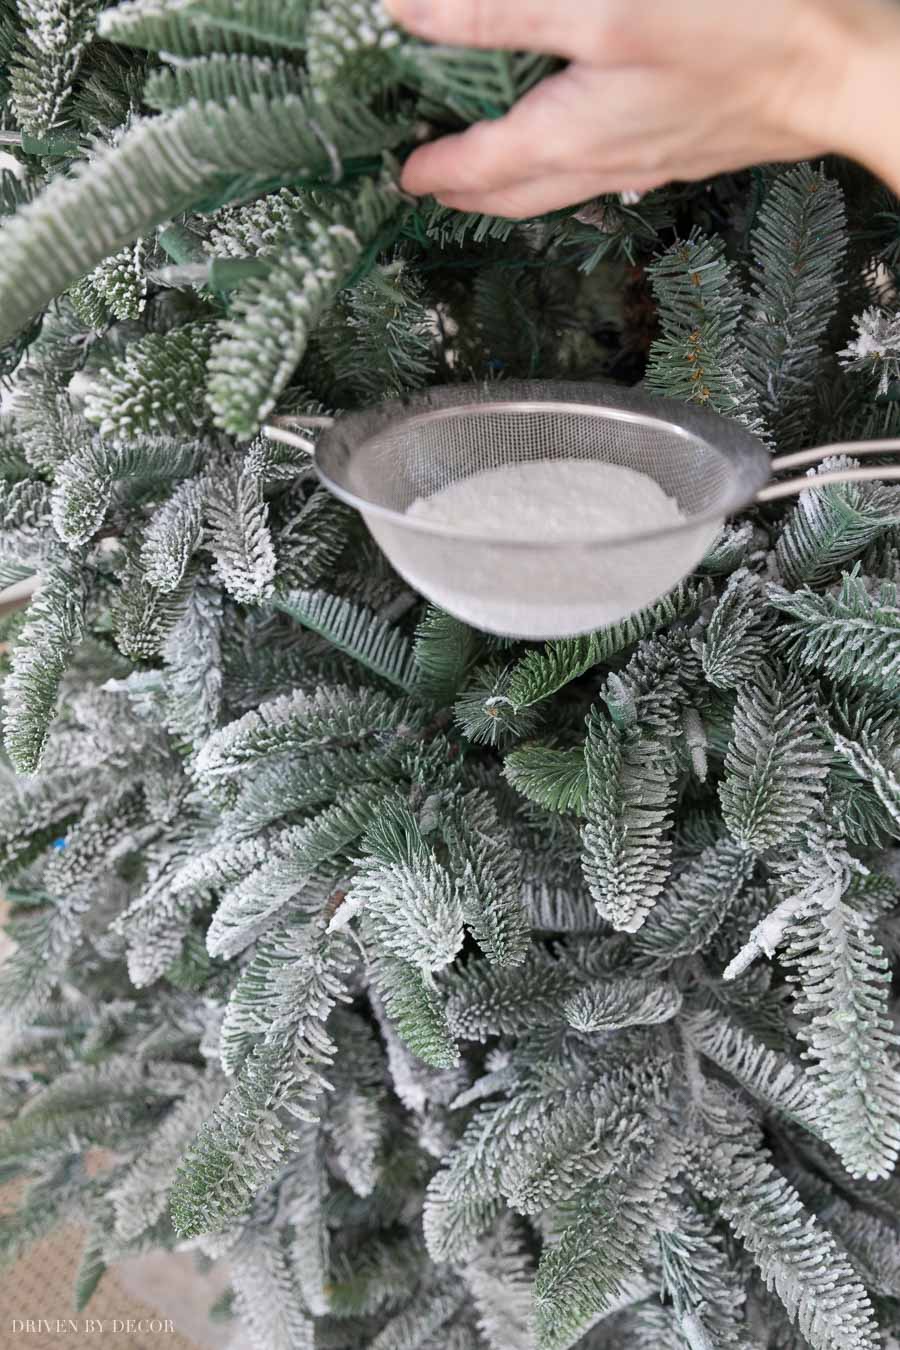
Step 5: Sprinkle & Spray
You’re ready to flock! With your strainer of flocking powder in one hand and your water bottle in the other, sift the flocking powder in the area you’ve already sprayed and as the flock is falling, spray it onto the tree:

Be sure you don’t spray the strainer itself because then the flocking powder will clump up and block the holes of the strainer. You can flock as lightly or as heavily as you want – I wanted just a light flocking for my tree.
You don’t need to flock every little branch all of the way into the inside of the tree because you really won’t see them (and real snow wouldn’t typically make it’s way to the center of the tree either). But once I was done flocking each area, I found it helpful to put some flocking powder in a smaller strainer to cover some of the areas that were a bit harder to reach with the large strainer – sometimes that would include lifting up on some branches above it to give me better access to it:
Step 6: Finish with an Overall Misting to Seal It in Place
Continue on with the same steps until you’ve flocked your entire tree. The flocking process was actually pretty quick – it took me only about 40 minutes to knock out. Once you’ve finished, mist your entire tree with water. This will seal and lock your flocking powder into place. Just like when you first misted your tree, you want it to be damp but not dripping wet.
Step 7: Let It Fully Dry
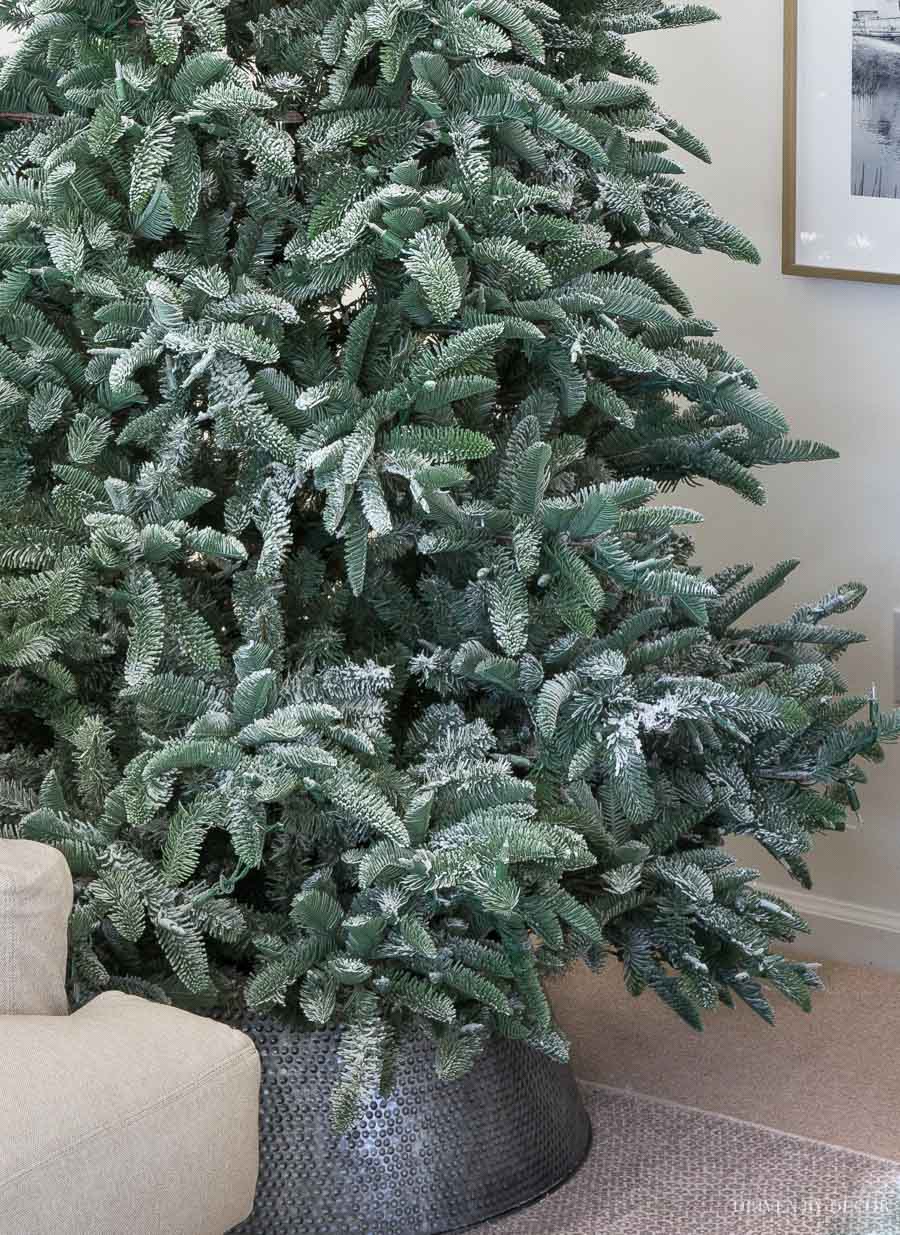
Now just leave your newly flocked tree to dry before doing anything else to it – I flocked mine in the afternoon and it was fully dry when I checked it the next morning. That’s when I carefully removed all of the surrounding plastic and got decorating! This is what my naked, newly flocked tree looked like – I was thrilled since it was just exactly what I had in mind and looked very natural:
Want to save this post?

Step 8: Decorate!
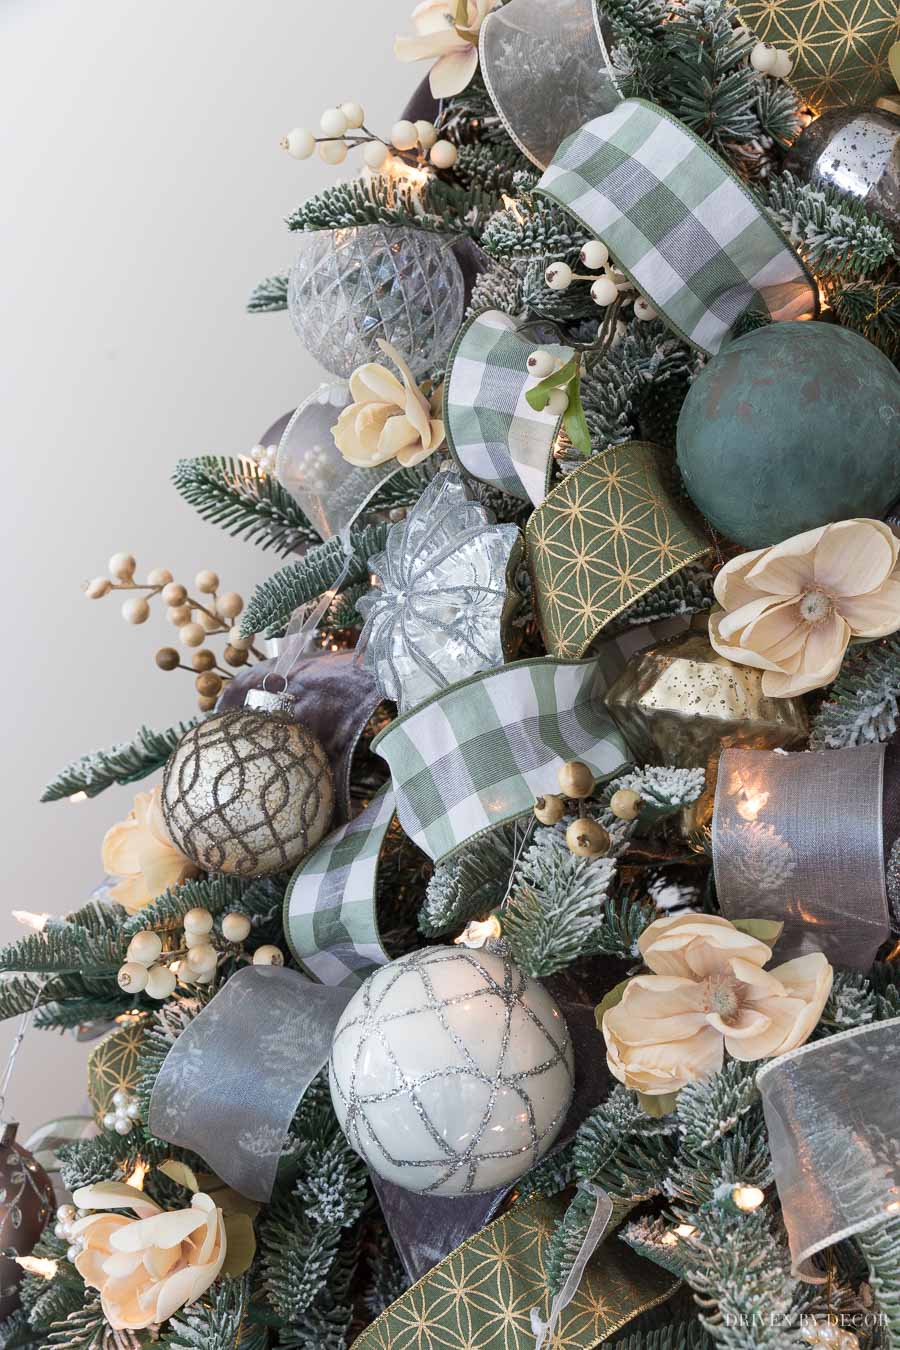
The last step is the fun part – decorate your tree! If you missed it, check out {this post} with the step by step of how I decorate my Christmas trees from my favorite tree collars to how I add my ribbon and more. This year I decorated with a mix of silver, gold, and green using my 4″ gray velvet ribbon I’ve had for years (from Balsam Hill) plus {this gray & white check ribbon}, {this sheer ivory ribbon}, a green & gold wired ribbon (no longer available), and {this sheer silver ribbon}.
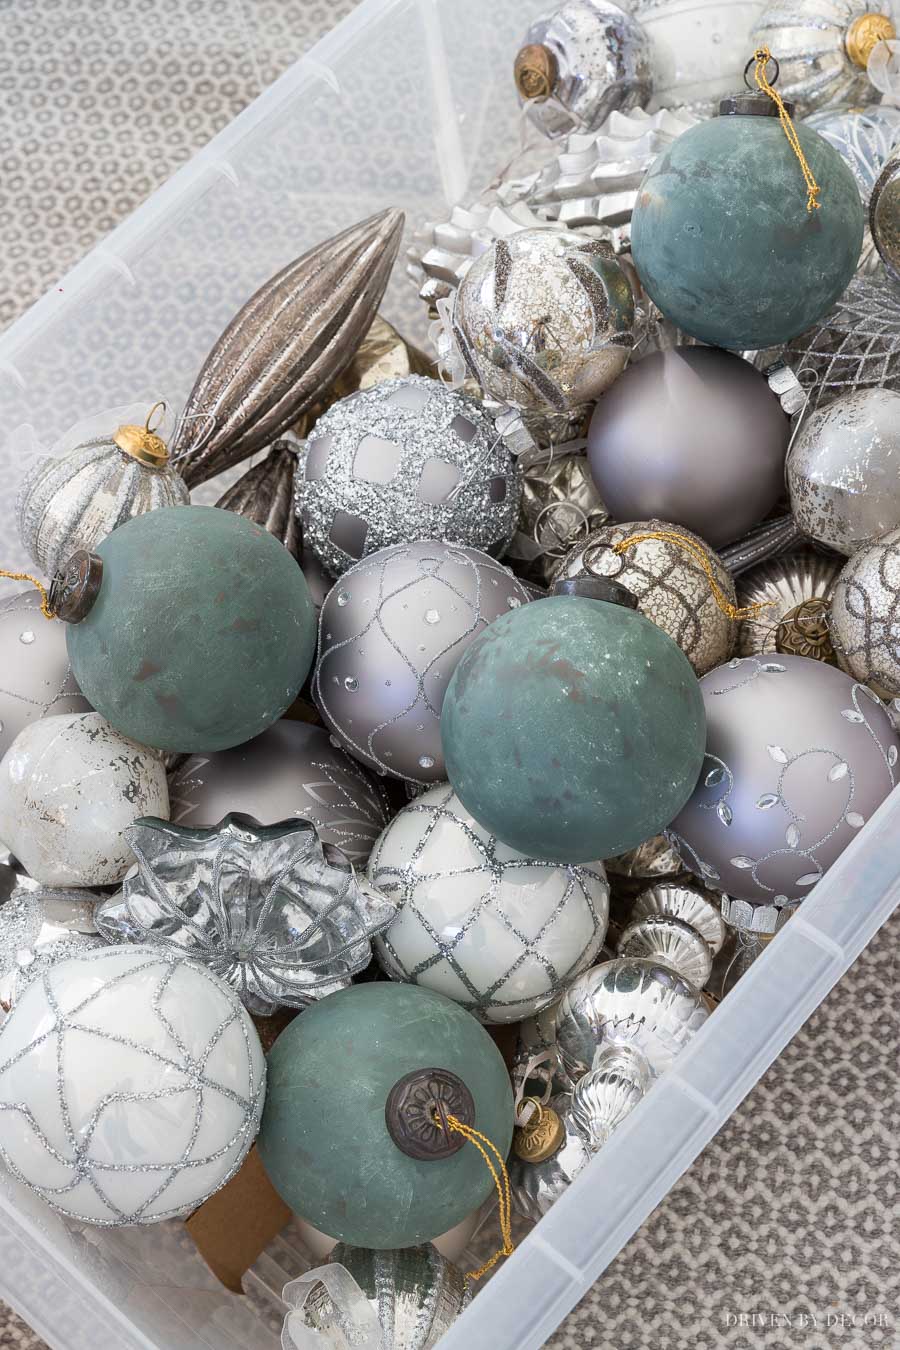
And these are my ornaments, all unwrapped and ready to be hung (silver & gold ornaments are from Balsam Hill & HomeGoods, green ball ornaments are from Terrain):
I’m so happy with how it turned out:
I’ll share more pics once I’ve gotten the rest of our family room decorated but it’s been so nice to have our tree up early – we’re all enjoying it (Cricket included 🙂 ):
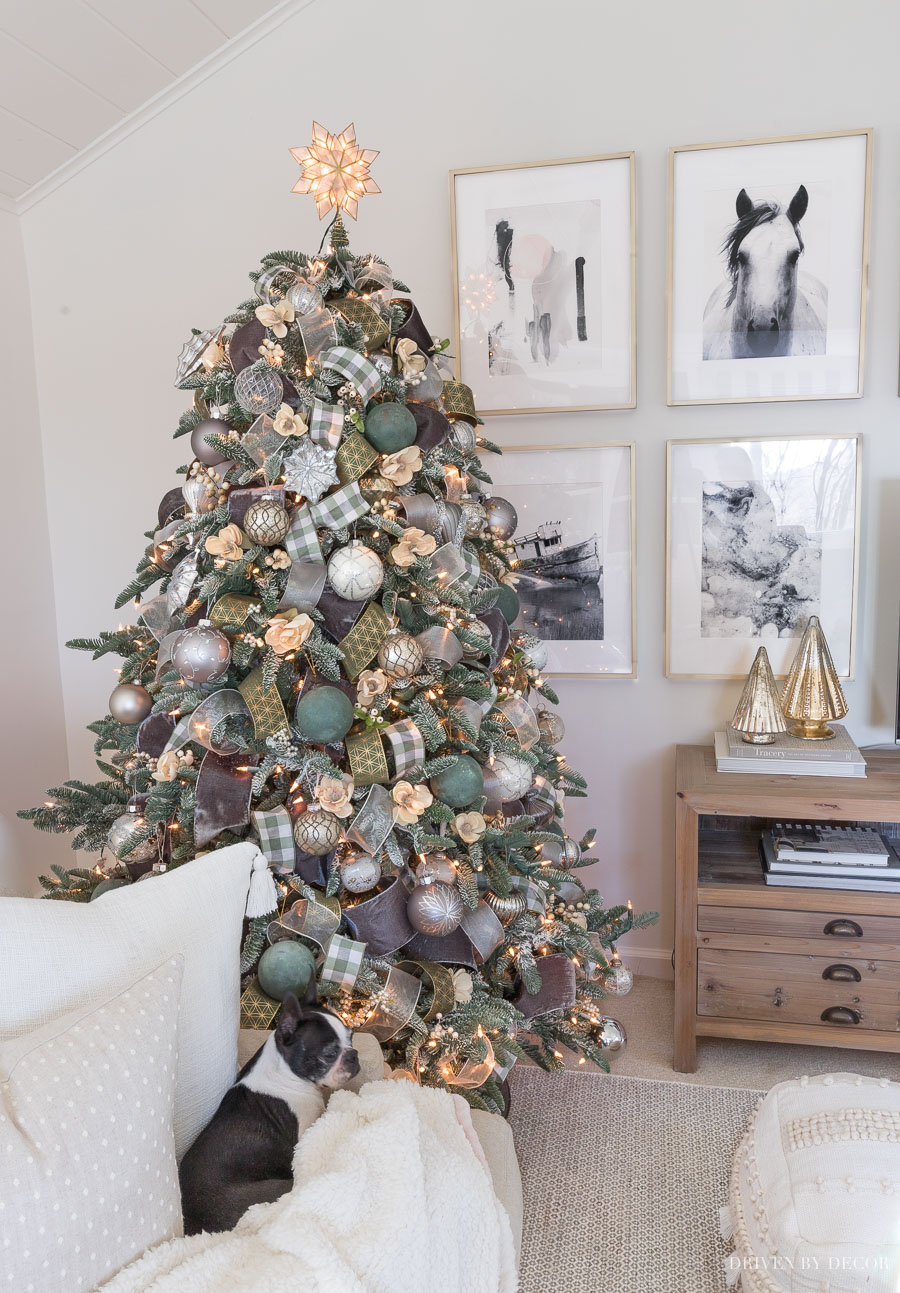
Sources: Cream tassel pillow | Neutral dot pillow | Pom pom throw | Rug | White textured floor poufs | Metallic trees – HomeGoods | Capiz star tree topper
Let’s wrap things up with a few of the most commonly asked questions you had about tree flocking when I shared a little preview on Instagram Stories:
How Much Flocking Powder Do I Need?
How much flocking powder you need depends on the size of your tree and how heavily flocked you want it. My tree is 6 ½ foot tall and I wanted it lightly flocked which took about ⅚ of my two pound bag of flocking powder. If you want heavy flocking or have a much larger tree, you’ll want to buy more.
Can You Flock A Pre-Lit Tree?
The directions state that you can flock a pre-lit tree IF the lights are rated for indoor/outdoor use. My tree had lights that were only rated for indoor use so I was flocking at my own risk :). Everything turned out fine with mine (I didn’t lose any lights) but if you choose to flock a pre-lit tree with lights that aren’t outdoor rated, know that there are no guarantees that it won’t harm them. Regardless of the rating of your tree lights, definitely unplug your lights during the flocking process and don’t plug them back in until your tree is completely dry.
Doesn’t the Flocking on the Lights Make Them Dimmer?
The flocking on the light bulbs dims them a little bit but not noticeably to me. My upstairs tree that I bought pre-flocked has flocking on the bulbs so I knew from that tree not to worry too much about it. You could definitely tape off your lights before flocking if you didn’t want any of the flocking powder to adhere to them.
Is Flocking a Tree Messy?
It’s a somewhat messy process but it’s also pretty easy to clean up! The dry flocking powder vacuums up easily but you do have to be careful about tracking the wet flocking powder anywhere in your house because it will dry and harden and then be difficult to get off. I would recommend that you have a pitcher of water next to you while flocking that you can use to refill your water sprayer so you don’t have to leave the area in the middle of flocking your tree to travel to the sink with snow flock on your feet. Wear socks while flocking and then take them off as you step off the plastic when you’re done. I threw my socks and clothes into the wash afterward and they cleaned up perfectly.
Flocked trees do shed some of their flocking (whether you do the flocking or buy them flocked), especially when you put them up and take them down but it vacuums up easily. You can always add more flocking to your tree if you decide you want it more heavily flocked or if too much flocking comes off after a few years.
Is the Flocking Permanent?
Yes, the flocking hardens onto the tree like Elmer’s glue and is permanent. You can’t take it off and have an unflocked tree the next year.
If you have any other questions, just let me know!


Marliese Walter says
Can you please share the brand of tree you have? It looks so real!
Ellen | Ask Away Blog says
I always wondered how this was done. thanks so much for this!
sherri says
Beautiful flocking /beautifully decorated! Could you also share where you purchased the tree? Thank you!
Kim says
Love it!
Sally says
Thank you for the flocking tutorial. Your completed tree looks amazing! You’ve given me the incentive to try flocking a smaller tree I have from Balsam Hill that’s getting a little weary. Flocking may be just the pick-me-up it needs. Have a wonderful Thanksgiving with your family .
Darcy says
I love a flocked fresh tree……however if you do choose to flock a fresh tree be aware that the more flocking the quicker it dries out and the sooner it will droop. So flock sparingly on a fresh cut tree. Many years ago a group of us were friends with a guy who sold fresh cut trees every year. They were only cut a day or two before he picked them up. They went on sale the day after Thanksgiving. One gal wanted a flocked tree and he advised that it would be a light flocking because too much would cause the tree to start dropping needles early. Well,she wanted more flocking and again he warned her. The tree looked completely covered in snow.
It was beautiful….but on December 15th she called him crying that her tree was dying and all of the ornaments were falling off. He said he would replace the tree but he would not flock it.
I have no idea what ever happened to that gal but the guy still sells Christmas trees and he does not do flocking anymore. So is you want heavily flocked….go with a tree you can use several years. This tree looks perfect with it’s dusting of snow.
Susan says
Absolutely beautiful! A true labor of love … Wishing you very happy holidays!