Have you gotten an estimate for interior home painting lately? Yikes! If you have no idea how to paint a room, now might be the time to learn. Jeff and I first learned how to paint at a Home Depot class soon after being married and have painted 30+ rooms since then, saving thousands of dollars by doing it ourselves.
While painting the primary bedroom in our current home, I took photos along the way so I could share the step by step of how to paint a room with you. There’s definitely a learning curve to painting and your first paint job might not be perfect but it doesn’t take long to get the hang of it. And it’s so rewarding to see how transformative a new paint color can be! (post includes commissionable links; for more information, see my full disclosure statement {here})
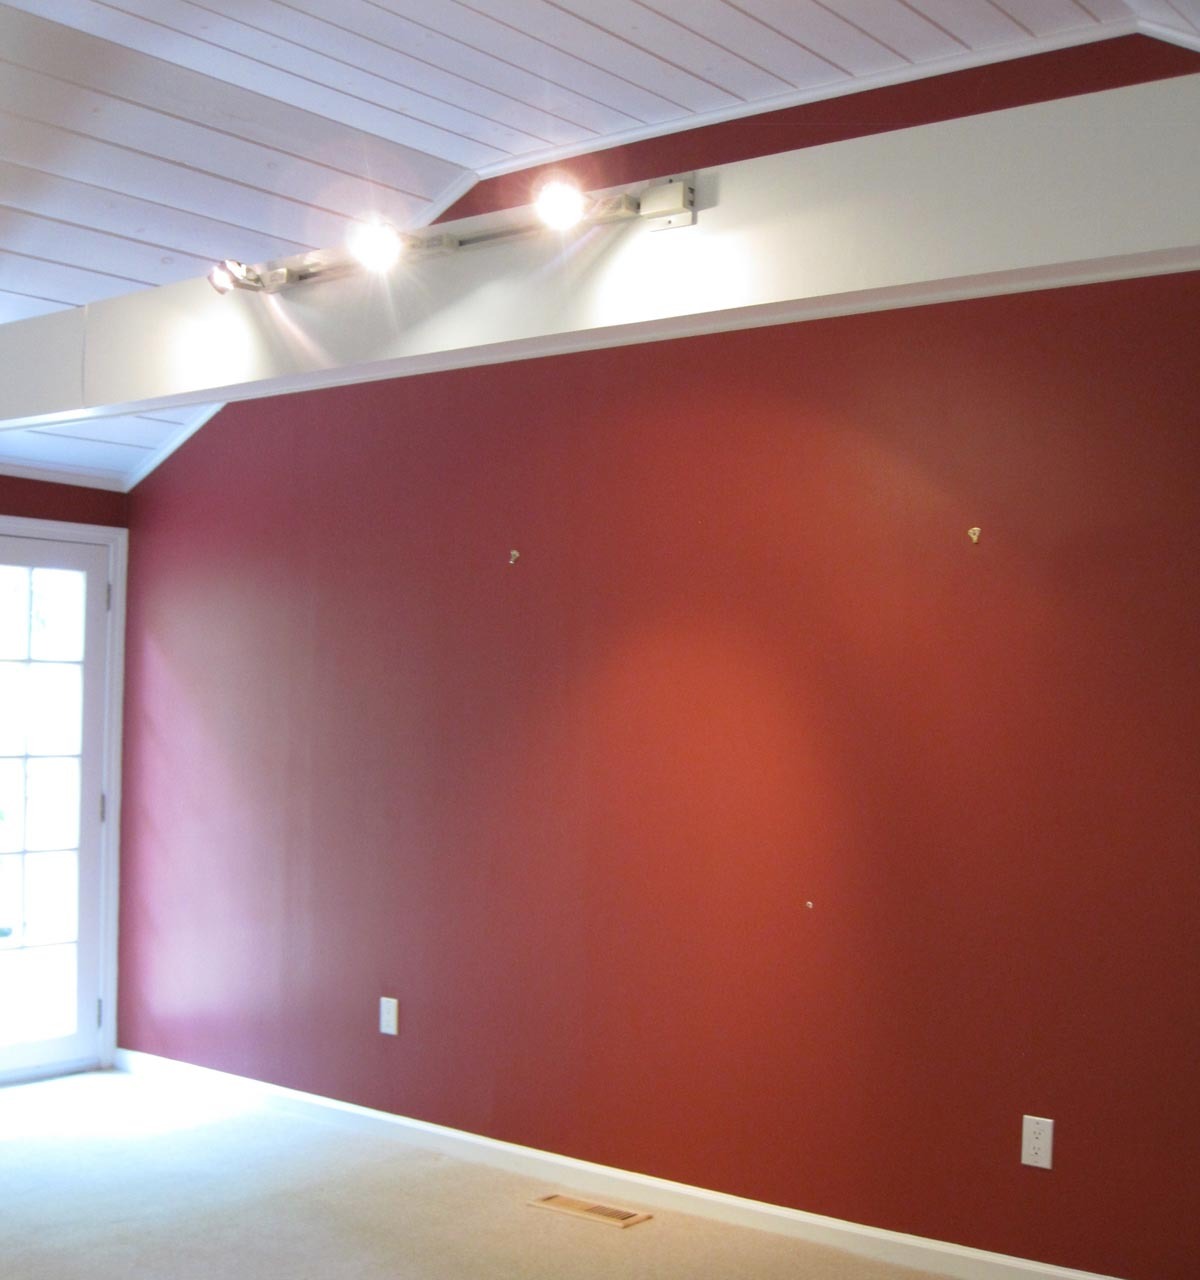
One of my favorite “before” and “afters” where a change in paint color made a huge difference is the family room in our previous home which looked like this when we moved in:
and like this after decorating and painting everything Benjamin Moore Cloud White:
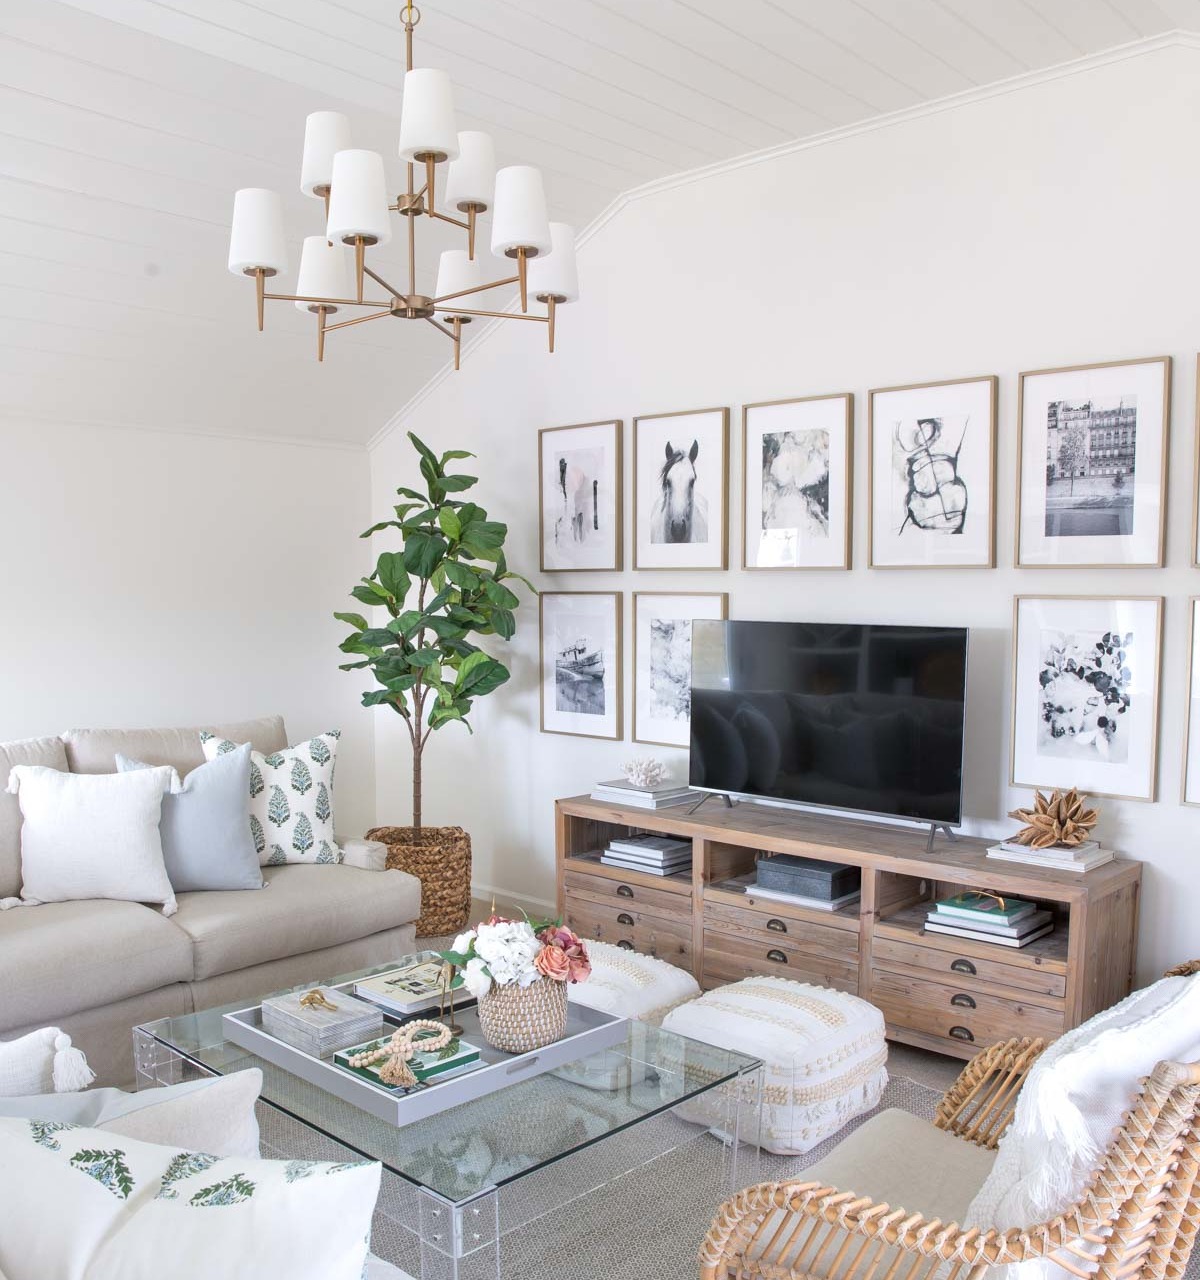
Family Room Sources: TV console (similar) | Chandelier (satin bronze) | White tasseled pillow cover | Blue linen pillow cover | Green & blue block print pillow cover | Faux fiddle leaf fig tree | Rug | Pair of floor poufs | Acrylic coffee table (similar) | Coffee table tray (28″ square)
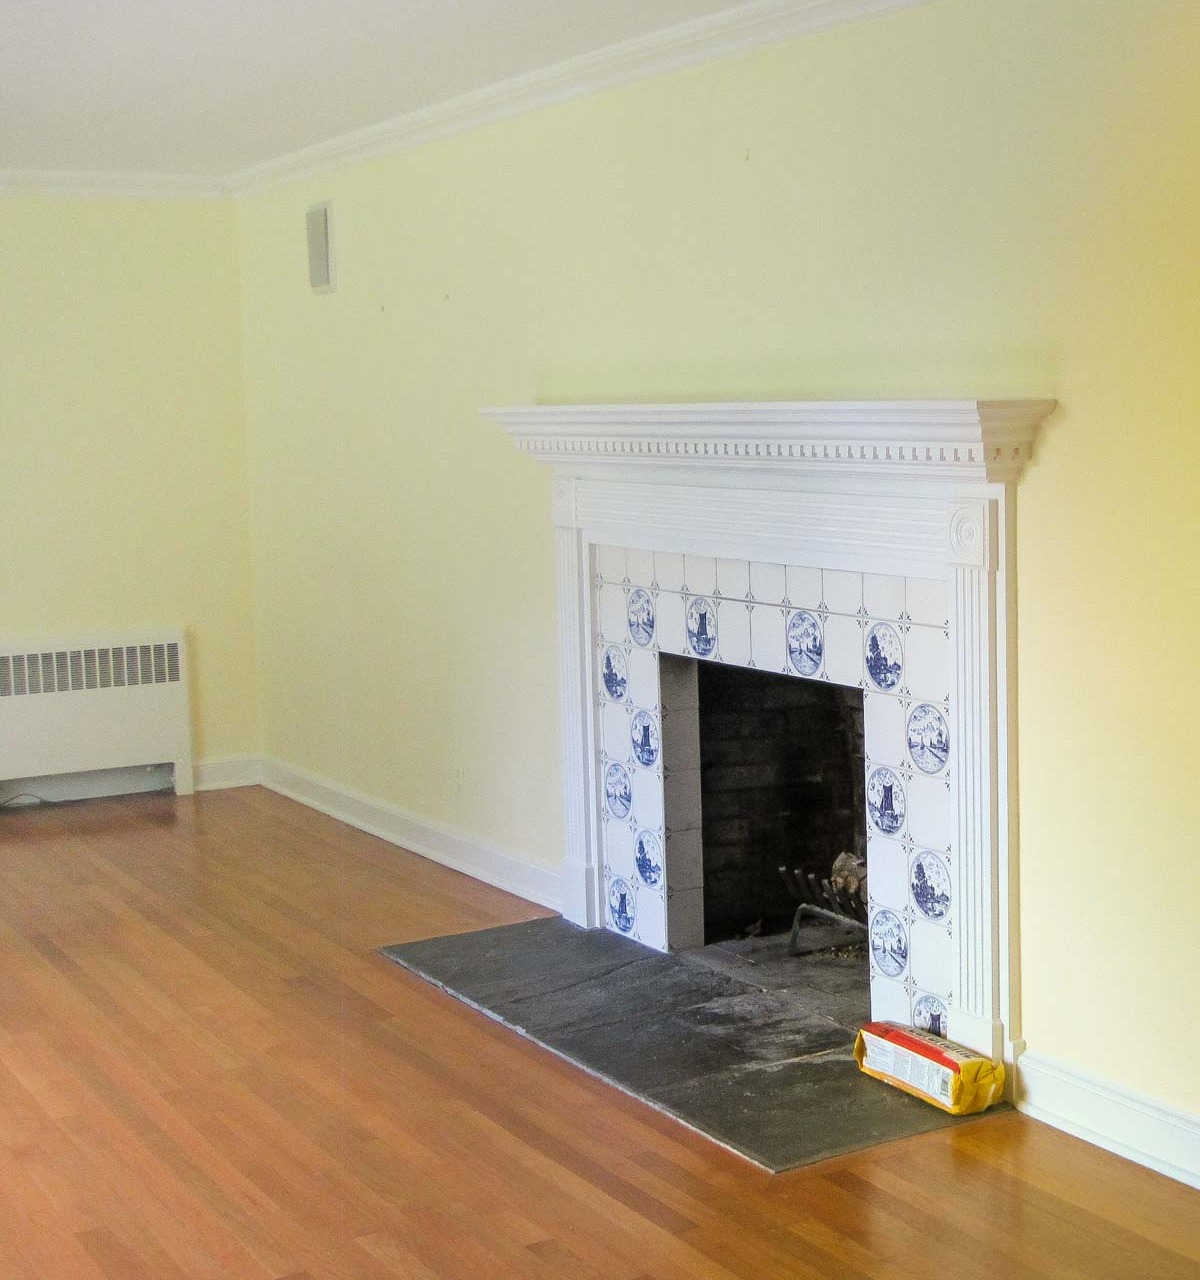
Another favorite is our living room that started out looking like this:
and ended up having a much more sophisticated vibe after painting the walls Sherwin Williams Anew Gray & remodeling the fireplace:
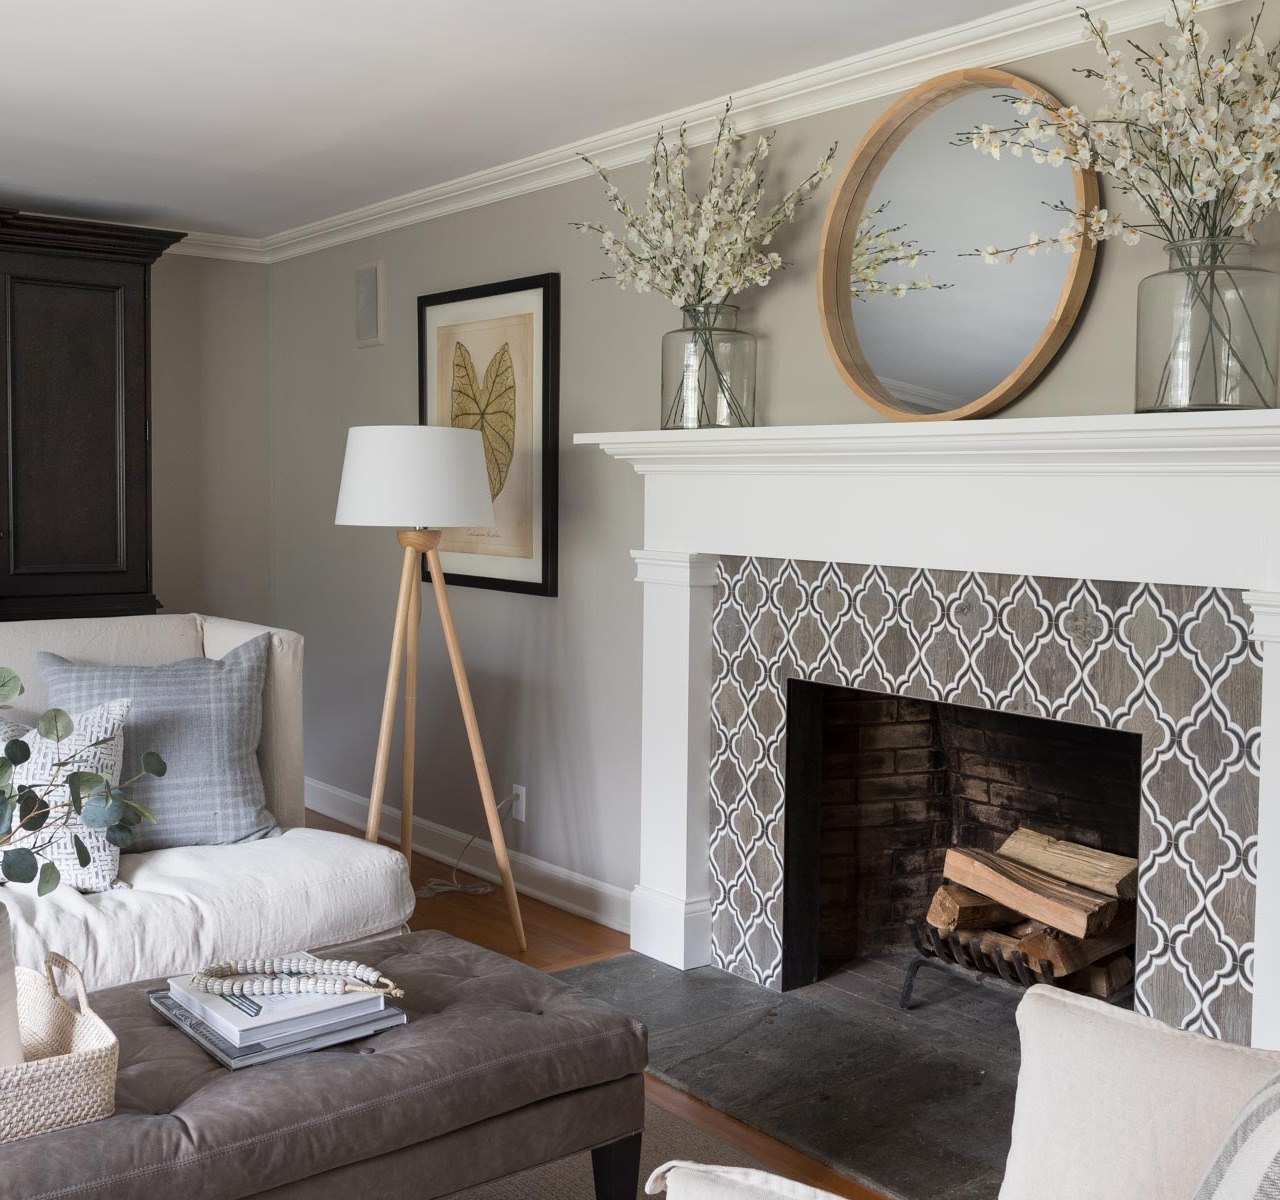
Living Room Sources: Loveseat & ottoman (custom order from Lee Industries) | Linen swivel chairs | Wood floor lamp | Round mirror over fireplace
And with that inspiration, let’s get painting…
1. Gather Your Supplies
For a high quality paint job, it’s important to start off with the right supplies. There are a few supplies you can save money on like using a disposable Solo cup for a paint cup and old sheets for drop cloths. But there are also supplies that you shouldn’t skimp on, especially brushes and rollers. Spending a few extra dollars on high quality brushes & rollers will give you a better paint job and save you time too (with cheap rollers, you’ll be picking lint off your walls with each roll).
Here’s a run-down on the supplies you’ll need to paint your room:
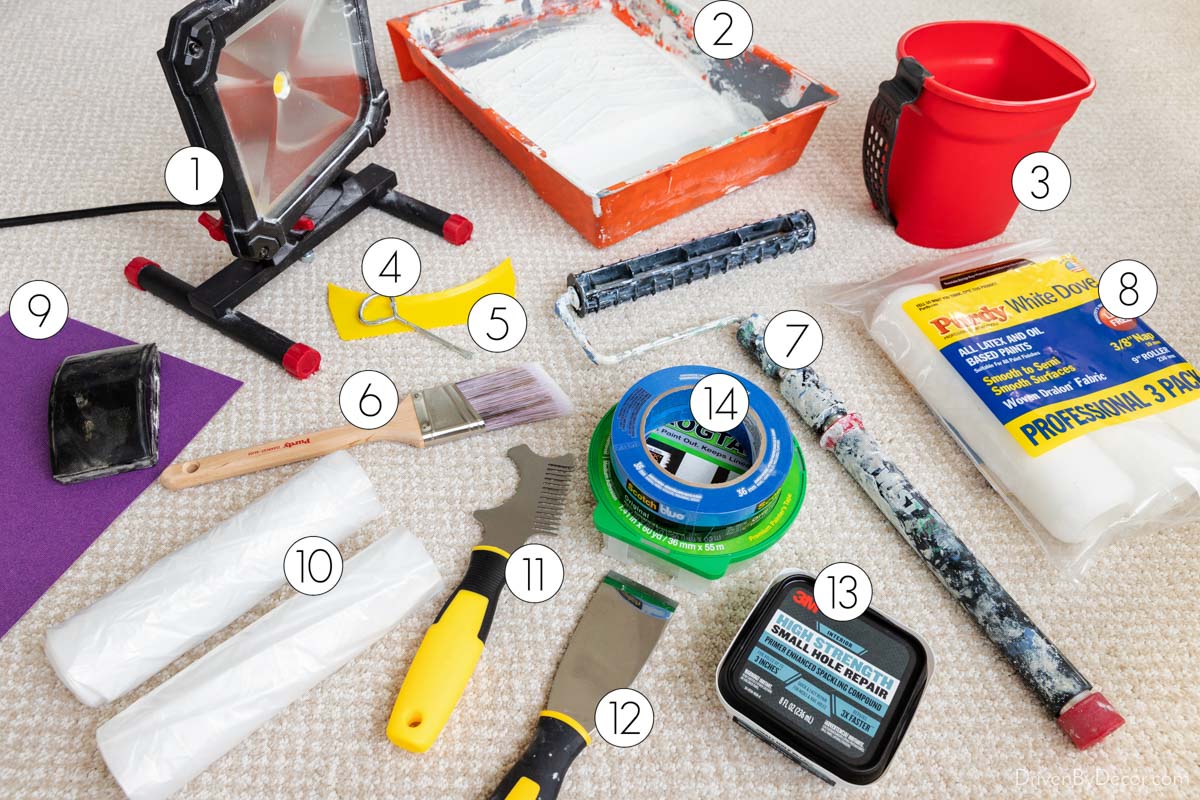
- Work light such as {this one} to use for both painting and prepping your walls
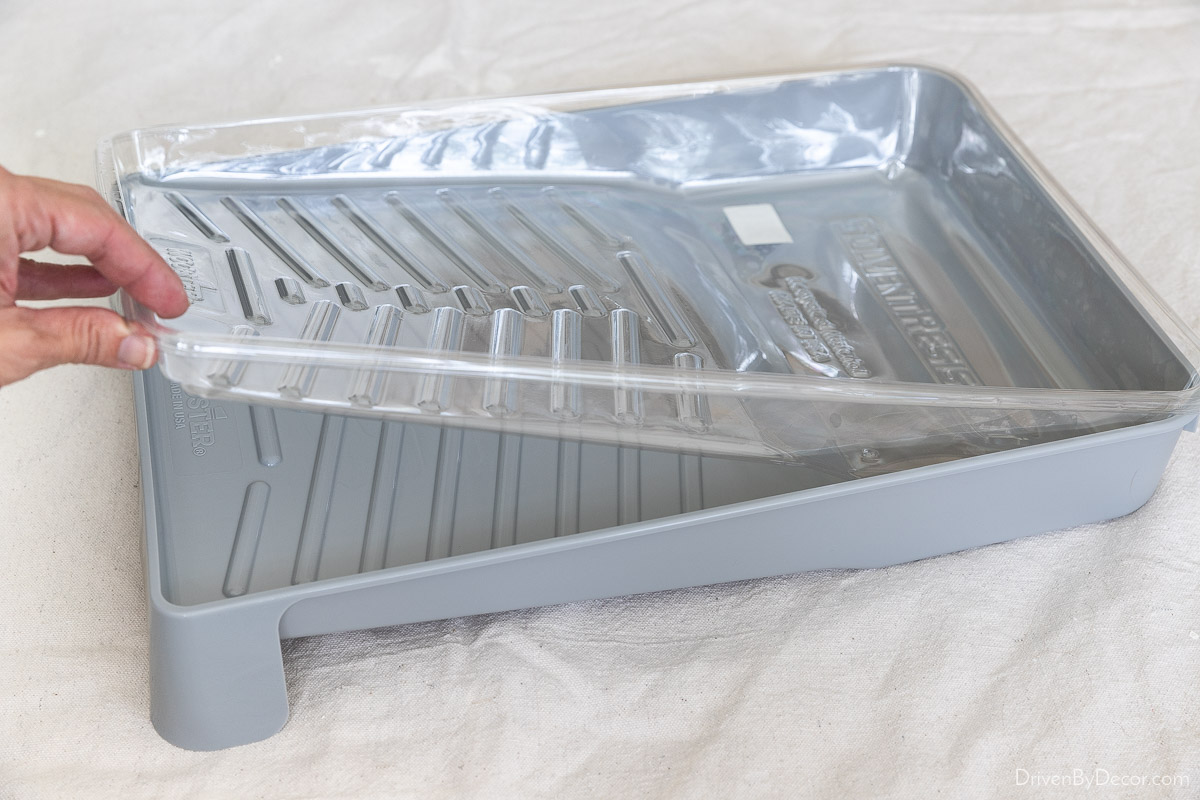
- Paint tray such as {this one}. You can make clean-up of your tray easy (so yours doesn’t end up looking like mine 😂) by lining it with aluminum foil or cling wrap or by buying disposable liners like {these liners} that fit right inside of it (tip: tape the liner to your tray to keep it from shifting):
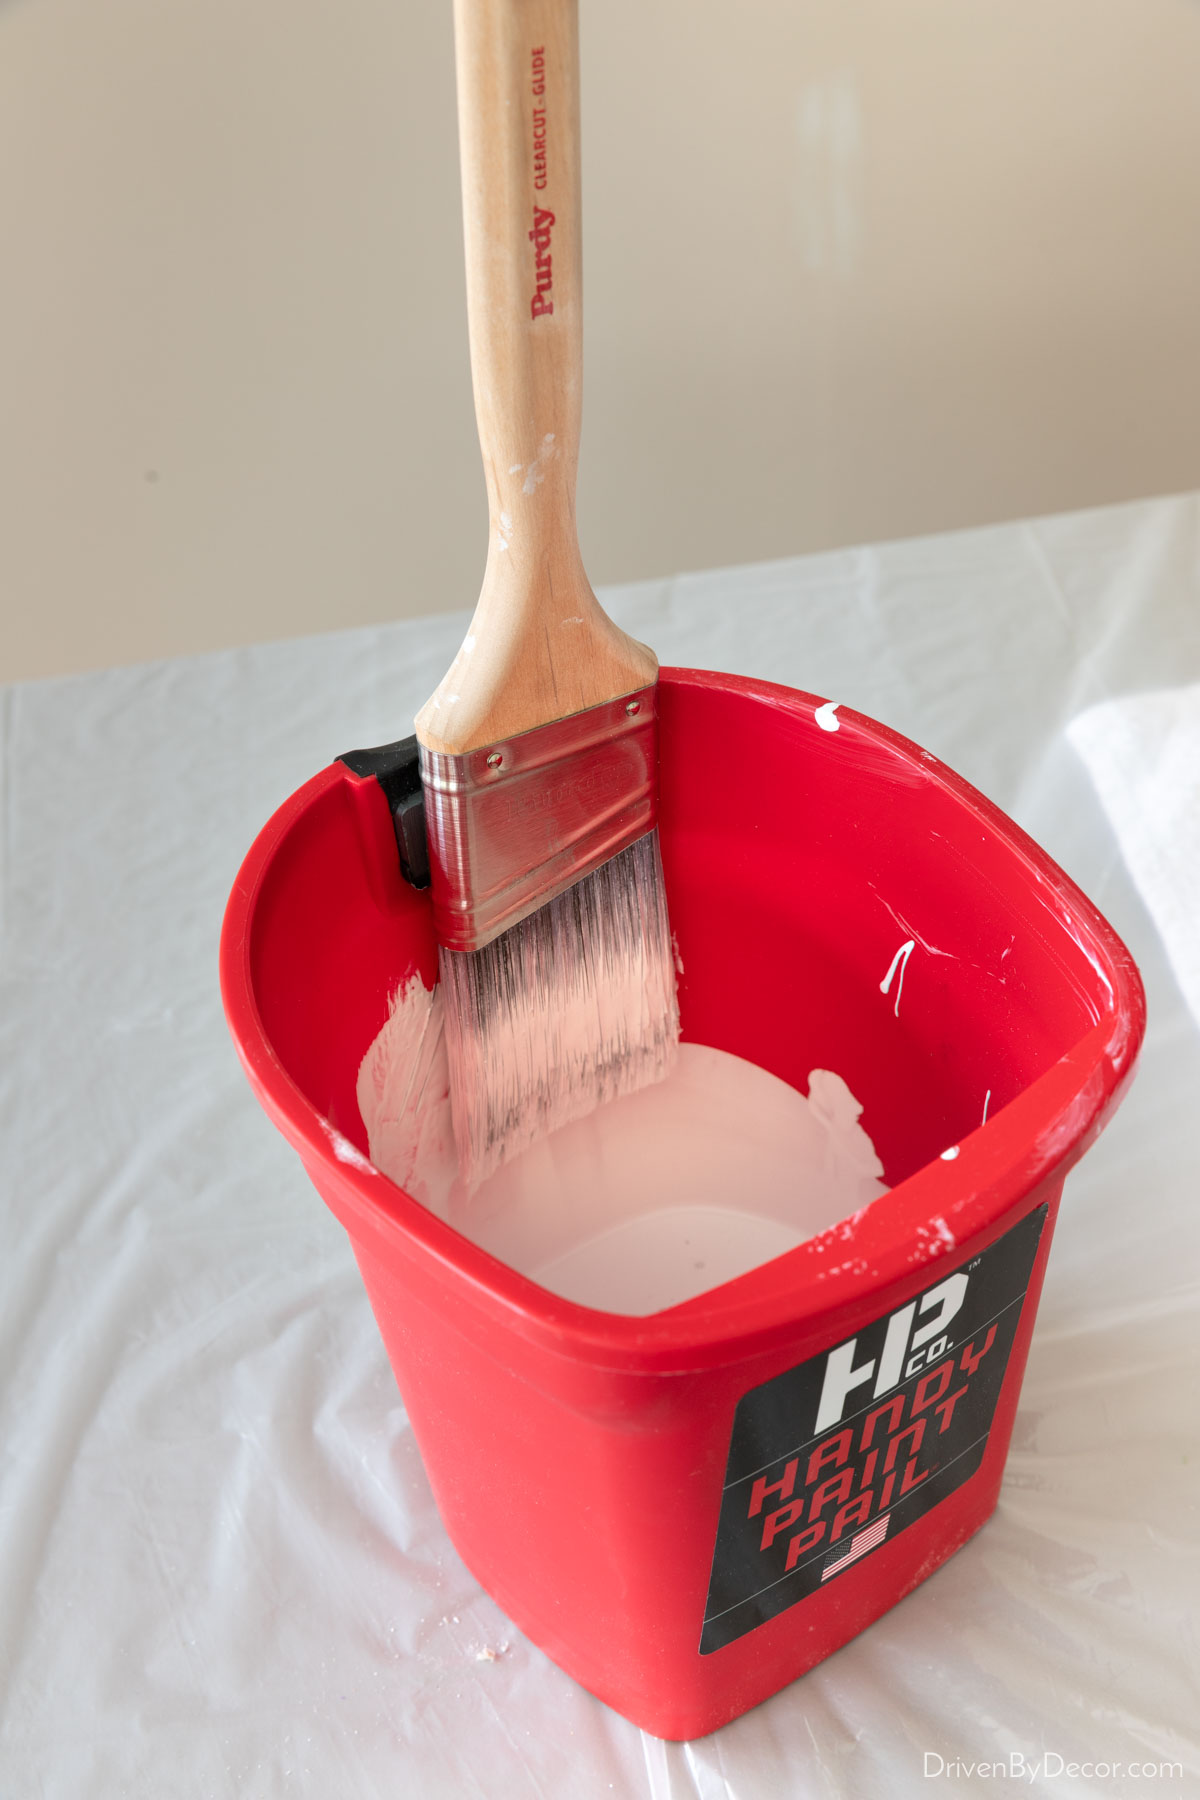
- Paint cup – You can simply use a disposable Solo cup or for a few dollars, snag {this paint cup} that’s my favorite. I love the adjustable handle & that there’s a magnet inside the cup to hold your brush:
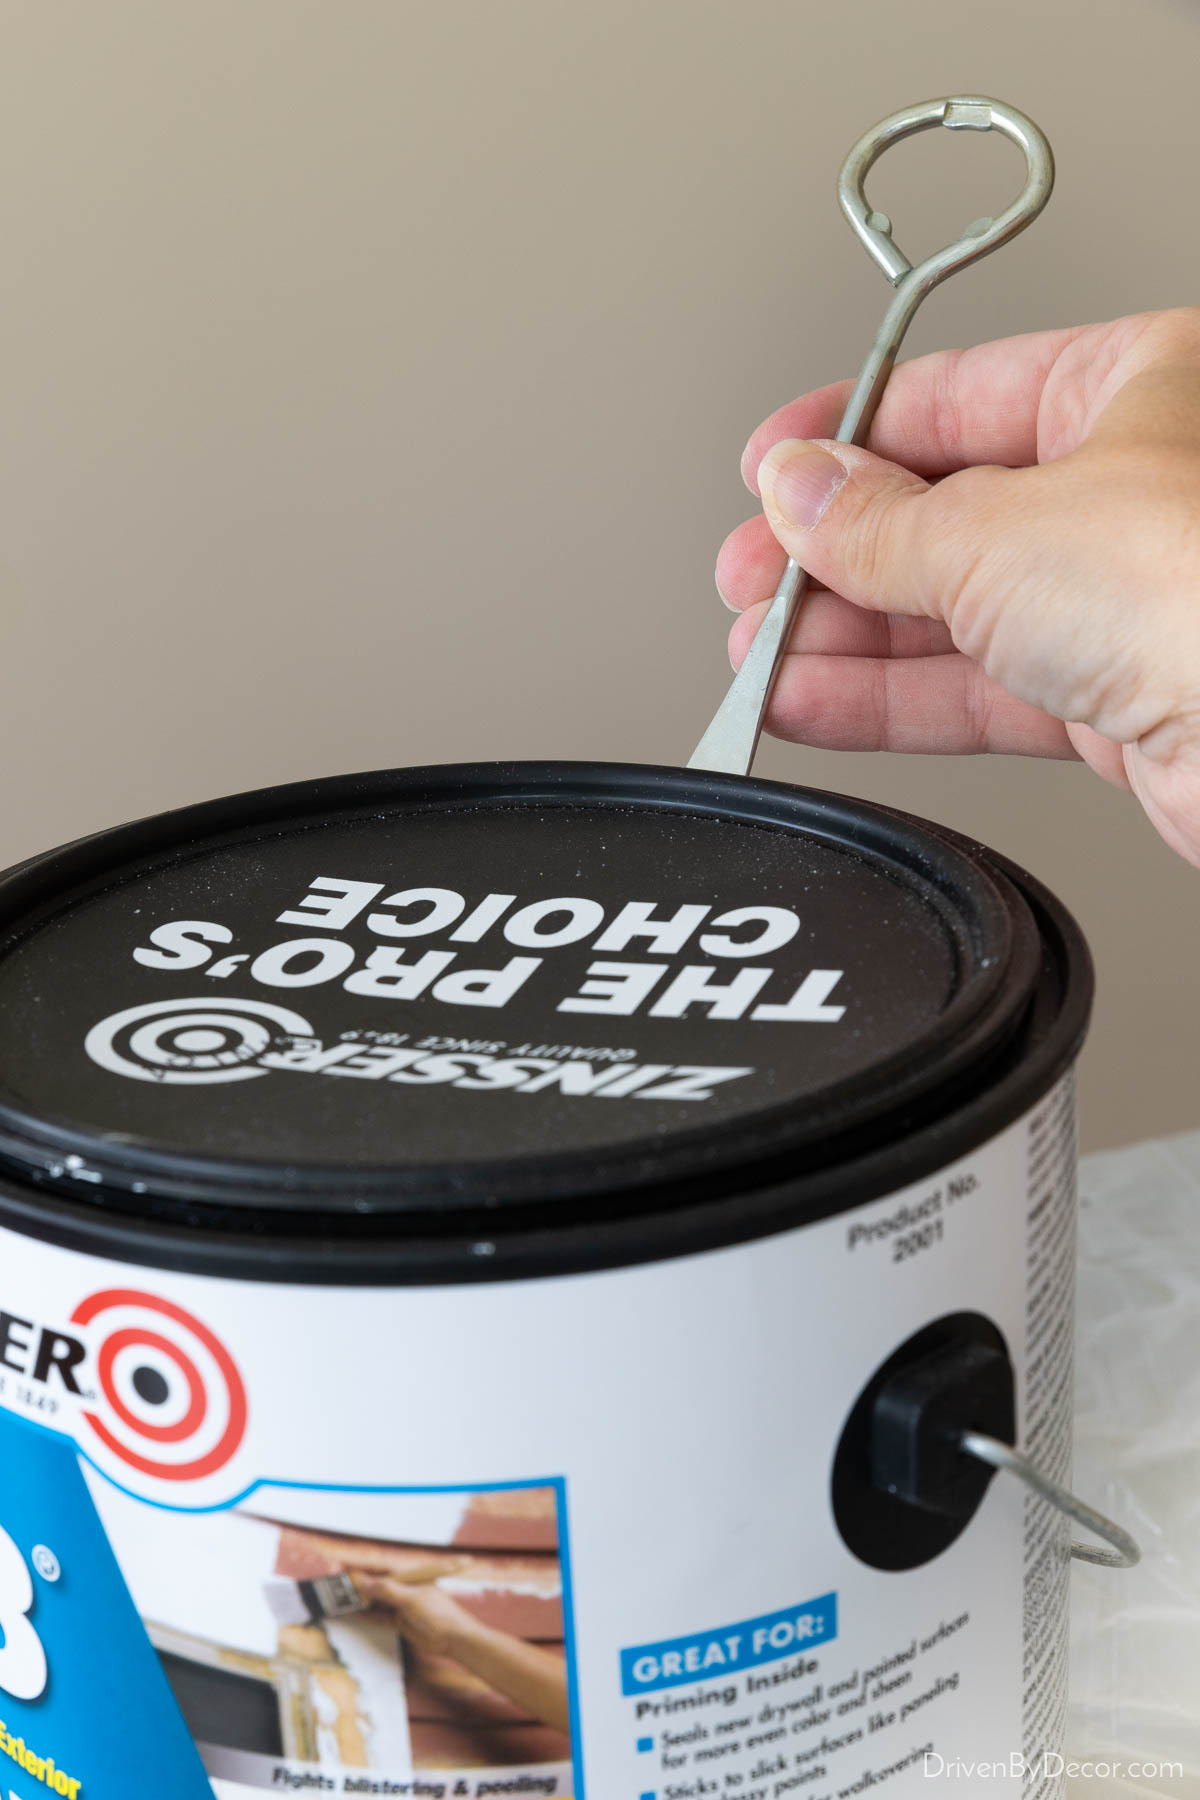
- Paint can opener – you can buy them online {here} but they’re cheaper (usually under $1) if you get one where you buy your paint. Also make sure you get a stir stick (which should be free) with your paint.
- Paint pouring spout (optional) – I like using a pouring spout like {this one} that you snap onto the top of the paint can because it keeps paint from getting into the can’s rim when you pour it:
- Paint brush – use an angled brush that’s 2 to 2 ½ inches wide – my favorite is {this 2″ Purdy Clearcut brush} that’s great for getting a crisp line when you’re cutting in.
- 9″ Roller frame – For rolling paint on the walls, I have & love {this roller frame} that has a built-in twist-and-lock extension pole that extends up to 3 ft., making it easy to reach the top of your walls. If you’re also painting your ceiling, you’ll want a standard roller frame with a threaded end such as {this one} that screws onto a longer extension pole such as {this one} (the 5-12′ extension size is perfect for most ceilings).
- Rollers – I swear by {these ⅜″ nap 9″ Purdy rollers} that give a nice, smooth finish. Some professional painters use ½″ nap rollers because they hold more paint which makes the job go faster but they won’t give you as smooth of a result so stick with ⅜″.
- Sandpaper (I use 150 grit & 220 grit) & a sanding block
- Drop cloths – I cover furniture with thin plastic drop cloths like {these} and protect the floor with canvas drop cloths like {these} that you can wash and reuse an endless number of times, won’t rip, and aren’t slippery to step on like plastic. I like the 4′ x 15′ runner size for my canvas drop cloths because they’re perfect for running along the length of a wall. When I’m painting the ceiling in addition to the walls, I also use a larger canvas drop cloth that covers the center of the room. To save money, you can use old sheets to protect your floor from paint spatter but put something thicker under your paint can and tray to catch any larger drips and spills.
- Brush & roller cleaner such as {this one}. Also consider {this roller spinner} that I share more details on later in this post.
- Putty knife such as {this one}
- Spackling compound such as {this}
- Painter’s tape – I use both 1″ painter’s tape and 2″ painter’s tape
You’ll also need a ladder and may need paintable caulk & a caulk gun if you have any cracks & gaps between your walls & trim that need to be caulked prior to painting.
2. Choose Your Paint
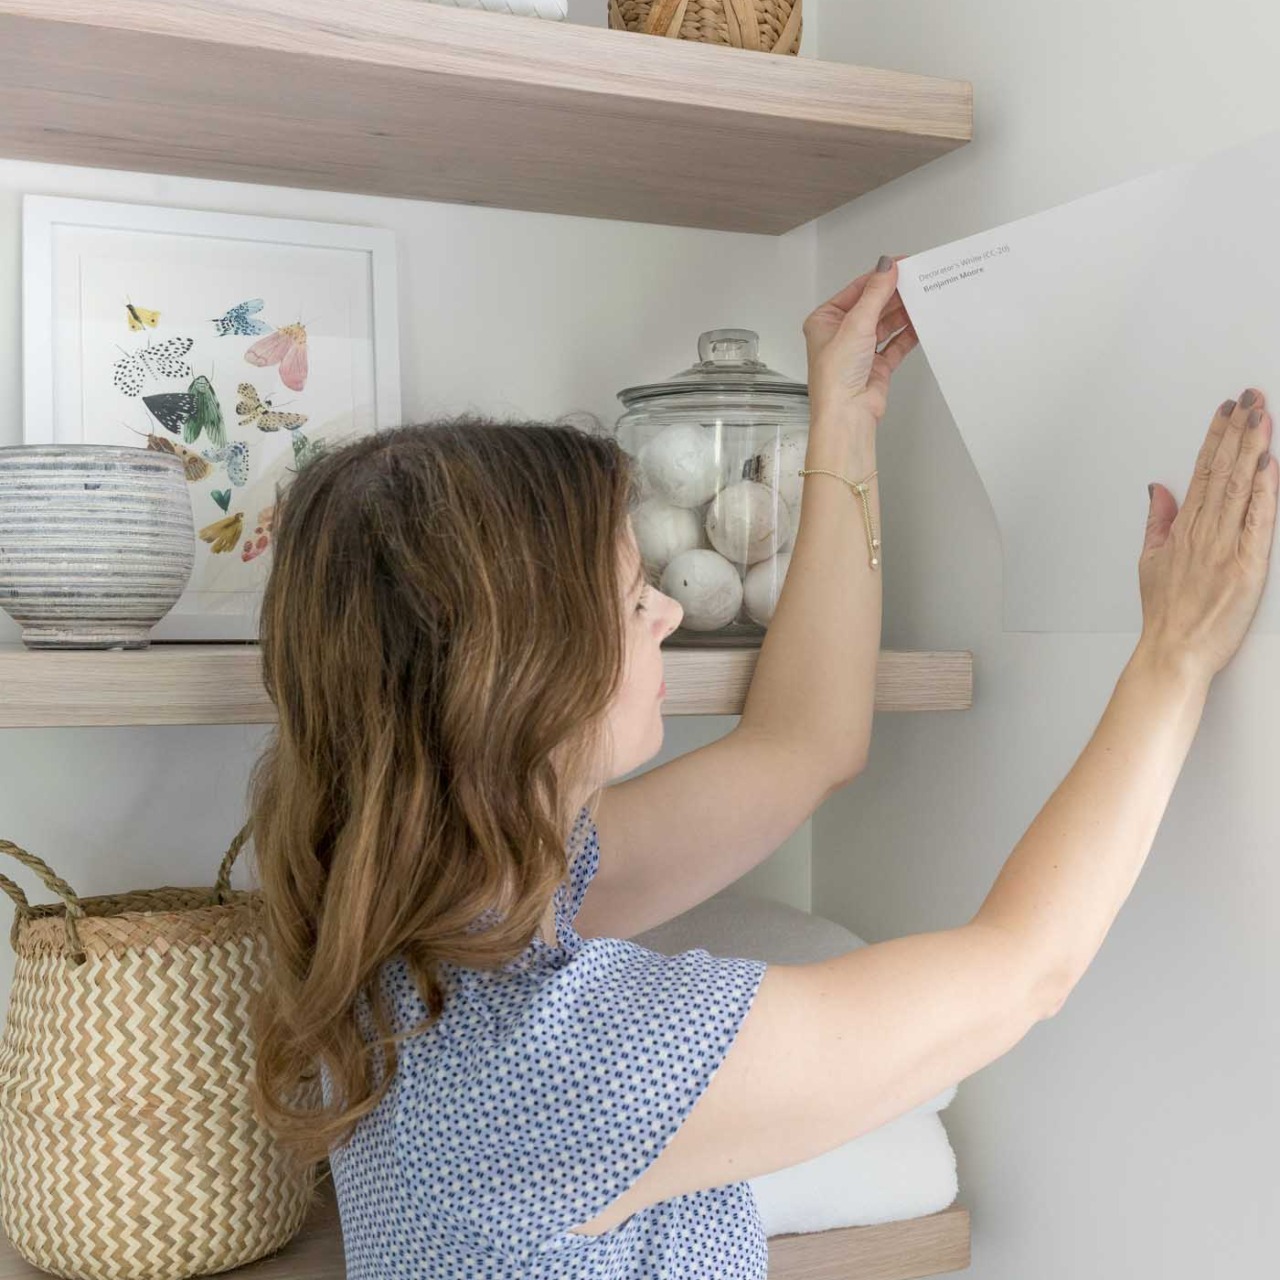
Choosing your paint color is sometimes harder than actually painting the room. The same paint color can look very different depending upon the light your room receives & the direction it faces among other factors so it’s important to test the colors you’re considering in the space you’re painting.
The best way I’ve found to do this is with Samplize 9″ x 15″ peel and stick paint samples that you can find {here}. They’re large samples with the actual paint rolled onto them (not just a digital version like color strips are) and you can stick them on the wall in various locations to see how the color looks throughout your room:
It’s a MUCH easier way to try out paint colors than buying sample pints of paint and painting multiple samples on your wall or a board. Want to know some of my favorite paint colors? I’ve gathered together the best white, blue, and greige paint colors in these posts:
Once you’ve picked your paint color, you need to figure out how much paint to buy. For an average sized room, you’ll typically need two gallons of paint for the walls but you can use a paint calculator such as {this one} to get an accurate estimate based on your room’s measurements.
Choosing Paint Sheen
Next you need to determine what sheen of paint you want. The advantages of flat or matte paint are that they’re great at hiding imperfections in your walls & they’re easier to touch up (the old paint blends well with the new). At the other end of the spectrum, the advantages of semi-gloss and gloss are that they’re very durable finishes and wipe clean easier. These are common uses for the six most common paint sheens:
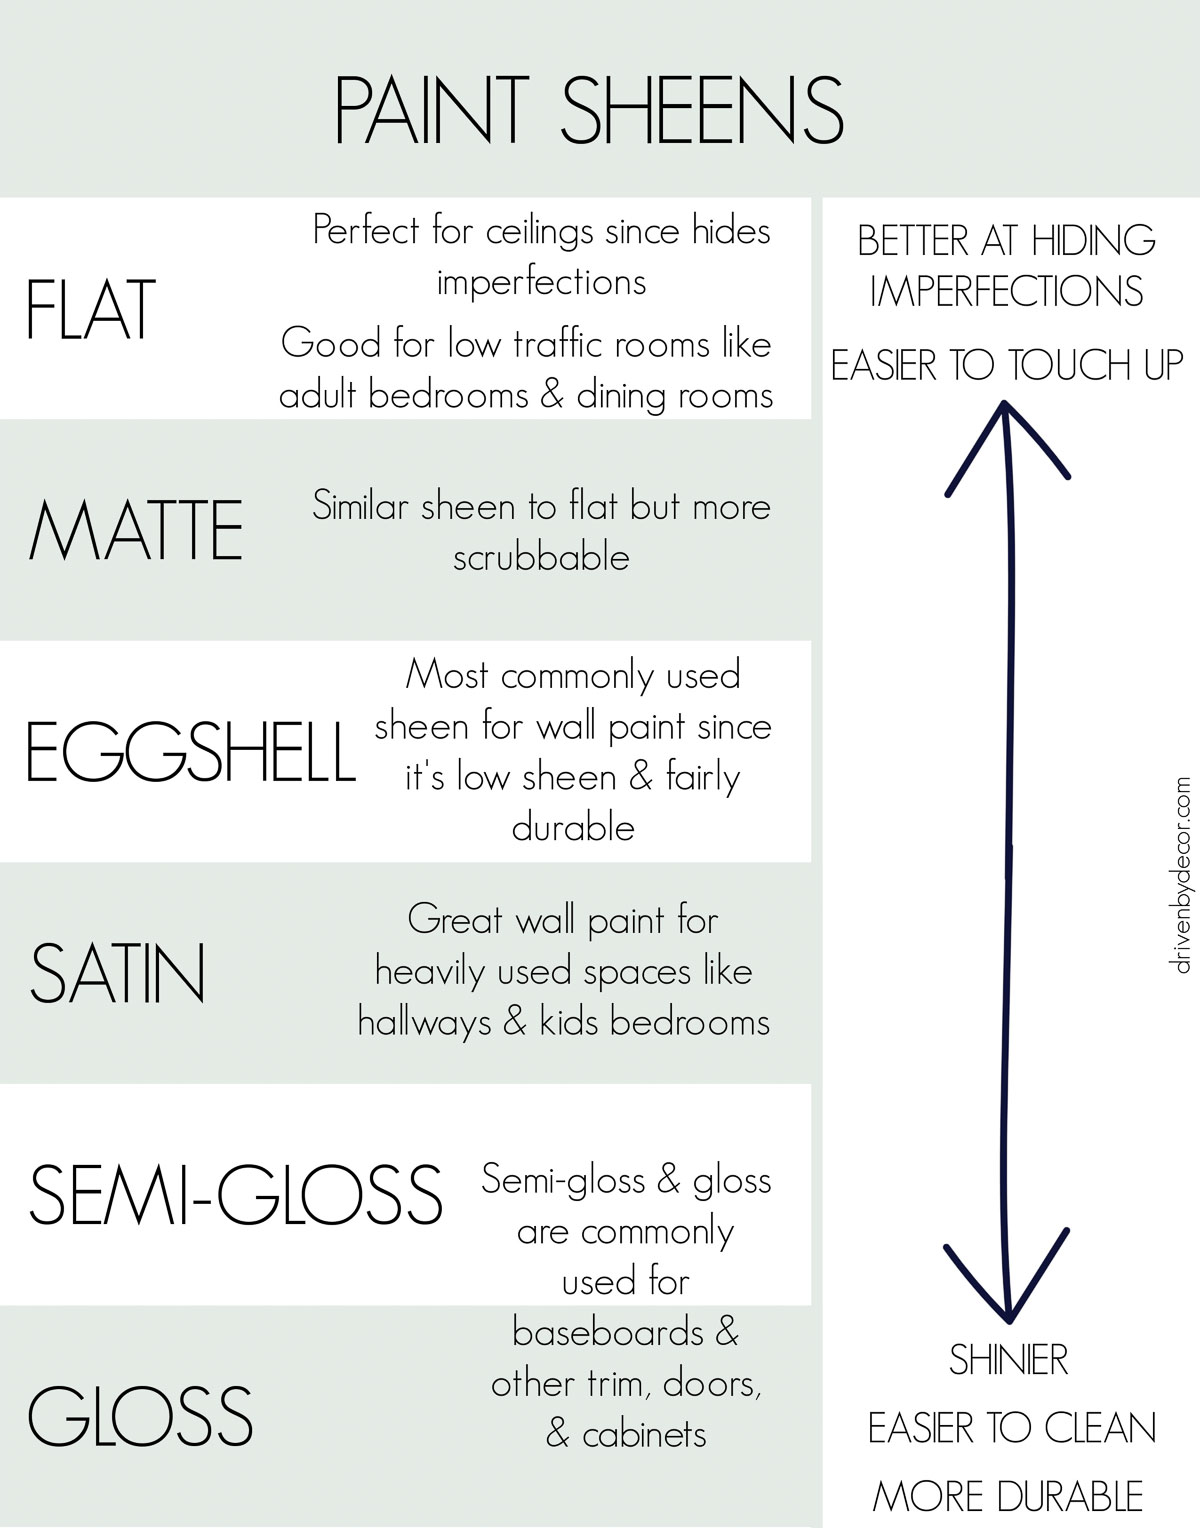
One thing to note is that improvements in paint over the years have made the lower sheen paints much more durable than they’ve been in the past. My personal preference visually is for lower sheen paints so I use flat or matte on walls throughout our home and satin on doors, baseboards, and other trim. But I don’t have young kids running into my walls & baseboards – lifestyle should definitely be a consideration when choosing your sheen!
To Prime or Not to Prime
Let’s talk about primer and whether you should paint a coat of primer on your walls before using your regular paint. You’ll need to prime your walls first if you’re (1) painting brand new drywall, (2) have a lot of repaired spots on your walls, or (3) have stains on the walls such as from past water damage (specifically use a stain blocking primer in this case). Two other common reasons to use a primer are (4) if you’re painting a light color over a previously dark paint color like painting white over navy blue. If you don’t, it will take you several coats of paint to hide the dark color underneath. Also, prime first if (5) you are painting with latex (water-based paint) paint over an oil-based paint. Latex is the current standard for paint but older homes may have been painted with an oil-based paint (especially trimwork).
How can you tell if the paint on your walls or trim is latex- or oil-based? Rub a colored towel or cloth soaked with rubbing alcohol over a painted area. If the paint comes off on your cloth, you have latex paint. In this case, you’re good to go without a primer (unless there is a big color difference between the old and new colors). If the paint doesn’t come off when you rub it with rubbing alcohol, it’s an oil-based paint. In this case, you’ll need to use a primer to prime those painted surfaces first and can then use latex paint over the primer. Or if you have oil-based paint on your trim, you can use Benjamin Moore’s Advance paint which can be used over either oil or latex paint.
Choosing Ceiling Paint
What about ceiling paint? If I’m painting the walls of a room white, I use the same color as the walls in a matte or flat finish to paint the ceiling. If I’m painting the walls of a room something more colorful, I use a simple white ceiling paint (my go-to is Benjamin Moore’s Muresco):

Do you have to paint your ceilings white? Nope! I prefer white ceilings but it’s just a matter of personal preference. You can choose to paint your ceiling the same color as your walls whether that’s blue, green, or any other color for a more enveloping feel. I actually think it’s the way to go in rooms with lots of funky angles because it makes the space feel more cohesive.
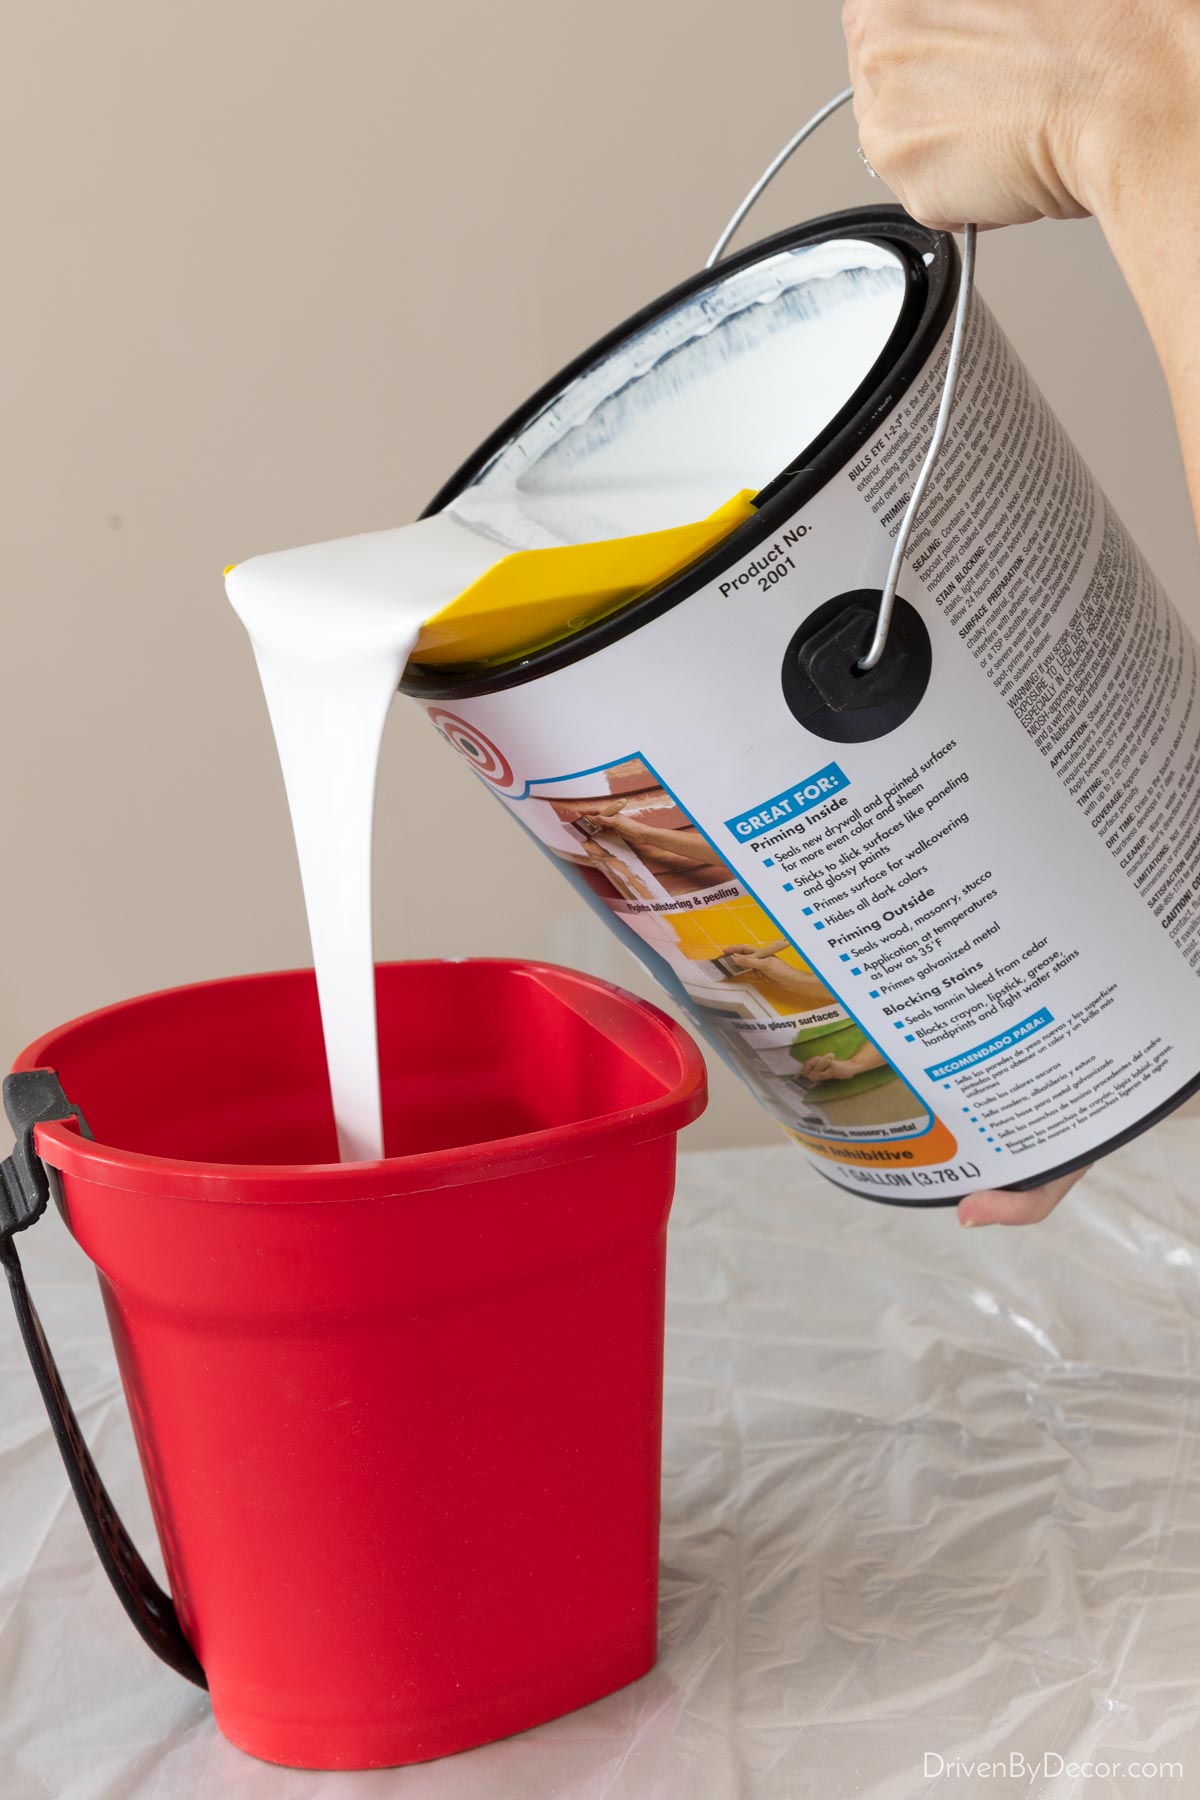
One last tip on choosing your paint… It’s best to get all of the paint you need at once since there can be some subtle variation in the color of mixed paint when bought from two different stores or at two different times. Even if you buy two gallons of paint at the same time, it’s recommended that you combine them in a large bucket in case there’s variation between the two cans. To be honest, I’ve never done that and haven’t had any matching issues as long as it’s paint I’ve bought all at the same time but mixing your gallons is the recommended way to go.
3. Prep Your Room
Note: If you have an older home that could have lead paint on the walls (typically homes built before 1978), you need to use precautions when sanding and scraping painted surfaces – see {this publication} for details
A great paint job starts with prepping your room. Move your furniture away from the walls and protect your floor & furniture from paint splatter by covering everything with drop cloths. Also, remove your light switch and outlet covers. Then prep your walls by looking for any gouges or deep scratches that need to be repaired. The best way to see imperfections in the wall is by shining your work light on it as you’re walking along the length of the wall.
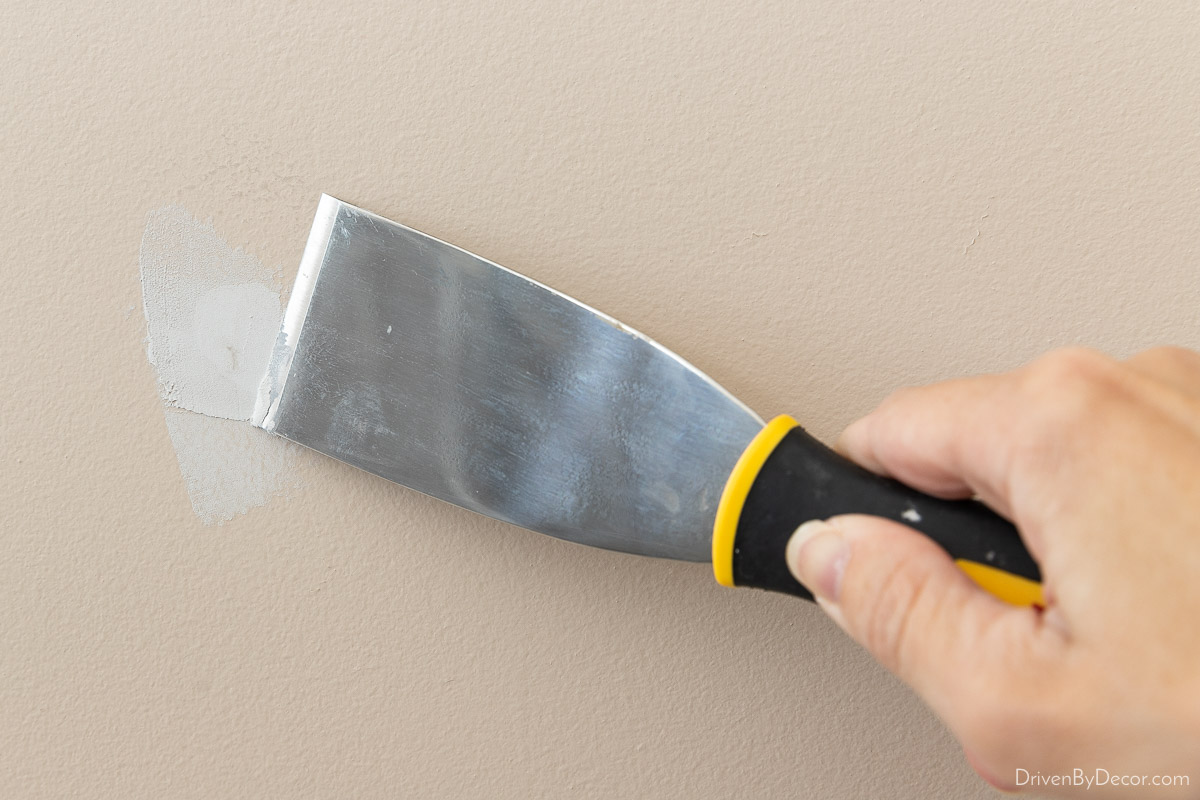
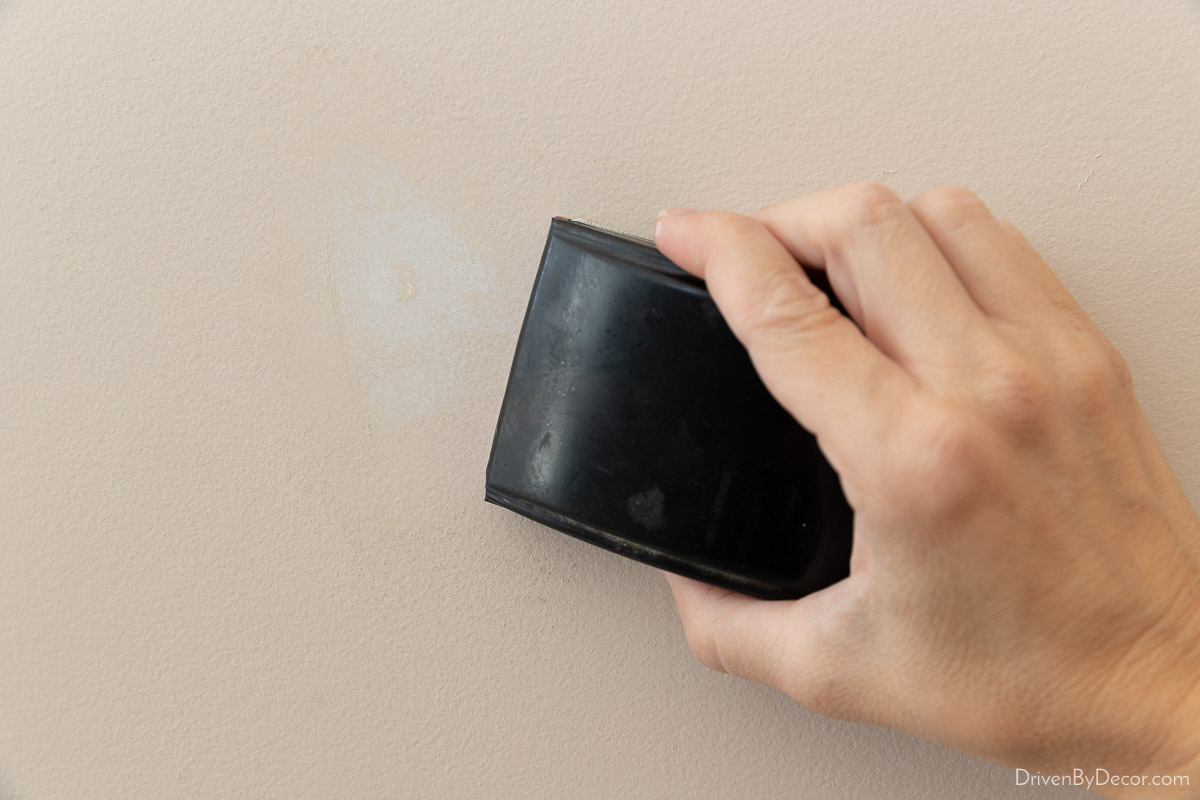
Repair any wall damage by filling the spot with spackling compound using a putty knife to press it into the defect and smooth the spackling:
Then once it’s dry, use sandpaper (I use 150 grit sandpaper) to sand the area smooth:
If you’re also painting the trim, repair any gouges in it by filling with wood filler & sanding smooth. Next give your walls (& trim if you’re painting it) an overall quick sand using 220 grit sandpaper so you’re starting out with a smooth surface (use a mask and protective glasses while sanding).
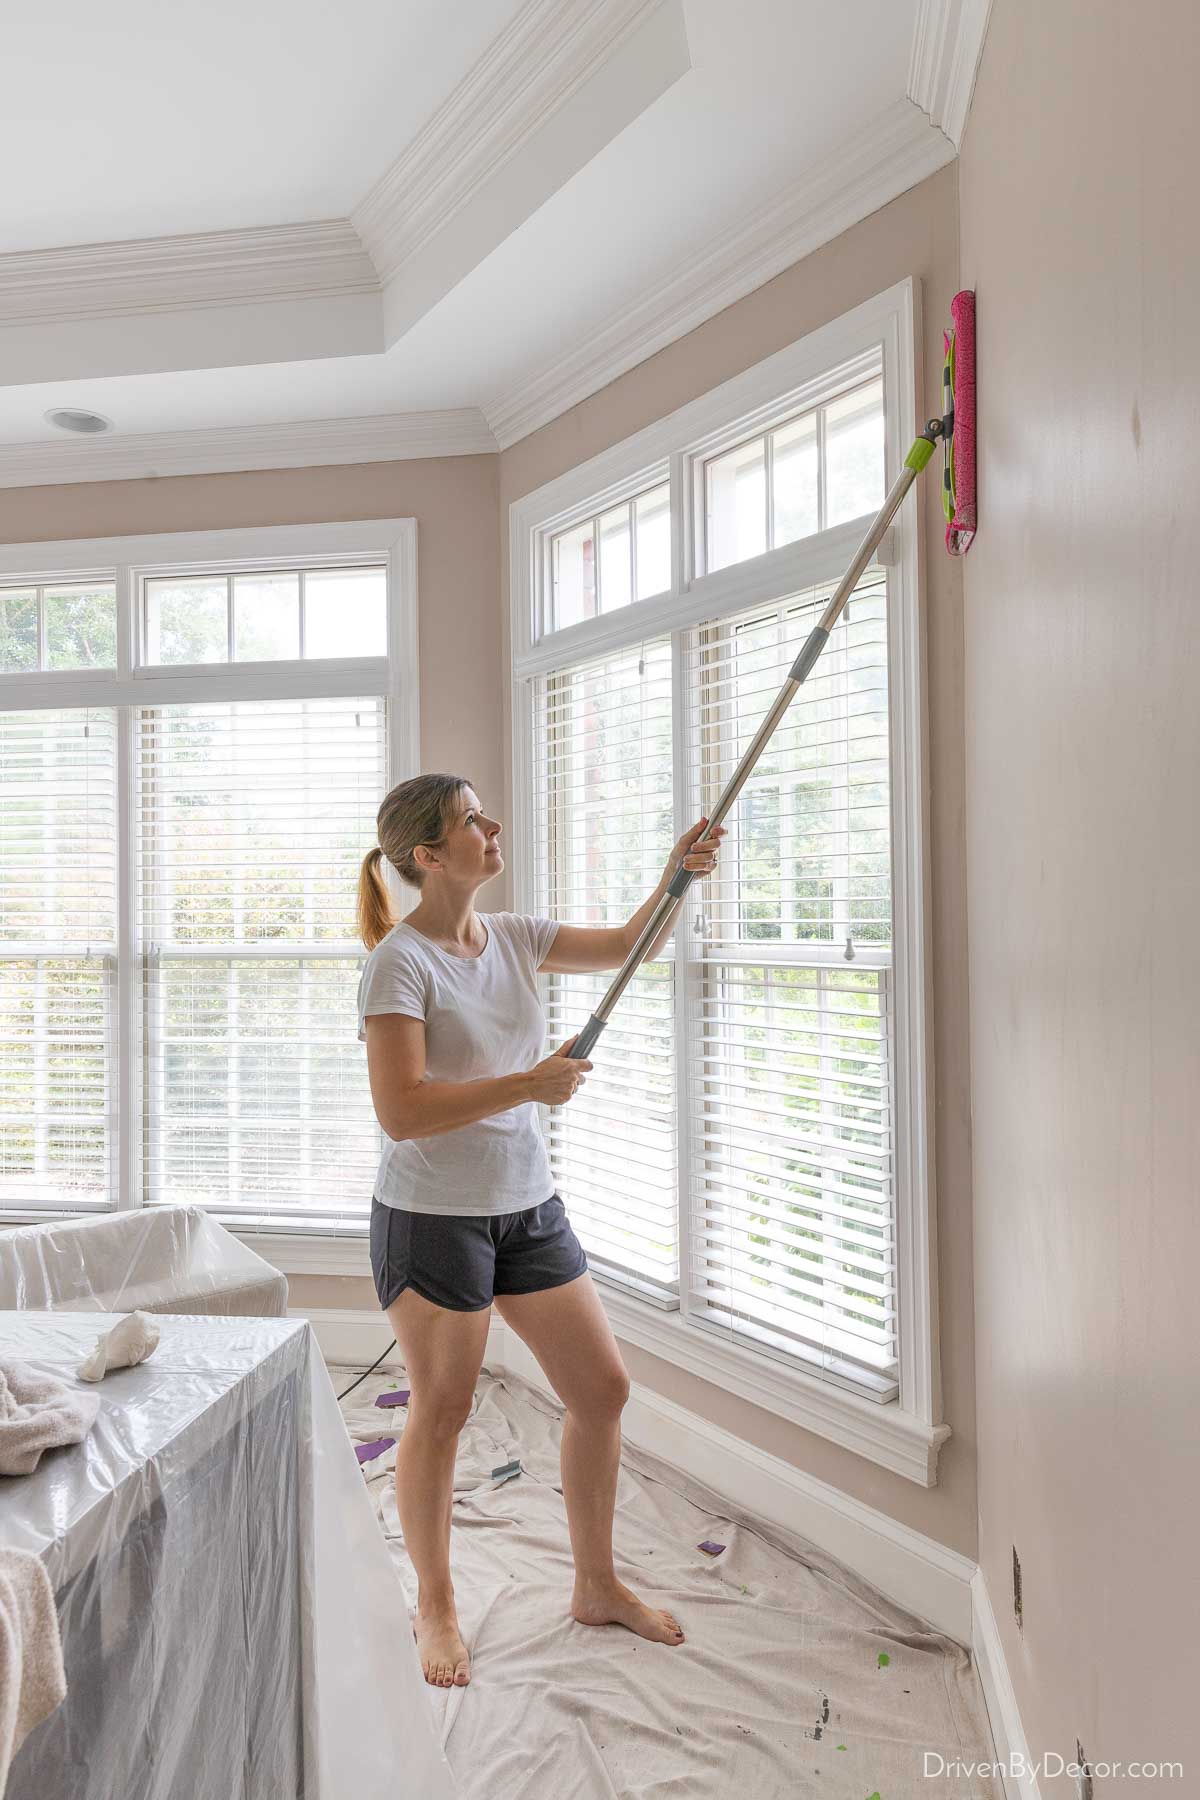
As an easy way to get rid of any sanding dust left behind, I run my microfiber mop (similar to a Swiffer but with reusable, washable cloths) over the walls.
If you’re painting a room where the walls are particularly dirty or greasy (such as in a kitchen), use a sponge to scrub your walls with a mixture of warm water and mild soap followed by a sponge with only water as a rinse. Let thoroughly dry before starting to paint.
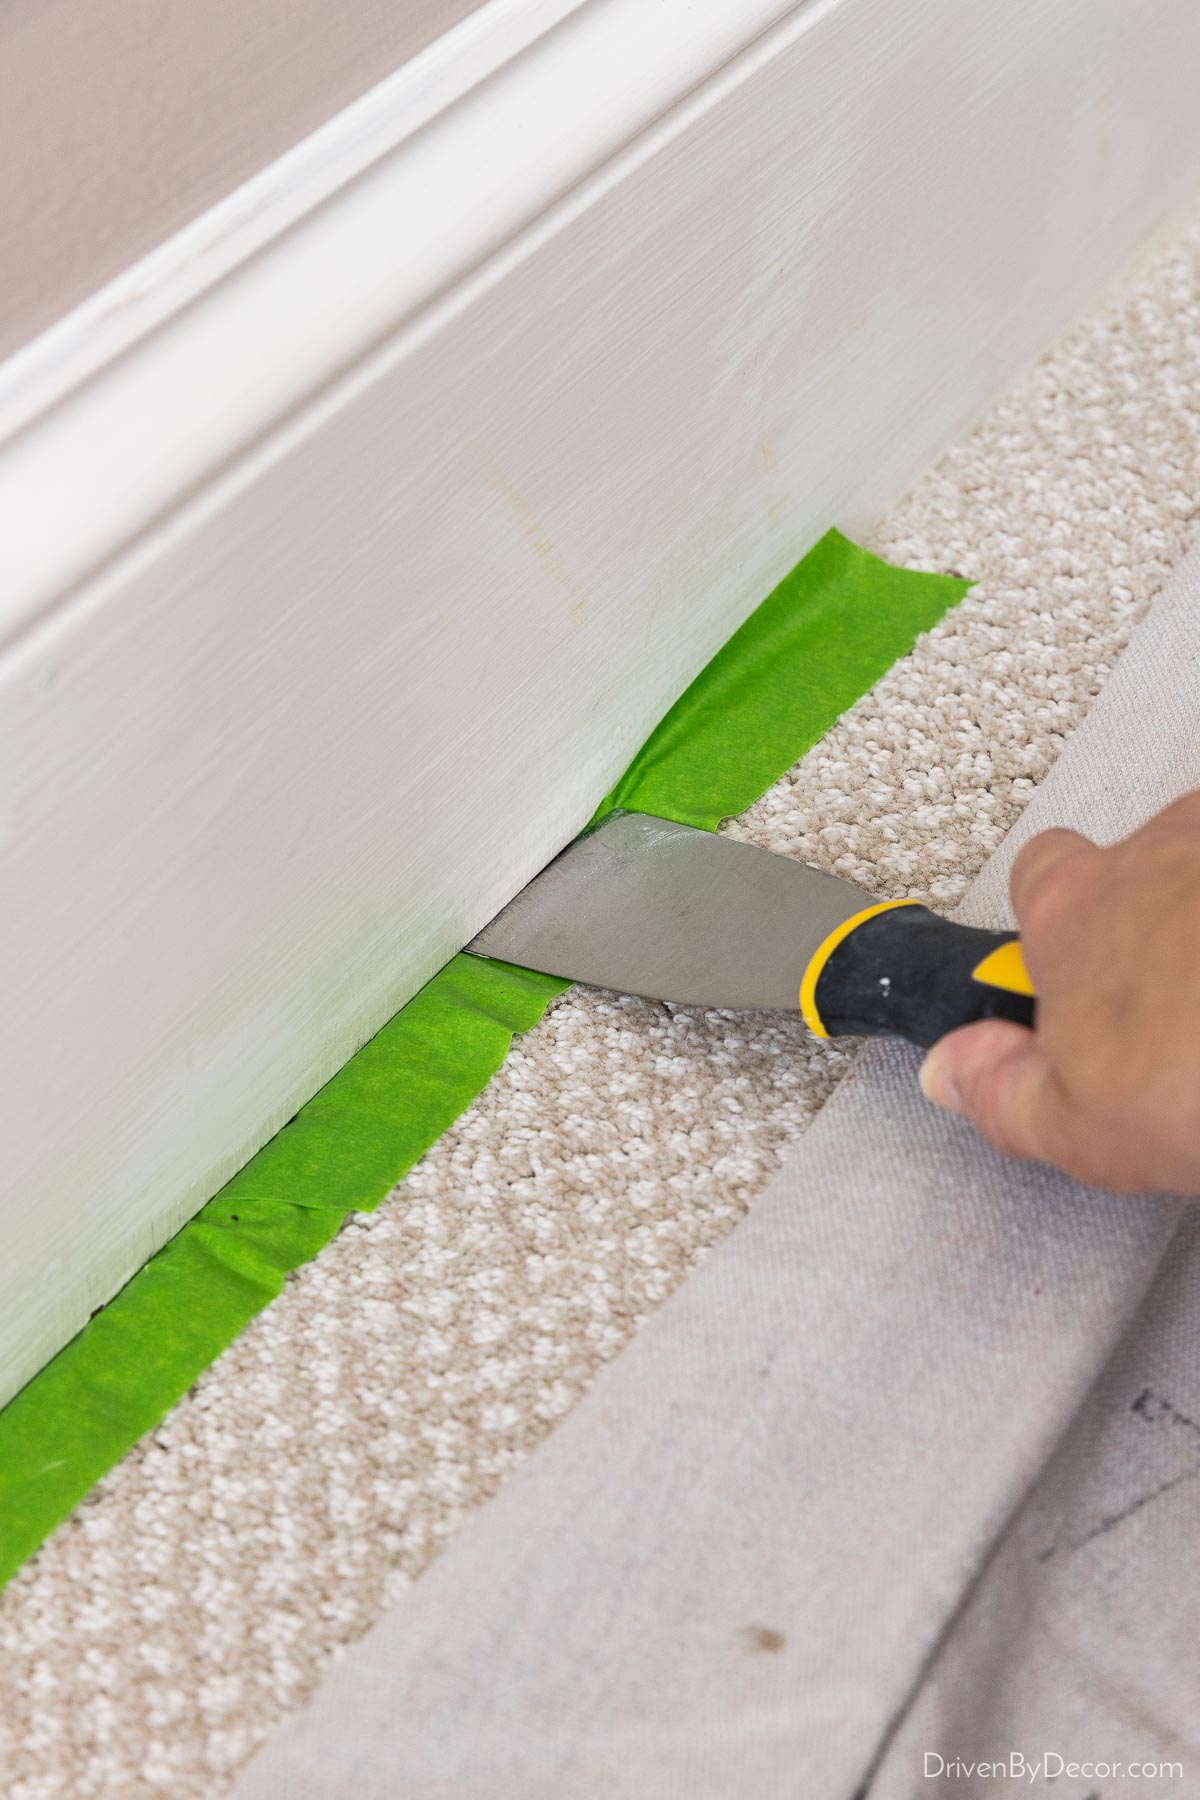
Next, use painter’s tape to tape off areas that you don’t want to get paint on. I place 2″ painter’s tape at the base of my baseboards to keep paint from getting on my floor. For carpet, I use my putty knife to push it about ¼″ under the baseboard to ensure none of the trim paint gets on my carpet:
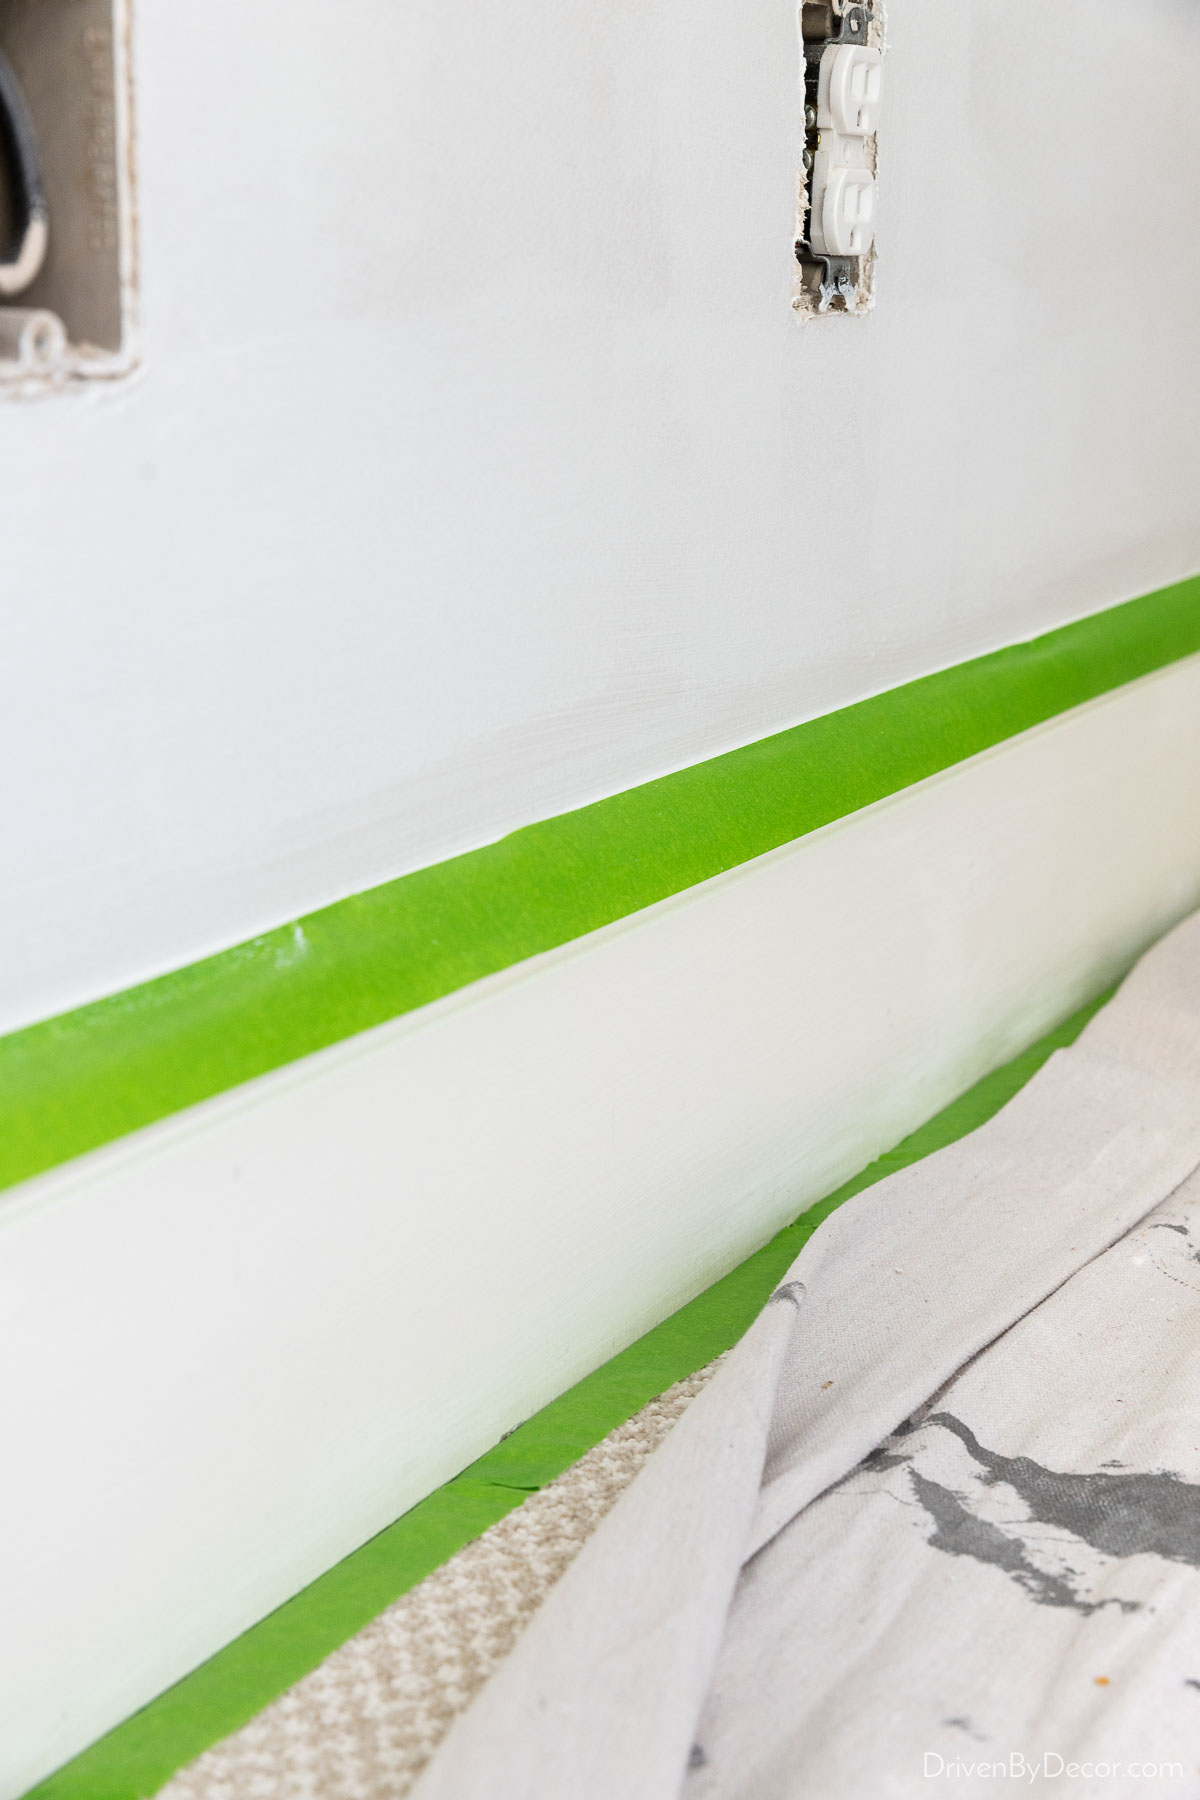
I also run 1″ painters tape along the top of my baseboards to keep paint splatter from rolling my walls from getting on them:
You can also use painter’s tape to “tape off” your entire room. This involves placing tape precisely along the line where the wall meets the baseboards, crown molding, and window and door molding. Then when you start cutting in with your paintbrush around the edges of the room, you can be kind of sloppy because the painter’s tape is protecting the molding from getting paint on it and will give you a nice clean line of paint once you pull the tape off.
While a lot of homeowners do this, you’ll never see a professional painter tape off an entire room. Why? Because it takes a LONG time to do, uses a ton of tape, and it’s common to have paint leak under the tape in spots and not give you that crisp paint line you were hoping for. My recommendation is to practice making clean, straight lines with your paint brush while cutting in, and skip taping off your space – it doesn’t take much practice to do it well and your painting job will move along much quicker once you get the hang of it!
4. Caulk Cracks & Gaps
The general order for painting a room is to prime (if needed), then caulk, paint the ceiling, paint the walls, and finally paint the trim. Your room might not need any caulking but if you have any cracks or gaps where the walls or ceiling meet the trim, fill them with caulk. Be sure you use a paintable caulk such as Alex Plus.
Want to save this post?
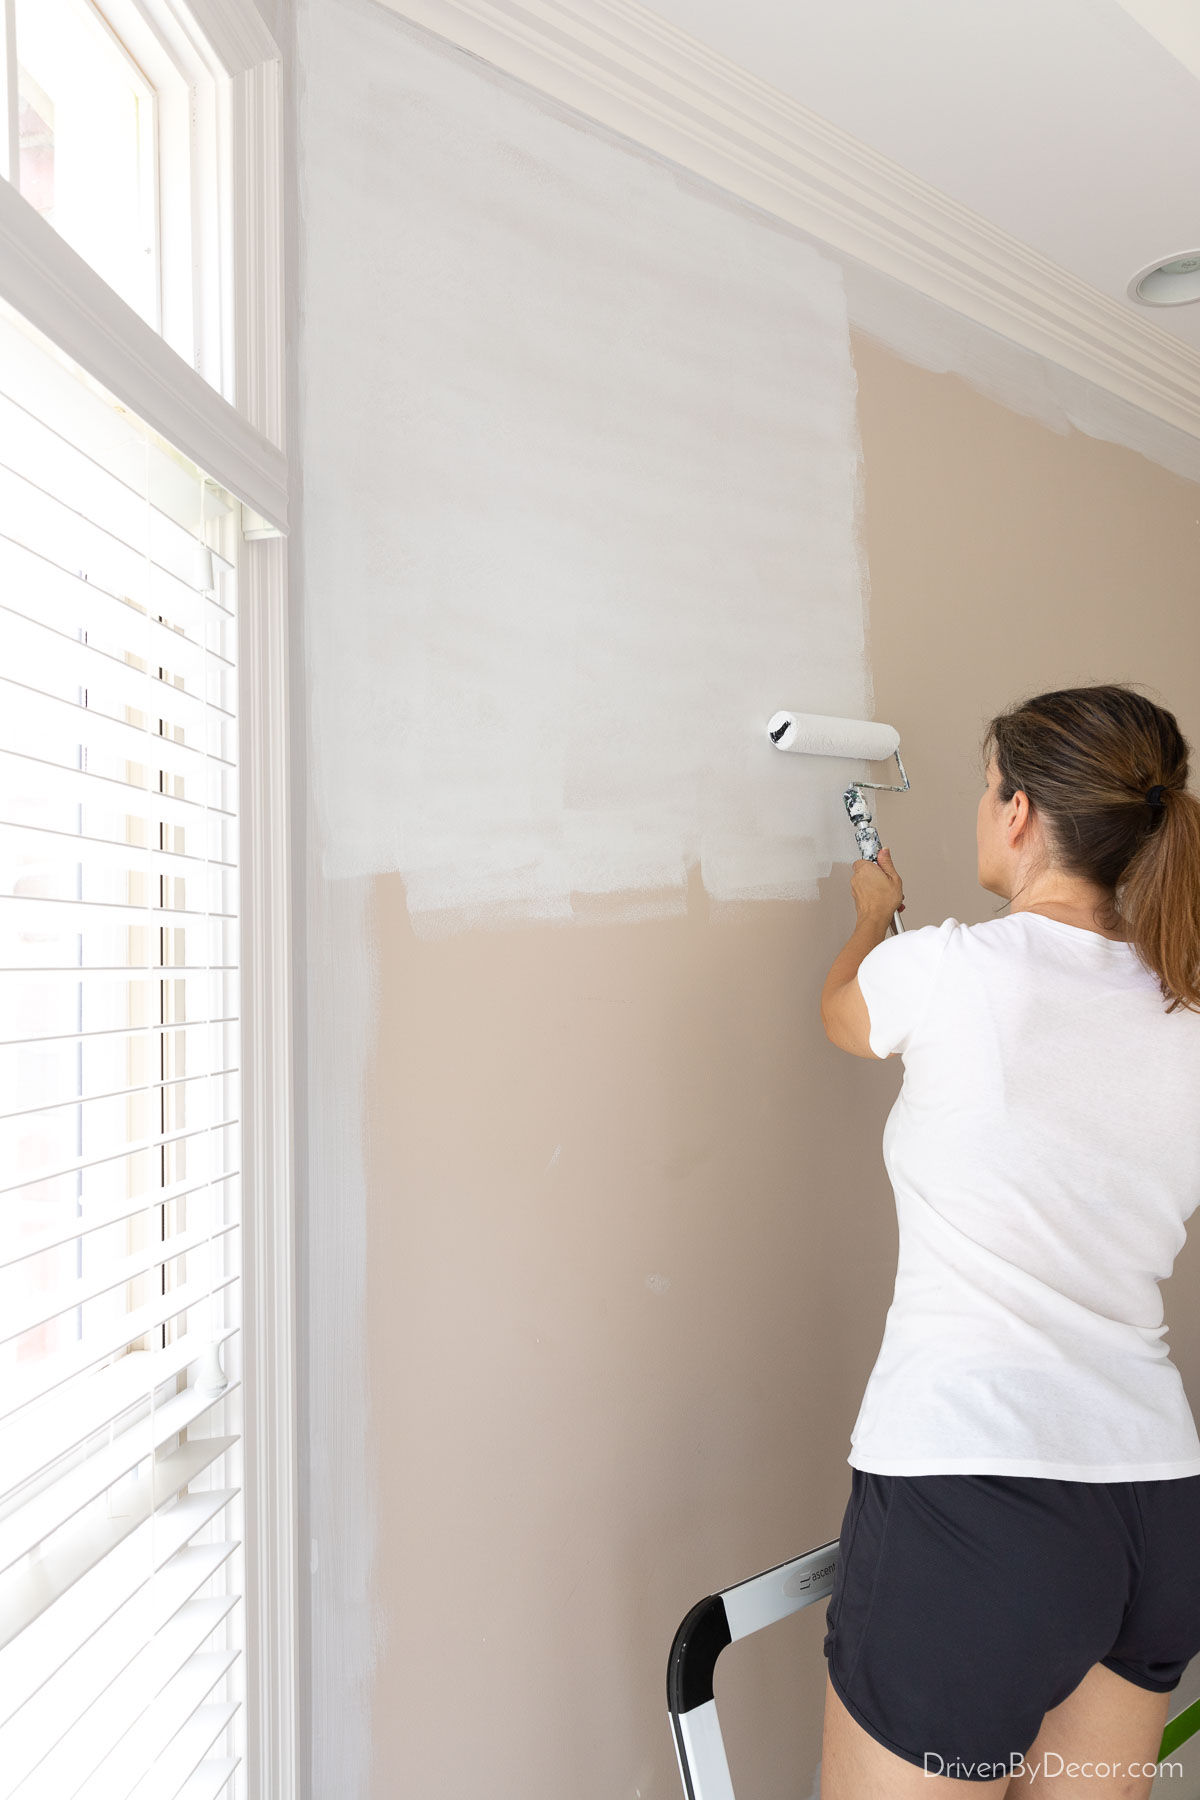
5. Start With Cutting In
Now you’re ready to go with your first coat of paint. I’m going to explain each step by showing what to do on a wall but the same steps apply if you’re painting a ceiling. First, open your paint can with your opener and use a stir stick to mix it well. We’ll start by “cutting in” or “edging” each wall which involves using your paintbrush to outline the perimeter of each wall and around doors and windows. Since you’ll be going up a down a ladder to do this, it’s much easier to work with a paint cup than the entire paint can. Keep a damp rag nearby to wipe off any “oops” where you might edge too far onto the trim or get paint on your hands.
Start cutting in along the top of your wall and work your way down. Dip your paint brush about ⅓ – ½ way into your cup and tap it on the edge to remove any excess paint. Holding your brush near the base, make your first stroke about ½-1/4″ away from the edge.
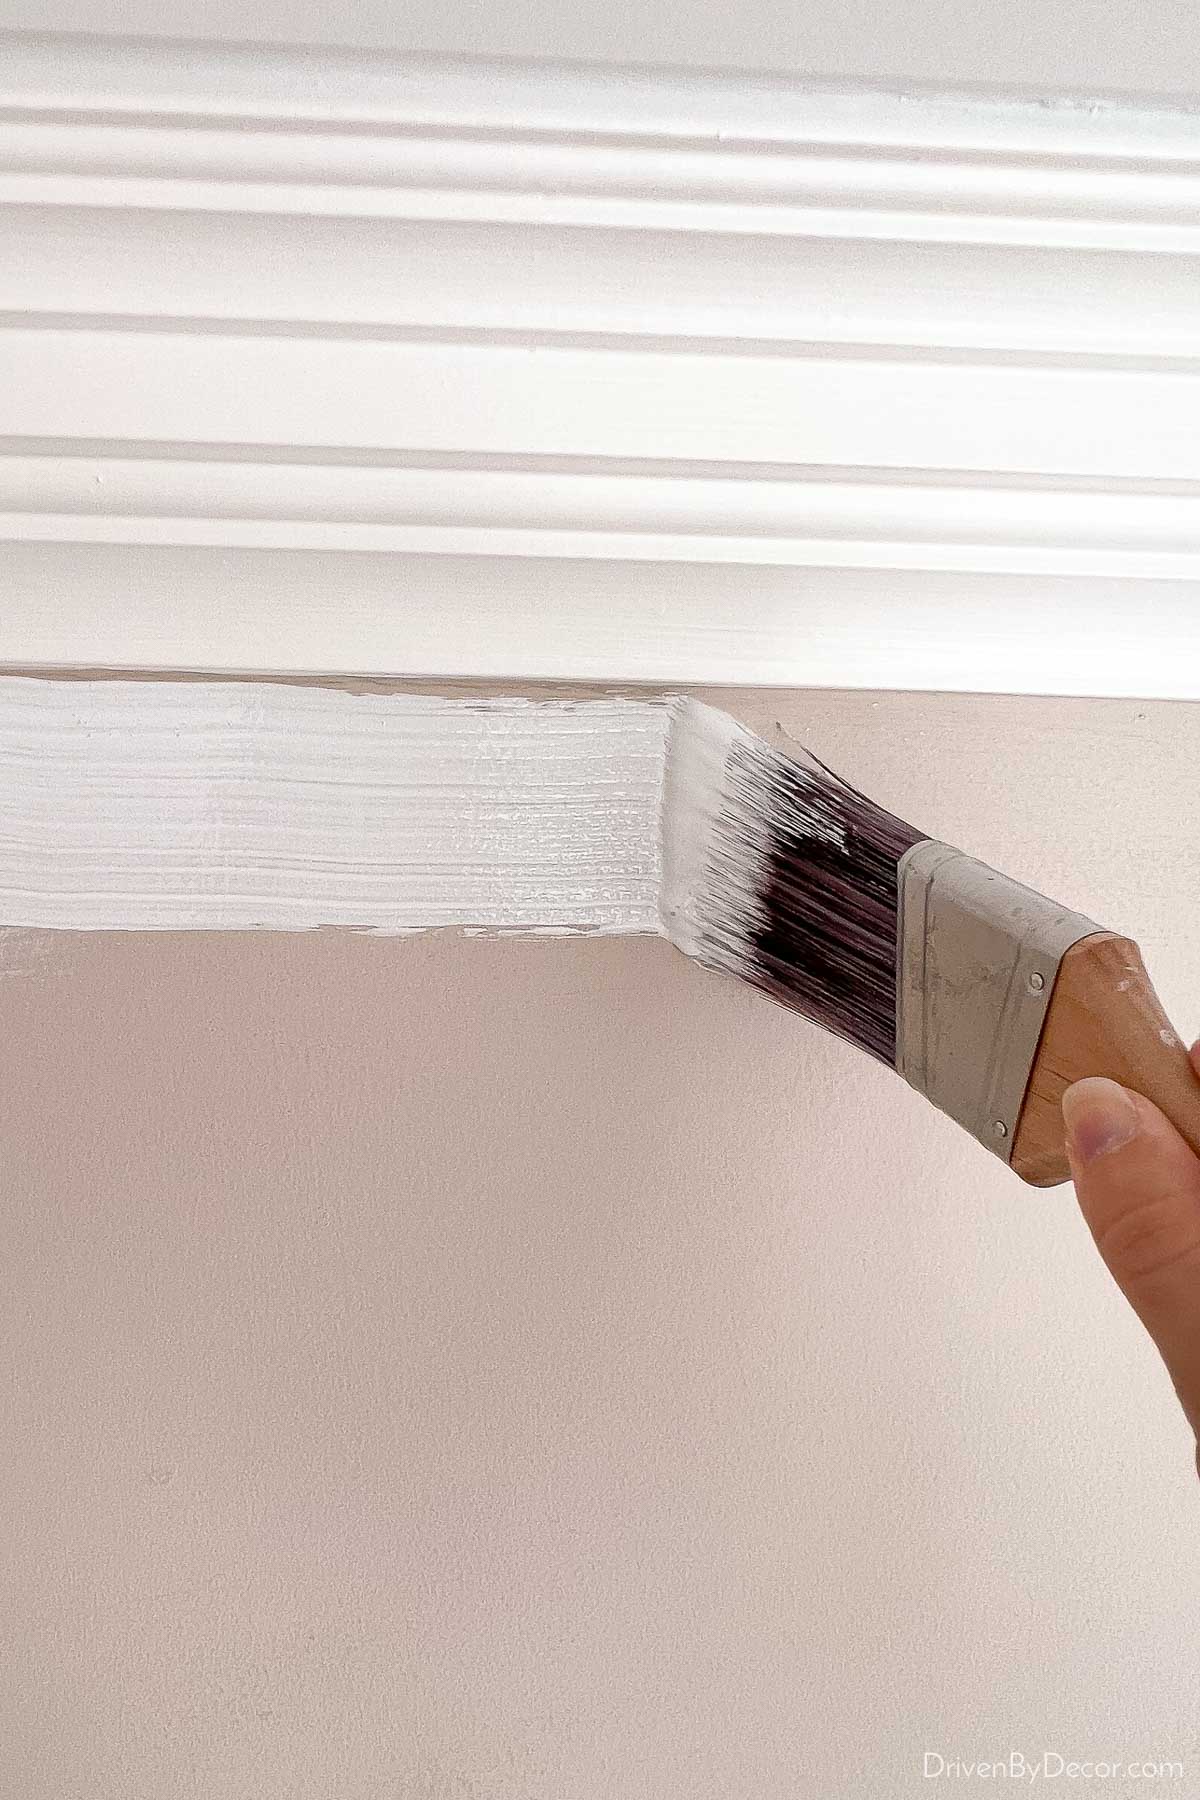
Then go over that stroke again, getting your paint closer to the edge this time. Continue until your line of paint is right at the edge:
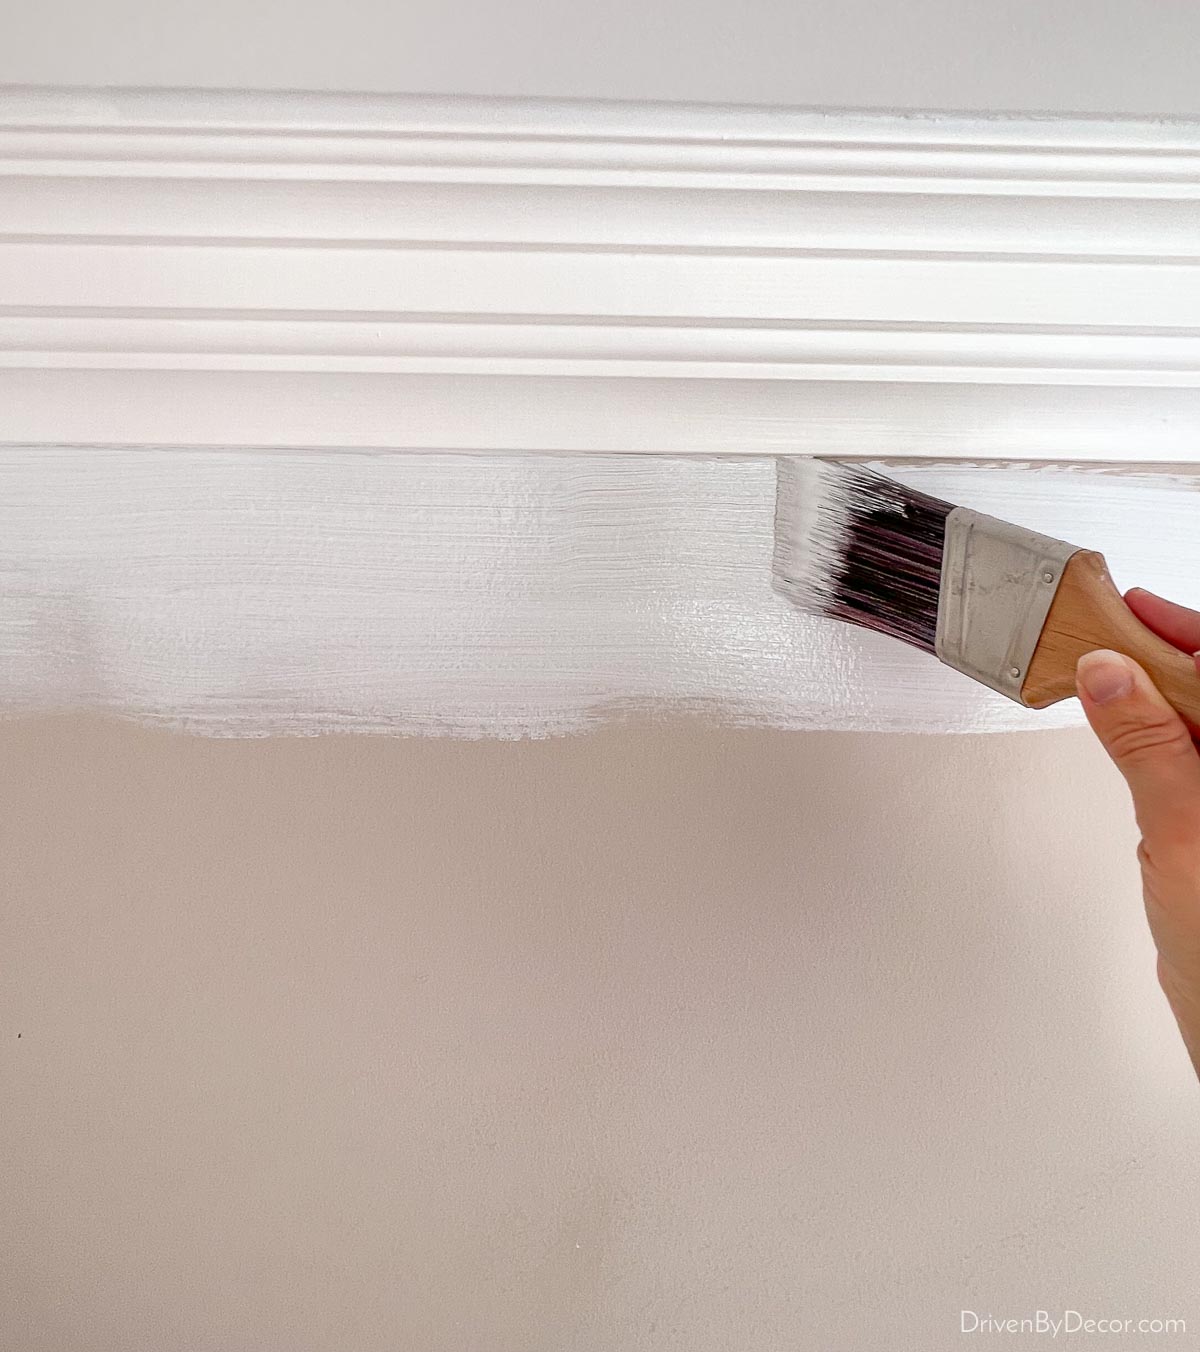
Once you’re done with that section, move down the wall and do it again. Always blend the different sections you’re working on by brushing over them. Also brush the paint back and forth along the edge toward the inside of the wall so you have a nice feathered edge that will blend well with the paint you roll on. Your edging should be roughly 2-3″ wide.
The pros edge a wall, immediately roller the rest of it while the edging is still wet, and then move on to edging the next wall. But as long as you feather the paint well when you’re edging, it also works to edge the entire room followed by rolling paint on the entire room. I typically paint solo (Jeff was fired from helping me after several mishaps including knocking over an almost full can of paint with his foot several years back 😂) and am not a very fast edger so this is what I do.
6. Roll on Your First Coat
Now we’re ready to roll! Place your roller on your roller handle and prep it for painting by wrapping it in painter’s tape and then gently pulling it off:
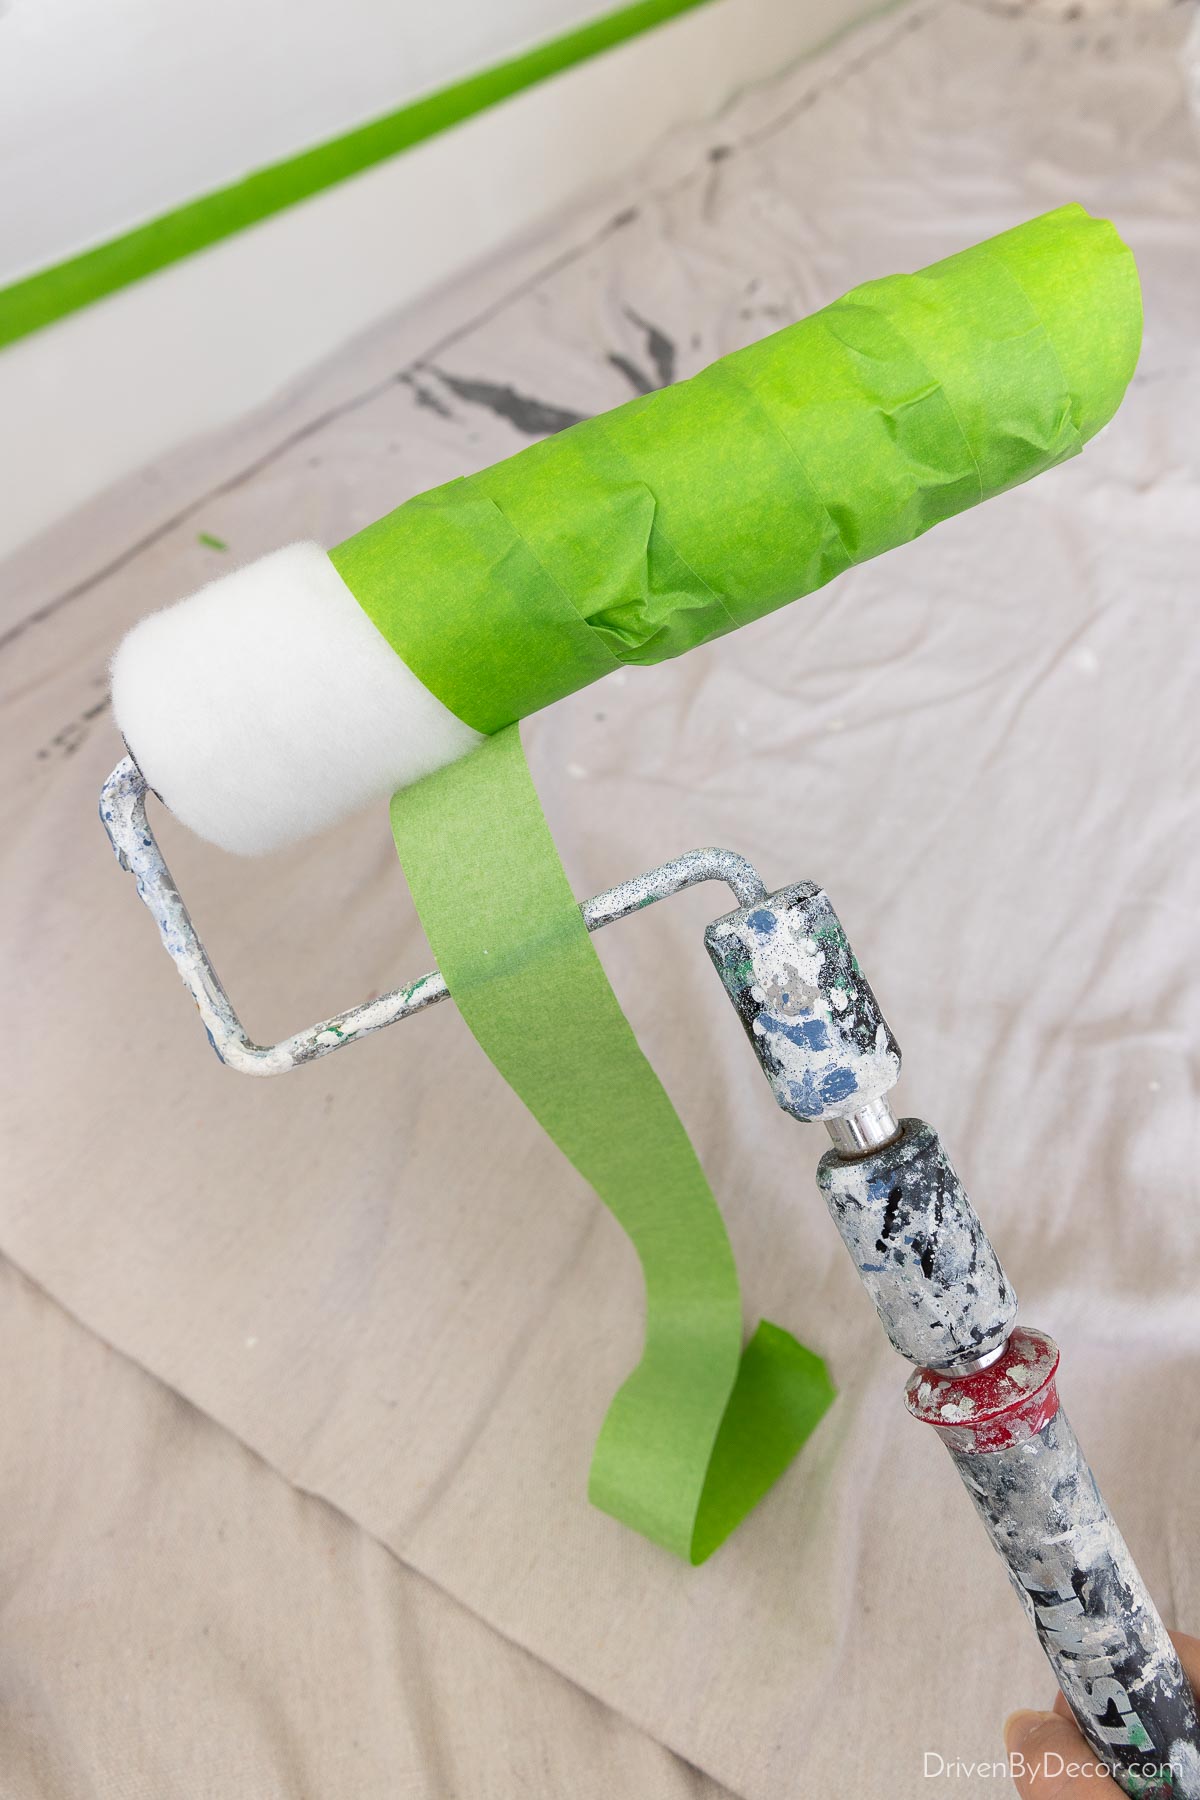
This removes loose fuzzies from your roller that would otherwise get in your paint.
Next pour some of your paint into the well of your paint tray. Run your roller down your paint tray and barely dip it into the paint well. Then roll it back and forth along the angled surface of the tray to remove excess paint and distribute it evenly on the roller. Do this (dip, then roll) several times until your entire roller is evenly covered in paint. You want the Goldilocks amount of paint on your roller – enough that your roller is evenly saturated with paint but not so saturated that paint will drip off your roller.
The first stroke that you roll on the wall will unload the most paint so if you roll in a linear pattern from left to right, your paint won’t be evenly distributed. Instead of doing this, roll in a W pattern such as this:
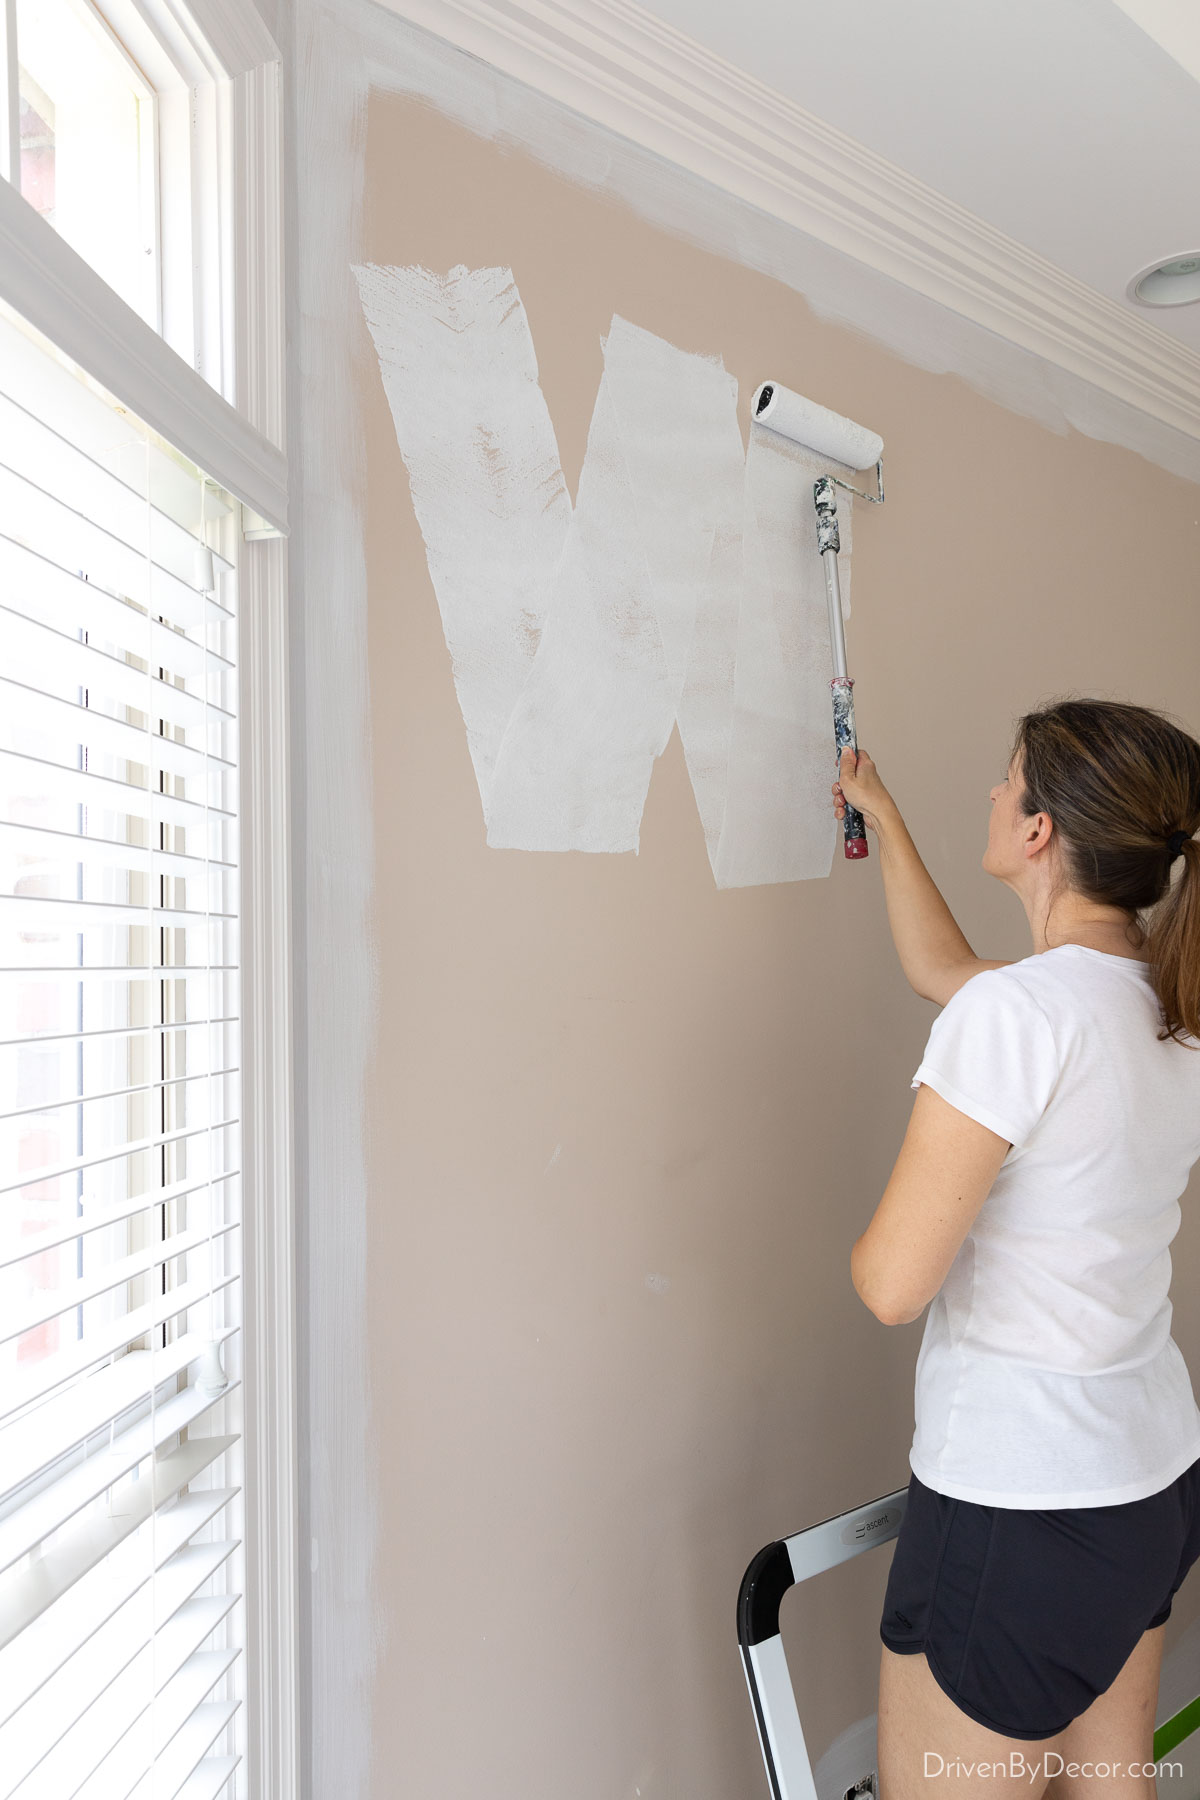
and then roll back over the space with up and down strokes to fill in that W:
Do this in sections along your entire wall, blending each section with the next. Don’t worry if your first coat looks streaky like mine. It will even out with subsequent coats.
7. Recoat Your Walls
Once you’ve cut in and rolled all four walls, let your paint dry the recommended time between coats (it differs from paint to paint so read the recommended drying time on your paint can). You don’t need to wash your brush and roller between coats of paint, even if you’re not recoating the same day. If it’s going to be over 24 hours before you recoat, pour excess paint back in the paint can and place your roller and paint brush in plastic baggies (or wrap them with plastic wrap):

and store them in the refrigerator. If you’re doing both coats in a less than 24 hour period, simply wet a towel, wring it out, and place it over your paint tray and roller to keep everything from drying out:
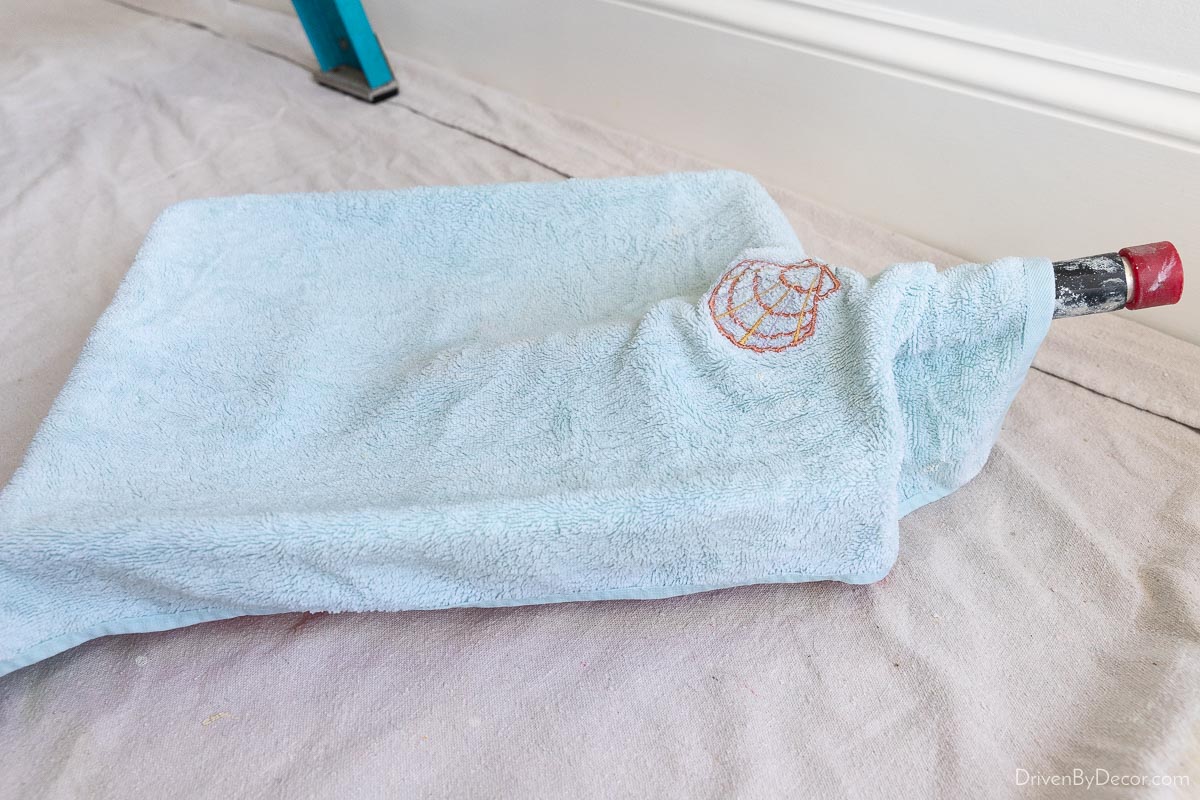
Bag your paintbrush and put it in the refrigerator. Take any brushes & rollers you refrigerate out of the refrigerator about an hour before painting so they get back to room temperature before use.
Now you’ll follow the same process of cutting in and rolling for the second coat as you did for the first. Typically two coats of paint will give you even, streak free coverage.
When you’re completely done painting your walls (or when you’re done priming and are starting with a new roller for your paint color), use {this brush & roller cleaner} to remove excess paint from your roller:
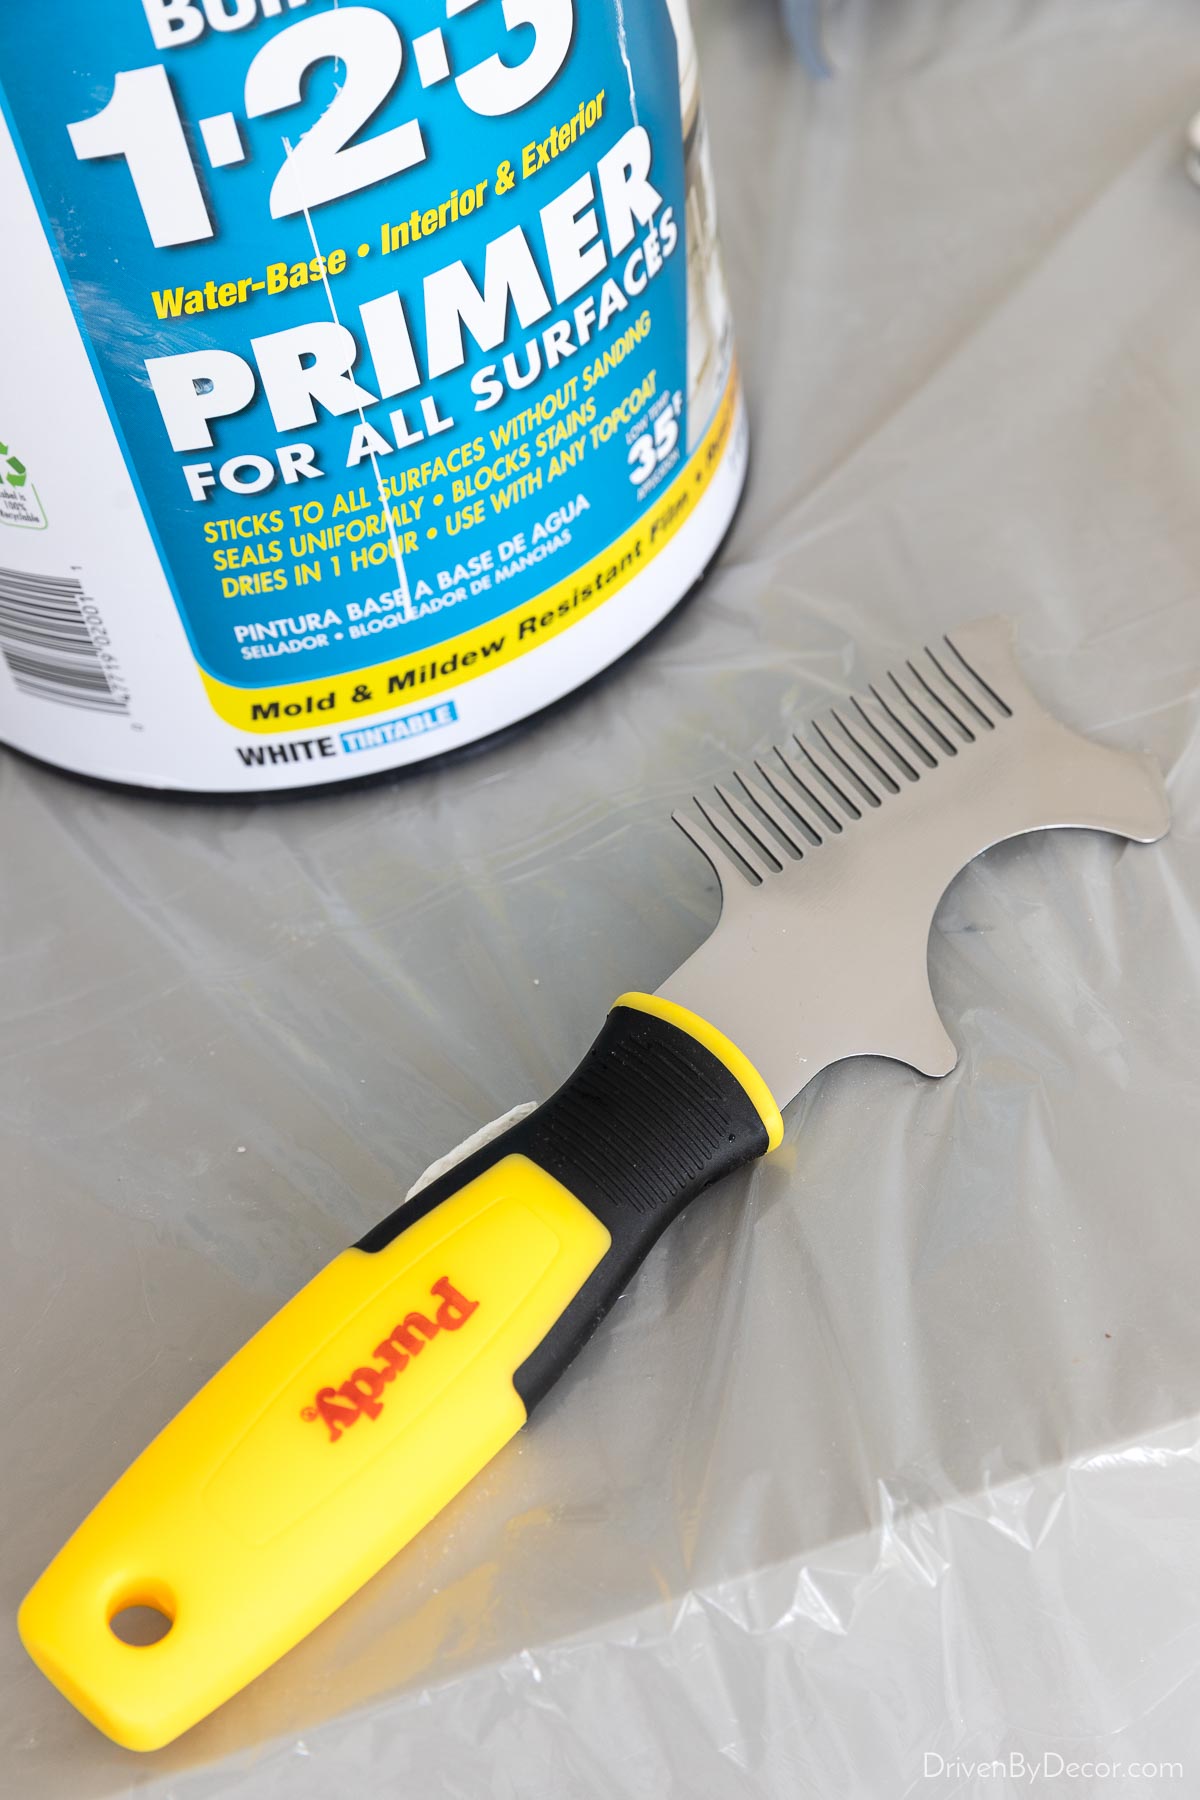
Simply move the curved area of this tool down the roller, returning excess paint to the paint can:
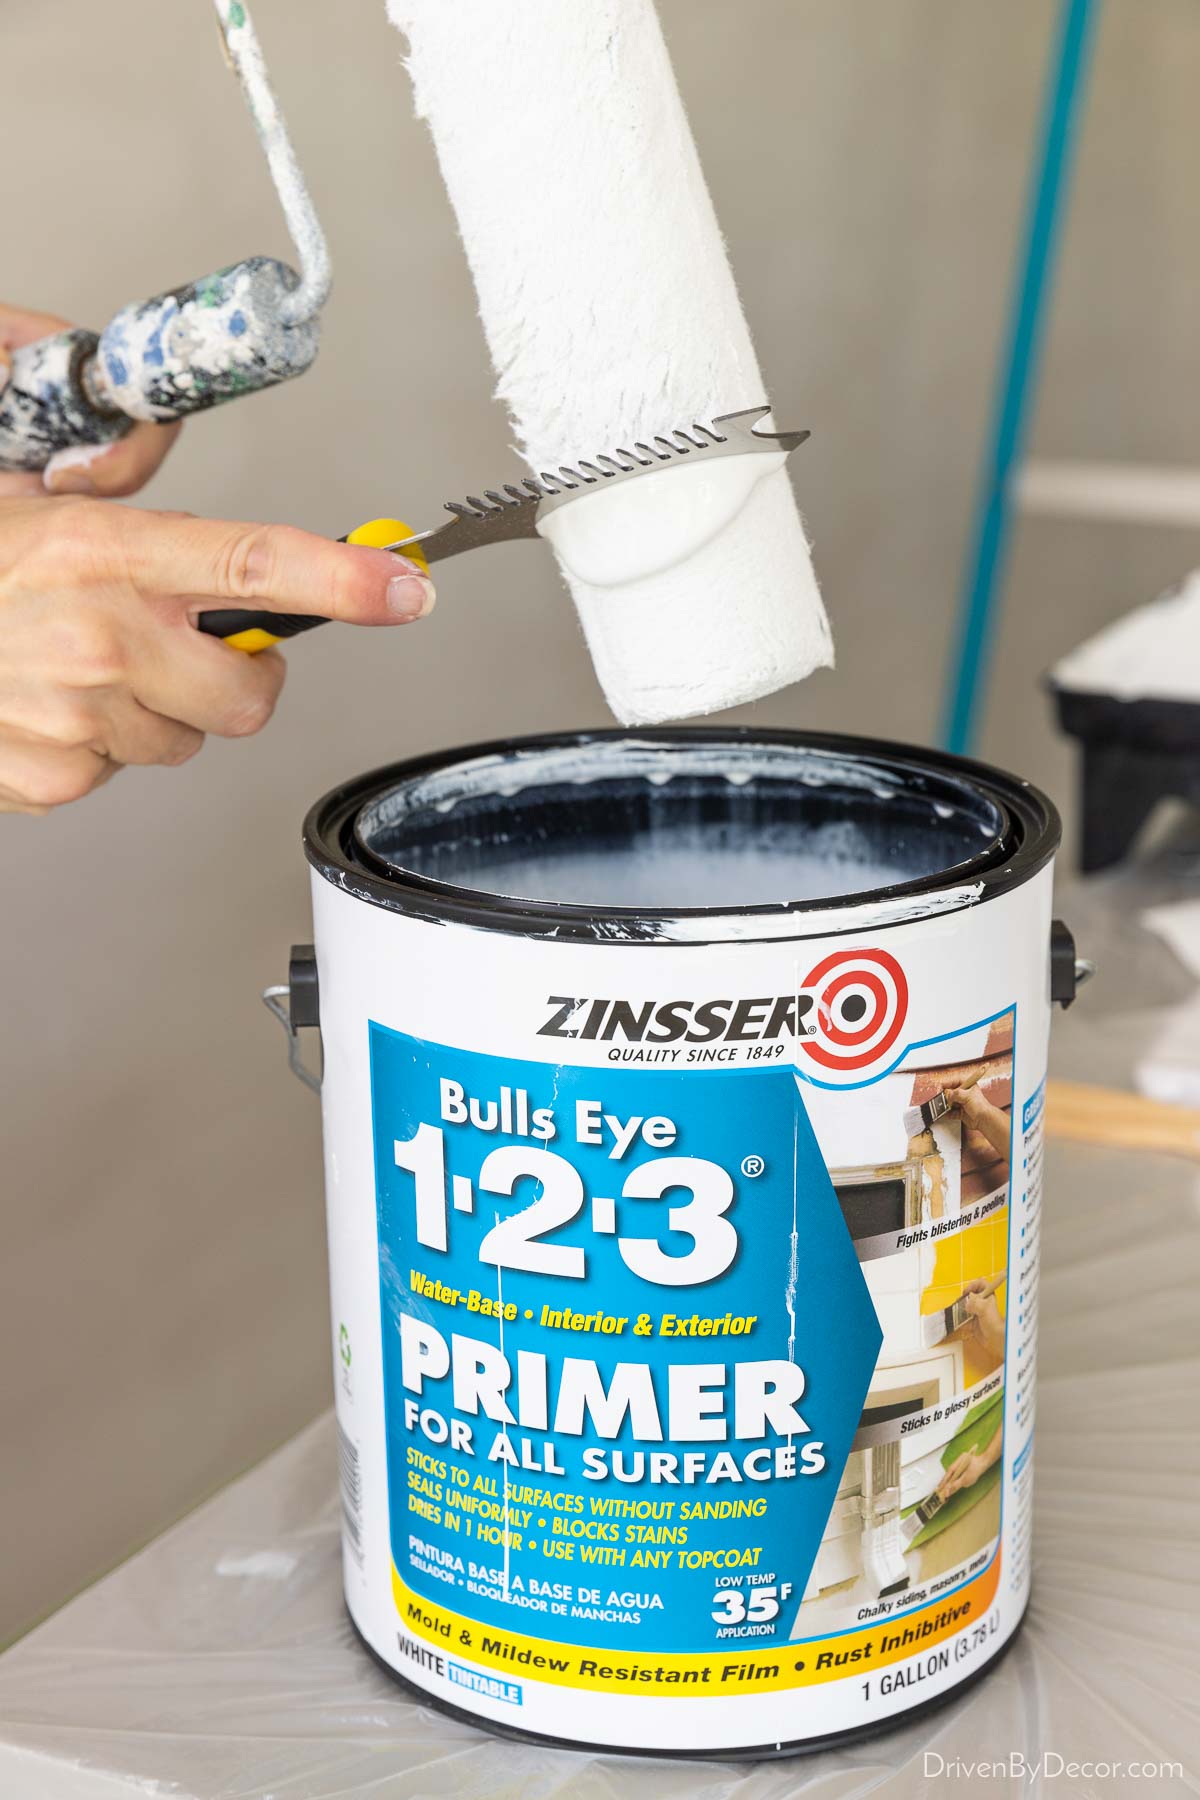
Not only does this make it quicker to clean the paint out of your roller but you’ll be surprised by how much paint it saves too!
9. Paint Your Trim
Once you’re done painting the ceiling and walls, it’s time to paint the trim (baseboards, crown molding, window & door molding) if it needs it. Remove any painter’s tape that you had on your trim protecting it from paint splatter. Then use a microfiber cloth to wipe all dust off the trim before using a clean paint brush to paint it. As mentioned before, if your trim was previously painted with an oil-based paint, you’ll can’t use latex paint on top of it. You’ll either need to prime your trim first or use a specialty paint such as Benjamin Moore Advance.
10. Clean Your Brushes And Rollers & Store Your Paint
Now it’s time to clean your brushes & rollers. If you used a quality roller, you can absolutely rinse all of the paint out of it and reuse it for a future paint job. Clean latex paint out of a roller by running it under lukewarm water and moving the cleaning tool back and forth over it until the water runs off clear:

Partially dry your roller with a lint-free cloth and air dry it the rest of the way with the roller standing on its end. Or you can use a brush & roller spinner like {this one}:
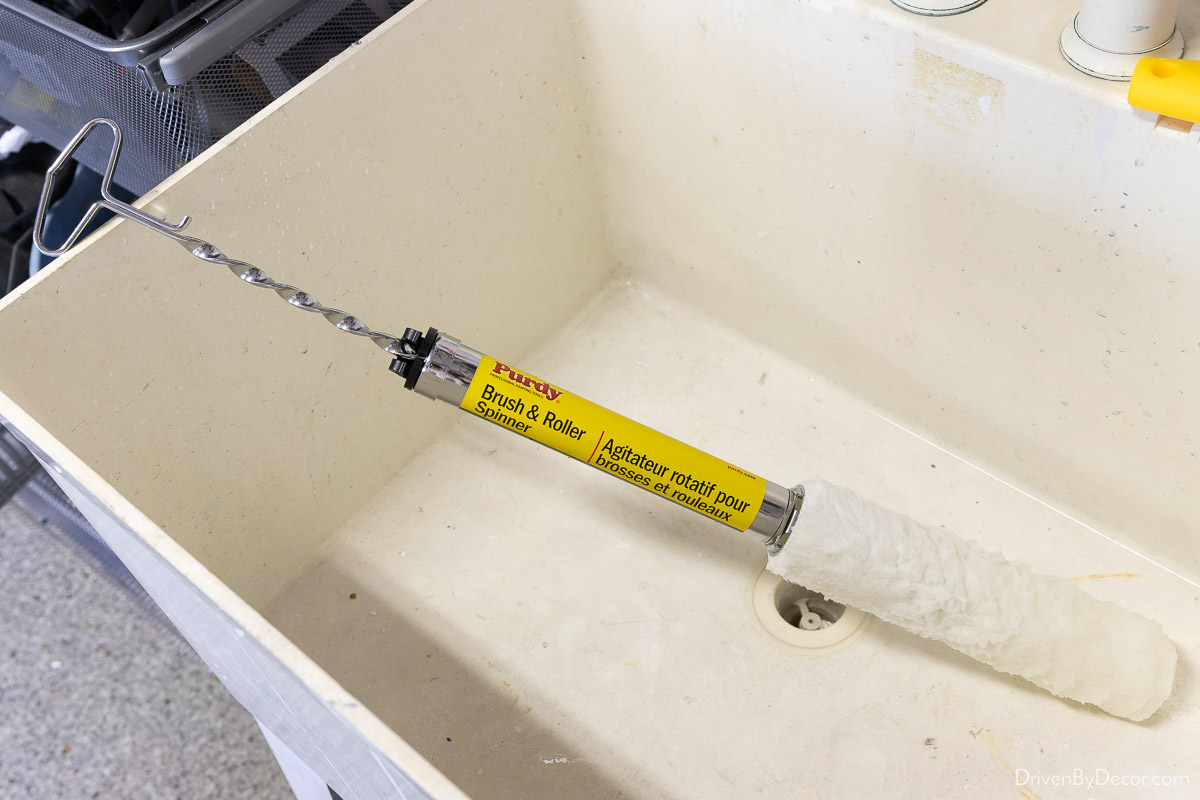
You attach the roller to it and press the handle in and out to spin the water out of the roller. It works really well but you can definitely get some water splatter with it so it’s best to either use it outside or in a garage utility area like we have.
Tip: If you have a septic system you want to minimize the amount of paint going down the drain so it’s best to pitch your roller instead of washing it clean
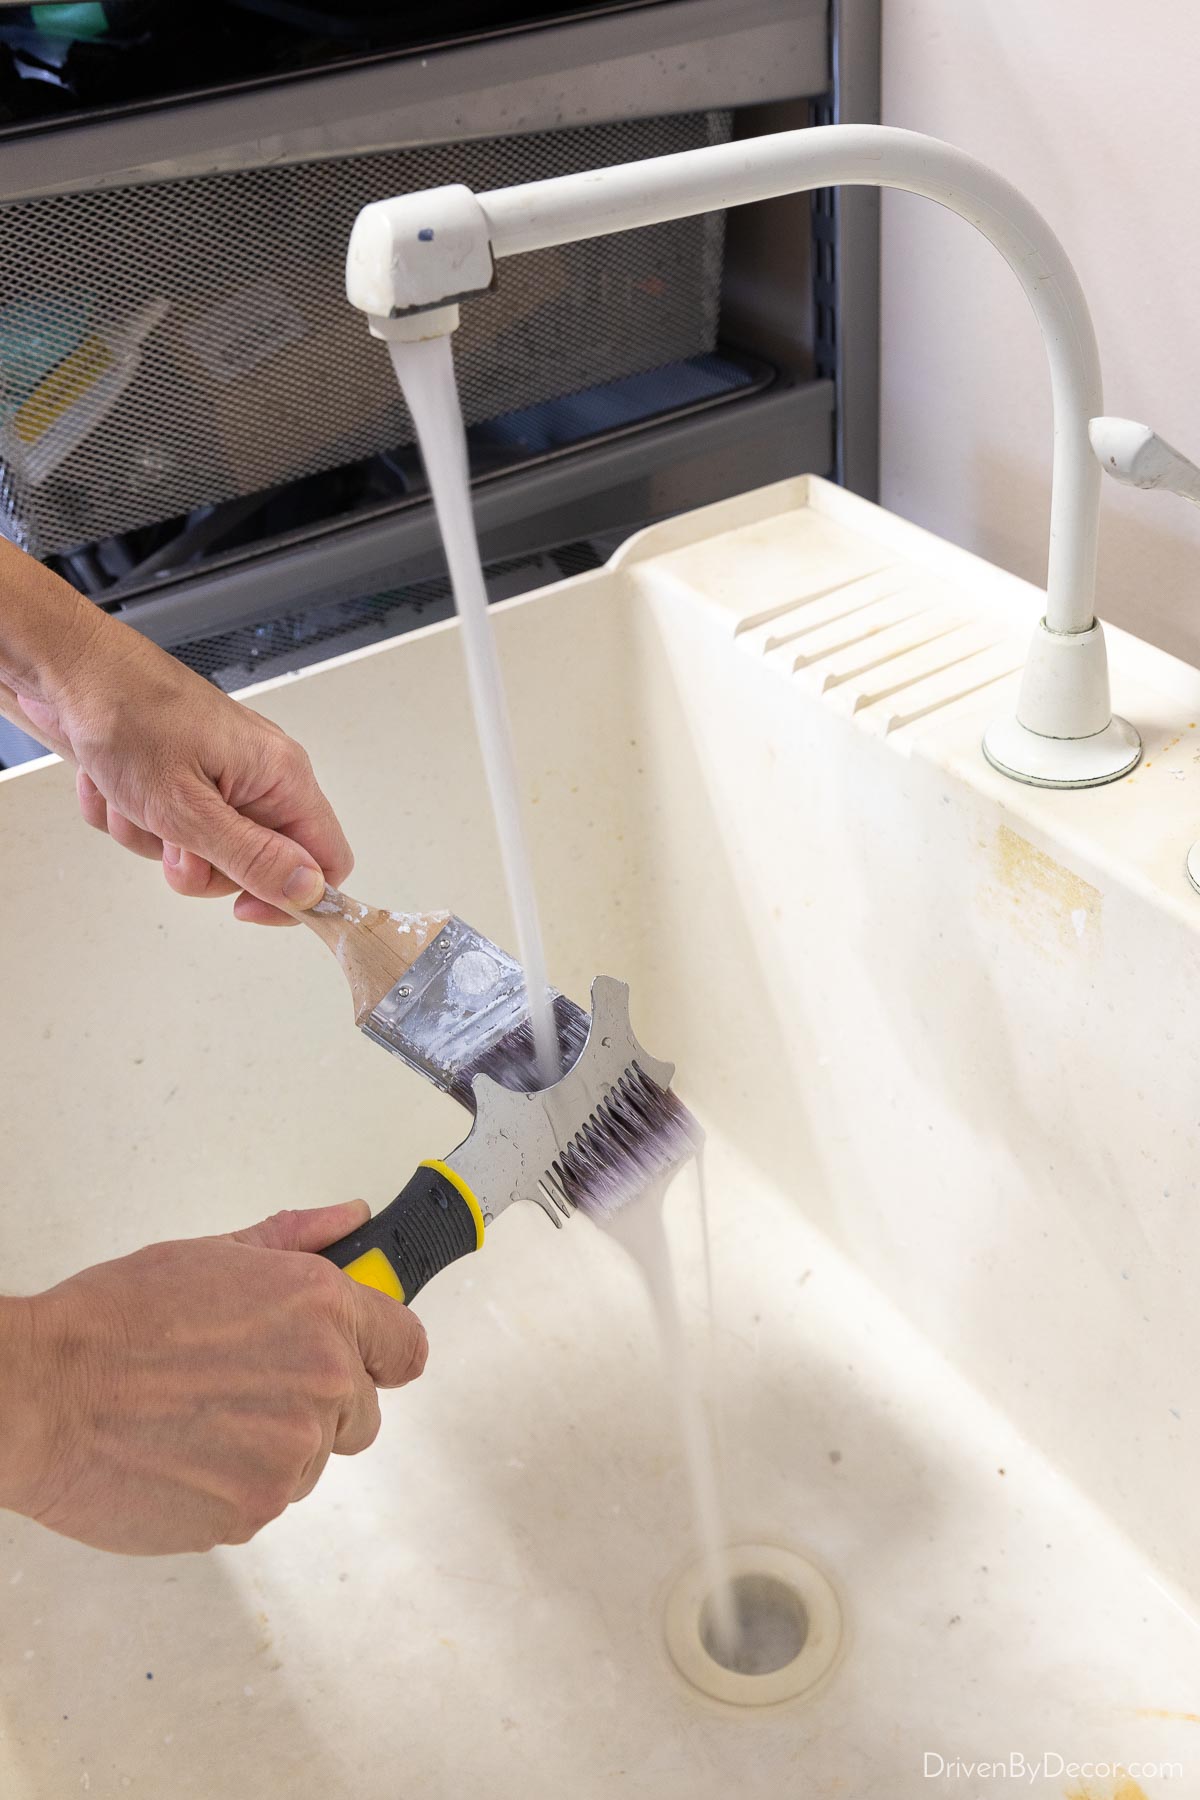
To clean your brush, first use a paper towel to wipe off any excess paint. Then rinse it under water, running the brush portion of the brush & roller cleaner down the brush to get between the bristles:
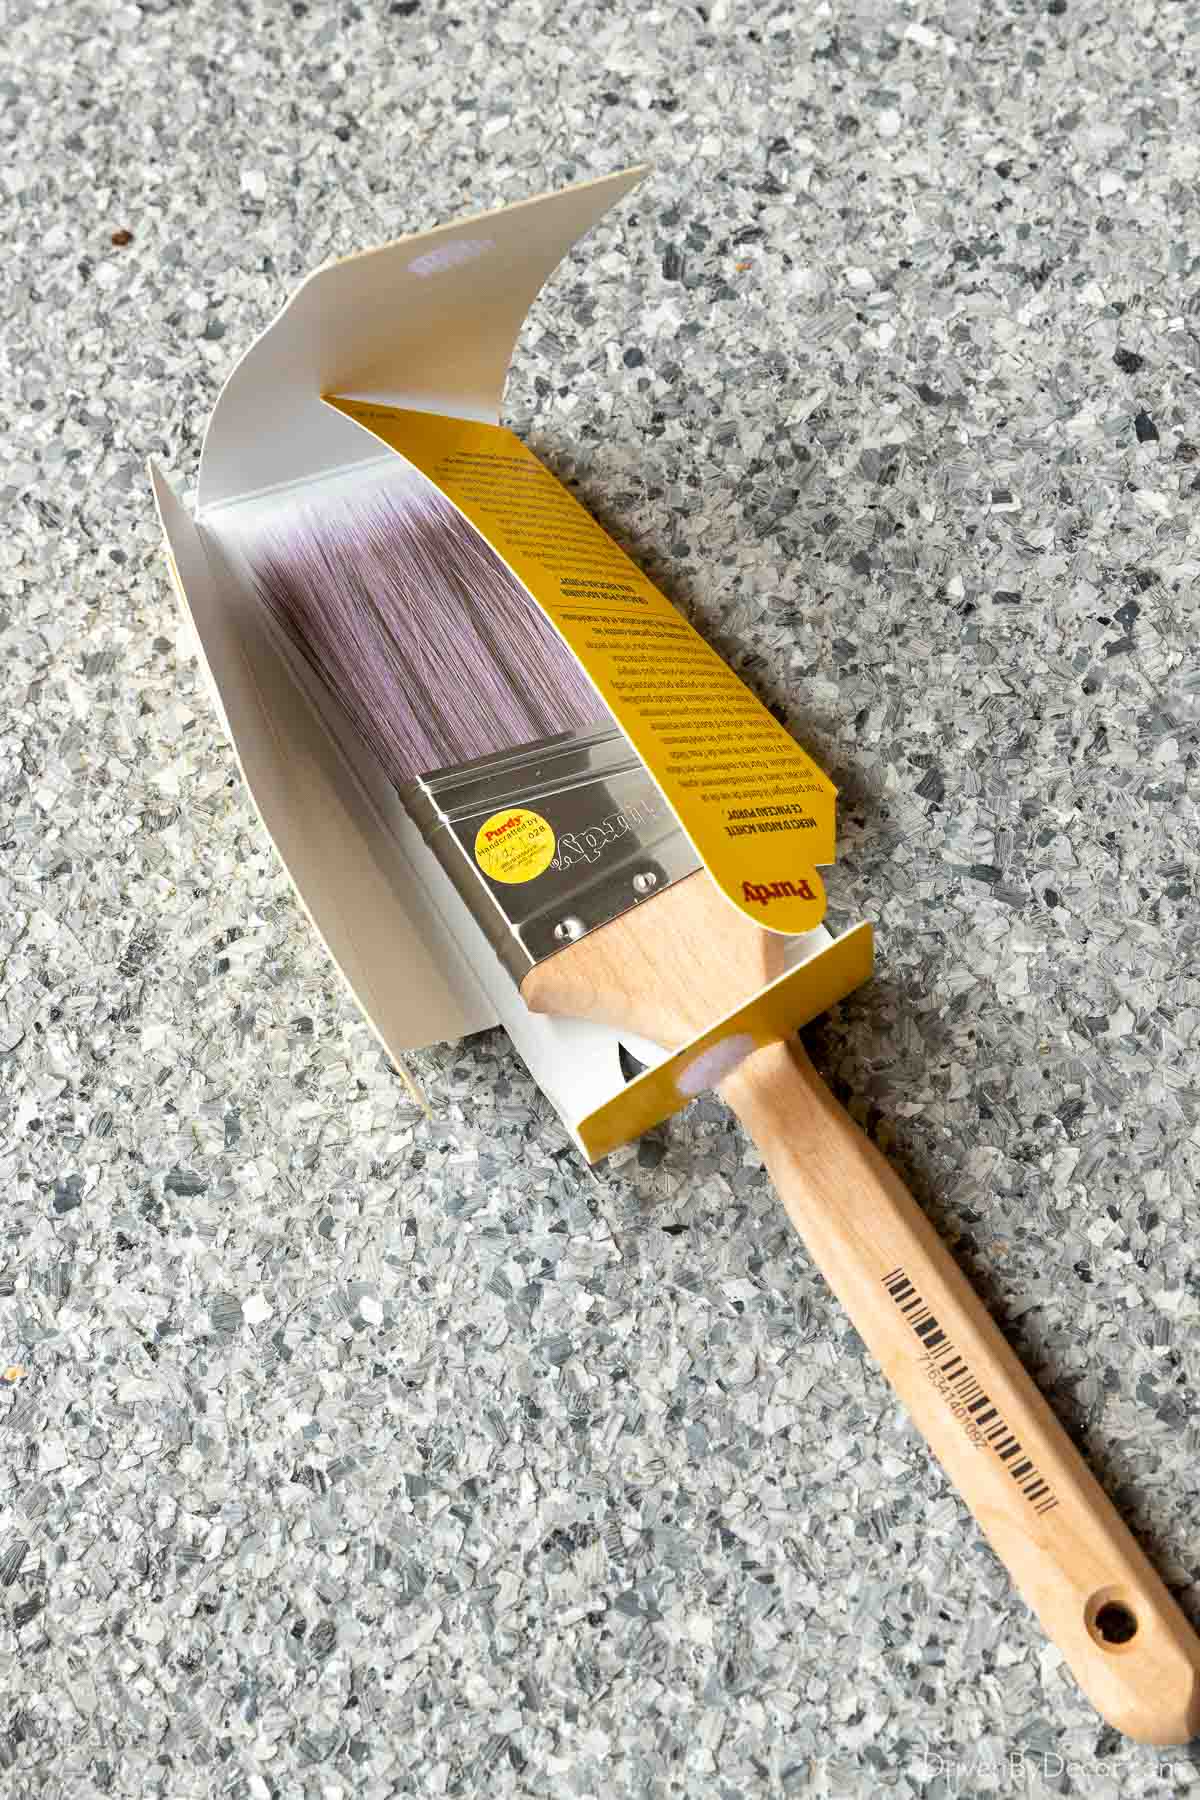
Partially dry it with a lint-free cloth and air dry it the rest of the way. You can also use the spinner cleaning tool for brushes but it’s hard to load the brush onto it so I rarely use it for that. Once your brush is fully dry, wrap it in its jacket (if it came in one) before storing to protect the bristles:
One other helpful cleaning tip is to keep {this latex paint remover} on hand:
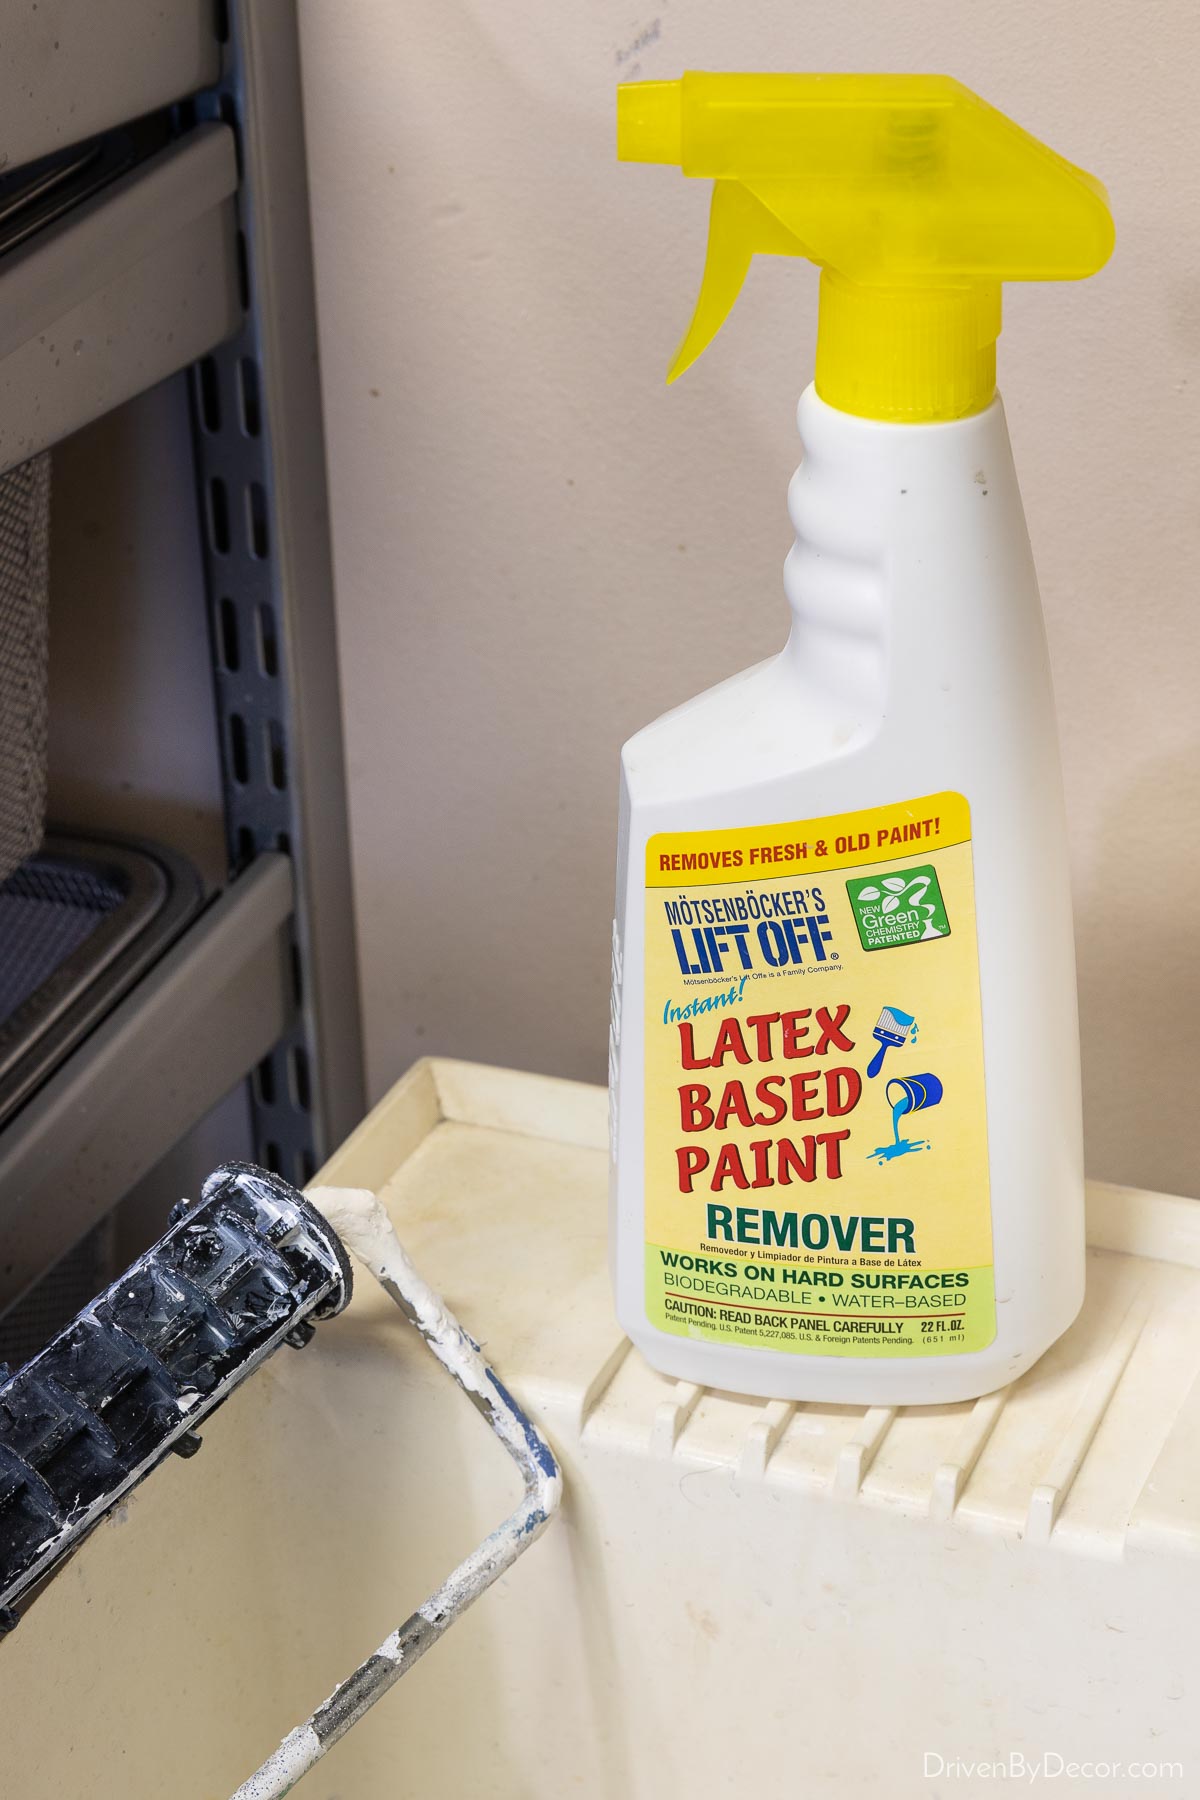
It does an awesome job of getting dried-on latex paint off of your paint tray, roller handle, or anywhere else you’re having a hard time removing it from. I just painted our bedroom and after I removed all of the tarps I found a dried spot of paint on our carpet (I have no clue how it got there!). I used this remover and it completely removed the paint spot.
You definitely want to keep any leftover paint for future touch-ups. Clean the rim of the can off as much as possible with a damp cloth and then seal it tightly by using a hammer along the top edge. Be sure to label your paint with the date and what you used it for so it’s easy to find. I stick one of these labels (that my daughter designed for me) on the side of all of my paint cans which makes finding the right can so easy:
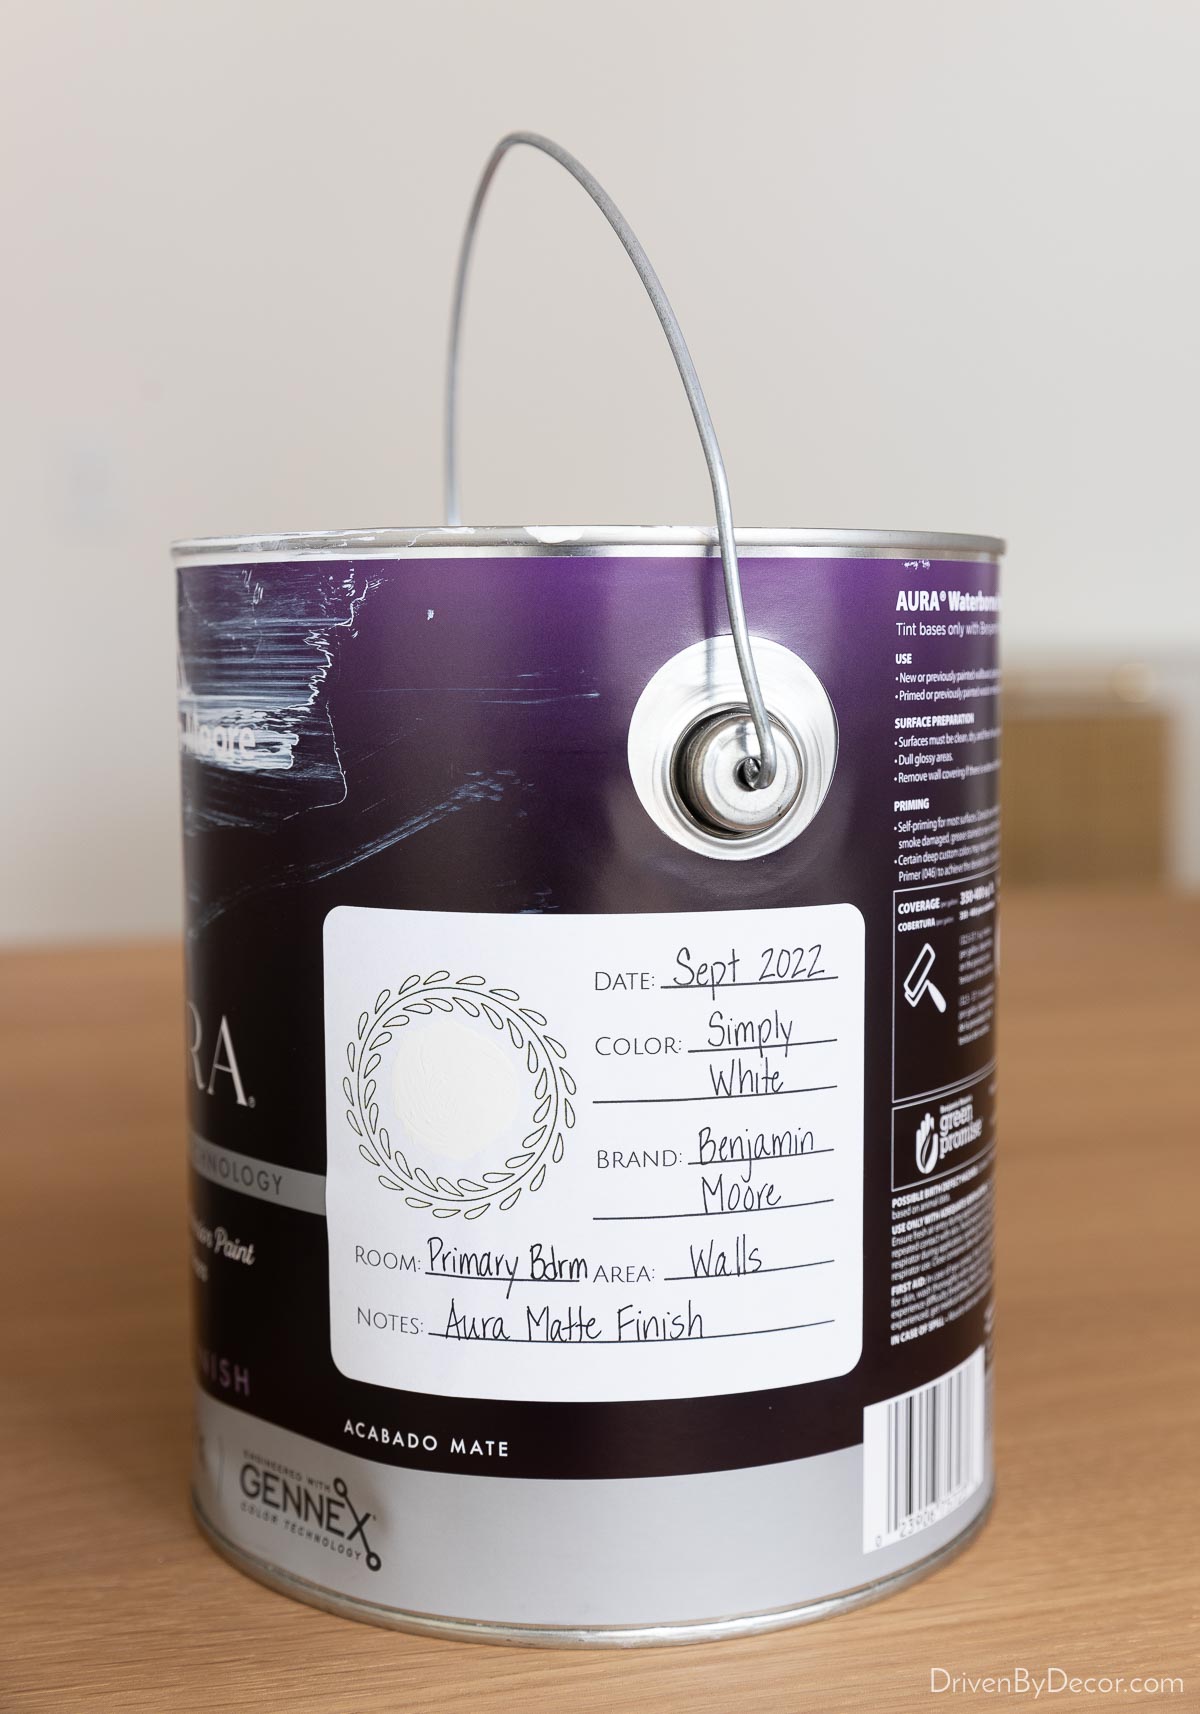
It’s hard to tell because this is a can of white paint, but in the middle of the leafy circle you can dab a bit of your paint on which also makes finding the right can easy.
These printable paint can labels are the beginning of a printables library that I recently created – you can download my printables {here}. The labels are sized to fit perfectly on Avery brand label #15264 that you can get {here}:
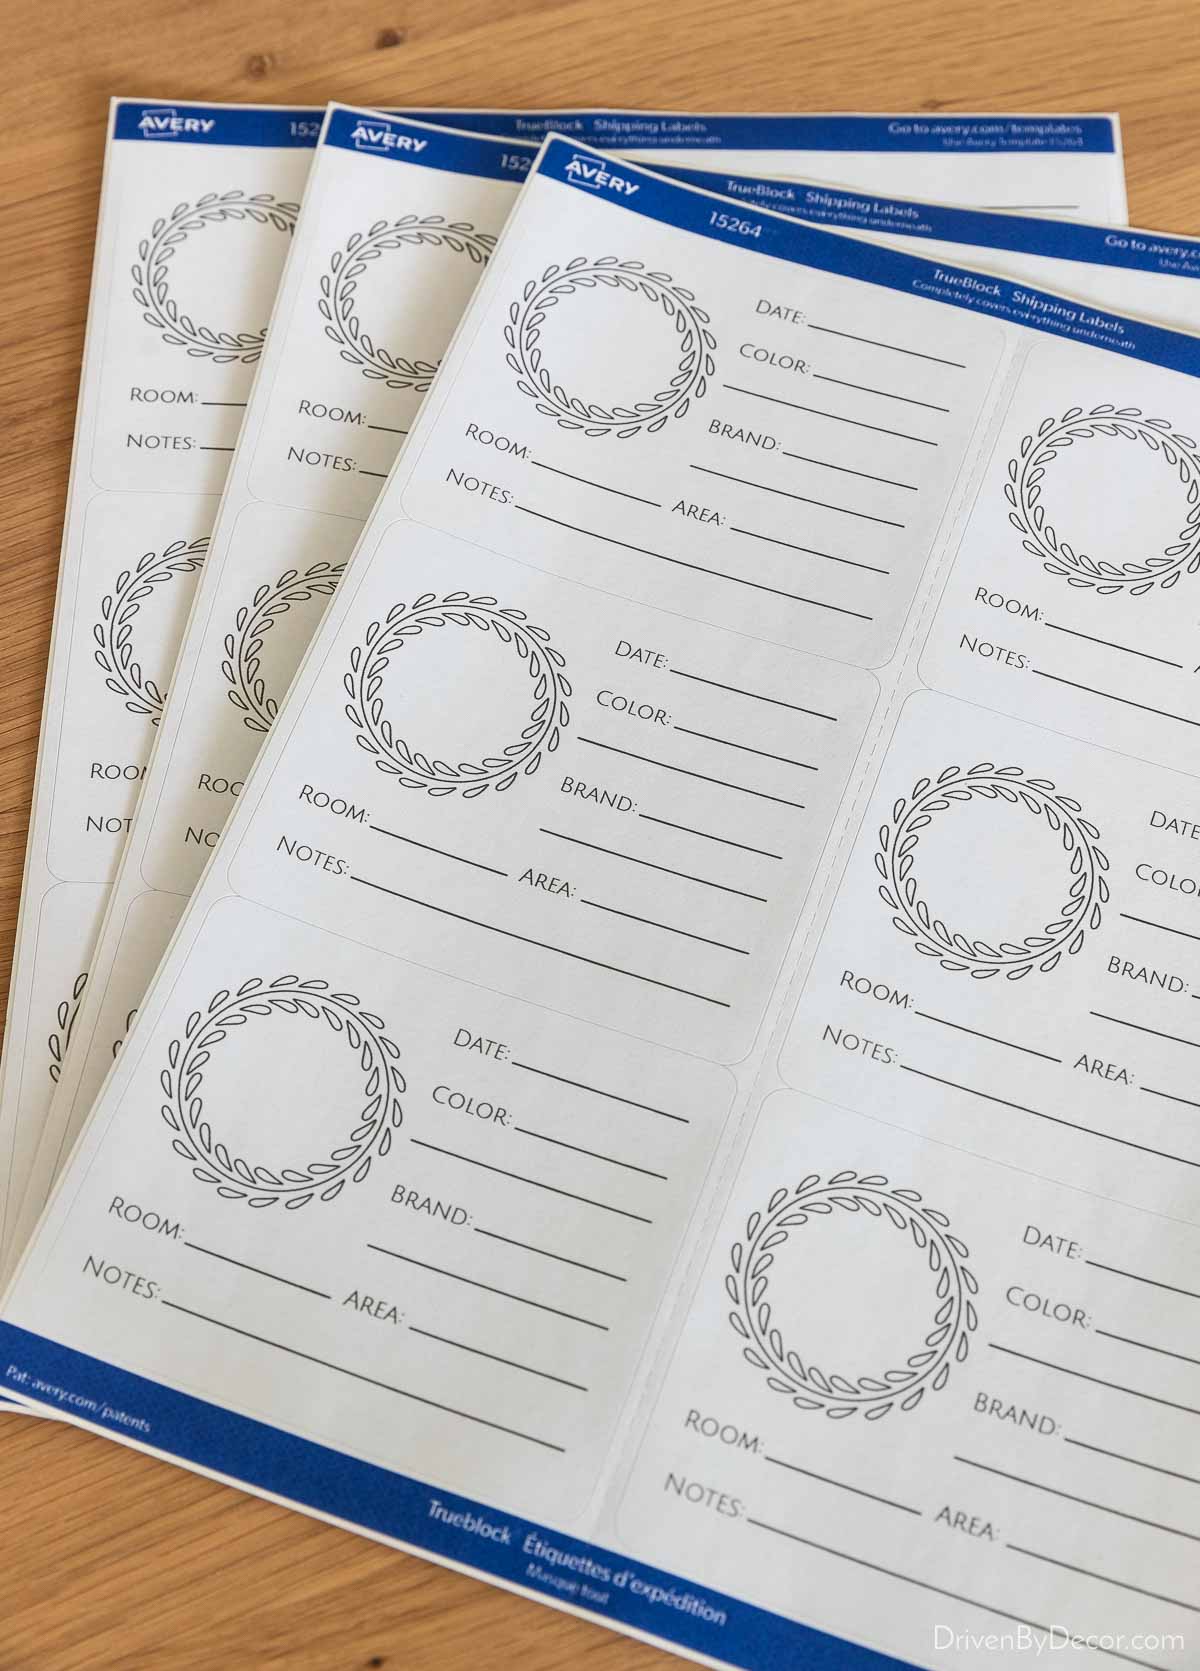
or you can print them on paper and tape them to your paint can.
And Finally… Stand Back And Admire the Painting Transformation You Just Made!
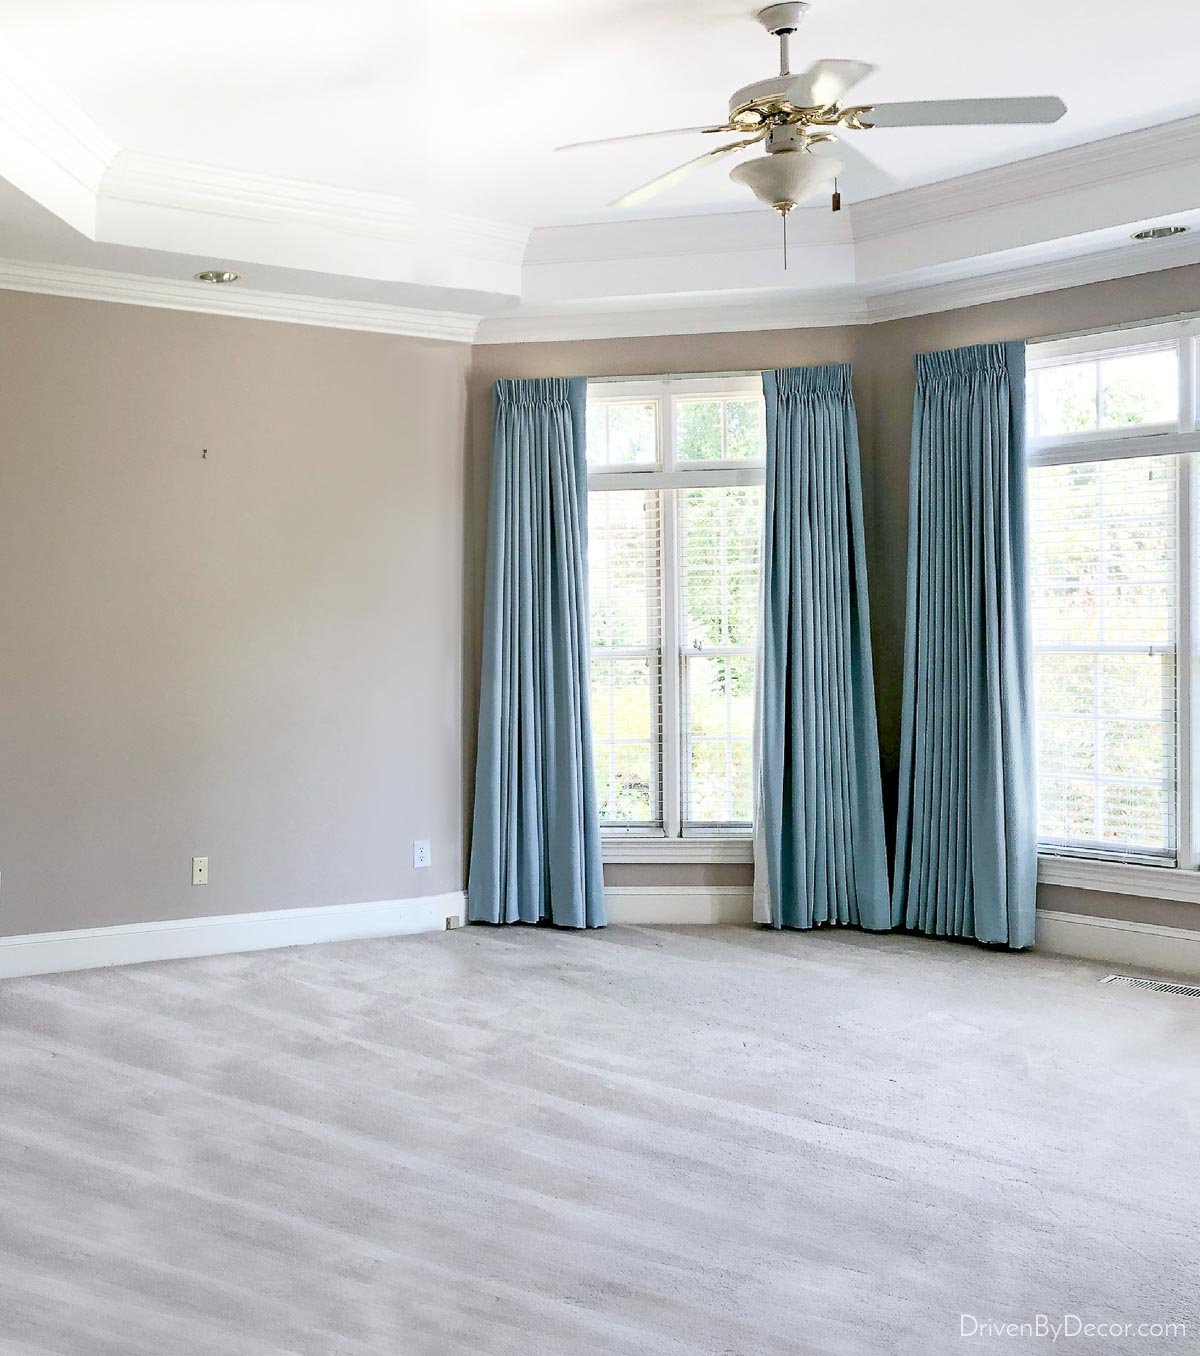
The last step in how to paint a room is to stand back and give yourself a pat on the back for transforming your room with paint! This is what our primary bedroom looked like before:
and this is our much softer & airier space after painting and redecorating:
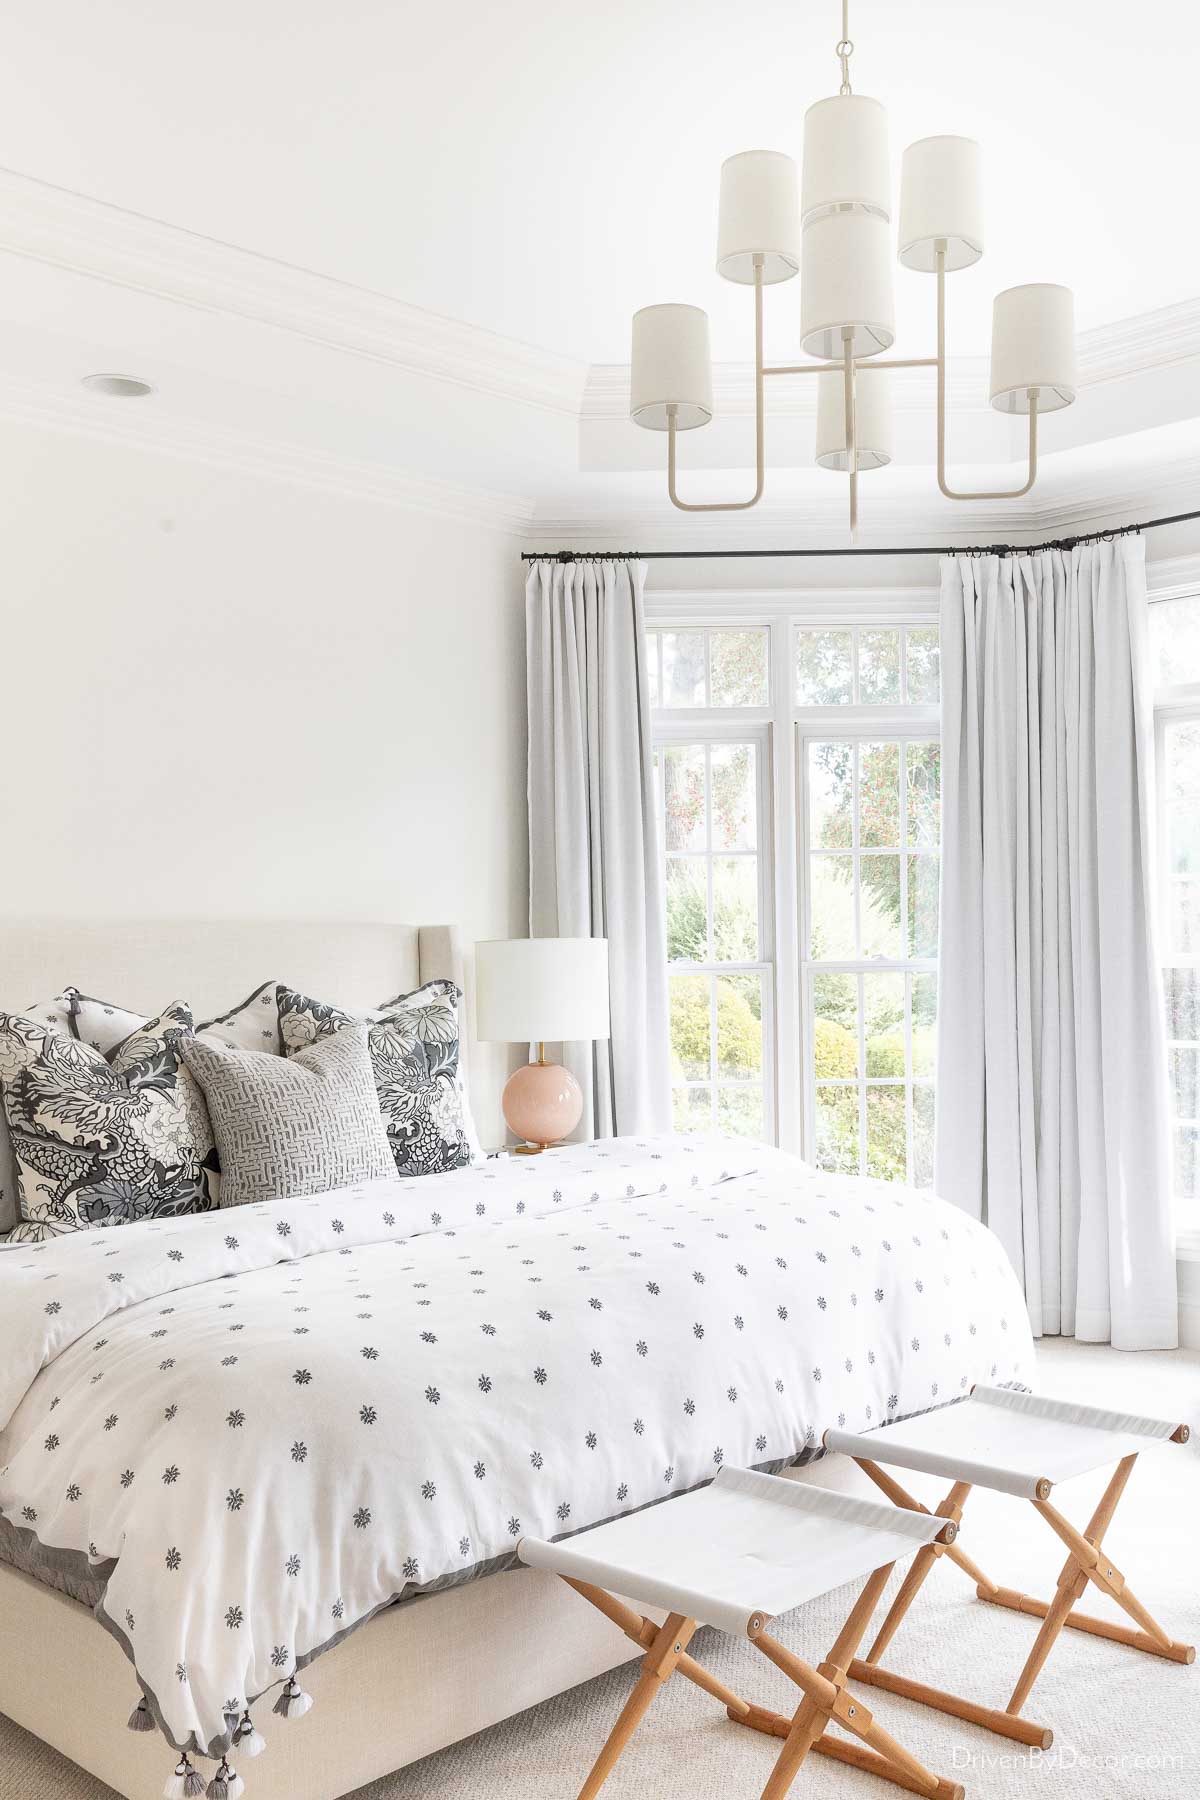
Sources: Upholstered bed (fabric is Zuma White) | Nightstands | Lamps | Duvet – no longer available | Gray & white patterned pillows | Camp stools (similar) | Chandelier. | White blackout drapes
Good luck with your painting job – you’ve got this! 🙌🏻


Melanie says
An easy way to get crisp edge lines, tape off trim, ceiling, etc where ever you have a color change. Then put quick dry painters caulk along the edge of the tape, and remove excess with your finger. Let dry for 20 minutes and paint over the edge of the tape. Once you are done pull the tape off at a 45 degree angle. The caulk prevents the paint from seeping under the tape and you have a crisp edge.
Tricia says
Another great how to that I will be saving for future updates. Thank you. Also, would you mind providing the carpet color and manufacturer? I love it!
Karen B. says
Kris,
As usual I find your ‘how to’ posts so helpful. I’ve been doing some painting here in the new cottage. I confess I have bought inferior brushes and rollers due to the fact that I have a terrible time getting them clean enough after use to use again. I will follow the guide you’ve provided and I will be buying the spray brush cleaner. Thanks.
Karen B.
cindy says
Thanks for this great guide! Like you, I have probably painted dozens of rooms to save money. Now, I hire out ceilings for sure but I still do a few rooms because I am picky about the result!
Love the tip to push the painter’s tape under the baseboard! And will try the paint remover product.
Julie says
Wow Kris! This is the most detailed and comprehensive how to paint guide. Absolutely splendid! I also love the links to your favorite paint picks for whites, grays and blues. And they are all updated. You are awesome. I save all of your “how to” guides with my most favorite and used being common measurements and placements for different home decor/remodeling tasks. How high to hang an item, etc. Thank you for the downloadable labels. I’m going to use those soon to update my cans that have sharpie marker on them.
Jon says
These are great painting tips Kris! I am so glad you shared them. Thank you