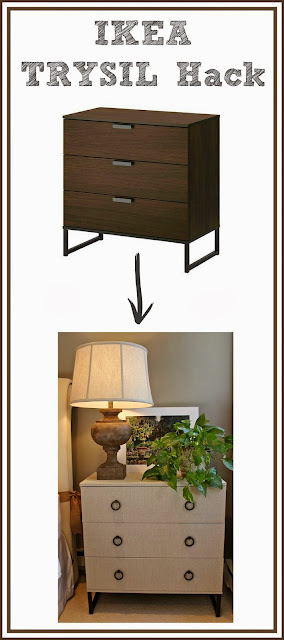
First off, I want to give you all a huge thanks for the sweet comments on my guest room makeover. You sure know how to make a girl feel good 🙂 My favorite part of our new guest room is the DIY chest that sits to the right of the bed.

Would you believe that it started out looking like this?


Next, you’ll want to get all of the pieces of the TRYSIL chest out of the box and read through the assembly instructions to figure out which piece is which. Put a small piece of painter’s tape on the side of each piece that will be on the inside once the chest is assembled. Write the name of the piece (side, top, drawer front, etc.) on the tape.
Measure the drawer fronts and the sides, top, and bottom of the chest and add about 6-8″ to the each of your dimensions (there will be some fraying of the edges of the fabric so you need this extra amount to allow for that – you can cut off excess later if needed). Cut out pieces of fabric in those sizes. One tablecloth is enough fabric for all of the pieces that you’ll need to cover the chest as long as you lay it out in a way that you’re not wasting lots of fabric. Do not use the hemmed edges of the tablecloth – cut off and discard those.

Next step? Iron. Steam iron the heck out of your fabric to get out the fold marks and wrinkles.
The last step before adhering the fabric to your pieces is to prep the drawer fronts. Each drawer front comes with two predrilled holes for the handles. Fill these two holes with wood filler, wax, or putty. I used a Minwax pencil:

Then figure out where you want your new pulls and drill the holes for them. It helps to use painter’s tape to mark the spot that you’re drilling the holes and to keep the laminate of the wood from flaking off the surface when you drill them.
Want to save this post?

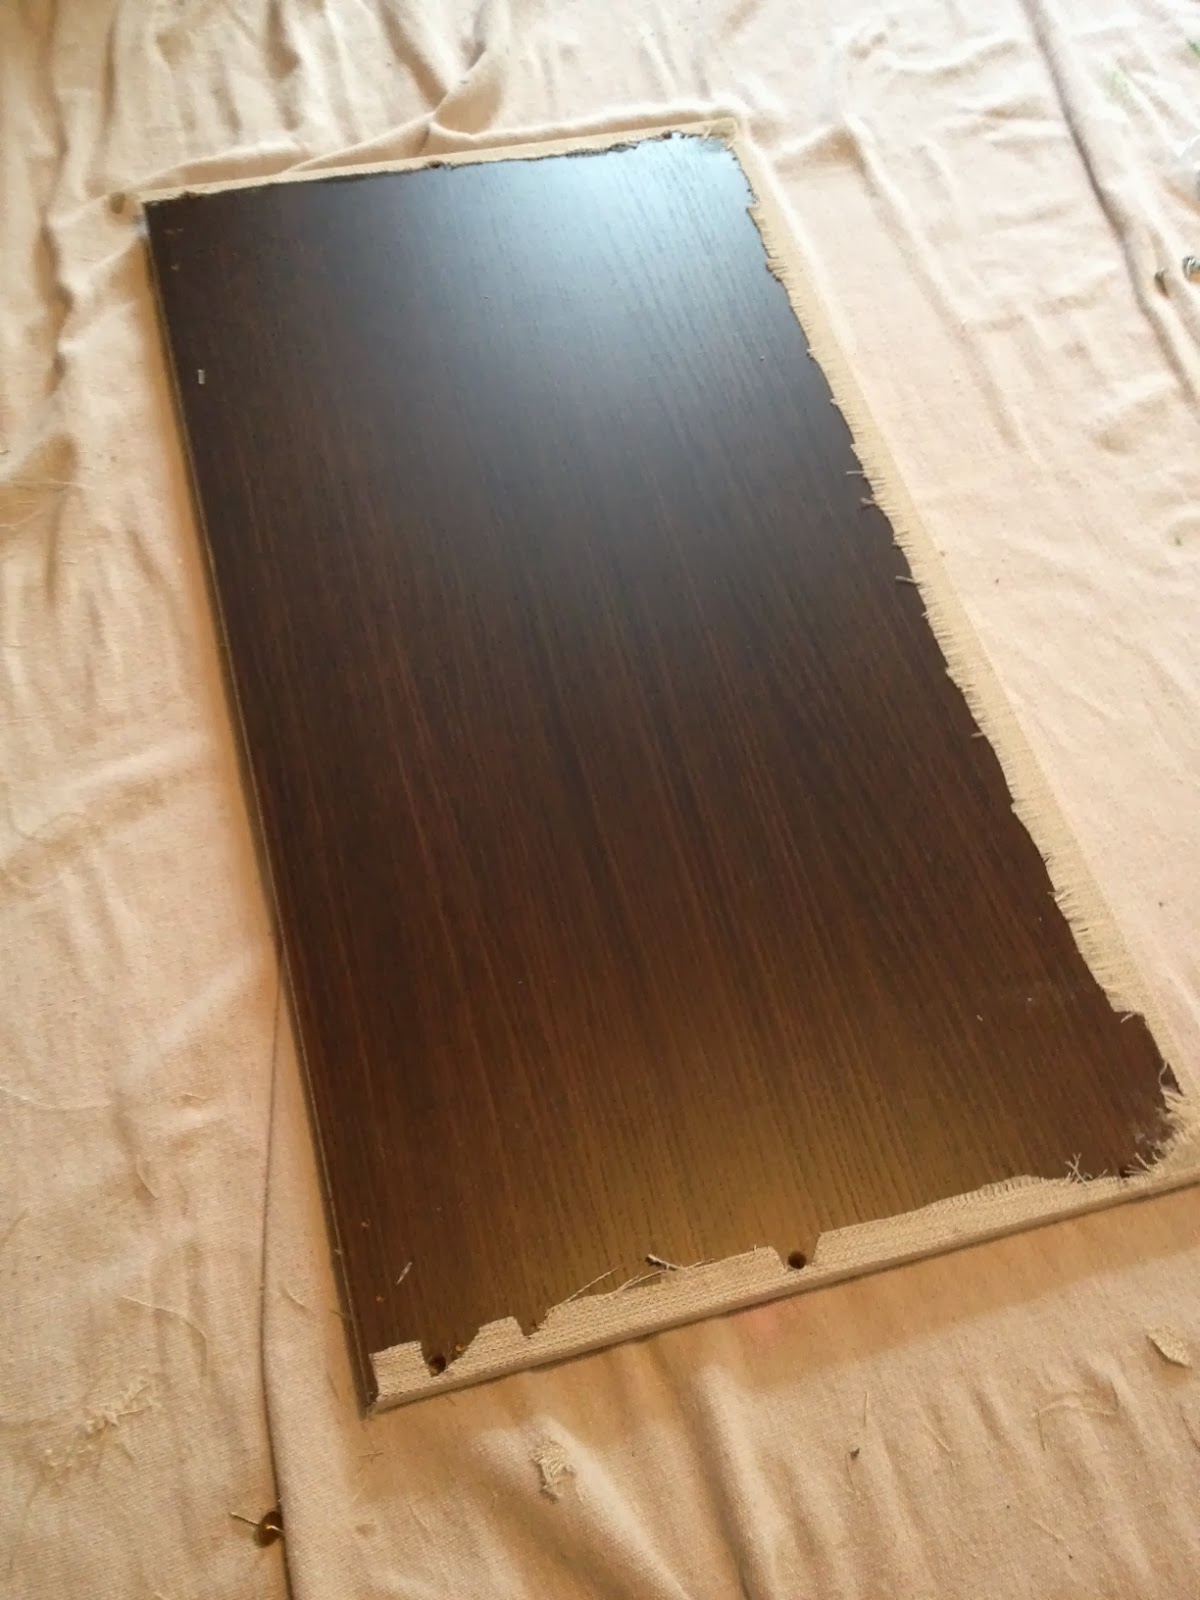
You’re now ready to put your fabric on the fronts of your pieces. I originally tried Mod Podge but I quickly saw that it soaked through portions of the fabric and darkened its color so for plan B I used {this Super 77 Adhesive Spray}, which worked great. This stuff is SUPER sticky and a little goes a long way. You need to use it in a well ventilated area so I spread a big dropcloth out in the garage (with the garage door open) and did it there. The process is pretty simple. For each piece, spray a light coat of adhesive spray on the side of the piece that will be on the outside of the chest and then gently lay your fabric piece on top of it. Readjust the piece to align it properly by lifting it up and placing it back down as needed. Once your fabric piece is centered on the wood piece, press it down onto the wood piece and smooth out any wrinkles.

Now you need to wrap the fabric around the edges. Instead of trying to spray the edges, I found it was easiest to spray some of the adhesive spray on a paper plate and then use a small paintbrush to spread it on the edges. Doing it this way also keeps you from getting too much glue on the fabric. The glue on the plate and the wood piece dries very fast, so you have to keep spraying more on the plate and keep wrapping and pressing the fabric down on the edges as you go.


Then insert the screw for your pull through the hole in the drawer and through the opening in the fabric that you made with the skewer. Turn the pull (NOT the screw) to tighten it onto the drawer front. Turning the screw can pull at the fabric and create a run in it (yep, unfortunately I learned that the hard way…).
I wanted the legs of the chest to match my hardware so before attaching them to the chest, I sprayed them with {this Rustoleum Paint & Primer}:

Done!

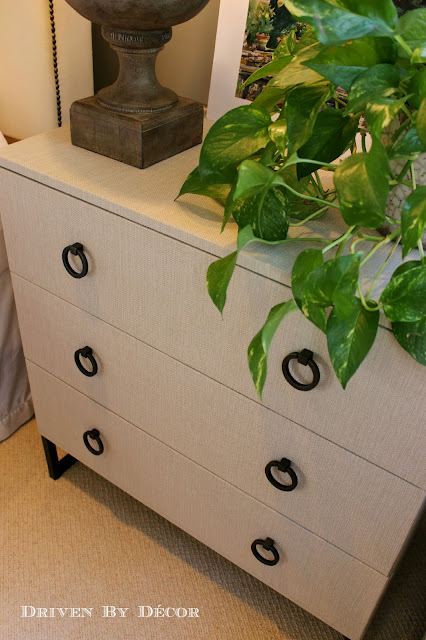

So what do you think? If you have any questions, shoot me an email or leave a comment. Enjoy the weekend!


Christina Armstrong says
Gorgeous!! I am so. grateful for your step-by-step instructions and linked products. After reading this article I canceled my nightstands that were back-ordered and ordered everything to recreate this look. Amazing job!!
Kris Jarrett says
So glad it was helpful – good luck with creating your nightstands! 🙂
Olga says
Could you please update the link for the pulls? I love them and want them for my dresser, but the link in your post no longer works. I tried searching online but all I am finding are the very thin, flimsy looking ones – yours look solid! Thanks in advance.
joanne says
Thank you for the detailed instructions! Looks like an expensive piece.
Lindsey says
This is seriously amazing!!! I’ve been looking for a way to wrap fabric that doesnt involve compromising texture with the mod podge method. Thank you for posting this!!
Jodie McGrath says
It looks fantastic gives me an idea for my kallax. Is there any reason you couldn’t staple the fabric in rather than glue?
Kris Jarrett says
You could try staples but you’d have to be careful about where you put them because if it’s at a point where two pieces come together, it’s could cause problems since the surface would be more raised with a staple over the fabric than with glued fabric.
Kathy Pozzuto says
This is exactly the information I’ve been looking for for a couple of hours tonight! Thank you. I’m having a custom sized dresser made and won’t have to worry about the grain of the wood since it’s being covered with fabric. It should look pretty sharp in a dark blue with a glass top.
Stephanie says
This is so genius and looks fantastic! I’m thinking of doing this with the nightstands from the same Ikea series. Do you think this would work with grasscloth wallpaper? If so, would you use the same adhesive or wallpaper paste?
Anonymous says
Loved what you did with night stand. Isn’t there a way to cut the edges to fit without folding the fabric?
Geri Juen says
Excellent job! Looks high end. Was the tablecloth all cotton or a poly blend?
Linda Plopper says
I love this and hope to try it in 3 months. It’s beautiful and I hope you approve my largest form of flattering by mirroring this! Wondered if this would work on a tall dresser.
Anonymous says
Great job you have professional results thanks so much for the great tutorial!!!
Jean says
Kris,
You did a wonderful job with this Ikea table!!!! I love the tablecloth idea!!! I love the tutorial you gave us and I might try this on a table if I can find an inexpensive one at thrift store. I just love your blog page!!! You are so talented and you explain everything to detail. Keep us the good work and can’t wait to see what’s to come. Have a good spring day and God Bless.
Kris Jarrett says
Thank you for the sweet comment! I’m so glad that you were inspired by this project!
Susan says
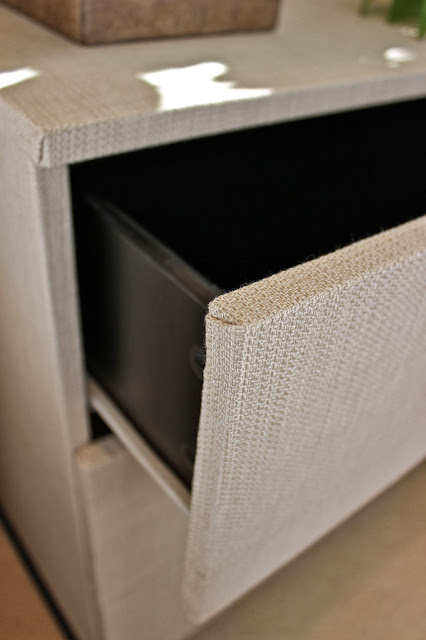
I’m wondering how you get the drawers to still close now that the edges are covered in fabric?
Kris Jarrett says
Hi Susan, it’s only a thin layer of fabric on the back of the drawers so they still fully close and are flush with the top of the chest!
Marta says
Kris,
Your “Ikea Hack” is definately awesome! As well, you prepared a great tutorial, for those who are interested in attempting a makeover. I love the look, and would recommend the glass top whenever you utlize textured fabric, due to normal dust! Looking forward to viewing your other projects!
Kris Jarrett says
Thank you so much! I actually did end up getting a glass top for it – that worked great!
Shelley says
This is awesome! I have my own Trysil hack I want to attempt but can’t find any 3-drawer ones at IKEA. Did you already have this or did you purchase recently? I’m thinking about cutting down a four drawer to three drawer. Can you tell me how tall the wood piece on your chest is? Thanks for your help!!
Kris Jarrett says
Unfortunately it looks like they no longer carry this TRYSIL piece 🙁 At the moment I can’t access our guest room due to our kitchen renovation but if you email me at the end of the month, I’m happy to share that measurement.
RJC says
Absolutely beautiful. I want to run right out and get the stuff to do it myself. You are an inspiration.
Kris Jarrett says
You’re so sweet! Thank you! And good luck if you try it out yourself!