Want to create a gift wrapping station so all of your supplies are in one place? I’ll show you how I created mine!
Today I’m sharing one of my favorite home organizing ideas that came out of our basement clean-up and organization project. Several of the messy piles in our basement included rolls of gift wrap, gift bags, and tons of stray rolls of ribbon. I gathered them all together and came up with an organized gift wrapping station where everything I need to wrap gifts is stored and accessible in one easy-to-use spot:
Choosing a Gift Wrapping Station
My search for something to organize all of my gift wrapping supplies started by looking for a typical gift wrap organizer. Unfortunately, everything I found was either overpriced or not large enough to fit my wrapping stash.
Then I found this pretty and well-priced kitchen cart {here}. It’s big enough to fit my wrapping stash, has a large top that’s perfect for wrapping a quick present, is on wheels to make it mobile, and is versatile enough that it can do double duty for a few other needs I have too. And did I mention that it’s super cute?
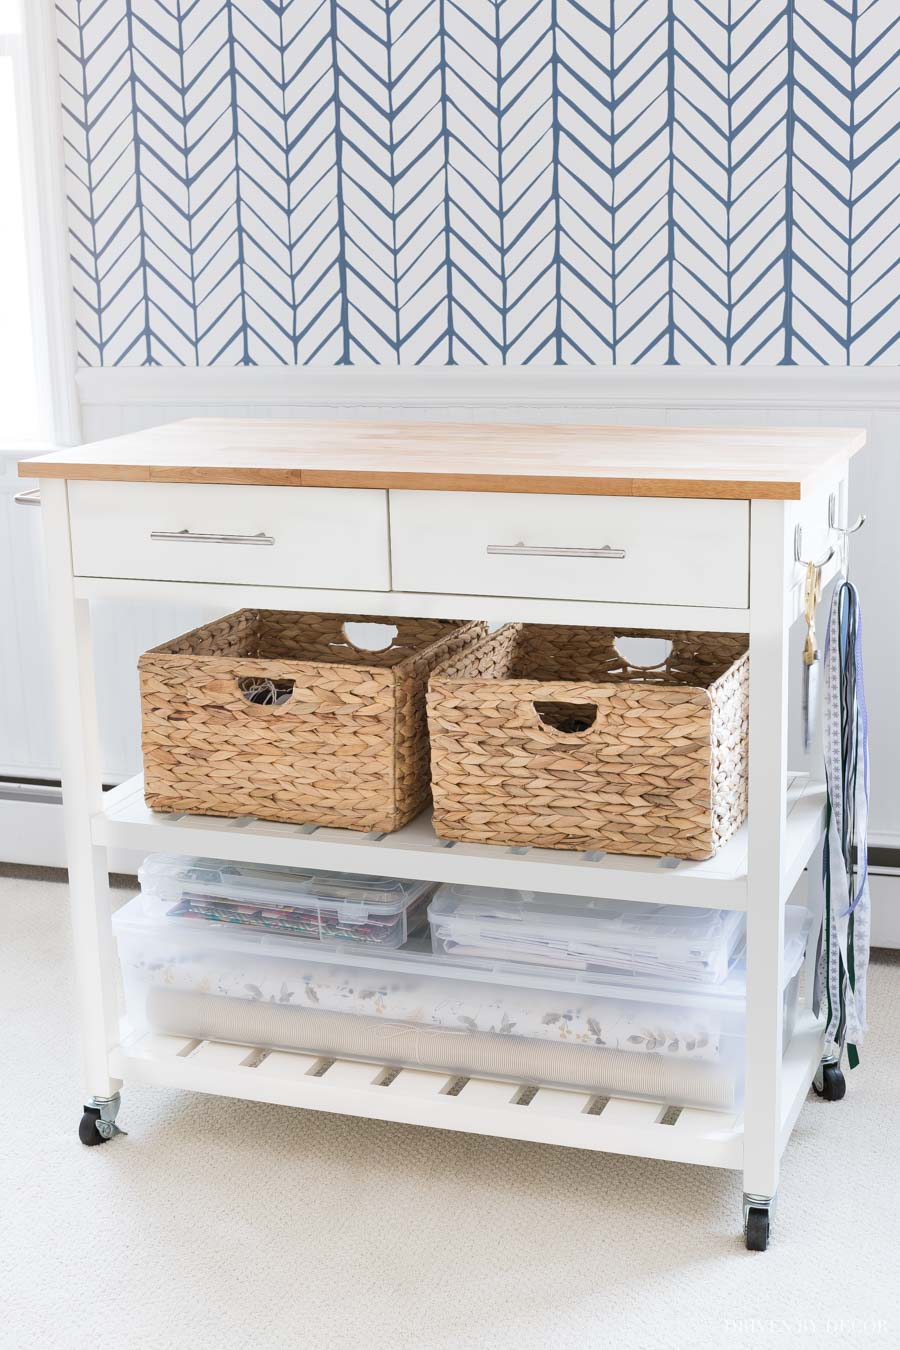
You never know how it’s going to go when you have to put a piece of furniture together but this cart was a breeze – each part was labeled with a sticker and even the hardware was divided up and labeled with each step of the instructions.
Gift Wrapping Station Drawers
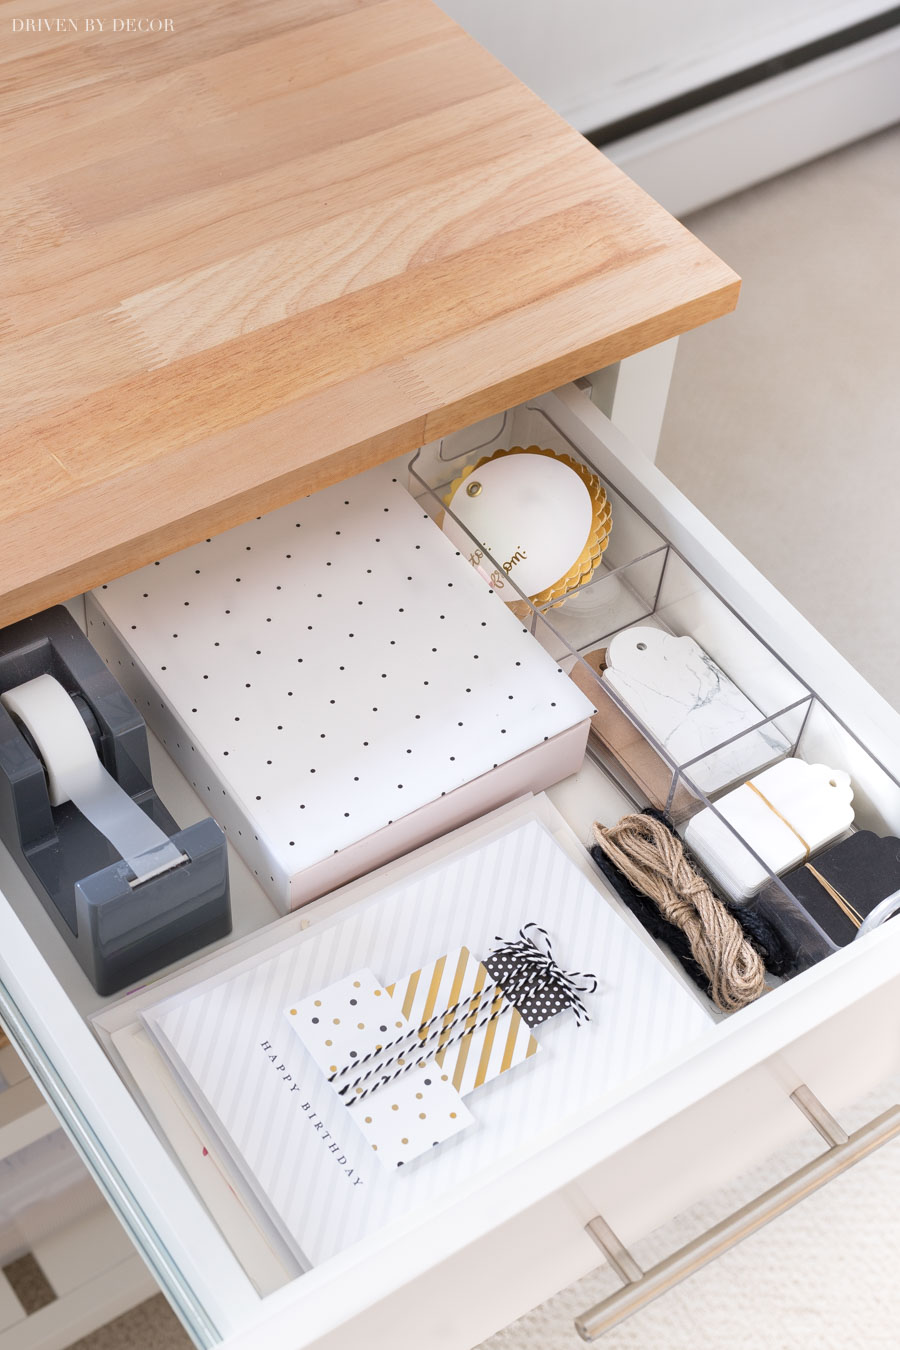
Once I had it assembled, I gathered together all of my smaller gift wrapping supplies to put in the drawers, including my tape dispenser, cards, and tags in one drawer:
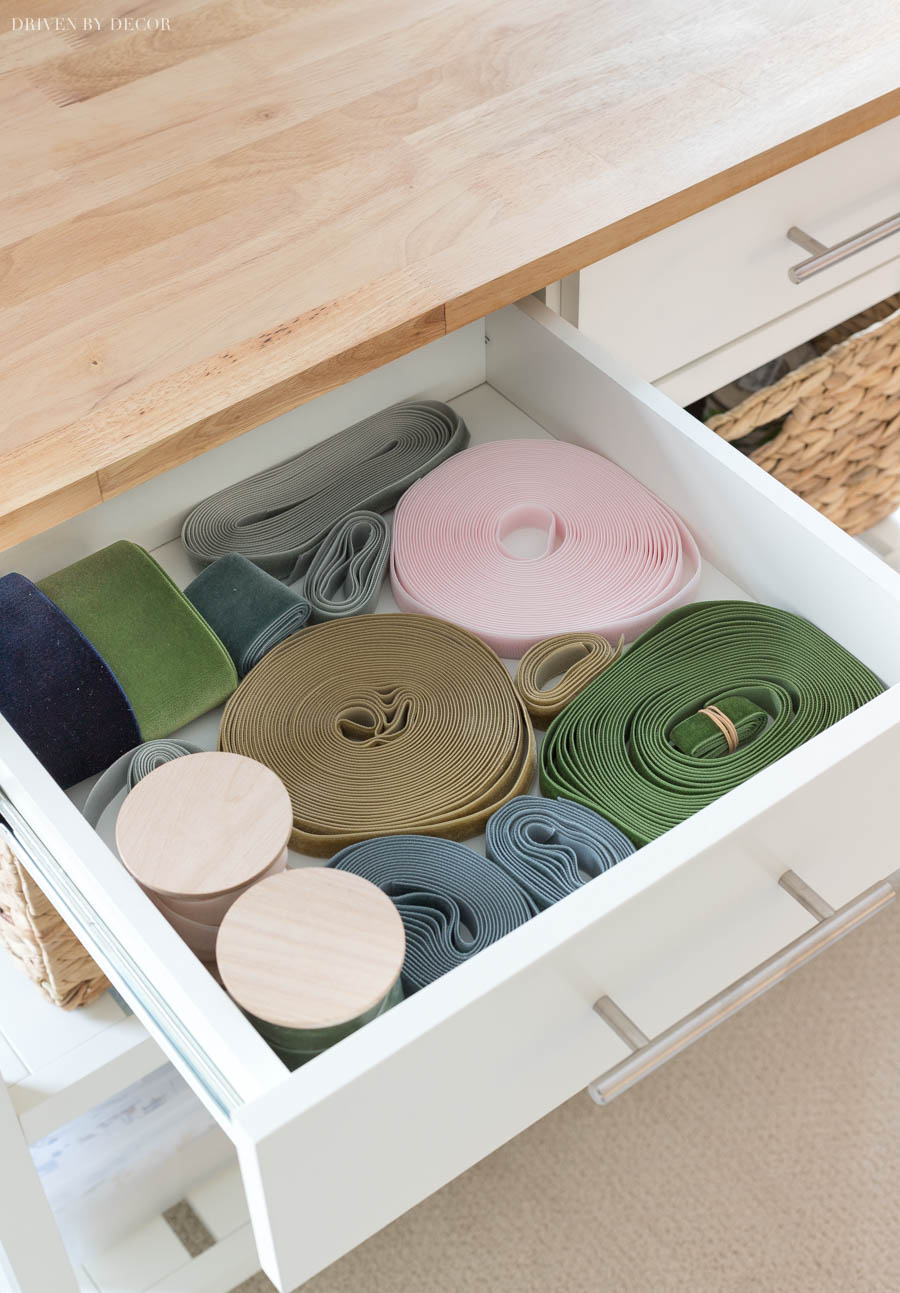
and my velvet ribbon in the other one:
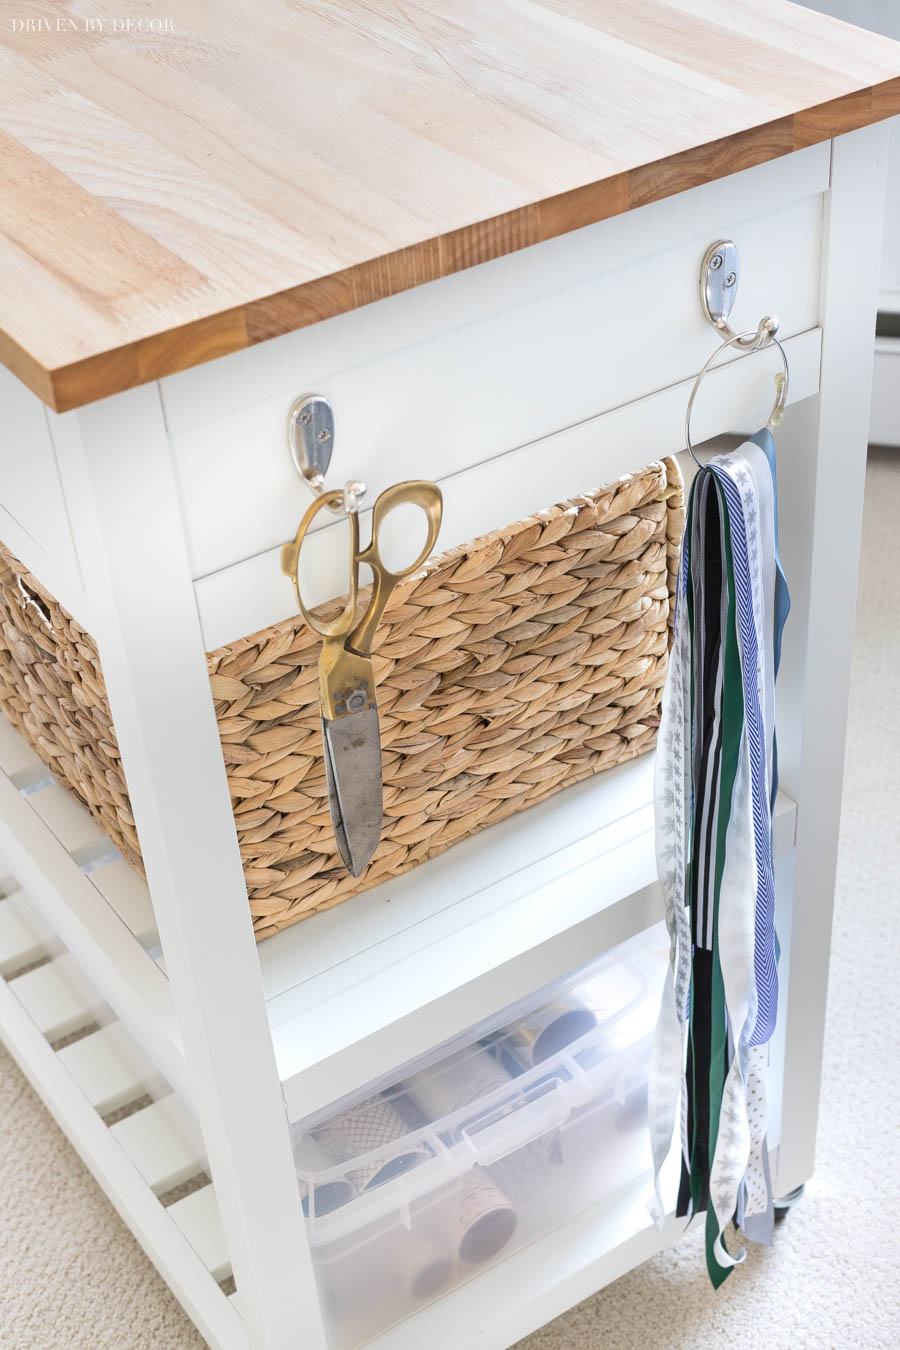
Handles & Hooks
The cart also comes with a handle on one side and two hooks on the other side. You could definitely drape tissue paper or folded gift wrap over the handle if you plan to mostly keep it in one spot but I decided to keep the handle naked so I had an easy way to grab the cart and roll it places when needed.
I did take advantage of the two hooks on the other side to hold a pair of scissors and shorter ribbon pieces that weren’t on rolls:
Gift Wrapping Station Shelves
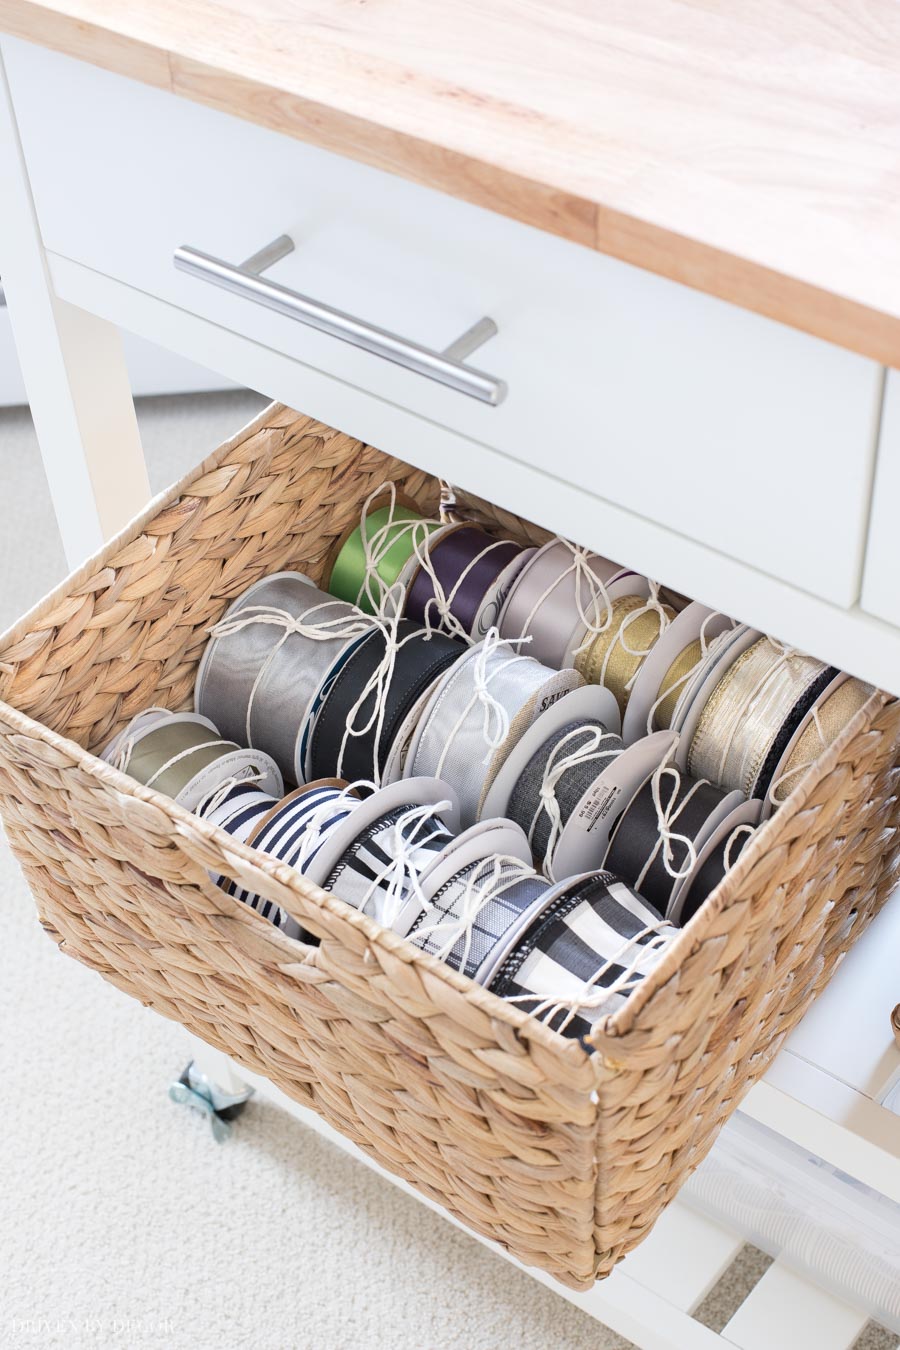
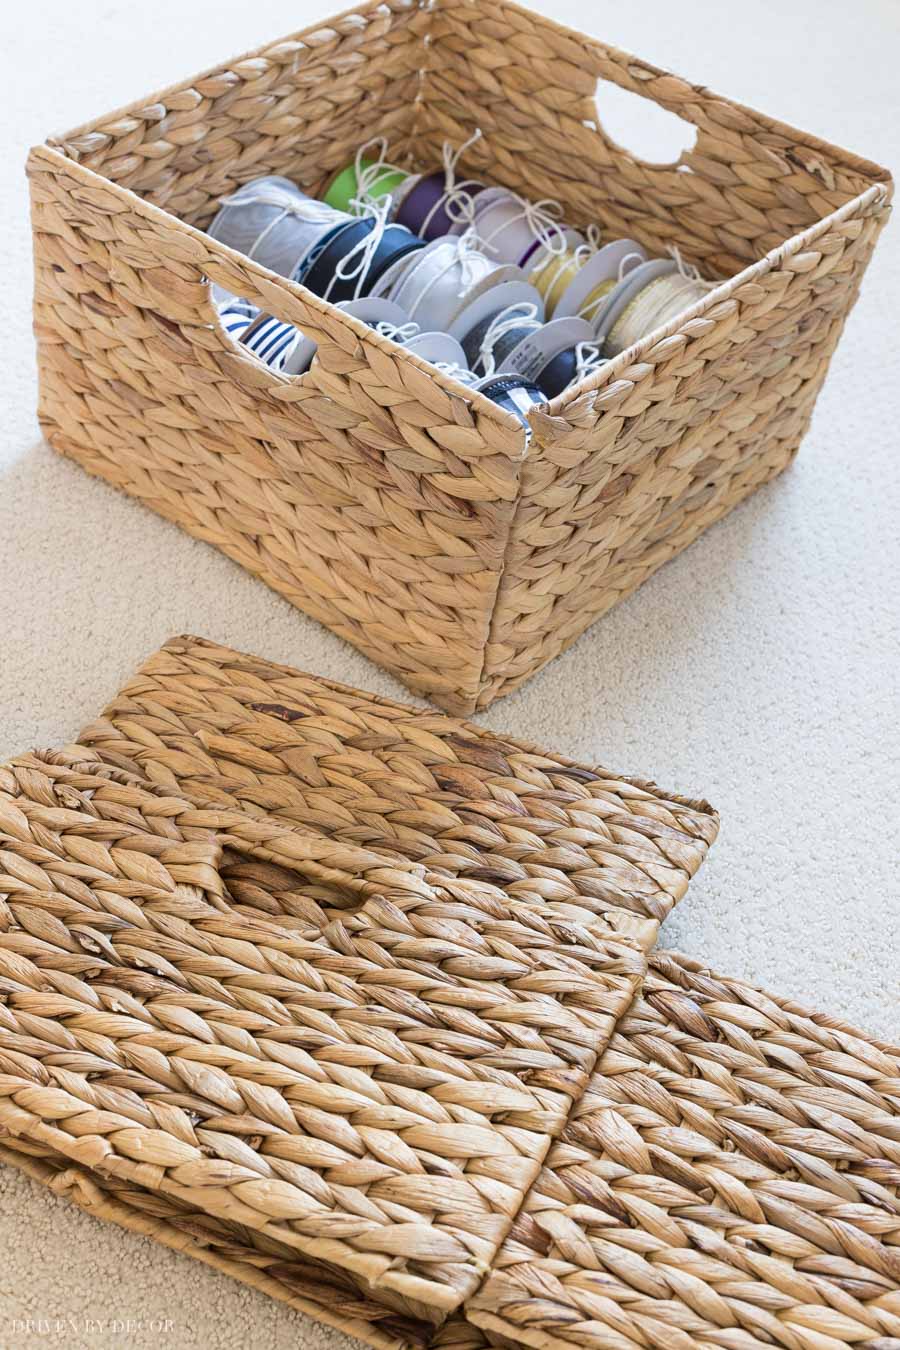
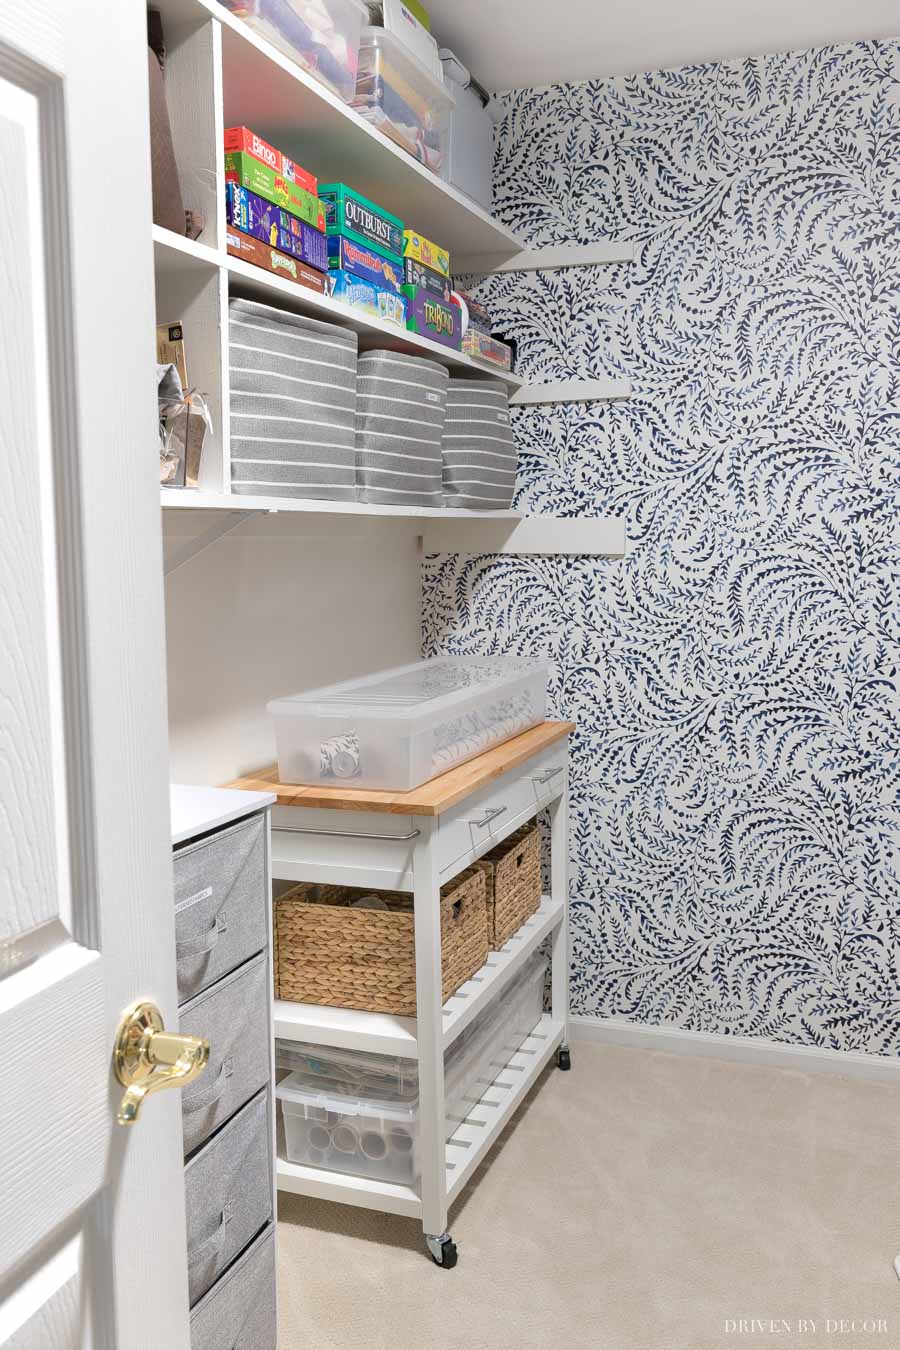
Moving on to what’s on the shelves of my cart, the top shelf holds two pretty woven baskets found {here} as a set. One of the baskets holds my spools of ribbon (I use a piece of simple twine to keep them from unrolling):
and the right basket holds my pre-made bows. One of the cool things about these baskets is that they fold up for easy storage which makes them super versatile for lots of other uses in your home too:
On the bottom shelf of my gift wrapping station is a clear storage bin for my wrapping paper rolls that I found {here} – it’s the PERFECT size for my cart and long enough to hold my wrapping paper rolls!
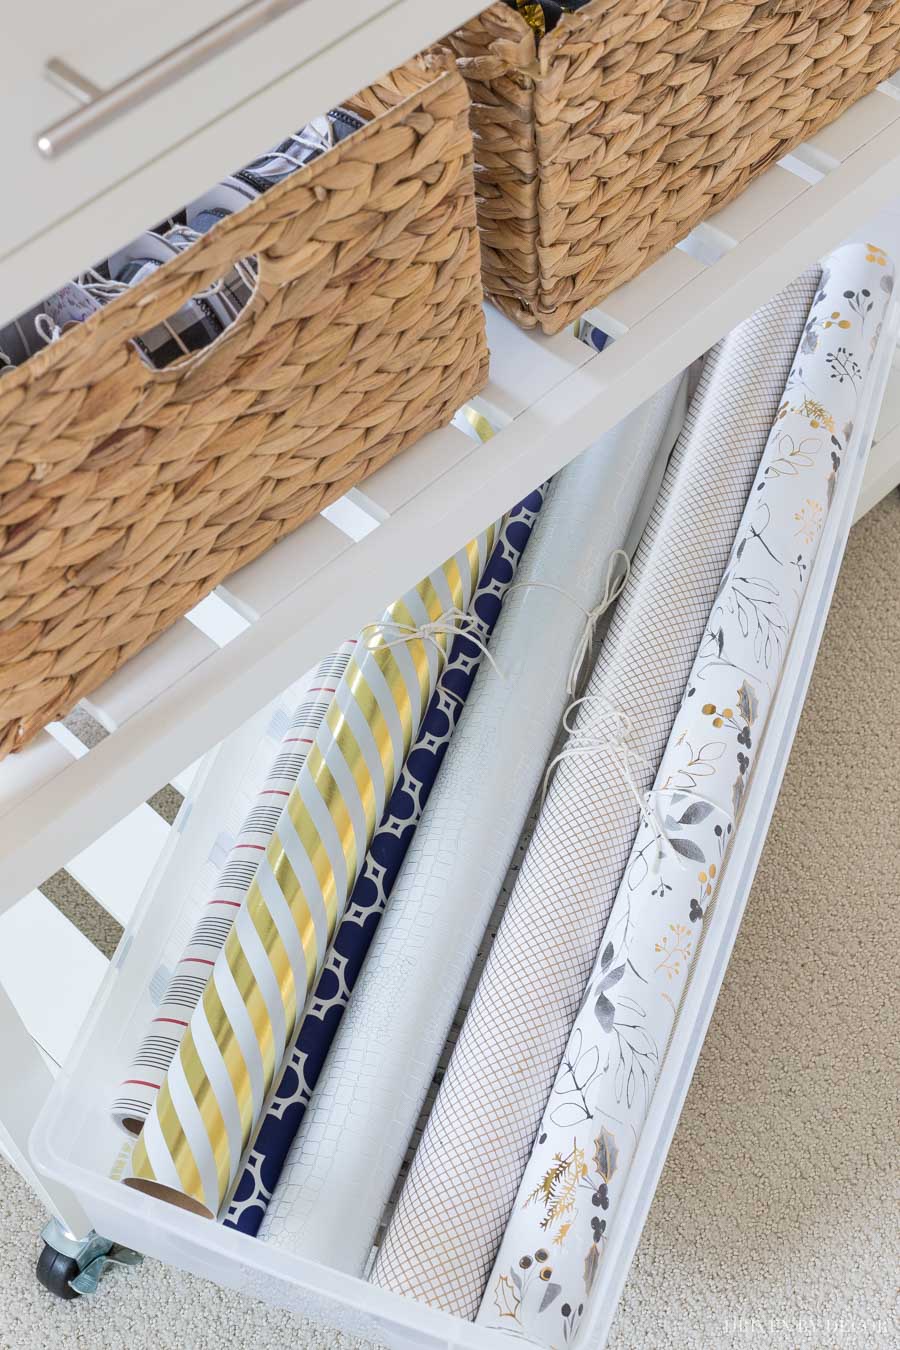
These bins would also work well if you simply want to store rolls of wrapping paper on a shelf because they are nice and narrow in width and stackable.
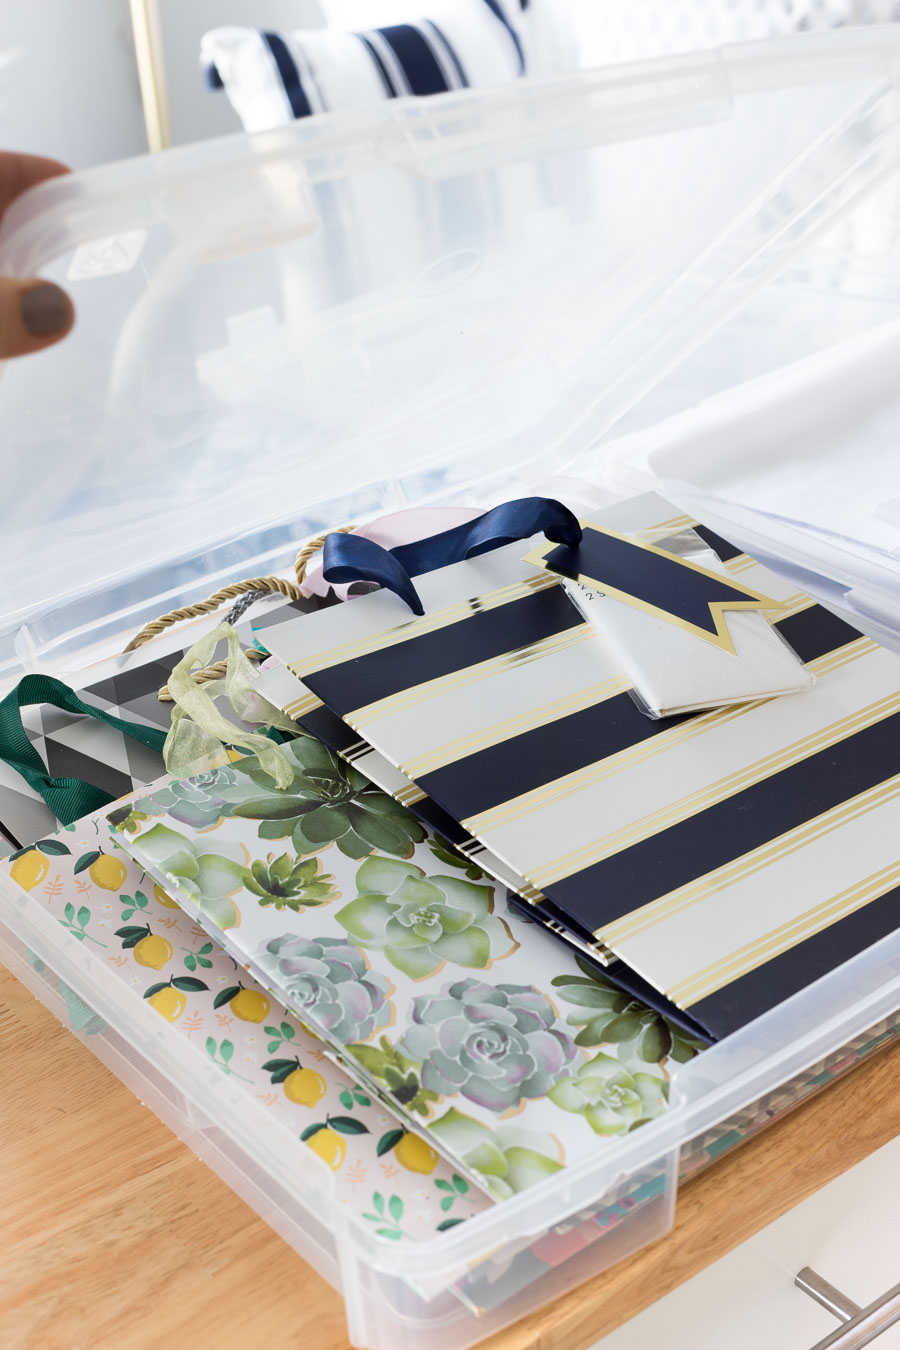
On top of my wrapping paper storage box is a pair of {these 12″ x 12″ bins}. One of them holds bundles of tissue paper and the other holds small to medium sized gift bags:
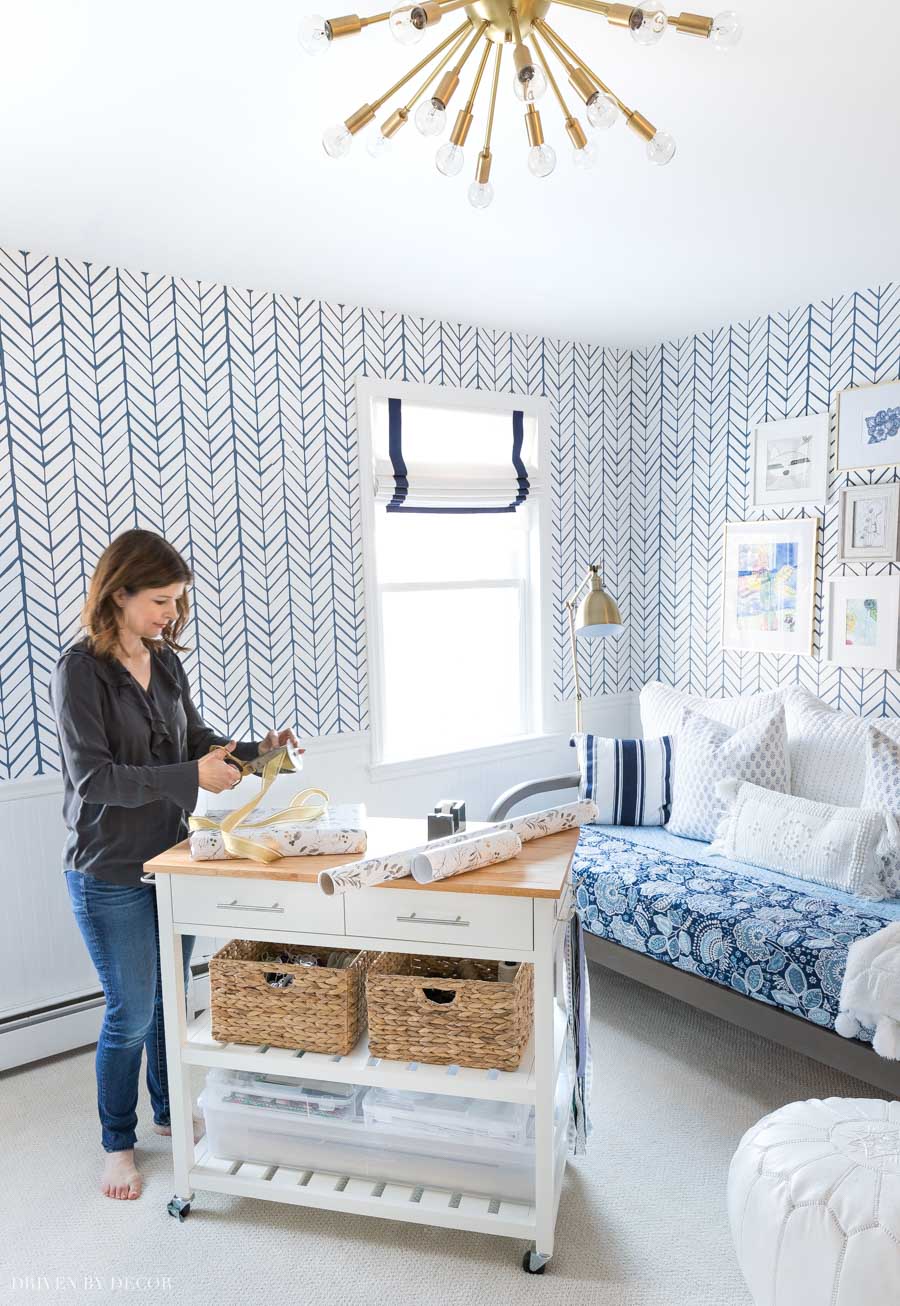
It’s so nice having everything I need to quickly wrap a gift in one place instead of it being spread out between piles in the basement and I love that my gift wrapping station is on wheels so I can roll it right into my upstairs storage closet:
It’s also super easy to take the wrapping paper roll bin off the top and use it to quickly wrap a present or roll the cart into the space right outside of my closet if I have several to wrap and want more space to do it in:
And here’s another big plus for using a kitchen cart for a gift wrapping station instead of a more traditional storage piece – there are a bunch of other ways that you can put it to work!
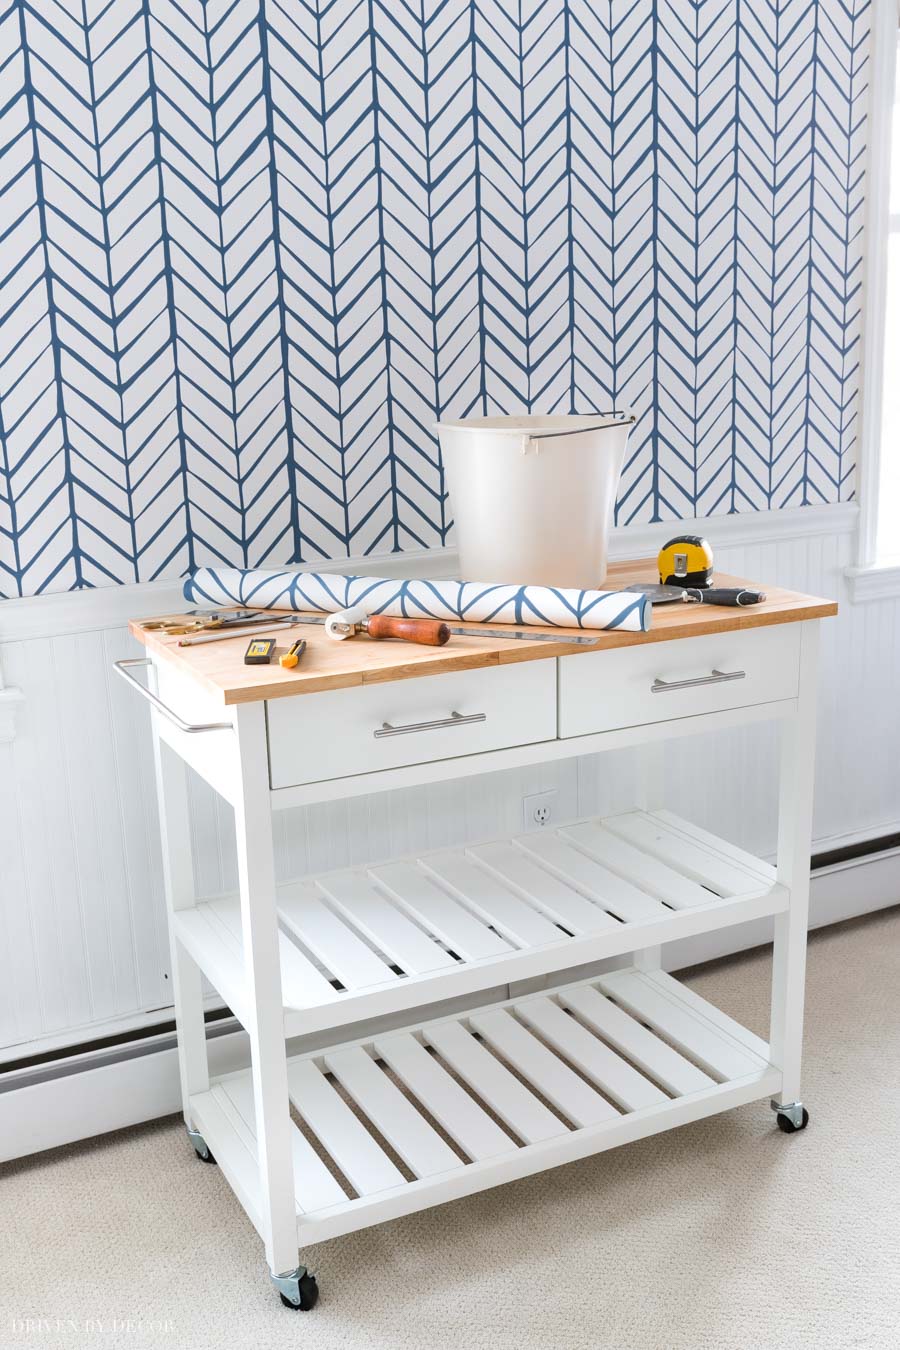
Next time I wallpaper, I’m planning to unload the storage bins and use it to hold my sponge and bucket for wiping off the glue, edge roller, pencil and straight edge, and all of my other wallpapering tools (I’ll throw a towel over the butcher block top since it’s too pretty not to protect!). It will save me from bending down to get them off the ground each time and I can roll the cart around the room with me rather than having to continually pick up and move my tools from place to place.
The same goes for painting – having a rolling cart to rest my paint can, roller tray, and paper towels on that I can roll around the room with me will make painting easier and faster.
There are a lot of other uses for it too depending on your needs! It would be great tucked into a corner of your kitchen for storage of extra dinnerware or small appliances, would be a super cute spot for a coffee station, or could be used as an extra surface for food prep if you have limited countertop space:
The cart comes in gray, black, and green too so if it’s something you’d leave out in your kitchen, there’s a color option that will work for you! Another use for my cute kitchen cart would be to hold a few side dishes next to your table when you have a big holiday dinner and your table’s packed with food and guests. Or use it for craft storage or as a bar cart … so many options!
So now that I’ve found the perfect home for the stray wrapping paper rolls, ribbon, and gift bags, it’s time to start tackling a few more organization projects. Stay tuned…
Enjoy your weekend everyone!
Want to save this post?


Joanne says
This is a fantastic idea! I was looking online for ways to set up Christmas wrapping. This is perfect since it can be rolled away or moved to another room, and also used for other purposes! I could use it when baking – especially since it is counter height, too!
Thank you!
Susie says
Hi Kris, Great idea for gift wrapping! Is this a guest room and is that a daybed? I am looking to update our guest room. Thank you!
Bobbye Johnson says
I cannot begin to tell you how helpful this post is to me. This is the best solution to messy gift bags, paper and ribbon that I have ever seen. I love your other uses as well, but I am purchasing all of those items as soon as I say “Thank you”.
Karen Bunch says
Kris,
That is such a great storage cart. I’m afraid I have to do some serious reorganizing of my wrap and ribbon. It takes up more room that I like. Even after not buying any new Christmas wrap this year I still have several rolls of Christmas wrap…what’s up with that?! I liked your idea of tying simple string around ribbon spools so that they don’t go all rouge in the ribbon drawer.
🙂
Denise Baliotti says
Kris – I love your gift wrap cart! Wish I had space for one in my house. I ended up using The Container Store’s over the door ELFA rack, which I love. It helped me to seriously edit my gift wrap stash and always stays organized. Great tips as always :).
Denise
Katharine says
I use our fancy Butcher block kitchen cart as our 1st floor diaper changing station right now lol. Thanks for the organizing post. Love it!
Amy K says
Well I don’t know what happened to the rest of my post …..but what I said was that I love this idea of using the kitchen cart. I’ve seen lots of gift wrapping station ideas, but this one makes total sense to me. Thanks!
Amy K says
Amymakes total sense to me. Thanks!
Andrea says
I love the wrapping paper cart. It is so versatile, you could use it for so many things. I love your blue and white wallpaper, but most of all I really love your french bulldog. Is that what I see? I’m pretty new to your blog. I will have to go through your history and see.
It sounds like you have a wrapping paper addiction. My sister loves hers so much that it’s too precious to wrap gifts with. I agree, there are so many beautiful papers and so few times to use them. I’ve seen so many creative ways to use wrapping paper now that at least there are ways to use it that are more permanent. I saw a post recently where people used paper to wrap books (not just for the holidays).
Liz says
I have a similar setup in my quilt room to be able to cut fabric. I put my cutting board on top, my rulers and tools are nearby. I have pressing mats so I can even use the cart to press blocks. And, it’s at the right height so my back doesn’t hurt after a day of quilting.
BTW, I bought one of the mobile scanners that you suggested a couple posts ago. I’ve already scanned my financial receipts for this year and I’m noticing other papers that I can scan and keep as pdfs or jpegs. I’m looking forward to a cleaner office & quilt room!