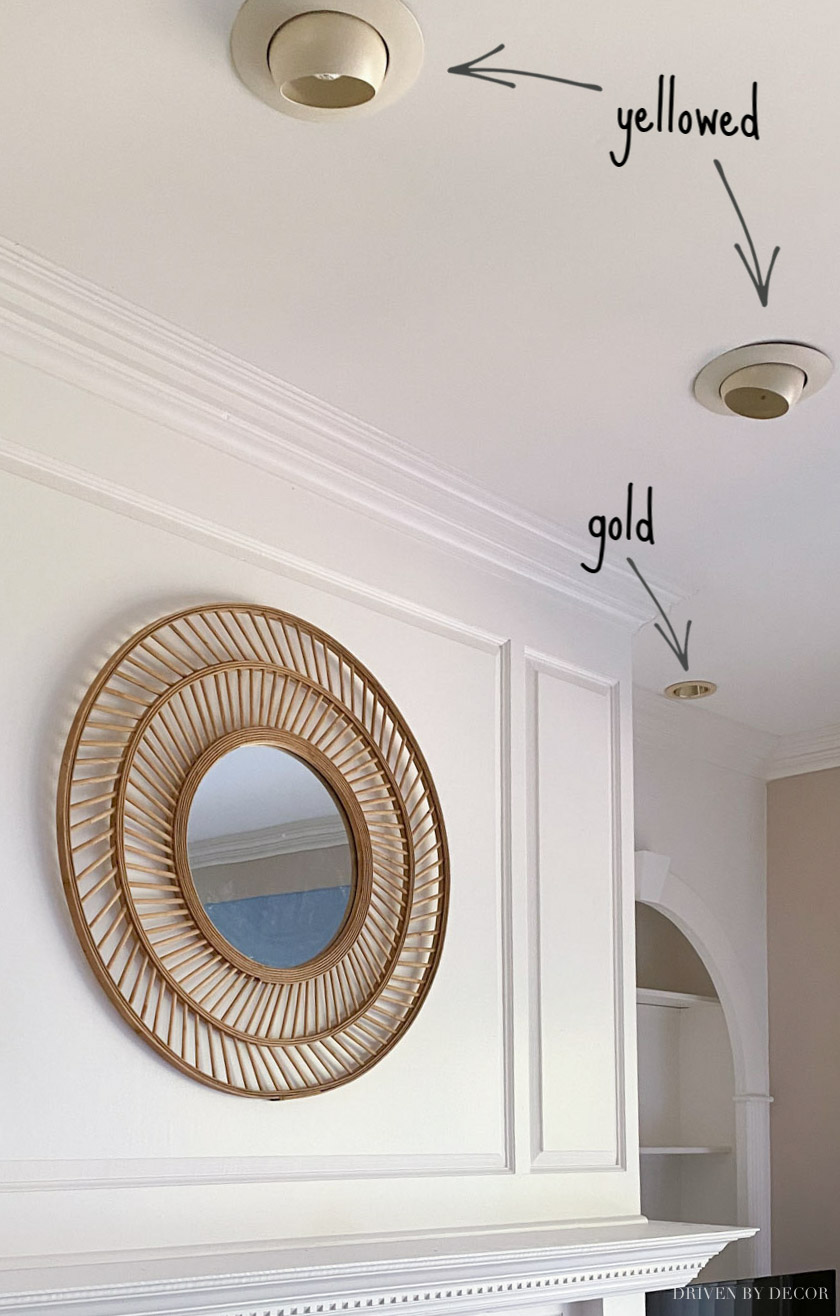
All of the recessed lighting in our home originally had gold or yellow trim. It really dated the house and was such on eyesore against our newly painted white ceilings. I could have bought replacement trim but with over 50 recessed lights in our house, that would cost hundreds of dollars. So I decided to try spray painting them instead and it was SO easy!
Today I’m sharing the step-by-step of how to get it done so you can give your recessed lighting a glow-up too! (post includes commissionable links; for more information, see my disclosure statement {here})
This is what our recessed light trim looked like originally:
The first step in this simple DIY is to take out the lightbulb from your recessed fixture. Then, remove the trim from the light’s housing (the part that holds the fixture inside the ceiling). I recommend flipping the breaker to the lights you’re working on to avoid any risk of electrocution while doing this. In most cases, the trim is hooked onto the housing with three little springs at the top of the trim. You simply unhook them from the housing and it should come right down.
After removing the trim, lightly sand each piece with {this 220 grit sandpaper} (wear a mask to prevent inhaling the dust). This is done to scuff up the surface and help the paint to adhere. Then, clean the sanding dust and any grime off with a damp cloth. If your trim is visibly dirty, a good scrub with soapy warm water might be needed.
Want to save this post?
Once dry, place each trim piece on cardboard or a tarp outside on a day when there’s little to no wind. Then, using {this high heat spray paint}, spray your trim so it gets a thin, even coat. A spray can trigger like {this one} is really helpful for getting an even, consistent spray job. Wear protective gear on your eyes over your nose and mouth per the recommendations noted on the spray paint to prevent inhaling the spray paint or getting it in your eyes.
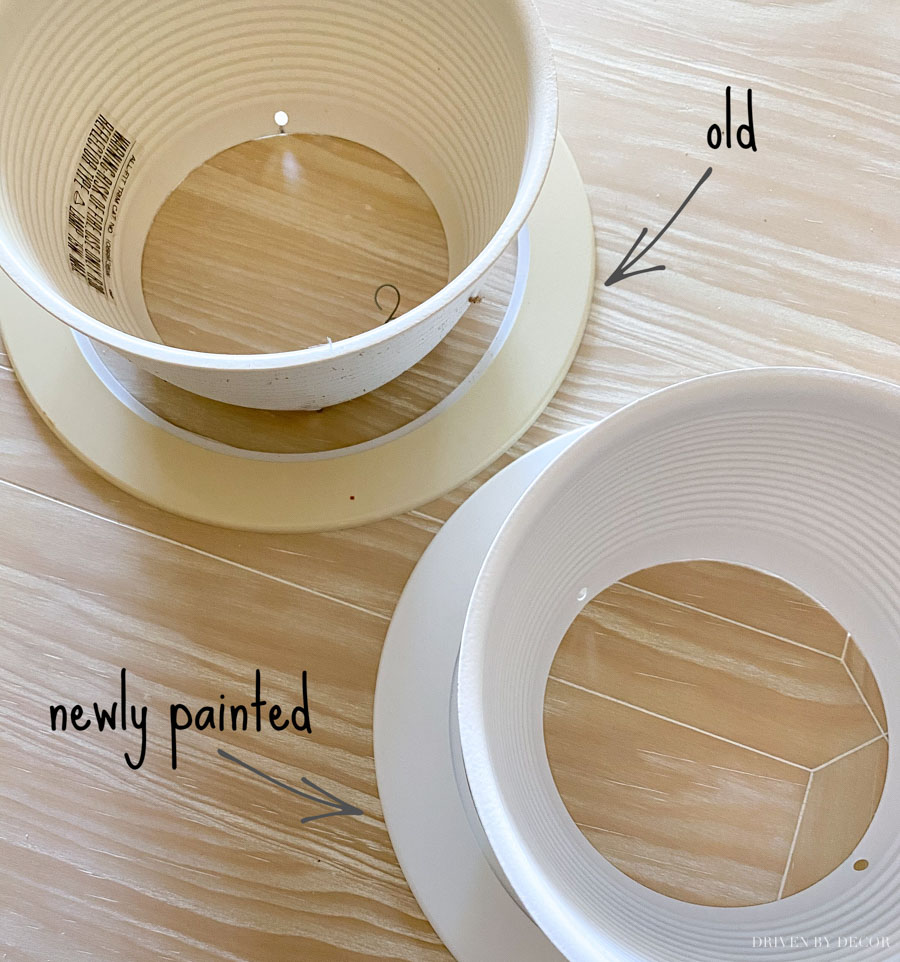
Once the paint is dry (read the spray paint can for recommended drying times), repeat with a second coat. That’s it! The difference between the old lighting trim and the newly painted trim is pretty huge:
I ended up painting all eight of the recessed lights in our family room plus the ceiling fan with just a single bottle of spray paint – not bad for only about $5!
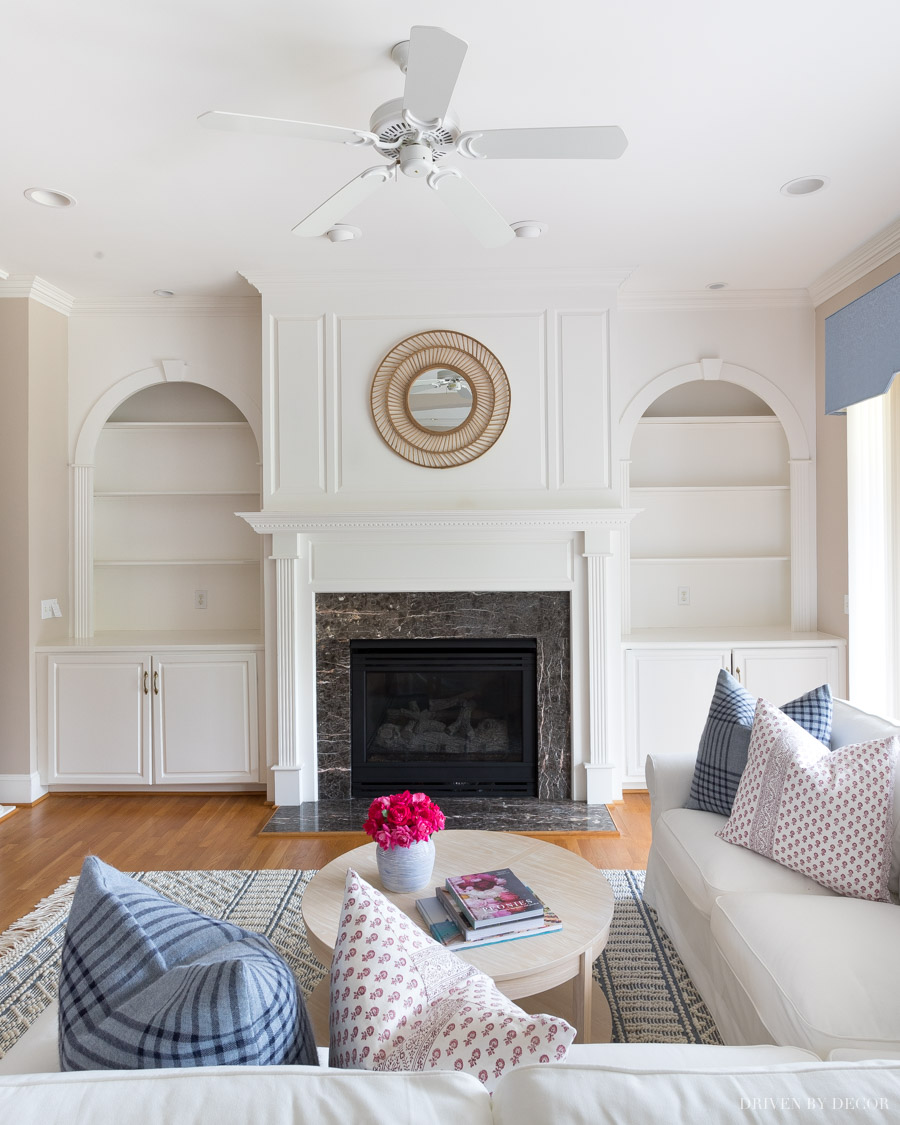
Family Room Sources: Blue & white rug | Round coffee table | Round rattan mirror
If you want to see more spray painting projects, check out my makeover using curtains instead of closet doors where I spray painted the metal hardware as part of the makeover. Or check out my posts on how to spray paint a brass fireplace or how to paint a ceiling fan.
I’ll see you back on the blog soon!


Betty L Stockman says
I found your site after knowing I had to do something with the seven 30-year-old constructor grade ceiling fans that still work but are outdated. I knew I needed advice before I botched the project up and was forced to purchase new ones. I have never seen an article with more precise instructions on any site than this. I have often tried to complete different DIY projects found on the internet only to wonder how to complete one or more steps that were either left out or not fully explained. You have done an excellent job, going above and beyond in writing and photographs. I feel much more confident with a printed copy of your instructions by my side. Thank you so much!
NL says
Looks fantastic! I hate to be the bearer of bad news, but the top piece you thought was stationary is actually very simple to remove. 2 bolts on the underside hold it in place. Just a shortcut for anyone else who has this fireplace!
Denman says
Can I spray paint a brass towel rack? What kind of paint should I use? (Thanks for inspiring me! We just paid $$$ for a new ceiling fan to replace our gold one identical to yours 😥😥😥)
Melinda says
How did you get the lighting trim out of the ceiling? Did you pry it out? Mine don’t seem to have any screws and I don’t want to damage the ceiling finish by trying to remove the trim . Appreciate any suggestions you can offer!
Thanks!