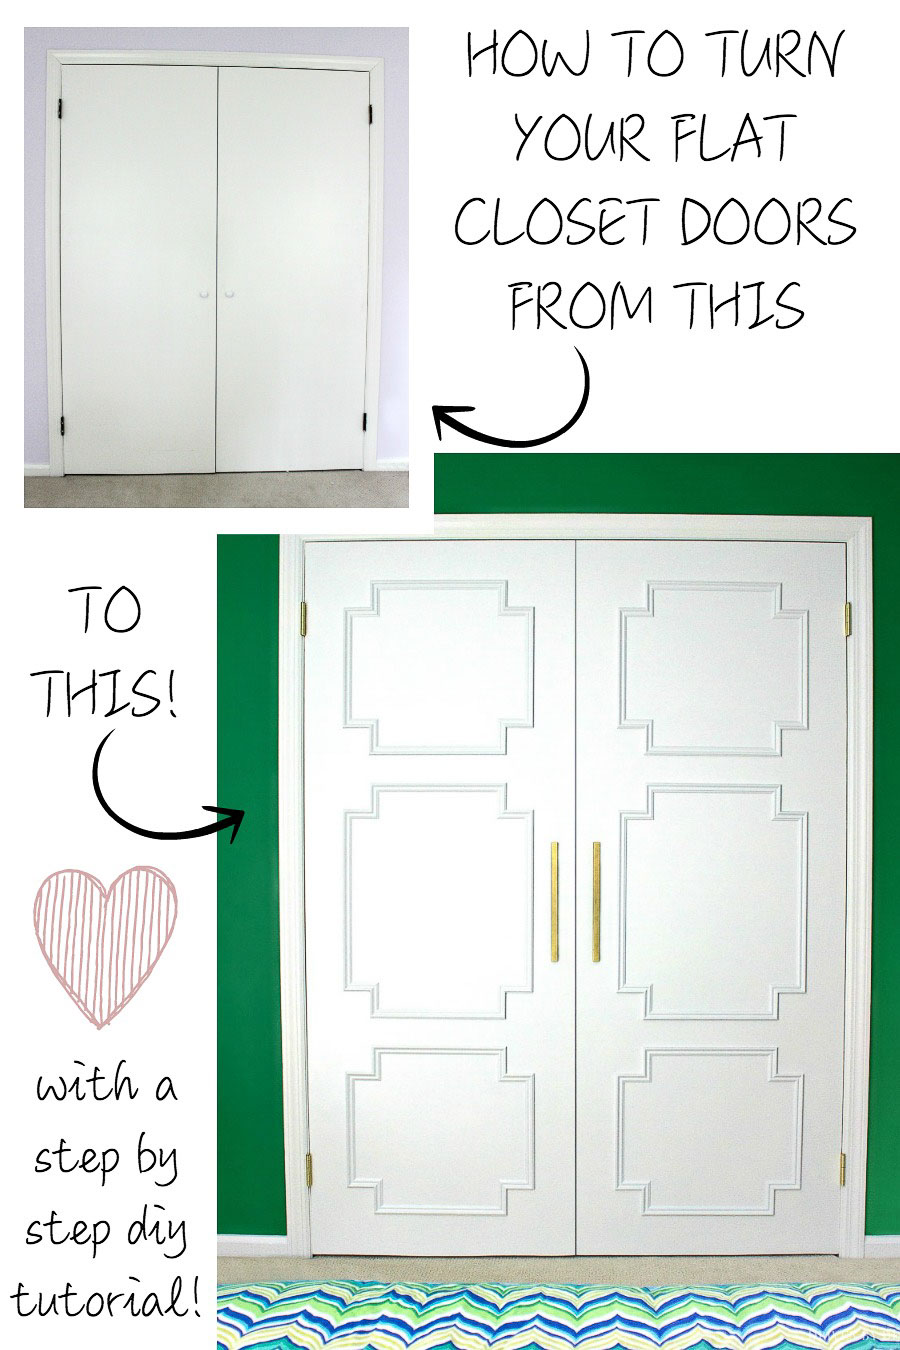
Do you have cheap looking flat slab doors? Instead of buying new doors, consider a flat panel door makeover! You can makeover your doors at a fraction of the price of new doors and they’ll look like a million bucks! I’ll share the step by step of what to do by walking through my own flat panel door makeover, taking my doors from this:

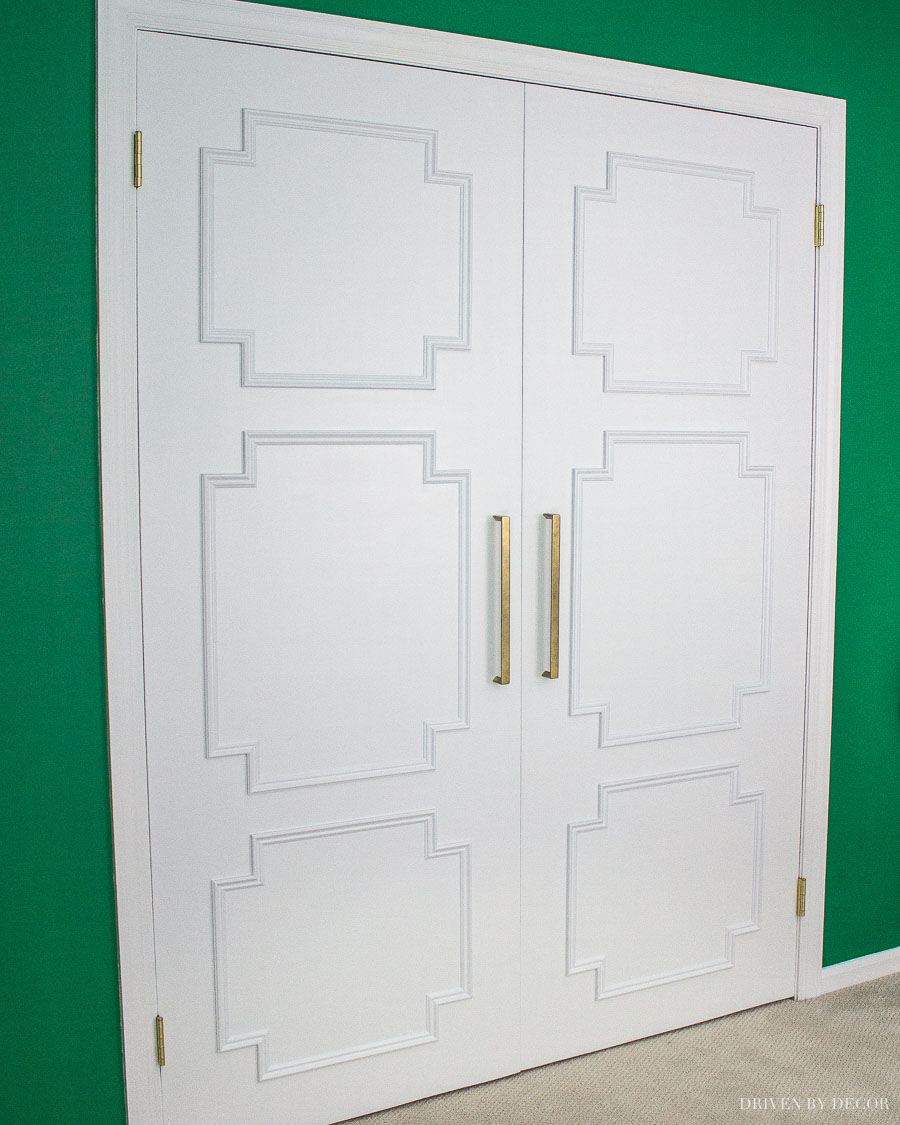
to this:
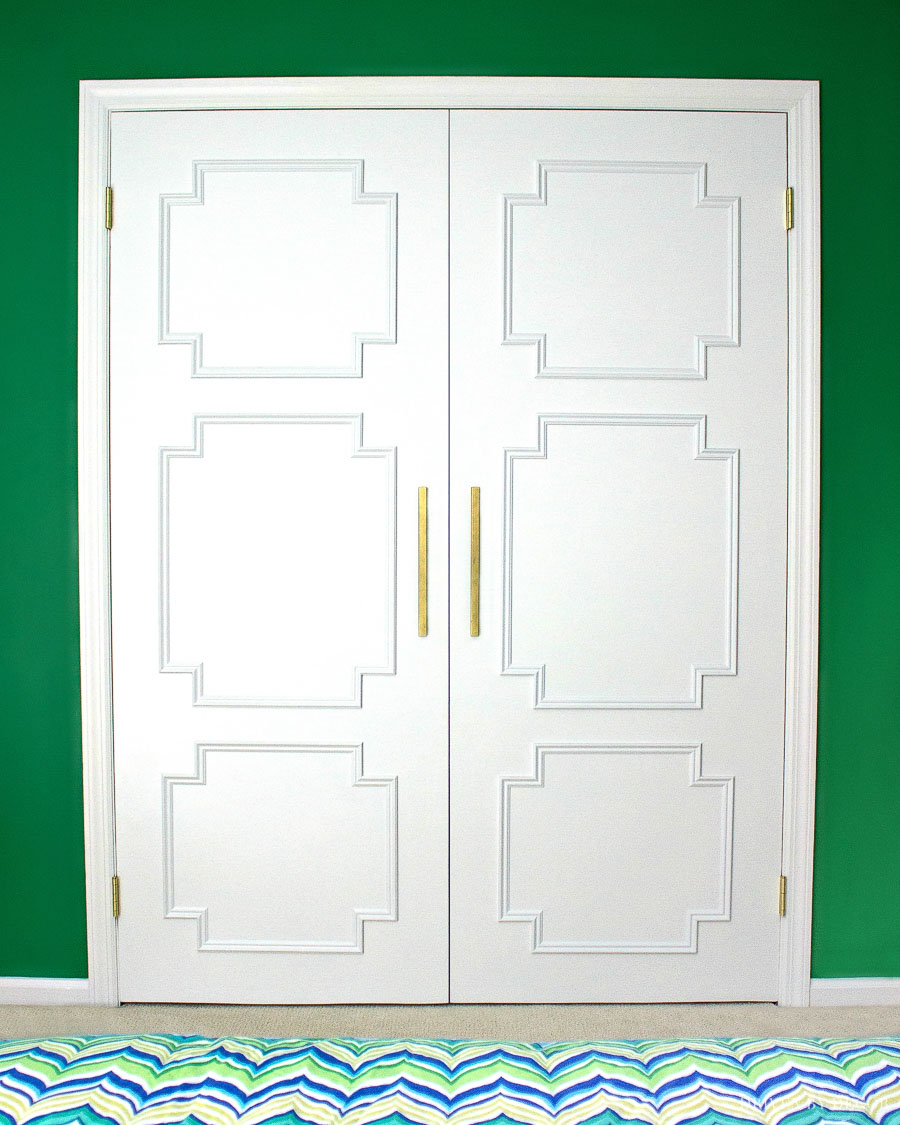
Best of all, I knocked this entire project out with no power tools other than a simple drill. Let’s get to the simple step by setp… (post includes commissionable links; for more information, see my full disclosure statement {here}).
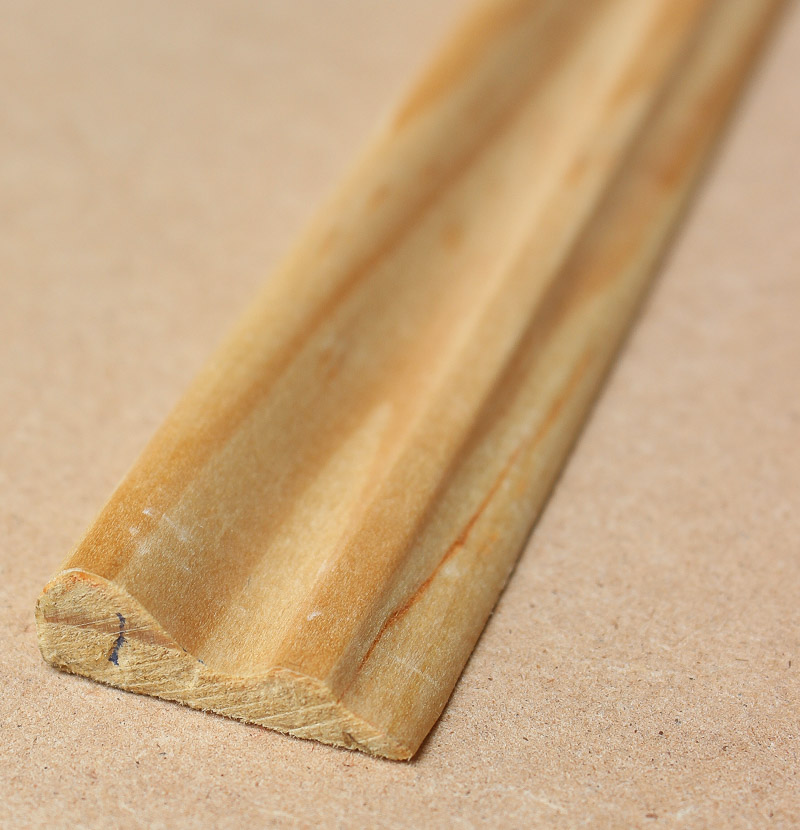
Let’s start with the supplies you’ll need to knock this project out. My raised panel design was created using inexpensive panel molding that I bought at my local hardware store. If you want to find a similar low profile molding, here’s a close-up view of mine (it measures 1″ wide and 5/16″ at its thickest point):
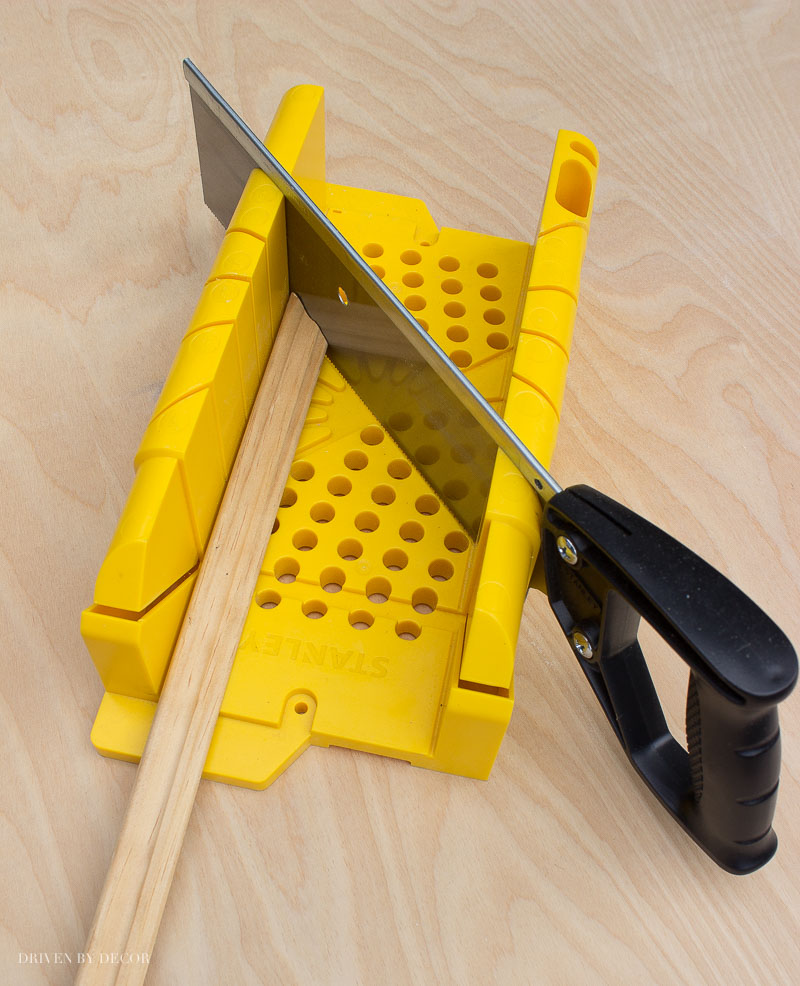
I also used a miter box and saw similar to {this one},
wood glue, some small brad nails, a hammer, a drill, paintable caulk, wood filler, painter’s tape, a level, and paint.
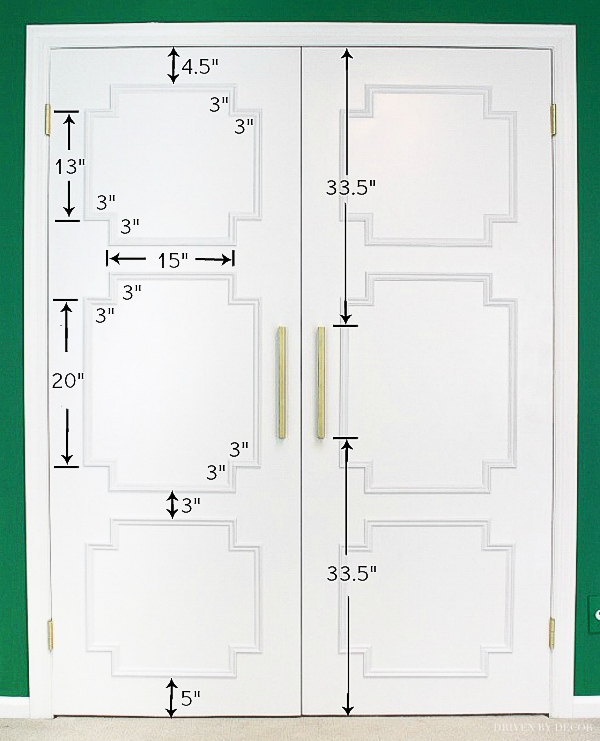
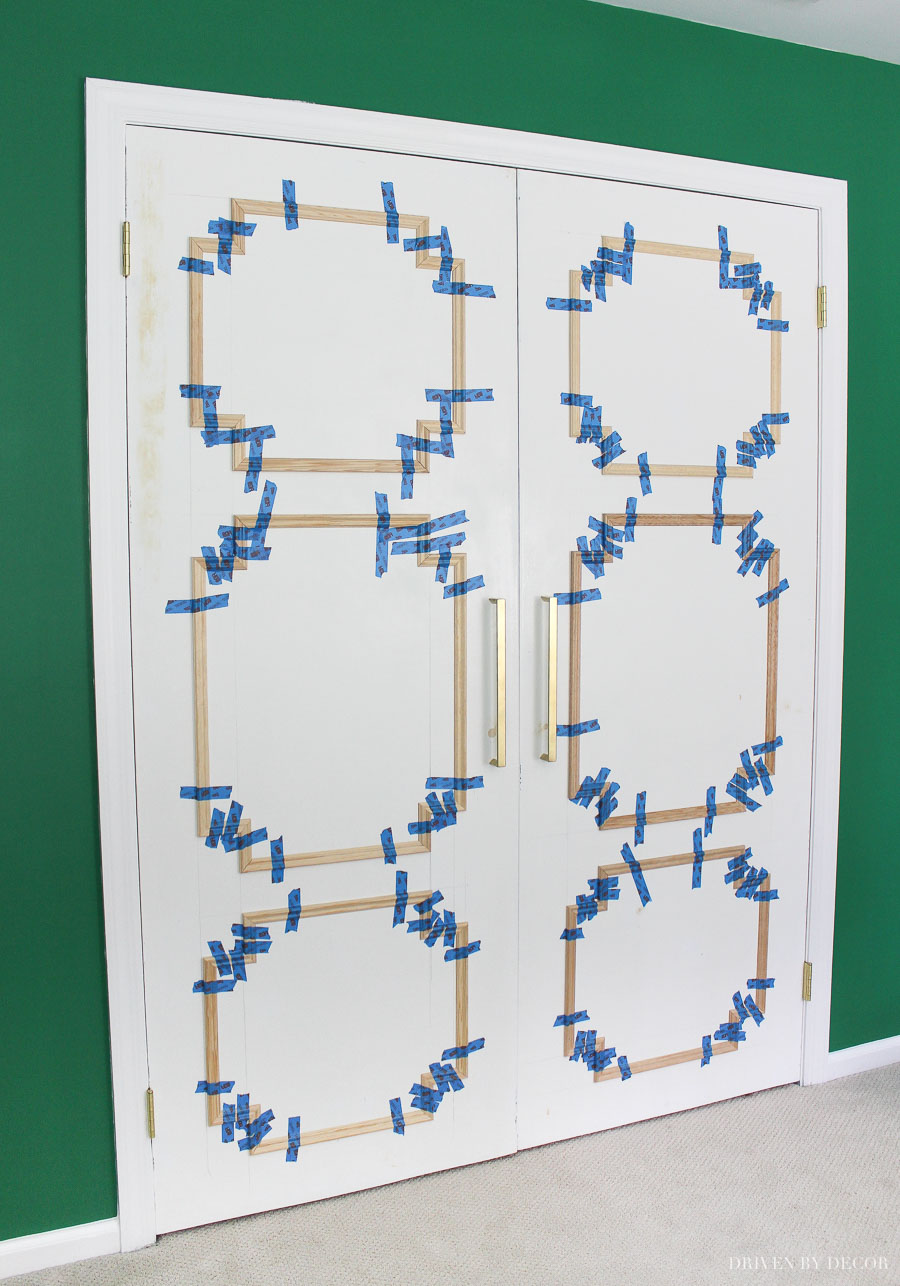
The first step of the flat panel door makeover is the one that takes the most time – deciding what type of pattern you want to create and figuring out the measurements for each piece of molding that you’ll be cutting. The closet doors that I worked on were each 30″ wide by 79 ½″ tall. These are the measurements that I used to create my paneling pattern:
Once I figured out how long each piece of molding needed to be, it was time to go to town with the miter box and saw, cutting all of my molding pieces to size. The molding was easy to cut but there were lots and lots of cuts to make so it took about 2 ½ hours from start to finish. If you have a miter saw, by all means, use it!
Before jumping any further into this project, if you are going to replace the door’s hinges, do it now! Sometimes new hinges can slightly change the alignment of the doors and you want them in their final position before you start measuring and leveling the molding pieces.
Next it’s time to mark up the door, making measurements with a level and pencil to mark the where the molding pieces will go. After that, I taped each of the molding pieces in place with painter’s tape and double checked that everything was level and aligned:
To adhere the molding to the door, I added a line of glue to the back of each piece of molding and pushed it into place. I secured it to the door with the blue painter’s tape and wiped away any excess glue.
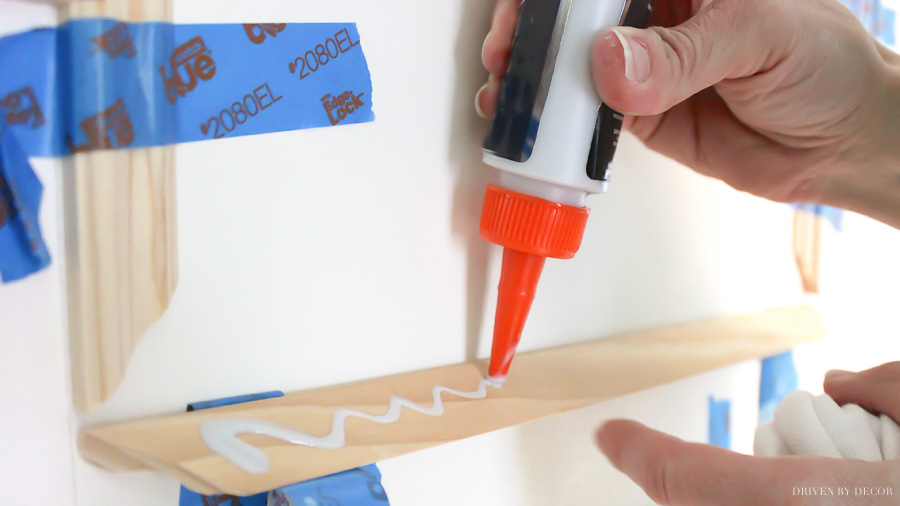
Using glue alone worked great for all but about six of the long molding pieces. These pieces were not totally flat and so both ends would not stay flush with the door while the glue dried. For these difficult pieces I added a small brad nail to the end of the molding piece that was sticking up to get it to stay down while the glue dried.
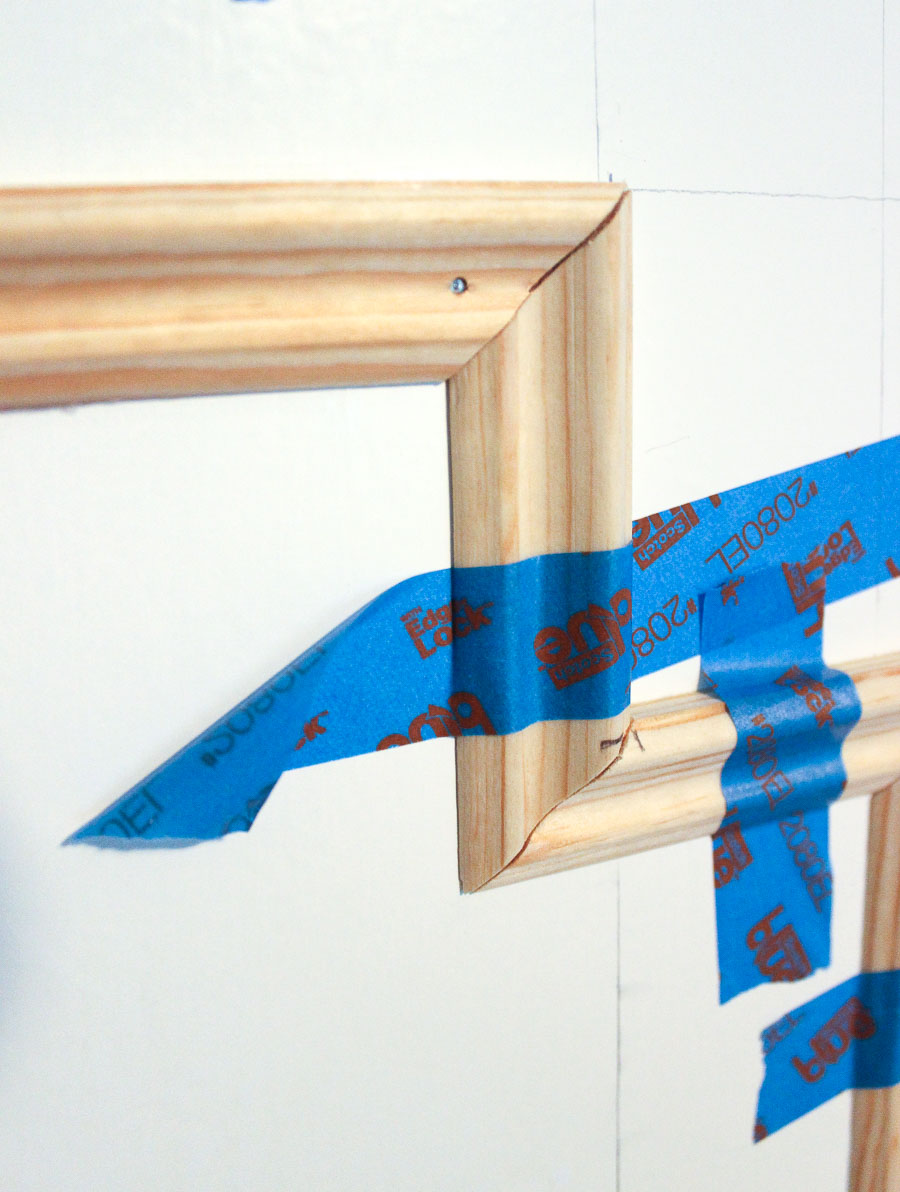
Since even small brad nails can easily split the wood of molding as thin as the panel molding that I was using, I predrilled a tiny hole in the molding before tapping each brad nail in with a hammer. Once the glue dried, I removed the painter’s tape, added wood filler to the small holes where I used the brad nails, and then sanded the holes smooth once the filler dried.
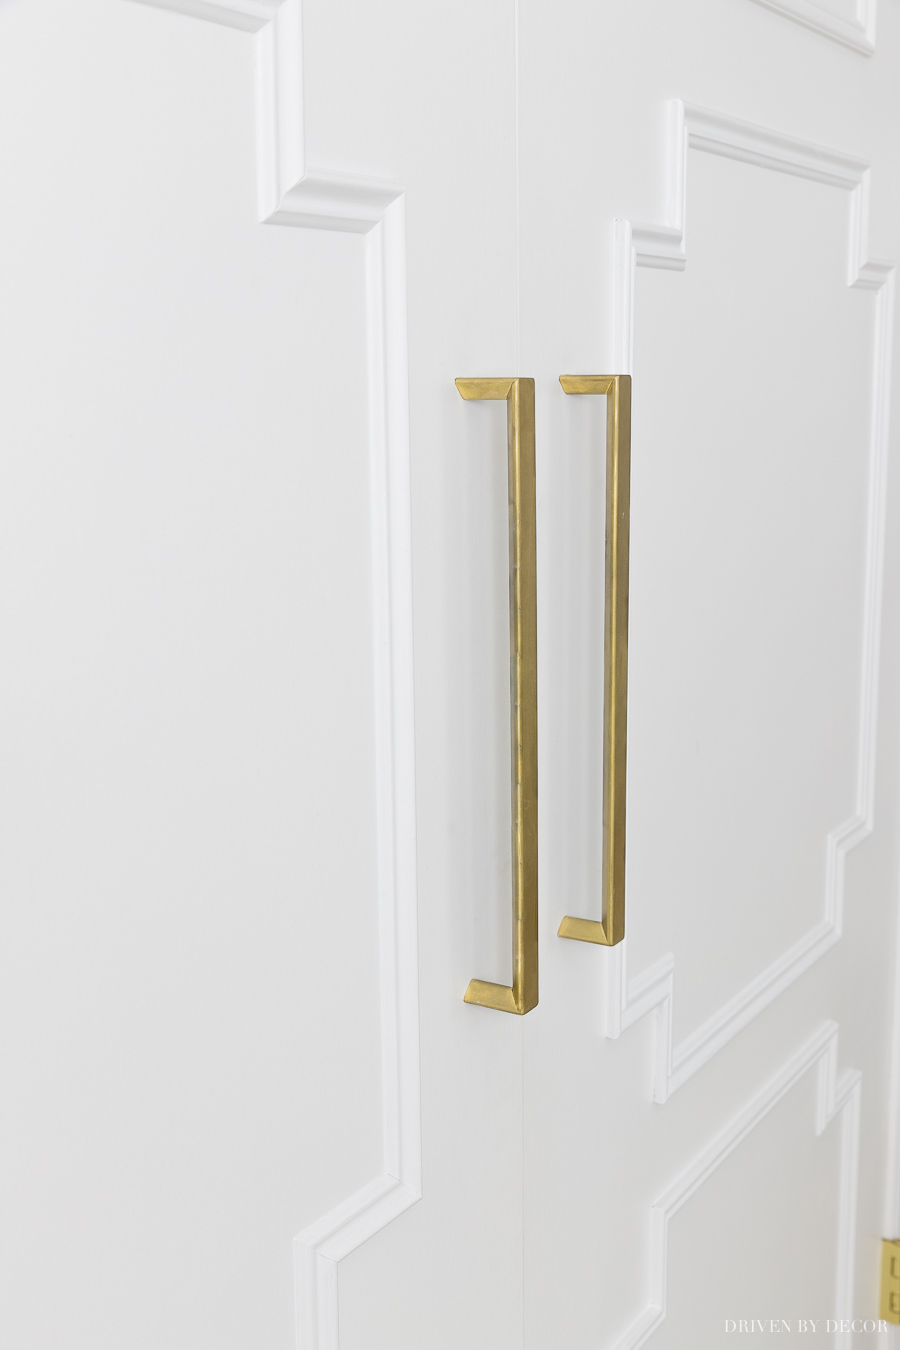
The final step in this flat panel door makeover is to caulk any gaps and paint the entire front of your doors. My doors were originally painted with oil-based paint so I used Benjamin Moore’s Advance. This paint can be used over oil-based paint yet it cleans up like latex paint. Just be aware that it has a long dry time between coats.
For the closet door pulls, I bought IKEA’s 13″ TYDA handles. They don’t sell these pulls anymore but {these pulls} are quite similar.
And with that, my flat panel door makeover was DONE!
I was so happy with how they turned out and most importantly my daughter was too! If you have some flat doors in need of a little TLC, I hope you found this helpful! Be sure to pin the image below so you can find this post when you’re ready to tackle the job ->
Update: I made over the flat closet doors in my other daughter’s bedroom too but in a totally different way! Check it out in my post on closet door ideas.
Hope you all enjoyed seeing this project and I’ll see you back on the blog next week!


Karrie Kitzman says
This fits my midcentury modern home. I have bedroom doors to do as well and considering same diagram but just 2 figures per door and looking for knobs to fit the bill. I am copying your door exactly if I can hide the holes.
Kris Jarrett says
Ahhh… didn’t see this comment before I responded to the last one. For bedroom doors you would probably have a big old hole so I think you’d have to keep some type of true doorknob on them unfortunately!
Karrie Kitzman says
How did you hide the doorknob holes? I have the same doors but my knobs seem larger creating a larger hole to hide.
Kris Jarrett says
I was fortunate that the holes were really small and I could just fill them with wood filler and paint over them. Most closet door knobs aren’t drilled all of the way through – they’re just screwed onto the front of the door – hopefully that’s the case with yours because then all you need to do is remove the knob and fill in the holes with wood putty!
Ivory says
Wow, absolutely fanstatic
Kris Jarrett says
Thank you so much!
Tammy says
Love it!
Kris Jarrett says
Thanks Tammy!
Betty in Arlington says
WOW!
Kris Jarrett says
Thanks Betty – glad you liked it!
Melinda says
Stylish & classic… You did a great job with the doors!
Kris Jarrett says
Thank you so much Melinda!
Ann says
Marvelous!
Bertha Ossachuk says
Like what I have seen s0far but would like to see something a little simpler thanks
NB says
Thanks for this! I have a similar “before” door situation and your wonderful step-by-step guide has inspired me to transform it!
Kris Jarrett says
So glad that you got some inspiration from this post – I hope you love your new doors!!