Get ready for bed making 101! I’m showing you how to layer a bed for a designer look that rivals a five-star hotel!
What’s just as important as having beautiful bedding? Knowing how to arrange it! Today I’m sharing a bed making 101 guide to show you exactly how to layer a bed step by step, starting from the bare mattress all the way through to the final throw pillow.
I’m also giving you my bedding recommendations, including the best duvet inserts, pillows, sheets, and more. By the end of this bed making guide, you’ll know everything that you need on your bed to build the foundation for a great night’s sleep (and look beautiful doing it)! (post includes affiliate links; full disclosure statement available {here})
Guest Room Sources: Upholstered Wingback Bed (fabric is Zuma White) | Bedding – no longer available
1. Put on a Dust Mite Proof Mattress Protector
Layering your bed starts with a quality mattress protector – this is KEY! Over years of use, mattresses can actually gain weight due to the accumulation of dead skin cells, sweat, and dust mites. I know… gross!
So start by covering your bare mattress with a dust-mite proof mattress/box spring protector like {this one} that encases the entire mattress (top and bottom) and zips closed around the end:
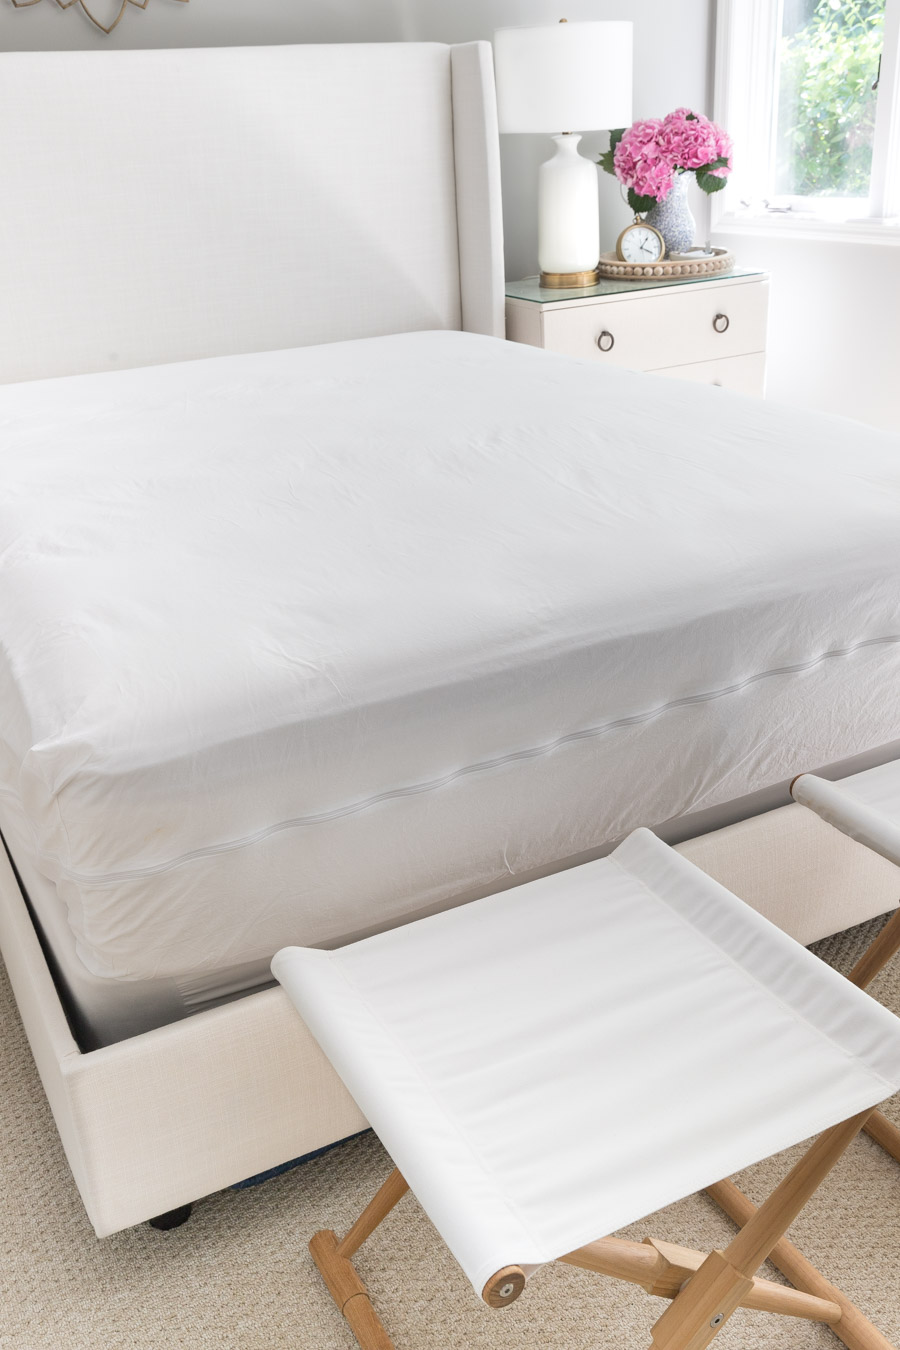
Look for one that matches the height of your mattress instead of getting a “one size fits all” protector for the best fit. When you buy a new mattress, put a mattress protector on it from day one to extend its life. If you have an older mattress and haven’t been using a protector, it’s not too late! Just give your mattress a good overall vacuum and put one on so it’s protected from this point on.
2. Add a Waterproof Mattress Pad
You also want to protect your mattress from spills and accidents and have a layer that’s easier to remove and wash than a mattress protector. So the next step is to add a waterproof mattress pad such as {this quilted mattress pad}:

And if your mattress isn’t as soft as you’d like, think about also adding a foam topper like one of {these}. They can make a HUGE difference in the comfort of your bed! I have these on some of the beds in our house but not on our guest bed since it’s a pillow top mattress and already pretty soft.
3. Next Up Are the Sheets
The next layer includes your fitted and flat sheets. In my opinion, the best sheets are organic cotton sheets but since they’re fairly expensive, we only have them on our primary bed and use other types of sheets for the rest of the beds in our home. Here’s the bedmaking 101 on the three main types of sheets so you can pick what’s best for you and your budget:
Cotton Sheets
The pros of cotton sheets are that they’re durable and breathable (good if you “run hot”) while the biggest con is that they tend to wrinkle a bit more than some other sheet types. Options include 100% cotton or cotton mixed with materials such as linen or bamboo. I currently have {these bamboo/cotton sheets} on our guest bed and really love them!
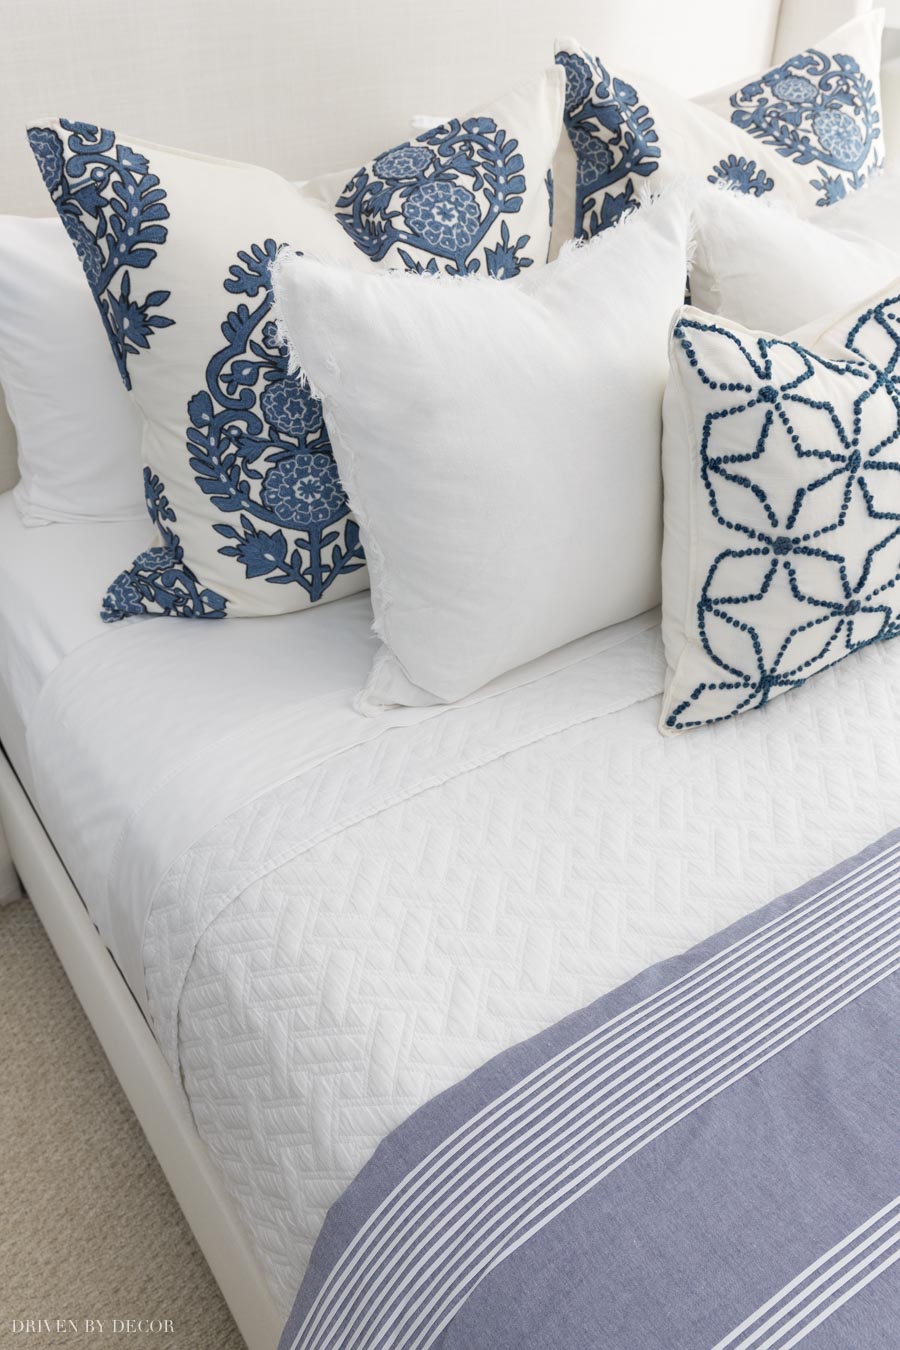
I lay the flat sheet on the bed with the finished side down and fold it down from the top about 8″ or so over the quilt or coverlet:
Organic Cotton Sheets
Organic cotton sheets such as {these} that are on our primary bed have the same pros & cons as regular cotton sheets with the added plus that they’re grown, harvested, processed and manufactured without chemicals so they’re the most environmentally friendly choice. And it can be argued that organic cotton sheets are better for you and your health since they’re pesticide free and you do spend about ⅓ of your life in bed!
Microfiber Sheets
The biggest pros of microfiber sheets are that they’re inexpensive, soft, and wrinkle free. The cons are that they aren’t made with natural materials and aren’t as breathable (so not a great choice if you have night sweats or live in a hot climate) or environmentally friendly. I’ve tried {these microfiber sheets} which get amazing reviews and they truly are super soft and wrinkle free.
Whatever type of sheets you choose to buy, pay attention to the size of the fitted sheet to make sure it’s deep enough to fit your mattress. I also like a generously sized flat sheet so that Jeff and I aren’t playing sheet tug-of-war at night. I was impressed that {this bamboo/cotton sheet set} on our guest bed is a nice, generous width and length.
Also, beware of putting too much stock in thread count – some manufacturers inflate their thread counts by using double- or triple-ply yarns made by twisting 2-3 lower-grade threads together so a 500 thread count sheet from one company is often not going to be the same quality of a 500 thread count sheet from another company.
4. Add Your Sleeping Pillows
It’s tough to make recommendations for pillows since what’s best for one person isn’t best for the next. Jeff prefers to sleep on a contoured foam pillow like {this one} since he has back problems and feels like it helps quite a bit. I tried sleeping on his pillow and it wasn’t for me! I prefer a down pillow made for stomach sleepers like {this one}.
The key is to find a pillow that is the most comfortable for you and works best with your sleeping style. Generally you want to choose a pillow that is soft for stomach sleepers, medium for back sleepers, and firm or extra firm for side sleepers.
5. Don’t Forget the Pillow Protectors
Just like you should use a mattress protector, you should protect your pillows too, especially in your guest room! No one wants to be sleeping on the yellow stained pillow from a previous guest or one that’s filled with dust! {These pillow protectors} are perfect because they zip shut but are still breathable so you don’t get uncomfortable air pockets or any plastic-y crinkling like you do from some others.
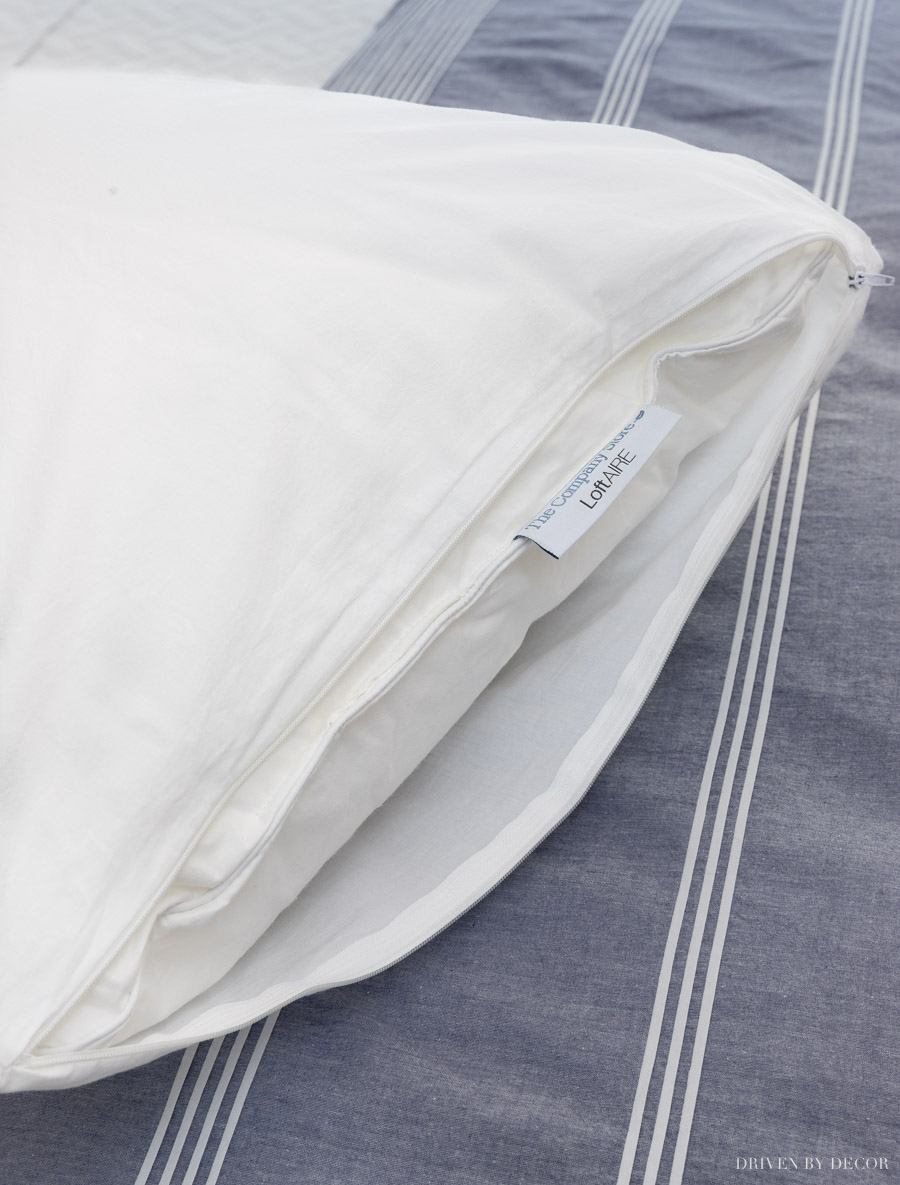
After covering your pillows with protectors, pillow covers matching your sheets are your next layer.
6. Layer on a Blanket
I don’t have a blanket on our guest bed right now because a coverlet and duvet is plenty for warmer months but you might want to add a blanket in the winter depending on where you live. When I have blankets on our beds, I sandwich them between the flat sheet and the quilt/coverlet. {This gossamer cotton blanket} that comes in tons of color options is a favorite:
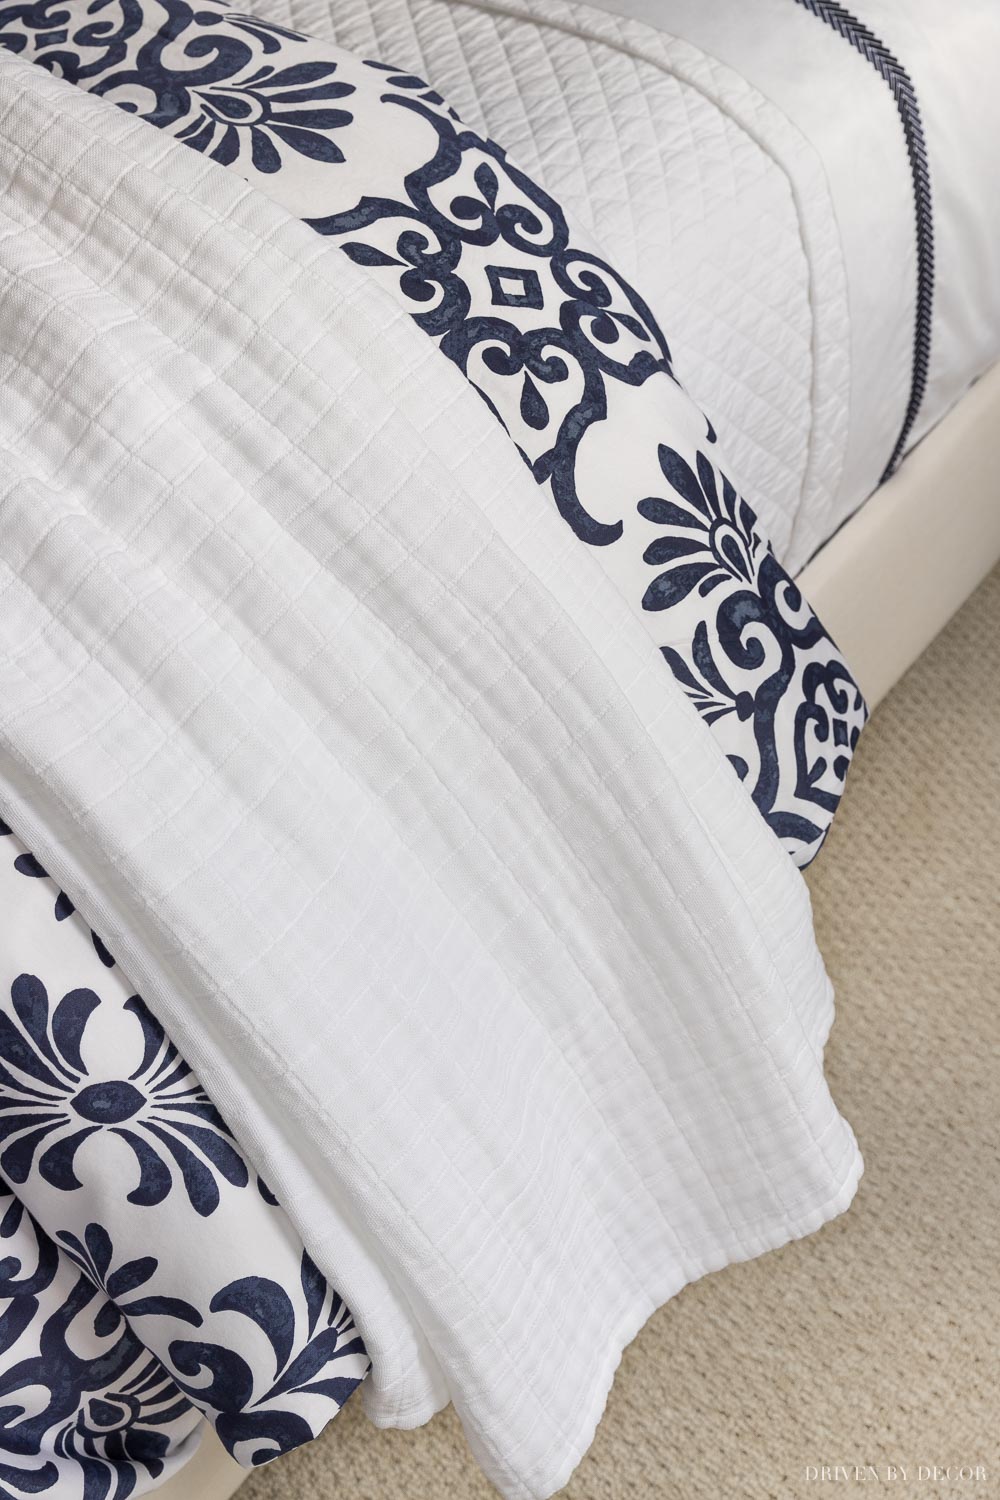
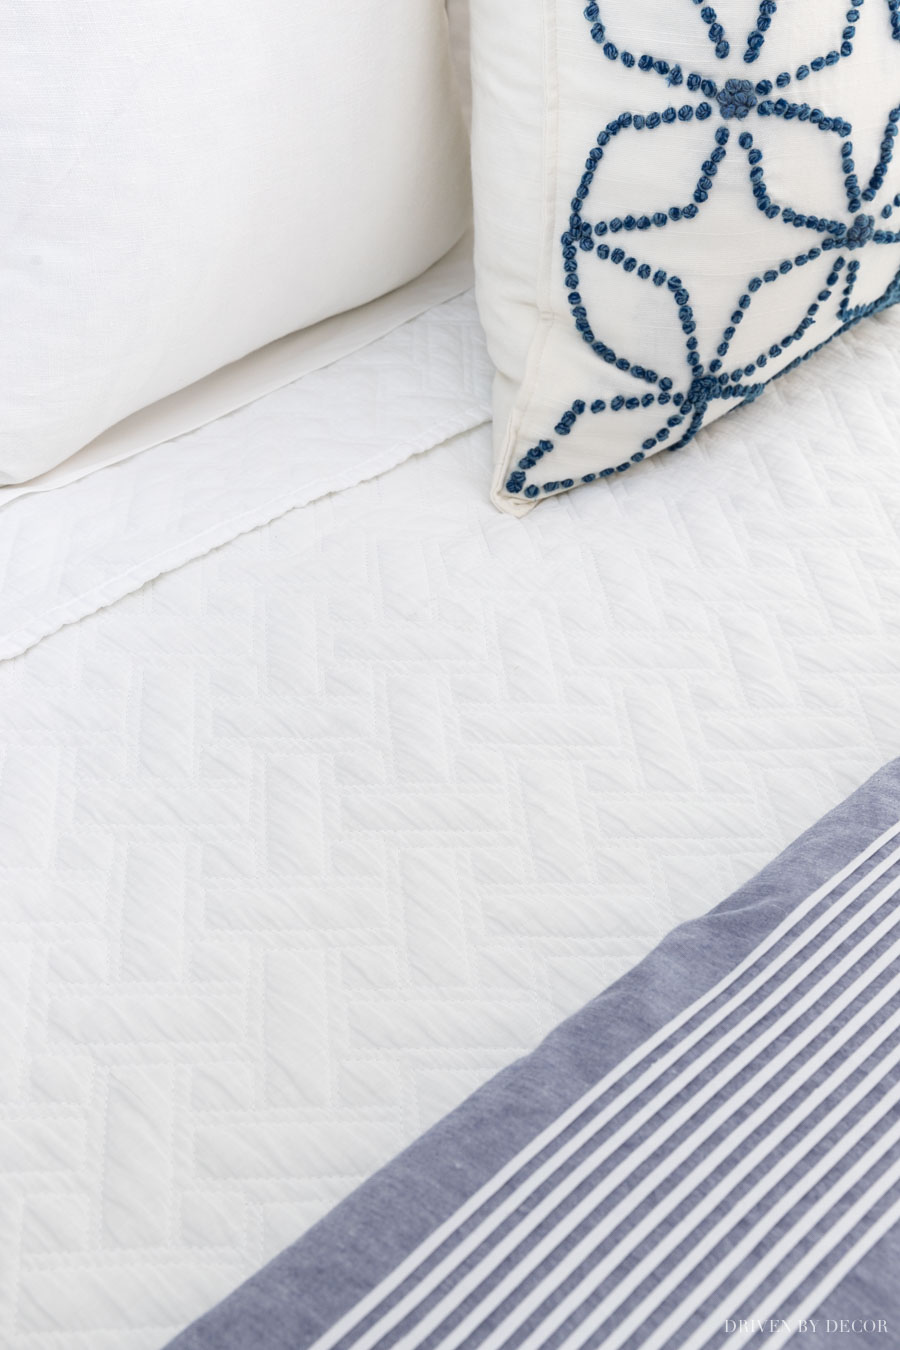
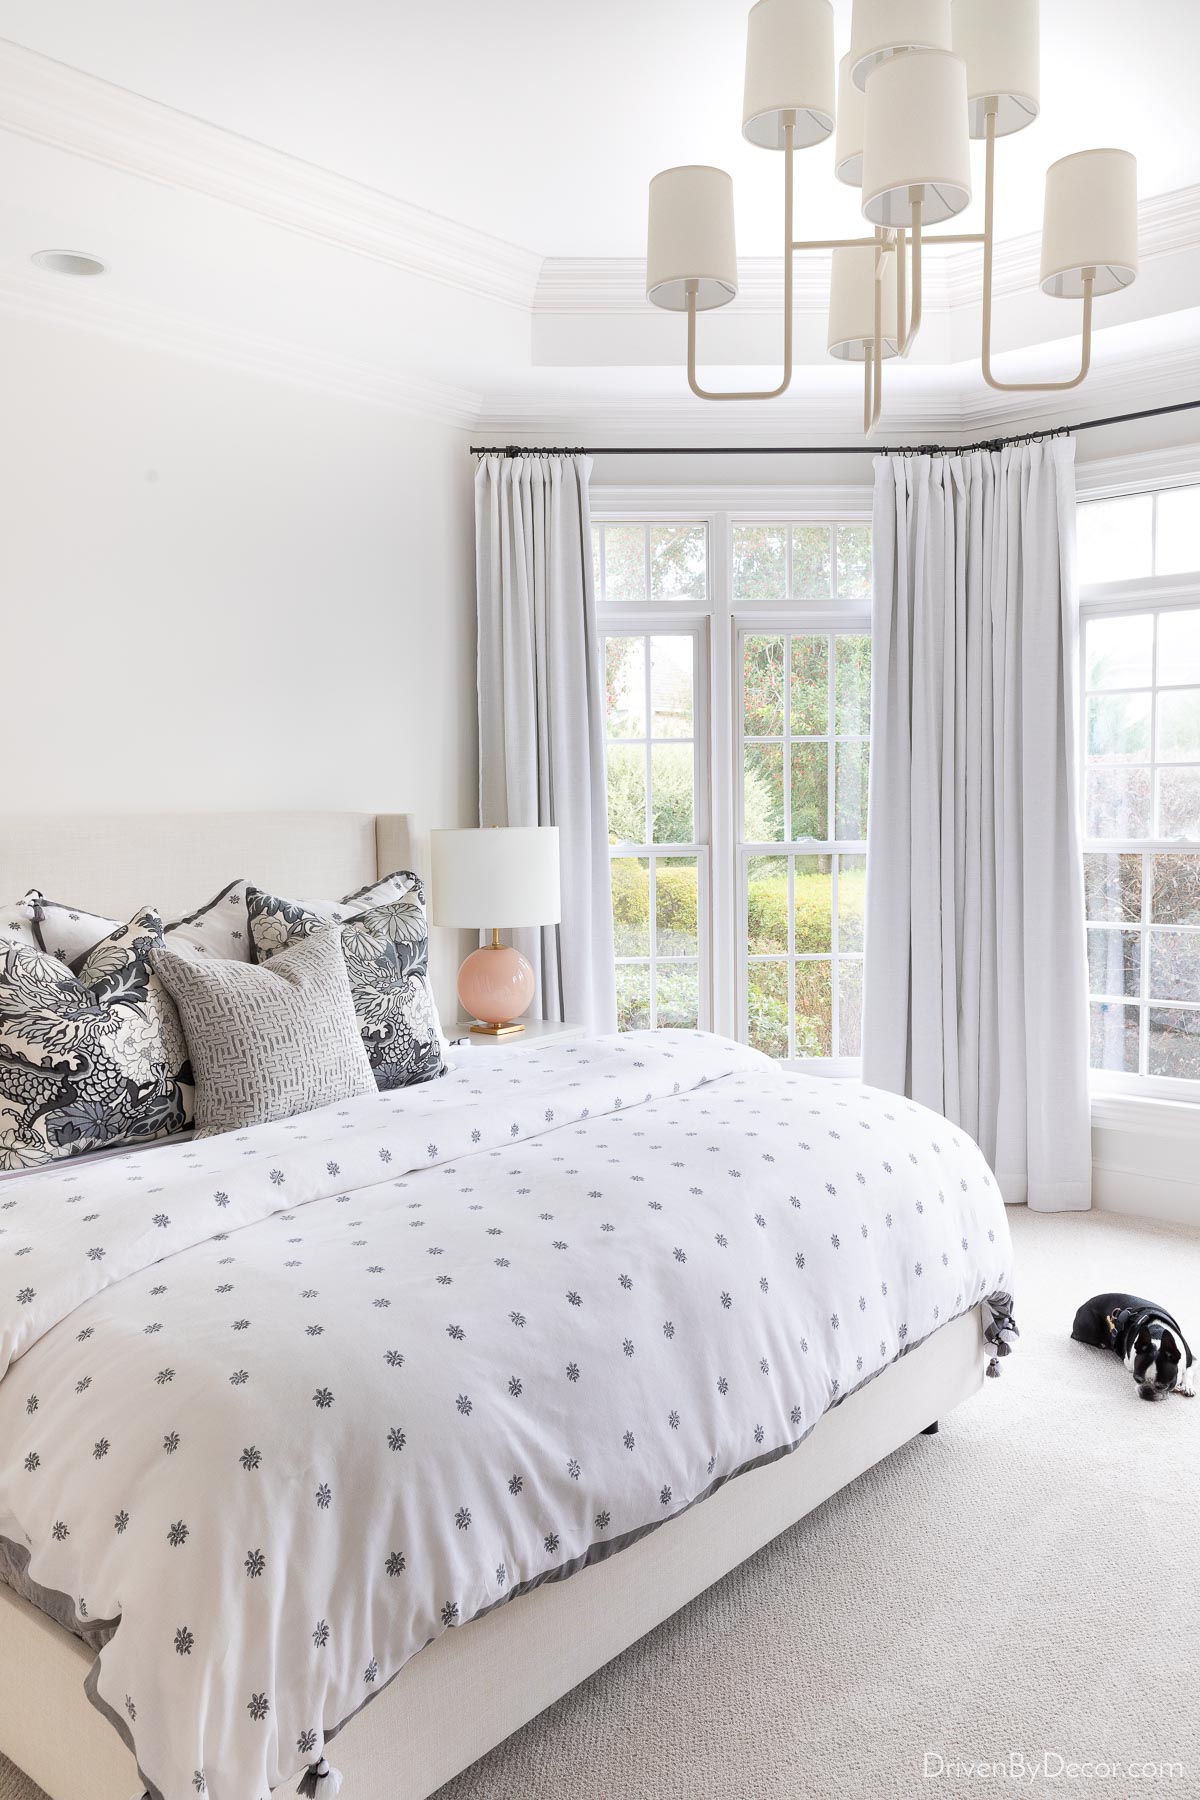
7. Add a Quilt or Coverlet
I have a quilt or coverlet on every bed in our house! The main difference between the two is that coverlets are generally lighter weight but I pretty much use them interchangeably. Both work beautifully for layering and wash up really well. In the summer, a top sheet and quilt or coverlet might be all that you need!
My go-to quilt is {this Belgian flax linen quilt} that I have in three colors. They are pricey but I’ve had them for years and they look as good as the day I bought them. They wash up beautifully!
8. Make it Fluffy With a Duvet Cover & Insert
A duvet is key for making your bed look fluffy and inviting so I add it as the final bedding layer.
On this bed, I have this duvet folded in quarters (you can also fold it in thirds) at the end of the bed:
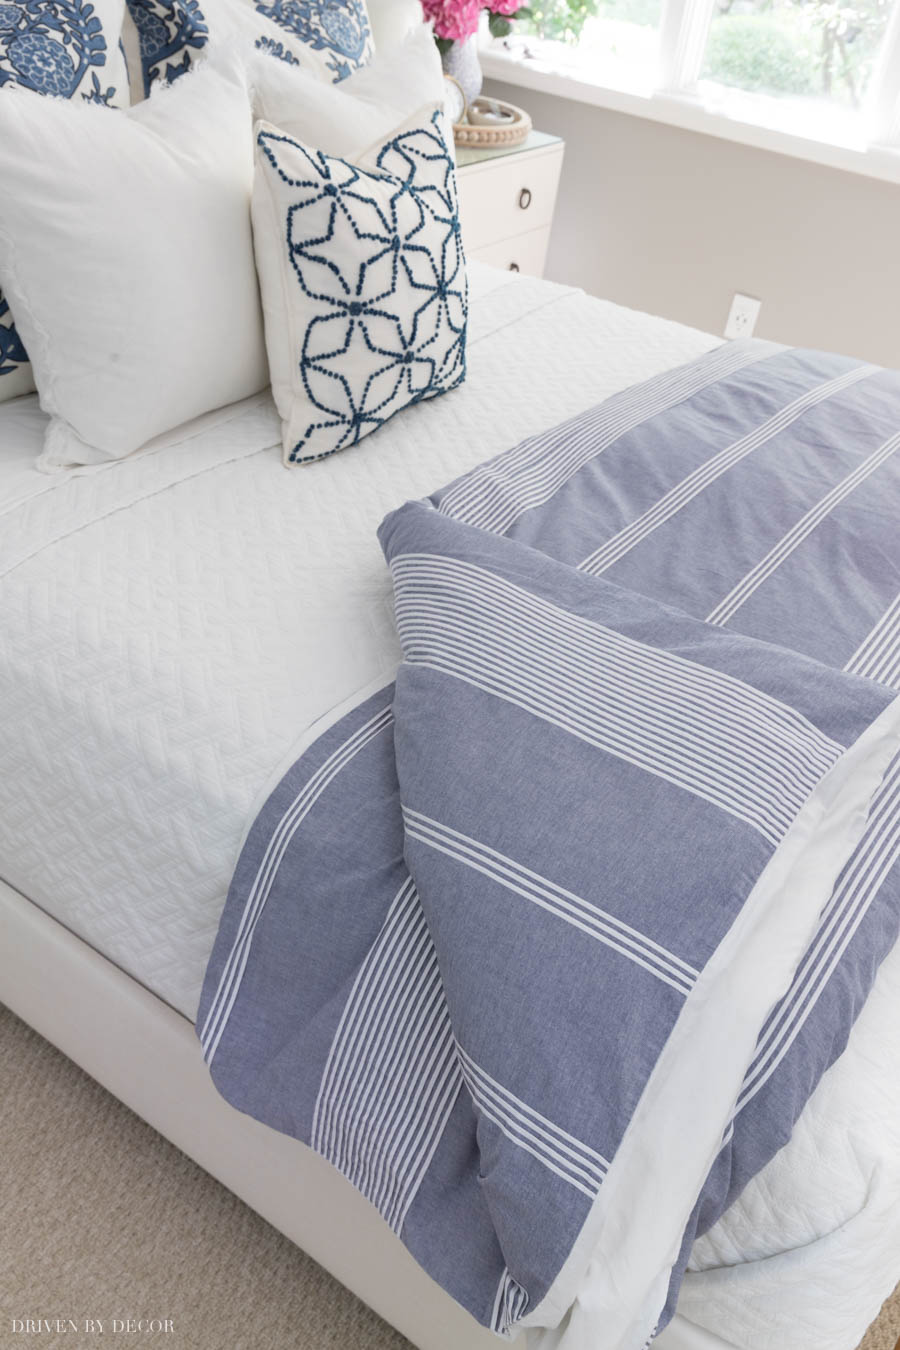
In other cases, like you can see here in our primary bedroom, I cover the entire foot of the bed with the duvet and simply fold it back twice from the top:
What duvet insert should you use in your duvet? One of my favorites is {this duvet insert} that’s checks all of the boxes of what I look for. Another good and slightly lower cost option is {this duvet insert}. I love that it has oversized options that completely fill out even larger duvets.
Want to know more about choosing a duvet insert? I wrote an entire post on what to look for when shopping for one – check it out my guide for finding the best fluffy duvet insert.
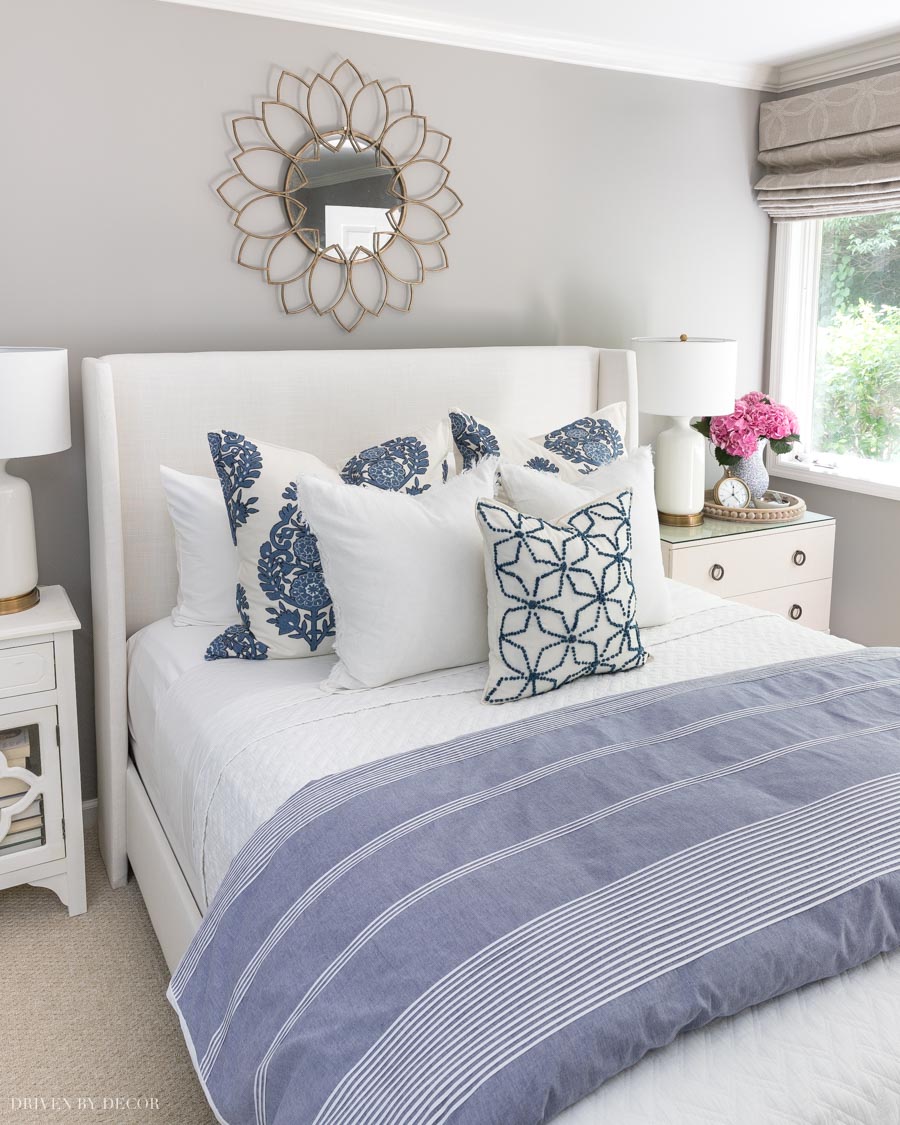
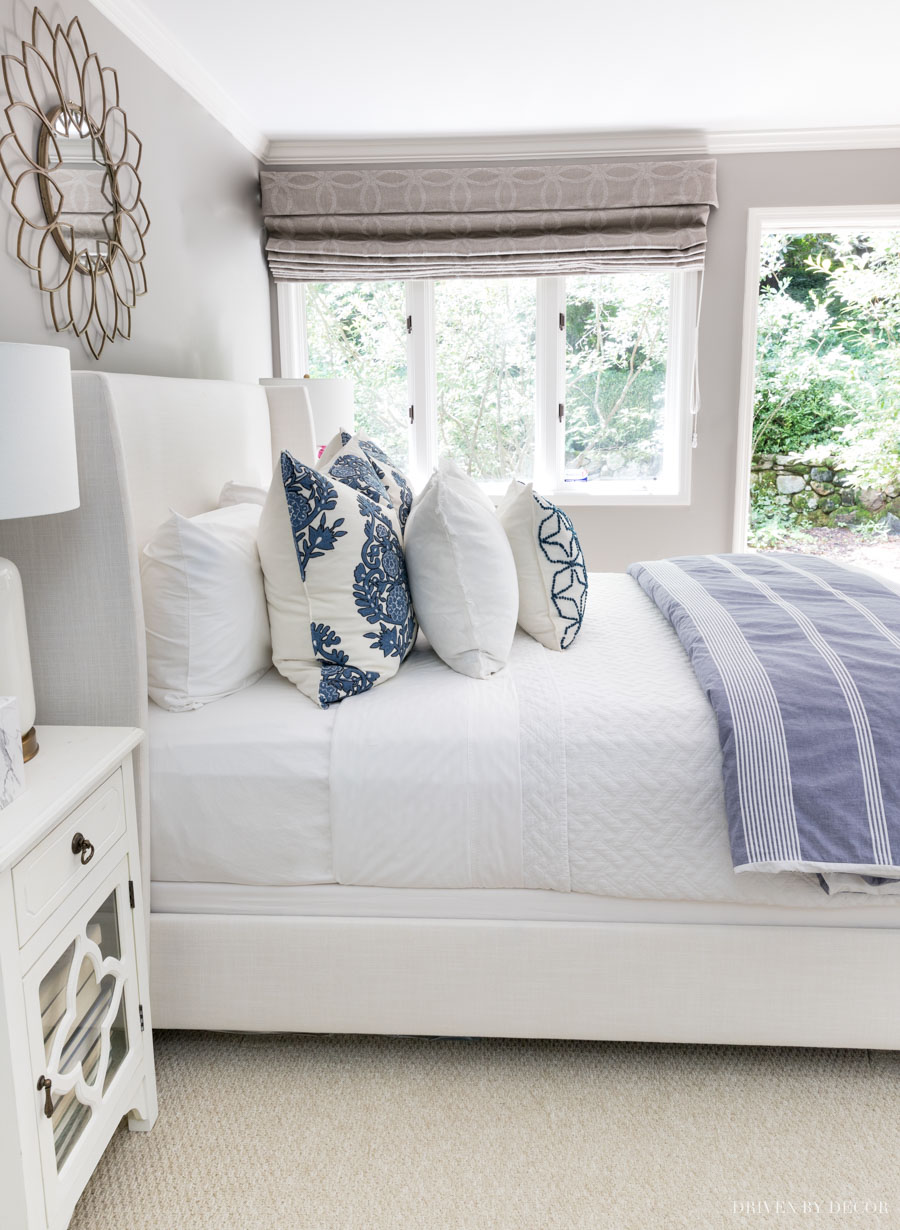
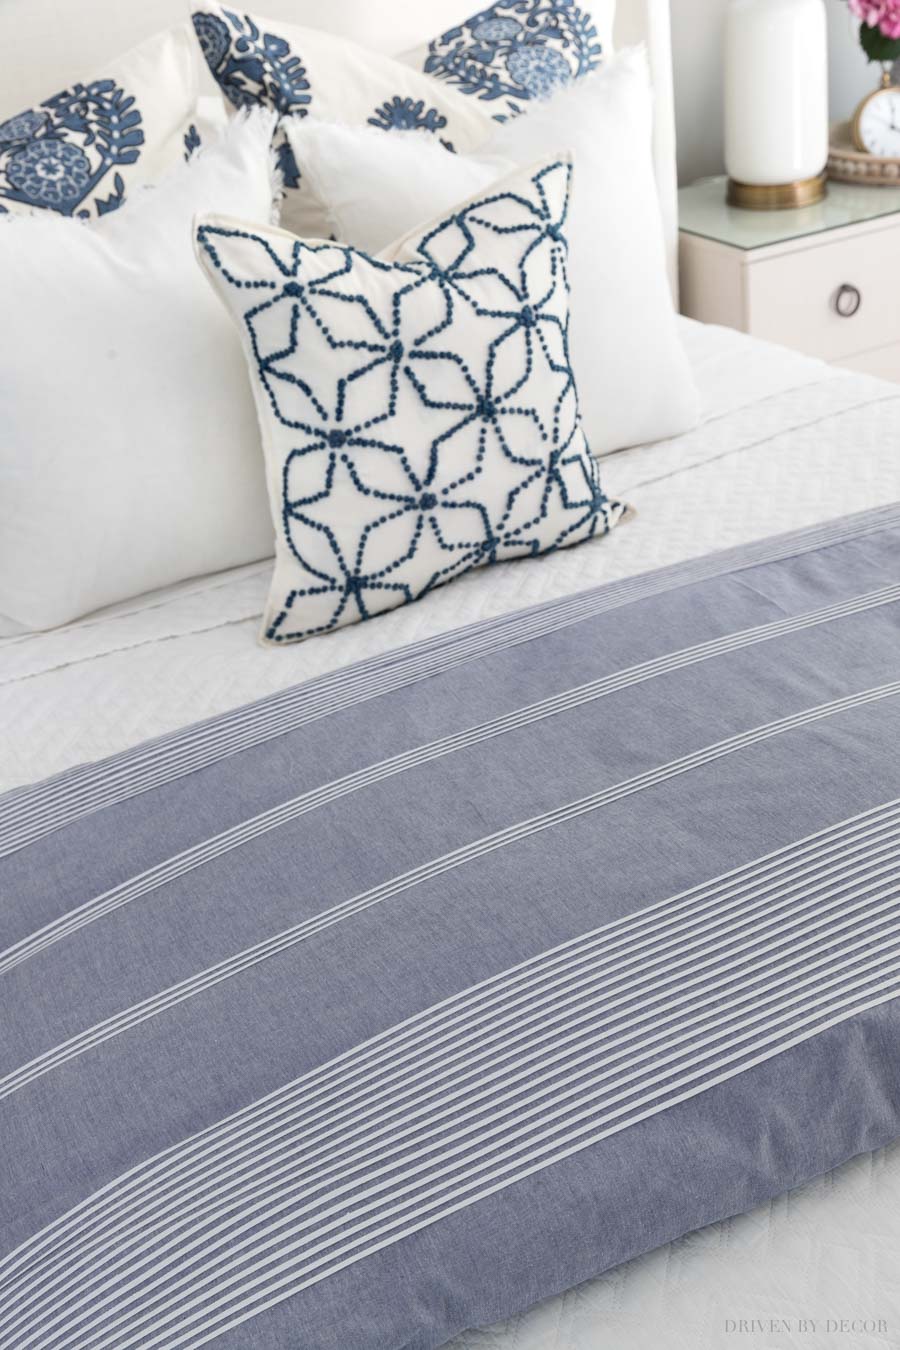
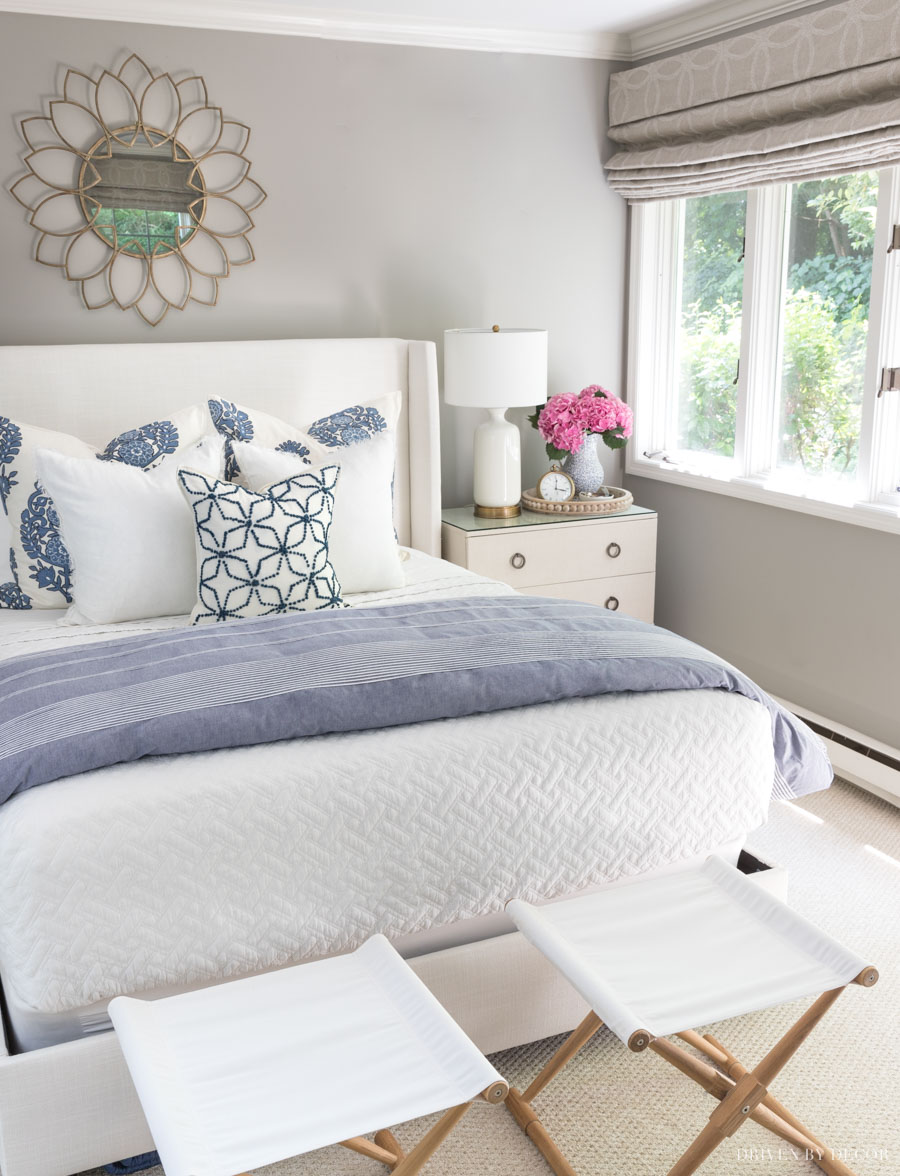
9. Add Decorative Throw Pillows
And finally, the most fun part… the throw pillows! The formula I most often use for a queen bed is two 26″ pillows, two 20-22″ pillows, and one 18-20″ or lumbar pillow. But check out my post on how to arrange pillows on a queen bed for more options. This is the beautiful group of pillows that I chose for our guest room:
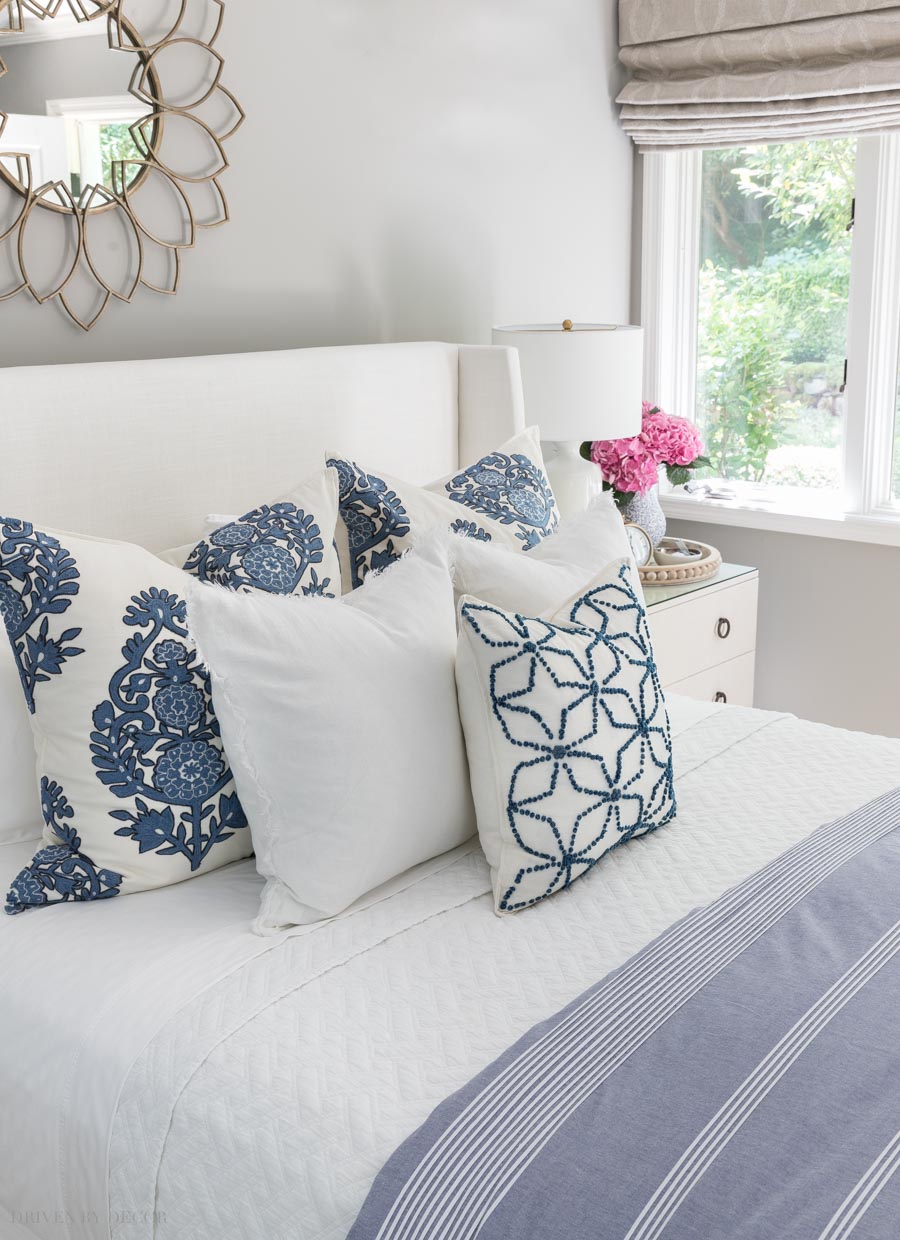
As always, I recommend that you size up with your pillow inserts, choosing an insert that’s 2″ bigger than the pillow cover (so a 22″ pillow insert for a 20″ pillow cover, etc.).
I like to have quality down inserts for the two largest decorative pillows since those are what most people use as back support if they’re sitting in bed reading or watching TV. {These down inserts} are my favorite because they’re nice and fluffy and more reasonably priced than many other down pillows. I think it’s fine to go with less expensive inserts for the smaller pillows since those are mostly there just to look pretty and aren’t used!
And with that, you’ve created a beautiful, cozy, fabulous looking bed that’s going to give you an amazing night’s sleep!
I hope you enjoyed these bed making 101 tips! Thanks as always for stopping by!


Sandra F says
where do you buy the pillow inserts? I have purchased the covers from The Company Store but they do not carry a 22″ or 28″ insert.
Kris Jarrett says
Hi Sandra – this post has some different sources for pillow inserts that I like: https://www.drivenbydecor.com/what-size-how-choose-arrange-throw-pillows/
Olivia says
Hey! I love what you did with the room. Where can I find that white quilt? I love how you layered the folded duvet on top of it.
Jeannene says
How was assembling the bed? Was it really difficult? It’s a great looking bed but I know sometimes they can be really hard to put together.
Kris Jarrett says
Hi Jeannene,
I’ve assembled two of them now since we bought one for our house in NC too. It’s definitely a two person job that took a little over an hour to put together. I definitely thought the assembly time was worthwhile for such a well priced piece!
Kaara Lind says
With a King bed, what would be your rule on the number of pillows?
Kristine says
Where did you get your roman shade for this room
Kris Jarrett says
Hi Kristine, I had that custom made since the window is an odd size – unfortunately the fabric I used is no longer available.
Rosemary Coronna says
Love your Bed Making 101 guidelines. I also live in CT and those 90 degree days were really something. Thank goodness for Central AC!
Can you share with me where you got the lovely Roman Shade that is in the bedroom pics? We are remodeling a townhome we recently purchased and I’m looking for something like that (hope it won’t break the bank as some window treatments do)!
Any suggestions?
Thanks very much~
Kris Jarrett says
Hi Rosemary, I had the Roman shade custom made since the window is an odd size – unfortunately the fabric I used is no longer available. Wish I had an easier answer!
Jane says
What size pillows and configuration do you suggest for the decorative pillows on a king size bed?
Kris Jarrett says
I play around with all sorts of different arrangements! You can see my current pillow arrangement in our master bedroom in this post: https://www.drivenbydecor.com/favorite-spring-summer-essentials/
Caroline says
Kris, where do you put your SLEEPING pillows, the ones that match the sheets and which you actually put your heads on? I love how your bed looks, but where are the “real” pillows? Thanks.
Kris Jarrett says
They’re behind the decorative pillows! Look at pictures 1 and 5 in this post – you can clearly see them from those angles 🙂
Lauren says
This is such a thorough guide! I need a lot of help with the decorative aspects of layering a bed to look cozy, but you’ve given me great pointers for the practical aspects as well. Need this for both my own bed as well as the guest room we’re currently redecorating, so very timely!
Kris Jarrett says
I’m so glad that you found it helpful Lauren!
Lindsay says
Where is the mirror above the bed from? I love it!
Kris Jarrett says
Thank you! The mirror and other room sources are linked here: https://www.drivenbydecor.com/guest-room-sources/
Karen Bunch says
What a fun post. I’ve always liked Cotton Company and found their products to be of great quality. The throw pillows on the bed you show is amazing. The blue and white pillow is my favorite (with the embroidery work on it). Thanks for always giving us detailed and beautiful ideas for everyday living space in our homes.
Karen
Kris Jarrett says
Thank you Karen – you are always so sweet to stop by and comment! XO
Tammy says
I have an iron bed frame that shows the mattress and box spring and the black metal support bars on the bottom. I never know how to decorate with that. I’m kind of tired of dust ruffles
Kris Jarrett says
I hear you! I was feeling the same way about our guest bed which is why I ended up getting this upholstered bed – I was ready to ditch my bed skirt! I still have a similar situation in our master bedroom and found that using a more simple, tailored bed skirt gives me more of the look that I like!
Portia says
Can you share where you got the upholstered bed frame. I’m in the market for a king size one. Thanks!
Deanna Fernandez says
This is possibly a basic question, but I have a king-size bed and my duvet covers never seem to drape down the sides of the bed long enough for my liking, which is as pictured in this post. Any suggestions?
Kris Jarrett says
I’ve definitely had that issue before too – for example my IKEA duvet and cover just kind of sit on top without much draping. It’s just all about finding companies that sell more generously sized duvets and inserts. The Company Store’s are some of the most generous in size that I’ve found so you get the pretty draping.
Judy says
Looks beautiful and cozy and I love those embroidered pillow covers! Thanks, Kris, for all of your wonderful and very helpful tips.
Kris Jarrett says
Thank you Judy!
Curious says
Where do you put all the pillows every night?
Kris Jarrett says
We have a little loveseat in this room so the pillows can just be thrown on top of it 🙂
Steffey Whitney says
Hi!
On the subject of bed making, my question is how much is enough to spend on the bed? There is a $1600 queen size Crate and Barrel bed I like for our guest room, but am unsure of quality.
Thanks!
Steff Whitney
Kris Jarrett says
That’s always such a tough call! I think that for $1600 you should be able to find something of very good quality! I personally wouldn’t spend any more than that for a guest room.
Kelley Lopez says
Kris, I love this blue and white combo- those embroidered pillows are gorgeous! And, would you believe I have never use pillow protectors? OMG that would solve so much! haha. Thank you for the tip!
Kris Jarrett says
Well get on it! 🙂 Thanks for your sweet words!