Want to try mixing metals in your bathroom but aren’t sure how to do it? These tips will help you pull it off like a pro!
In almost every room in our home you’ll find lots of neutrals, loads of texture, and usually a mix of metal finishes too! My natural tendency has always been to match things so mixing different metals together in one space isn’t something that came easily to me. I baby stepped my way into doing it and now there’s hardly a space in our home where stainless, gold, and other metals aren’t all thrown into the mix.
While there are no hard and fast rules for using mixed metals, I thought I’d share some tips that may help you step away from matching and start mixing it up in your bathroom and other spaces in your home! (post includes some affiliate links – see my full disclosure statement {here})
1. Stick to Two Metals + Use Each Metal More Than Once
A good rule of thumb for newbie metal mixers is to stick with only two different metal types in your room and use each metal in more than one place. Are there rooms that break this rule and are amazing? Absolutely! But if you’re baby stepping into mixing metals, this is a good rule to keep your room from looking like a mismatched mess. I’ll use our master bathroom as an example – I love the mix of soft brass with brushed nickel so I used both metals in our space. I also used each metal in more than one place: our bathtub filler, shower hardware, and vanity faucets are satin/brushed nickel:
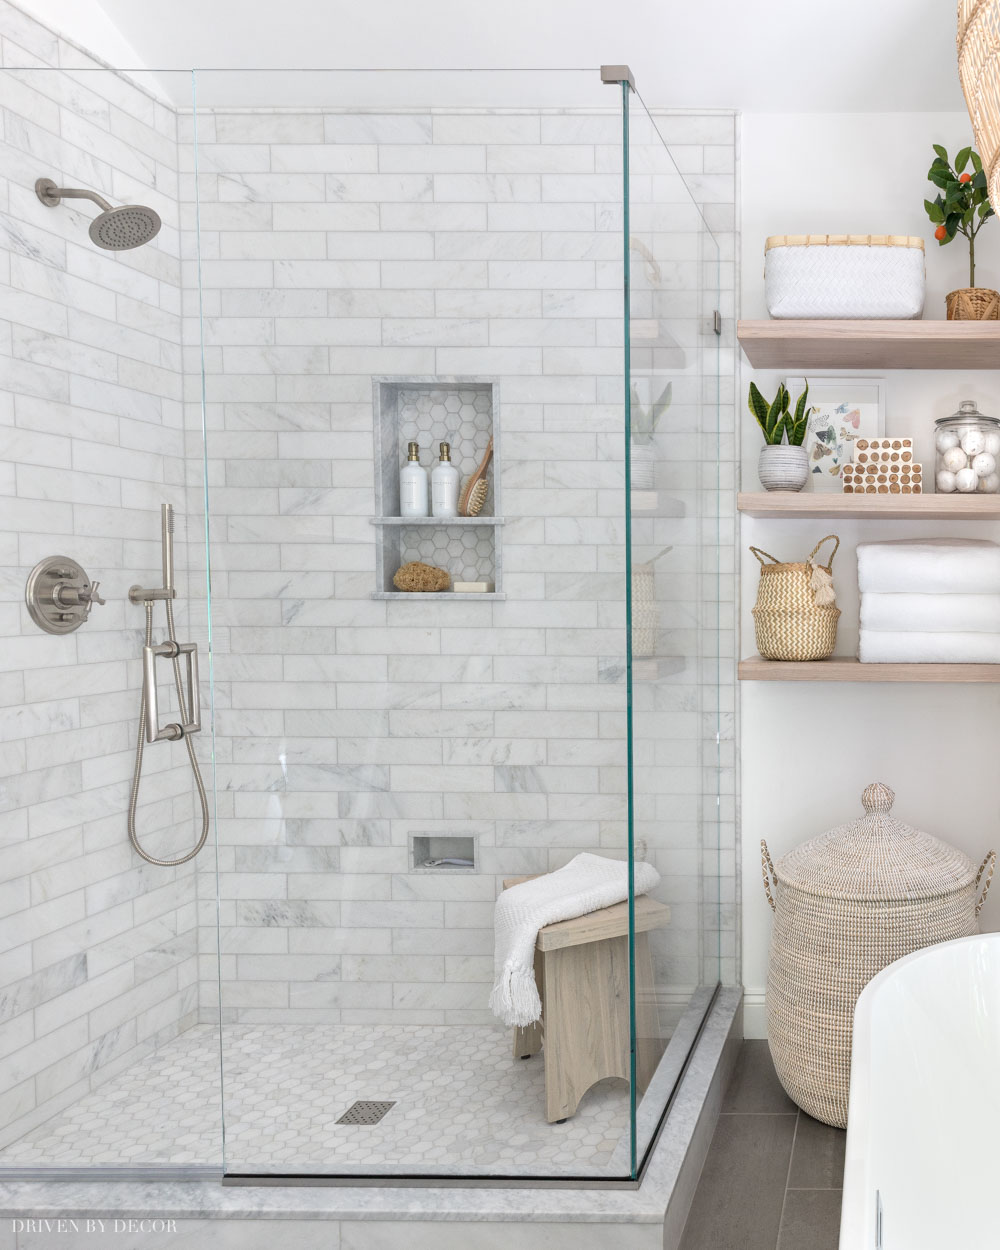
Shower sources: Pump bottles (16 oz white/gold) | Body brush | Sea sponge | Stool | Shelf sources: Floating shelves | White woven basket (medium) | Kumquat tree & stacked boxes – no longer available | Gray & white striped planter (holding snake plant) | Colorful moth art print | White wood frame | Glass canister (1 gallon size) | Bath bombs | Belly basket with tassel | Favorite bath towels | Large lidded basket for hamper
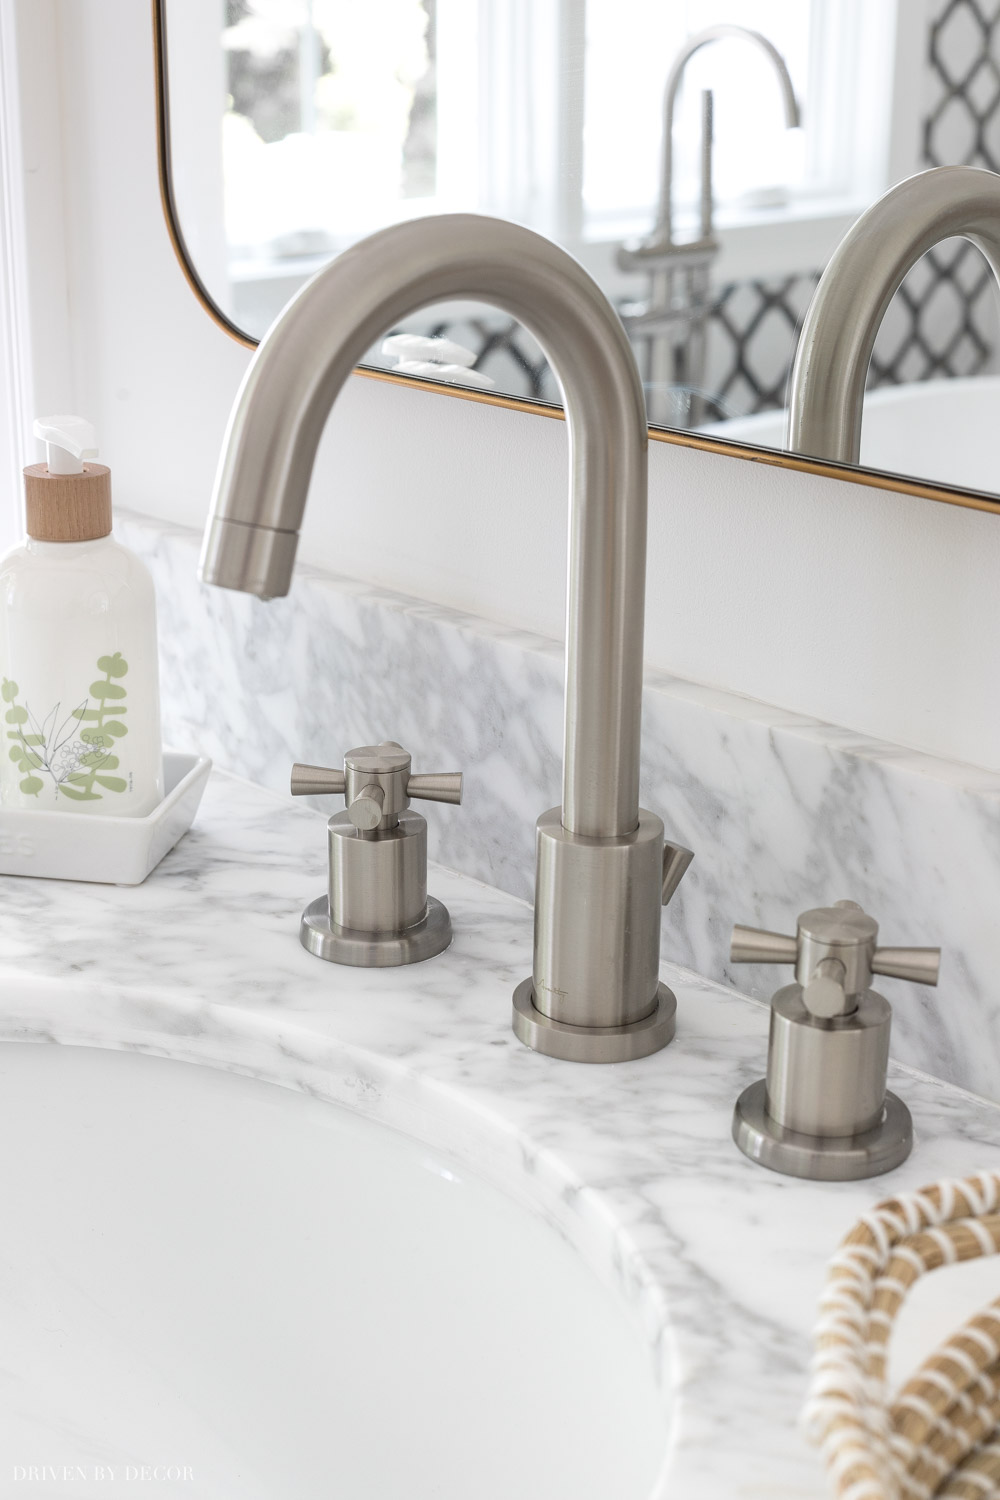
but our mirrors and vanity lights are brass
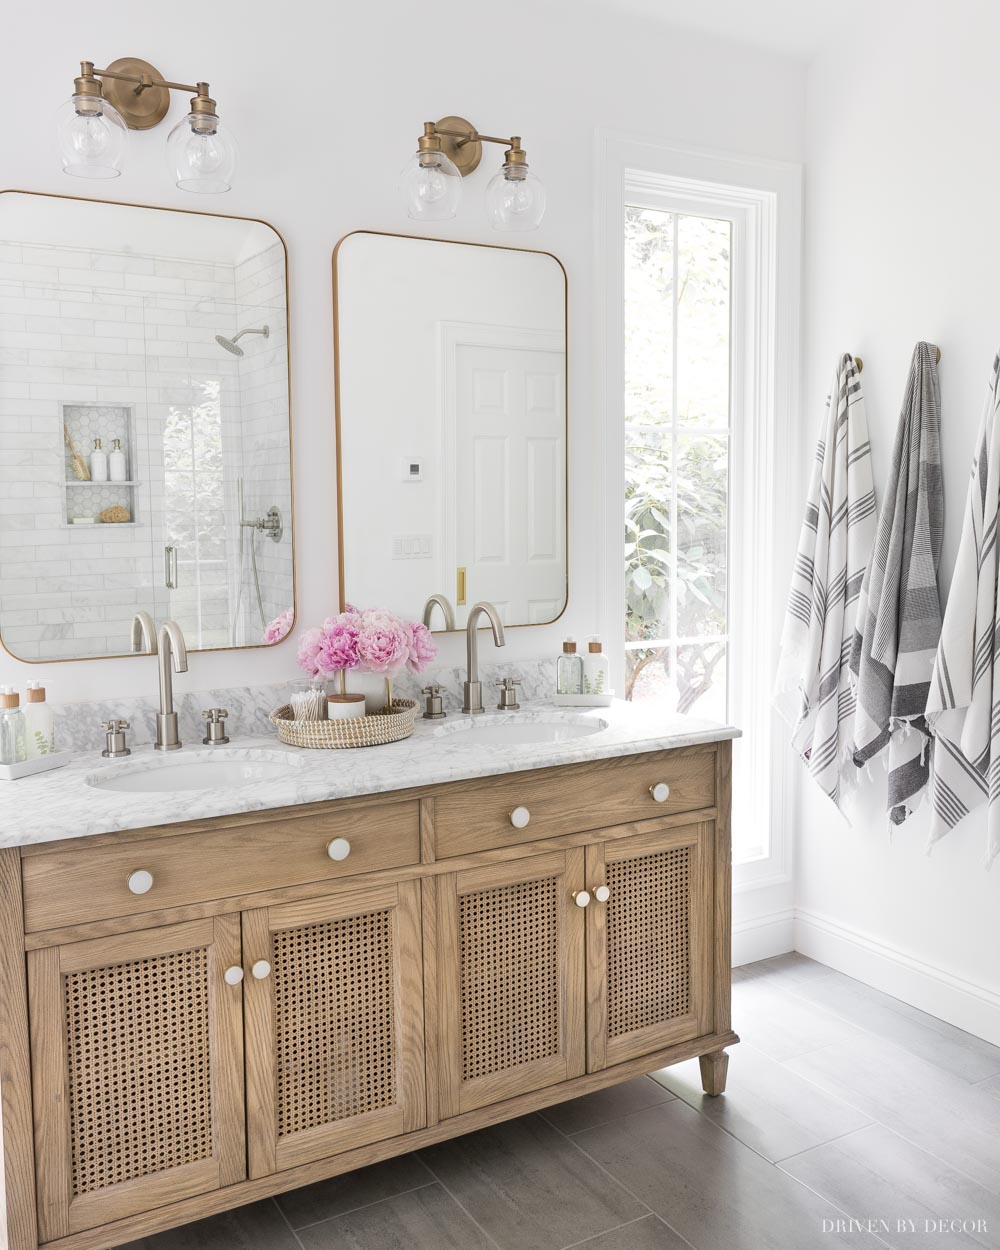
Sources: Wood & rattan double vanity | Vanity knobs | Bathroom faucets – brushed nickel | Vanity lights | Vanity mirrors – gold | Soap & lotion sink set with tray | Toothbrush holder | Bamboo toothbrushes | Gray & white striped towels | Robe hooks – golden champagne
2. Sprinkle, Don’t Cluster
Make sure you’re sprinkling the different metals throughout your room instead of clustering them together on different sides of it. You don’t want one side of your room to have brass accents and the other side to have silver – mix them up within your space. It can even be a small metal accessory that you mix in that makes the difference! For example, my vanity area is a good mix of brushed nickel and brass but my shower that’s across the room was solely brushed nickel so I added shampoo and conditioner pumps with brass tops to bring that metal into the mix:
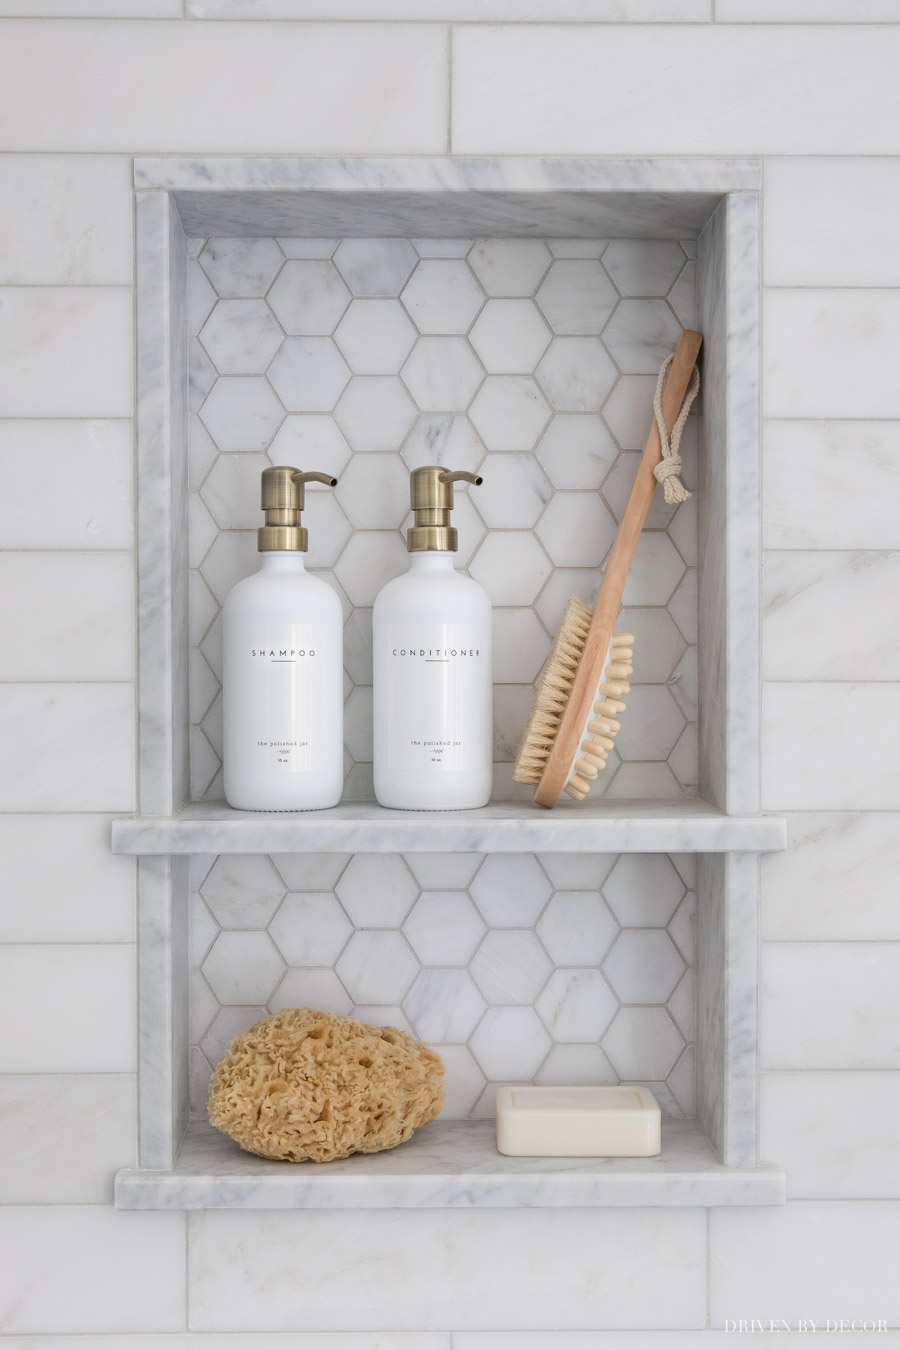
Sources: Pump bottles (16 oz white/gold) | Body brush | Sea sponge | Hexagon tile
3. Don’t Mix Two Metals in the Same Color Family
Mixing two metals that are in the same color family but have different undertones/sheens (for example, the combination of brushed nickel + chrome or the combination of shiny brass + brushed gold) is usually going to look like you tried to match your metals but failed. Instead, you want contrast in your two metals!
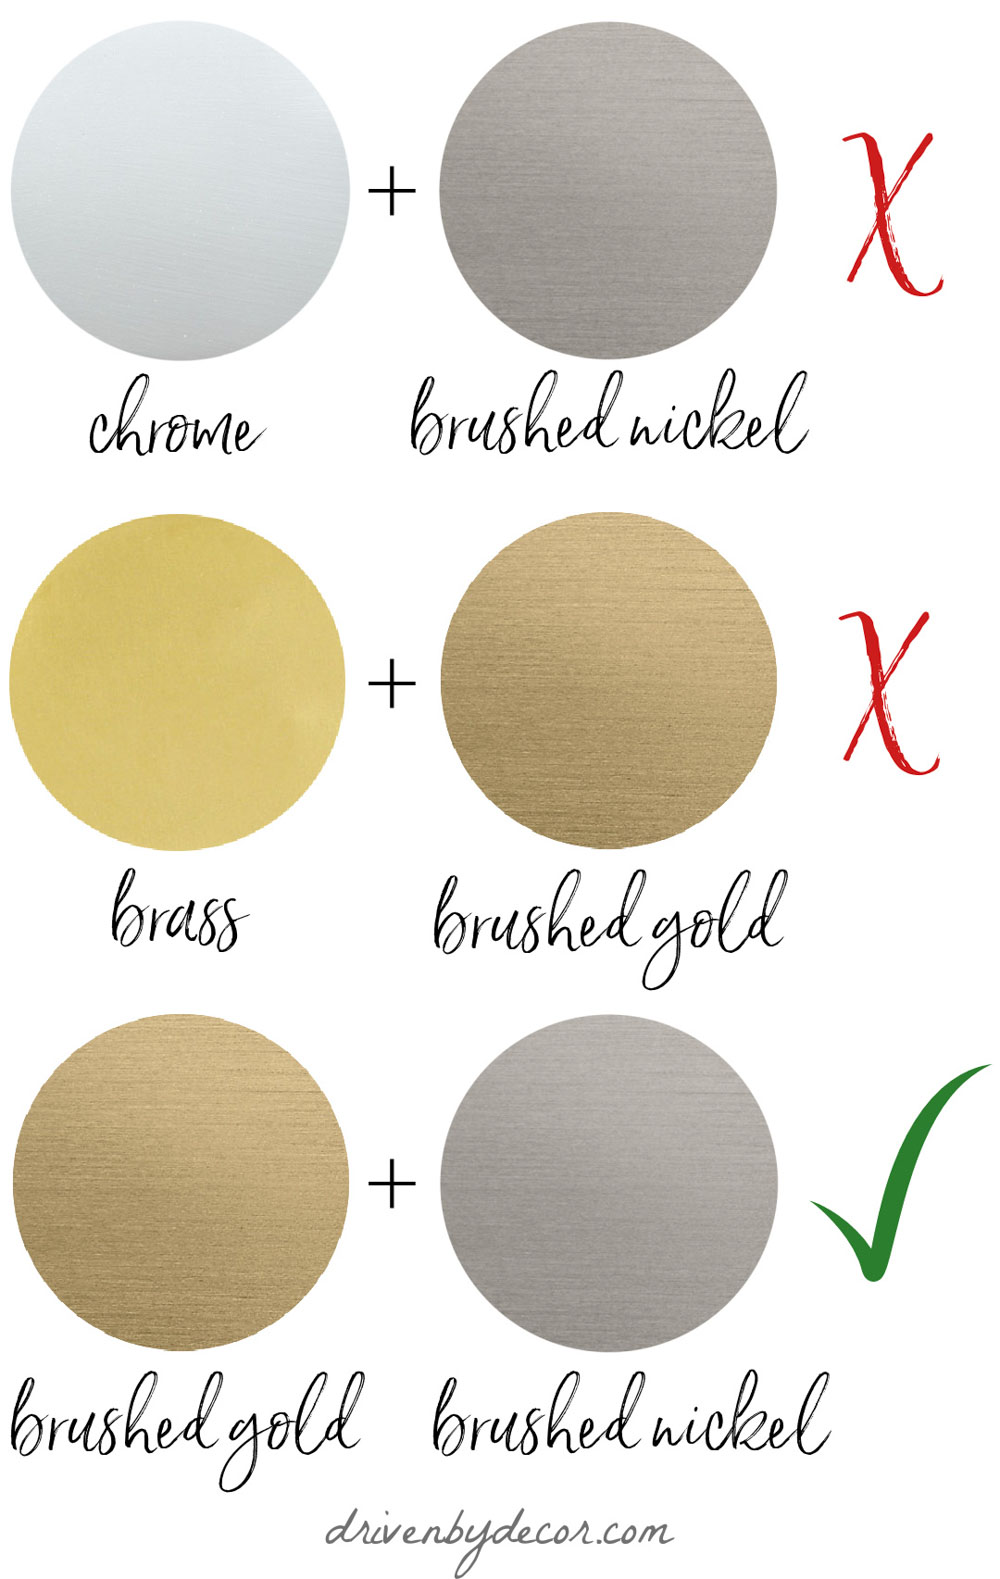
Two things to note though – (1) subtle variations of metal tone within the same color family are totally fine. For example, the mirror and vanity lights in our bathroom are both gold/brass but they’re definitely not identical in appearance – luckily the variation is subtle so it works. (2) Different brands sometimes call almost identical looking metals completely different names so don’t go by the names, go by what the metals look like.
And one last thing – I have seen some really well designed rooms that break this “rule” and totally get away with it but it takes skill to pull off. As a mixed metals newbie, following this tip will make your metal mixing attempts more likely to succeed.
4. Know that Dark Metals Are Every Metal’s Friend
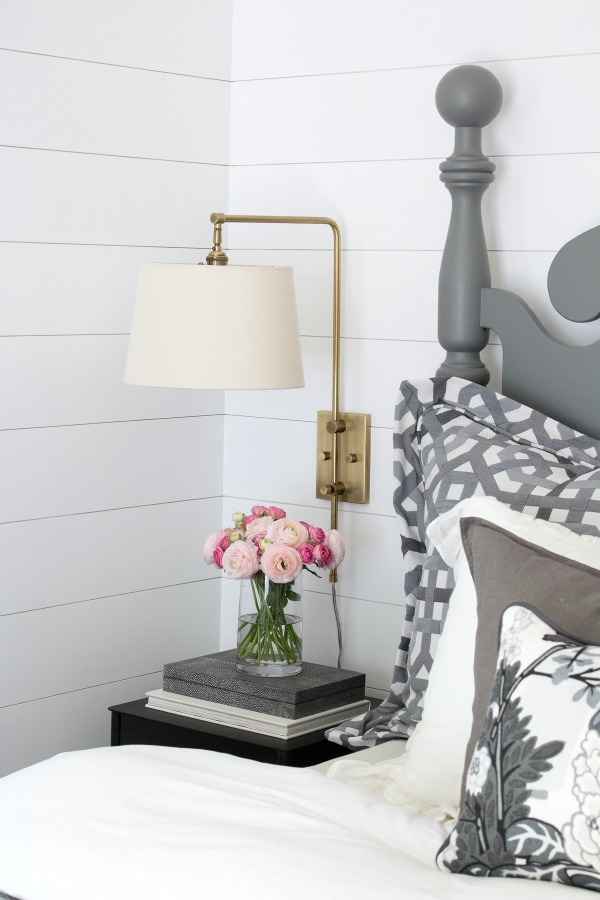
Iron, gunmetal, and other dark metals work as neutrals and mix well with brass, stainless, chrome… pretty much anything and everything! The combination of black metal with gold or brass is a personal favorite. I mixed the two in our master bedroom remodel when I topped our black metal nightstands with brass swing arm lamps:
And did you notice that in my bathroom I actually broke my own rule of only two metals? You probably didn’t because the third metal is the dark bronze chain of our woven pendant and it just blends right in and lives happily with all of the other metals in the space:
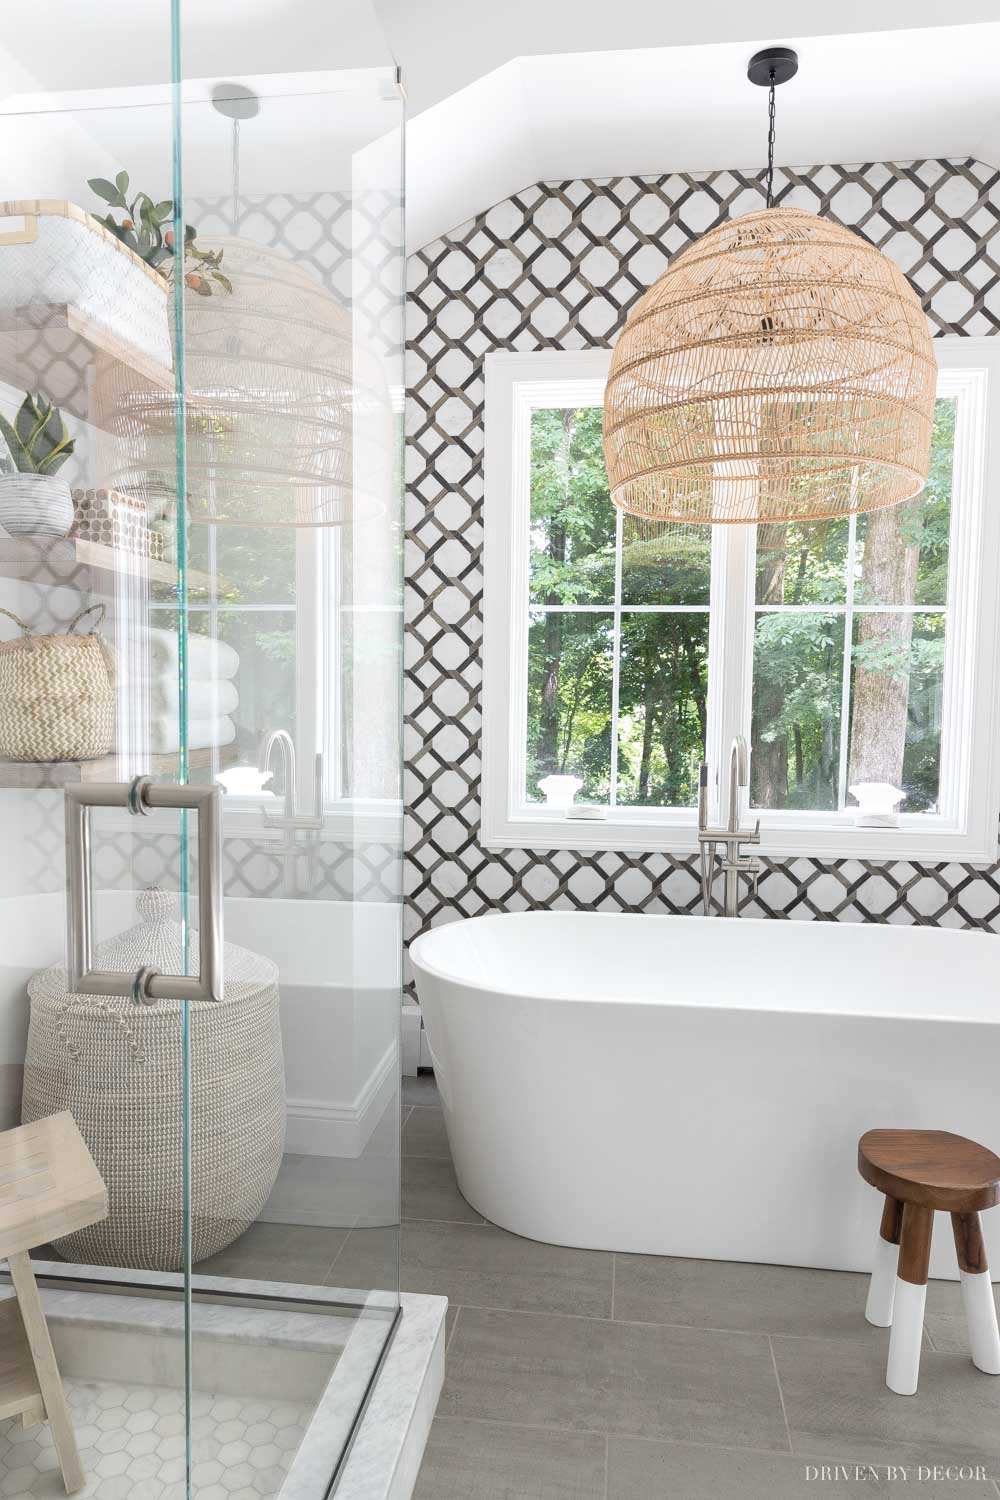
Sources: Woven pendant | Tub filler | Bathtub | Stool
5. Keep Trendier Metals on Low Commitment Pieces
I often get asked whether I’m worried about using a lot of brass in my home because it’s “trendy” (I actually think soft brass will be around for quite a while but that’s a whole other post…) and the answer is no because I’ve mostly kept it on low commitment pieces that would be easy to switch out.
For example, when planning our kitchen remodel I was tempted by a range with brass accents that I thought was stunning, but decided to stick with more traditional metals for our range and other big money items (appliances, faucet, & pot filler). I still brought some brass into our new space but only with our cabinet pulls, pendant lights, and a few accessories that wouldn’t be too difficult or expensive to swap out if a new homeowner wasn’t a brass lover:
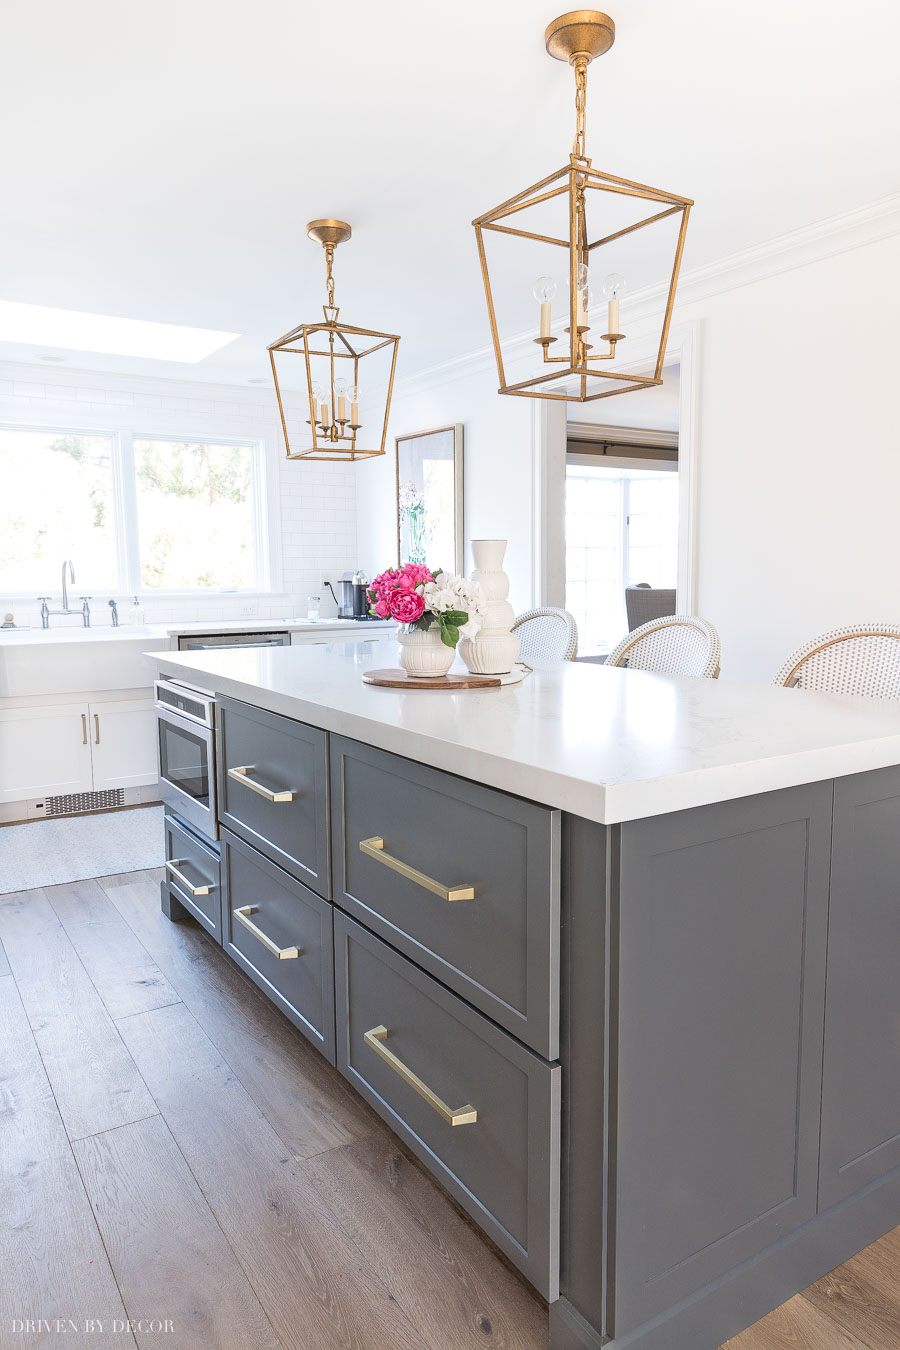
Sources: Pendants | Large appliance pulls on drawers | Counter stools | Marble & wood cutting board | All other sources are in my kitchen reveal post {here}
Did you notice I said I’ve “mostly” kept it on low commitment pieces? One kinda higher commitment place where I brought in brass was with {these brass and crystal doorknobs} that I added throughout the first floor of our home:
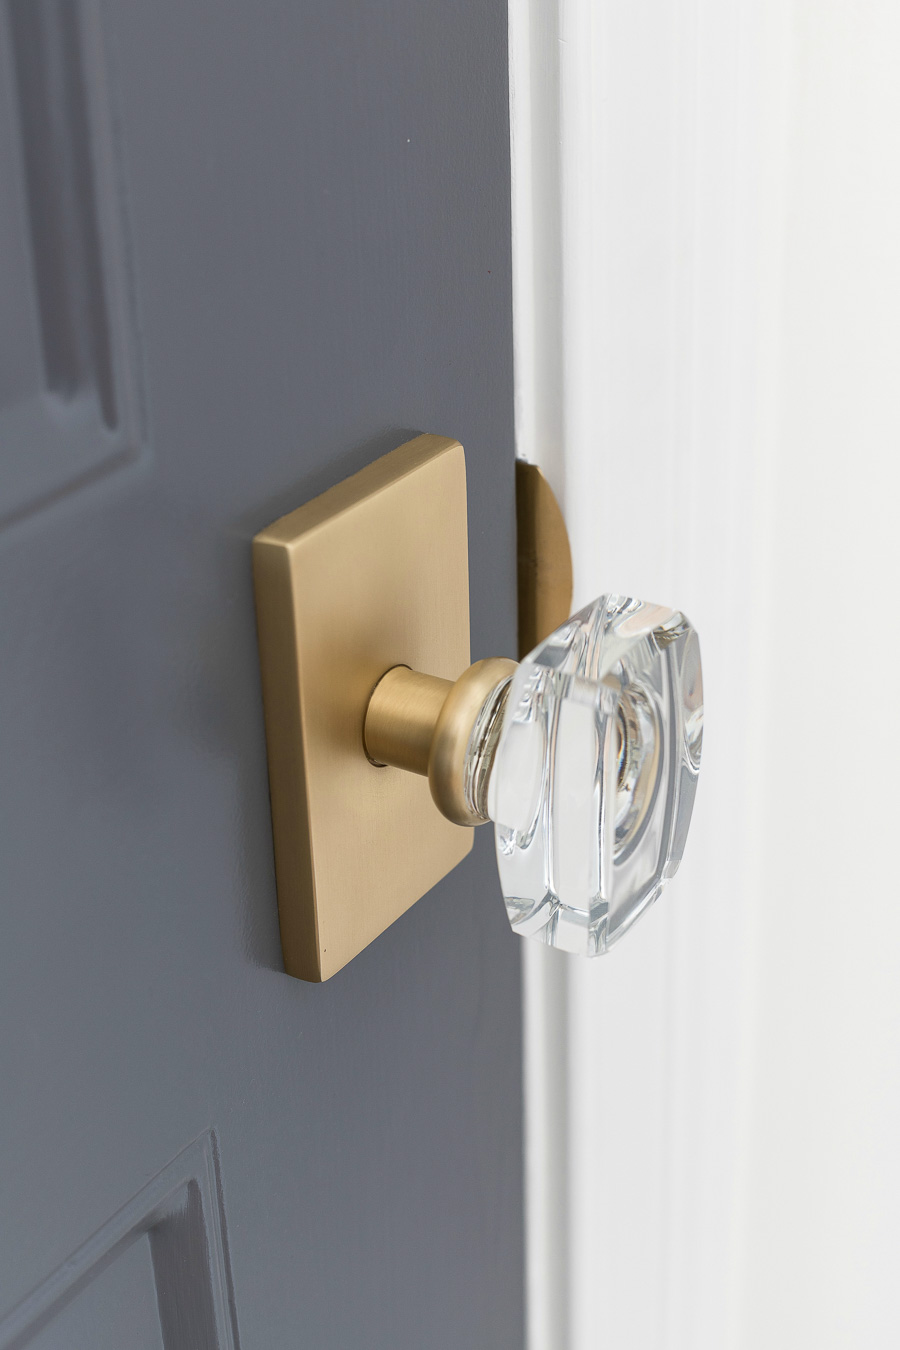
It was love at first sight and they’re just SO me that I went for it – I do keep resale in mind when decorating but I also have to follow my own heart in my own home!
6. Spray Paint and Rub ‘n Buff Are Easy Fixes for Mixed Metal Fails
The great thing about experimenting with mixed metals is that if you try a combination of metals out and it just isn’t working in your space, it usually isn’t anything that a can of spray paint or tube of Rub ‘n Buff can’t fix! The large round mirror over our bedroom dresser came in a bronze finish that was beautiful but just didn’t work like I wanted it to with everything else going on in the space. Luckily it was an easy fix – in just 15 minutes (and without even taking it down from the wall) I was able to change it to a gold leaf finish with nothing more than a dry cloth and this tube of Rub ‘n Buff (I used the Gold Leaf finish).
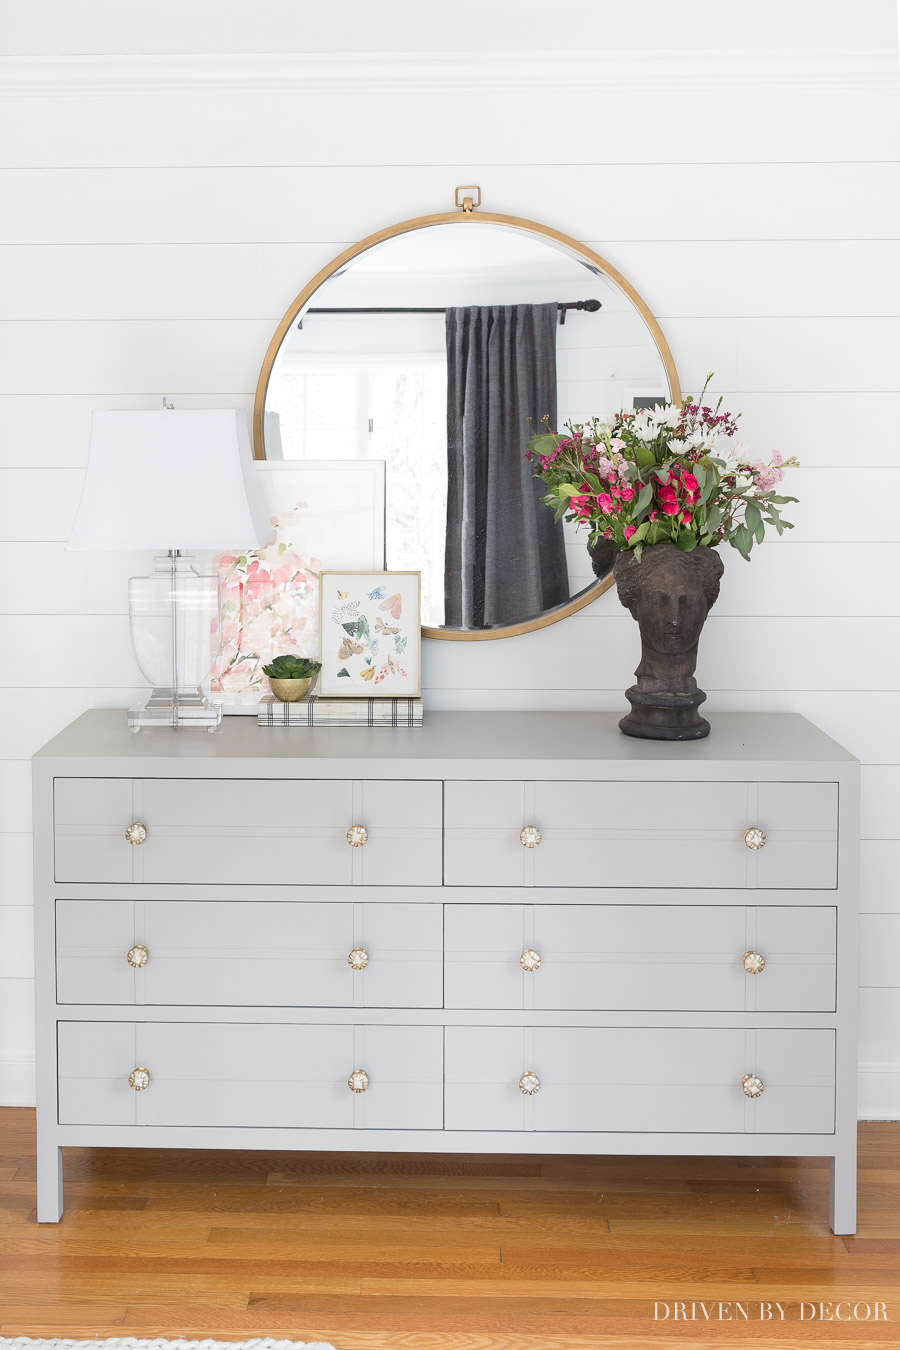
Sources: large round mirror over our bedroom dresser | Gray drapes | Acrylic urn lamp | Framed butterfly print | Black & white grid box | Knobs on dresser | Cherry blossom print, dresser, and bust planter not available
You can also see how I used Rub ‘n Buff to change the finish on wall hooks that you can see in my post on garage entryway ideas. Also check out my post on Rub ‘n Buff colors to see what each color looks like and pick the one that’s best for your space.
Still nervous about mixing metals? I’ll leave you with one last tip as a great way to start! Buy a bunch of different sized metal photo frames in a variety of metal finishes and mix them together on a shelf in your home. It’s a great baby step to mixing metals plus you can play around with them a bit and see for yourself which combinations you love and can be more confident about bringing into the rest of your home! Hope this has been helpful – let me know if you have any questions for me!
XO,


Jenny says
I love that dresser – where is it from?
Kris Jarrett says
The dresser was actually one that we’ve had for over ten years (It originally came from Crate and Barrel) but I painted it when I did a makeover of our bedroom yeears ago – you can see the before and after pics here: https://www.drivenbydecor.com/one-room-challenge-master-bedroom-reveal/
Rita says
Hello! I love your bathroom renovation! Where did you get the stool in the shower please?
Joanna says
This was a great post! Thank you for all the great hints. Mixing metals can be daunting.
Terri says
I’ve been looking at my island pendants that are brushed nickel along with my pulls on cupboards. Albove my Kitchen table is a farm style chandelier. It was a dark bronze to start with but I covered it with paint to be a grey color to tie in with pendant lights. Then in family room. (all three rooms are hooked together to an open plan) is a fan that is a
Dark bronze bronze color with goes well with couch and my shiitake paint color. But looking at all together doesn’t look right. What do I change? I’m puzzled. Kitchen table and chairs are dark brown and white cabinets and counter tops throughout. Thanks so much
TT
Janice says
Excellent, helpful post. Thank you! I’ve started mixing some metals and will continue to as I do more redecorating. I love your style and decor taste!
Beverly says
Such a helpful post! You are giving me courage to try some new things.
Jennifer says
Hi Kris,
What is your go to white paints? Walls and trim?
: )
Lily says
What is the white paint in your bathroom pictures in this post? Many thanks.
Bryan says
Thank you for your informative post! Would you consider the stainless of a stove and dishwasher one of those two colors?
Lynn says
I’m getting a new water filter system for my kitchen sink and it comes with a light filter indicator faucet in brushed nickel. I don’t really like that color, but have to keep it since they don’t have other colors. What is a good match kitchen faucet that I can get to go with that brushed nickel water filtered faucet? My remodeled kitchen will have white shaker cabinets with black pullout handles and white quartz countertop with a few vein lines. All of my bathroom faucets are in chrome with same cabinets and countertops. Thanks.
Aimee says
Ordered a vanity with brushed nickel pulls. I would love to mix metal. Should I go with a brushed nickel faucet and then brushed gold mirror and light? Shower is separate room, what would you do with fixture there? Or keep all brushed nickel? I am so horrible at this!
Sally says
Such a great post! I feel like I am going about my bathroom all wrong now. I have brushed nickel shower door hinges and the tub and shower faucet on one side and wanted aged brass faucets and black, but it’s going to be too much in clusters. How would you incorporate the three? Could I tie it together with the cabinet pulls? I have white cabinets and marble countertops.
Mary says
What are your thoughts on polished chrome vans polished nickel together in the bathroom?
Kris Jarrett says
It really depends on the brands used – polished nickel from some brands can look almost identical to polished chrome from other brands.
Joe says
I stopped by to inspect a primary bathroom remodel in progress and came to find a Kallista vibrant gold rain dome in the shower. Every other fixture in the bathroom is Kallista brushed nickel, including the 12″ ceiling mount shower arm. My designer says that the gold is intended to “pickup the warm tones” in the gray/beige porcelain on the walls.
Am I missing something?
Kris Jarrett says
It all boils down to personal taste but I personally wouldn’t mix metals within a single shower – I’d do all of the shower hardware in the same finish…
Kt1557894 says
Love your design style! How do you think chrome sink faucets and chrome shower head will look with brushed gold vanity pulls and light? Do you think brushed nickel would work better?
Nona Diaz So Hu says
How about brass gold 2light vanity and polished nickel sink faucet and champagne bronze vanity knobs?
Sheila says
Kris, what do you think about using an antique copper faucet with an aged looking gold mirror, gold toilet paper holder and black plunger holder that has a worn gold trim around the top. We’ve been doing a lot of remodeling and I feel like I got my rooms mixed up. Help!
Sheila says
And your home is beautiful!
Carol M says
Your design styles are wonderful and fresh. In process of pulling items for bathroom redos. Faucets and shower system are Grohe in the starlight chrome. Was planning on sticking with the chrome for the robe hooks and towel bar. But for the grab bars and drawer pulls leaning towards a satin or stainless finish and light fixture is satin finish. Any thoughts or other ideas? The tile shower and floors is muted ivory with veins of darker sand tones. Using mixed tone pebbles for shower floor. Still looking at countertop ideas. Appreciate your taking time to read and reply.
gail p says
I have brushed nickel faucet in my remodeled bathroom. It is small so I’m looking at floating shelves with a towel bar. Is black for the towel bar ok with the brushed nickel or would gun metal gray or galvanized gray be better. I think the shelves will be maybe walnut.
Stephanie P. says
Hi! Can you please let me know the make/model of the shower hardware? Thanks!
Kris Jarrett says
Hi Stephanie – you can find links to my shower hardware and everything else in our bathroom in this post: https://www.drivenbydecor.com/master-bathroom-reveal/
Lynn says
I am in the middle of a bathroom remodel and have decided to mix metals. My vanity has black handles and the top is black granite so I am doing the vanity faucet and shower head in chrome. Mirror and lights over the vanity will be black. I am unsure if the towel bars, toilet paper holder, toilet handle and I am putting a “train rack” towel bar over the toilet should be black or chrome. I planned on black for all but don’t know if it will be too much. Would love some advice!!
Regina Green says
I am planning to use polished chrome for my faucets, tub filler & shower hardware. I want to use champagne gold as my mixed metal on the vanity mirrors, sconce, towel bar & hooks. I will have both metals in each part of the bathroom. Do these two metals work to mix?
Monica says
This is a combination I’m also looking at, Regina. I’m curious – What will you use for the cabinet hardware?
a says
they will clash.
Gerri M says
I have ORB faucets, shower fixtures, light fixtures and grab bars in my bathroom. My decor leans towards the primitive/colonial look. I also have a wood peg rack with a shelf to hand our bath towels. I’m looking at some darkened iron towel holders. What are your thoughts? Thank you.
Judy says
My master bathroom is very big. I have brushed nickel faucets, lights and accessories. It has 2 walk-in closets and 2 smaller closets and the toilet area and then French doors to go into bedroom. Should I go with brushed nickel door handles and hinges or is that to much brushed nickel?
Jessica says
Hello! Love the looks. What are your thoughts about mixing polished nickel with brass?
Diana says
What pairing of metal would you use with polished nickel. PN is in all hardware and I want to use something different for a medicine cabinet and shower curtain rod. Which will be across from each other in the room. Thank you
Candace Grey says
Hi – I have been trying to find what to do in my renovated bathroom. I have a large steam shower that we cannot change the trim on and it is polished brass. Main focal in the bathroom. I dont know what to do as far as what would be best to mix with it. I like polished nickel and I was looking at some of the golds but because I live in a small area, I cannot see them in person. Should I stick with polished nickel tub filler as I have ordered a claw foot tub but it has polished brass legs and then go polished nickel taps and try and bring some brushed brass in rather than trying to bring in gold? Any help would be appreciate so much. Thank you
gar says
where’s the third metal in your bathroom? i only see 2
Kris Jarrett says
Our woven pendant about the tub has a dark bronze chain 🙂
sandy says
hi have matte black shower fixtures with beige tumble marvble tiles(varying in shades and a hint of gray and want to soften the look and use different fixtures satin bronze for the sink and add some mixed metal sconces and or a mirror. will it be too much like one side of the room is one way and the other is mixed? any suggestions? My floor is warm gray tile. Have not yet picked a vanity but we did put in beadboard one third of the wall
Michelle says
Great information on combining metals. I am still a little confused about pairing satin (nickel) with gold or brass. I have heard of French gold and don’t know if this would pair nicely with satin nickel in similar ways to what you have shown with “soft brass” and nickel. I am not sure what “soft brass” is!
All in all, a great article.
Adrienne boudreaux says
If I have an antique brass shower head what do you recommend for the shower glass door hinges?
ANN says
What metals mix well with champagne bronze?
kim trankina says
where did you get your bathroom two light brass fixtures and the mirrors? I’m obsessed!
Kris Jarrett says
Hi Kim – you can find links to everything I used in my bathroom in this post: https://www.drivenbydecor.com/master-bathroom-reveal/
Anonymous says
This is a fantastic post! Lots of great detail and practical advice. Thank you!
Rachel says
Hi, great article! Can you please tell me what your shower tile is? Thank you!
Kris Jarrett says
Hi Rachel – Sure you can find all the info on the tiles I used in our shower in this post: https://www.drivenbydecor.com/master-bathroom-reveal/