In our previous home, we used the door from our kitchen to the garage like a lot of people use their front door, as the primary door that we went in and out of every day. It needed some freshening up from when we moved in so I spruced it up with a mini makeover! Not only is it a prettier space, but it’s a whole lot more functional too.
Ready to see its new look and get some garage entryway ideas for your own home?! (post includes affiliate links; full disclosure statement available {here})
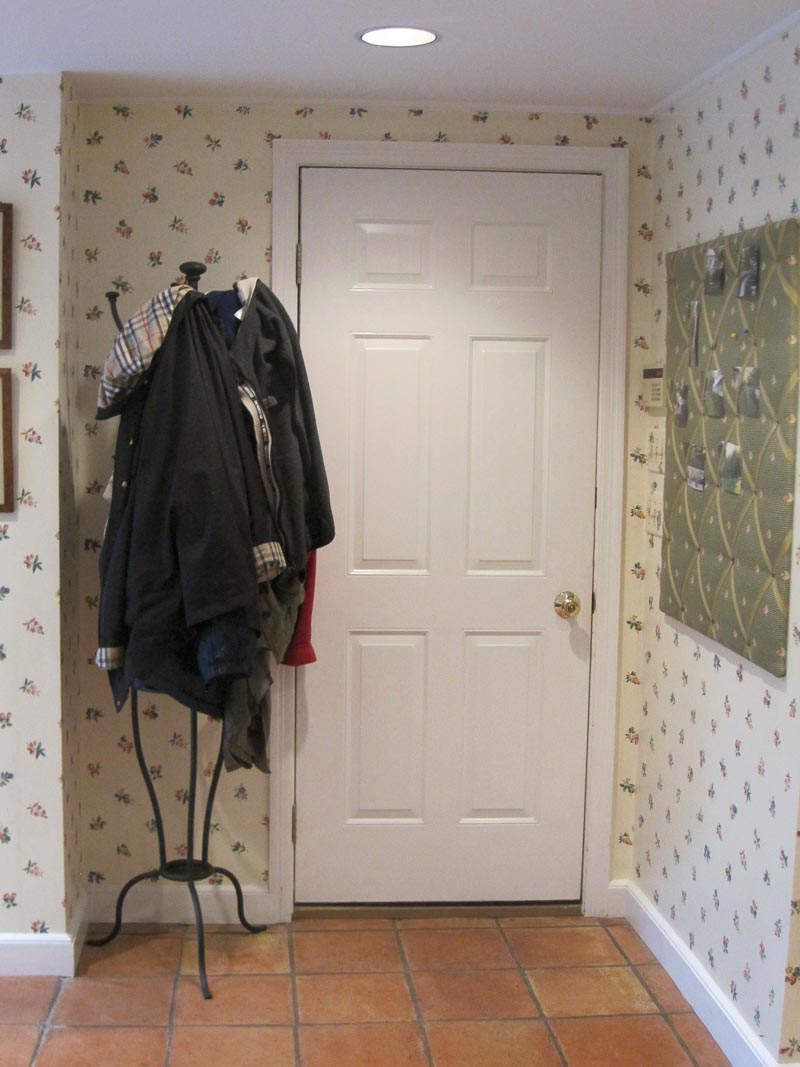
Let’s start by throwing it way back to a pic of our garage entryway from before move-in:
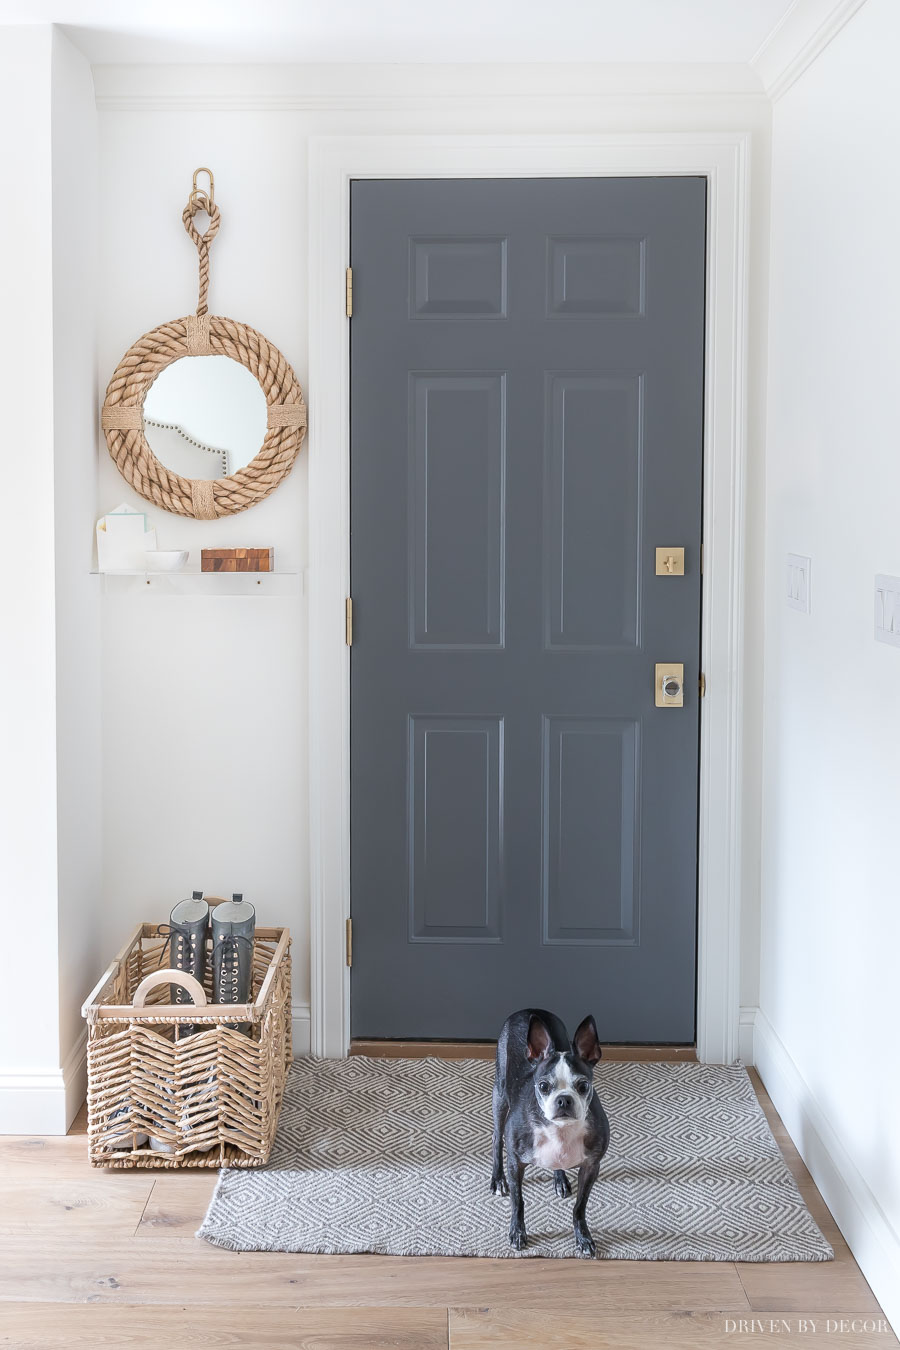
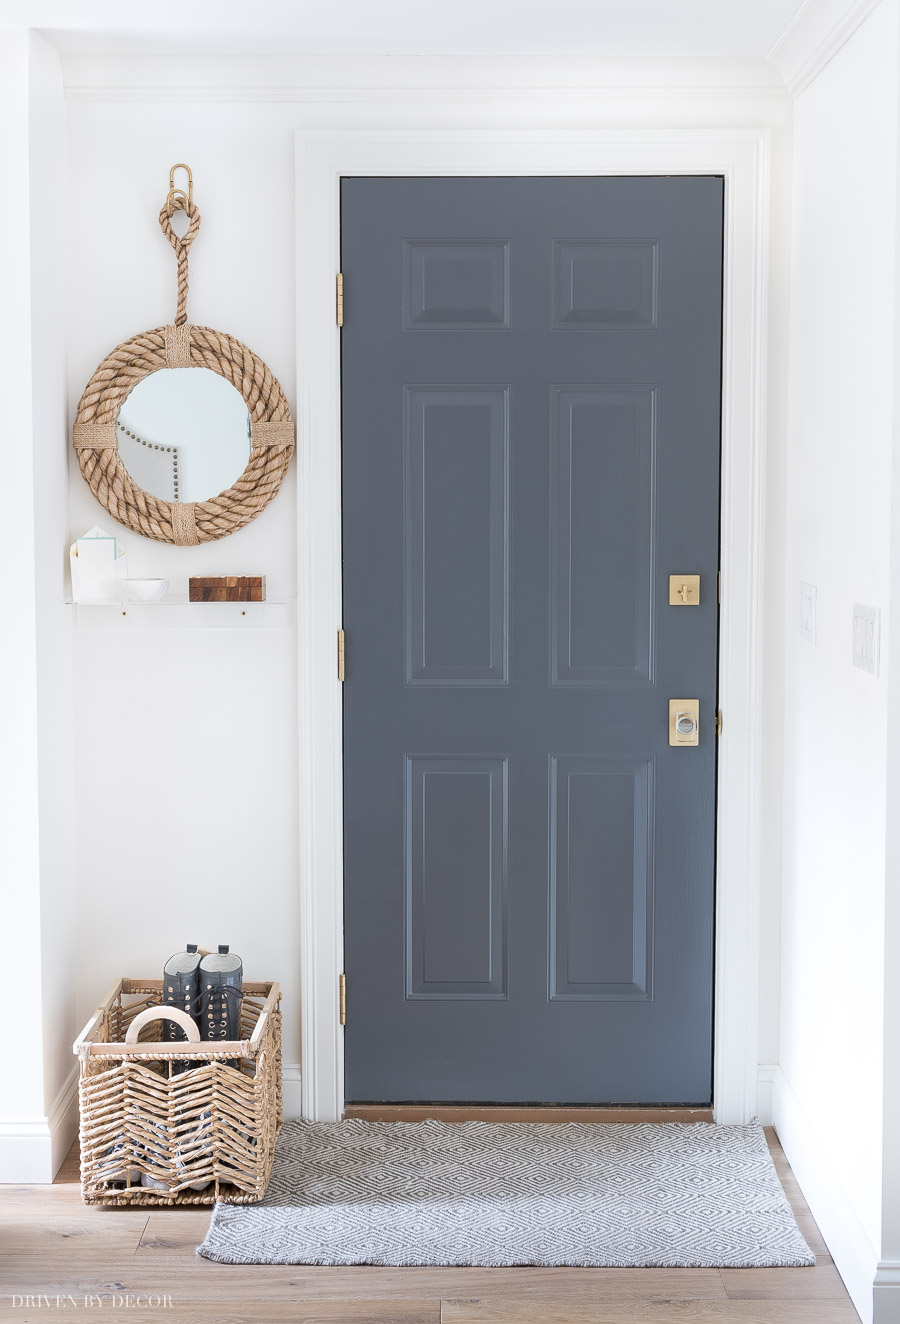
Not much of anything has stayed the same! Here’s what this same space looks like after its mini makeover:
We made several changes, both big and small. I’m sharing five garage entryway ideas that helped us get the job done!
1. Freshen Up the Space With Paint
One of the biggest changes we made to this little garage entryway shortly after moving in was removing the floral wallpaper and painting the walls. Not fun but so worth it!
My post on how to remove wallpaper has several tips if you haven’t had the joy of removing wallpaper before!
When we remodeled our breakfast nook last year, I repainted the entire space
I chose Benjamin Moore Cloud White in flat for our garage entryway. It’s the same color that I painted our breakfast nook:
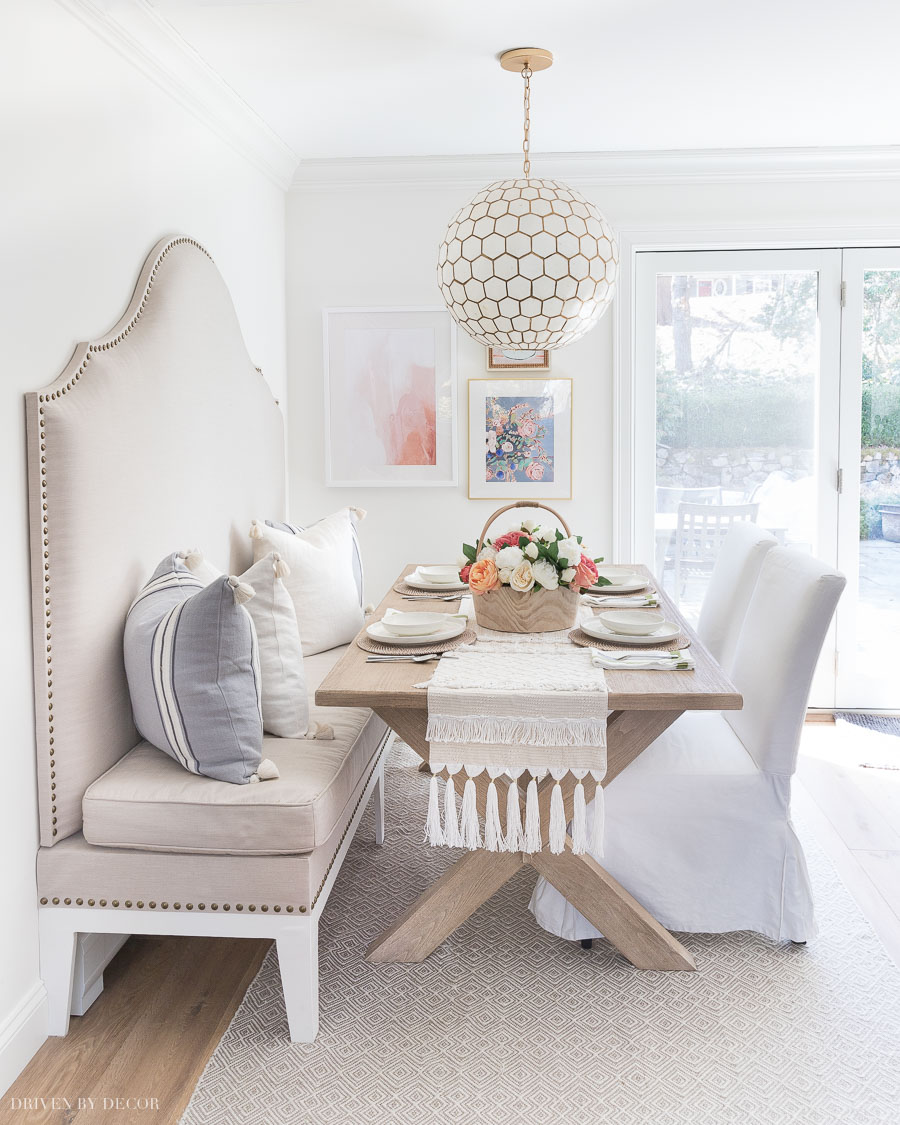
Sources: Dining table | Capiz pendant (22.5″) | Geometric gray rug | Faux peonies | Rattan chargers | Large blush abstract framed art | Blue floral framed art | Pink floral framed art | Slipcovered dining chairs (similar) | Table runner no longer available
and our kitchen that are adjoining spaces:
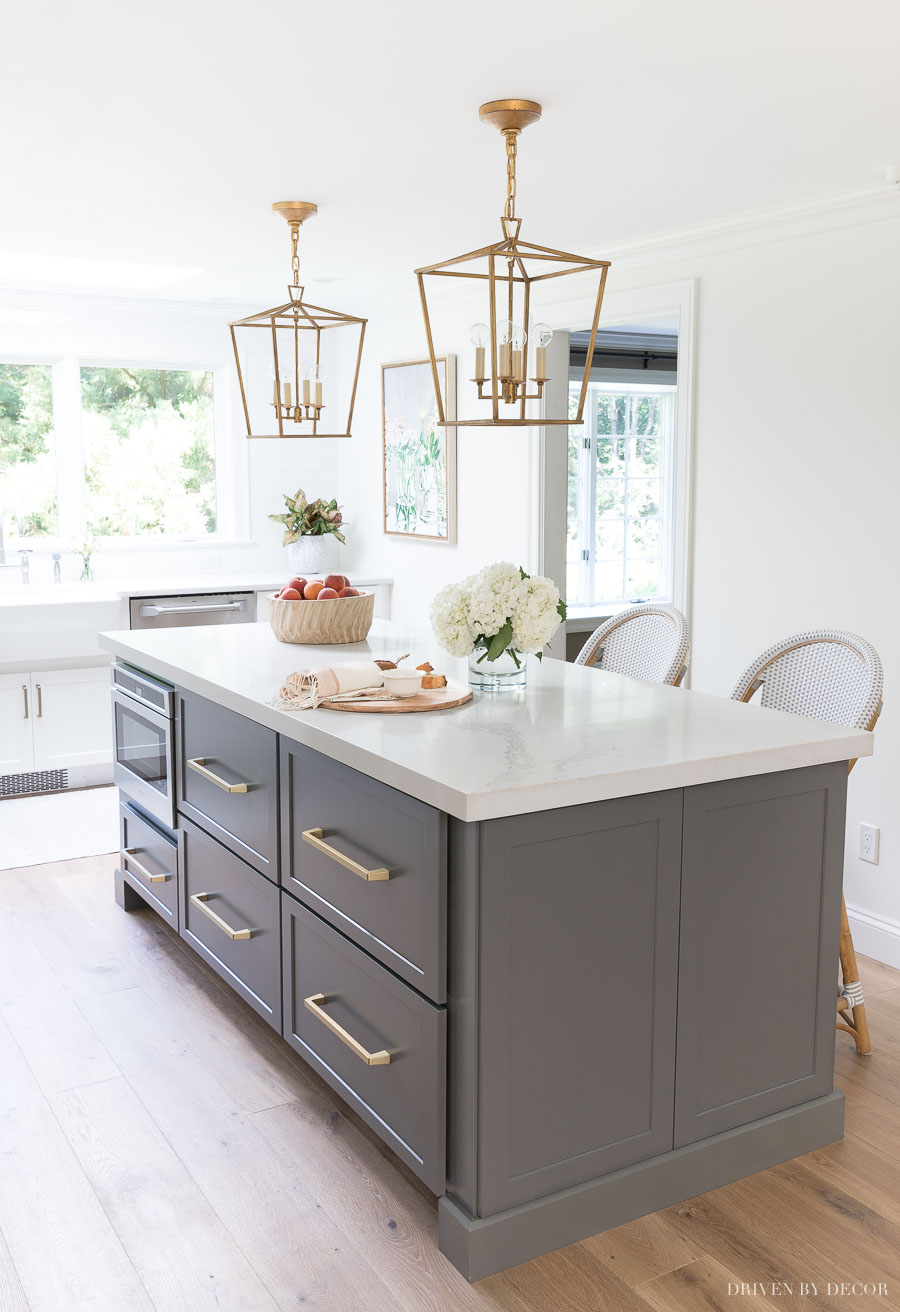
Sources: Lantern pendants over island (12.5″) | Rattan counter stools in Fog | Pulls on island drawers (12″) | Large framed floral art print
Cloud White is a great warm white that’s one of my favorites and is actually the same color as our family room too. See my post on favorite white paint colors for more great whites.
Painting everything white went a long way in making the entire space feel more open and less dated. At the same time we painted the walls, we upgraded the crown molding and baseboards and painted them Cloud White in Satin.
2. Change Up the Color Of Your Garage Entry Door
One of the most significant changes I made was to paint our garage entry door Benjamin Moore Charcoal Slate. It’s a super close match to our nearby kitchen island that’s painted in “Moonstone” (one of MasterBrand Cabinets’ stock colors):
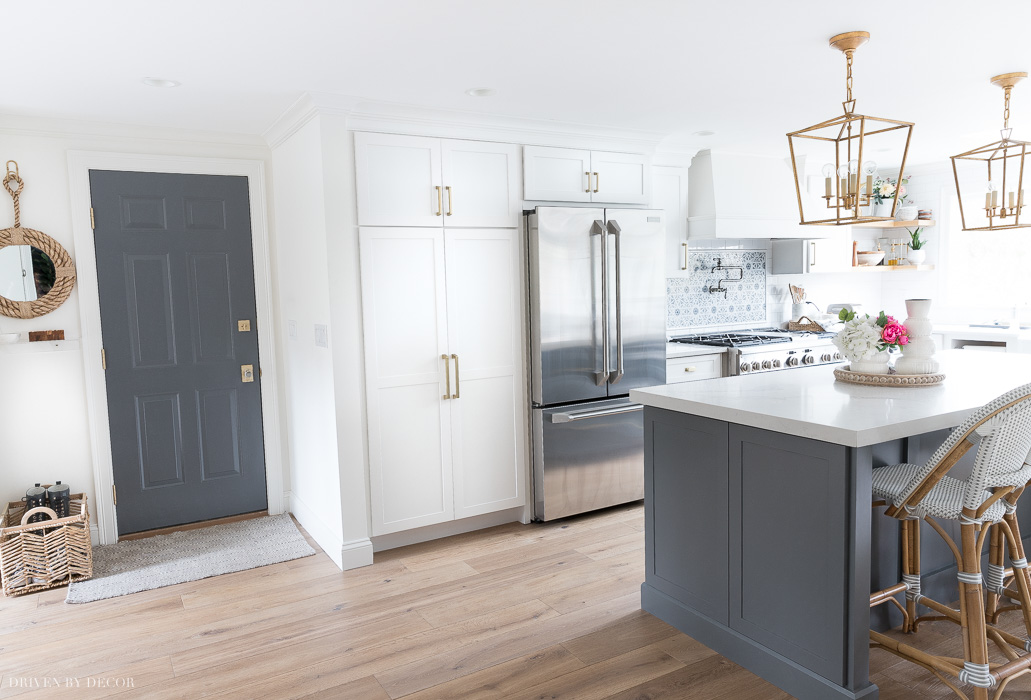
I think it helps make the space to feel more cohesive to have that pretty gray color in more than one spot! It’s a simple garage entryway idea that can make a big difference
Install New Door Hardware
Another change I made was to upgrade the door hardware to {this stunning crystal & brass duo} in the Satin Brass finish that I couldn’t love more:
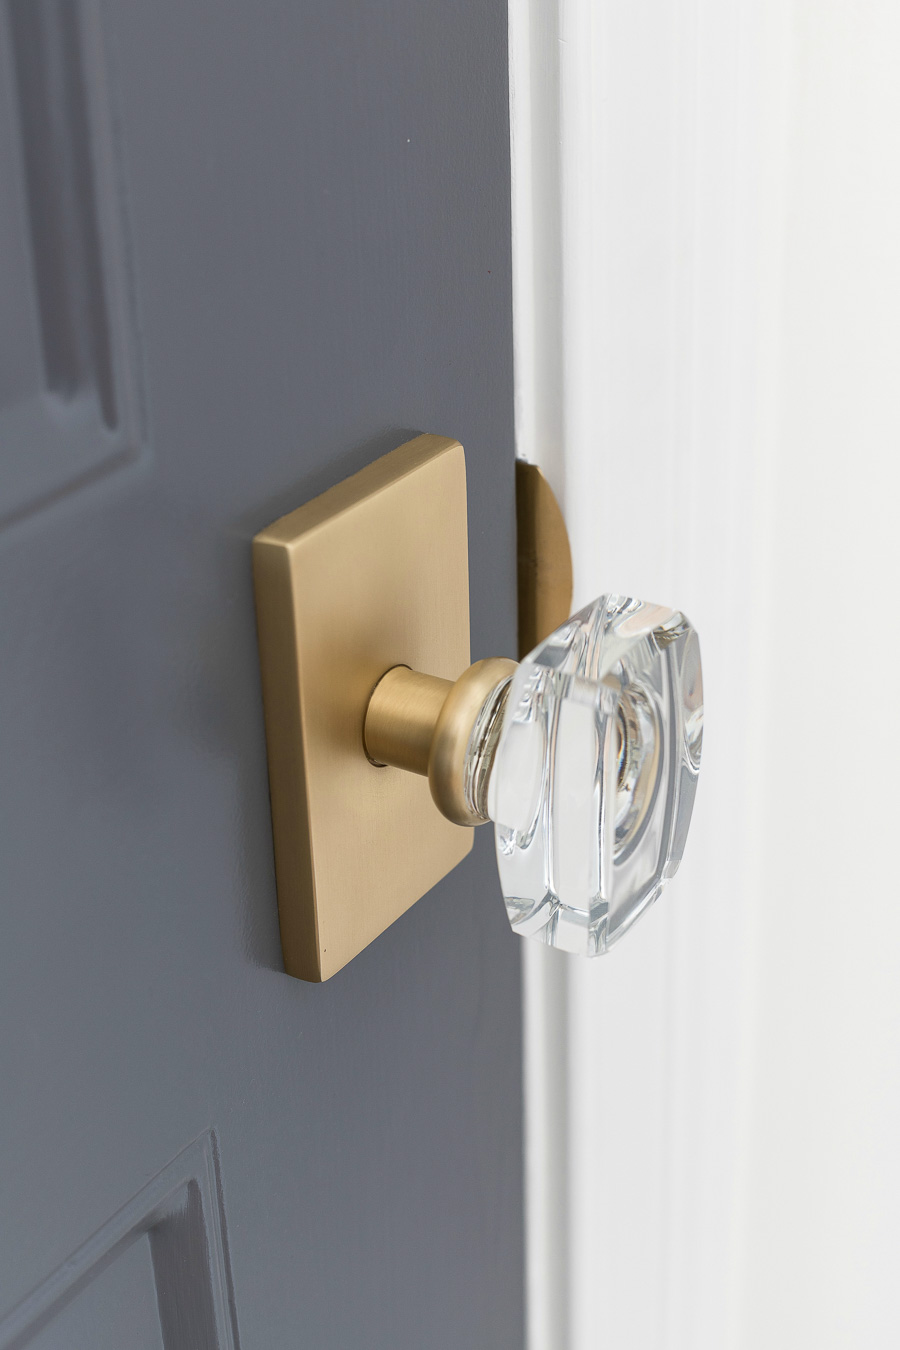
I replaced our door hardware with these beauties throughout our first floor where we don’t have a ton of doors and kept our less expensive door hardware as-is upstairs. For the deadbolt, I chose {this square deadbolt} in a similar style and the same finish.
3. Dress It Up With a New Rug
I also placed {this geometric rug} and a basket for shoes in front of the door:
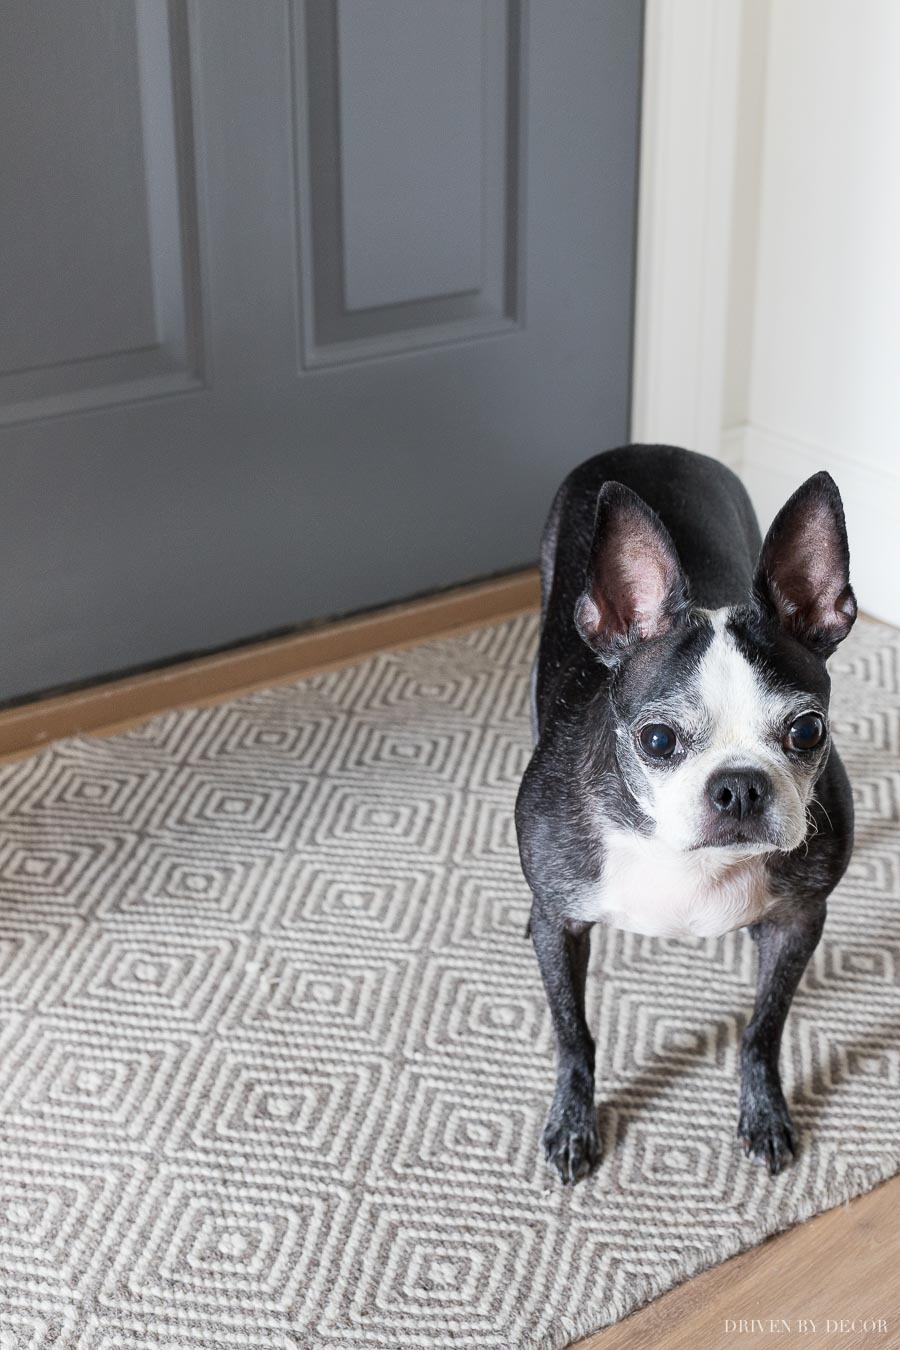
In our new laundry room coat & shoe storage area, we have several drawers for shoes but we each keep our most frequently used pair of shoes in this basket to make things quick and easy. If you have more space than I do for shoe storage, check out my post on entryway shoe storage ideas for several other solutions.
You might remember that as part of our kitchen remodel we also said goodbye to the Saltillo tile, replacing it with Hallmark wood floors. No regrets there – those tile floors were a maintenance nightmare so it was a welcome change!
4. Consider A “Last Minute Check” Mirror
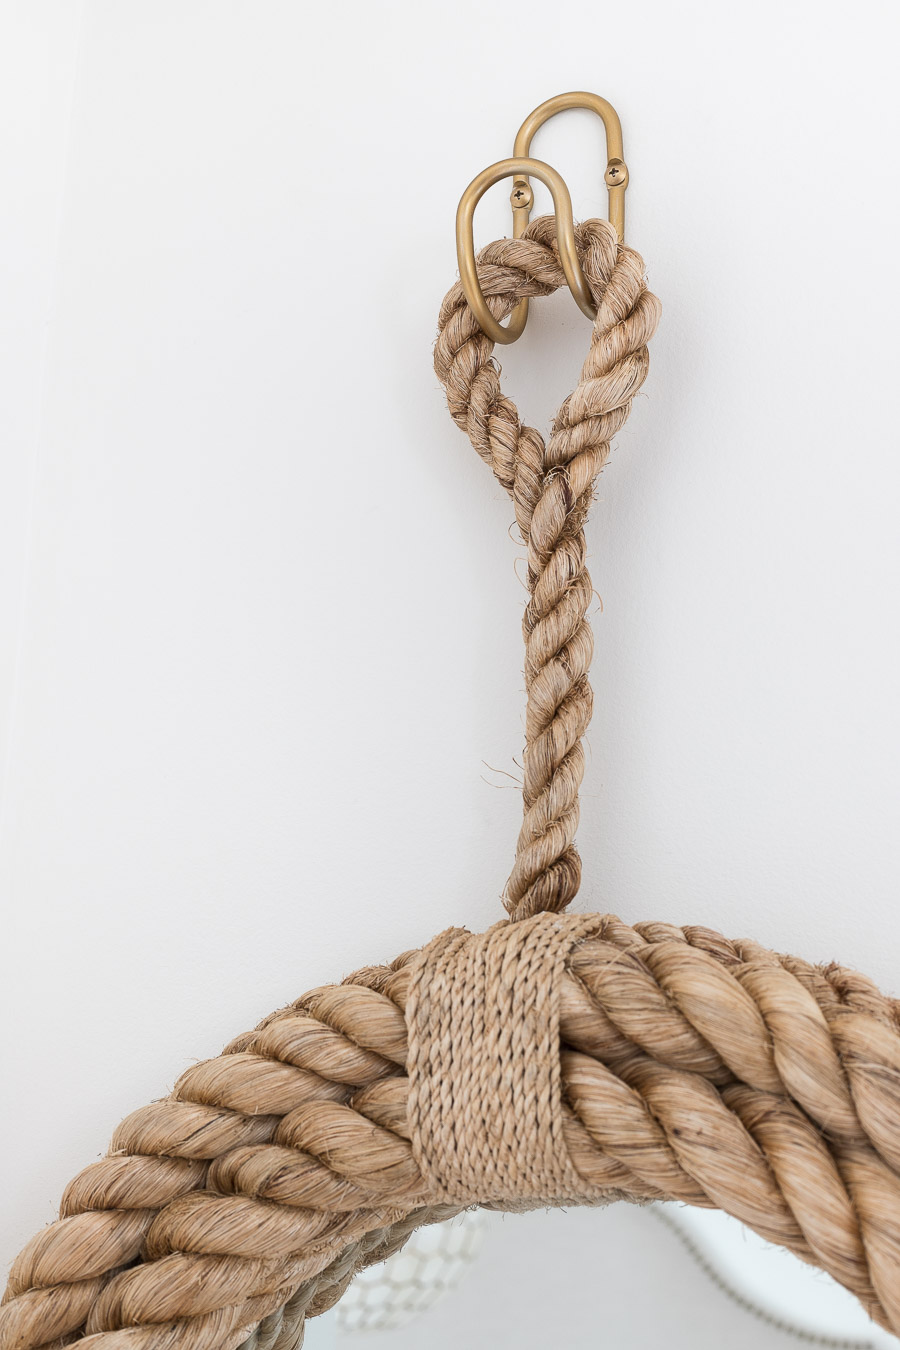
On the wall to the left of our garage entry door I hung a super cute rope mirror that’s perfect for applying some last minute lipstick as I head out the door. Or am I the only one who does that 😂?! It saves me a trip running back to the other end of the house to the bathroom mirror 🙂
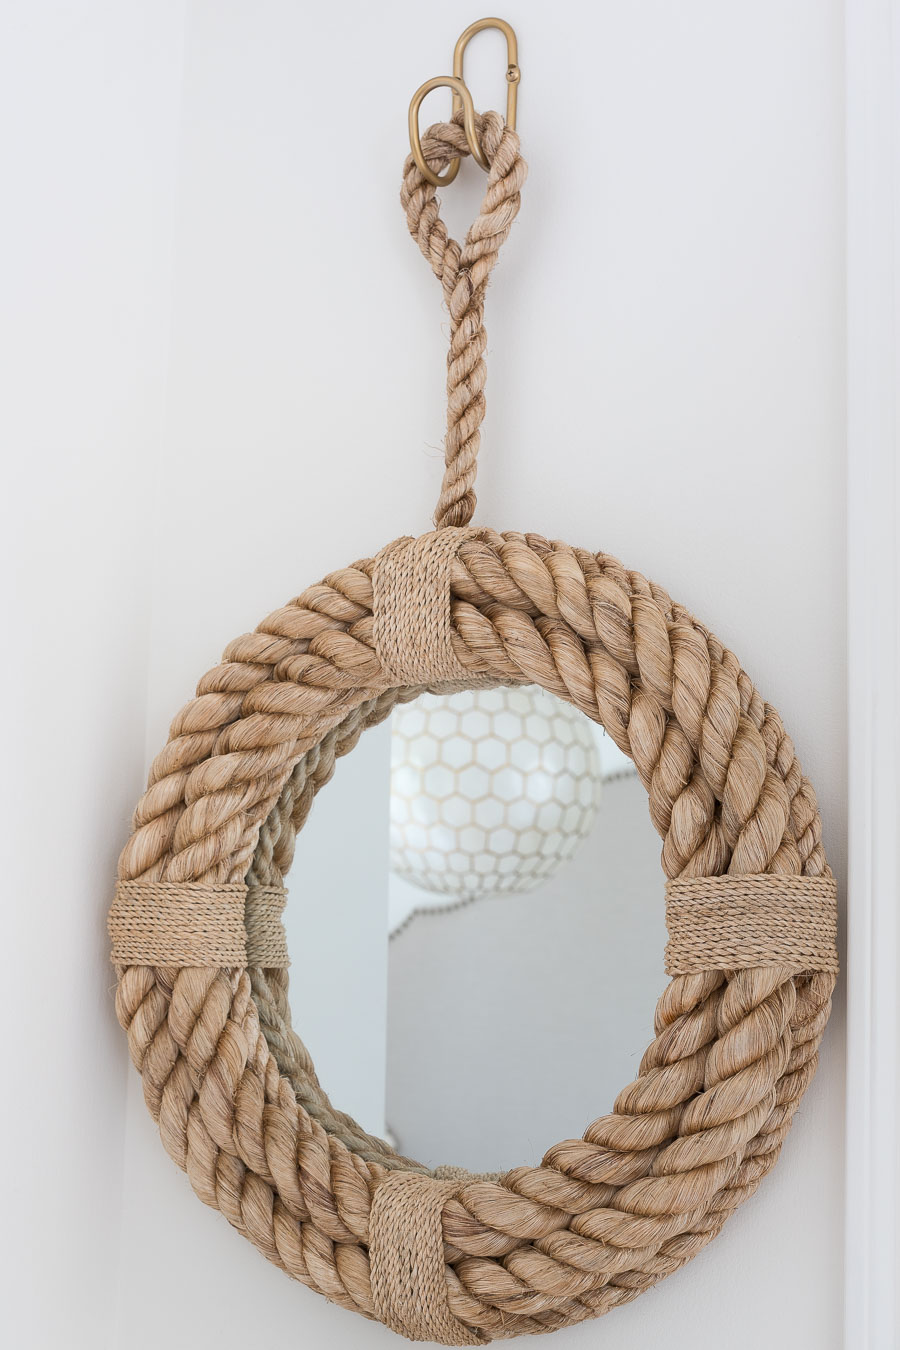
I went with a small rope mirror similar to {this one} because it’s the perfect size for my space and I love how it’s hung by a loop.
I wanted something unique to hang my rope mirror with and ended up using one of {these loop wall hooks} that I had been eyeing:
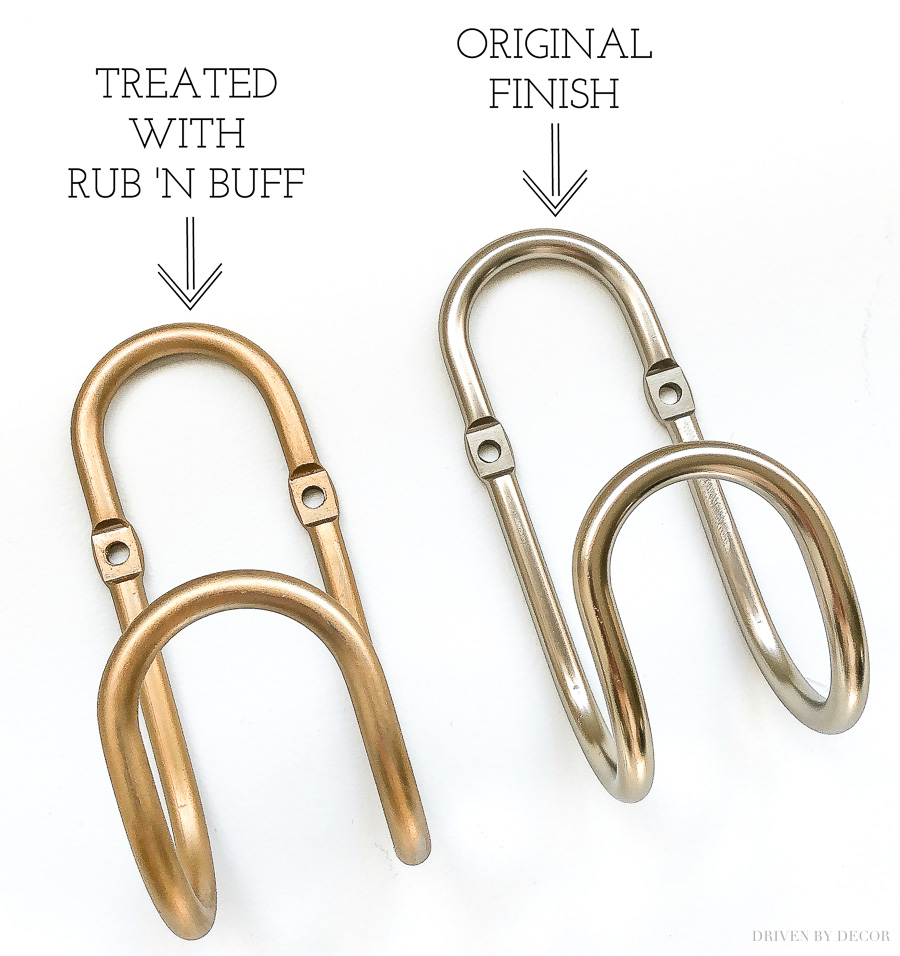
I wasn’t sure what to expect with the finish of the hook since the color was described as “light bronze” but it looked like a soft brass in the online image. The actual finish is a fairly neutral metal finish that would blend well with both silvers and golds.
Even though I really liked the finish, I wanted it to match my door hardware so I used Rub ‘n Buff in Gold Leaf to change it up!
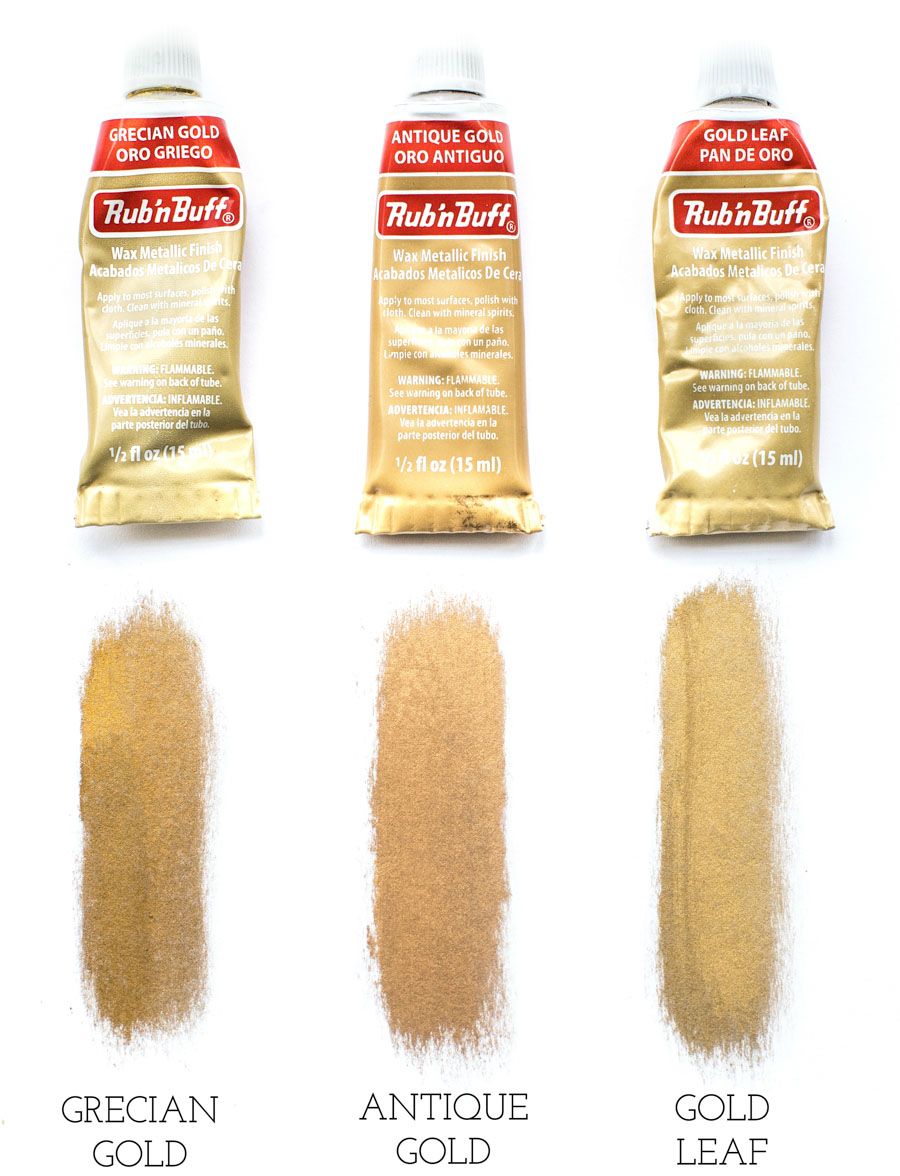
Have you guys used Rub ‘n Buff before? It’s great stuff! It comes in 16 different finishes including six golds plus black, pewter, silver leaf, antique white and others (see my post on Rub ‘n Buff colors for details on all finishes).
The three Rub ‘n Buff colors that I use the most are these three golds: Grecian Gold (available {here}), Antique Gold (available {here}), and Gold Leaf (available {here}). Gold Leaf is my favorite of the three since it’s a bit softer of a gold than the other two. Antique Gold is the most copper colored of the bunch while Grecian Gold is similar to Gold Leaf but just a touch more orangey so it has more of an Old World vibe.
You simply rub it on with a soft cloth (you only need a very small amount) and then buff it and let it cure overnight. It creates a beautiful, uniform finish that doesn’t rub off! One of my favorite uses of it was on {this large round mirror} over my master bedroom dresser that came in a bronze finish but with Rub ‘n Buff I was able to turn it to gold with just 10 minutes of work.
5. Add a Catch-All Shelf
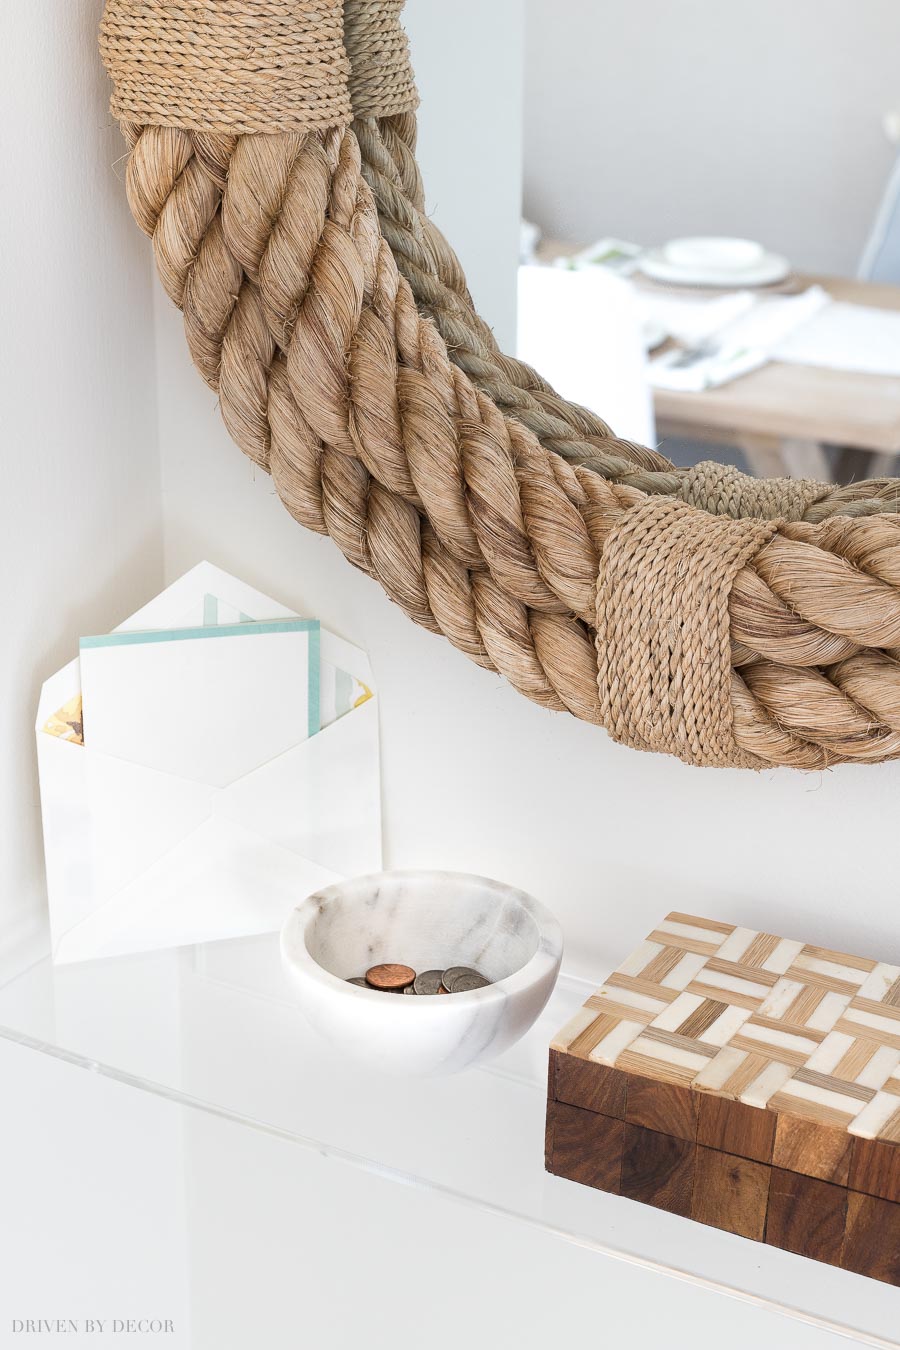
My favorite of the garage entryway ideas I’m sharing is to add a catch-all shelf. We added {this small acrylic shelf} that comes in three lengths (mine is 18″):
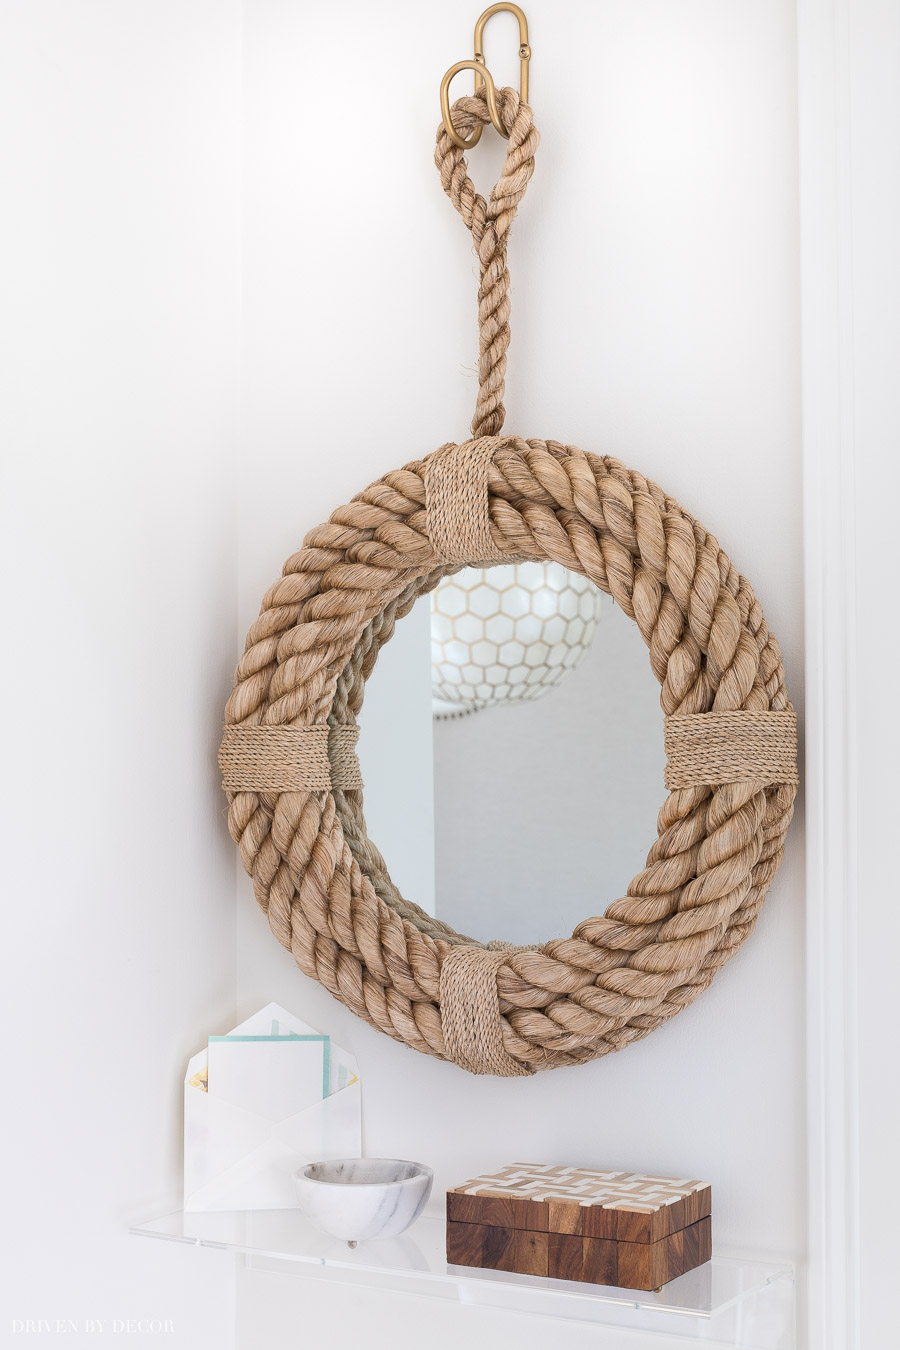
It was the perfect spot for placing notes the girls needed to take to school, letters to mail, this small marble bowl for my husband’s change (I’m going to try to get him to empty his pockets in that little marble bowl as he walks in because I find his change EVERYWHERE), and a small wood + bone box for our car keys:
Most of these same little upgrades could be used at a front door entryway too. Even just adding a cute mirror and shelf is a simple weekend project that would add so much to your home!
Want garage entryway ideas for a larger space? Consider turning part of it into a mudroom like I did with our laundry room. Check out our IKEA mudroom using PAX wardrobes that will show you how much storage space you can create!


Kimberly Wright says
Kris
I also love the door hardware and just purchased some dummy ones for our closet doors in our new home. The question I have for you is what did you do to make the screw plate that came with the hardware to fix the width of the door? The square back and thick screw are way too short for our closet door. Any advice would be great!
Sandra says
Hi… what a difference! Beautiful! Curious what sheen of paint did you use for the inside of the garage door and did you use the same sheen for the other side that faces the garage?
Jen R says
Hello, and thank you for sharing the “rub & buff” product. That is such a great thing to know about! I noticed you had terracotta tiles. Did you remove them all? How difficult was that job?
Jen says
I meant to add, great job! What I’ve seen is beautiful 🙂
Kim says
I just love everything that you have done and do Kris! On the Rub ‘n Buff, I see there are two silverish colors. Have you used one that you feel would be close to brushed nickel? I have matte black rimmed mirrors and vanity lights with brushed nickel faucets and vanity hardware. I was thinking of doing the section of the light that the glass shades hang from in a “brushed nickel” to mix the two metals. Or maybe I shouldn’t… Thank you!
Tanya says
I love this update! Would you mind sharing your countertop choice?
Jeanie Crouch says
Hello! I love you design style and creative diys!! I’m sure you have shared a “how-to” for painting rattan/wicker but I’m not finding it…what’s your preferred method/products? I have several pieces I need to refresh so I’m hoping to get by using a spray paint. Thank you!
Kris Jarrett says
Believe it or not I actually haven’t every painted any rattan or wicker pieces but that would probably be a project that I’d invest in an inexpensive paint sprayer for!
Bonnie says
I found this post by typing in Rub n’ Buff. You’re comparisons of three was awesome…I know I *need* gold leave;)
Such a beautiful make mover. But I have to say, you’re little black & white model was the absolute show stopper!
Nataliya says
Hi, Kris!
Your kitchen remodel is just breathtaking! We are considering this flooring all over downstairs in our open space concept. Can you, please, let me know how does your floor hold up, especially in the kitchen. As far as I understand, it has to be cleaned only with Hallmark cleaner. Are oils and liquids penetrate the oil finish? Also, how Soft is this comparing to the one with polyurethane finish? Is it easy to scratch?
I will really appreciate your opinion! Thank you so much!❤️
Kris Jarrett says
Thank you! Yes, you are supposed to use the Hallmark cleaner to clean it. I haven’t had any issues with stains or scratching!
Barbara says
Thanks so much for all the information, You are so talented and your home is beautiful.
Kris Jarrett says
Thank you so much for the super sweet comment! Glad to have you here! XOXO
Robin says
Always enjoy your posts and especially your “favorite finds.” Your home is beautiful and I love all the creative ideas and tips you share! Just ordered the adorable (weird!) snail. lol
Kris Jarrett says
Thank you so much Robin! And I love that you love the weird snail too – it’s the cutest!
Karen Bunch says
Kris,
What a huge difference this made. I love the fact that you painted the door to the garage the same color as the island. It ties it all together, as you said. I also appreciate the Rub ‘n’ Buff stuff you mentioned. I can’t tell you how many items I’ve wished there was something to change the finish on. Wood is relatively easy, metal has always baffled me. The rope mirror is great.
Thanks for such great tips and inspiration.
Enjoy your weekend.
Karen
Kris Jarrett says
Karen you’ve definitely got to try Rub ‘n Buff next time you have something metal – it works so, so well!
Judy says
Love your new garage entry and all of your accessories! The rope mirror is such an eye catcher and I love the hook you hung it from. I have to remember that one.
I’m a big fan of Rub’n Buff. I’ve rejuvenated a ton of things with it. My only problem is…I get overly anxious to start my project and I apply the Rub’n Buff with my finger and then remember the cloth. Then I am wearing the Rub’n Buff on my finger for a day or so…HAHA. Must tell myself to slow down!
Kris Jarrett says
That’s hysterical! I swear that Rub ‘n Buff is addictive – such good stuff!
Anne says
What a great job you did! I often encourage clients to paint some of their white interior doors and will show them your Before and After pictures to prove the point. Your attention to detail is lovely!
Kris Jarrett says
Thank you so much Anne! This is actually the first time I’ve painted an interior door something other than white and now I’m hooked!
Debbie says
What a major change! It looks sooo good! I was a little surprised that you have the keys out of sight in the box. Beautiful palette, I love everything.
Kris Jarrett says
Thank you Debbie! That box is just for our extra sets of car keys when we drive each other’s car (which isn’t often) so I’d rather have them hidden away 🙂