Wanting to try painting a room yourself? These 7 painting tips will save you time and help you get a professional looking result!
I’m spending a good chunk of the weekend with a paint brush and roller in hand working on painting the kitchen and adjoining eat-in area and laundry room (which are part of the reno too) so I can keep things moving with the renovation and save a little money along the way. It’s been almost 18 years since my husband and I first took a class at Home Depot about how to paint a room in preparation for painting our first daughter’s nursery and we’ve since painted our past three houses from top to bottom ourselves (other than hiring out for a few ceilings). Along the way I’ve figured out a bunch of time-saving painting tips that not only save me time and money but result in a killer paint job. They’re too helpful not to share so that’s exactly what I’m doing in today’s post! (post includes some affiliate links; full disclosure available {here})
Clean Drywall Dust Before Painting with Your Swiffer!
Whether you have new drywall that you’re about to prime or you’re getting ready to paint walls that are full of dust from spackling and sanding, cleaning some of that drywall dust off will help you get beautifully smooth walls. My weapon of choice that makes cleaning drywall dust easy? My Swiffer! You can use your Swiffer with the cleaning cloths that are made for it but since they get filled with dust quickly and they aren’t exactly cheap, I just use my own cloths and change them out several times as I go around the room:
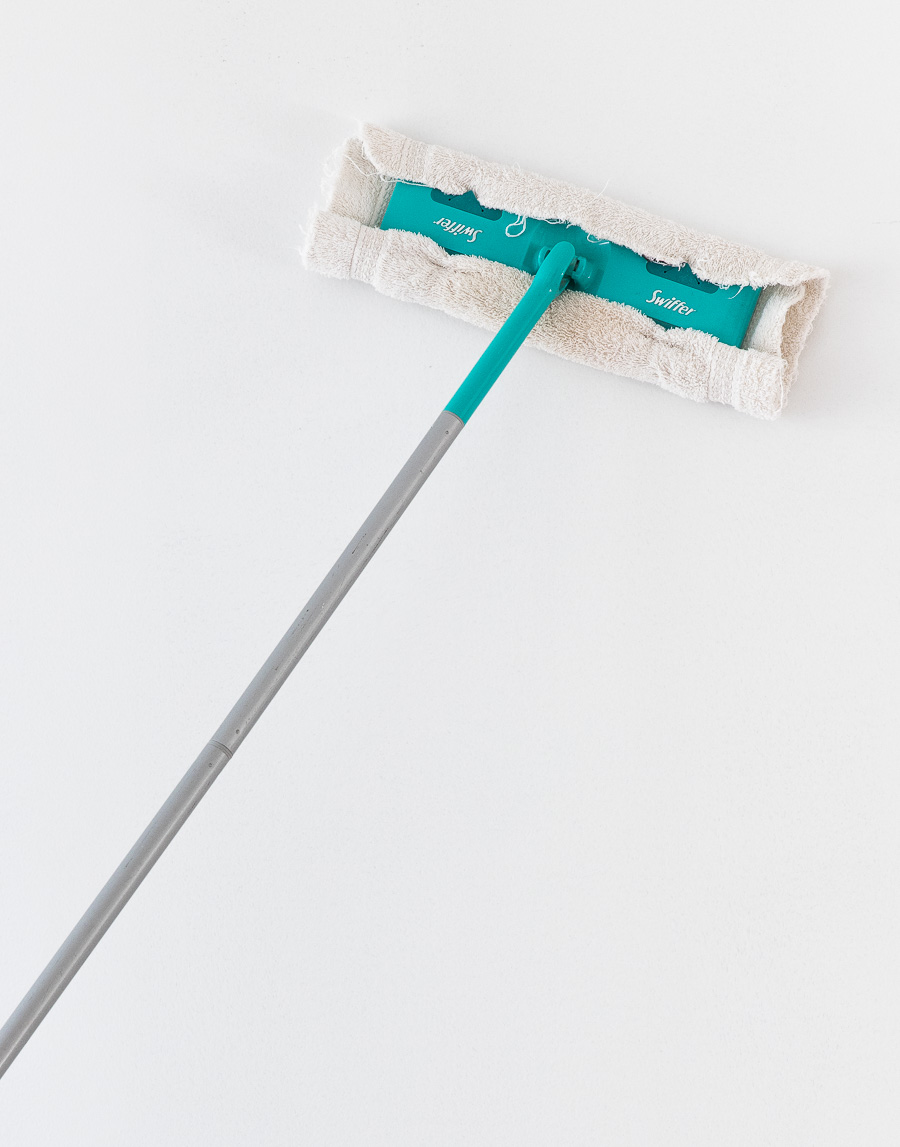
Microfiber cloths like {these} work best but if you don’t have any (or if they’re all dirty like mine were), old washcloths work too – just wrap them around the Swiffer and attach them like you would the regular Swiffer cleaning cloths. It saves so much time because there’s no need to go up and down a ladder as you go around the room because the Swiffer can easily reach the top of your walls:

Use a Stand-alone LED Work Light
LED work lights weren’t around when I first learned how to paint so I was taught to illuminate the walls that I was painting with a cheap clip-on light that you clip onto your ladder. The problem with a clip-on light is that it’s easy to find yourself in the way of it, creating shadows on the wall and you tend to have to move it around a lot. A good LED work light that sits on the floor can illuminate a large area of wall so there’s not nearly as much time spent fiddling with it to get good light. I have and love an LED work light similar to {this one} and use it with {this 15 foot cord} which is a nice length that keeps it from getting tangled and being in the way.
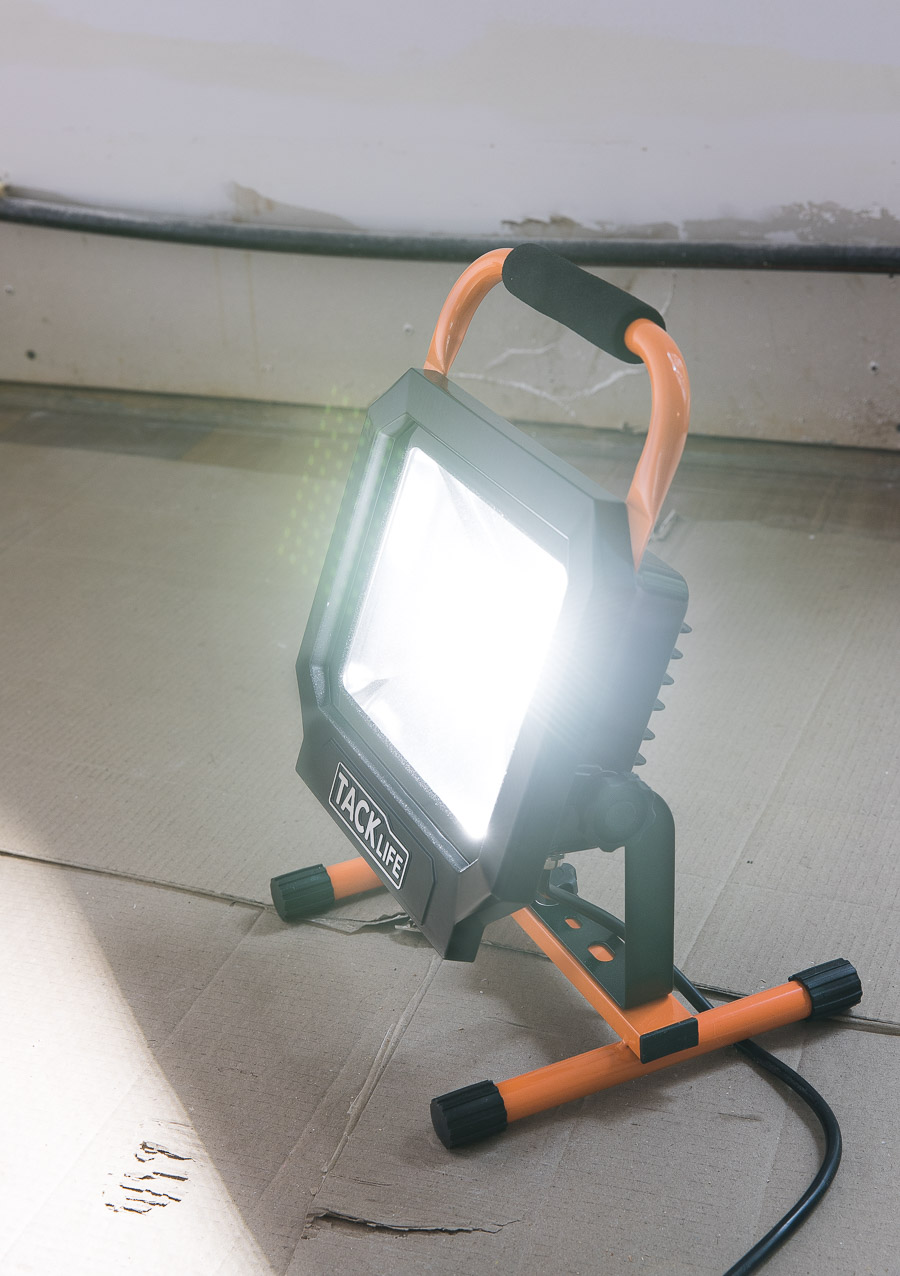
I also like that since it’s LED, it’s not only energy efficient but it doesn’t generate nearly as much heat as traditional work lights that can get crazy hot and be a fire risk.
Remove Lint from Rollers with Painter’s Tape Before Painting
There’s nothing more annoying than rollering a wall with paint and then noticing that there are a ton of lint pieces from your roller sticking on the wall. This happened with the ceiling in our kitchen that someone rollered for me – I spent about 45 minutes lightly sanding zillions of spots with lint sticking off the ceiling – not fun! The first way to prevent this is to NOT use a cheap roller. Paying an extra couple of dollars for a good quality roller will get you a roller that sheds a lot less (I use {these} ⅜″ Purdy rollers for all of my walls).
My other tip is to wrap painter’s tape around your entire roller before painting and then pull it off:
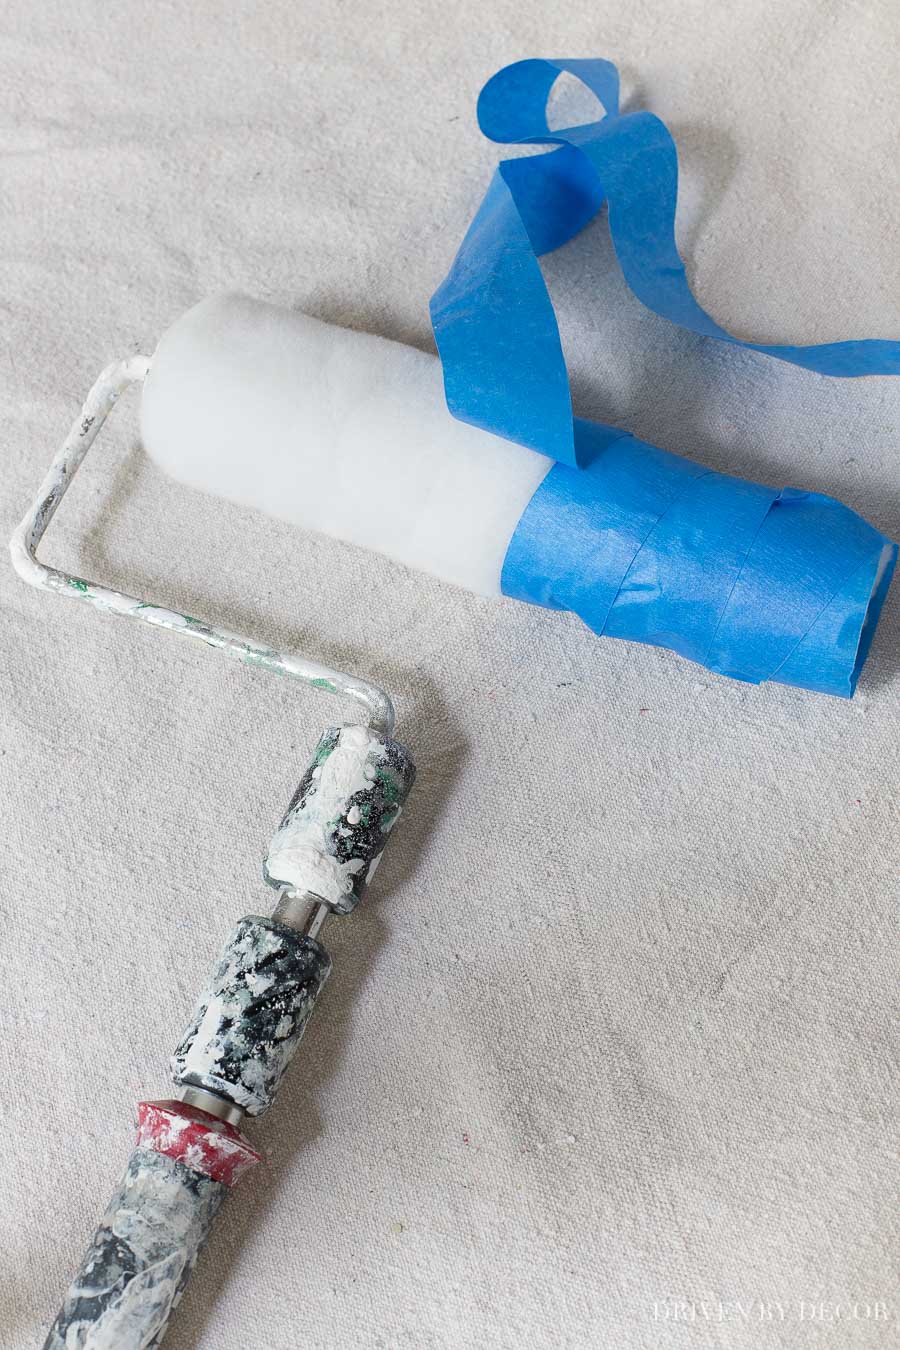
It pulls off any loose fuzzies/lint with it and significantly lessens the amount of lint that will end up in your paint!
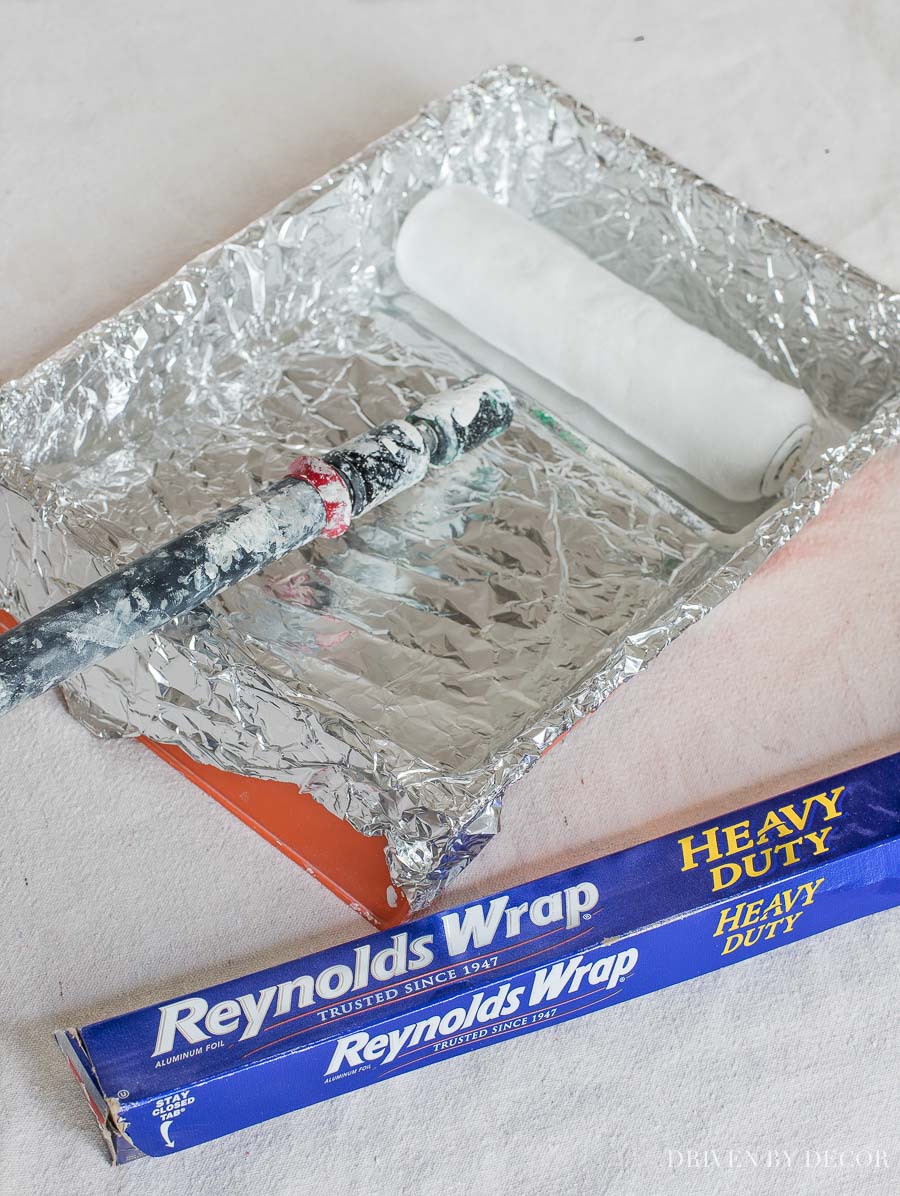
Line Your Roller Tray with Aluminum Foil for Easy Clean-Up
Want to save this post?
You can do the same thing with Glad Press & Seal too!
Use a Telescoping Roller Frame
A telescoping roller frame is KEY to getting a paint rollering job done quickly and one of my most recommended tips for painting walls, especially if you’re a shorty like me! It saves so much time not having to go up and down a ladder and move a ladder around the room. The handle length can be set like that a typical roller or you can twist and extend it to almost double the length of it and reach the upper part of your walls. As you can tell by looking at my roller, it’s been well loved and used for years and years so I don’t have an exact match for it but it’s very similar to {this extendable} roller frame.
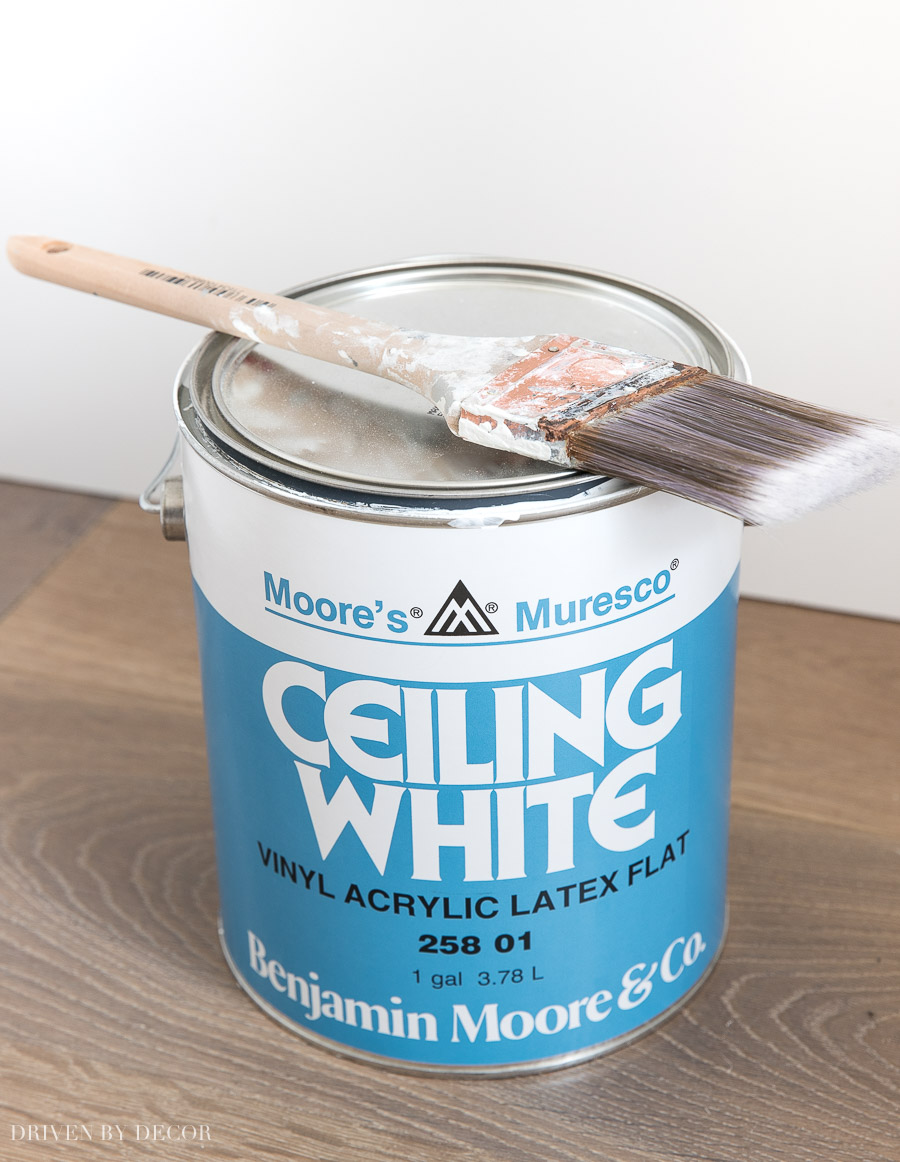
Use the Best Ceiling Paint
Painting ceilings is SO not fun so you want to make sure you get it right the first time around and don’t end up having to do any extra coats. My #1 ceiling painting tip is to make sure you have the best paint – in order to hide flaws in the ceiling and avoid roller marks, choose one with a flat sheen that has a touch of gray. I’ve tried lots of different ceiling paints over the years and my favorite is Benjamin Moore’s Muresco ceiling paint. It’s the one paint that I never see roller marks with and that never needs more than two coats.
Store Paint Brushes & Rollers for the Next Day (or Week!) in Baggies
The first several years that I painted, I rinsed my brushes and rollers out at the end of each day which took a lot of time and used a ton of water. A friend tipped me off about storing paint rollers for the next day in baggies and it works beautifully! I simply leave the roller on my roller frame and put it in a large baggie that I zip closed as far as I can. For paint brushes, I put their heads in a small baggie and again zip them closed as far as I can. Also I use plastic Solo cups to hold paint for edging/cutting in around rooms and I cover those with a baggie and place a rubber band over the top. I then place everything into the fridge (if it’s a low VOC latex paint) because that slows down the drying process even further. I have everything tightly sealed so I haven’t had issues with odor or the paint affecting taste of food in the refrigerator but everyone has different sensitivities and there is the potential for the release of odor with poor sealing so put paint in your fridge at your own risk 🙂 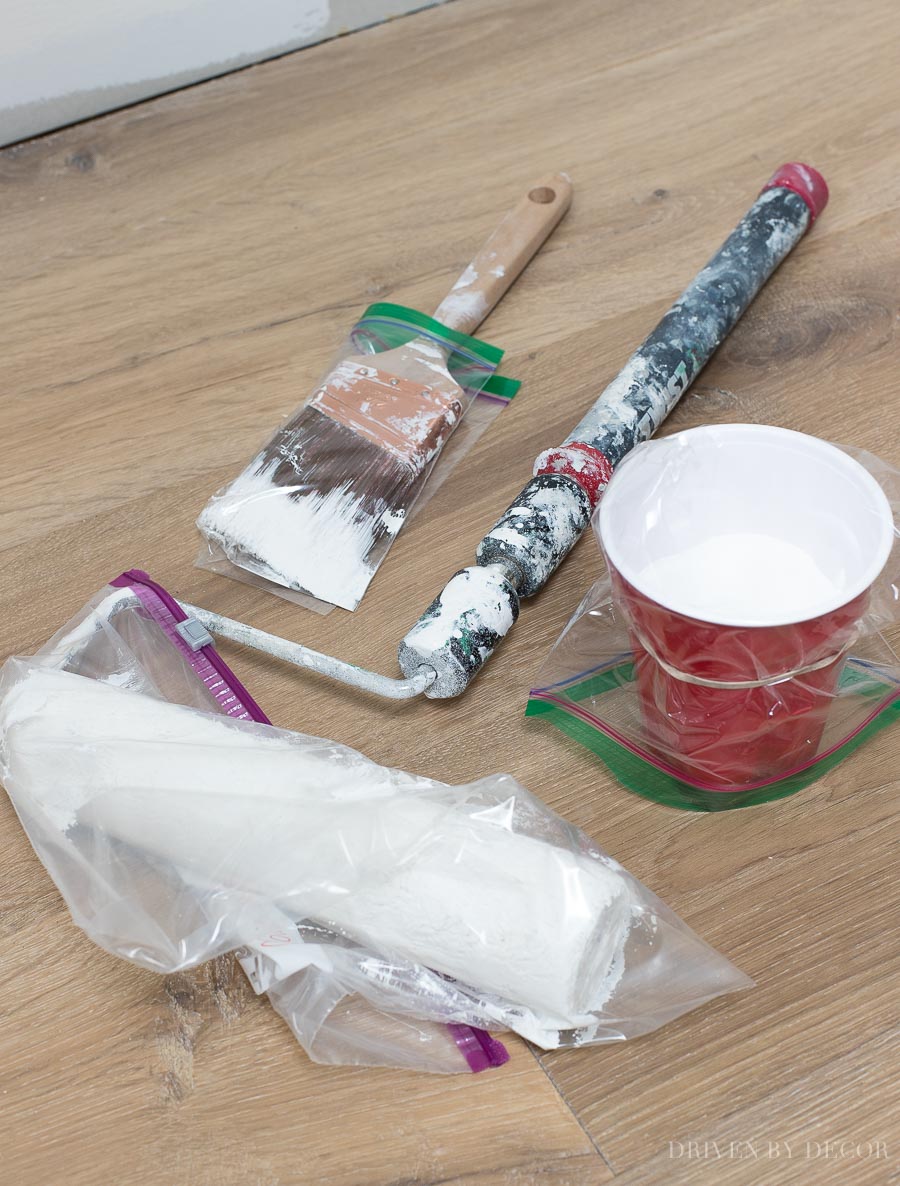
I’ve kept brushes and rollers like this for weeks before and have still been able to use them! I do always use high quality rollers and brushes so I can’t say whether cheapies would hold up to this abuse as well or not.
That wraps up my time-saving tips for painting! I hope you DIY painters picked up a tip or two that you found helpful and that you’ll share any tips that you swear by too – I always love having new tips and ideas to try!
For more painting tips, be sure to check out these posts:
How to Prep Walls for Painting
How to Paint Bathroom Cabinets
Enjoy the rest of your weekend everyone!


Laurie says
I know this is an older post, but just wanted to say I love your kitchen! Also wanted to second a suggestion a reader posted below about the Glad Press n’ Seal. I’ve been using it for several years while painting, and it’s great for lining trays and storing rollers and brushes. The stuff is great
for everything! I even used it to cover my broken wrist cast in the shower 🙂
Emma says
Hello, I also put my brushes and rollers in baggies. For my paint pan I use Glad press and seal . It seals so well the pain is good till get back to it. I have had paint in mine up to a month. Hope this helps. Emma
Kathleen says
I’m wanting to paint ceiling after i figure out how to scrape off the texture . I’ve always done ceilings semi gloss pure white to reflect light. Now i think I’m not liking the semi gloss and maybe it shows more flaws. What exact color grey do you like ? Thank you
Emma says
Hi Kathleen, I too just came to that same decision . I never knew why everyone did the flat. I thought semi gloss was best to reflex light too. Who says you cant teach an old dog new tricks. Emma
Rita says
Here’s one more tip for you. If you are using enamel paint, you can put it in a ziplock bag and put it in the freezer. It will be good for several days. If you leave it too long, it will eventually dry up, but for a few days, it is a good deal for getting back to on your painting.
Kris Jarrett says
That’s a great tip – thanks!
Michelle says
The kitchen is going to be gorgeous! Can’t wait to see it all come together. Are your lanterns the small or medium size?
Kris Jarrett says
They’re the small size!
Audrey Johnson says
Wow, what a huge project. Looks like its moving right along though. Very good tips throughout. Thanks for sharing. Can’t wait to see the end result.
Kris Jarrett says
Thank you so much Audrey!
Hiluhilu says
Great painting tips!!! I use Glad press-n-seal wrap to line paint trays and for temporary paint can or brush covers. Works really well. For larger jobs, I prefer a 5- gallon bucket and a hanging grate to remove excess paint over a paint tray. Fewer refills needed and I seem to get the paint onto the roller a little more evenly. That kitchen will be amazing!
Kris Jarrett says
I’m totally going to try the Glad wrap – genius! That would solve the problem of the aluminum foil getting a hole in it sometimes. Thanks for the tip!
Anna Makridi says
The painting ideas were fantastic, and the kitchen is beautiful!
Kris Jarrett says
Thank you so much!
Vritika| Villas in OMR says
Kris, thanks for posting this at the right time! We had a revamp of our closed kitchen to open last week and these tips are so much useful for me, Thank you:)
Kris Jarrett says
I’m so glad that you found the tips to be helpful! Good luck finishing off your kitchen!
Lisa says
What brand and type of paint are you using to paint your walls?
Kris Jarrett says
It’s Benjamin Moore Cloud White in flat
Cynthia Madore says
Love that sink. I like the idea about the control panel being more “down to Earth”. It’s important to us short people. You brought back memories of a kitchen reno I did years ago. The sink and stove were about the only things not moved, but we did order out a lot. When I did cook, we went on hunts into the kitchen, living and dining rooms for whatever I needed. For 6 weeks. Picture that with 5 kids. I can’t wait to see your kitchen when it’s finished.
Kris Jarrett says
Cynthia, that sounds exactly like my life right now – I have to hunt for EVERYTHING and it’s driving me crazy!
Kathy Jones says
What are your kitchen floors.?
Kris Jarrett says
They’re engineered hardwood – there are more details about them in this post: https://www.drivenbydecor.com/kitchen-renovation-countertops-flooring-lighting/
Elizabeth Aaron says
Kris, your Swiffer trick is genius! I just saw a professional cleaner using it at Pirch appliance & plumbing showroom in San Diego. I’ve been recommending my clients use a more costly solution and am switching to your option right away! You are THE BEST!!!
Kris Jarrett says
I’ve been using it for years – it works really well! You’ll have to report back on how your clients like it!
Carol Heartfelt Whimsies says
First, those are some great painting tips!
Second—-I’m falling in love from afar with your new, almost-finished kitchen!! It’s going to be incredible!!
Can’t wait to see it all done and styled by you!!
Kris Jarrett says
Carol, thank you!! I’m glad you enjoyed the post and I can’t wait for this kitchen to be done!
Karen B. says
Kris,
I love the good ideas for painting—it’s my least favorite thing to do around the house. Mr. B. usually handles it, but I think these ideas will be helpful to him too!
Can’t wait to see your finished kitchen, I know it will be worth the wait.
xo,
Karen
Kris Jarrett says
Thanks Karen! I tried to pass the painting off to my husband too but he’s not so great at it so I had to take the job back 🙂
Caroline says
One question: don’t you get a smelly fridge when you store the brushes, etc., overnight? I know most paints are low VOC now, but I STILL smell them, and I wouldn’t want my food or fridge to smell of paint.
Kris Jarrett says
Hi Caroline,
Good question! I seal mine up pretty tightly and also CT has strict paint laws that require all paints to be low VOC so I’ve never had a problem with that but I definitely wouldn’t do it with an oil-based paint or if you’re particularly sensitive to smells/odors.
Anonymous says
Mine have never caused a smell. I use the plastic bags you get at the grocery store and put the whole roller tray and roller in the frig.