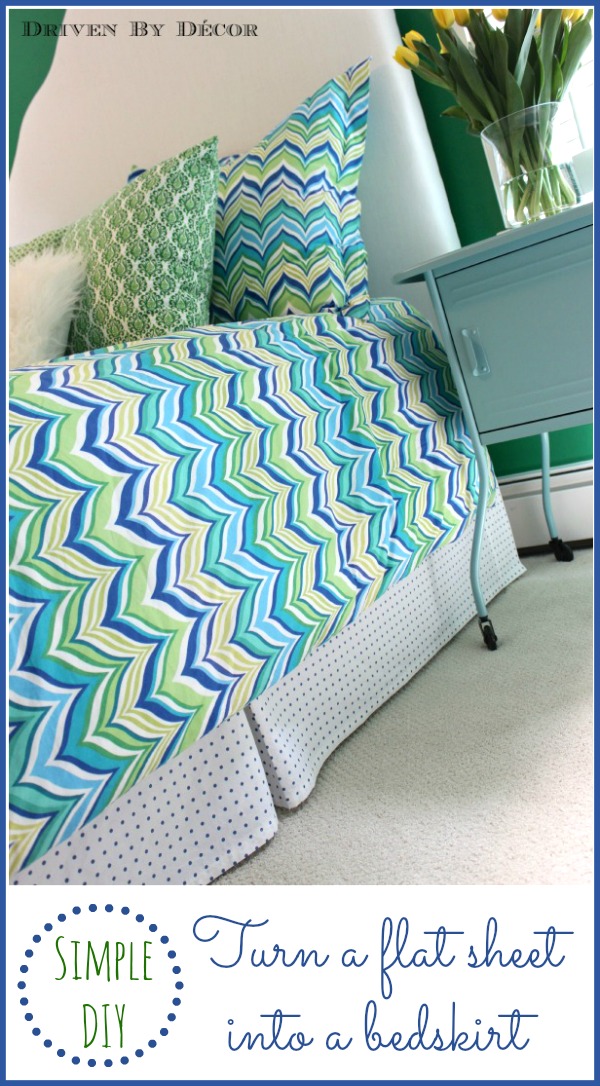
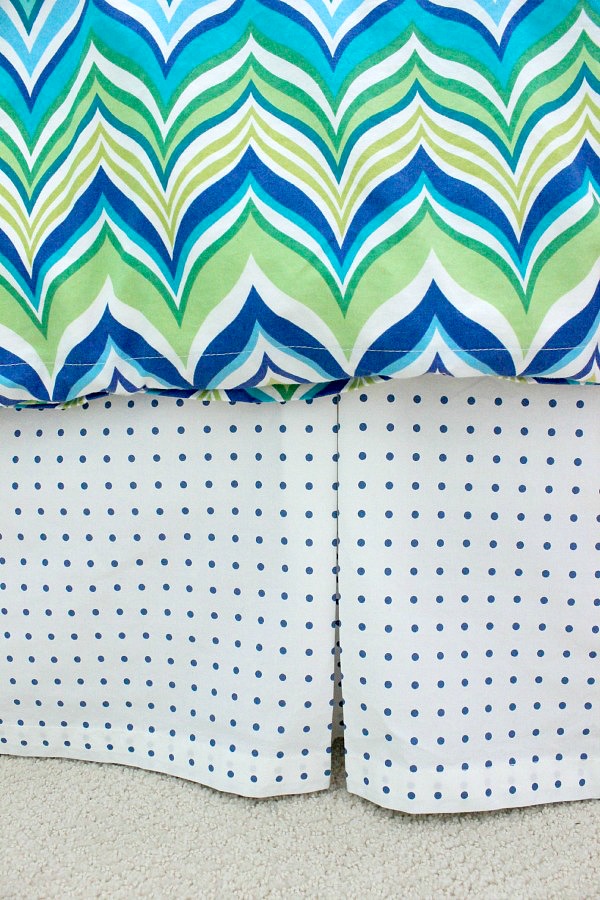
Want to know how to make a bed skirt with little to no sewing? This easy DIY bed skirt is made using a simple sheet! It looks amazing and will be a perfect fit!
While I love to DIY, you may have noticed that my DIY projects rarely involve a sewing machine. That would be because my sewing abilities are limited to sewing a simple stitch in a kinda straight line. So when I couldn’t find a bedskirt that I liked for my daughter’s room, sewing one was definitely not plan A. But after striking out on finding one I liked and realizing that the cute polka dot sheet set I just bought from HomeGoods would make the cutest bed skirt, plan B (aka turning my polka dot flat sheet into a bedskirt) was born!
 What convinced me to take the plunge is realizing that the finished edges around the flat sheet would work perfectly for the bottom edge of a bedskirt so there actually wasn’t going to be that much sewing involved. I’ve seen some great DIY sewn bedskirts but when push comes to shove, I get too intimidated when too much sewing is involved. Also, using a flat sheet was cheap and I loved that I would be able to throw it in the wash when needed.
It turned out to be a much simpler project than I ever would have expected and I LOVE that the bedskirt fits the bed perfectly and looks custom-made (because, well…it is!). (post includes affiliate links – see my full disclosure statement {here})
 Here’s the how-to for this simple DIY:
1. Wash, Dry, & Iron the Sheet You’re Going to Use
If your sheet is new, wash it first because if it’s going to shrink, you want it to shrink before you size it perfectly for your bed skirt. One of the perks of having a sheet-turned-bedskirt is that if something gets on one of the bedskirt panels, you can just spot treat it and throw it in the washer! And you want to iron your sheet too so you have accurate measurements before you do any cutting.
2. Figure Our the Sizes for Your Bed Skirt Panels
Knowing the size of your flat sheet and the size of your box spring, get your math on to figure out how you’re going to cut the panel sizes that you need out of your sheet. I was able to use an oversized full sheet to make a bedskirt for my full bed but sheets are not consistently sized so check your measurements before buying your sheet to make sure you don’t have to go up a sheet size. You will need the following (these are finished sizes):
- Two side panels that each measure the length of the box spring (from the head to the foot of the bed) minus 3 ½″ (because it will stop 3 ½″ from the bottom corner of the bed), plus 5″ for the pleat, plus any additional inches that you want the side panel to extend beyond the top end of the boxspring. I extended my bed skirt about 3 ½″ beyond the top end of the boxspring so my final, finished panel length was simply the length of the box spring +5″ . If you cut yours out in the same way that I did below, you’ll have one unfinished end that will need to be sewn or taped so add about ½″ or so to that measurement when cutting out your piece.
- One end panel that measures the width of the box spring minus 7″ (because it will stop 3 ½″ from each side) plus 5″ for the pleat. In other words, your final, finished length will be the width of the box spring minus 2″. Again, if you cut yours out like I did, you’ll have one unfinished end that will need to be sewn or taped so add about ½″ or so to that measurement when cutting.
- Two corner panels that are each about 16″ in length.
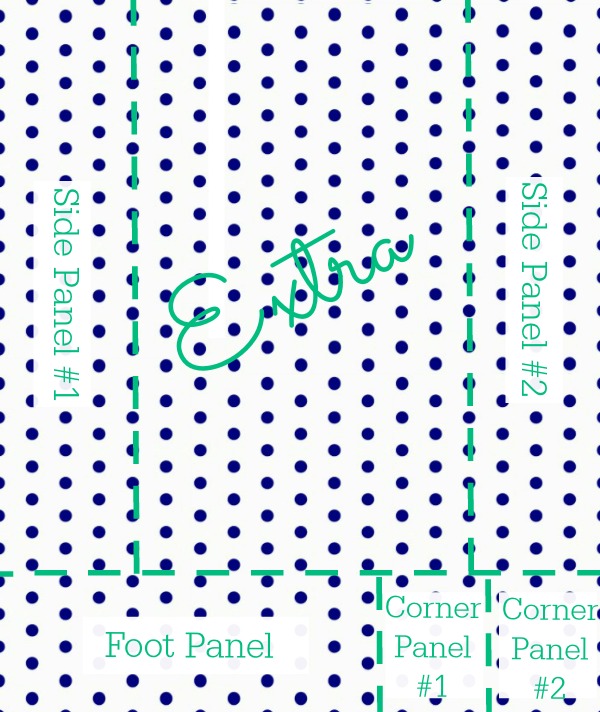
- If you have a standard height bed, make each of your panels about 16-18″ tall. For taller beds, make the panels a few inches taller (the height doesn’t need to be exact).Here’s the plan that I went with for cutting out the panels for my bedskirt:
 When you’re planning the cutting of your panels, keep in mind that most flat sheets have a wider folded edge at the top of the sheet. If you want to avoid using the wider folded edge as as one of the pre-finished edges on your two side panels, take that into account. I used the wider folded edge as the edge of each side panel that is closest to the head of the bed and actually like the look of it:
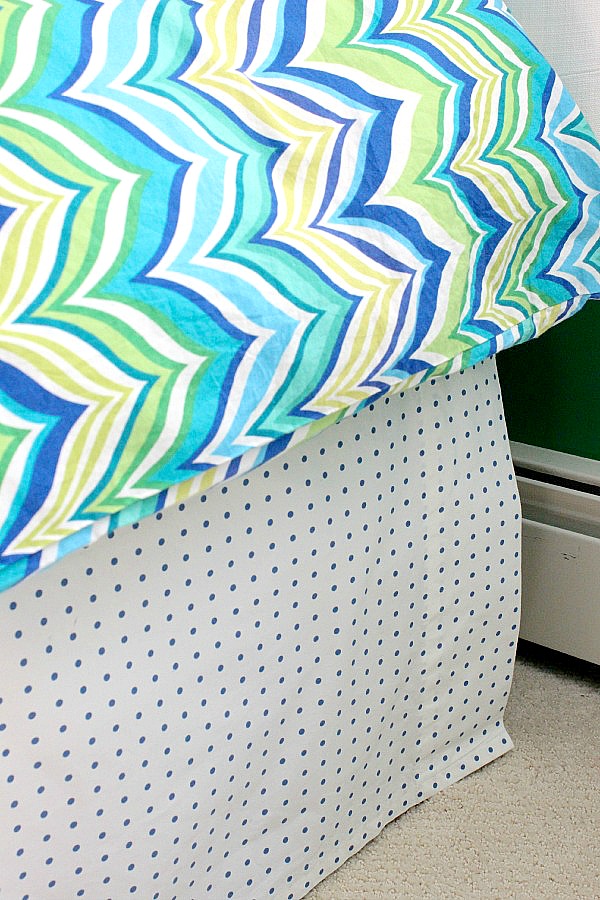
So that you have the least amount of sewing to do, plan the cutting of your panels in a way that most of the edges that will show are pre-finished edges. With my layout, all I ended up having to sew was a few short stitches to make each of the three pleats (more on that in a minute) and three short straight lines (in pink). All of the other cuts (in green) won’t show on the finished bedskirt so can remain unfinished:

Want to save this post?
3. Sew Any Unfinished Edges (Or Use Stitch Witchery!)
It’s time to get the sewing machine out and sew the few edges that need sewing (or you can cheat and use Stitch Witchery available {here} – I won’t tell!) along with a box pleat in the center of each of the two side panels and the end panel. Did I just lose you there with the mention of box pleats? No worries – I used my friend Jennifer’s tutorial of how to make them {here} and it was super easy! Each pleat will end up looking like this:
4. Attach Your New Bed Skirt Panels
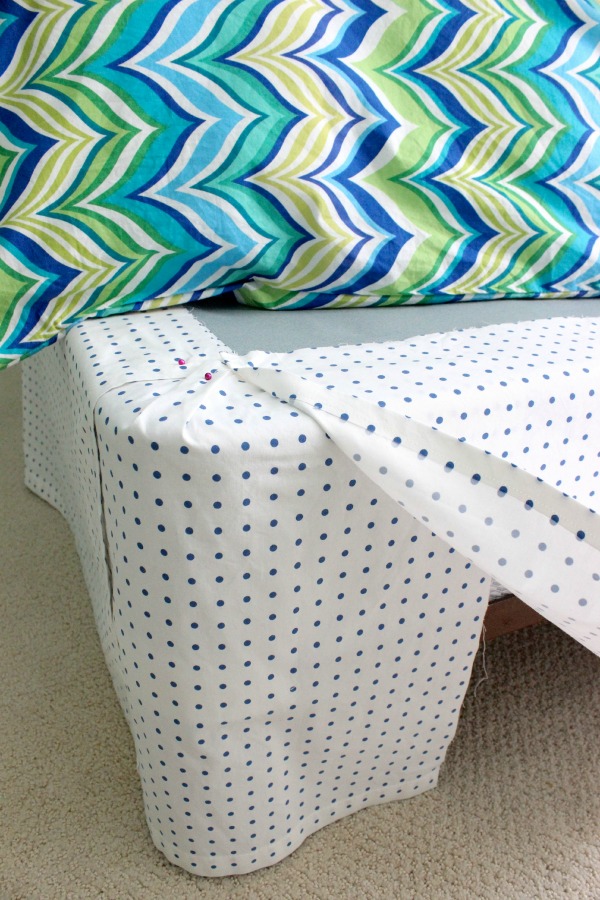
Put the two corner pieces on the bed first, centering them on the corner, wrapping them around both sides, and then pinning them in place at the top of the box spring. I used simple straight pins with large heads to do my pinning but you can buy bedskirt pins available {here} if you want to hold the panels on even more securely. After your corner pieces are pinned in place, you can pin your foot and side panels in place, overlapping the corner piece.
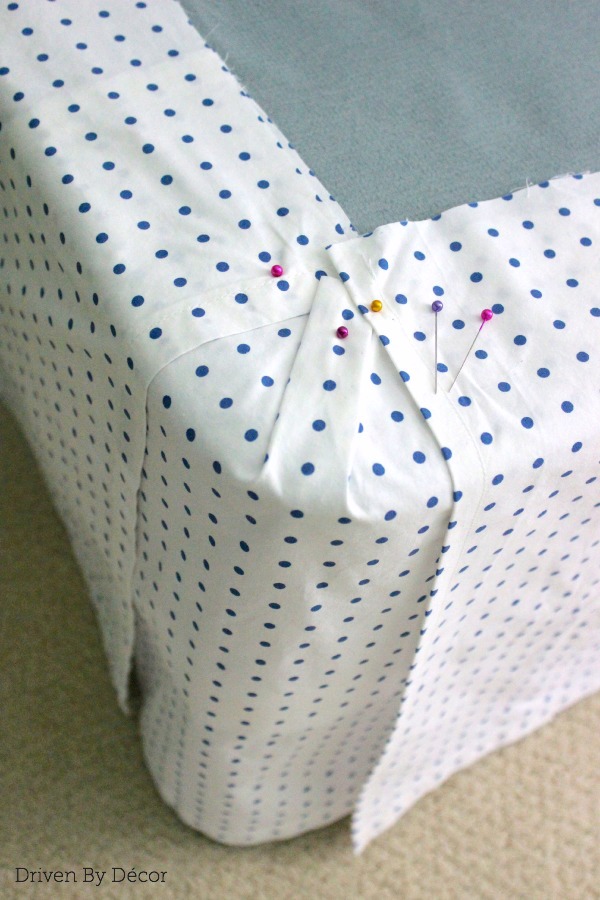
No one will ever know if the edges of those corner pieces are left all ratty since they’ll be covered up:
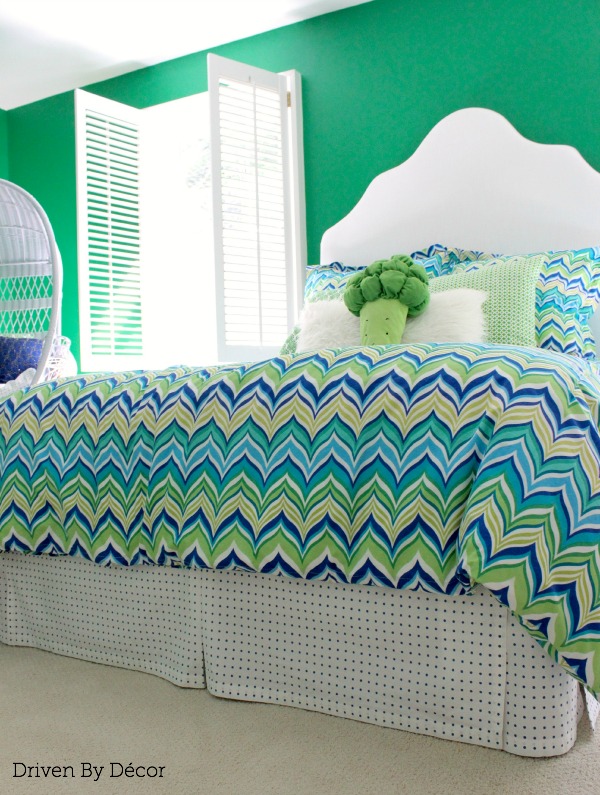
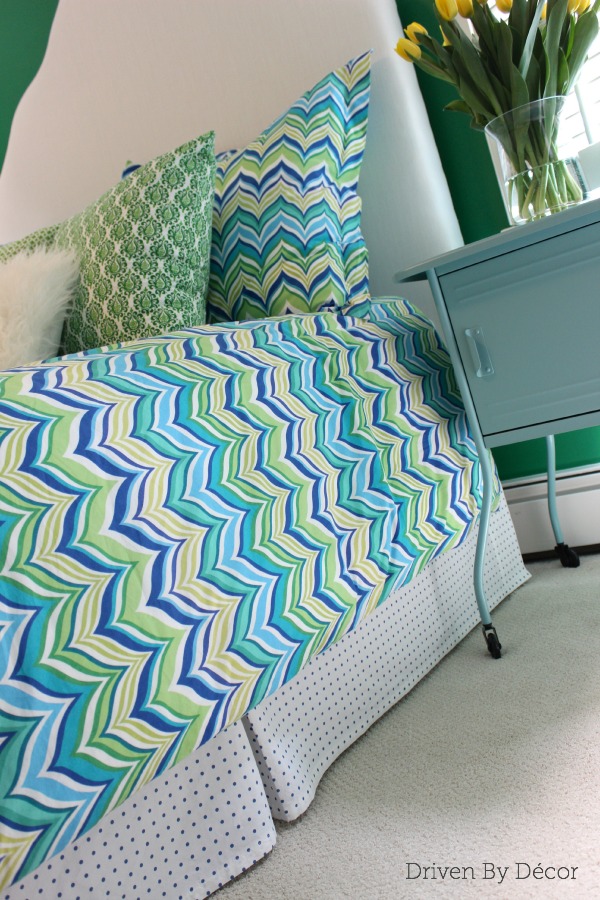
 And….we’re done! The whole project was finished in less than two hours (with a big chunk of that time spent on the measuring, layout, and ironing):
Thanks for stopping by!


Julia says
Me gustaría saber como puedo ver los distintos proyectos
Sistersoe says
Now I see the hem is already there I wouldn’t waste all the expensive 100% cotton thread. In your pin about reusing bed sheets, sewing the sides to a recycled sheet (it wouldn’t be seen) would leave plenty of fabric for pillows, scarf for table, recover lamp shade, cut up in strips and make a small rug. A king size sheet you could go buck wild and sew up everything on your sewing board. I like your ideas.
Kris Jarrett says
Great ideas – thanks for sharing!
Dee Pauley says
Great idea. I have a very tall bed so finding a skirt that will look right isn’t easy. Can’t wait to get mine started.
Graceread says
On the corners…do you just stick the pins straight down into boxspring?
Kris Jarrett says
Yes, I ended up using upholstery twist pins – you twist them straight down until the top of the pins is in contact with the boxspring.
Graceread says
Thank you. It did take a while to figure out the measurements. But it turned out great!!
Yolanda Venditto says
How did you attach the bed skirt to the box spring .
Kris Jarrett says
I ended up using upholstery twist pins – I linked the exact ones I used in the post!
Dr T says
I must really be brainless bc I have read these instructions several times and theres one thing I don’t get.
“plus 5″ for the pleat, plus any additional inches that you want the side panel to extend beyond the top end of the boxspring.”
can you please explain what you mean by this? What is extending beyond the TOP end mean?
Kris Jarrett says
What I mean by extending beyond the top end is extending closer to wall than where the boxspring ends. If you look at your bed, typically there’s several inches between where the boxspring ends and the wall. It’s how many inches you want it to extend beyond the boxspring.
Laura says
Beautifully done! I so want to make one. Thank you for beautiful pics and tutorial!
Kris Jarrett says
Thanks Laura! I’m so glad that you found it helpful!
Myrna says
I want to purchase a headboard but I have a box spring and mattress. Looks like you have this in your daughter’s room. Question: it looks like it is possible to have a sizable headboard without a platform bed. Is this correct? I think this is how your daughter’s bed is. Hope to hear from you.
Kris Jarrett says
I actually made my daughter’s headboard because I had the same problem and couldn’t find a fall enough one – here’s a link to the post on how it was made: https://www.drivenbydecor.com/how-to-make-simple-upholstered-headboard/
Adelle Aaberg says
Love this idea. Have a question about the measurement of the foot of the bed. I understand adding 5″ to the side measurement to accommodate the pleat, but do not get the minus 2″ for the foot. Don’t you need to add for the pleat here, too? Seems like it will be too short. How many inches do the pleats take up? Thanks in advance.
Kris Jarrett says
Hi Adelle,
I added a few more details about how I arrived at those measurements in my post so if you re-read it now, hopefully it will make sense where I got those numbers from 🙂
Myrna says
My biggest problem is the King bedskirts are white. and that doesn’t make it with my color scheme.
Myrna says
This is beautiful! I have a box spring that needs covering. You make it look so easy. I’m not sure I’ll find it easy! Did you remove the mattress to put this on?
Kris Jarrett says
Thanks Myrna! No, I didn’t remove the mattress – I just pushed it over toward the other side of the bed to do the sides and lifted it up to do the end 🙂
Kris Jarrett says
You’re so sweet – thanks Shirley!
EILEEN-RIPP-EMERSON says
How did you attach the pieces to the box spring?
Kris Jarrett says
I initially used straight pins but ended up switching them out for the bedskirt pins I linked in the post!
Grace says
You can always use the center part that isn’t used for the bed skirt to make one or two matching throw pillows or pillow shams for the bed.
Kris Jarrett says
That’s a great idea Grace!