Looking for some great vinyl wall decals and the how-to for applying them? I’m sharing the laundry room decals that I used, step by step details on applying them, and other vinyl wall decal options you’ll love!
I’m definitely not a big fan of doing laundry and I don’t think that anything’s ever going to change that but I figured that if I made our laundry room a little more bright and cheery, it would be a start! I decided to add some super cute tangerine vinyl wall decals to the walls and I’m so glad I did! They were SO easy (and actually kind of fun) to apply and if the day comes that I tire of them, they can be removed by just peeling them off without any wall damage.
Today I’m sharing some pics of our finished space along with details on where to buy the vinyl wall decals I used, how to apply them, and how to remove them so you know everything you need to for using them in your own home! (post includes commissionable links; for more information, see my full disclosure statement {here})
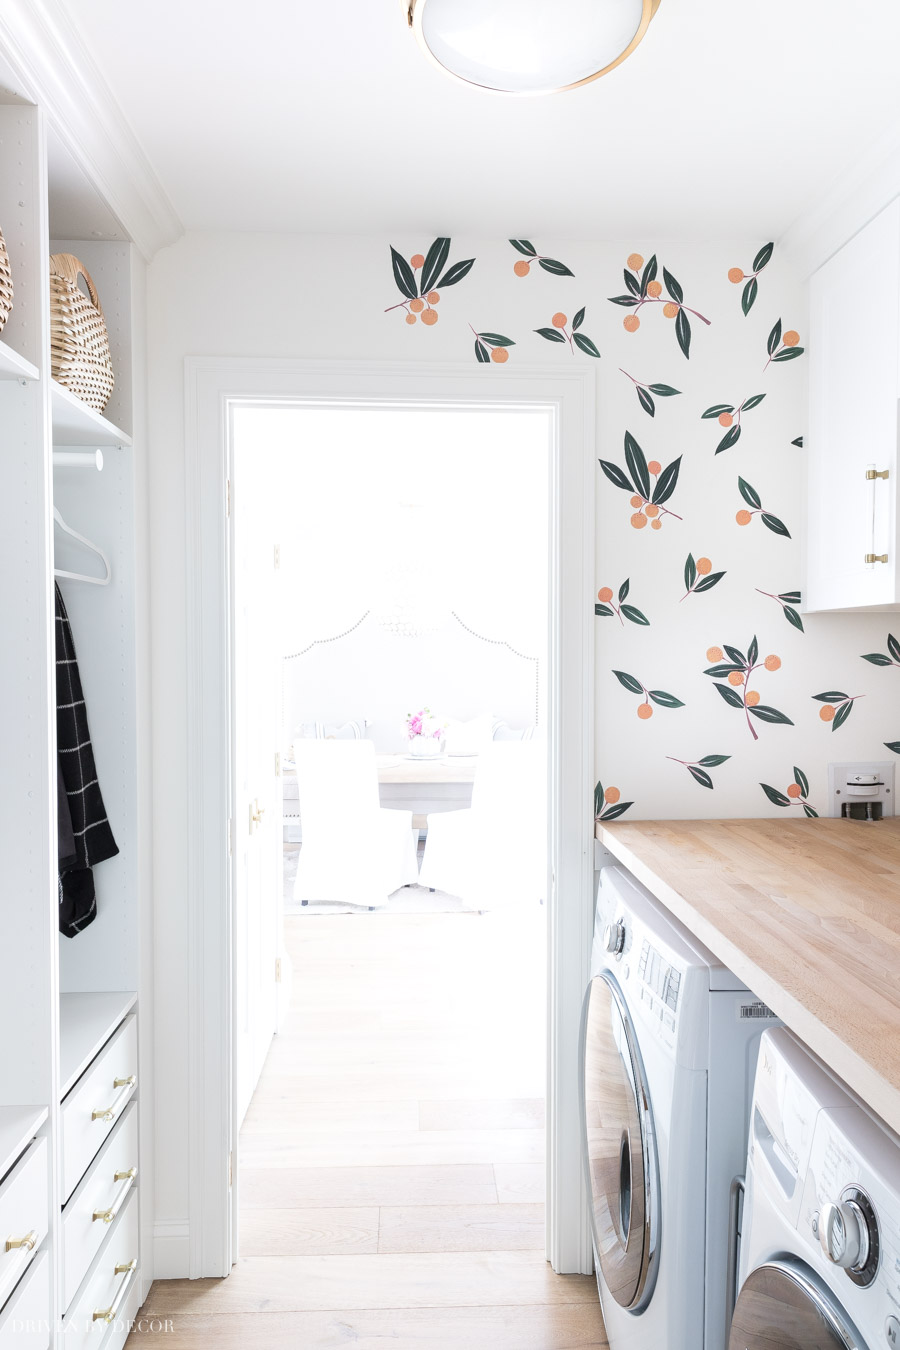
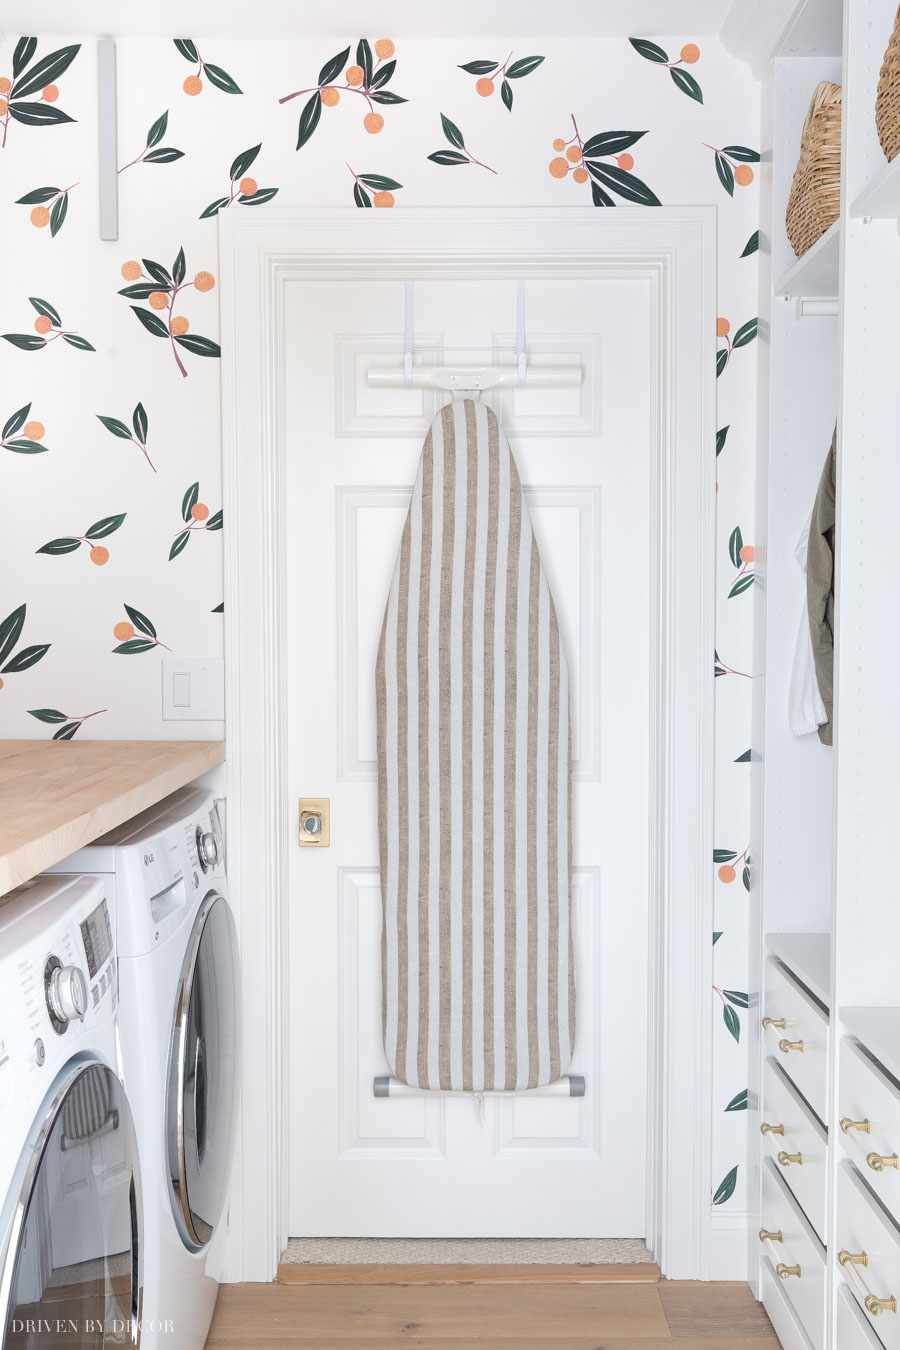
First off… our finished space! After adding new laundry room cabinets, the vinyl wall decals were the perfect finishing touch! Here’s our much-happier-feeling-now-that-there-are-tangerines-on-the-wall laundry room:
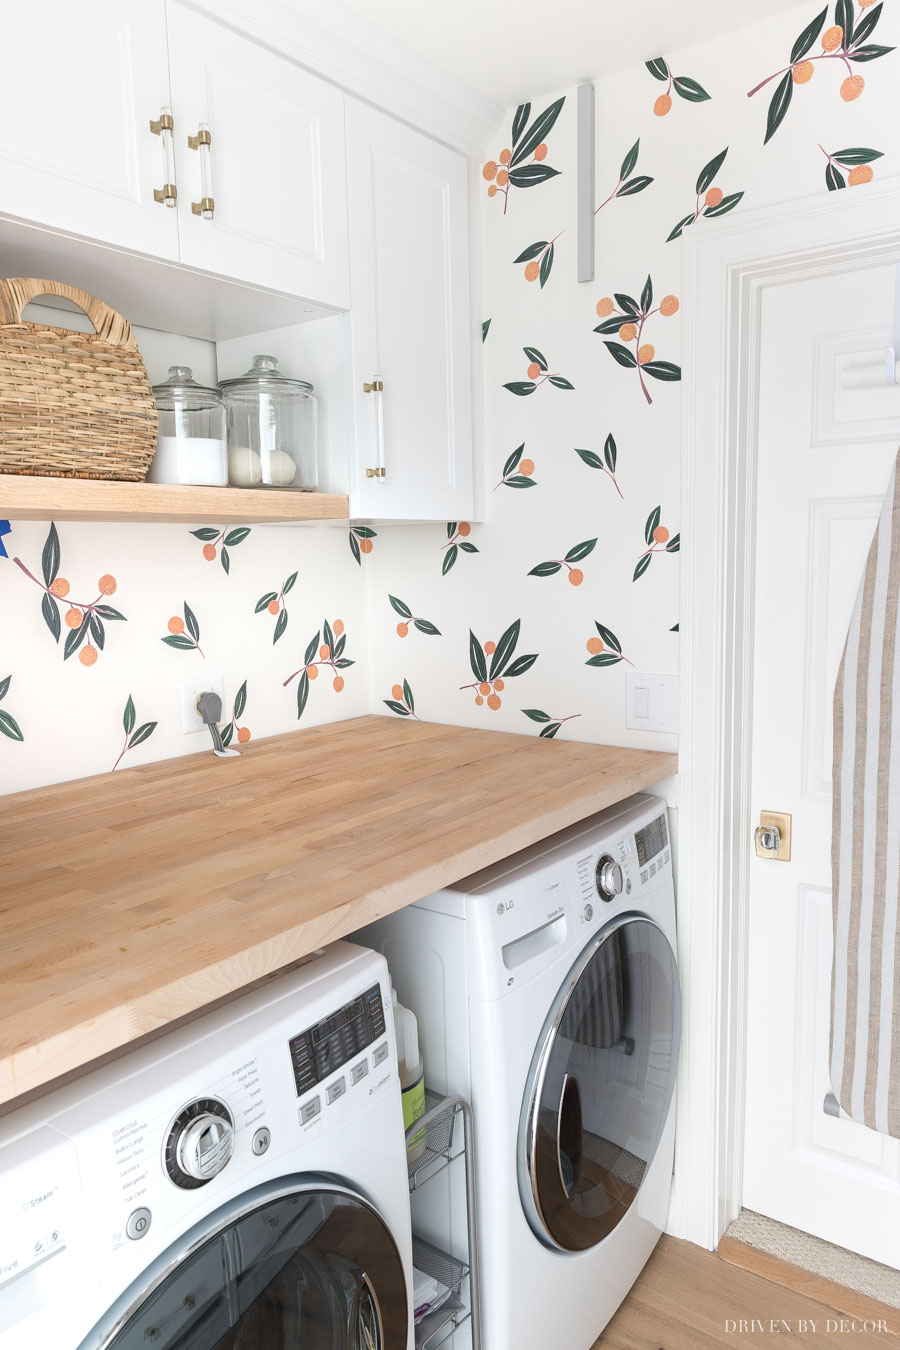
Cute right?! Small spaces like laundry rooms and powder rooms are perfect for doing something fun and different. Since there’s not a lot of wall space, it’s inexpensive to add decals to the entire room and you can get away with using decals that might be overwhelming in a larger space.
Where Do You Buy Vinyl Wall Decals?
I bought my tangerine vinyl wall decals {here} – each order consists of a roll like this:
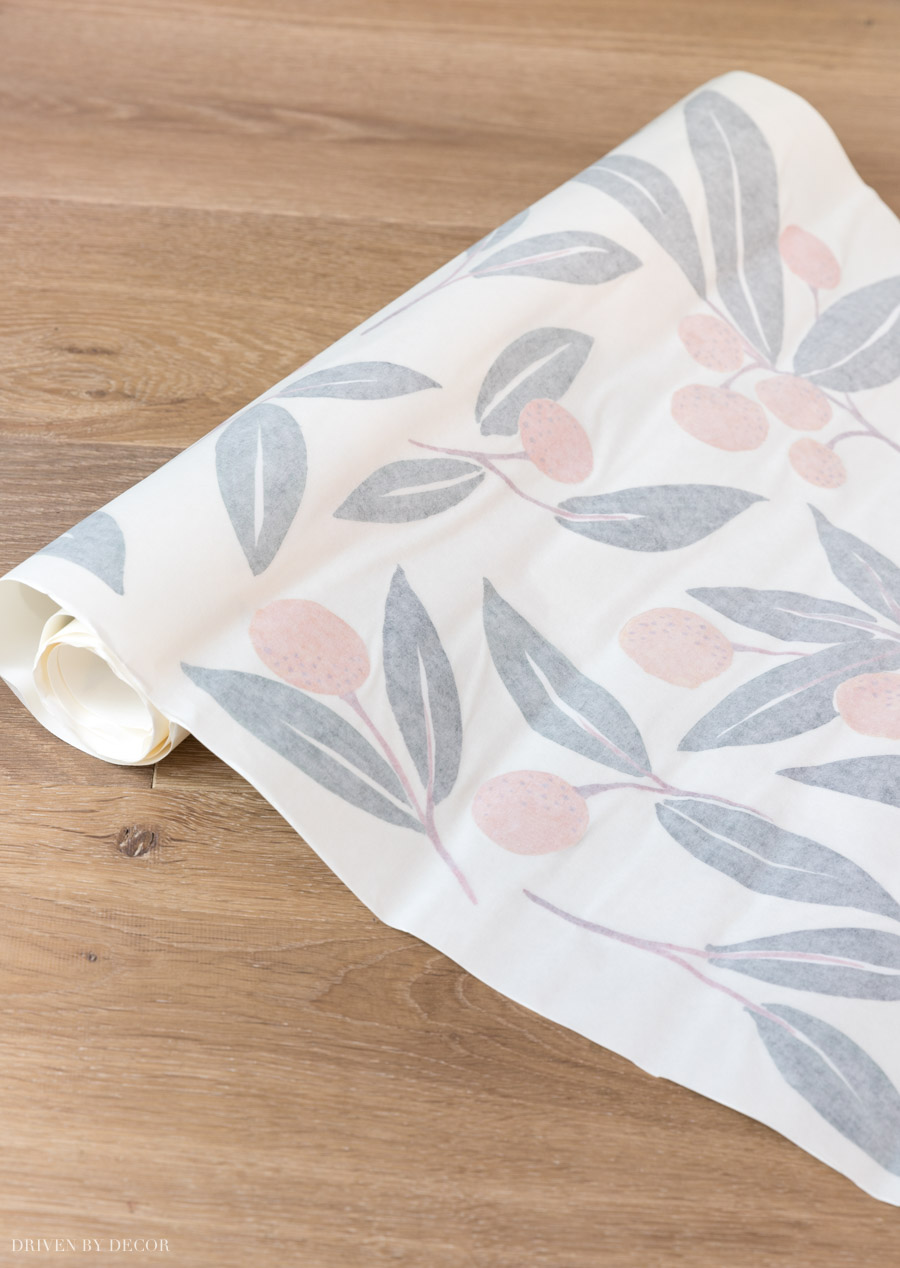
There’s no exact formula for how many rolls to order since some people space the decals out more than others. For my project, I initially ordered two rolls but forgot about the little strip of wall between each of the two doors and our coat cubbies – that little space used up more decals than I expected! So after using two rolls, I ended up having to order one more roll to finish off this little space:
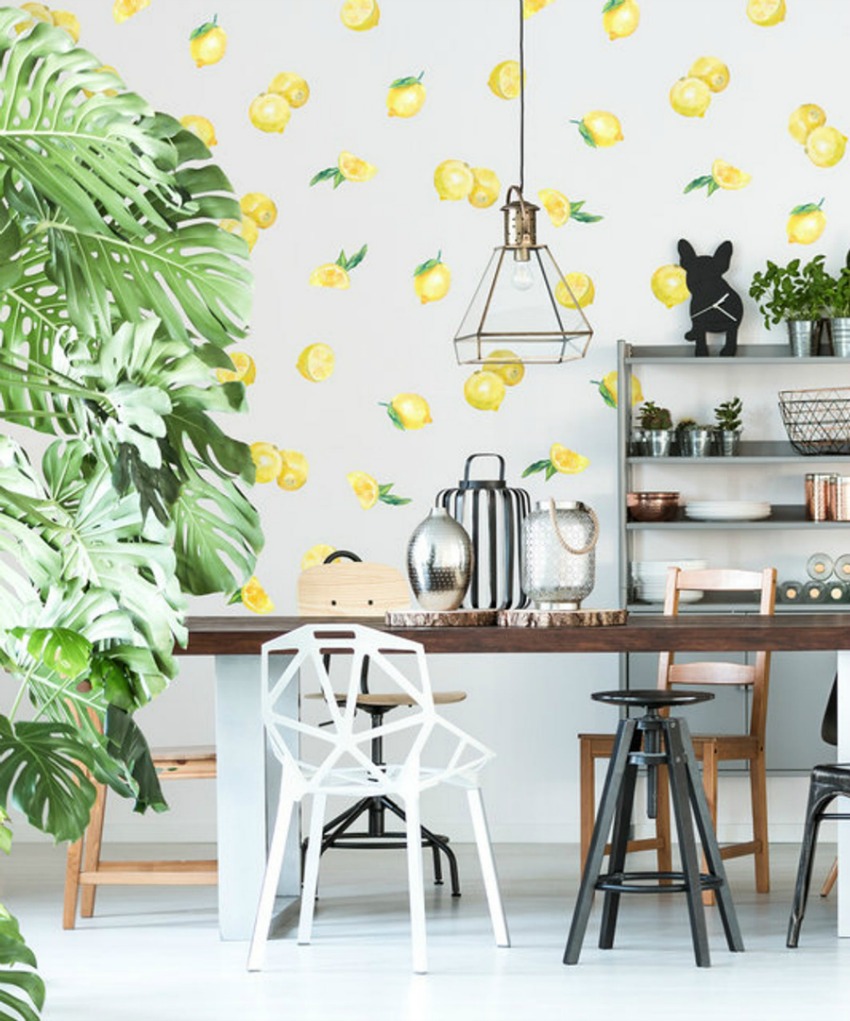
Probably a good idea anyway since now I have some extras just in case. I’m so happy with my choice of the tangerines but there are lots and lots of other great wall decal options. In case you missed my previous post where I shared my favorites, they include these lemon vinyl wall decals found {here}:
along with these:
Scroll and Click/Tap to Shop My Favorite Wall Decals:

You can also get a similar look with peel and stick wallpaper – check out my post on how to hang peel & stick wallpaper to check out the wallpaper we added to my girls’ room for more details!
Do Vinyl Wall Decals Work on All Walls?
Unfortunately it’s not recommended that you use wall decals on highly textured walls. I’ve had some people tell me they had success on mildly textured walls but the application process will be a bit more difficult. Also, don’t apply decals to freshly painted walls – allow for the paint to fully cure first. Always make sure that your walls are clean and free of lint, cobwebs, and any debris before applying them.
How Do You Apply Vinyl Wall Decals?
I’ve gotten a lot of questions about the steps to take in applying vinyl wall decals so I’m going to walk you through it step by step. Overall it’s easy and even the most novice DIYer should be able to do it! I tried applying them a few different ways and found this is the method that worked best for me:
Step 1: Cut Apart & Divide the Decals
Start by cutting apart the decals from the roll and dividing them into piles of decals that are similar to each other in size and design:
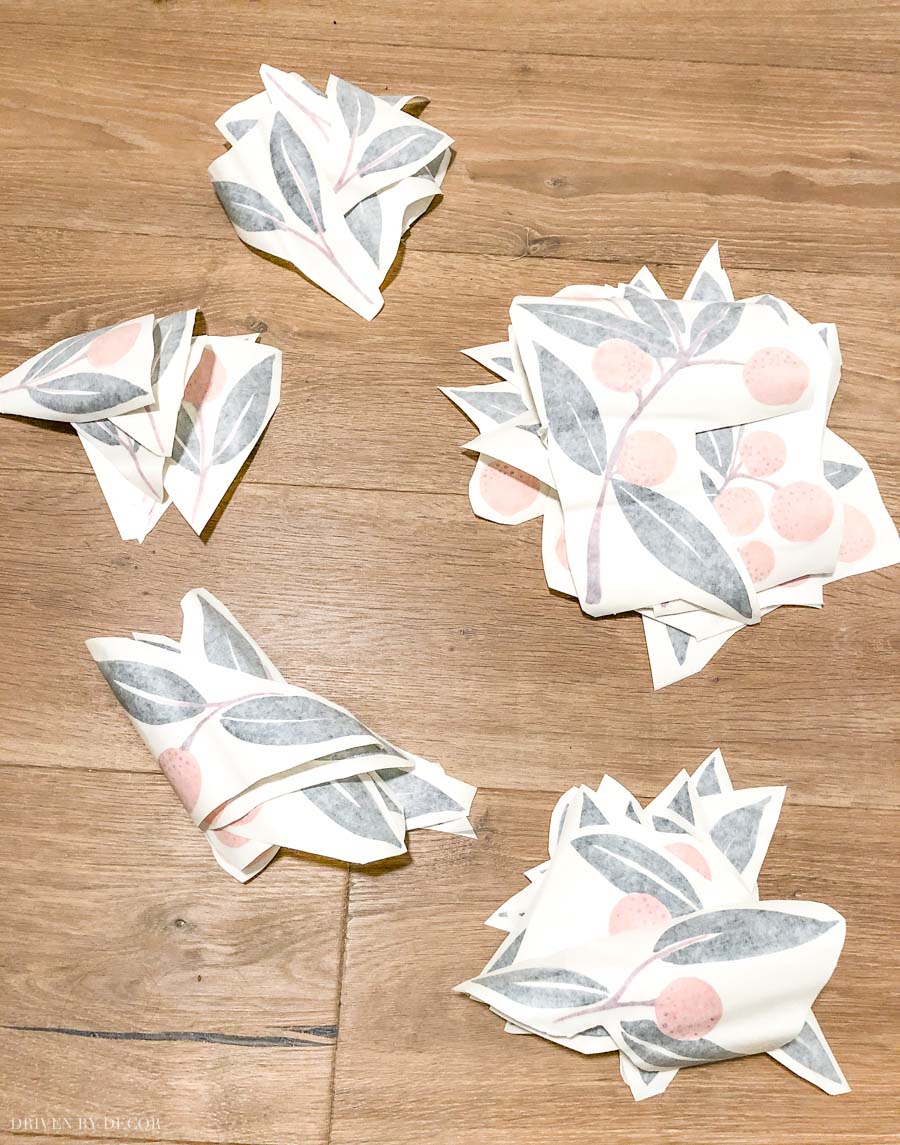
Doing this helped me space out the different designs by grabbing from the piles equally.
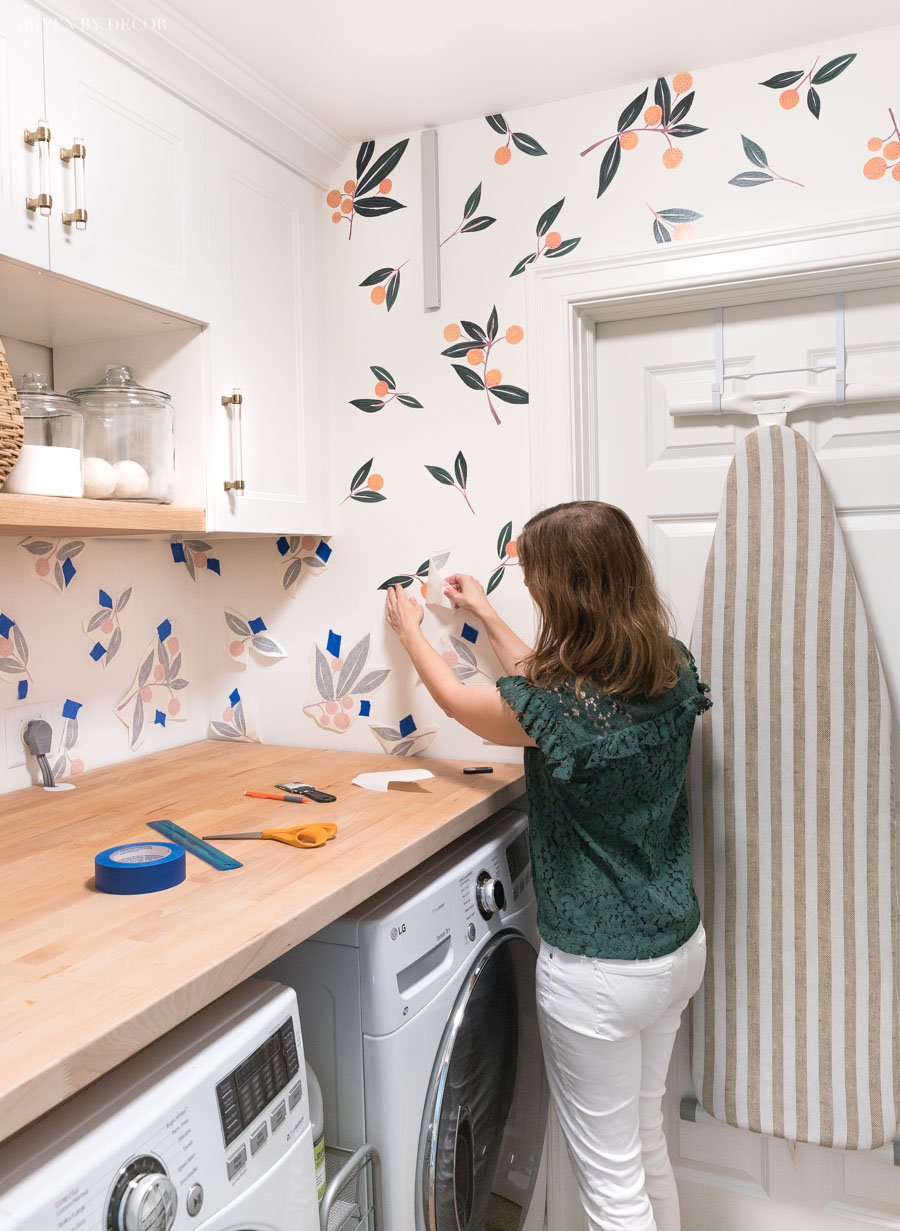
Step 2: Tape The Decals Up on the Wall
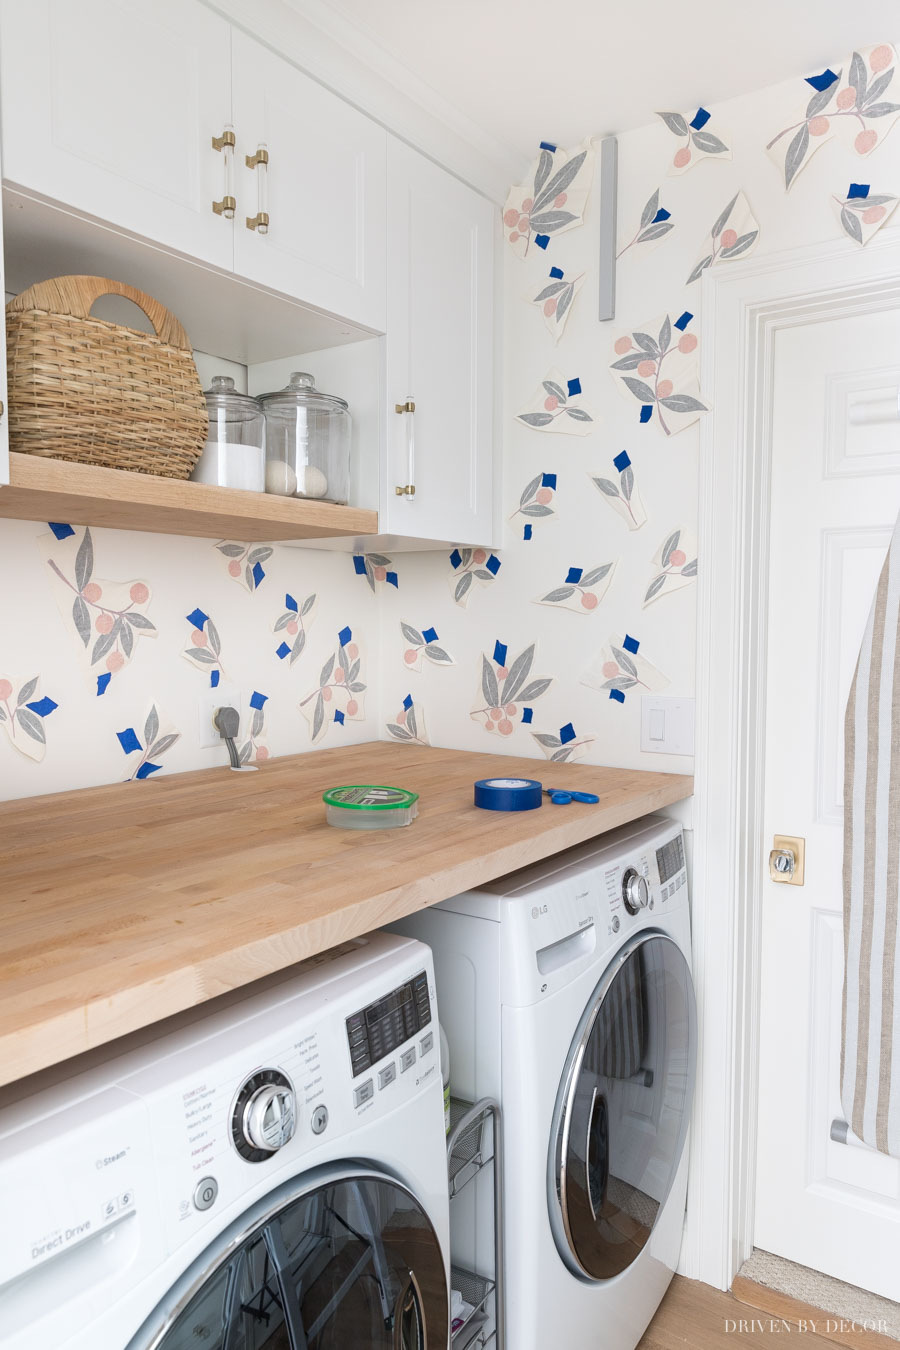
When I first started putting the decals up, I was using a tape measure to try and space them out equally but I soon realized that it was a whole lot faster and looked just as good (or maybe better) to just eyeball it. There’s no right or wrong distance apart to place the decals – it’s totally personal preference! For the decals that are identical to one another, position them in different directions from one another to make them look unique. I simply taped them up using painter’s tape like {this} that won’t damage the wall. Here’s how my space looked once all of the decals were taped up:
Notice that I didn’t keep all of the decals within the boundaries of the wall – some of the decals on the edges overlap the door molding, countertop, ceiling, and cabinets. You want to do this to get a more natural look – I’ll show you in a bit how to cut the decal to make it work. I recommend that you tape them up in the entire space you’re covering before starting to apply any of the decals and then take a step back to see how things look and move around / add decals until everything looks about right. If you feel like you don’t have a good eye, once you get them all taped up, have a friend come over and give their input!
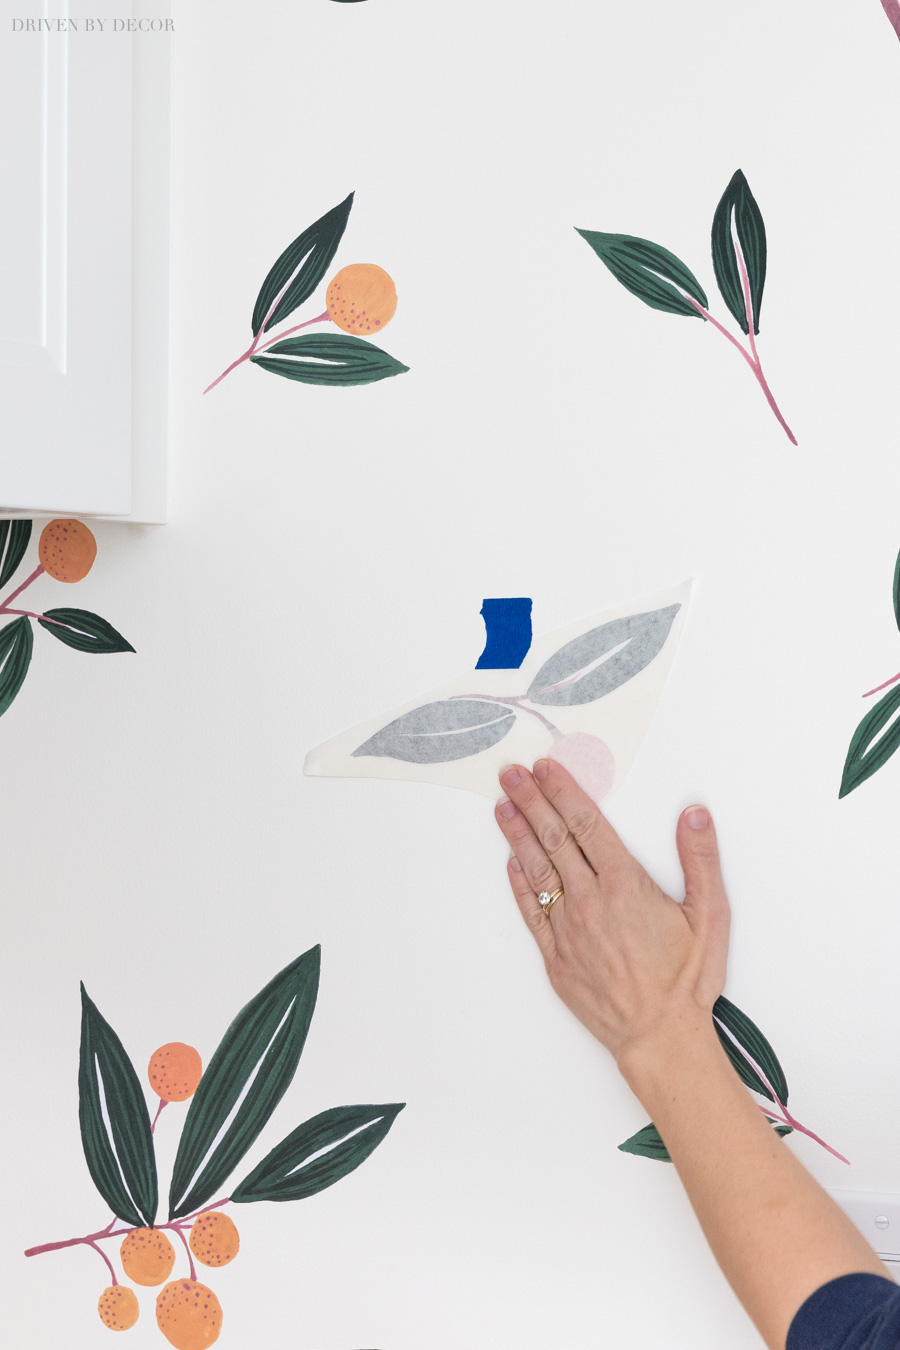
Step 3: Cut Off Part of the Decal’s Backing
To apply the decals, the best way to make sure they end up positioned in the exact spot you taped them is to first cut off about ⅓ of the decal’s backing on the end opposite the tape:
Step 4: Smooth the Decal into Place with Your Hand
Smooth the decal into place with your hand so that the portion with the backing cut off is stuck to the wall:
Step 5: Remove the Rest of the Decal’s Backing
Next pull the tape off the wall and gently fold the decal down and remove the remaining backing:

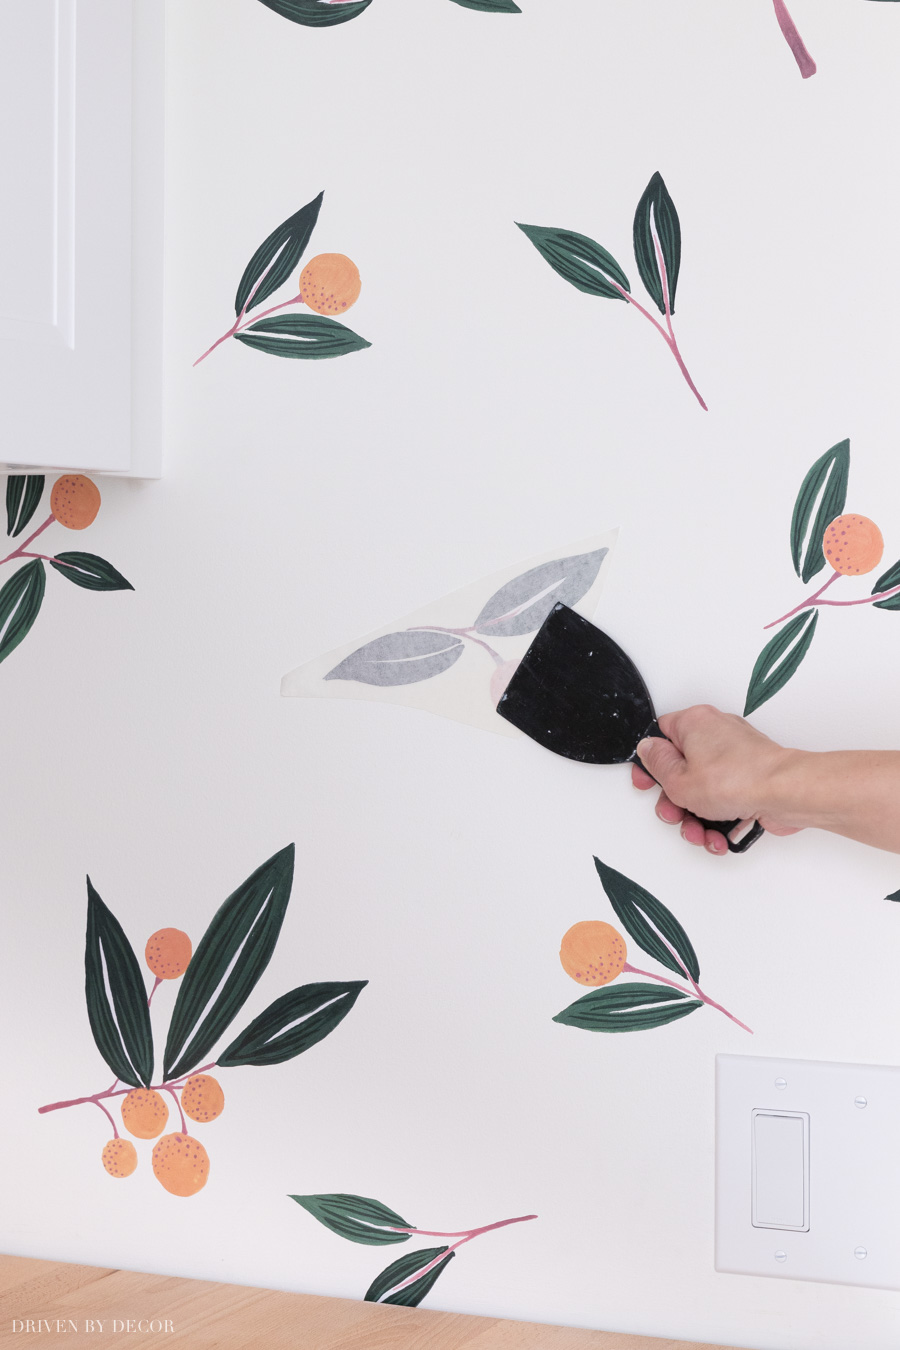
Step 6: Rub Over the Decal to Firmly Adhere it to the Wall
Now press the entire decal onto the wall, starting with the portion that’s already adhered to the wall and moving to the other end. Take something with a flat edge such as a plastic putty knife like {this} or a credit card and rub the entire front of the decal using a little bit of pressure so that it’s completely adhered:
Step 7: Remove the Paper on the Front
As the last step, slowly peel away the paper from the front of the decal:

And that’s it! Seven steps seems like a lot but all of those steps only take about one minute per decal – it goes quickly!
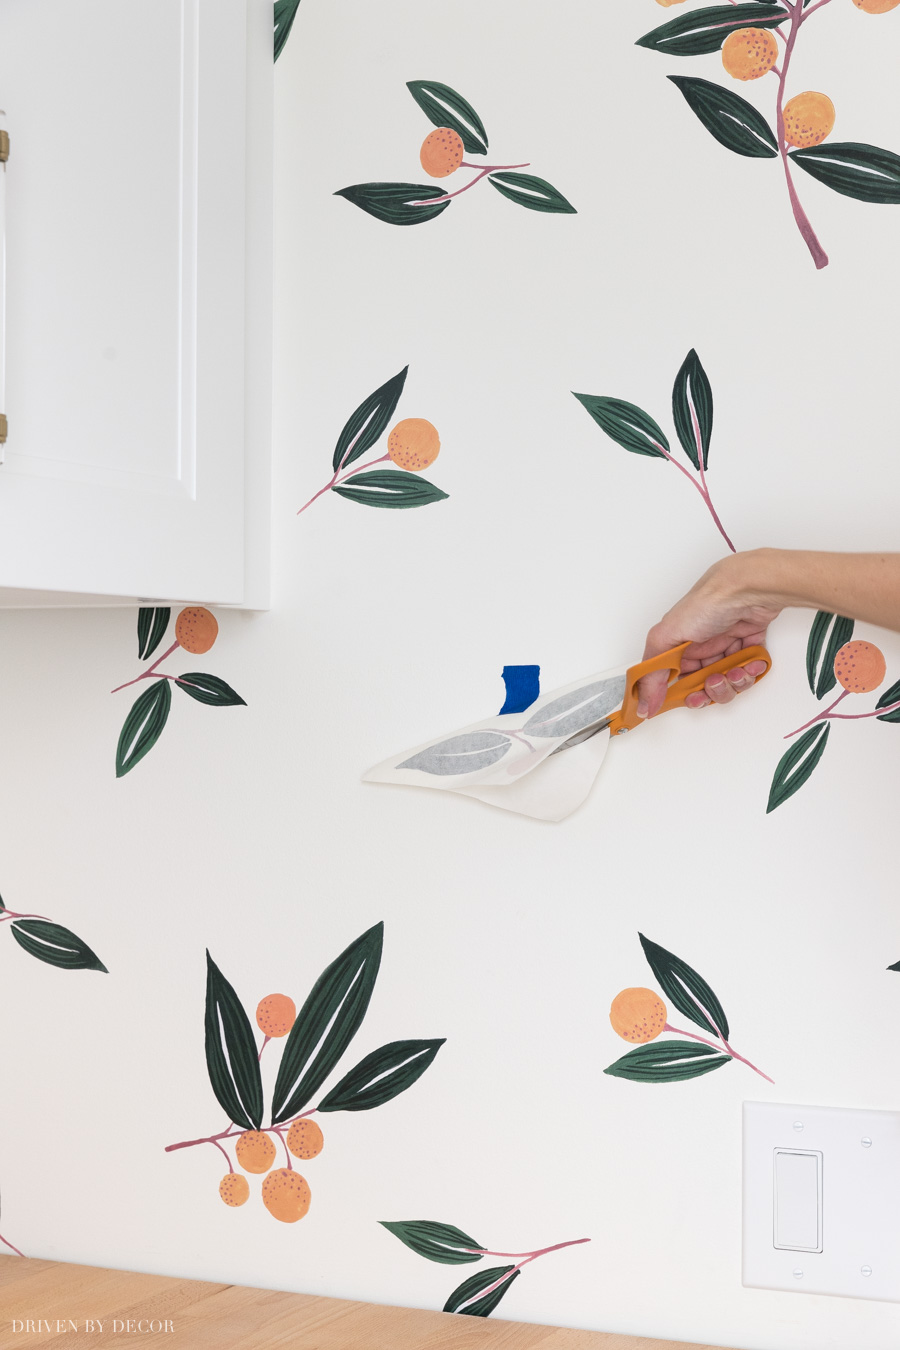
So what about the decals that “go off the wall” at the edge? I used a straight edge ruler to draw a line in pencil where the decal meets the edge:
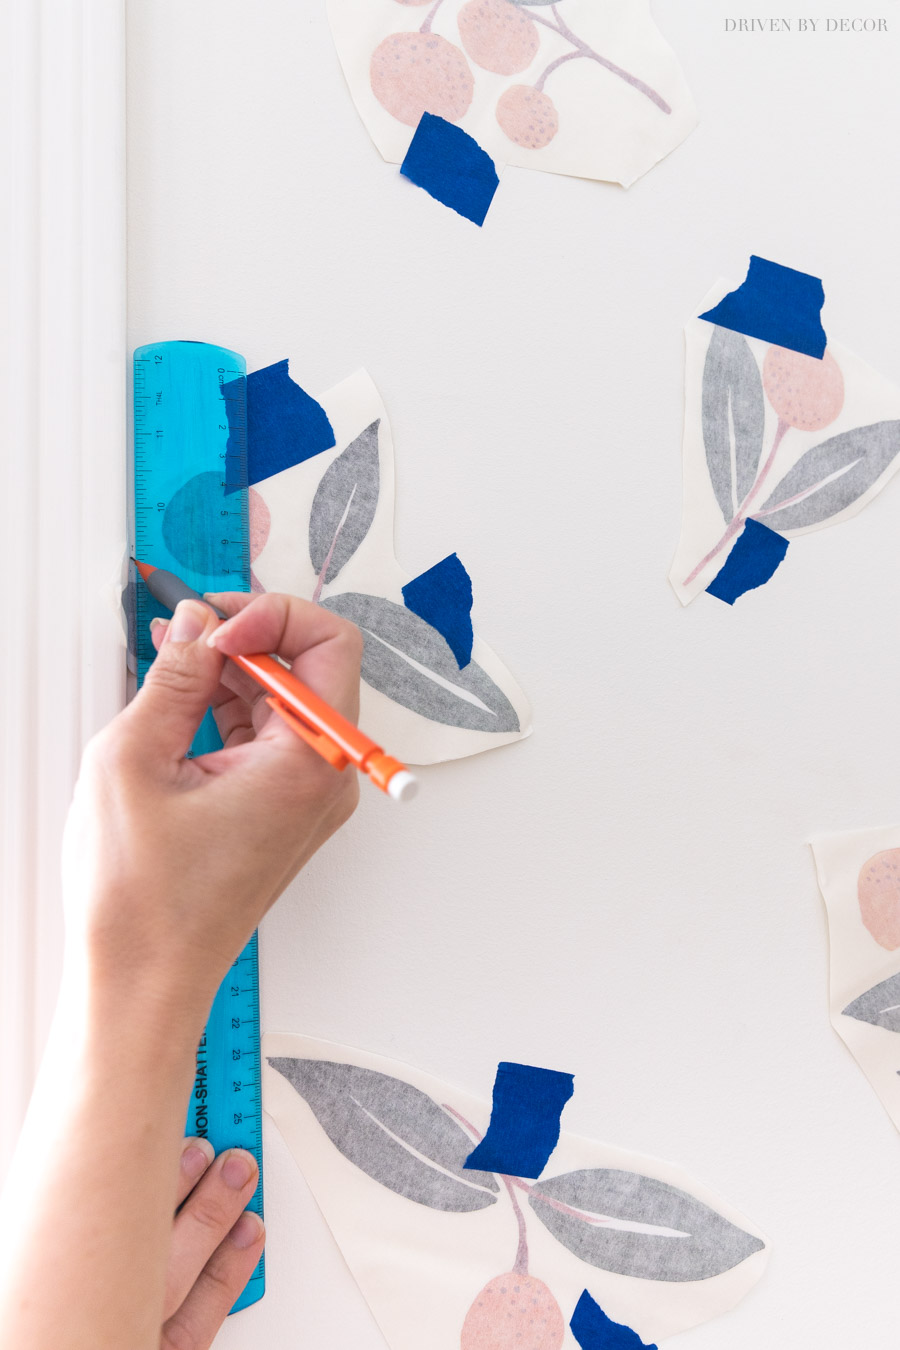
Then simply cut along that line – you can do this while your decal is in-place on the wall or you can take it off the wall to cut – just make sure to use painter’s tape to mark where it goes back up.
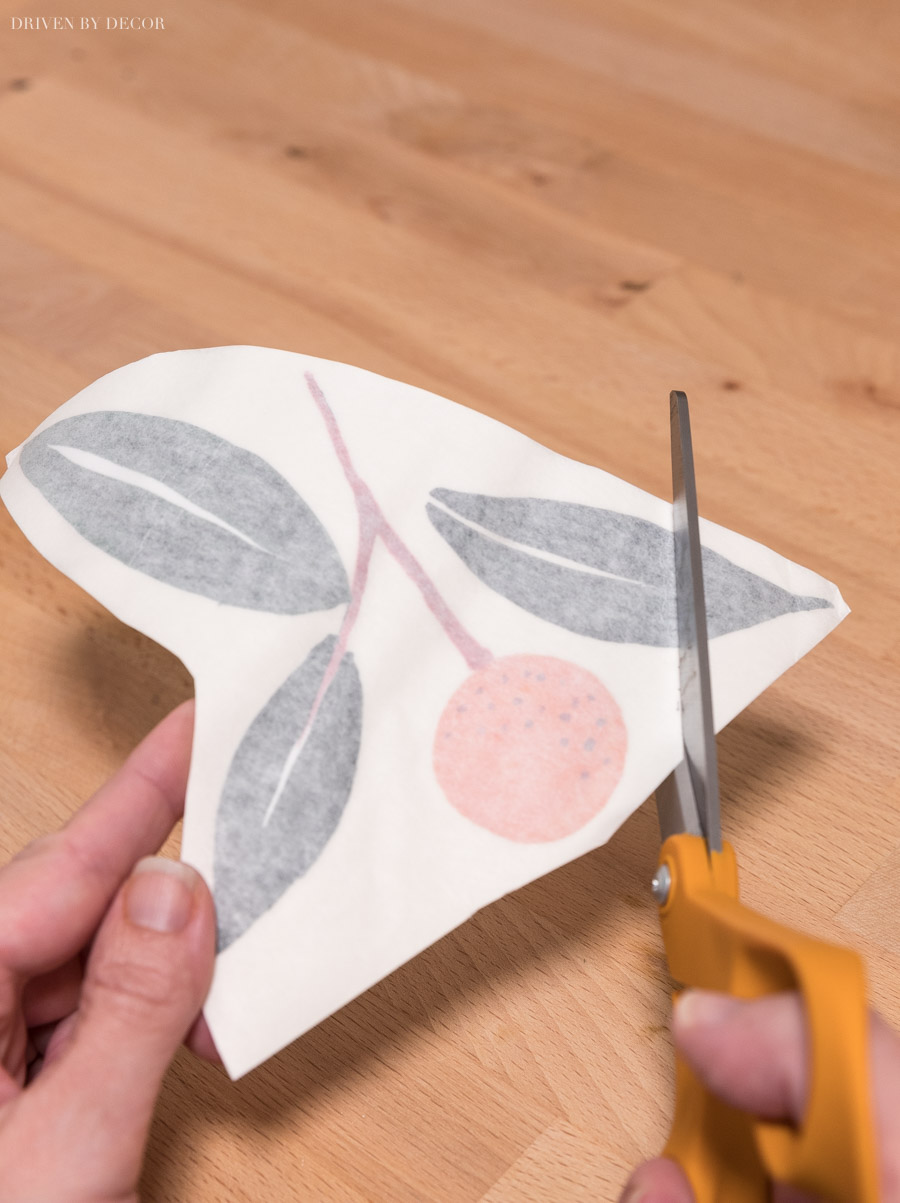
Then, as before, cut off about ⅓ of the backing from the side where you cut the edge of the decal:
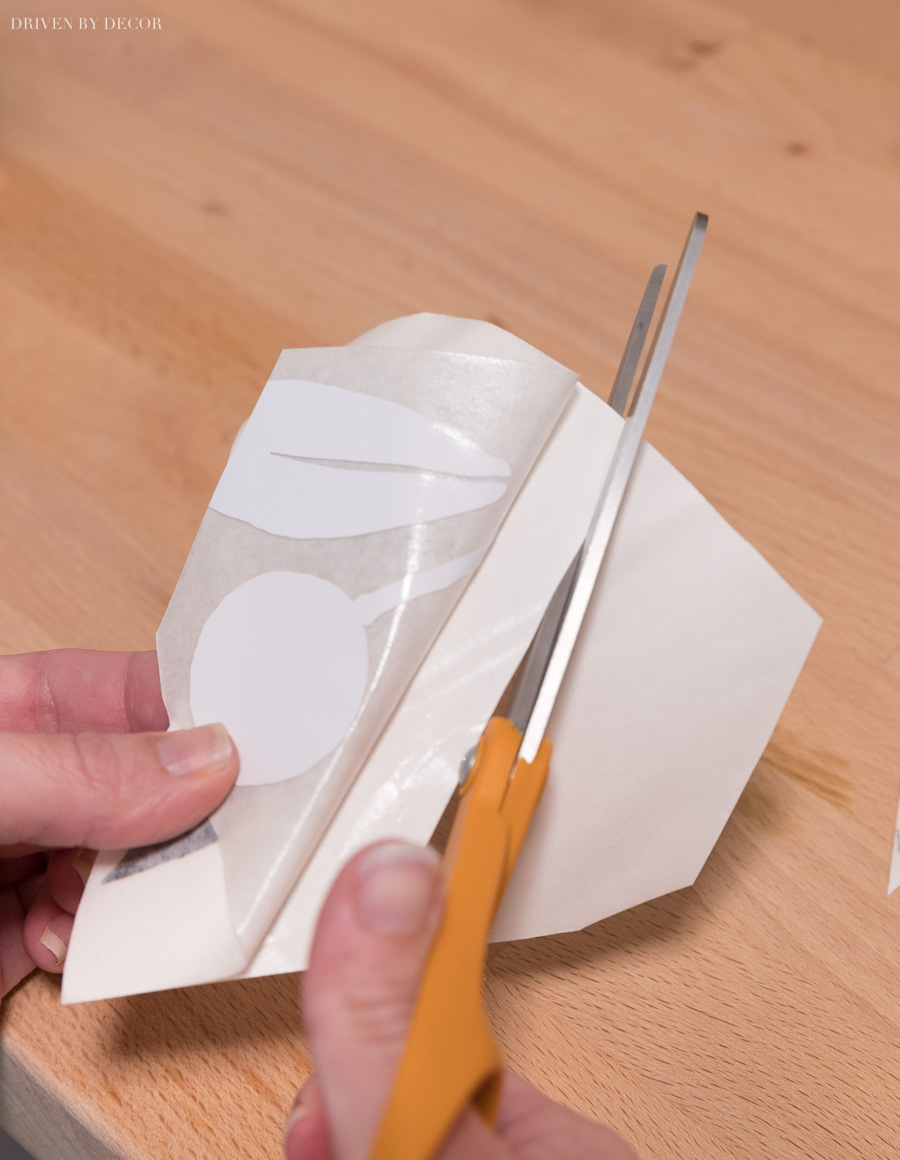
Stick the decal onto the wall at the spot you marked with painter tape and then proceed as before (peel off the rest of the backing, use a straight edge tool to press the decal down, and then remove the paper on the front). Be sure to keep the decal pieces that you cut off! When you’re done applying the decals to the wall, you’ll likely see a few spots at the edge of the wall that are a little barer than others – use the cut-off pieces along the edge in those spots! For example, see the little slice of leaf that I put above the light switch?
How to Remove Vinyl Wall Decals
The beauty of vinyl wall decals compared to wallpaper is that you can easily remove them! You should be able to remove them just like you would any kind of sticker, by peeling them off but if they’re being stubborn, you can use a hair dryer set on warm to warm up the decal, making it easier to remove. You typically can’t reuse vinyl decals once you’ve removed them but I had good luck reusing two of the decals I initially messed up when applying.
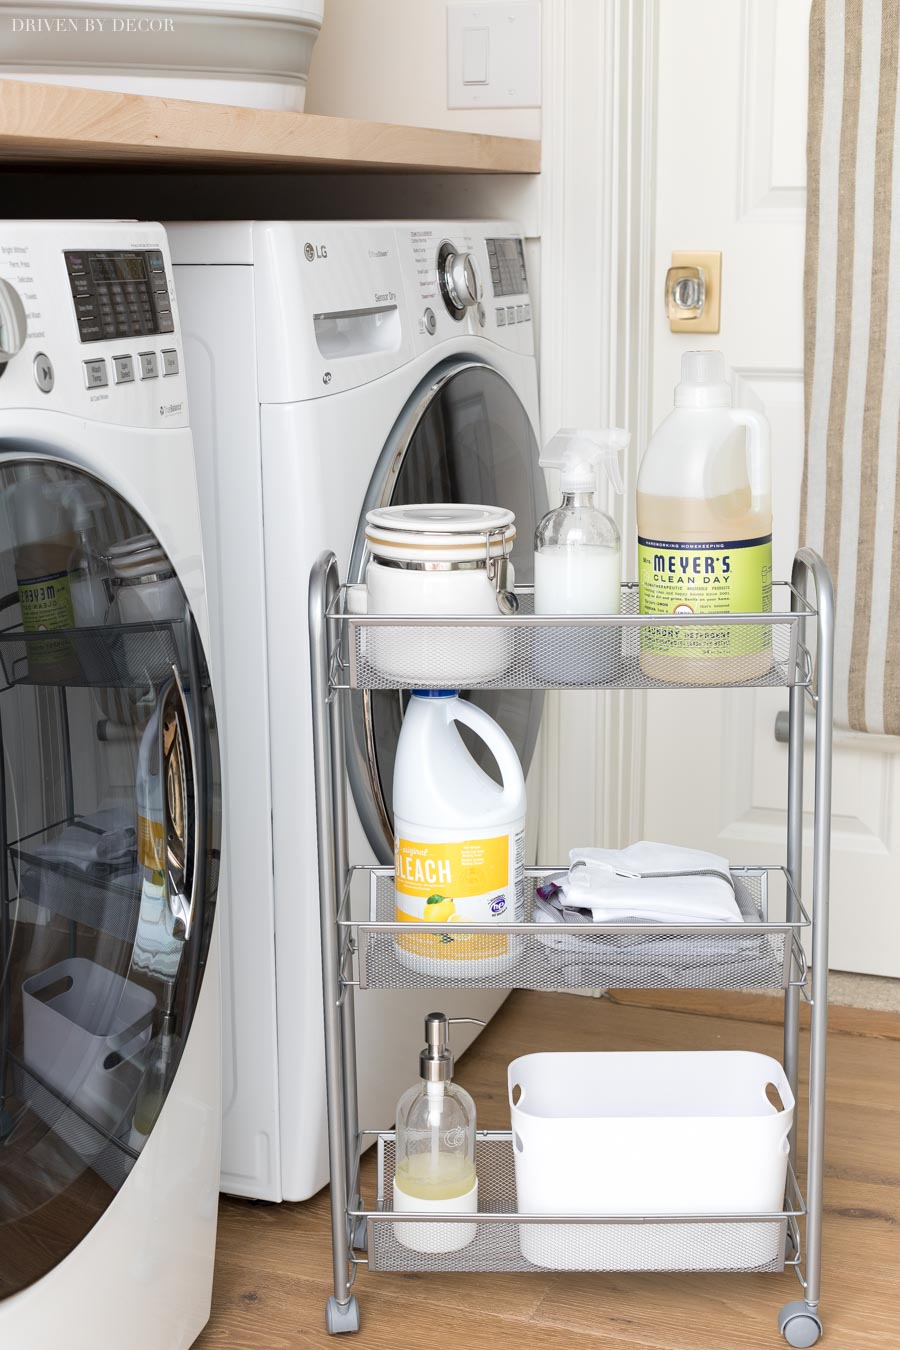
I hope that helped to answer some of the questions you all had when I shared this fun little project-in-process on Instagram! What do you think – is there a room in your home that you’re thinking could use some wall decals?? You could also think outside of the box and use vinyl wall decals in other spaces of your home besides your walls. See my post on wallpaper ideas – you could use vinyl wall decals in many of these same spots instead of wallpaper! Also check out my laundry room storage ideas for my favorite small space storage solutions for laundry rooms:


Walls: Benjamin Moore Cloud White (flat) with {these tangerine wall decals}
IKEA Laundry Room Cabinets | Countertop: IKEA Butcher Block | Lighting: Flush mount ceiling light
Accessories: Over the Door Ironing Board Hanger (similar) | Rolling cart between washer & dryer | Brass & Acrylic Cabinet pulls (Golden Champagne finish) | Glass Storage Jar


Sydney Haskell says
Our walls are a knock down finish or an orange peel look. All of the houses that were built ten years ago have this finish. Can decals be applied to this finish? Your laundry room looks adorable! I hate wall paper because it becomes old in my eyes and is so hard to put up and remove.
Mackenzie says
Hi, what is the trim color used in this space?
Amber Smith says
Hi,
Thank you so much for the inspiration. I love my laundry rooms decals. It is definitely the cutest room in the house now🤩🤩😍🤩🤩
Stephanie Atterbury says
Sooooo cute! Love this idea. Tfs
Erin says
Really cute, laundry room project! What color/sheen of paint did you use for this project? Can you see the decal edges?
Thanks
Kris Jarrett says
I used either flat or matte paint and no you really can’t see the decal edges unless you’re looking at it extremely close up!
Diana says
This looks amazing!! I know you said it was difficult to determine how many to order and you ended up purchasing another pack. Would you recommend on getting more than I “think” I will need?
Pamela Rangel says
Hi Kris!
What are the exact cabinets you used above your washer and dryer?
Thanks! Pamela
Nicole says
Nice article! Really helped a lot.
Karen B. says
Kris,
Like your powder room, you painted with decals, I watch in wonder and admiration at the things you can do in that department. I’m certain I wouldn’t manage…I’d have ordered the wrong number in advance and then they’d be upside down! Hahaha. The laundry room is definitely cheerful and I love it.
Karen
Kris Jarrett says
Ha – I doubt that Karen, you’re always on the ball! Thanks for your sweet words about our laundry room!