Looking for tips on how to make a bed layer by layer? I’ve broken it down to 8 simple steps!
Coming from a girl who loves fabrics and bedding, it’s no surprise that my idea of a perfect bed is one that’s cozy and beautiful but just as importantly, one that’s designed to help me get a restful night’s sleep. I love a layered bed both because it has that hotel-like look and because you can pull layers on or off depending on if you’re hot or cold. Starting with a bare mattress and working our way through to those final decorative pillows, I sharing how to make a beautiful bed in 8 simple steps! (post includes affiliate links – see my full disclosure statement {here}).
1. Make Your Bed Skirt the Perfect Length
If you have a bed with a bed skirt, start by making your bed skirt the perfect length – it should just barely graze the floor. The key is to use upholstery twist pins like {these} that secure your bed skirt to the box-spring at the exact length needed. The best part is that they hold your bed skirt in place through sheet changes too so don’t have to keep readjusting it:
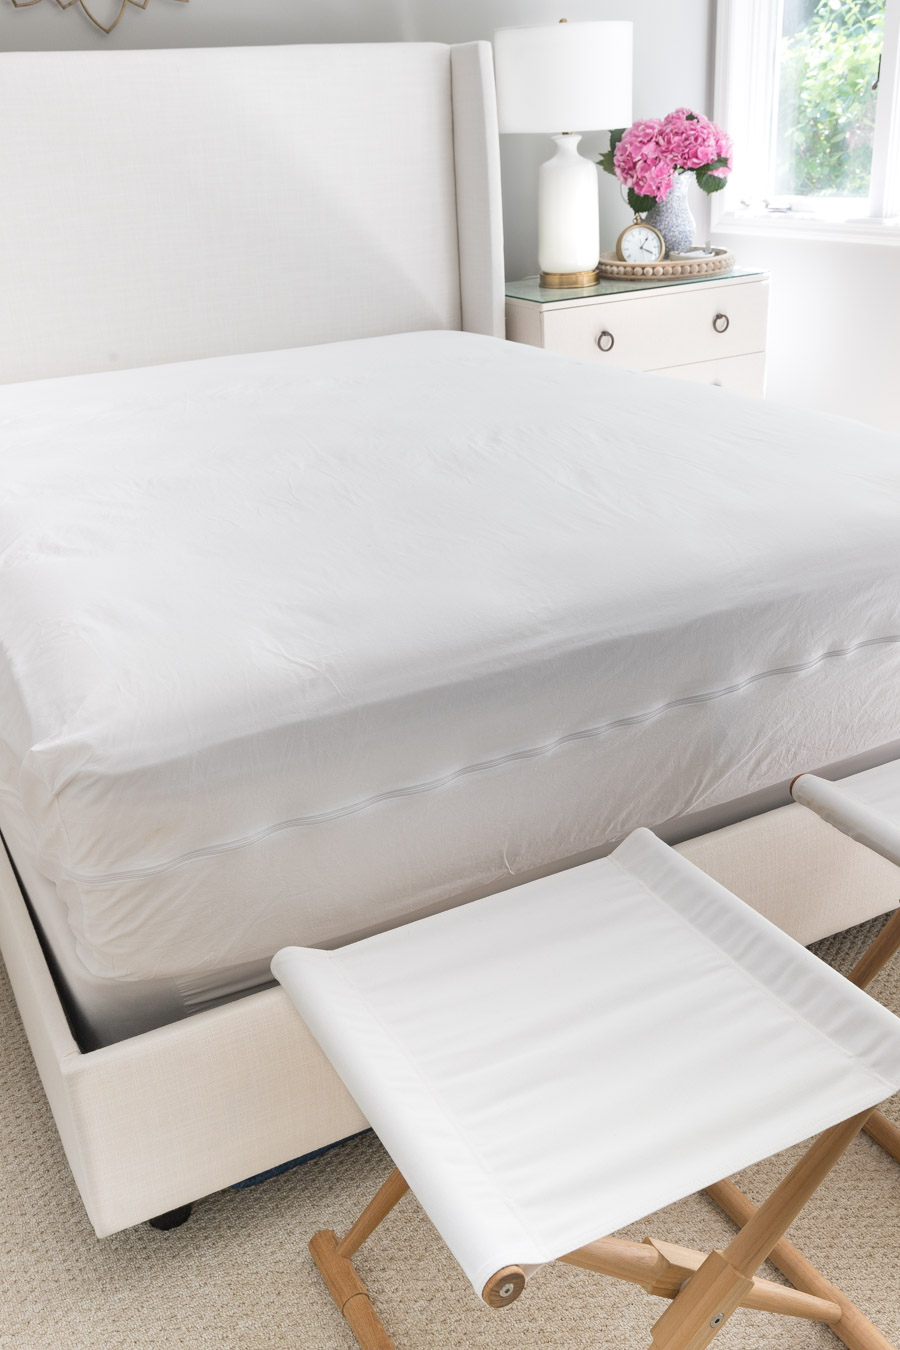
2. Protect Your Mattress
Before adding your bedding, be sure to fully encase your mattress in a zippered mattress protector such as {this one}. Unprotected mattresses can actually double in weight after ten years due to the accumulation of millions of dust mites – so gross! A mattress protector that not only protects from dust mites, pollen, and other household allergens but is also waterproof (a must with kids!) is key.
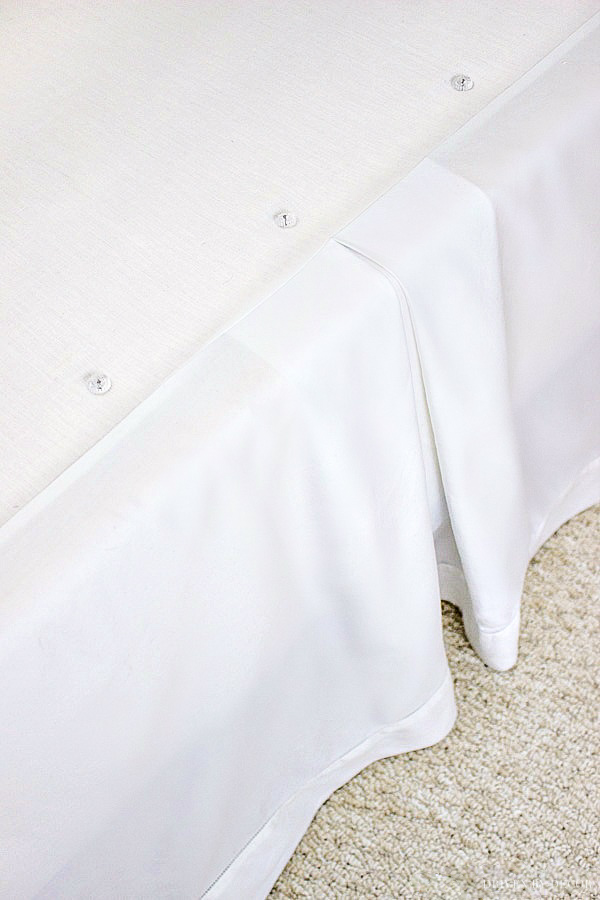
3. Put Your Flat Sheet on Upside Down
Next come your fitted and flat sheets. I love the simple, luxurious look of white sheets but patterned sheets are a fun option for adding color and interest to your bed. Make your bed with the finished side of your flat sheet face down so that when you fold back the top foot or so of your sheet (that step’s to come), you see the pretty edging or pattern. Here’s an example with a patterned sheet where you can more easily see what I’m talking about:
4. Add a Quilt or Coverlet
Next layer on a quilt or coverlet (mine is {this go-to quilt in the flax color} – I also love {this quilt}). Fold the top foot of it AND your flat sheet back toward the end of the bed. Tuck the sides in under your mattress:
5. Layer on a Folded Duvet or Comforter
Adding a duvet or comforter is the next step and it’s a key one because it’s what will make your bed look plush and inviting! There are a couple of ways you can do this – you can fold it in thirds the foot of the bed like this:
or you can drape the duvet over the entire foot of the bed and just fold down the top like this:
One final option is to switch the layering of the quilt and duvet – place the duvet over the whole bed followed by the quilt and fold them both back a foot from the top:
I love fluffy duvet inserts that make a bed look cozy and inviting. Fluffy doesn’t have to mean hot either! Get all of my tips for buying the best duvet for you in my post on the best fluffy duvet inserts!
6. Add Sleeping Pillows
Put zippered pillow protectors like {these} on your sleeping pillows: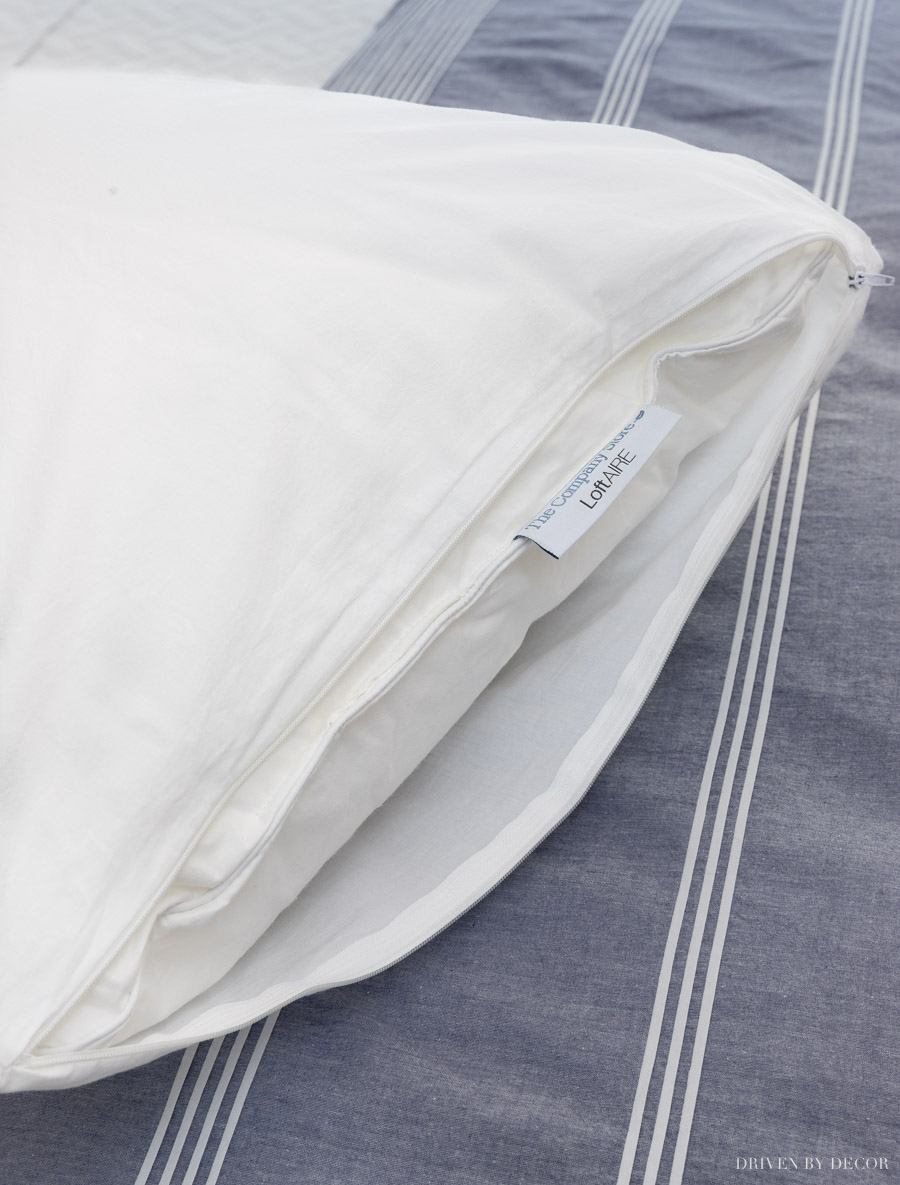
followed by decorative pillow covers. You can either stand the pillows along the headboard of the bed or stack them lying down like this:
Want to save this post?
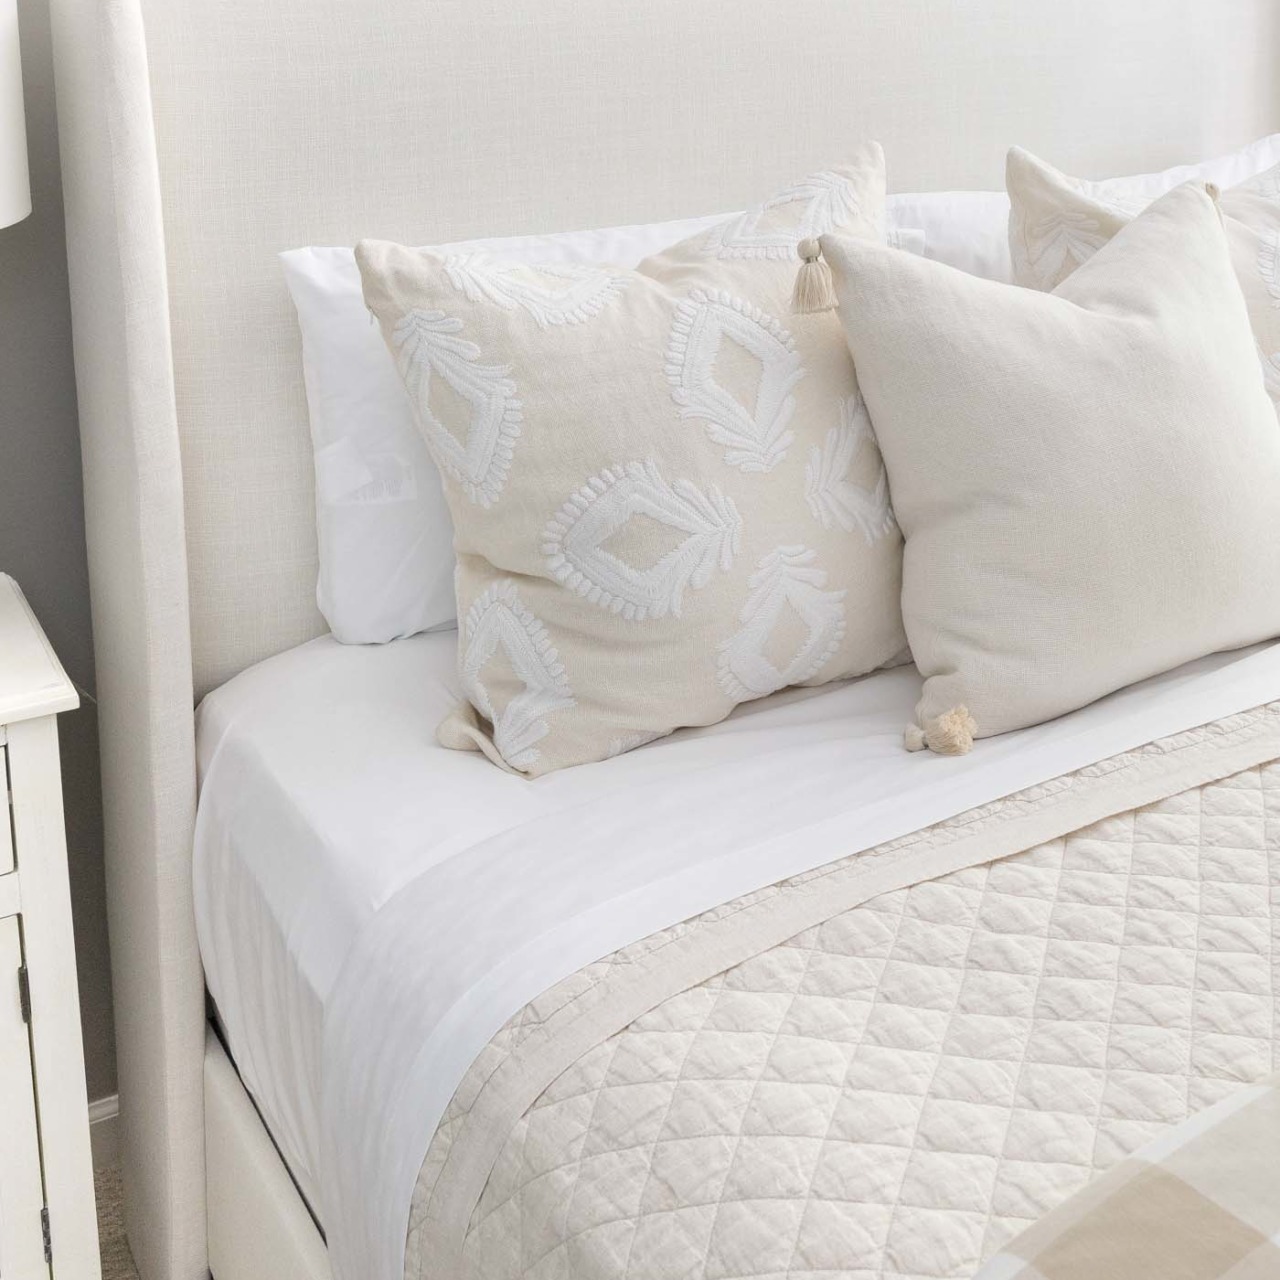
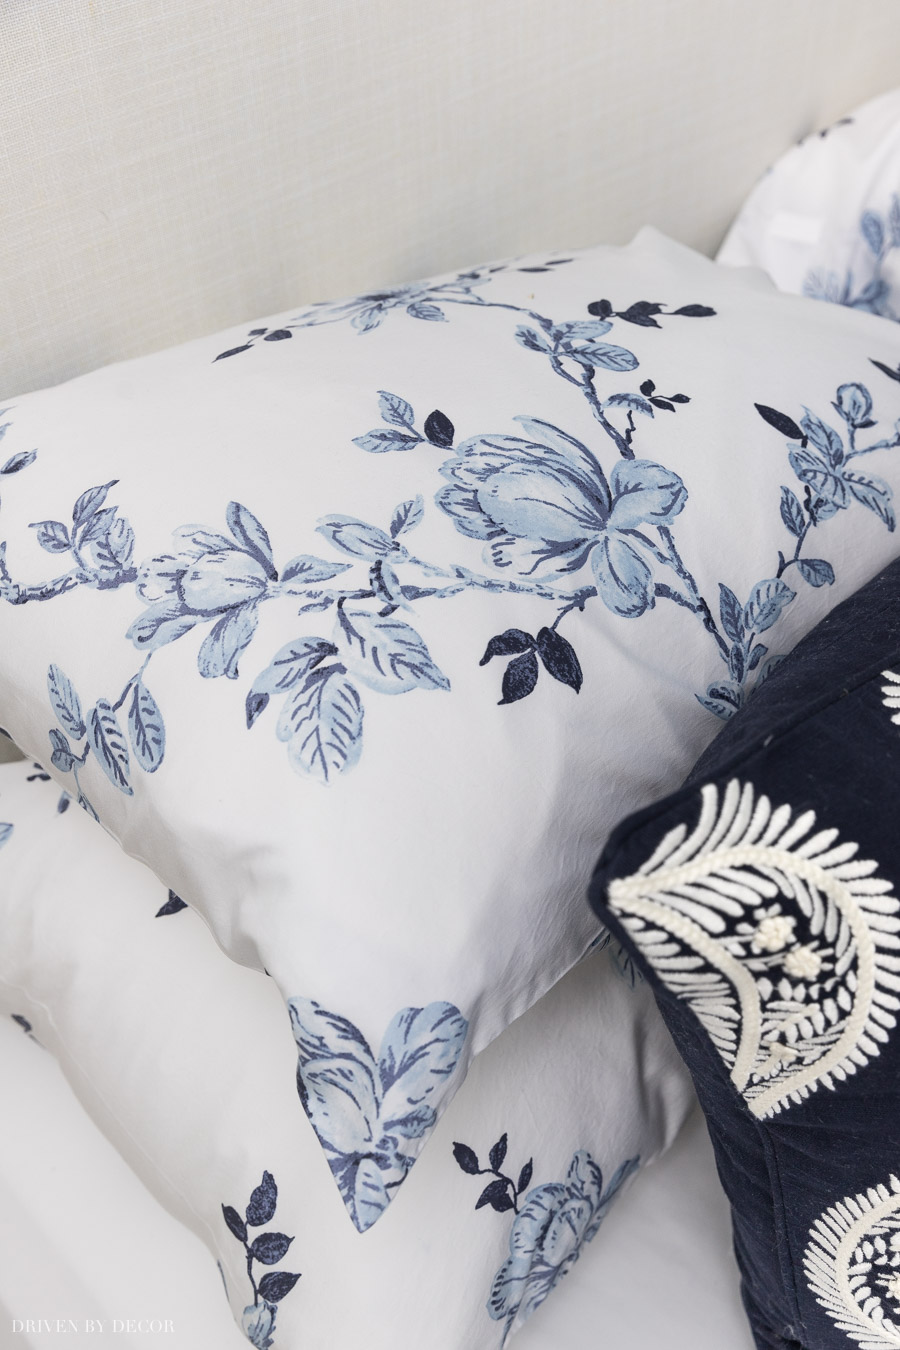
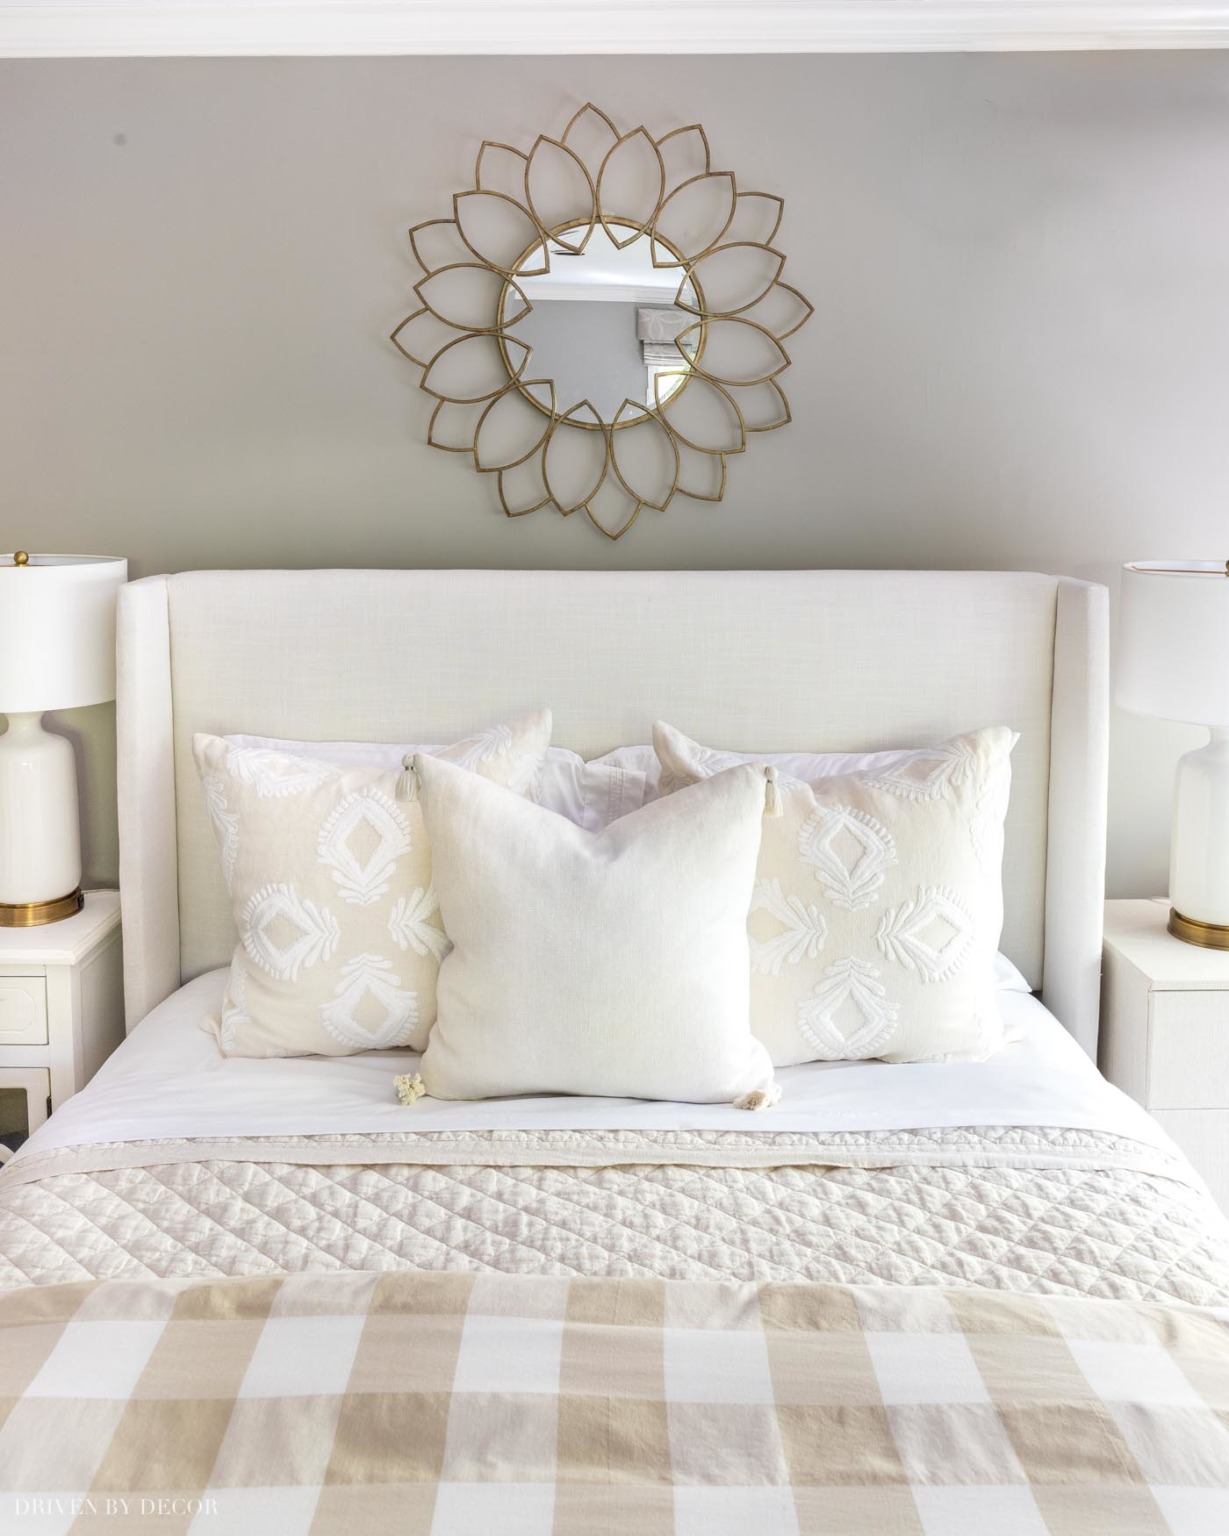
7. Layer Decorative Shams & Pillows in Front
This is where you can add a lot of personality to your space – layer decorative shams and/or pillows in front of your sleeping pillows. Choosing a variety of neutral shades and textures creates a restful, luxurious feel while more colorful patterned pillows are a great way to make your space more vibrant. For a queen bed, you can do anything from a simple arrangement of two 24″ decorative pillows with a 20″ decorative pillow centered between them:
to a pair of Euro shams, followed by a pair of 24″ decorative pillows, followed by a single centered lumbar pillow:

If you want more pillow arrangement ideas, check out my post on how to arrange pillows on a queen bed.
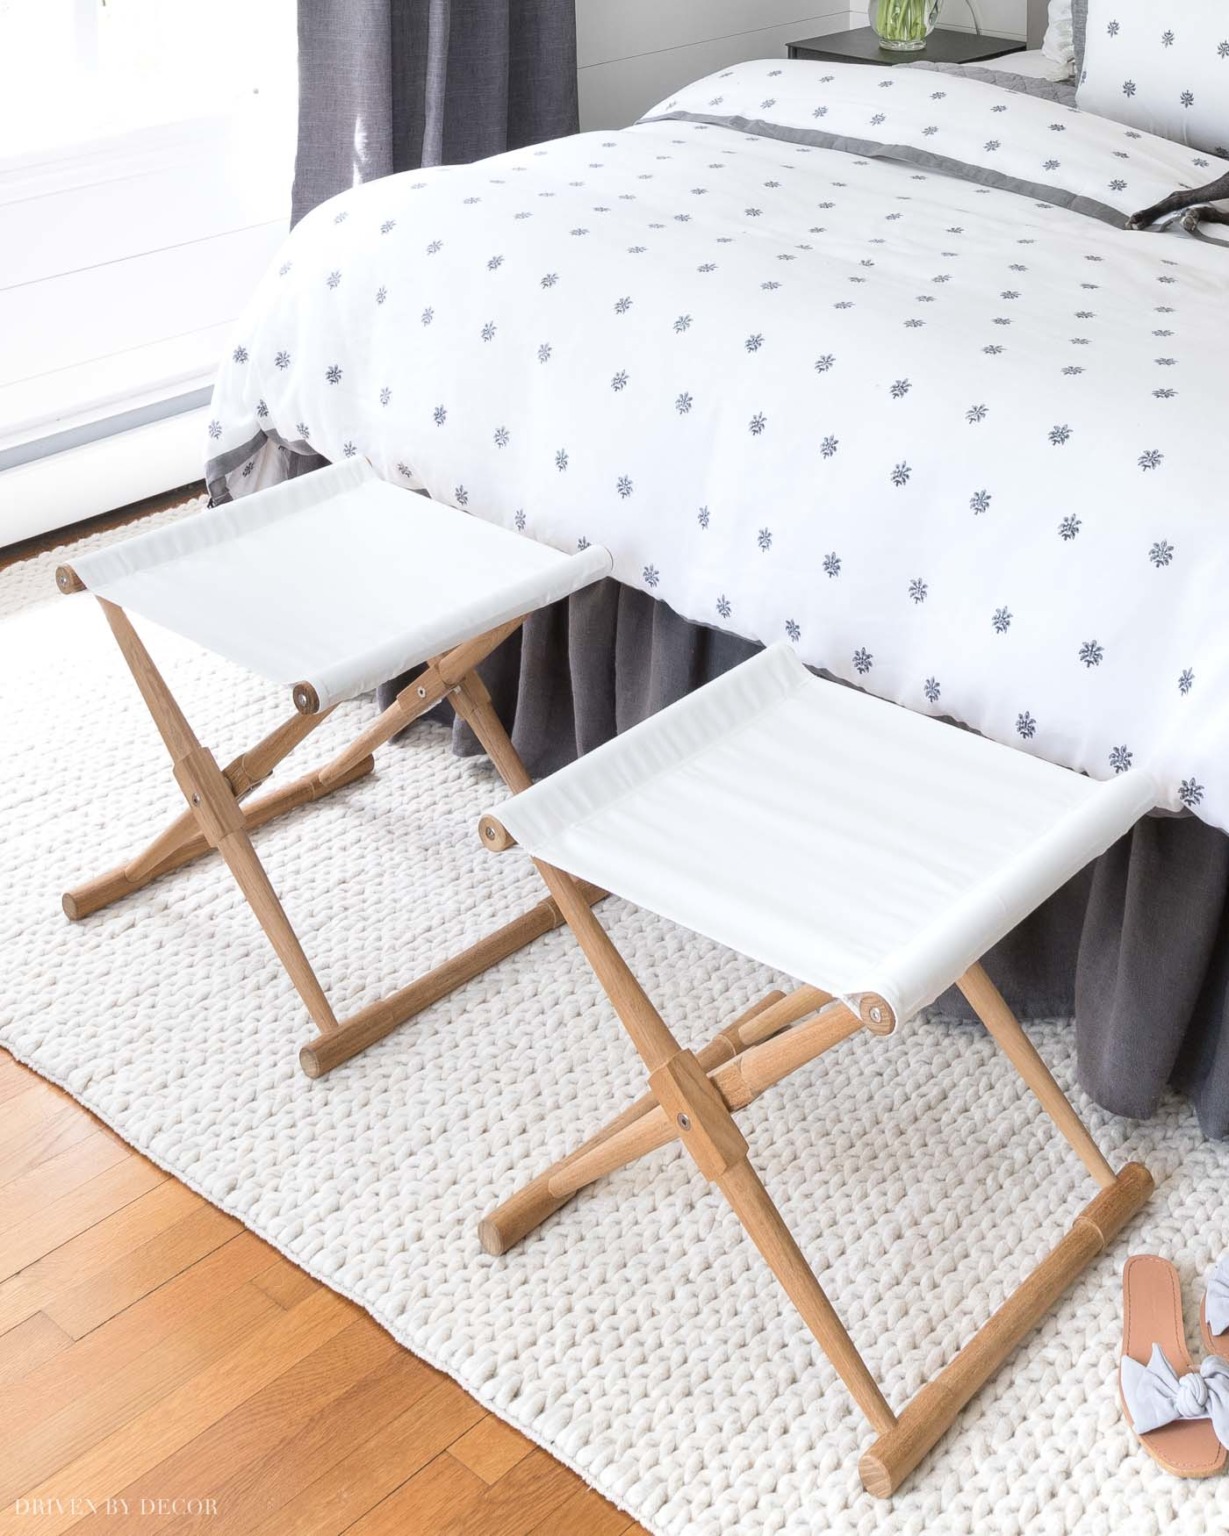
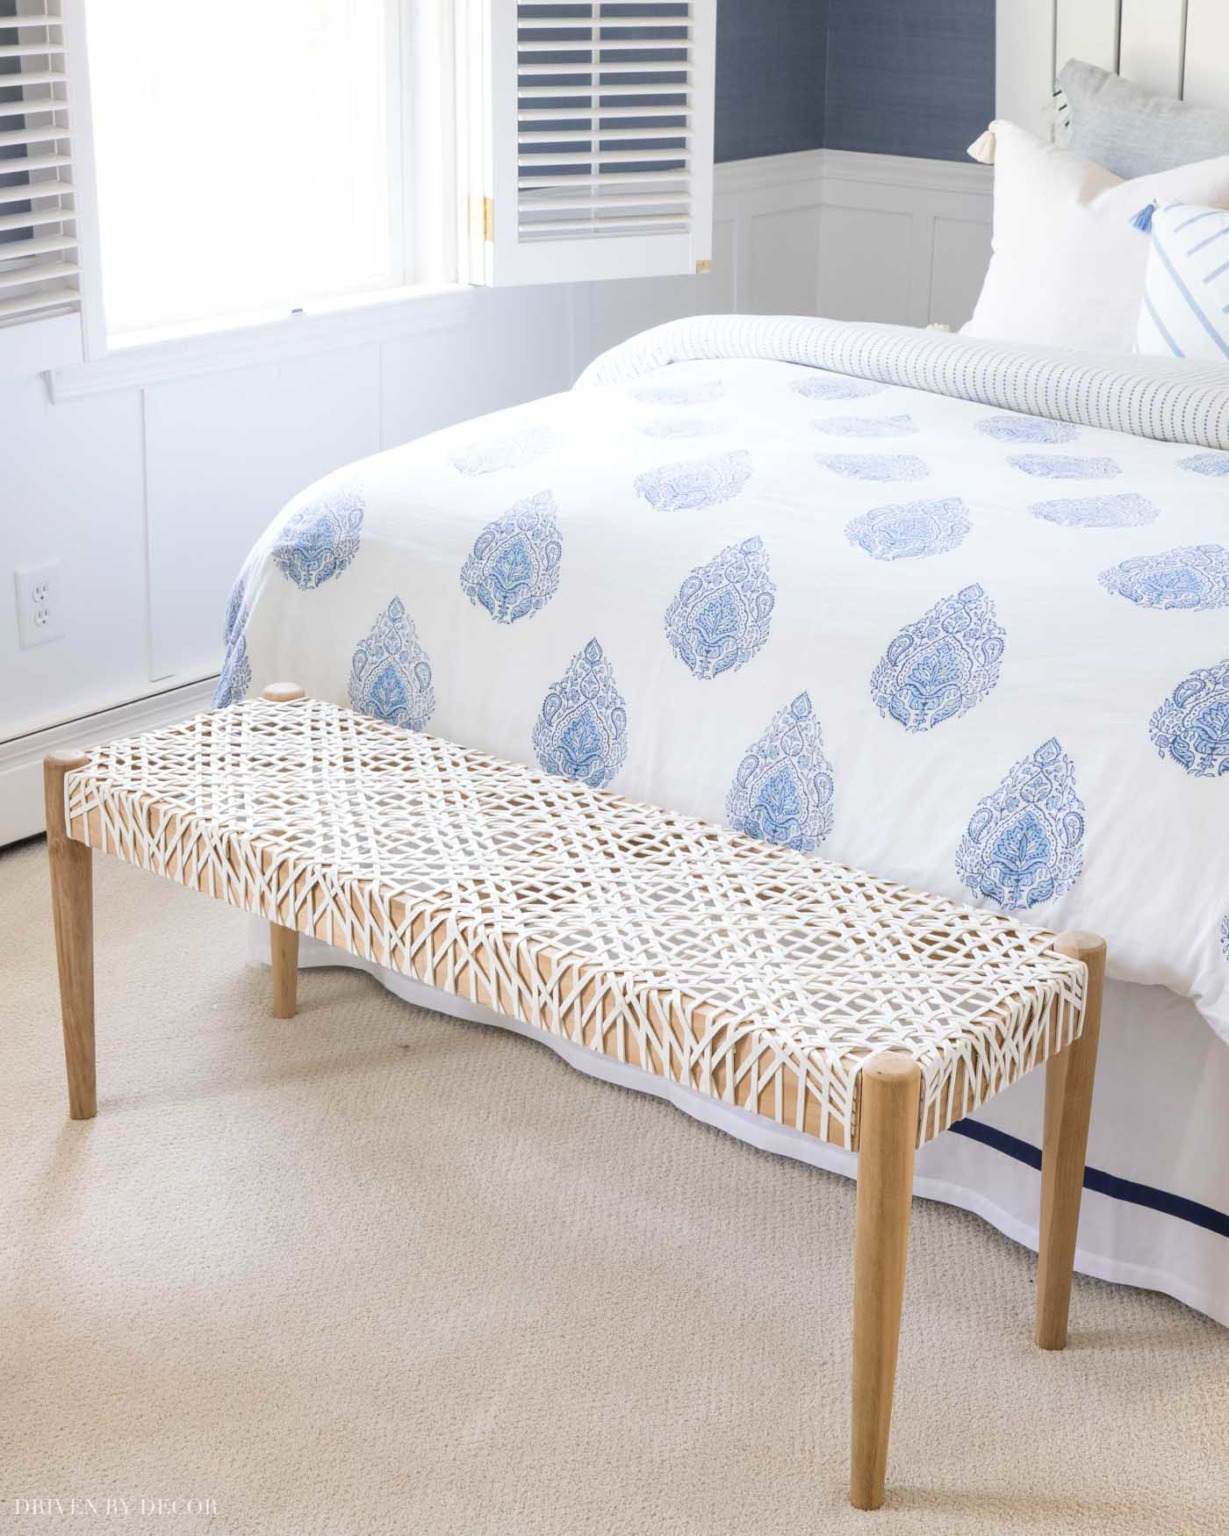
8. Add End-of-Bed Bench or Stools
The last step doesn’t really have to do with making the bed BUT there’s something about adding a bench or stools to the foot of your bed that makes everything come together. For example, I have this pair of stools in our master bedroom (the exact ones are no longer available but {these stools} are similar:
and {this woven bench} at the foot of the bed in my daughter’s room:
You can see my other favorites in my post on end of bed benches.
Now all that’s left is to slip into your favorite pj’s and cozy into your fabulous bed with a good book or the remote and a favorite movie. Warning: once you’ve created the perfect bed, you may never want to leave it… 🙂
I hope you found this post helpful! If you’re interested in sources for the spaces I shared, I’ve linked everything below:

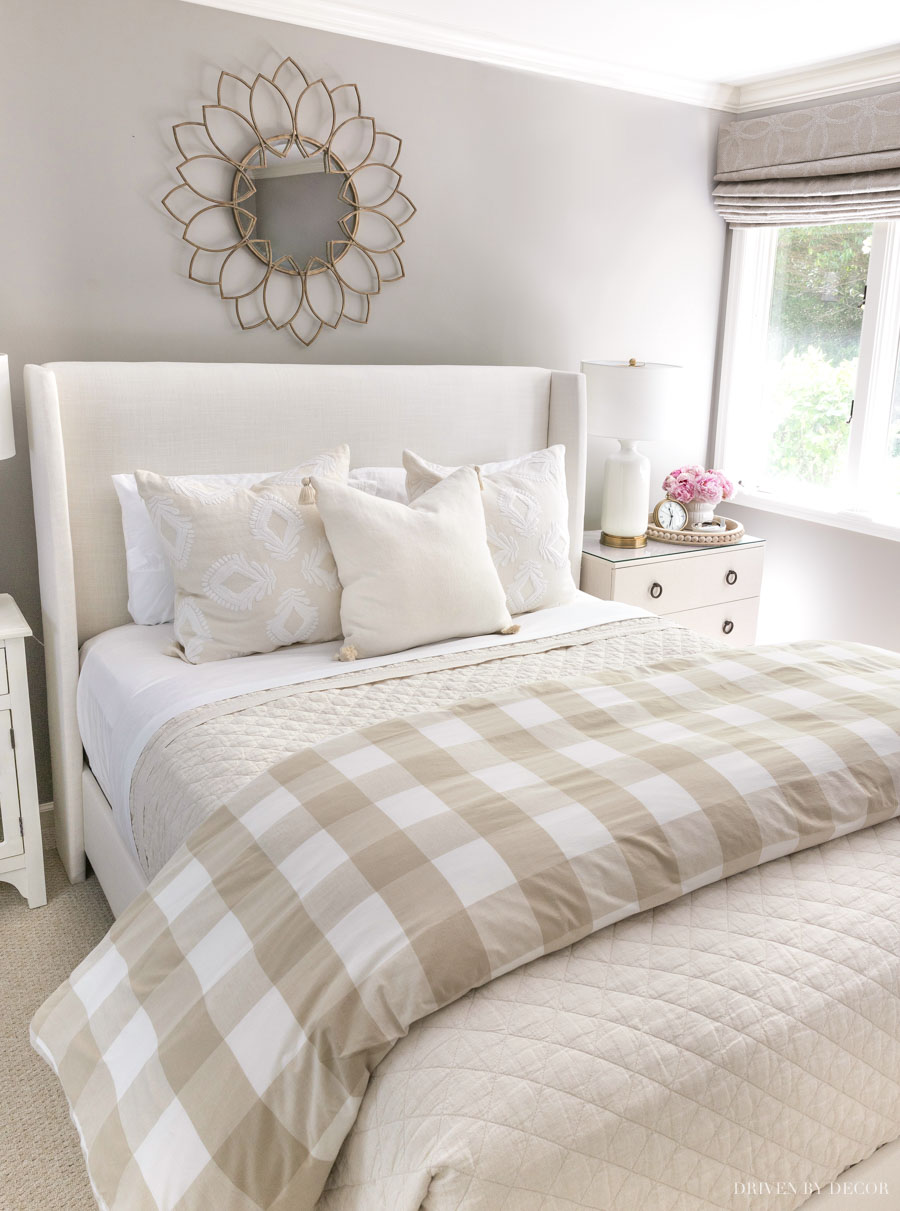
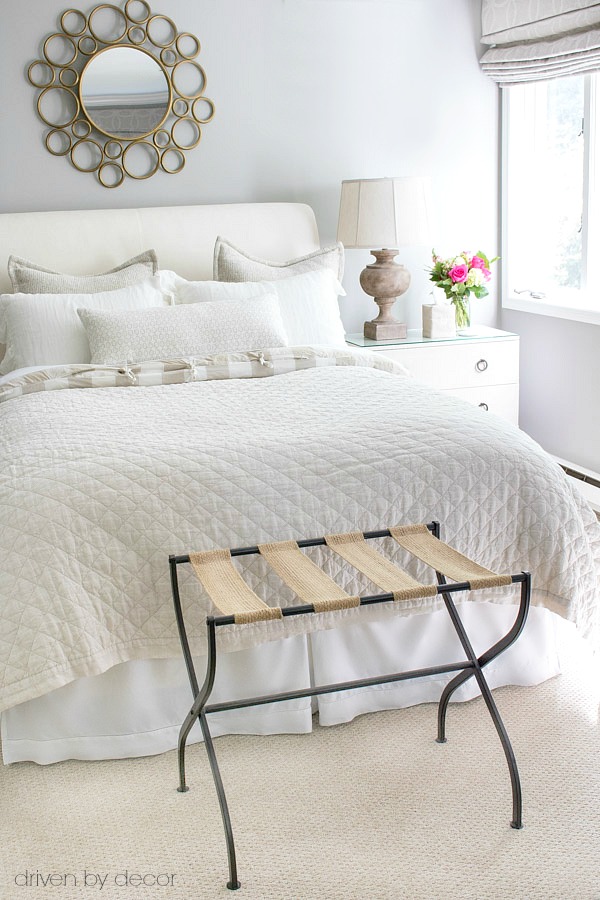
Neutral Guest Bedroom
Paint color: Pratt & Lambert’s Ever Classic | Sources: Mirror over Bed | Upholstered Wingback Bed (fabric is Zuma White) | Quilt (color is flax) | White and beige check duvet (similar)| 24″ Embroidered Medallion Pillow covers | Bedside Lamps (similar) | Round Wood Beaded Tray | Clock
Blue & white floral bedding shown in this same space is no longer available
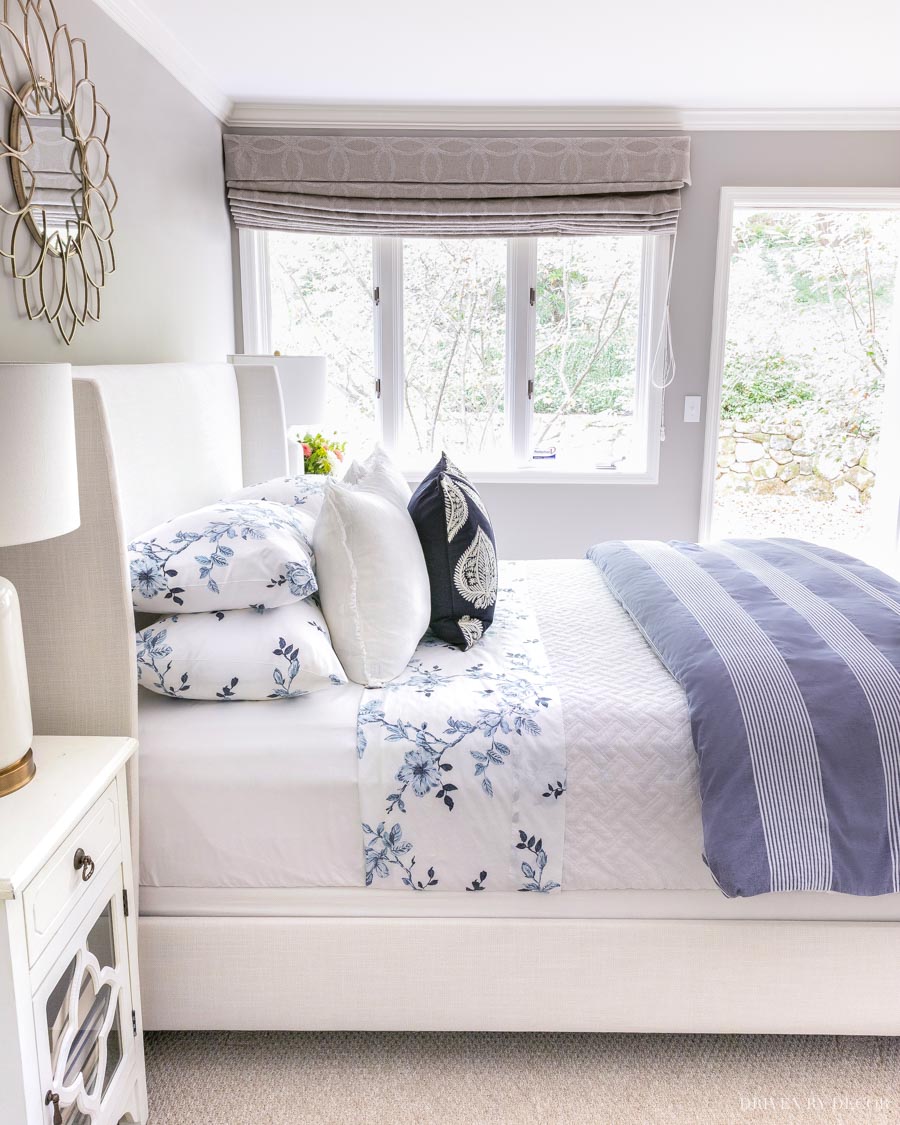
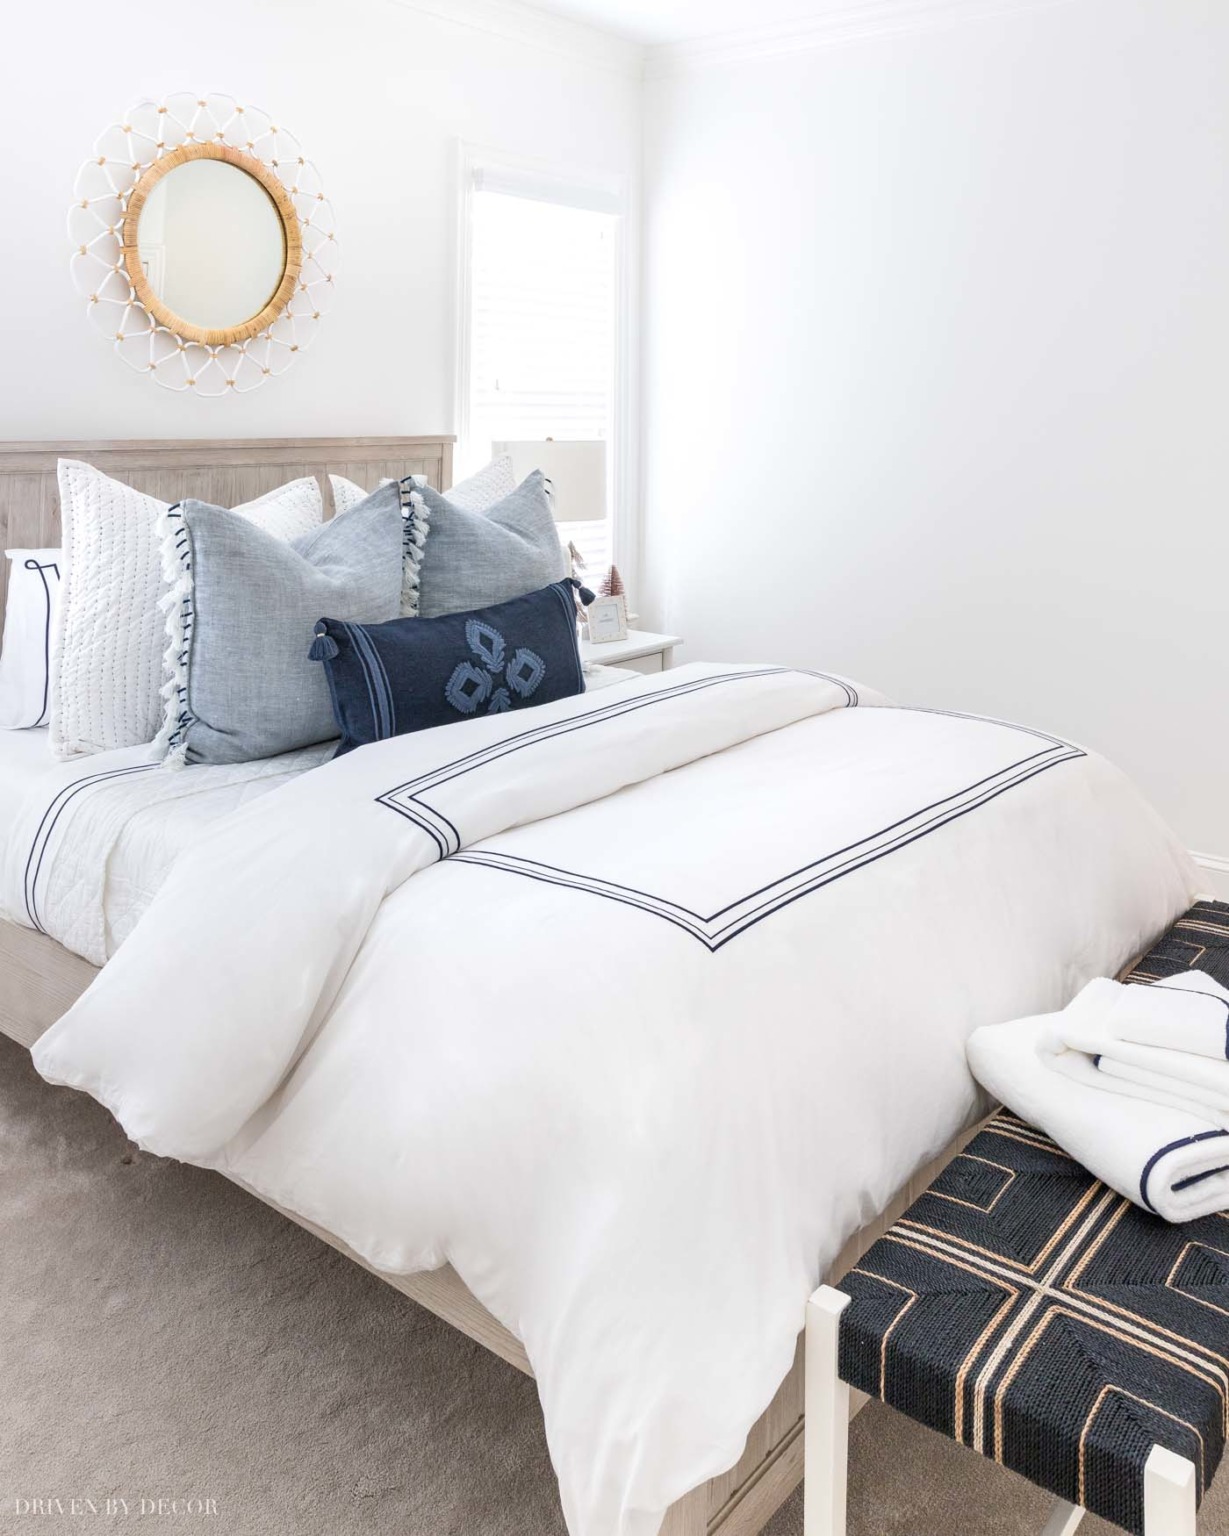
Blue & White Guest Room
Paint color: Benjamin Moore Simply White | Sources: Queen beadboard bed (weathered white) | 12″ Memory foam queen mattress (no boxspring needed) | Blue & white quilted shams (similar) | Blue tasseled edge pillow covers | Navy embroidered lumbar pillow cover ( with {this} pillow insert) | Navy border duvet cover | White quilt | Backless bench at foot of bed | Round mirror
XOXO,


Mary says
Hi Kris,
Do you have any advice about sheets? I just bought a set of the Pearl Embroidered sheets from Pottery Barn. My intention was to have the top sheet folded back (like your suggestion) & show off the pretty embroidered detail.
I washed them as soon as I got them & they came out of the dryer a wrinkly mess. Before I put them on the bed I had to iron the top edge of the top sheet so it would look crisp after the bed was made. Are you kidding me PB? Ain’t nobody got time for that!
These were a 280 thread count cotton percale. What kind of sheets don’t look wrinkled after washing?
Kris Jarrett says
Hi Mary,
That is so disappointing – I would hate to pay a lot of money for sheets only to have them come out of the wash as a bag of wrinkles because, like you, there is no way I’m ironing sheets! I wish I had an awesome answer for you but it’s hard to find wonderful sheets. If you want to make sure they don’t get wrinkly after washing, sheets that are a poly/cotton blend are a good bet but unfortunately they’re not as comfy as all cotton sheets. I would contact Pottery Barn to see if you can return your sheets even having already washed them – their customer service has been outstanding in the few cases where I’ve had an issue with their product. If I ever find the perfect pair of sheets, you can bet you’ll see a post on it 🙂
Catherine says
Bought awesome sheets from Target – Performance Sheets I think they are. Barely wrinkle and they have double elastics. Pull nice and firmly smooth over the nicely padded mattress protector I have (Costco).
Kris Jarrett says
Thanks so much for sharing that Catherine – I’ll have to check them out!
Sharon says
So clever! The twist upholstery tacks to hold the bed skirt in place, such a smart idea. I am going to definately do thus next sheet change! Let’s say “tomorrow”! I need to check out the Allerease a great addition to a bedding ensemble.
Kris Jarrett says
Thanks Sharon! Those twist pins are lifesavers for not having to constantly adjust your bedskirts!
Anne says
Thank you for the wonderful information. Will be getting a mattress protector for sure. Do I need one that fully covers all sides or would one for the top work just as well ?
I usually put the ties on my duvet cover at the foot of the bed. Some of them have buttons. Is this just a matter of preference or have I been doing it backwards?
Love the nice neutral tones used here.
Kris Jarrett says
Hi Anne,
A mattress protector that fully encases the mattress like the AllerEase one featured gives you better protection for both allergens and critters like bed bugs! And as far as the direction of the duvet, I think it’s just personal preference. I have a duvet that buttons and I put the buttons at the foot of the bed but I think the ties on this one are cute so I put it at the top of the bed. Thanks so much for reading!
Pam @ Simple Details says
You have such a way with making everything look so fresh and inviting! Great tips, too!
Kris Jarrett says
Thanks Pam!
Rachel @ A Mother Far from Home says
Do you have a source list for your bedding? I just bought a coverlet and really need to get a duvet that’s cute for the winter but don’t know where to start!
Kris Jarrett says
I’m happy to share that Rachel – the duvet cover (it’s checked on one side and striped on the other) is from IKEA and the coverlet is from Pottery Barn. I love our IKEA duvet cover and the price was definitely right but just beware that the size of it is a bit off for using with a standard duvet insert – it fits the IKEA duvet insert best.
Karen says
great post – love the way you balanced design tips with very practical suggestions for a clean and non allergenic bed!!
Kris Jarrett says
Thanks Karen!
Taylor Greenwalt says
Wow, I never imagined there could be that many bugs in a mattress…Know wonder I’m having allergies..my bed is over 10 years old…
Kris Jarrett says
I know, isn’t that just so gross?! I never knew how much of a role bedding had in managing allergies – it’s definitely changed I make my bedding choices!
lynne@lynnesgiftsfromtheheart says
So inviting and comfy looking. Thanks for sharing. fondly ~lynne~
Kris Jarrett says
Thank you so much Lynne!
Anonymous says
yah it was great!!!
debra @ 5th and state says
you never disappoint kris, every time i visit your blog i learn something new! one being that i need a new mattress, YUCK!
and upholstery hooks, brilliant. BTW, your bedroom is so beautiful and soothing. do you always iron your sheets? wink wink
debra
Kris Jarrett says
I can’t get a new mattress soon enough after learning what I did through AllerEase and you can bet that I’ll keep mattress protectors on all of my mattresses from now on too! And I had to laugh at your question about ironing of sheets – Ha! Never. Who’s got time for that? 🙂
Carrie says
Great tips! I’m glad to know about this company now. Your bed looks beautiful and very cozy! 🙂
Kris Jarrett says
Thanks so much Carrie!
Shelley @ Calypso in the Country says
On this dreary, rainy day, the sight of a comfy bed just might make me head back upstairs for a nap! Very pretty and great tips!
Shelley
Kris Jarrett says
Ha! I’m resisting the urge too Shelley – such a gloomy morning!
Kathy says
Beautiful inviting bed with no little mites!!
Kris Jarrett says
Thanks and yes, the mattress protector not only keeps out the allergens but the critters too! Bed bugs would be my worst nightmare 🙁
Lisa @ Shine Your Light says
I have to look into the mattress protector and pillows by this company. Your guest room looks soooooo comfy and delicious Kris!!!!!!
Kris Jarrett says
You will love them! I’m totally smitten by the pillows because every other pillow I’ve ever washed I’ve had to throw out because it got lumpy and horrible. These totally do keep their shape!
Kate says
Wow! Great idea & perfect performance! I love this bedroom….
Kris Jarrett says
Thank you Kate!
becky says
It looks so comfy! Love the soft, neutral colors.
Kris Jarrett says
Thanks so much Becky!
Mott says
Thank. I was glad to learn I am doing g the bed correctly. Love your ideas
René says
This looks so cozy you’re making me want to go back to bed!
Kris Jarrett says
Thanks Rene – it’s a dark, rainy morning here and it’s taking all of my willpower not to crawl back into bed!
Anonymous says
Hi I’m here in Dublin remaking my bed !!