Looking for bathroom floating shelves? I’m sharing where to buy them, tips for installation, and ideas for styling them too!
The floating wood shelves in our bathroom are one of my favorite master bathroom remodel ideas. After getting so many questions about them, I decided to write a quick post sharing everything I know! Let’s get to it… (post includes commissionable links; for more information, see my full disclosure statement {here})
Our Bathroom Floating Shelves
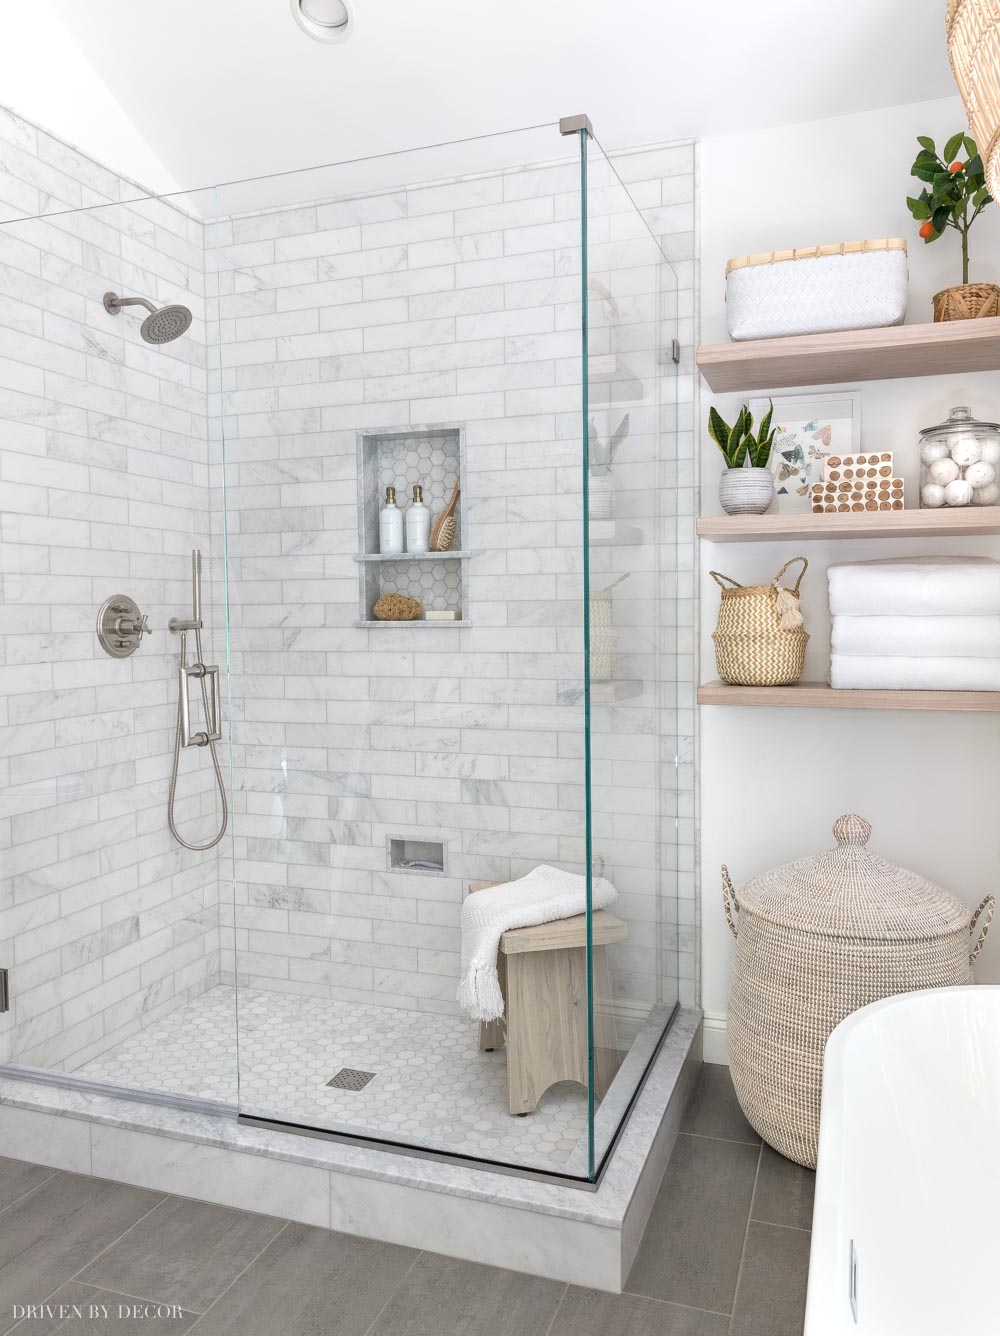
Let’s start with the details on the floating wood shelves I chose for our remodeled bathroom. I bought three of {these 1.75″ white oak shelves} for the nook between our shower and the far wall of our bathroom:

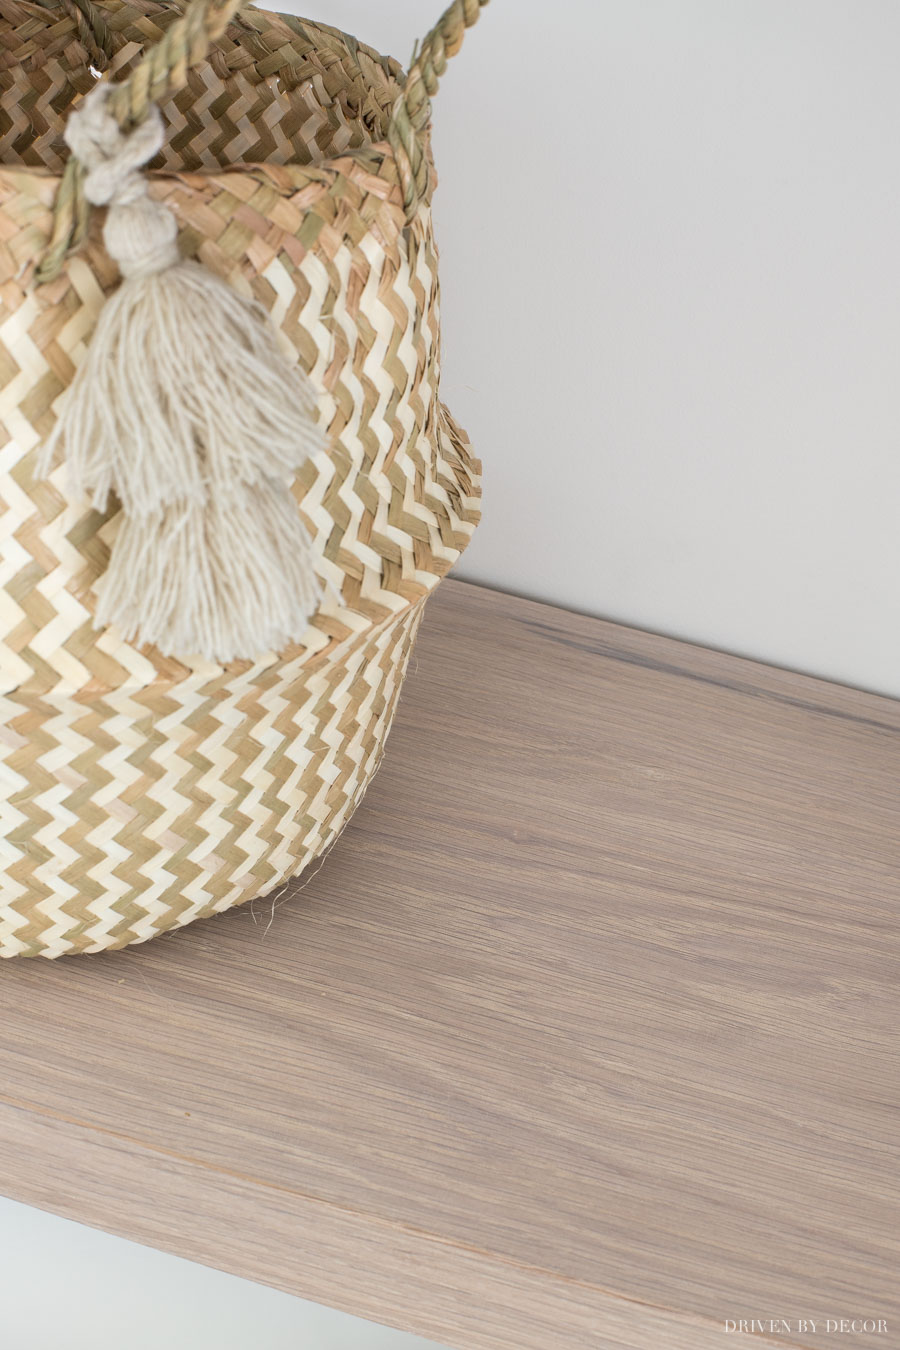
They function perfectly for this space by adding both storage and style. I’m using them to store rolls of TP (in the basket on top), bath bombs, washcloths (in the basket on the bottom shelf) and extra towels. They’re also a fun place for some decorative accessories:
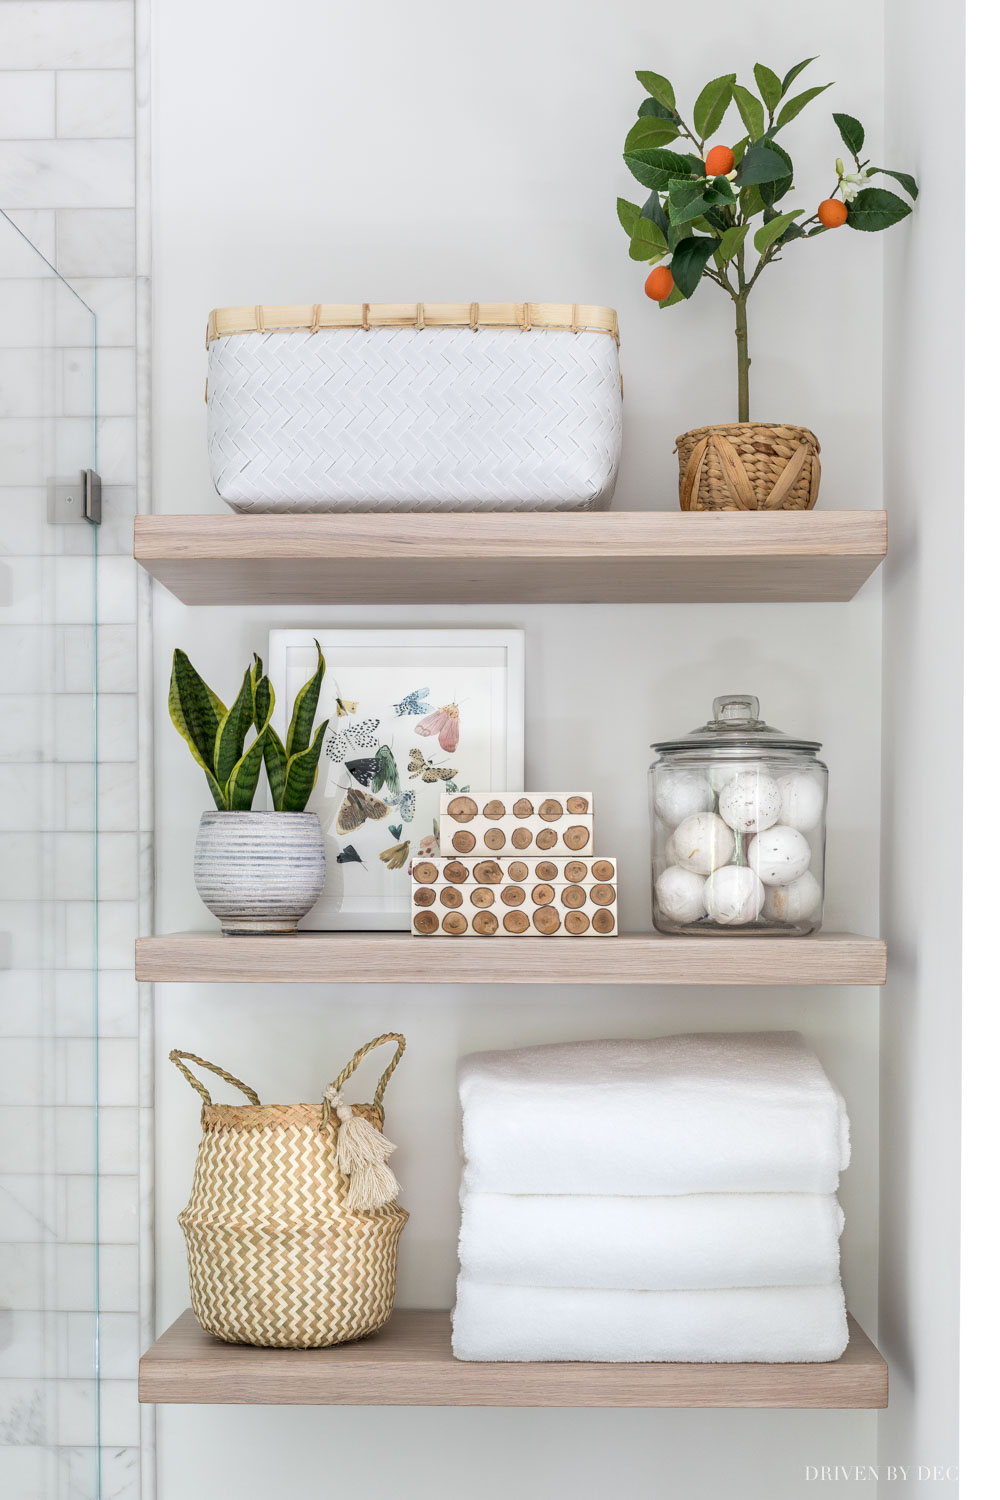
Shelf sources (from top to bottom): White woven basket (medium) | Gray & white striped planter (holding snake plant) | Colorful moth art print | White wood frame | Glass canister (1 gallon size) | Bath bombs | Belly basket (similar) | Favorite bath towels | Other accessories no longer available
What sold me on {these bathroom floating shelves} is that they are completely customizable. The ideal length of shelving for my space was 29″ so if I had to stick with a standard length, 24″ was the closest option and I’d be missing out on about 20% of the shelf space I could ideally have.
I was able to choose the depth (I chose 12″) and the finish too (you can specify it in the drop down “add your personalization” box when ordering. I took a while debating between these finish options – the top three were my favorites:
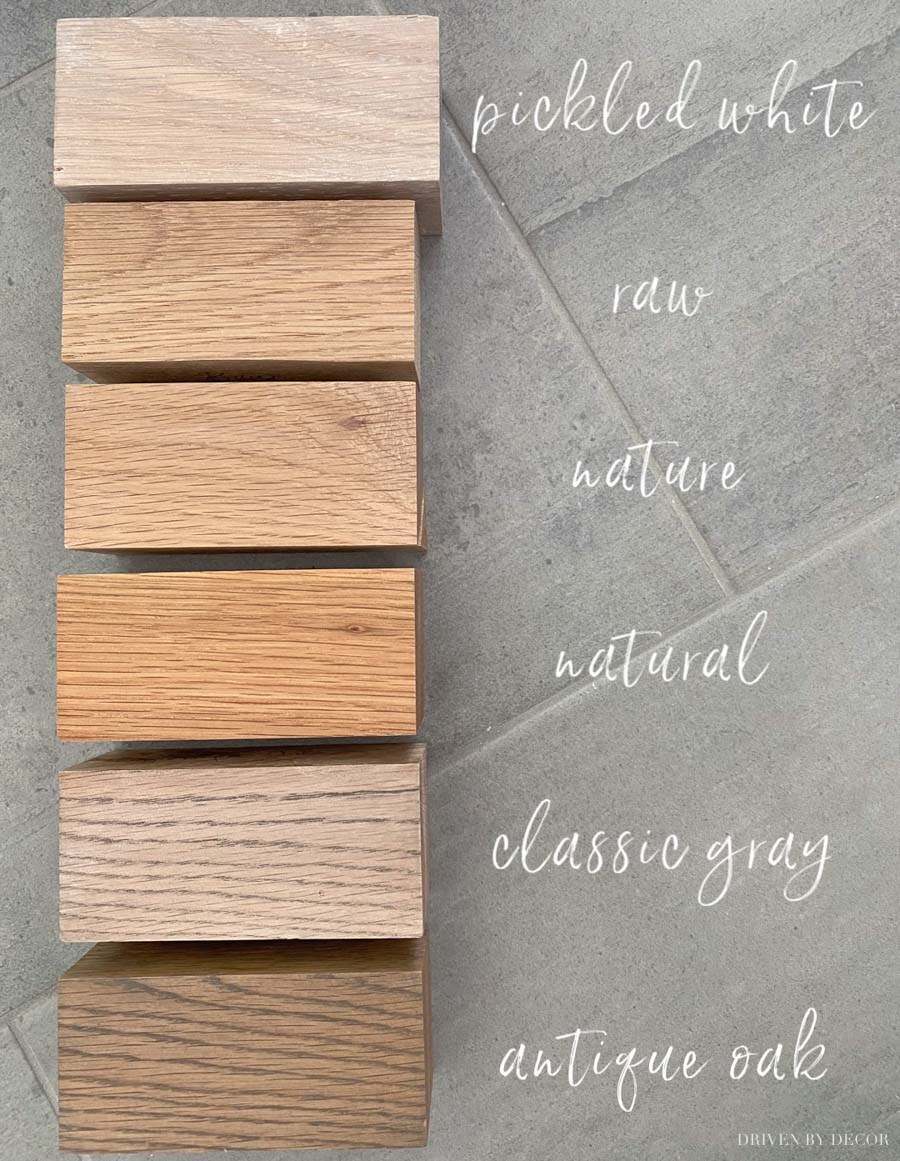
I decided on the Pickled White finish and love it – it’s so so pretty!
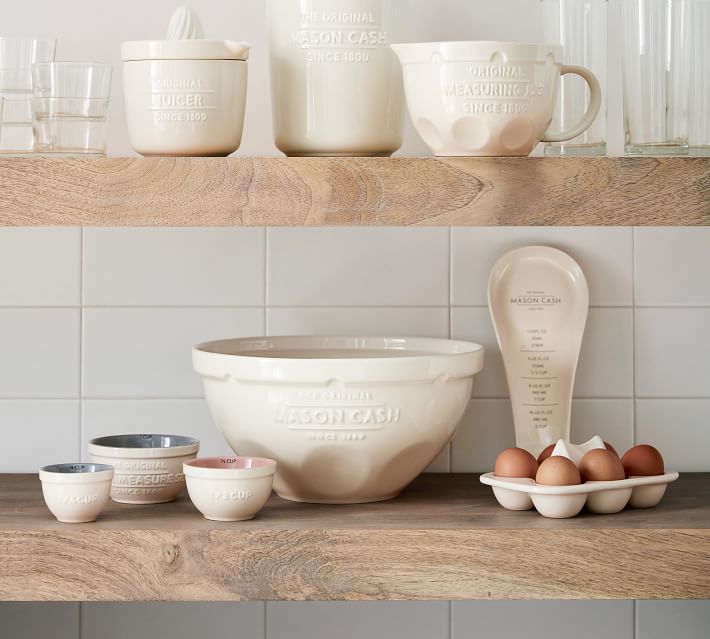
We installed similar floating wood shelves in our kitchen too:
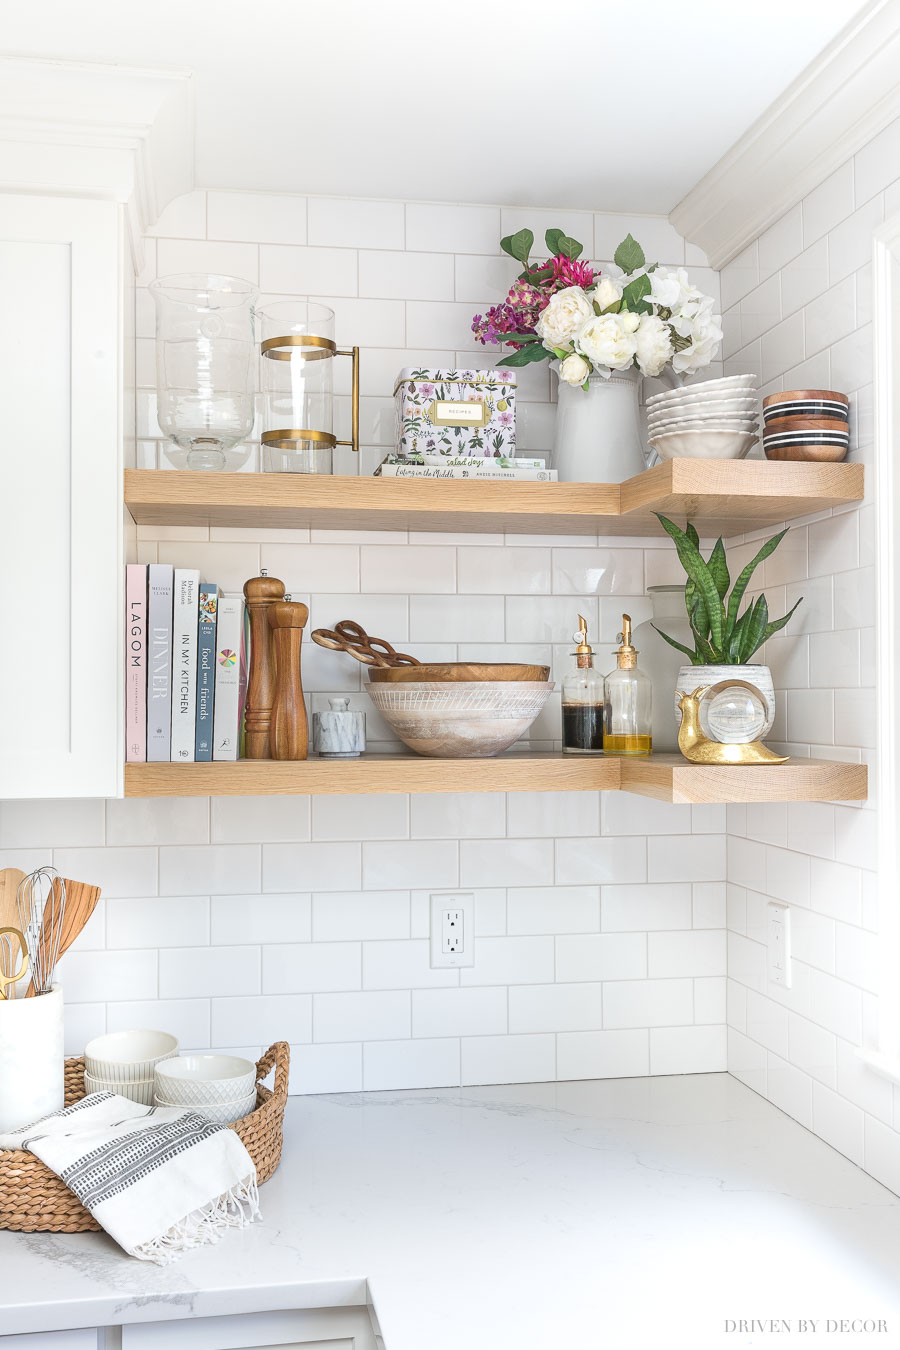
Shelf sources: Glass hurricane vase | Floral recipe box | White ceramic pitcher | Faux peonies | Marble salt cellar | Oil & vinegar bottles | Striped planter | Decorative snail | Tray & Accessories: Round woven tray | Black & white hand towel
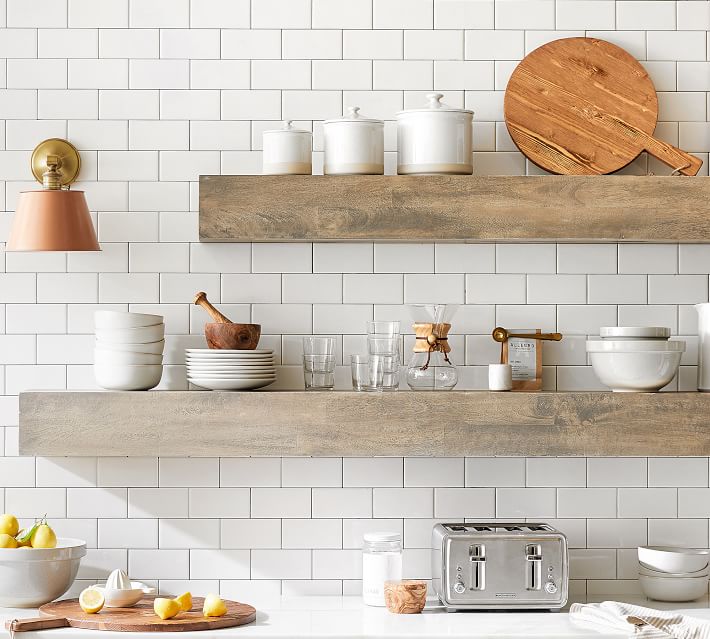
I had never had open shelving in a kitchen before so wasn’t sure how I’d feel about it but I LOVED it! At the time we installed our corner shelves there were no shops that sold floating shelves in custom sizes like the ones I found for my bathroom so we had to DIY them. You can find the step by step details of creating them in my post on floating corner shelves.
I share more about the open shelving in our kitchen plus other must-haves in my post on my favorite kitchen remodel ideas.
Installation of Our Floating Wood Shelves
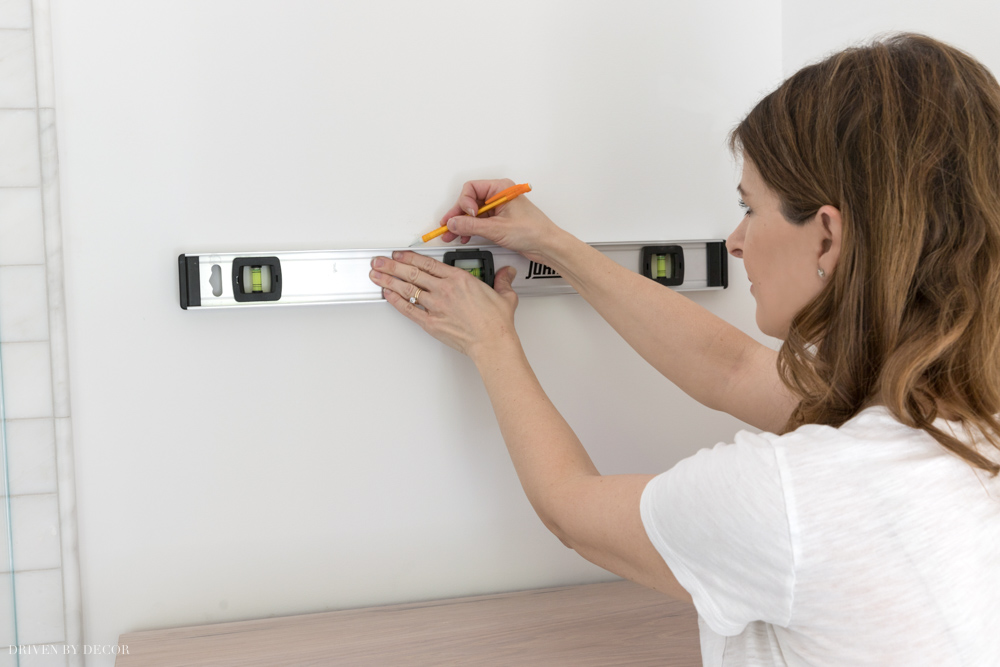
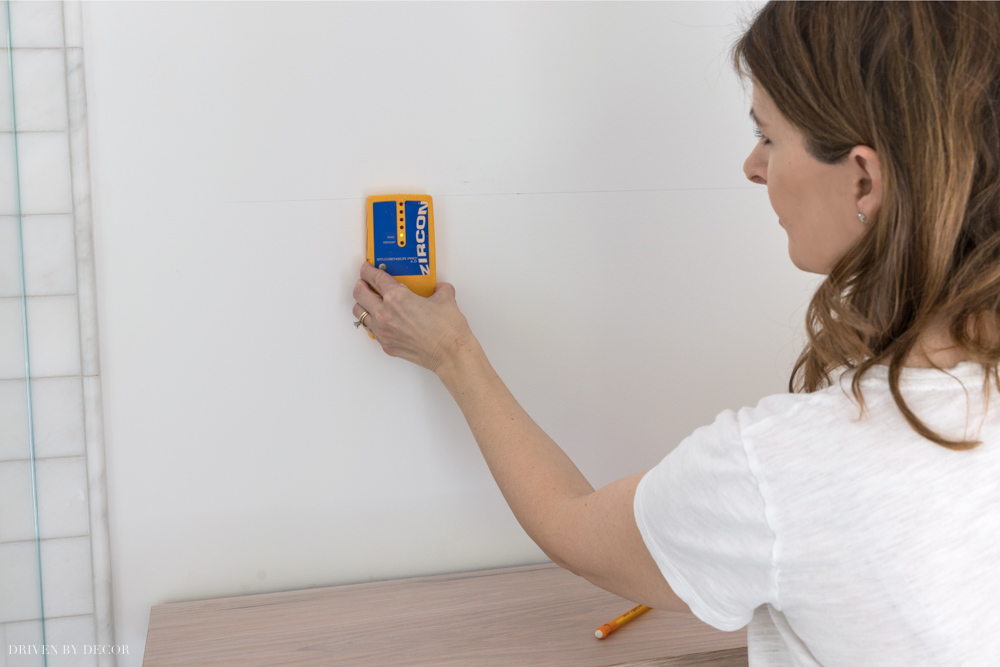
Installation of our bathroom floating shelves was pretty straightforward since the hanging hardware was included with my shelves. Since they weren’t very long, I was able to install them myself but longer shelves would require two people. I simply drew a level line for the screws that will hold up the steel bracket supporting the shelves,
and then found and marked the studs in my wall with a stud finder like {this one}:
I then screwed the steel bracket onto my wall, hitting at least one stud to ensure that it was secure (even the screws and the drill bit to screw them in are included in the hardware packet with the shelves):
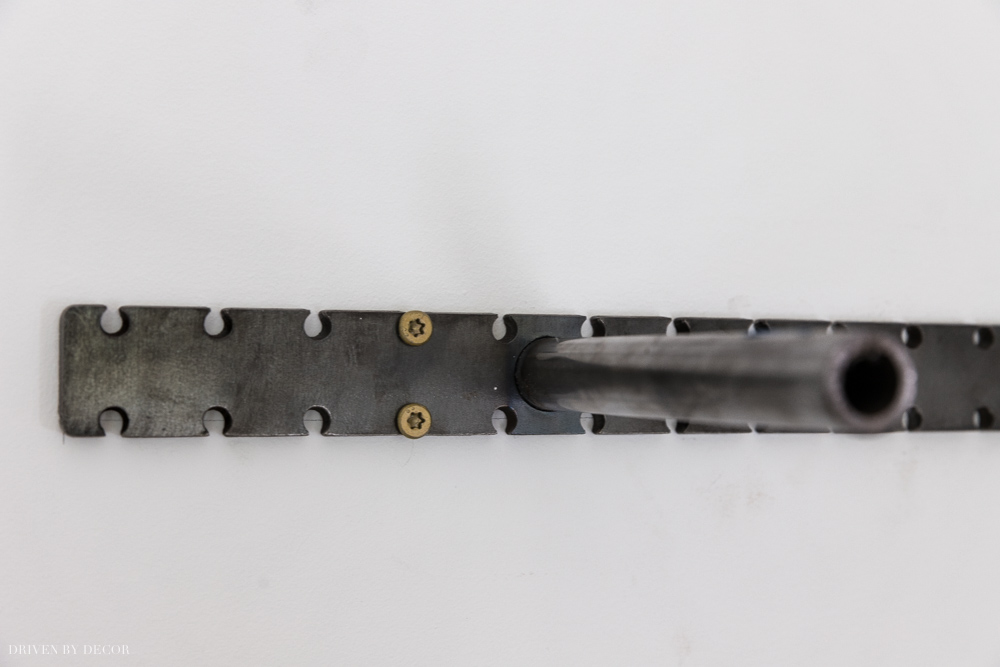
I then re-checked that the bracket was completely level (if it’s not, just loosen up the screws and give it a slight adjustment and rescrew tightly). And then finally I slid my shelf onto the bracket via the pre-drilled holes in the back of the shelf:
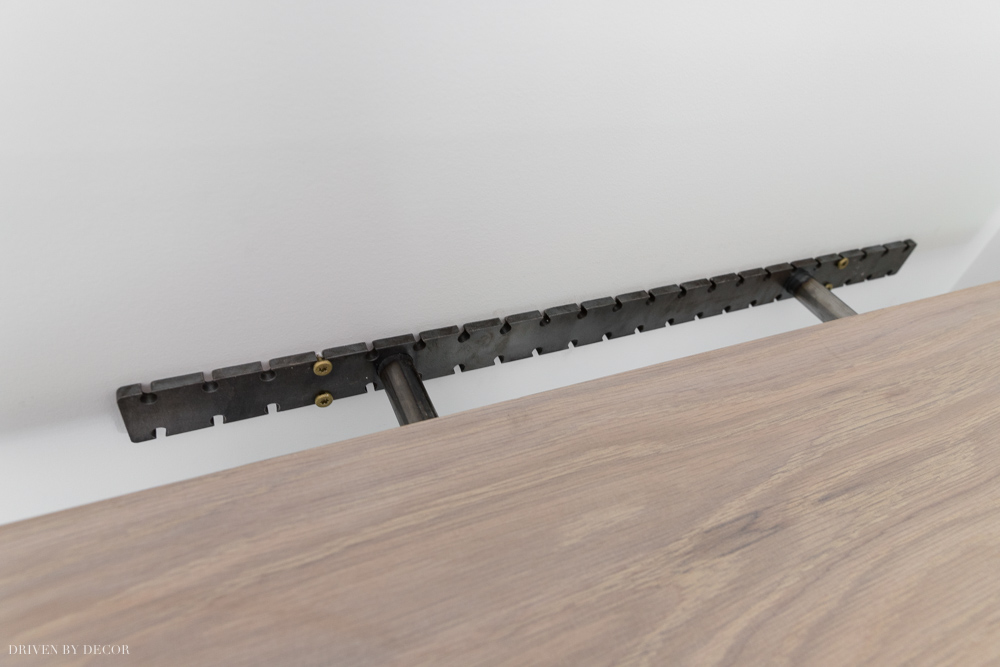
Done!
The shelves seem VERY secure and the bracket system keeps the shelves completely level from left to right and front to back.
Want the details on our shower? Check out my post on our glass shower enclosure for details on cost, glass choice, and more.
How High to Mount Bathroom Floating Shelves
For those of you wondering about how high we mounted our shelves, these are the measurements we went with:
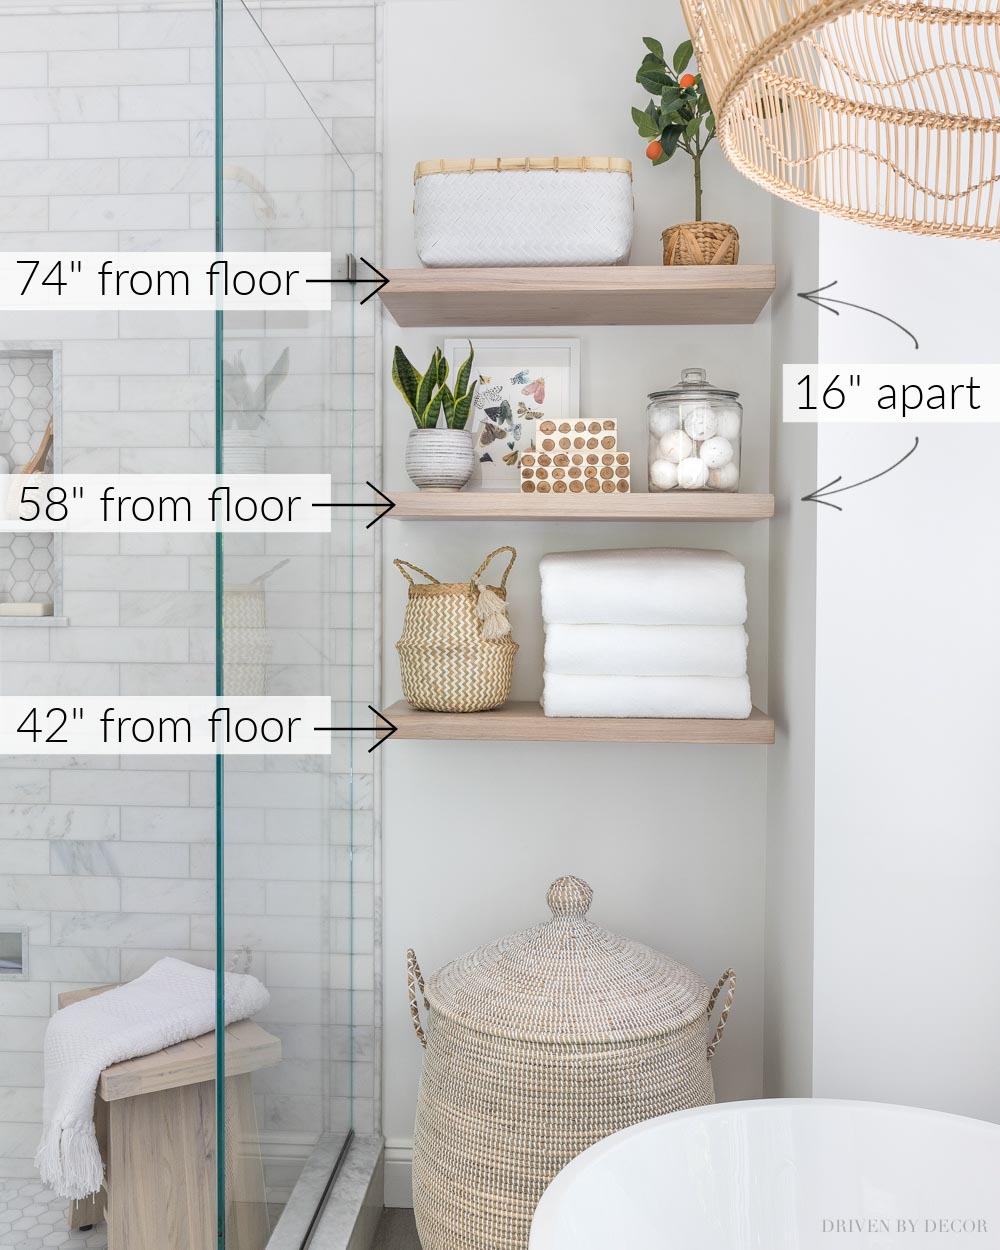
Each of the shelves is 16″ apart.The bottom shelf is 42″ from the floor because we wanted to leave ample room for {this large lidded basket}) underneath that we use as a hamper.
Other Options for Bathroom Floating Shelves
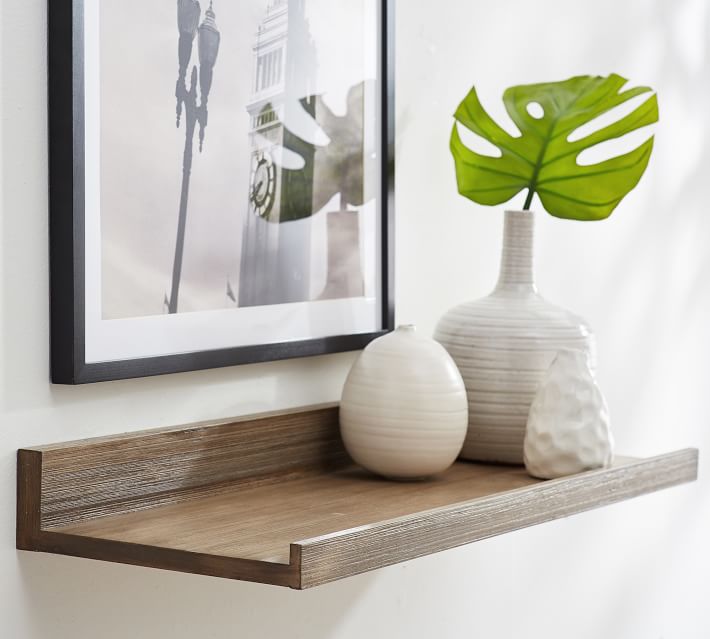
I did a LOT of hunting for floating wood shelves before landing on the ones I went with in the end. If you can find pre-finished shelves in the size and look you want, it will be cheaper than going with custom made. Originally, I had actually planned on using {these floating wood ledge shelves} in the Seadrift finish which is one of the six finish options they’re available in:
It’s actually the same exact finish as our bathroom vanity (found {here}) so I thought it would be nice to have a consistent wood finish on both sides of the space:
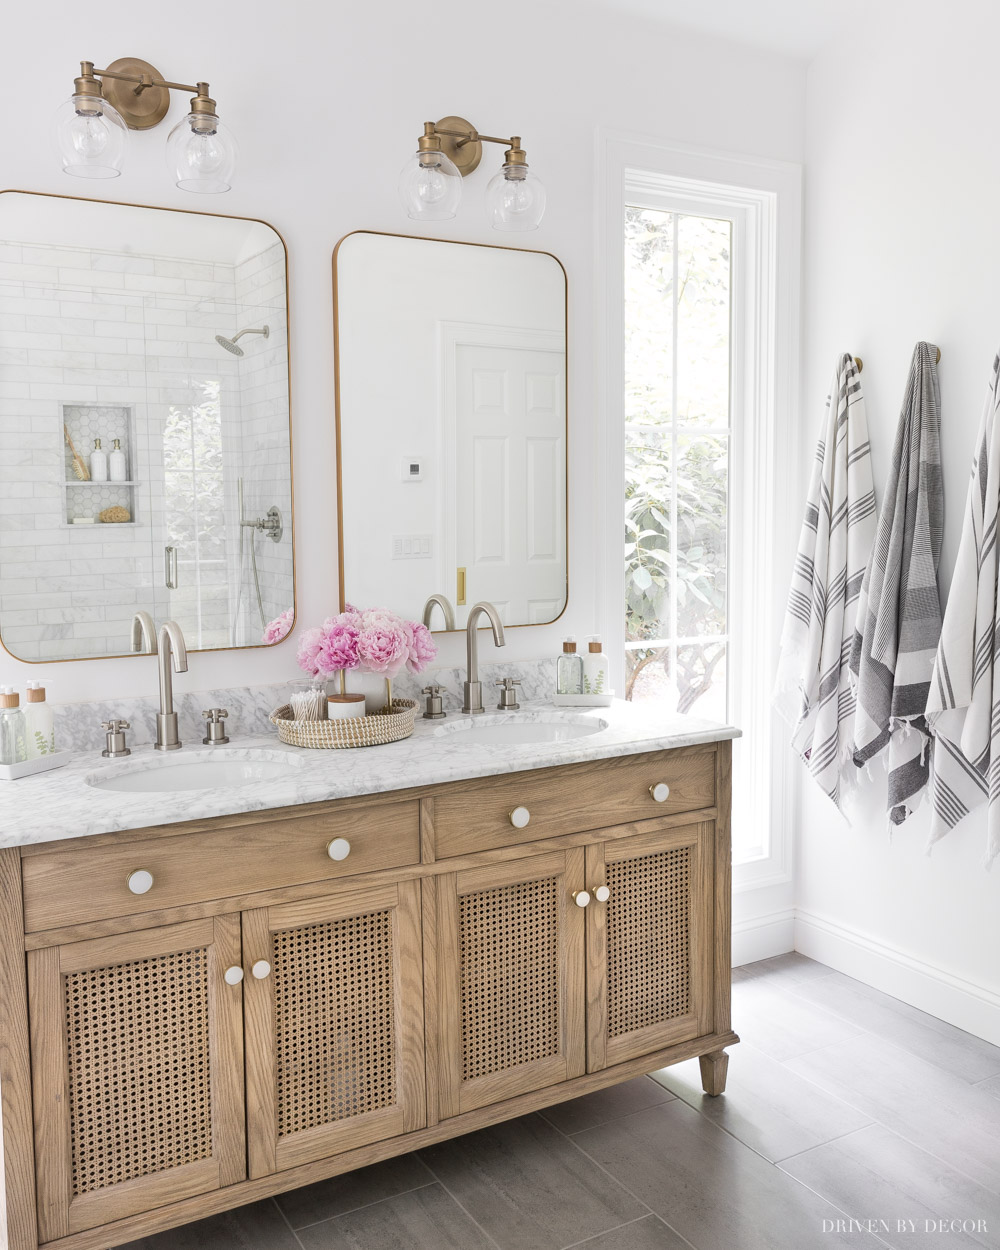
Sources: Wood & rattan double vanity | Vanity knobs | Vanity lights | Vanity mirrors – gold | Soap & lotion sink set with tray | Gray & white striped towels | Robe hooks (golden champagne)
Unfortunately once I received them, I realized that due to how they’re constructed, they couldn’t be cut down in size (which I needed to be able to do since none of the available shelf lengths fit for my space). So those were a no-go.
Other options I had looked at were {these 2.5″ thick floating wood shelves} in the white oak finish (they’re also available in four other finishes):
One of the big pluses of these shelves is that they’re available in a generous 14″ deep. Unfortunately they were backordered until late fall so they quickly dropped off my list of possibilities.
I also thought that {these 6″ thick mango wood shelves} were stunners:
but the smallest length they come in is 48″ and they’re only 10″ deep and a little thicker than what I was looking for so they went off my list of possibilities.
I was on the hunt for a light white oak for my bathroom but did come across {these reclaimed wood floating shelves} that might be winners if you like a more traditional finish:
I hope that answered all of your questions! Let me know if I missed anything that you want to know more about!


M. M. says
Those shelves thru Etsy are really expensive!! Are there any other options
Windisch Jannette says
Kris,
I love the pickled white oak wood shelves you used in your bathroom. What is the thickness of the shelves you chose?
Kris Jarrett says
Hi Jannette! I used the exact shelves linked in my post which are 1 3/4″ thick. Hope that helps!
Renae Falsken says
What kind of floors did you use in your master bathroom?
Kris Jarrett says
They are ceramic tiles from Floor & Decor. I can’t remember the name of them (it was something very generic) but they are linked in the Source List at the end of this post if you can’t find them on Floor & Decor’s site: https://www.drivenbydecor.com/master-bathroom-reveal/
Jenn says
What is the size of your shower?
Nena Sparrow says
Which thickness did you go with for the shelves…2″, 3″ or 5″?
Michelle says
Love these! What thickness did you choose? 1.25, 1.75 or 2? And did you use the same thickness in both the kitchen and primary bathroom?
Anonymous says
Love this! What is the brand/color of your walls?
Barb says
Where did you purchase the floating shelves?
Coral says
Hi I absolutely love everything about your bathroom getting ready to redo our master bathroom! How did the vanity hold up and with the shelves do you think they would look good behind a toliet?
Kris Jarrett says
Thank you! The vanity held up well – I would still choose the same one again! And yes, I think a series of shelves behind the toilet would be great – I would make them a bit more shallow than my shelves though.
EV says
This is so helpful! I am wondering, do you think the floating shelves you have in your bathroom and then nook will be able to be installed over tiled wall? I see you installed your brackets into non-tiled wall. My question is do the brackets have to be installed prior to tiling or can you just screw those brackets right into tile do you think? Thank you for everything, also appreciating the discount which I may actually be using very shortly for a few bathroom renovation projects we have going on.
Kris Jarrett says
Yes, their installation instructions say that it can be installed on an already tiled wall using a masonry bit to drill into the tile!
Wendy Blaszyk says
How many inches did you leave between the shelve and the bathroom nook wall- 1″?
Kris Jarrett says
Yes it’s a little over 1″