Want some amazing master bathroom remodel ideas? These are my ten favorite features from our bathroom renovation!
Our master bathroom remodel “before” and “after” is my favorite remodeling project to date! Some of my favorite master bathroom remodel ideas from that project were small details that I didn’t include in my big reveal. So today I’ve gathered together my top ten ideas to share with you! I hope it’s helpful for those of you who are thinking about a bathroom renovation or even just a few small bathroom updates down the road. (post includes commissionable links; for more information, see my full disclosure statement {here})
Idea #1: Install Fan Timer Switches
I’m not sure how I’d never heard of fan timer switches before (thanks to my contractor & electrician for sharing the idea!) but our toilet room fan and shower fan are on fan timer switches instead of a typical on/off switches and it’s the best!
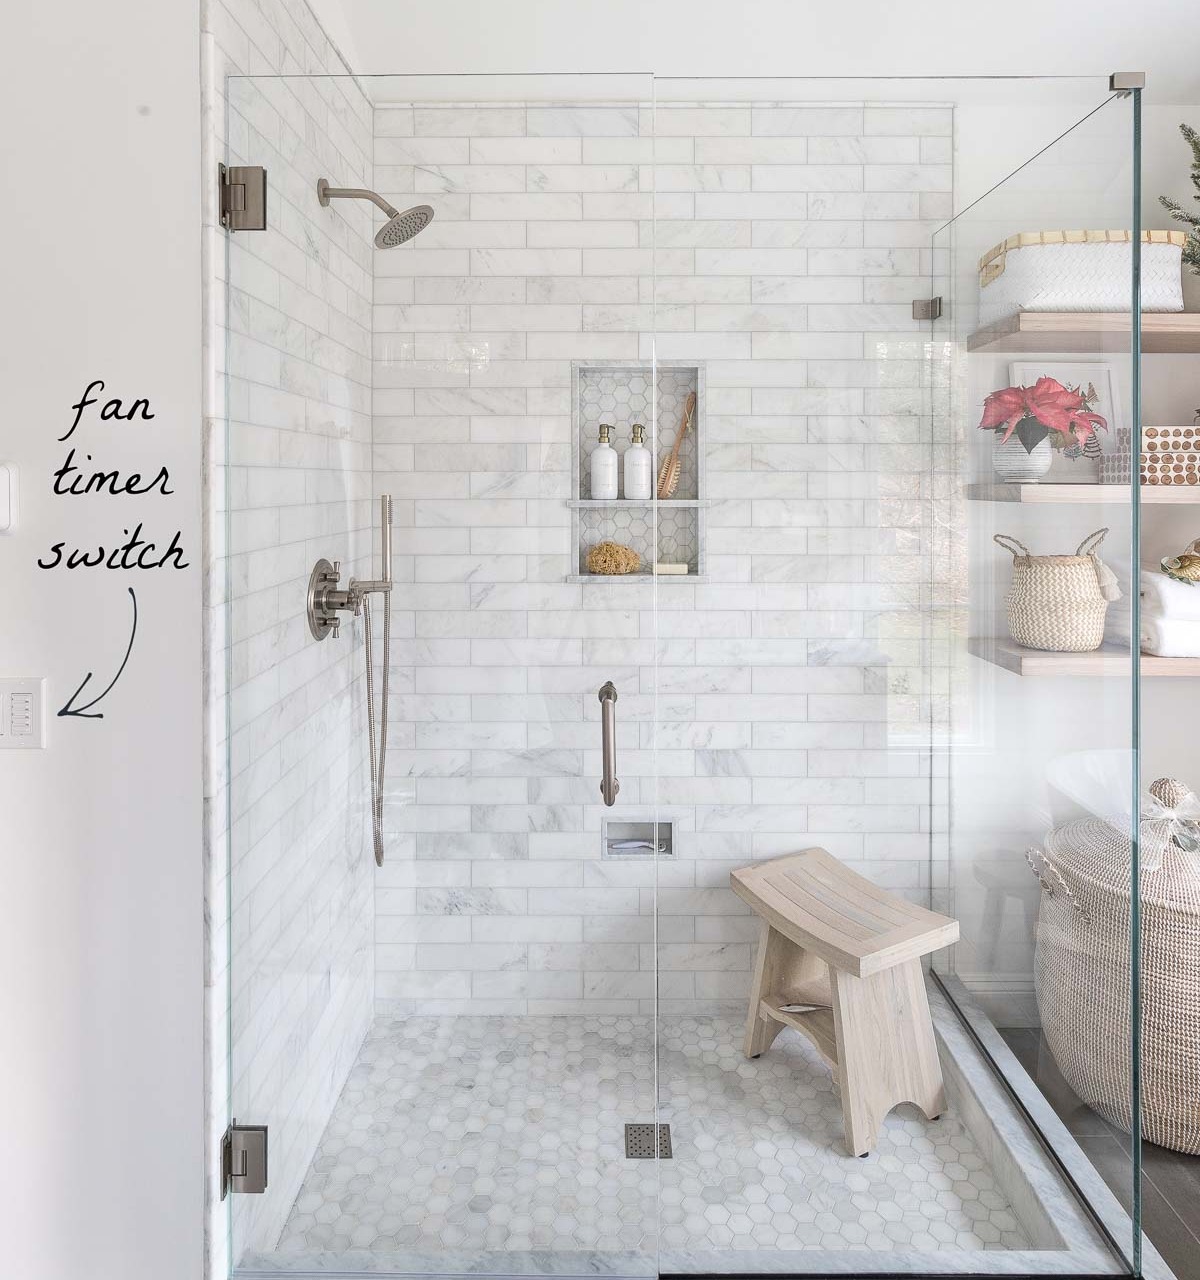
Sources: Driftwood teak shower bench | Marble wall tile | Hexagon floor tile | Shampoo & Conditioner Pump Bottles (16 oz white/gold)
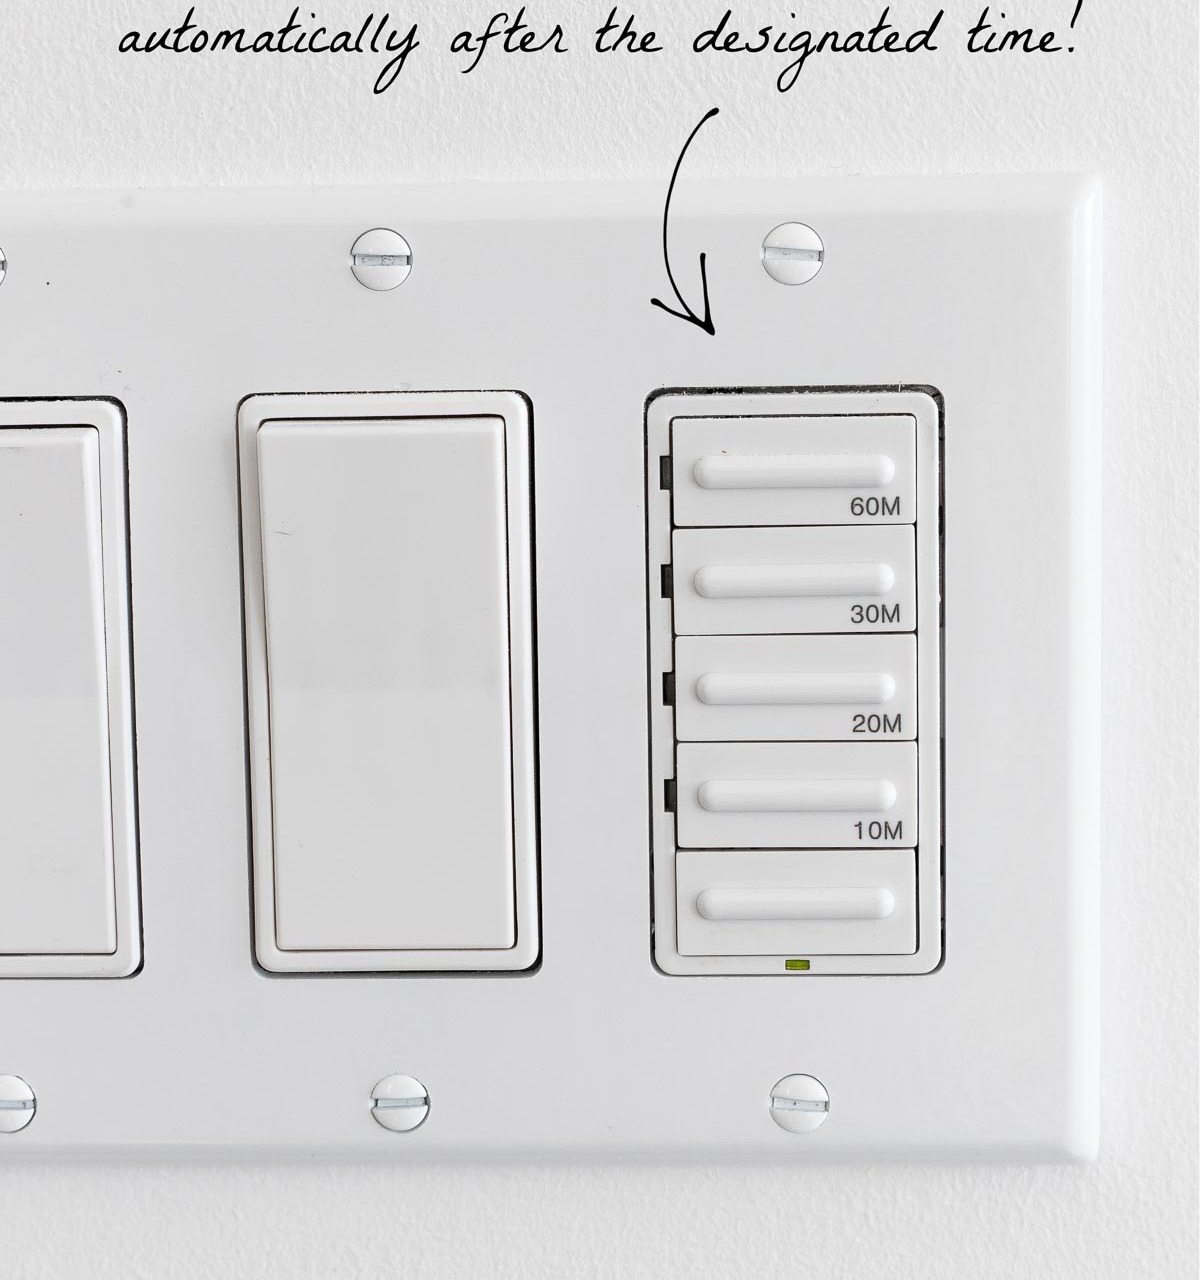
With a simple press of the button, the fan goes on and then automatically goes off after the set time (we were SO guilty of having fans run unnecessarily for hours before). In our toilet room we have {this timer} with presets of 5, 10, 15, and 30 minutes and for our shower we have {this timer} with presets of 10, 20, 30, and 60 minutes.
I also love that our bathroom fans are virtually silent because my contractor installed an in-line ventilation fan that’s remote mounted away from the bathroom in the attic (which means that the noise of the motor is away from the bathroom too). It functions every bit as well as a typical fan but without all the noise which is a welcome change from our previous bathroom fan that was so loud you couldn’t hear anything over it.
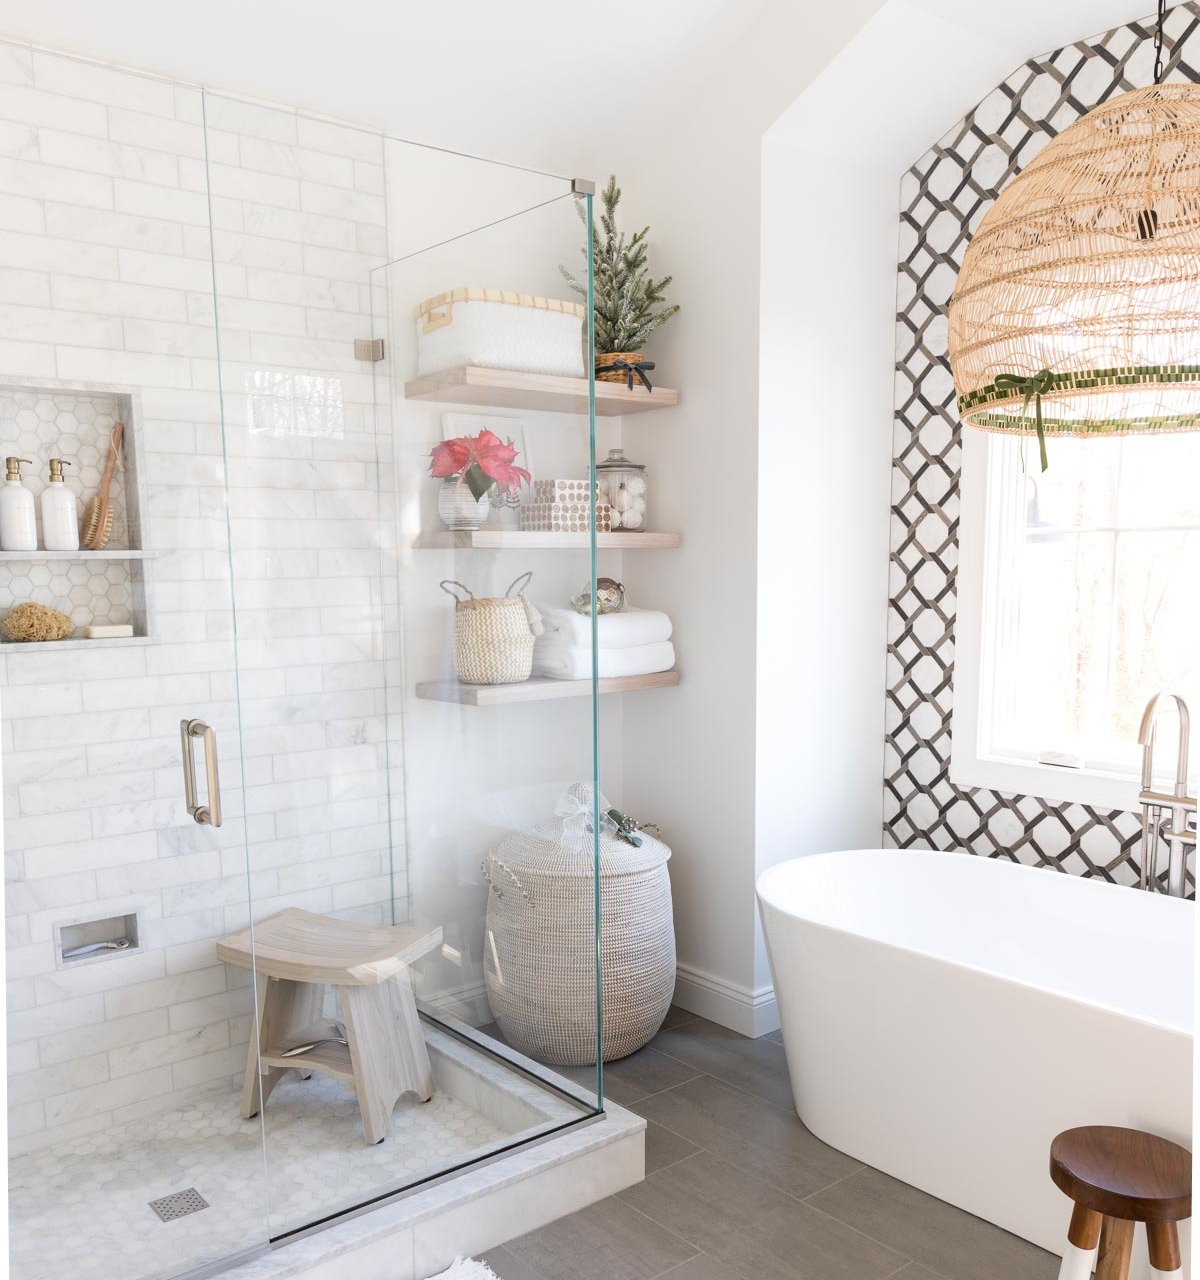
Idea #2: Reconsider Installing a Shower Bench
When you’re remodeling a master bathroom shower, almost everyone installs a shower bench because it’s “the thing to do”. But if you talk to people who actually have a built-in shower bench, you’ll find that most people rarely use them. And if they do, it’s often for collecting shampoo and conditioner bottles instead of actually sitting on. We installed a shower bench in our previous home when we remodeled our master bathroom and NEVER used it plus it was a pain to keep clean.
When planning our recent remodel, I was considering installing one anyway for resale purposes but found out that a bench would add an extra $500+ to our bathroom costs due to the additional labor and tile/stone required. So… we decided to save our money and cut it from our master bath plans. Instead I bought {this driftwood teak shower bench} that was a fraction of the cost but serves the same purpose and I have ZERO regrets:
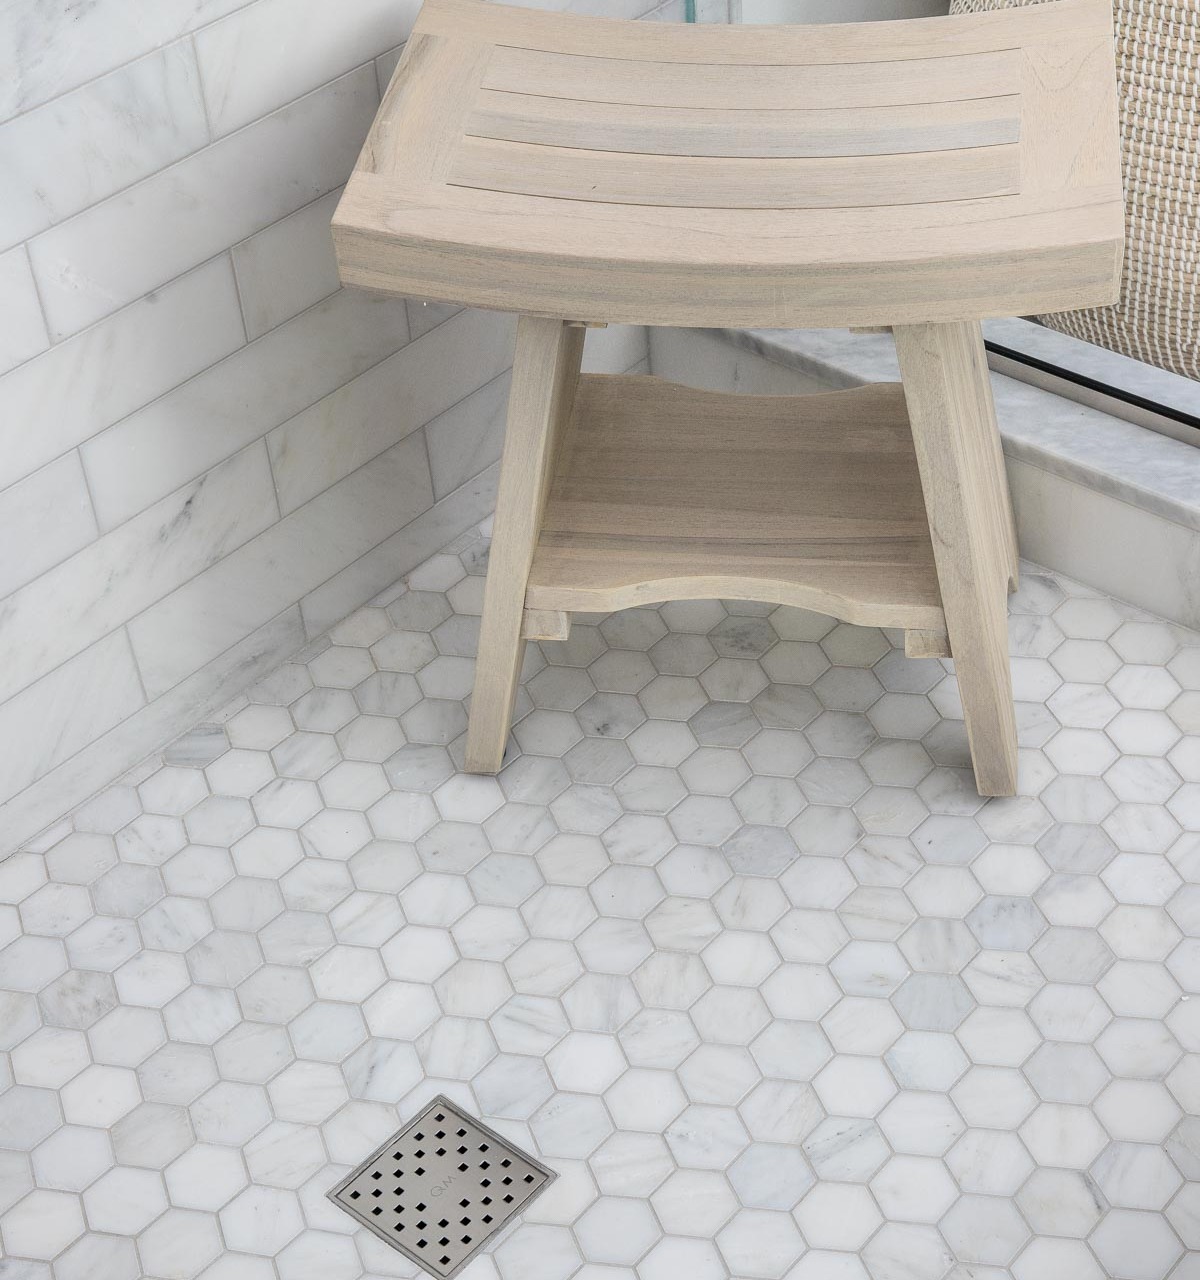
And I actually like the clean-lined look of the full panels of shower glass without a built-in bench better too – it’s has a spa-like feel! If you’d like some tips on designing your shower, be sure to check out my detailed post on choosing your glass shower enclosure.
Idea #3: Ditch the Standard Round Bathroom Drain
Sometimes it’s the little things that can help elevate the look of a space and your shower drain is one of those! Instead of your typical round shower drain, consider a square drain in a finish that matches your shower hardware – it’s super simple but really does upgrade the look of a shower:

Another option to consider is a shower drain that you can inset some of your floor tile into like {this linear drain} that comes in various width options:
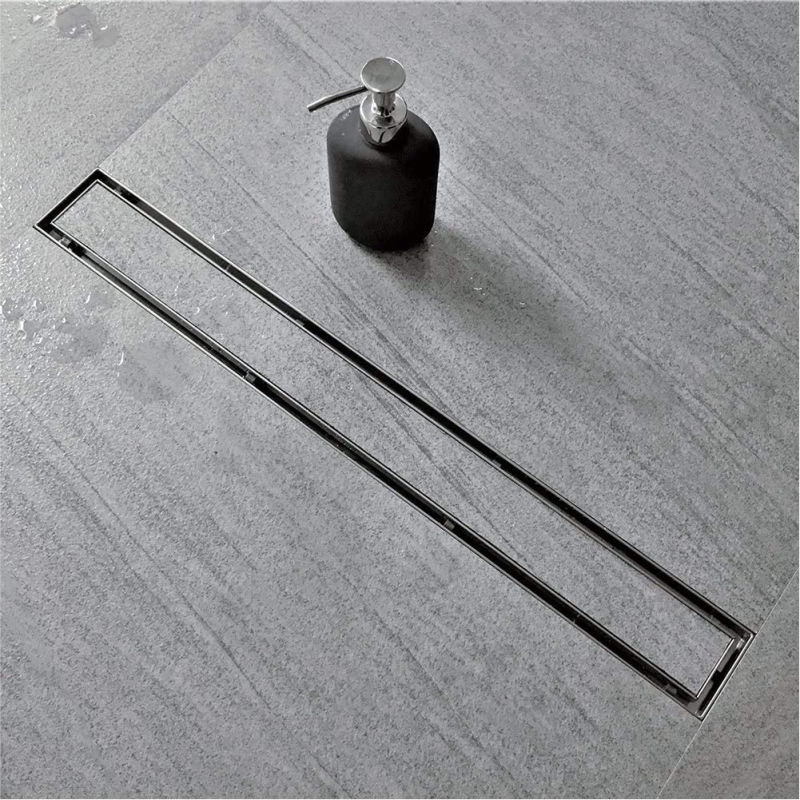
or {this square drain} that makes your tiled shower floor more seamless.
Also consider function – the top of our shower drain pops off and there’s a small removable basket strainer inside that catches any hair that the drain itself missed – love this feature!
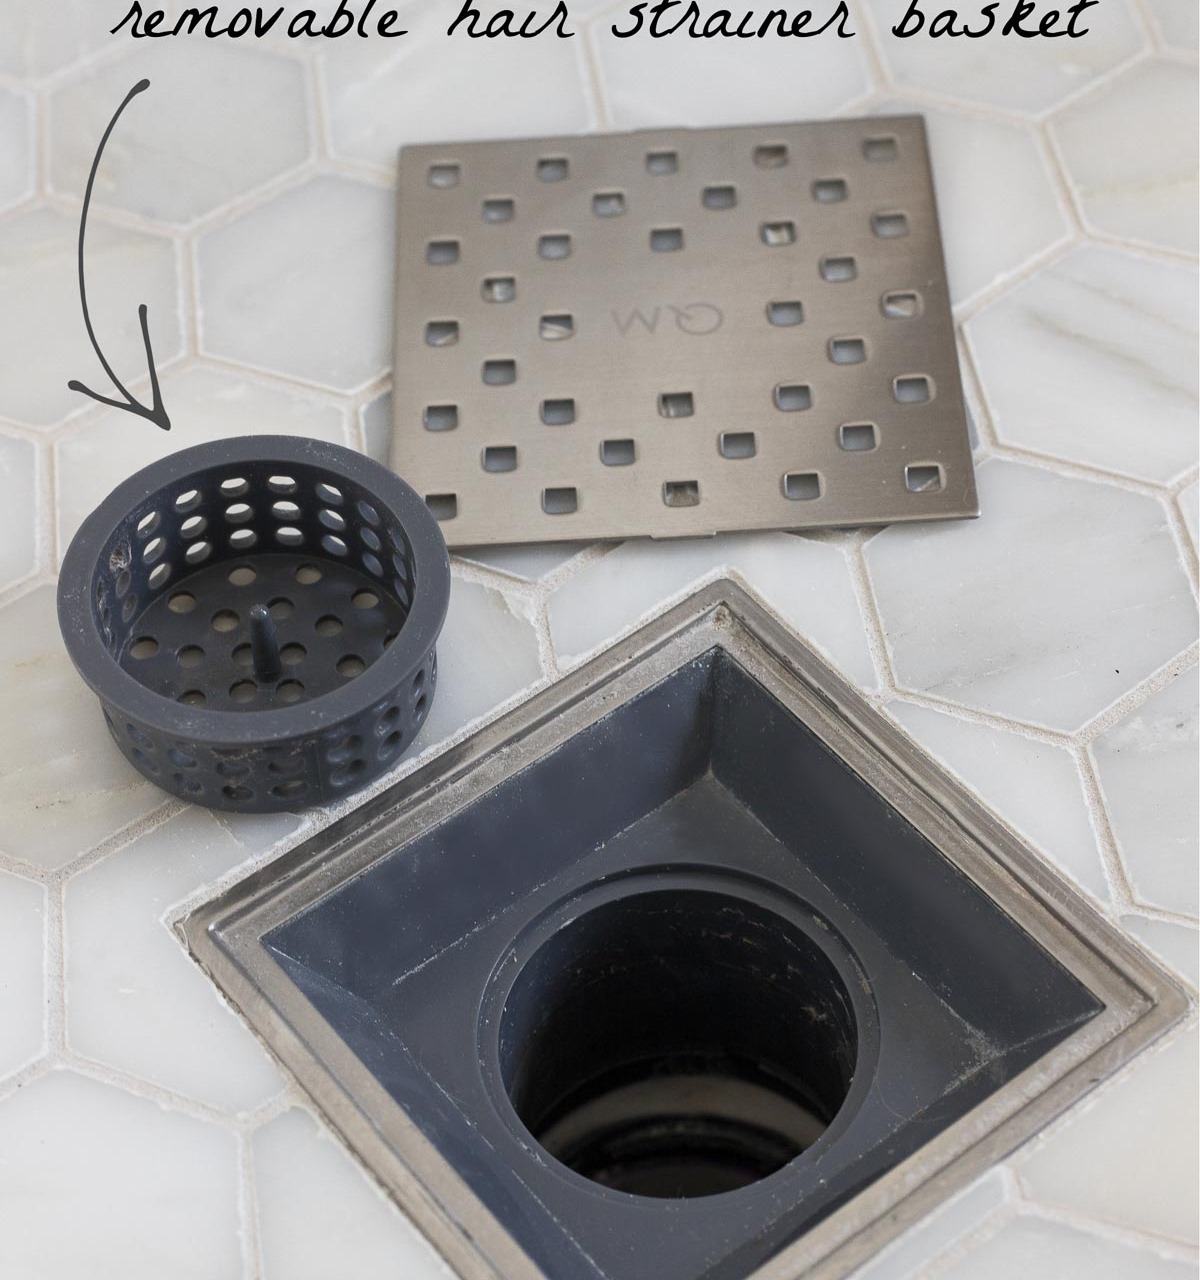
I have {this exact drain} in the Satin finish (and lucky you, the newest version no longer has the QM stamped smack in the middle like mine did!).
Idea #4: Be Intentional With Your Shower Niches
Don’t let the size and design of your shower niches be an afterthought! When we did a master bathroom addition in our previous home, I told our tile guy that I wanted a shower niche with one shelf dividing it and left the rest up to him. He installed a niche with a shelf in the middle that divided it exactly in half and… our tallest bottles didn’t fit 🙈. Thankfully we had the useless shower bench to put them on – ha!
So for our recent remodel, I made sure to be more intentional about the sizing and design of our niches. Thankfully I also had super detail oriented tile guys who did an awesome job making minor adjustments in the niche size so that it both stopped and started in line with the tile surrounding it:
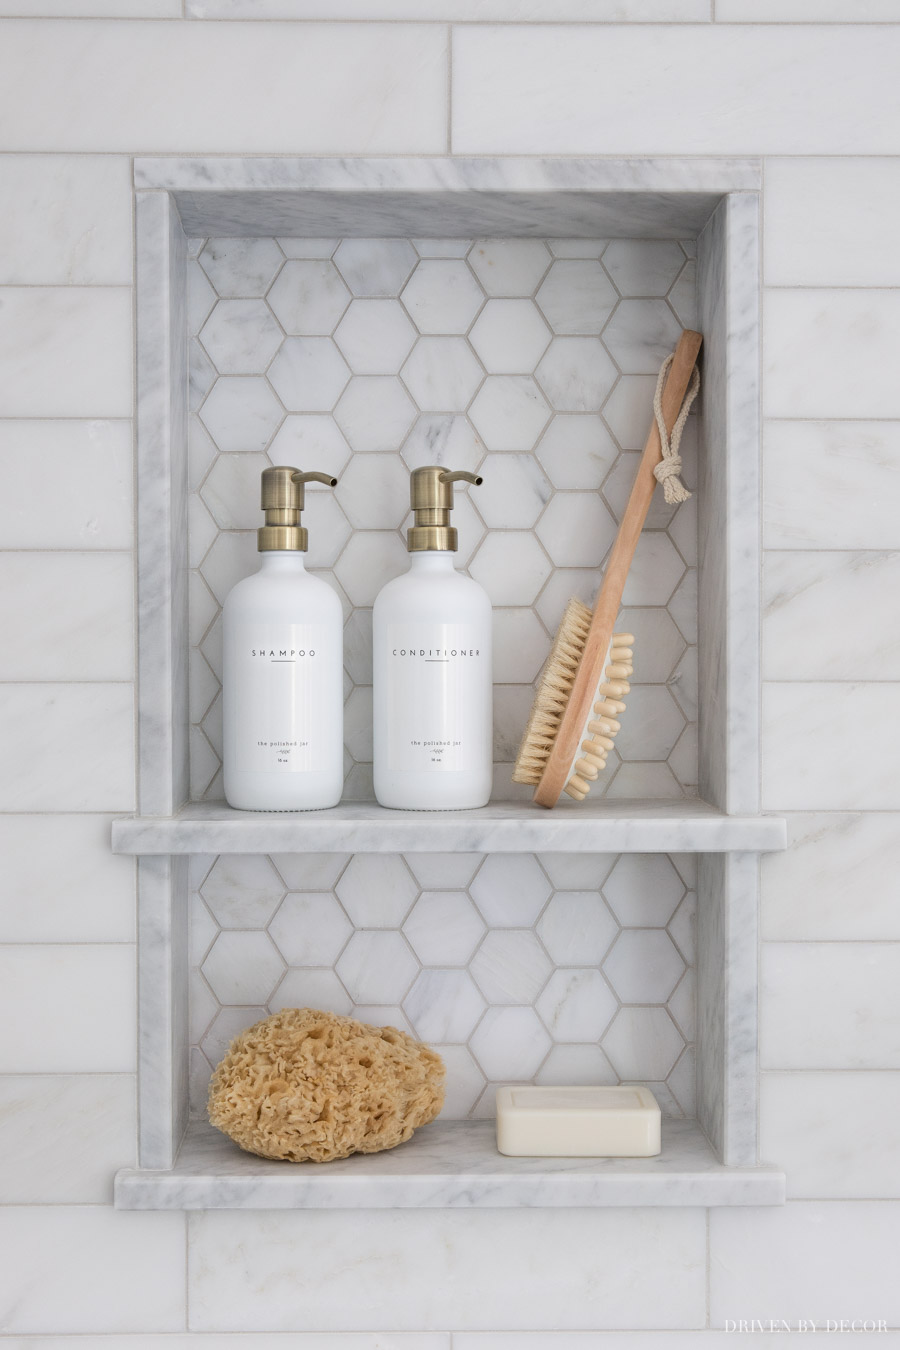
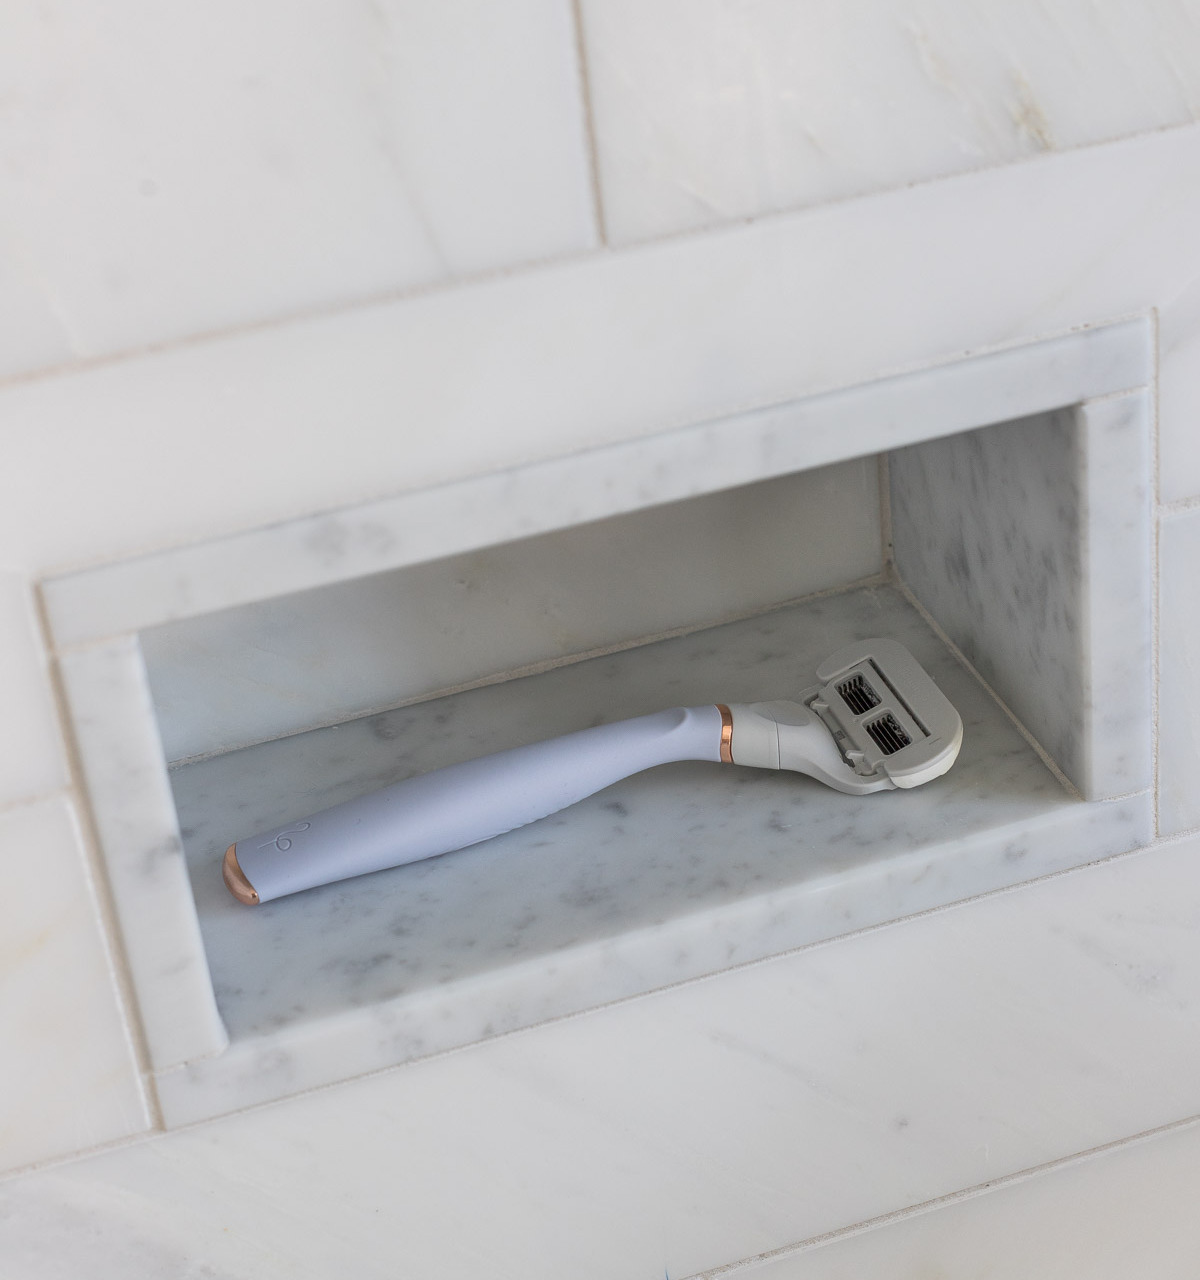
We have plenty of space on the top shelf for taller bottles and the bottom shelf is perfect for soap and shorter items. We also added a small niche below our main one which serves as a spot to put my foot when shaving and holds my razor too:
If you want the exact dimensions of our niches and how far off our shower floor they are, you’ll find those detailed measurements in my post on bathroom measurements.
Idea #5: Don’t Limit Your Lighting to “Bathroom Lights”
While it’s feature of our bathroom that people either love or hate, having a nontraditional pendant light over our tub is one of the features that I think really makes the space:
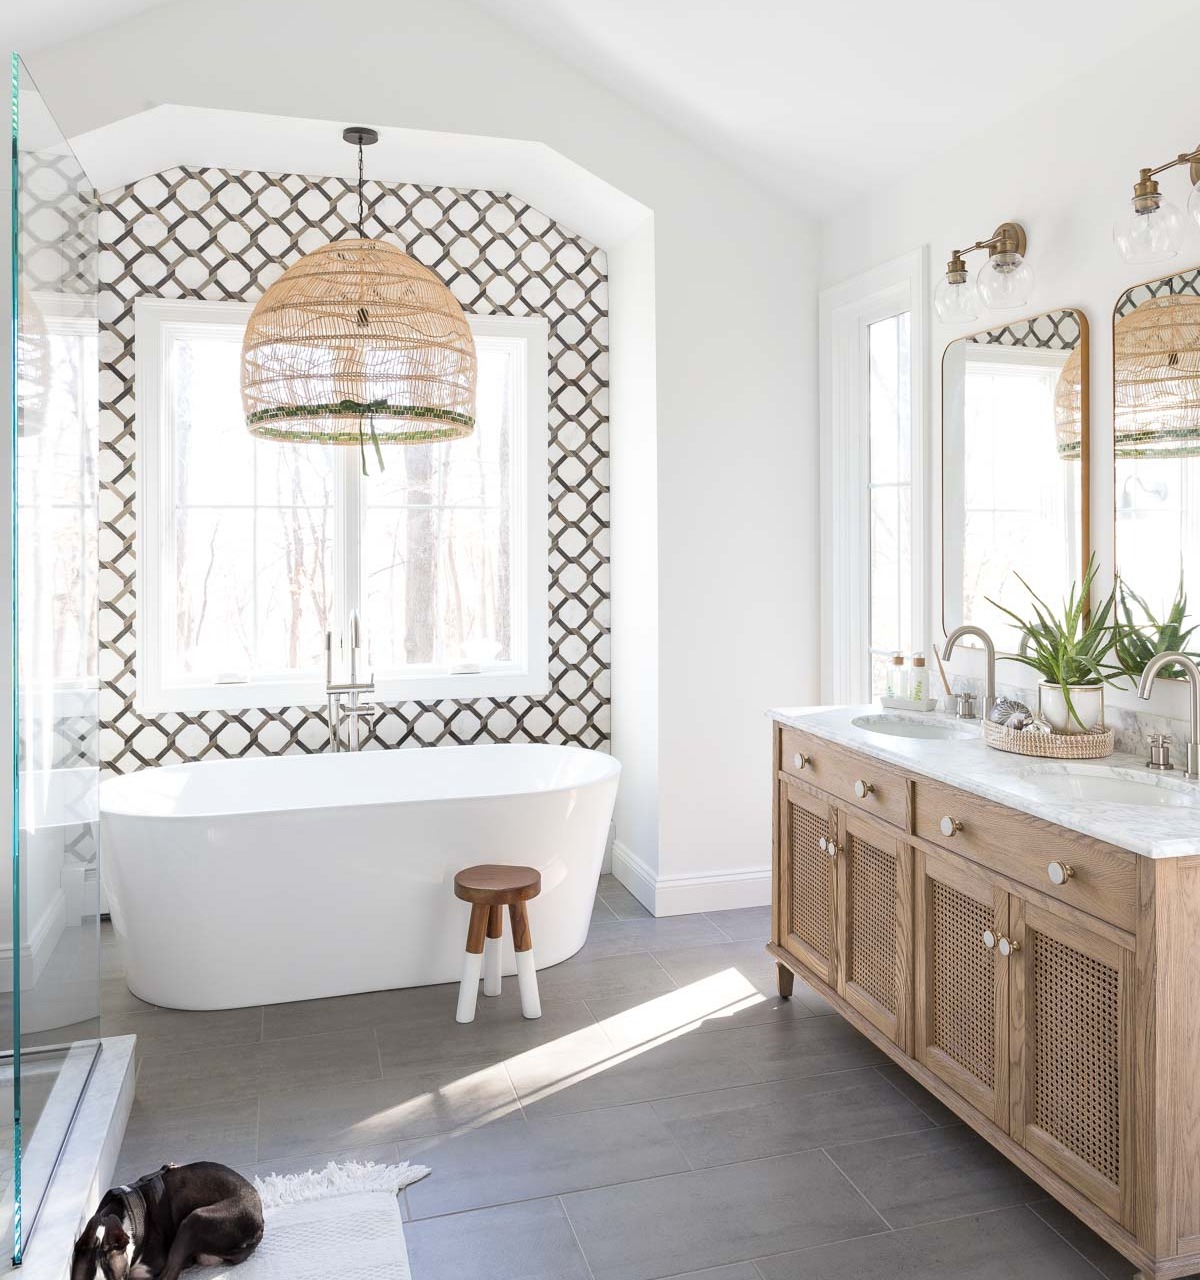
I chose {this oversized rattan light fixture} and love the texture and warmth that it adds! For the holidays I fancied it up a bit by weaving some velvet ribbon around the bottom of it:
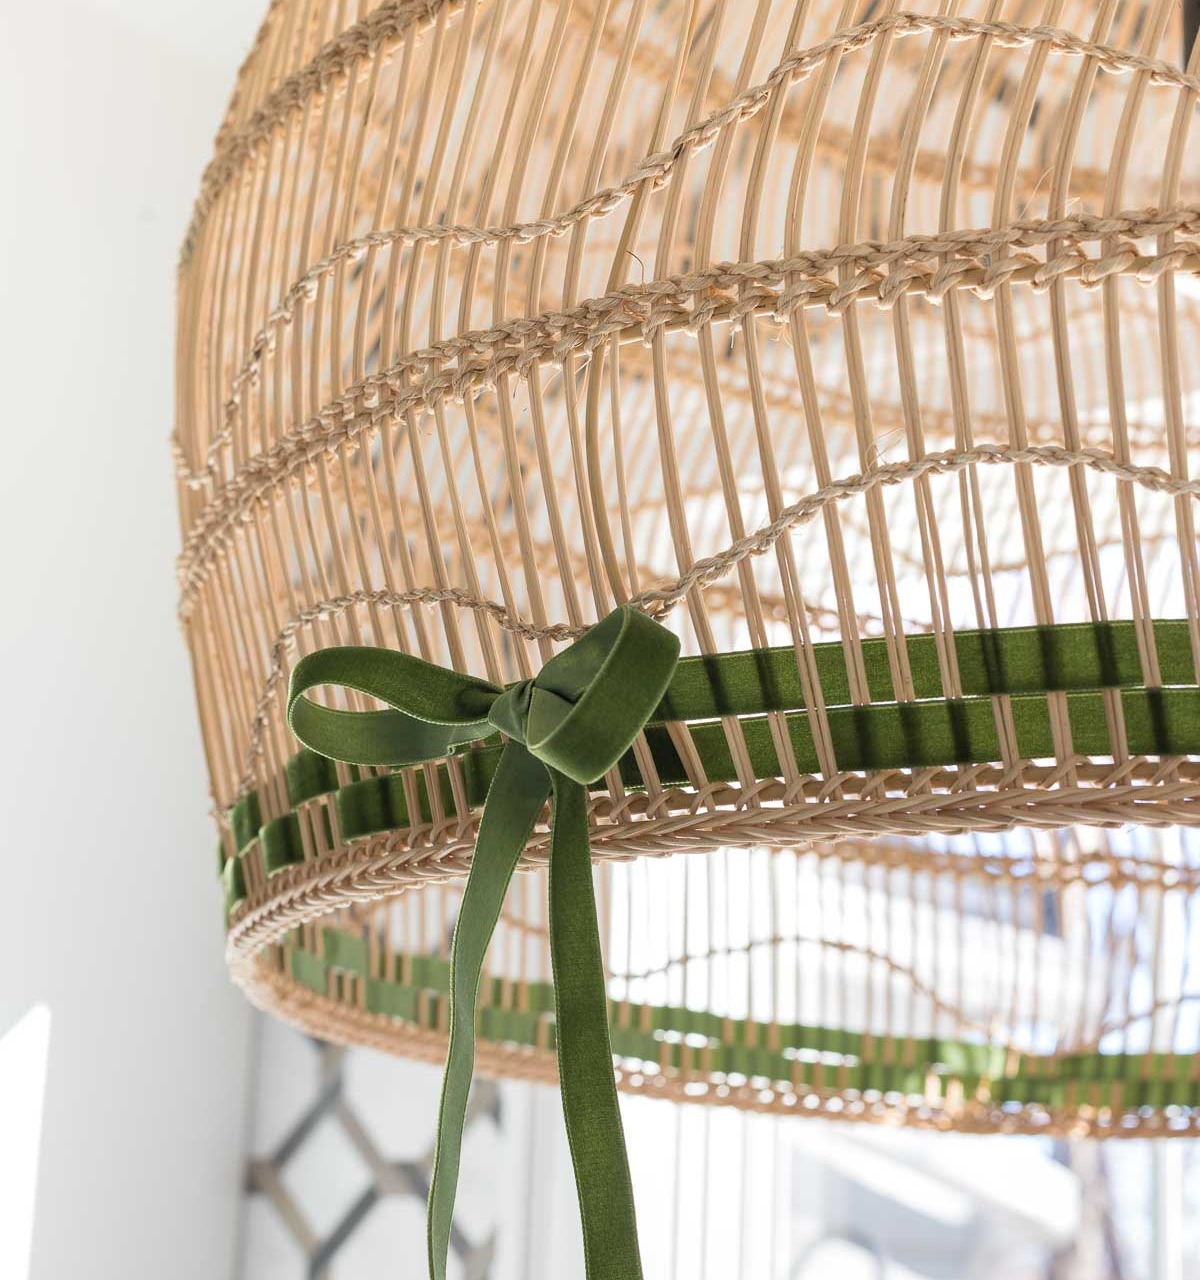
There are different regulations for lighting above bathtubs depending upon where you live (ours had to be on a GFI) but if you have the option, using a nontraditional light fixture such as a pendant or chandelier is a great way to introduce add some personal style to your space.
Check out my post on bathroom lighting ideas for more lighting ideas to use in your next bathroom remodel.
Idea #6: Consider a Heated Toilet Seat (Yes, Really…)
I know some of you are rolling your eyes right now because yes, this is definitely a bit of an unnecessary extra but it’s a pretty inexpensive one and honestly pretty awesome. When we started planing our master bathroom, our contractor told me it’s on his must-have list and when I remained unconvinced he said it would be his “bathroom moving in” present to us – ha! Well now that we have it, I’m sold!
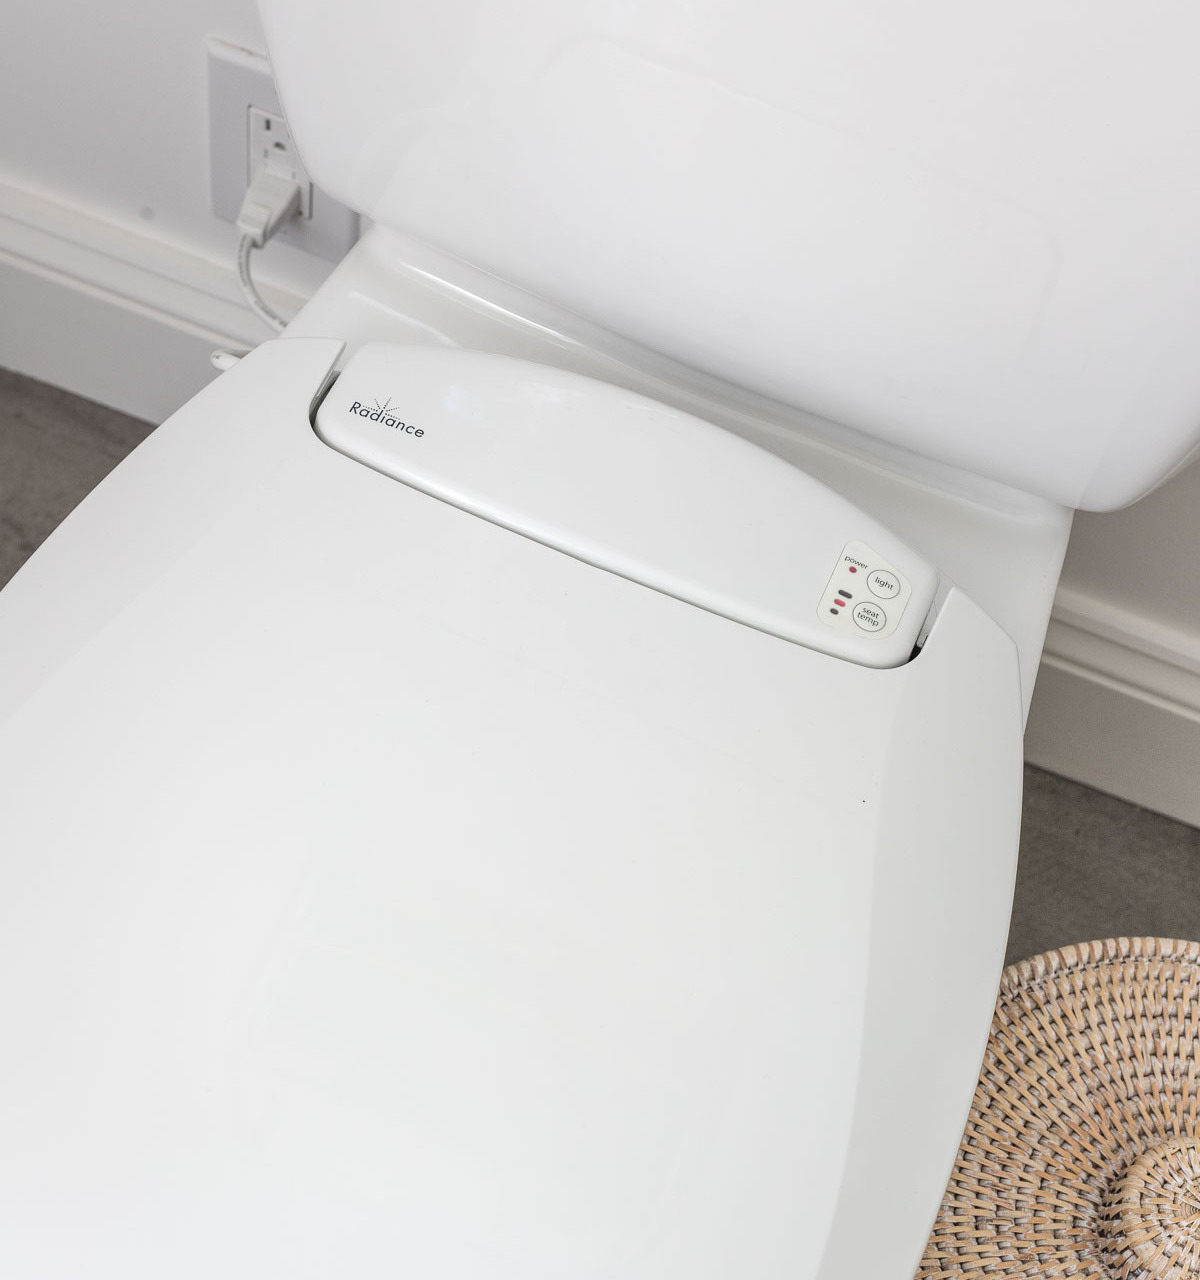
It IS something that you need to plan ahead for since it requires an outlet on the toilet wall to plug the heated seat into but other than that it’s just buying the toilet seat and plugging it in. And like I mentioned, it’s not a very pricey extra – we have {this toilet seat} which is less than $100 more than a typical seat.
Idea #7: Heated Tile Floors Are a Nice Extra Too!
Another extra that we put into our recent master bathroom remodel that I would absolutely try to work into my budget of a future remodel also is heated tile floors. They’ve been so nice to have, especially since we have cold winters and our bathroom doesn’t have a finished space below it (which makes our tile floor pretty cold).
Our bathroom isn’t a very traditional shape so we had a custom mat made where they measured the exact footprint of our bathroom and created a mat that fits it exactly. This is what it looked like once the mat was laid and mudded in prep for tile (the lines are the coils of our Nuheat mat):
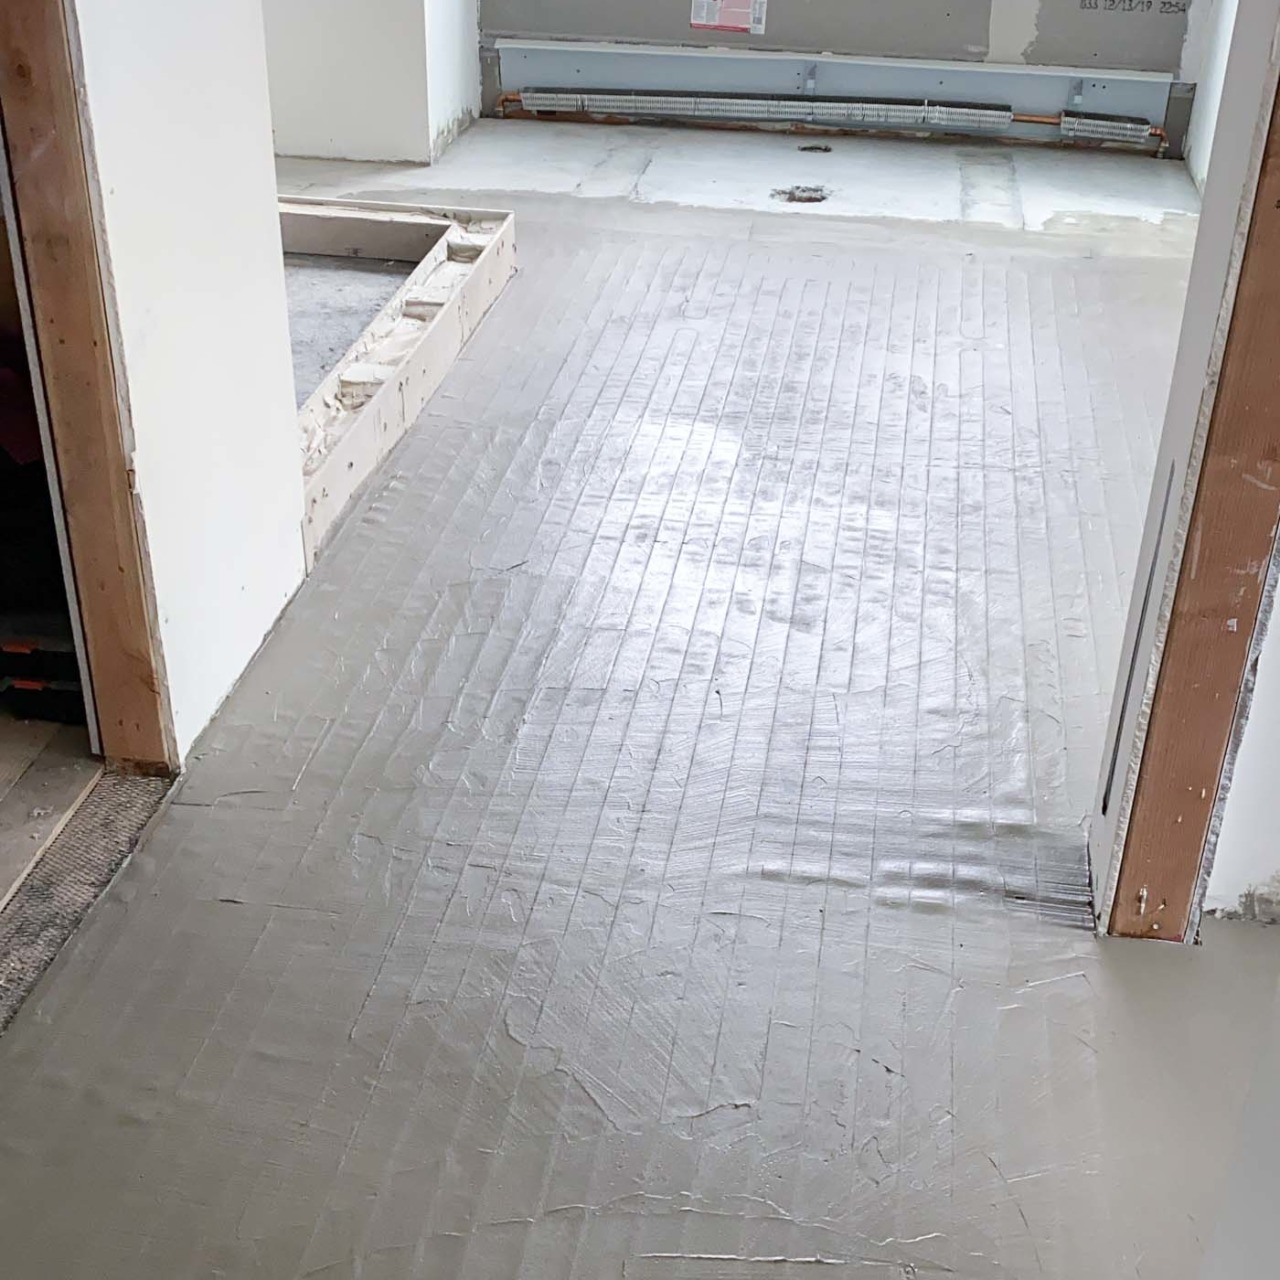
And it’s not necessarily as pricey of an option as you might think – you can save quite a bit of money by going with one of their standard sized mats which can work really well in a typical rectangular shaped bathroom.
Idea #8: Add Outlets to Your Vanity Drawers
We went with {this pre-made double vanity} in our master bathroom to save money vs. custom cabinetry but if you’re going with custom, having outlets installed in the back of at least one drawer is a really nice feature for helping with countertop clutter.
You simply use a specialty outlet like {this one} that’s mounted inside the drawer and has the cord attached to a large hinge behind it that allows you to pull the drawer in and out while keeping the outlet connected. Perfect for a hair dryer and so many other things!
It’s a very similar idea to this drawer in our kitchen where we have a double outlet and two USB ports that allows us to use it as a hidden charging station:
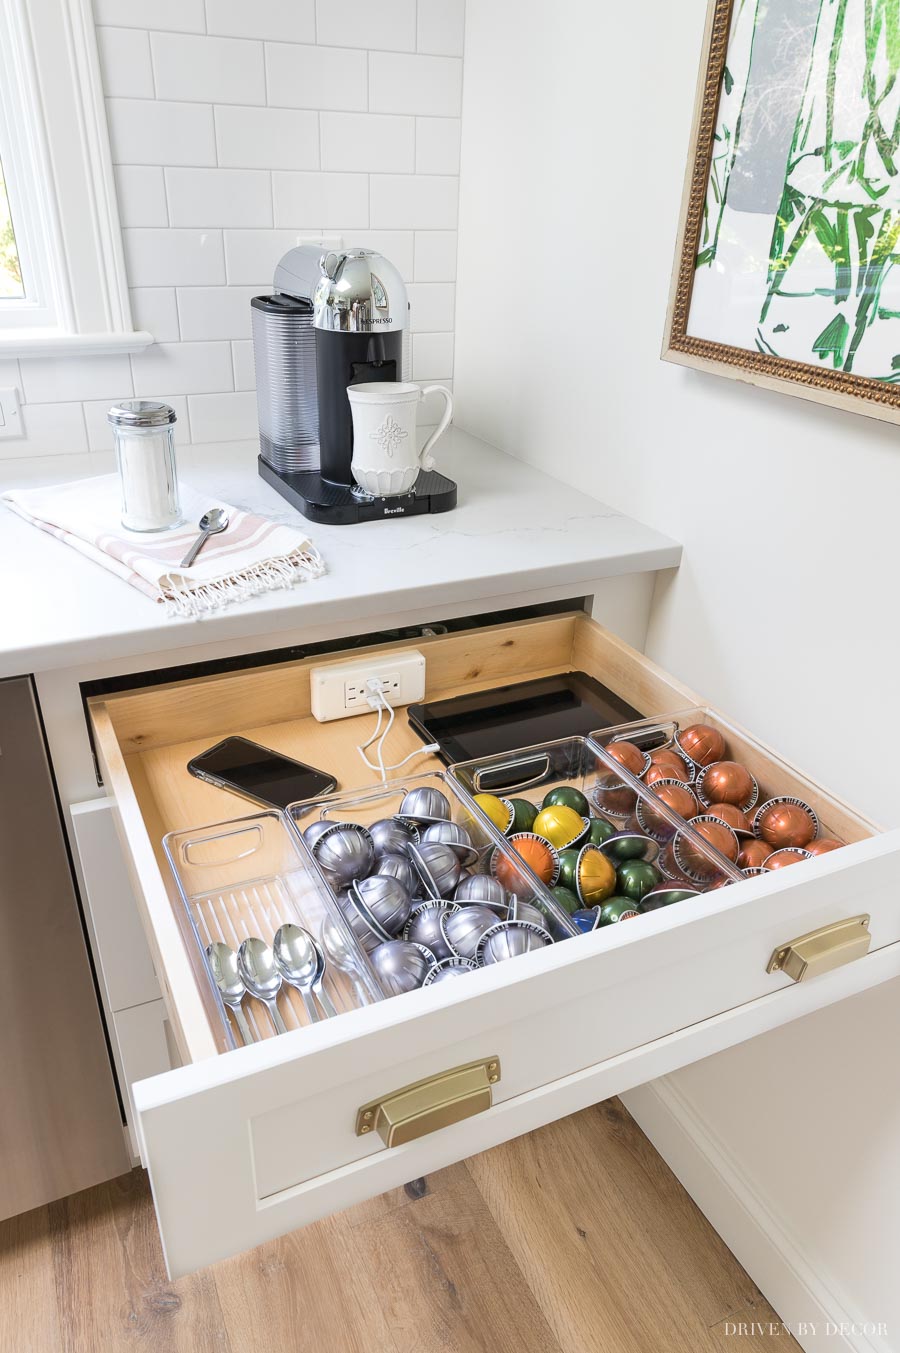
You can have non-custom cabinetry retrofitted with a drawer outlet too but you need to have a few inches of clearance behind the drawer to make it work.
Idea #9: Use Floating Shelves to Snag Extra Storage Space
Figuring out the layout for our master bathroom was a little tricky because while it was a new addition, the footprint was determined for us because we went both as wide and as long as we could based on our septic setback and a few other considerations. I originally planned to include a small storage cabinet for towels, TP, etc. but had only a very small space for it to the right of our shower and I couldn’t find a narrow cabinet that I liked.
I ended up having to change my plan and use floating wood shelves instead. I chose {these floating oak shelves} in the pickled white finish. It turned out to be the luckiest plan B ever because not only do they give our space a much more airy feel than a cabinet would:
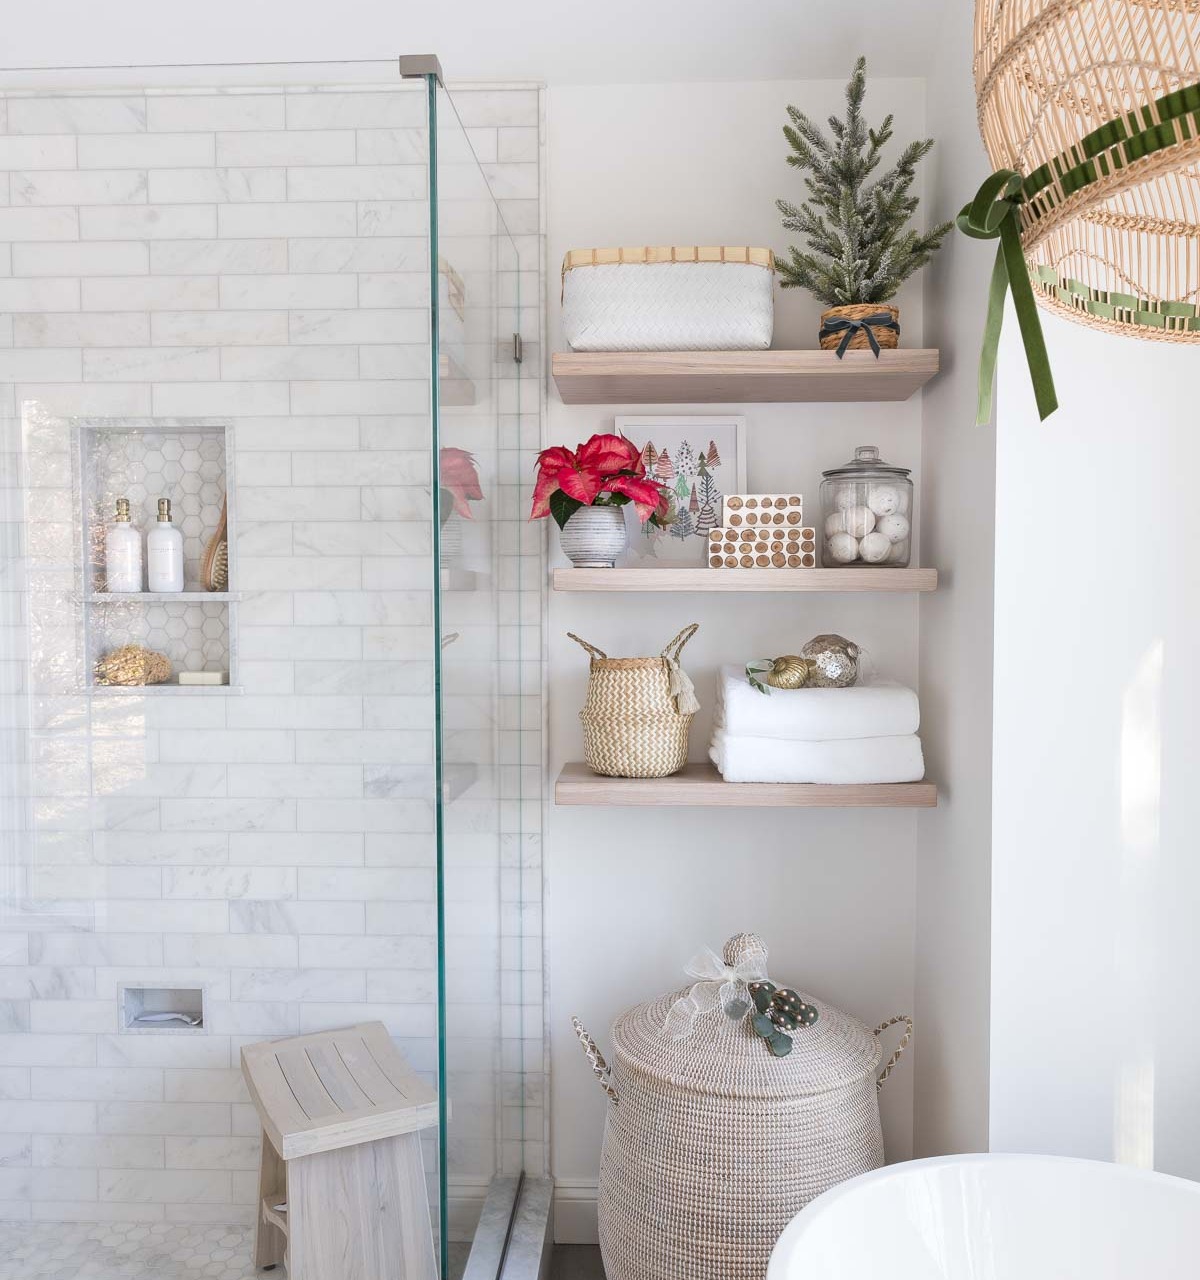
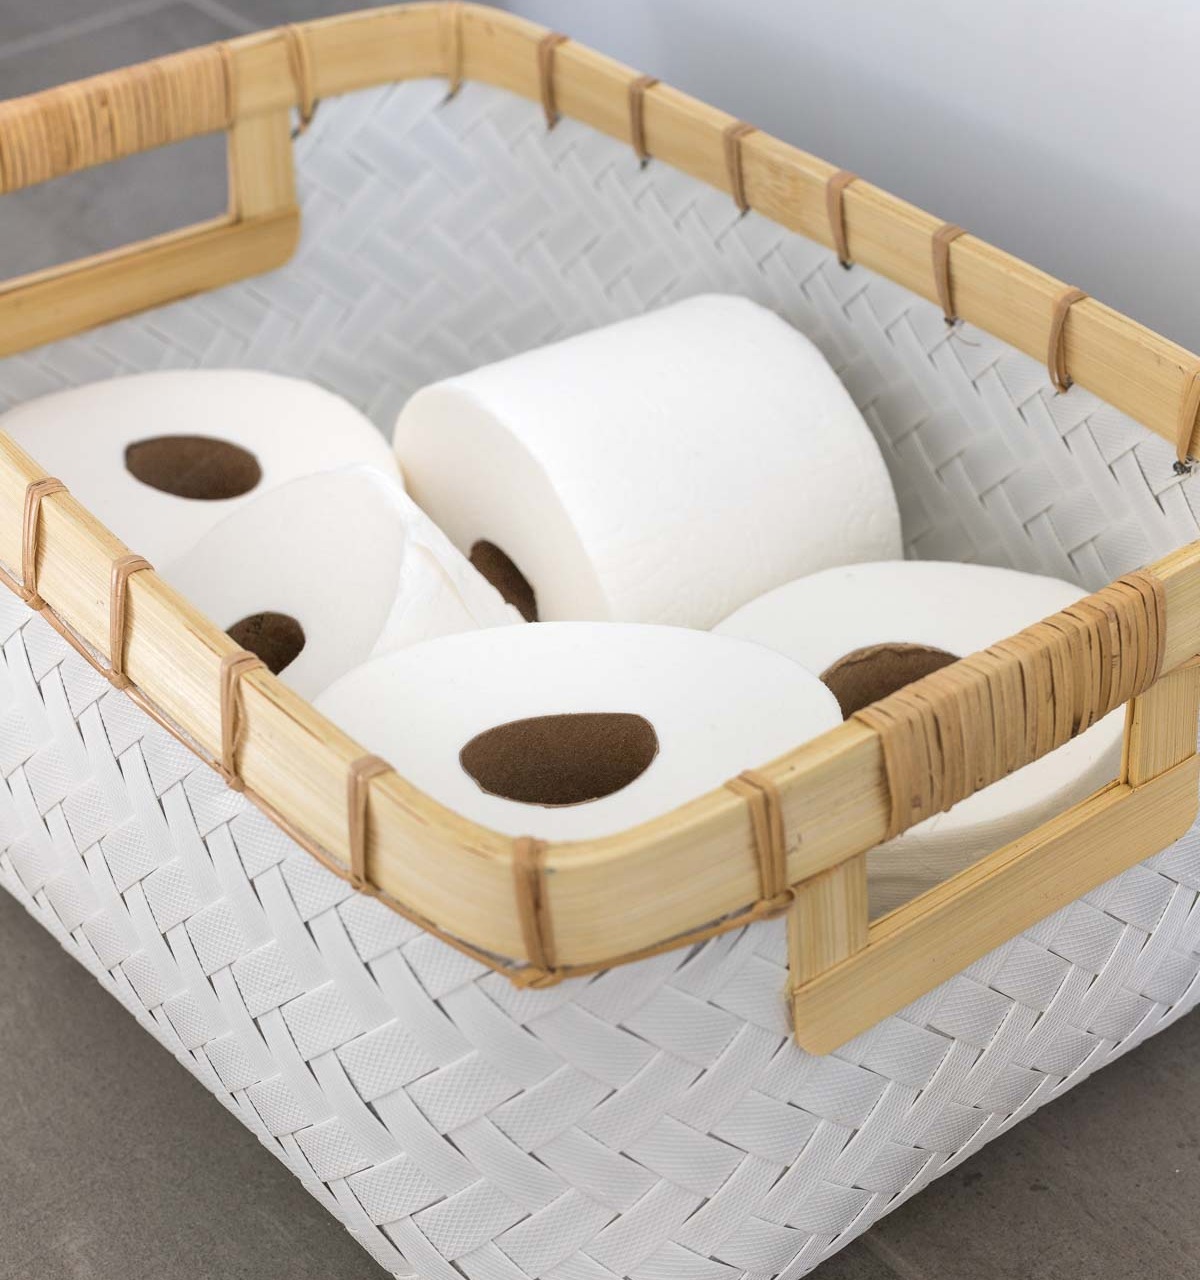
Shelf sources (from top to bottom): White woven basket (medium) | Gray & white striped planter (holding snake plant) | Colorful moth art print | Glass canister (1 gallon size) | Bath bombs | Belly basket (similar) | Favorite bath towels | Other accessories no longer available | Large lidded basket
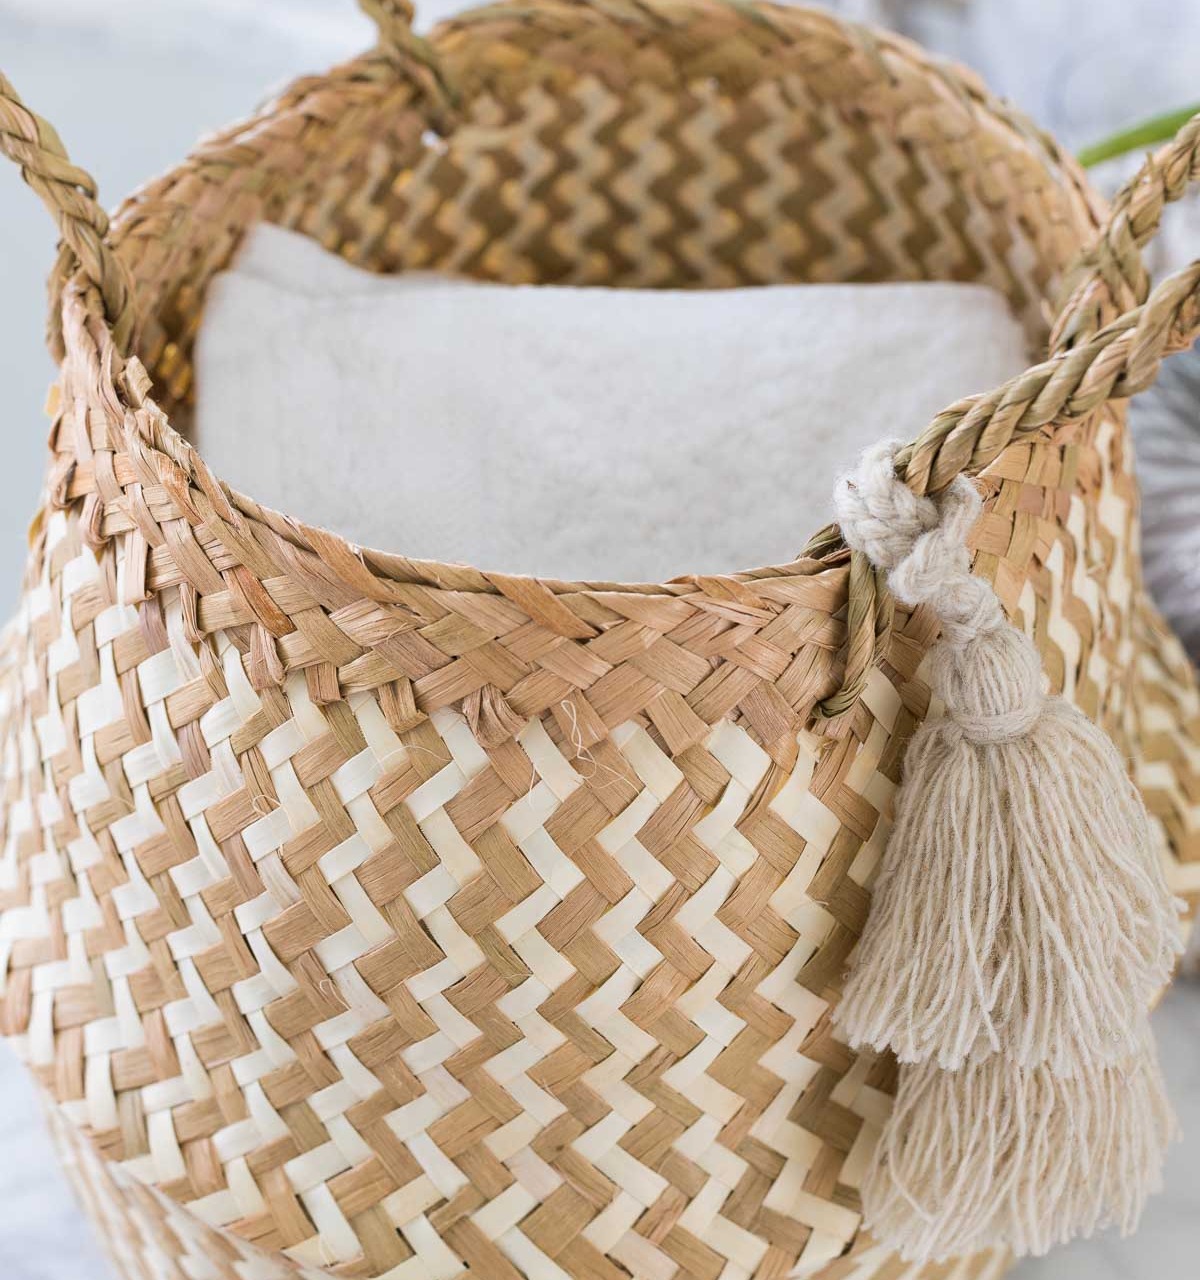
but they are much more functional than I expected because everything is quick and easy to grab. We use it for our extra towels, our washcloths (which are in the tasseled belly basket to the left of the towels),
rolls of TP (which are in the top basket),
bath bombs in a clear jar, and nail polish bottles which are stored in a pair of stacked decorative boxes. So don’t discount open shelving in a bathroom – it’s a great way to snag extra storage space without cluttering it up with a bulky cabinet! You can get all of the source details in my post on our bathroom floating shelves including the size, wood type, and finish we chose.
Another spot to consider snagging for extra storage is over the toilet – I used a wall shelf for that spot (my exact shelf is no longer available but {this shelf} is similar):
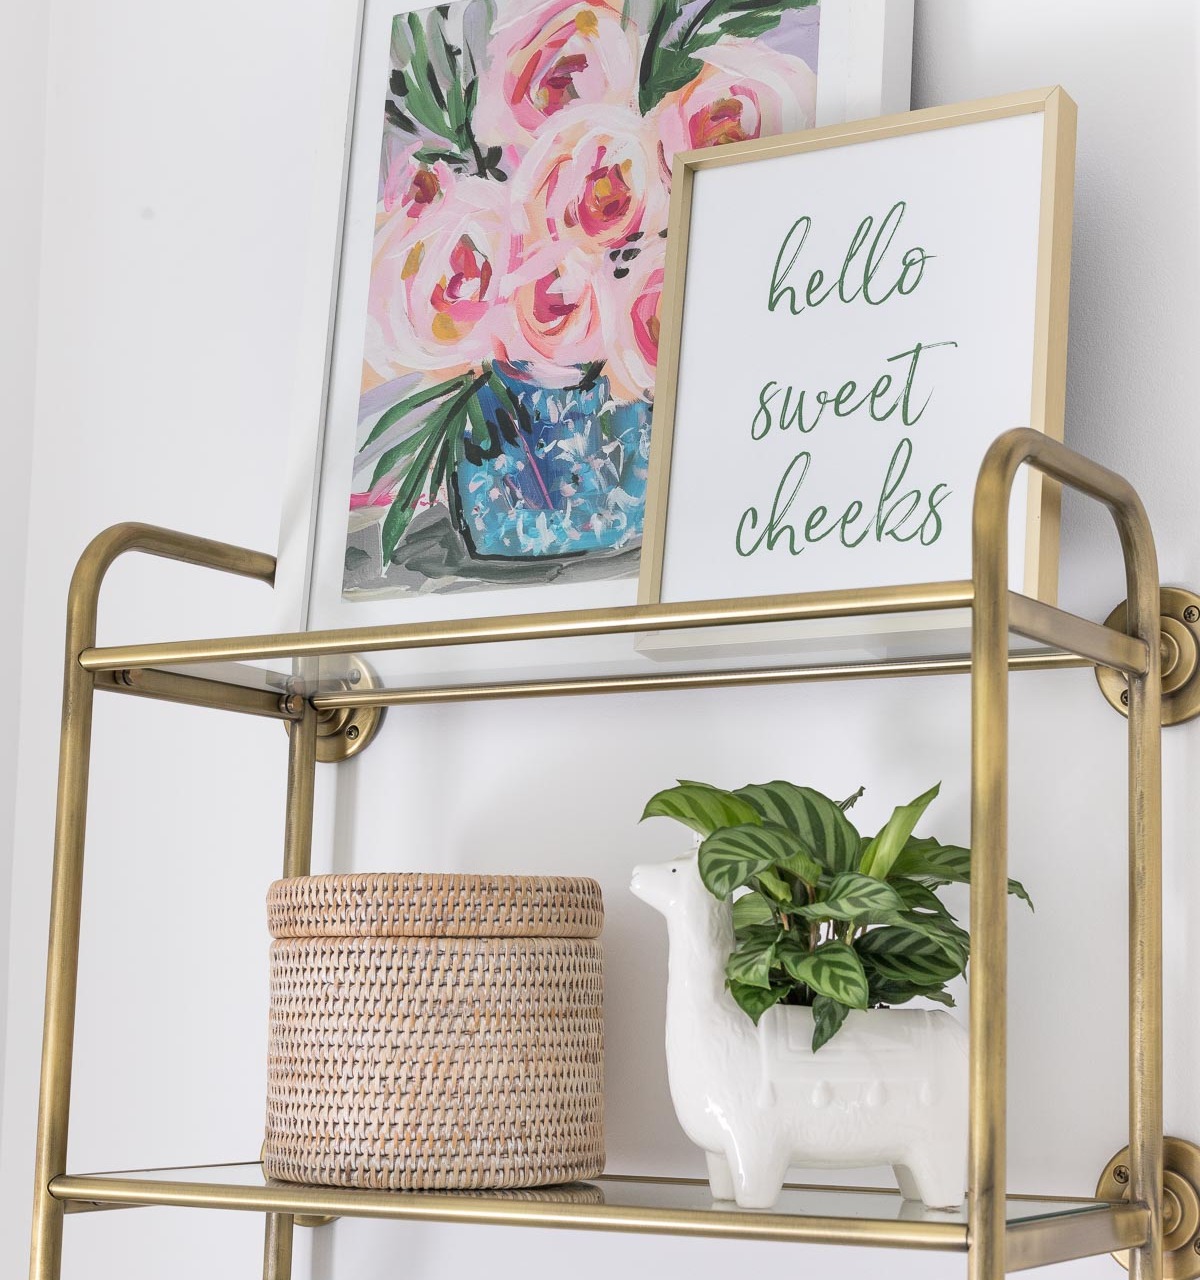
Shelf sources: Floral art print | Sweet cheeks print – made myself | Rattan holder for extra TP roll | Llama planter
but floating shelves with baskets for storage would work really well there too.
Idea #10: Take Your Tile to the Wall
If you have a focal wall in your bathroom (often the wall that your bathtub or vanity is on) consider tiling it! It’s a great way to add some personality and style – I feel like our bathroom would have a totally different vibe if you took away the tile on the wall behind our tub:
I used {this Walker Zanger tile} that’s a mix of porcelain and marble:
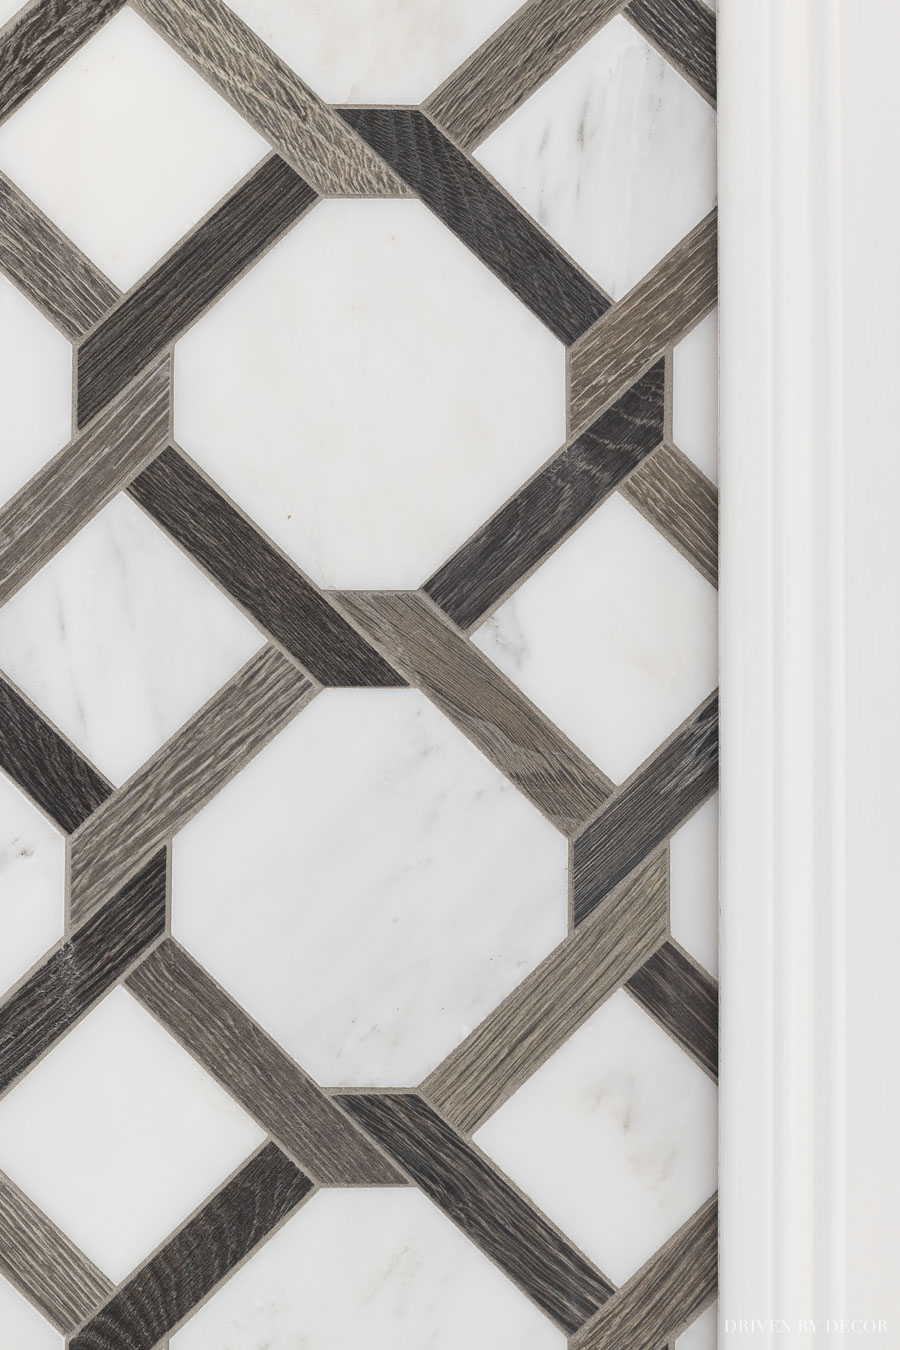
And if you want a more budget friendly option, adding wallpaper to a bathroom wall could make a similar impact.
Want more bathroom remodel ideas? Check out my post on 15 bathroom remodel ideas on a budget!
I hope you all enjoyed this post and found a helpful tip or two! If you haven’t already seen my full bathroom remodel reveal, check out my bathroom remodel before and after – it includes sources for everything!
XO,


Gemma says
What color did you paint the walls?
Glori says
Love your master bathroom! What color grout did you use? TIA
Sherri says
Hi, I love your bathroom remodel. I love your glass shower walls and how they do not have the brackets on the bottom to hold them. Can you give me more details on how that was accomplished Because my guy says it can’t be done without the brackets on the bottom.
Thank you.
Kris Jarrett says
Sure – this post has all the details on that: https://www.drivenbydecor.com/glass-shower-enclosures/
Gretchen Fleming says
Can you share a link for the tile in your shower? Thanks!
Deepa Labana says
Awesome tips! Thank you.
Michelle Terry says
Hi Kris…love your bathroom remodel. I am curious about your floor tile? I don’t see the color/size mentioned anywhere. Thank you
Valerie says
Love this bathroom! Great ideas. Thanks for sharing.
Heidi says
Do you have any recommendations for wallpaper similar to the tile you used on your wall? I am looking for a fun accent wall and need some inspiration. Also, any recommendations on using sconces for vanity lighting?
Justine says
Very helpful thank you!!
Stephanie says
Hi there! Your bathroom is gorgeous! Can you tell me more about your bathroom floors? I’m wondering what tile/color you used. Thank you!
Rebecca says
While the timer is great for odors in the bathroom, your shower fan should be on a humidistat. That way it turns off when the moisture has been removed from the room.
Anonymous says
What paint color did you use
Kris Jarrett says
It’s Chantilly Lace – you’ll find more details on it in this post: https://www.drivenbydecor.com/benjamin-moore-chantilly-lace/
Bonnie says
We have interior bathrooms without windows so moisture and mold are big concerns. We bought bathroom fans that were powerful, quiet and had a moisture sensor so that they would run and cut off after the moisture was under control. They were a little extra but not bad.
Vanessa Kynes says
Love your bathroom and in the middle of ours right now! What is your favorite cleaner for your marble? We tend to squeegee and wipe down after showers. Also, did they seal your marble?
Kris Jarrett says
Yes they did seal our marble and using a squeegee is key to keeping it clean! Honestly by keeping it squeegeed it hardly gets dirty. I’ve cleaned it with a mild dish soap but hardly get anything on my rag is stays so clean by keeping it dry after showering.