Looking for kitchen remodel ideas on a budget? I’m sharing 8 low cost, big impact ideas to instantly update your space!
Our house was in mint 90’s condition when we bought it so we have a lot of updating and remodeling in our future. While we plan to do a major kitchen remodel at some point, we have bigger fish to fry first (like our primary bathroom – yikes!). So in the meantime, we’re knocking out a few budget-friendly changes to help make our kitchen feel a little less dated and a little more like us.
Today I’m sharing the details of those changes to give you 8 kitchen remodel ideas for updating your space on a budget! (post includes affiliate links; full disclosure statement available {here})
1. Dress Up Your Dated Backsplash
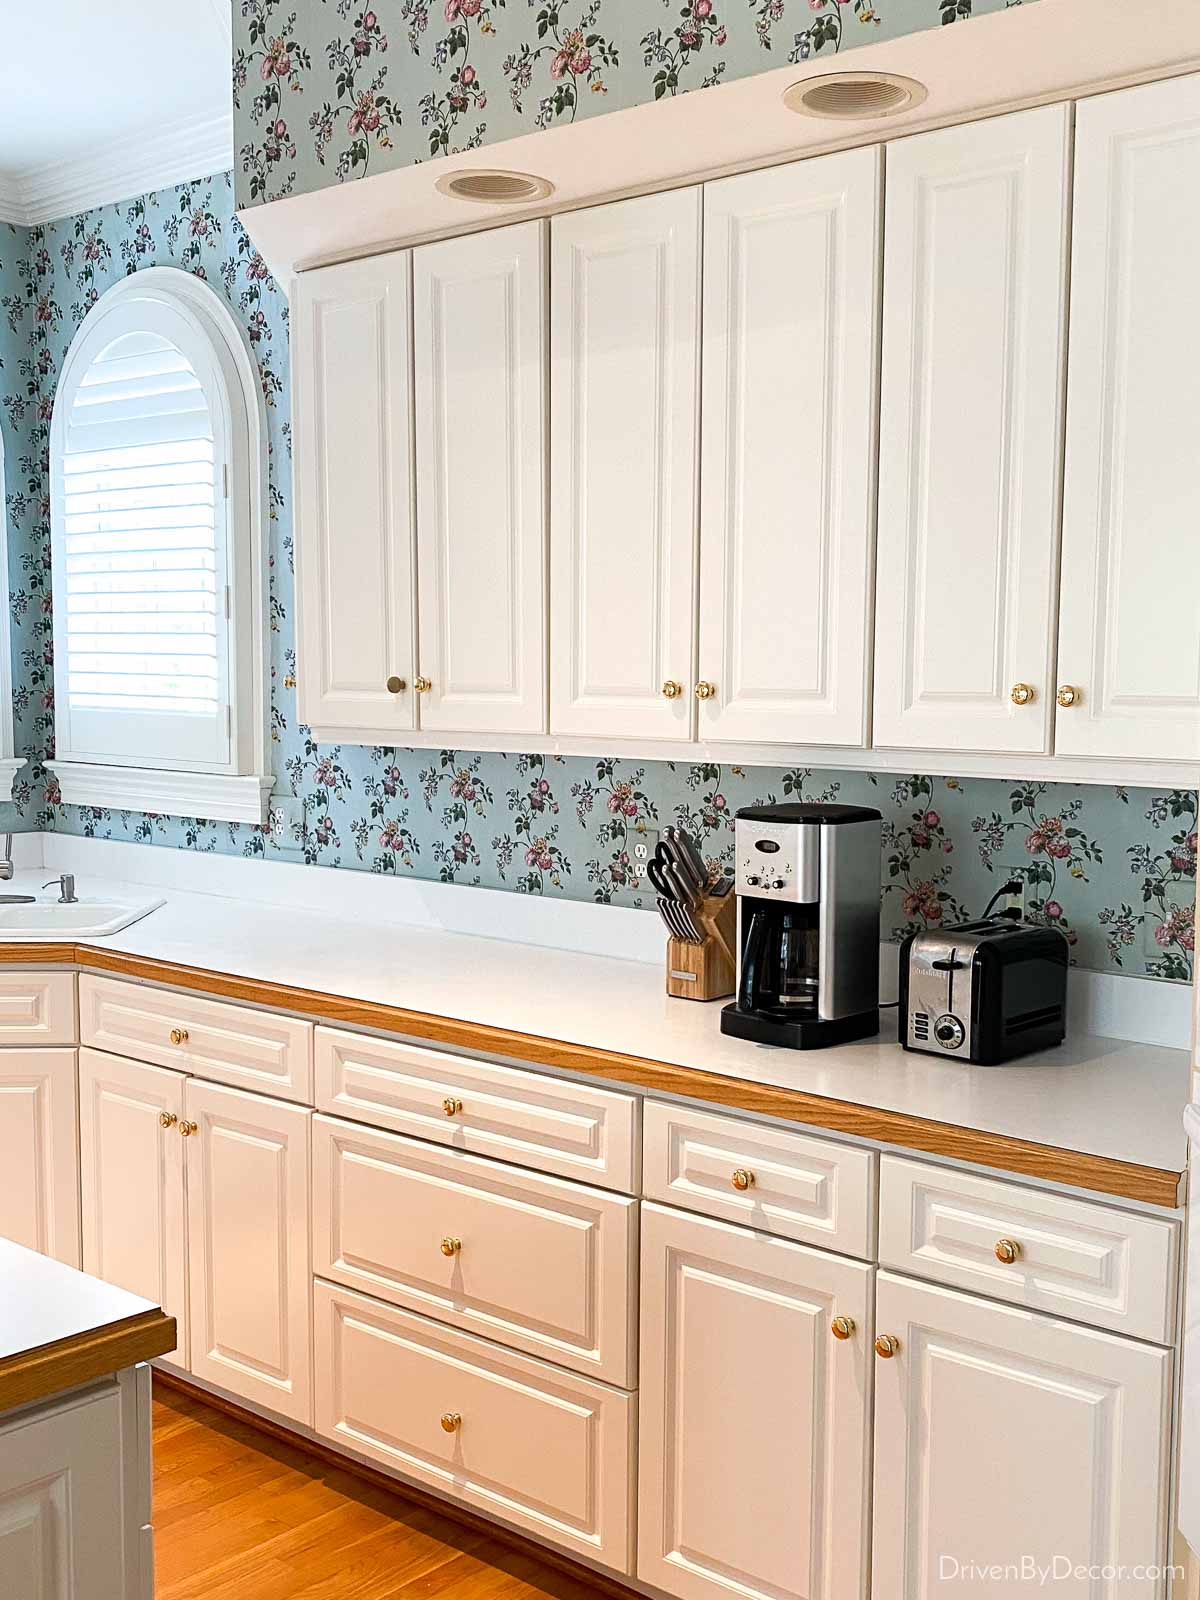
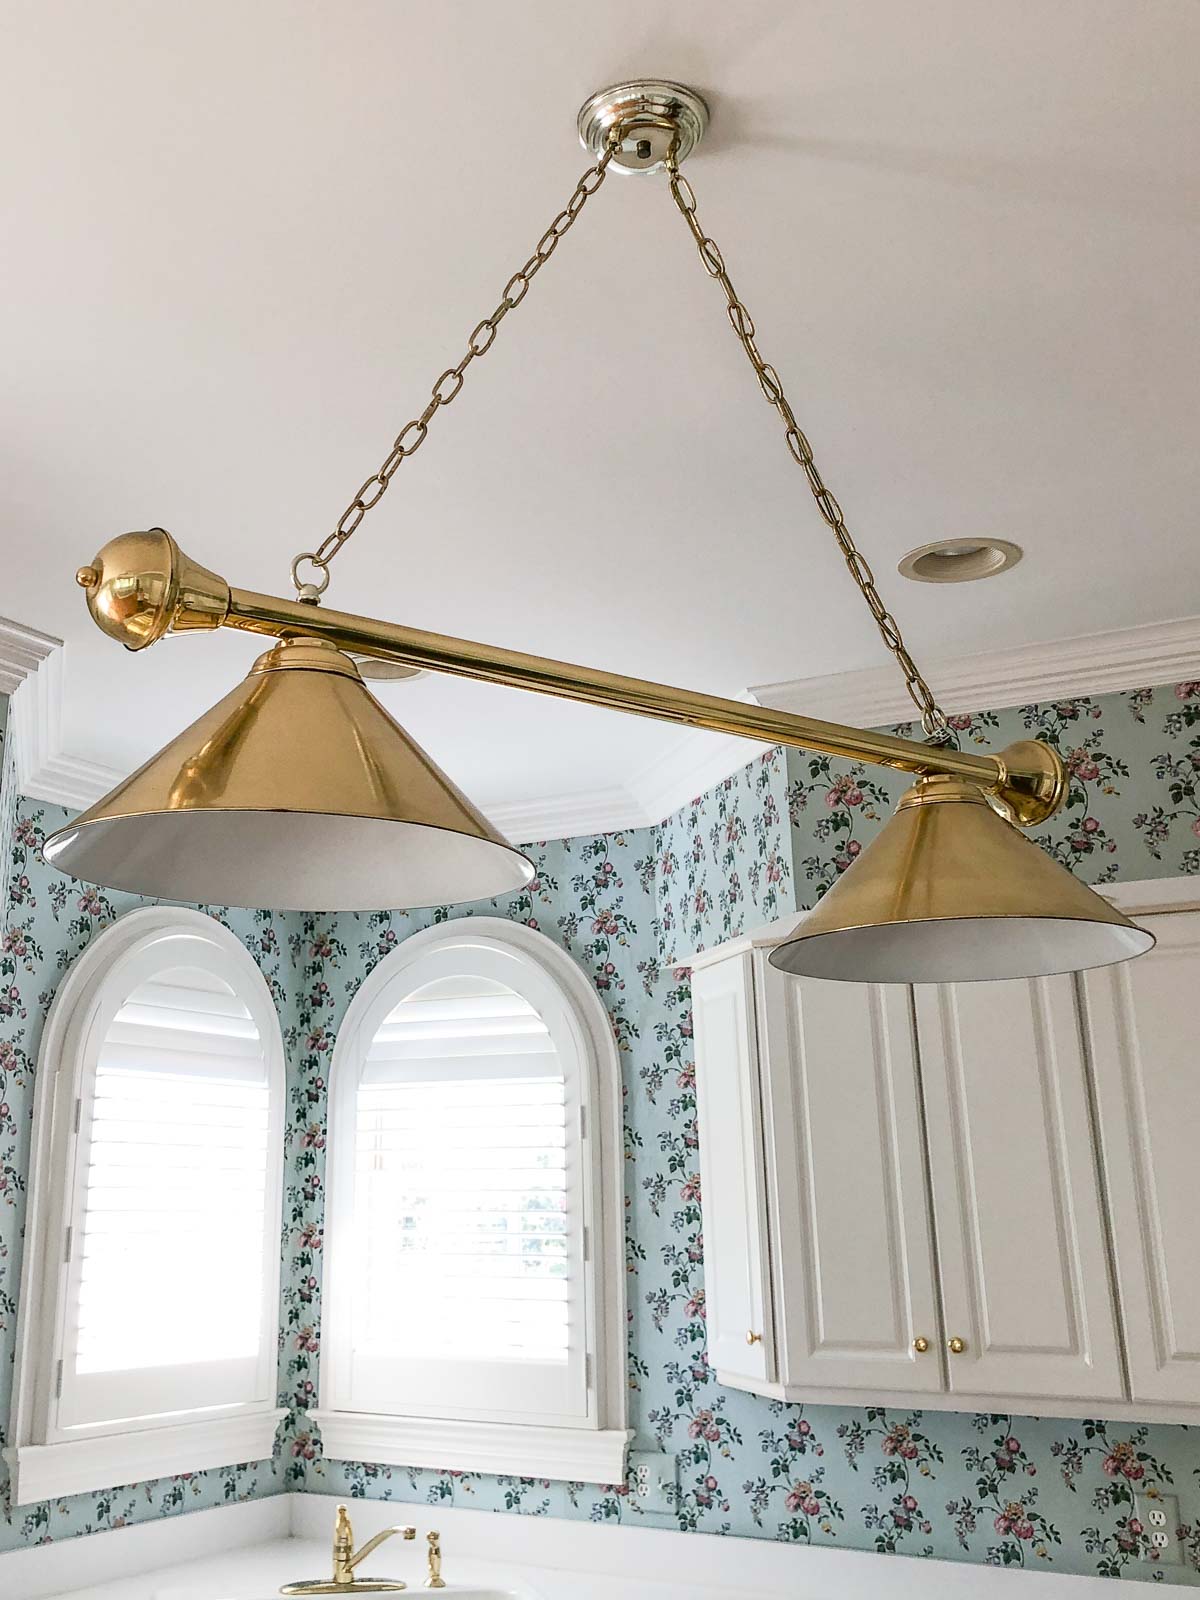
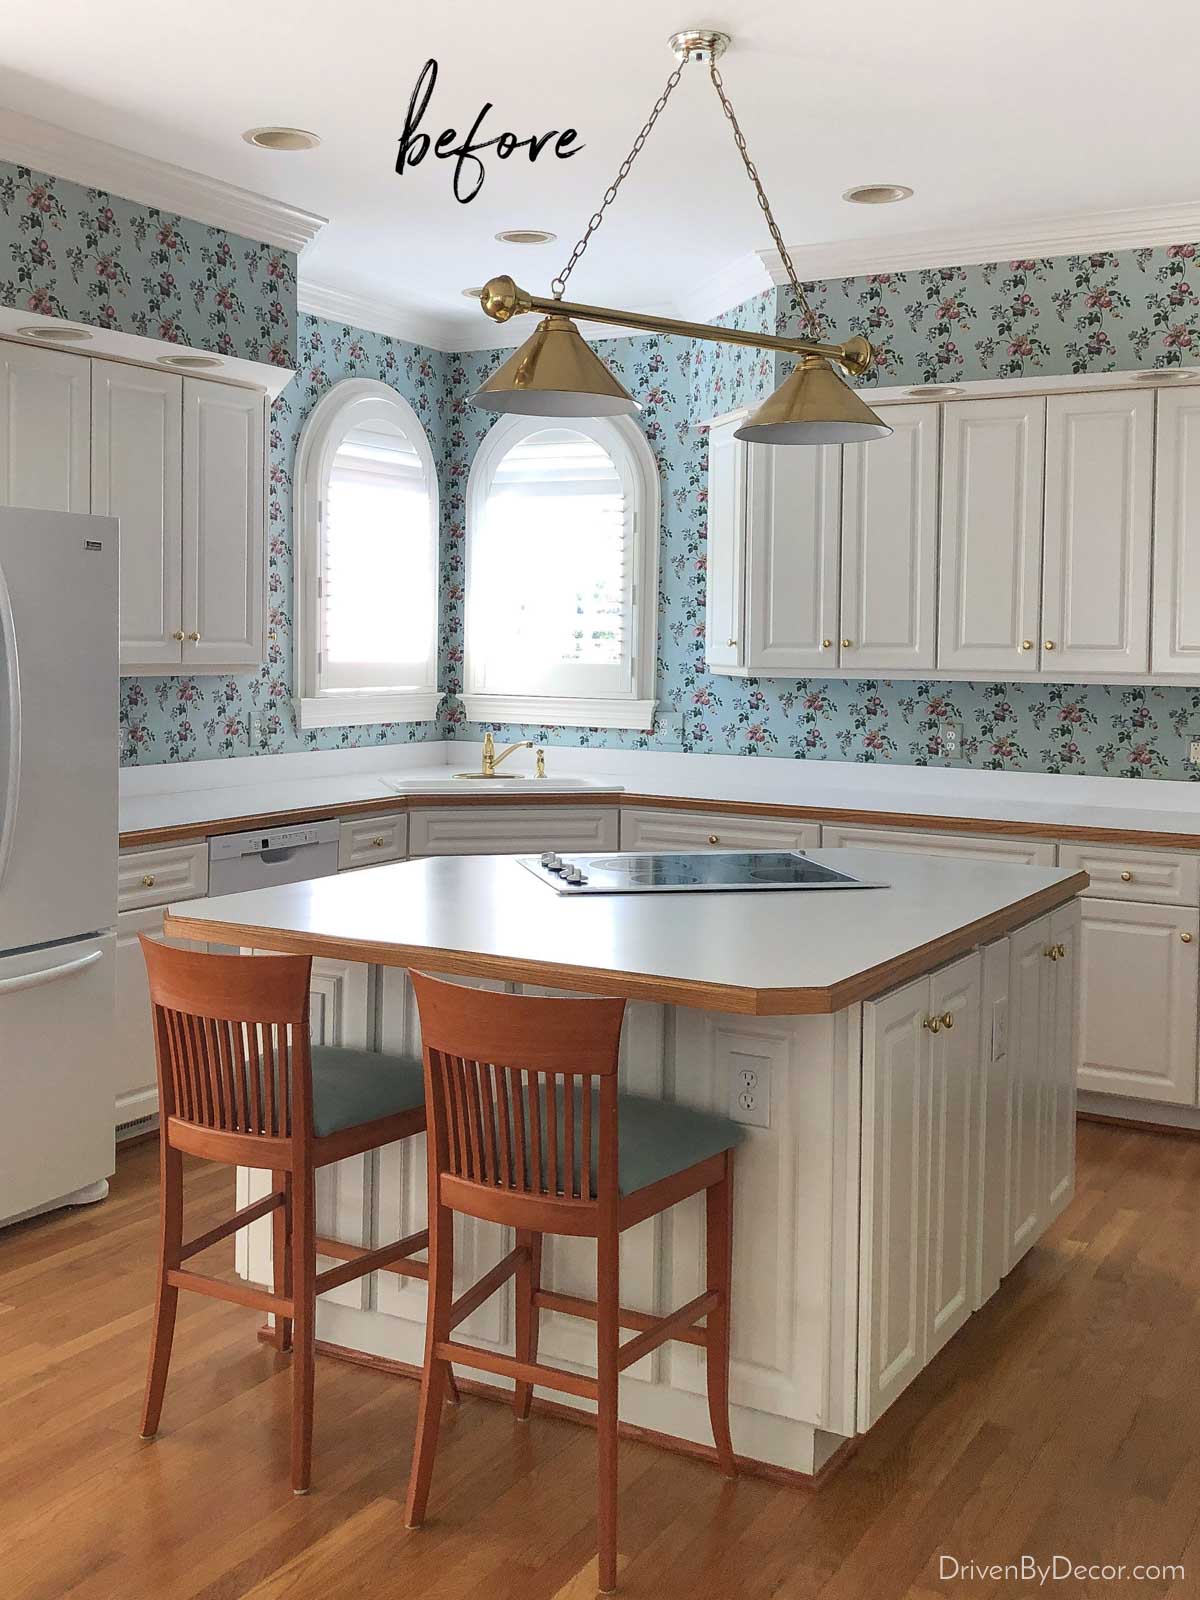
Most dated kitchens could benefit from a backsplash upgrade including ours that was wallpapered in a Waverly-like floral pattern when we bought it:
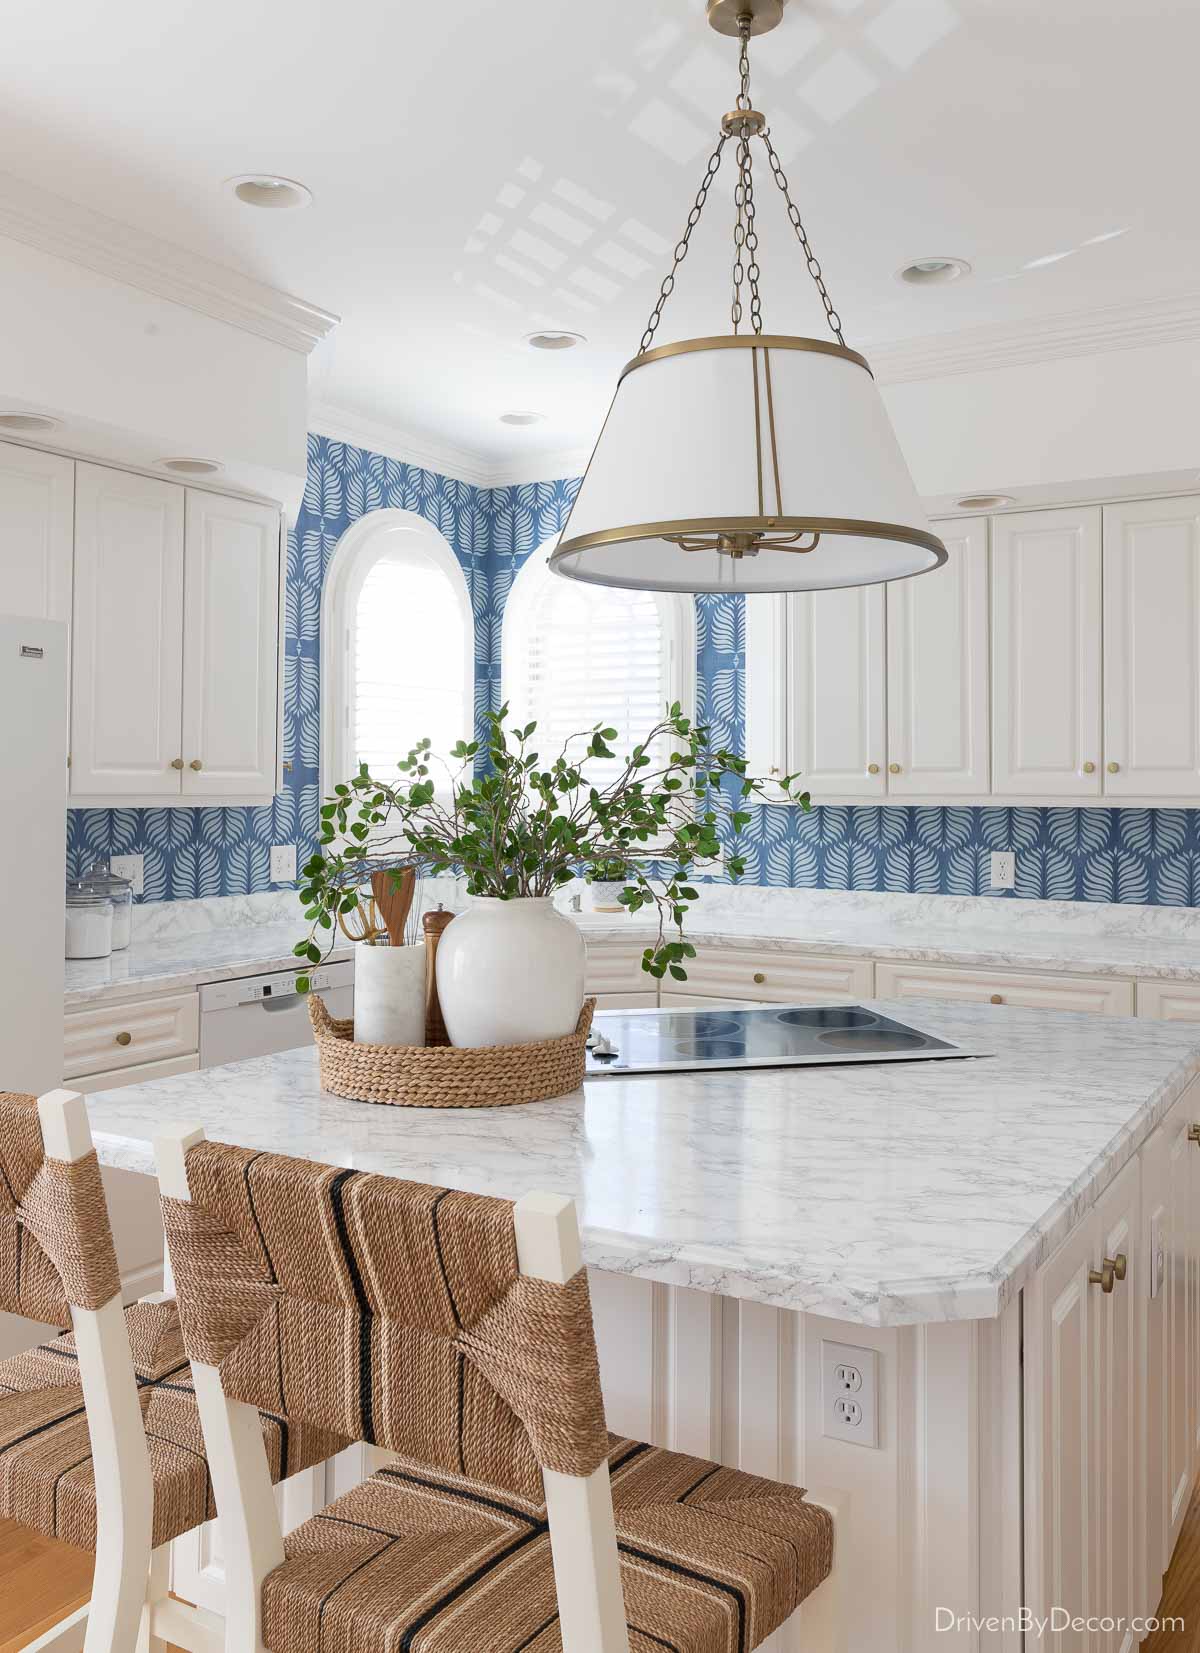
Fortunately there are LOTS of budget-friendly backsplash solutions including the one that I chose – removing the dated, stained wallpaper and installing a new, more stylish option. You can wallpaper just the backsplash area under the cabinets or take it all the way up to the ceiling like I did:
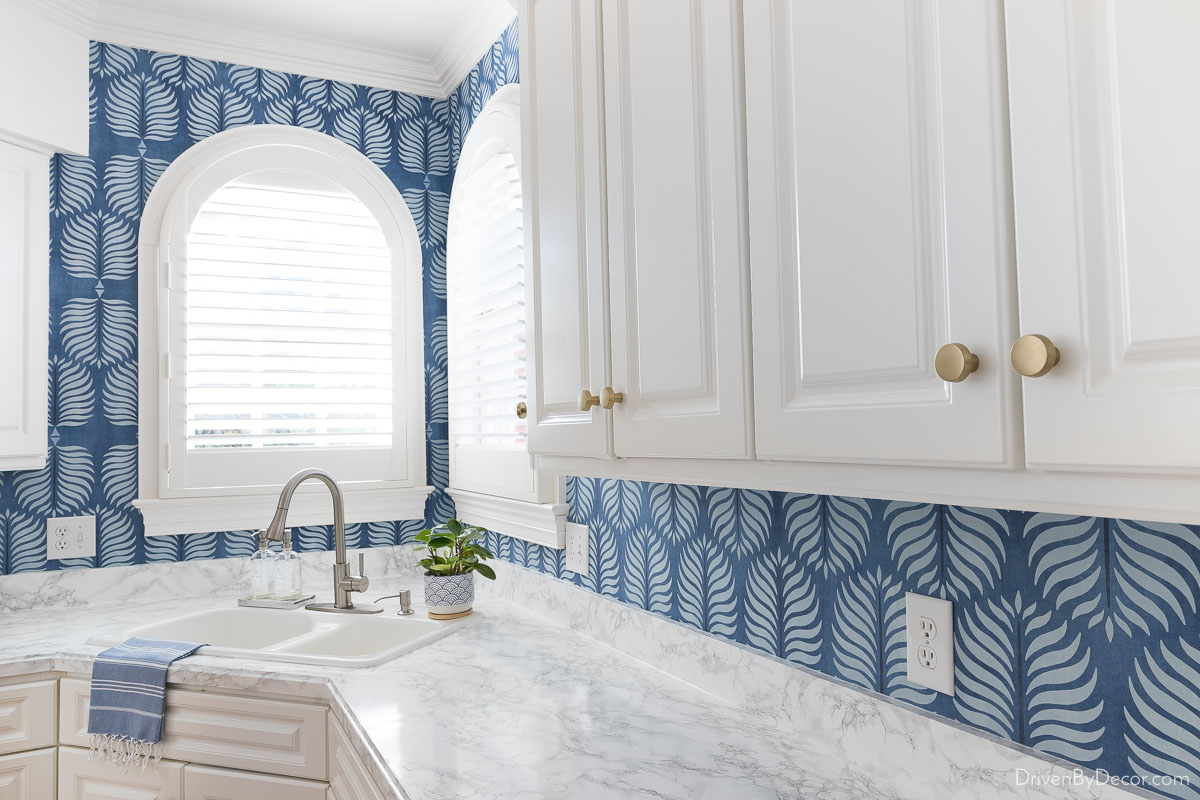
Depending upon the size of the wallpaper roll and the pattern repeat, you often only need a single roll. I used {this indigo wallpaper} which is on the pricey side but since I was using the leftovers from another project (wallpapering the back of our bookcases) to cover the kitchen, it didn’t end up costing me a dime.
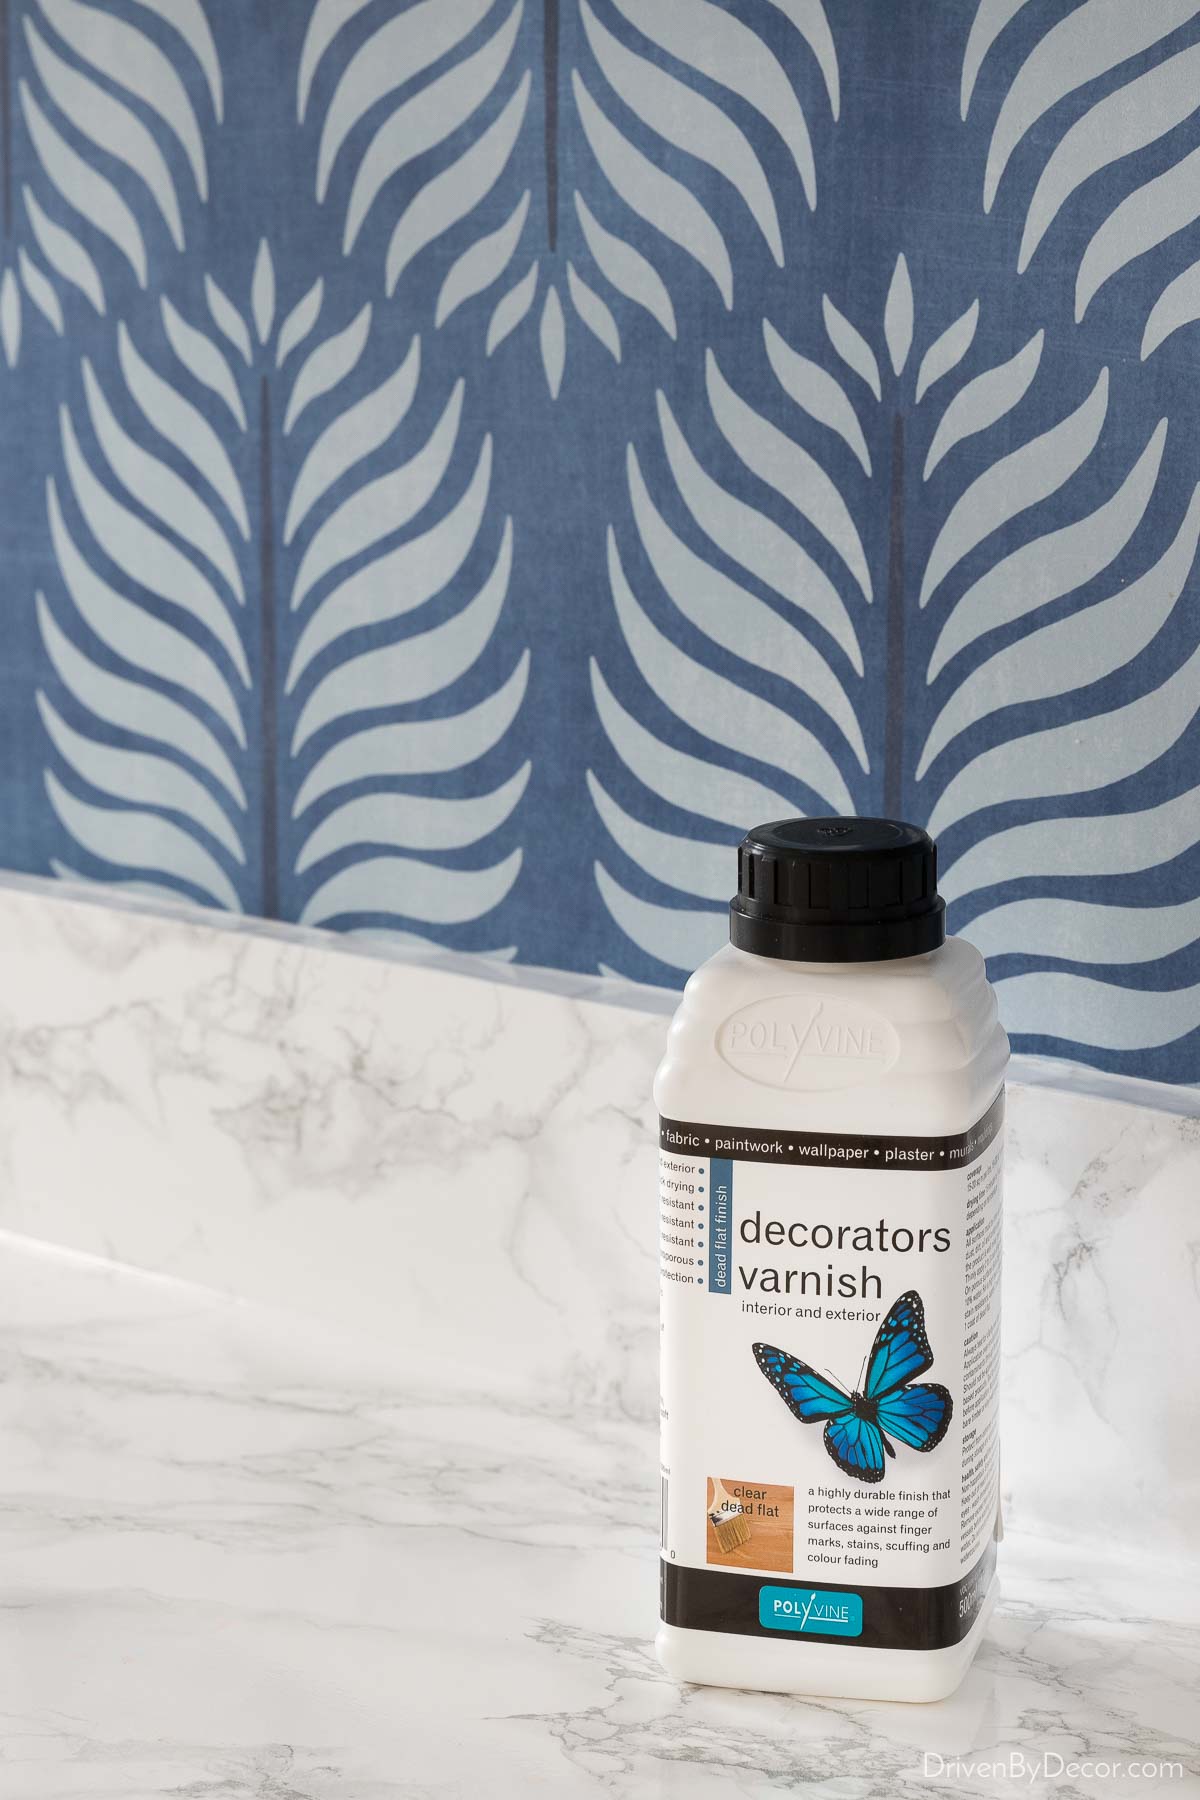
To protect it from getting ruined by water and food splatters, I coated it with {this dead flat varnish} that adds a protective coating with virtually no change in the color or sheen of the wallpaper:
At some point I’ll get to wallpapering the outlet covers in our backsplash too so that they blend in.
Other budget-friendly options for dressing up a dated kitchen backsplash are to use peel and stick subway tile sheets like {these} over bare walls or tile stickers like {these} that can be used on drywall or over pre-existing backsplash tiles:
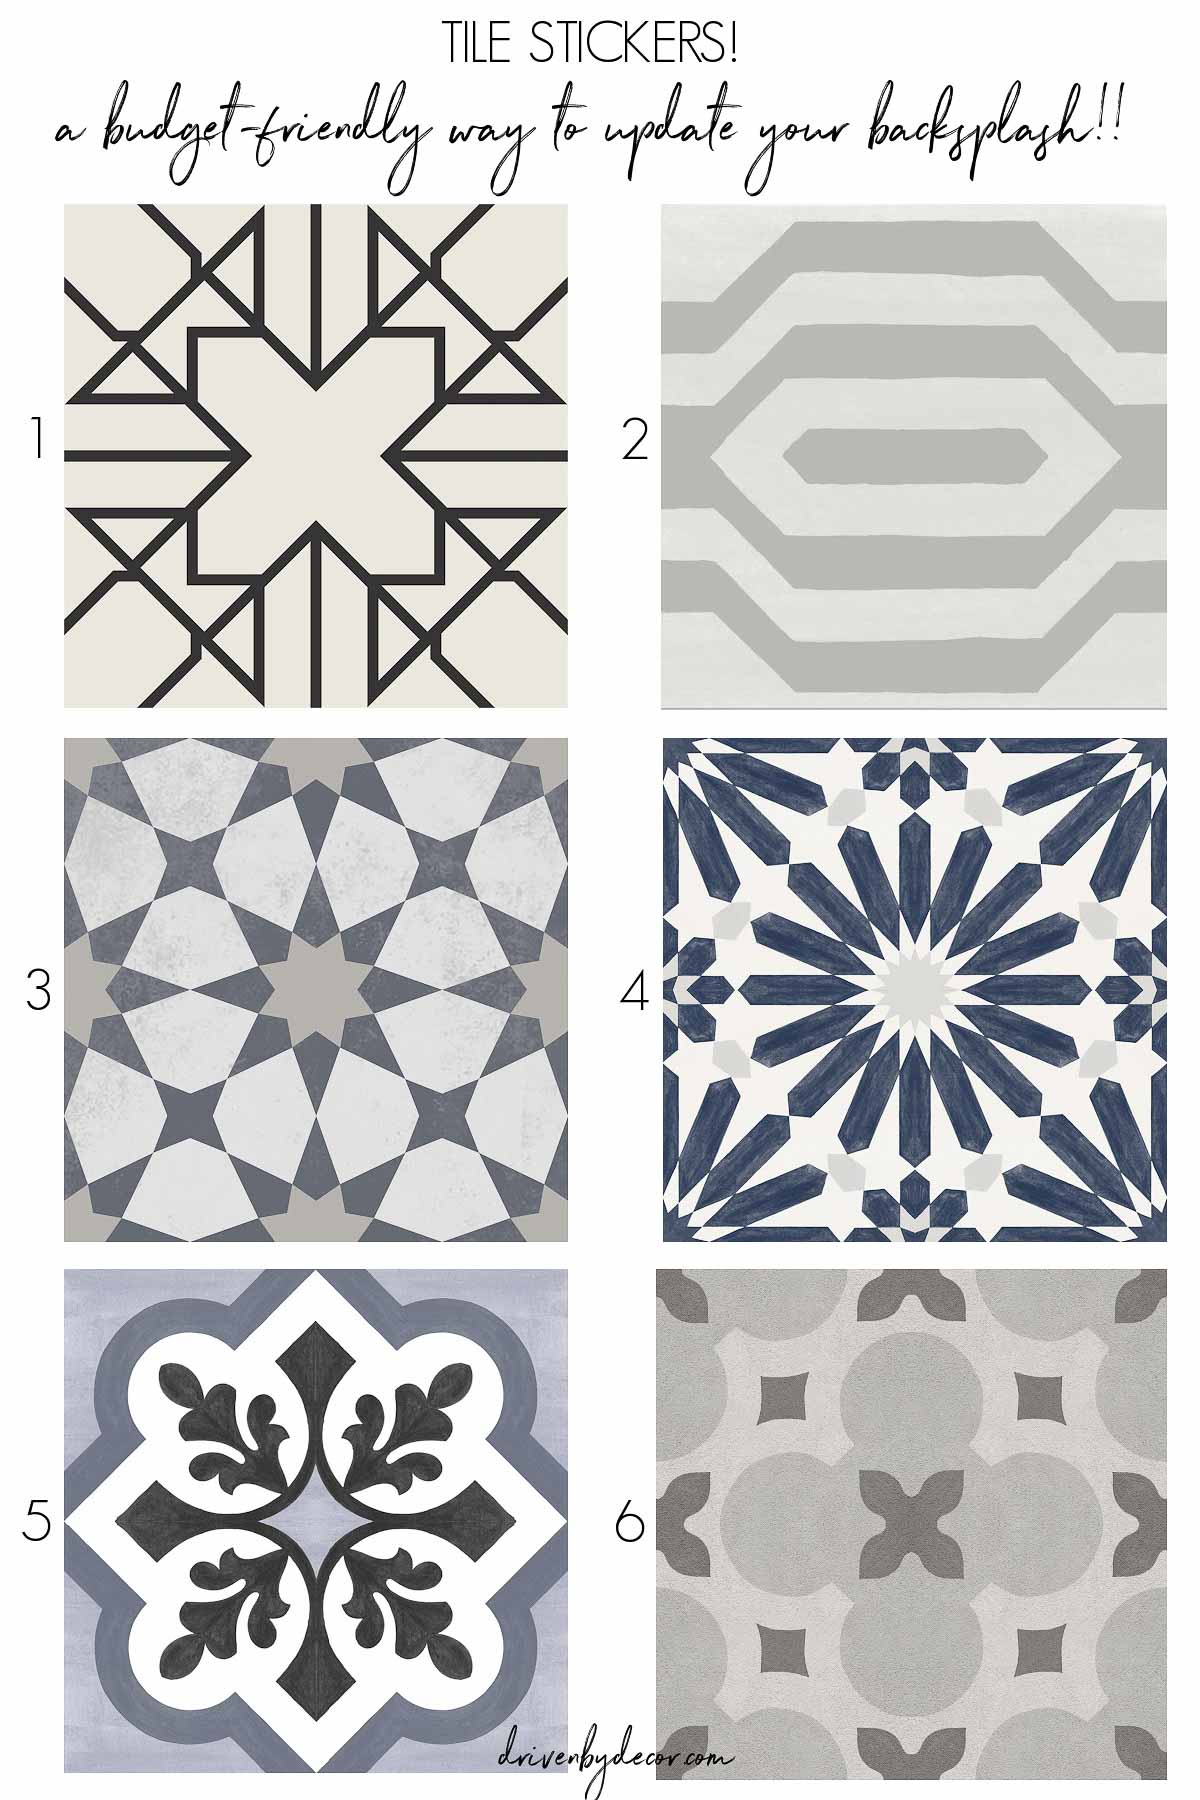
Tile Sticker Sources: 1. Geometric cross pattern | 2. Modern neutral pattern | 3. Neutral star pattern | 4. Blue starburst pattern | 5. Cement tile look-alike pattern | 6. Neutral tri-color pattern
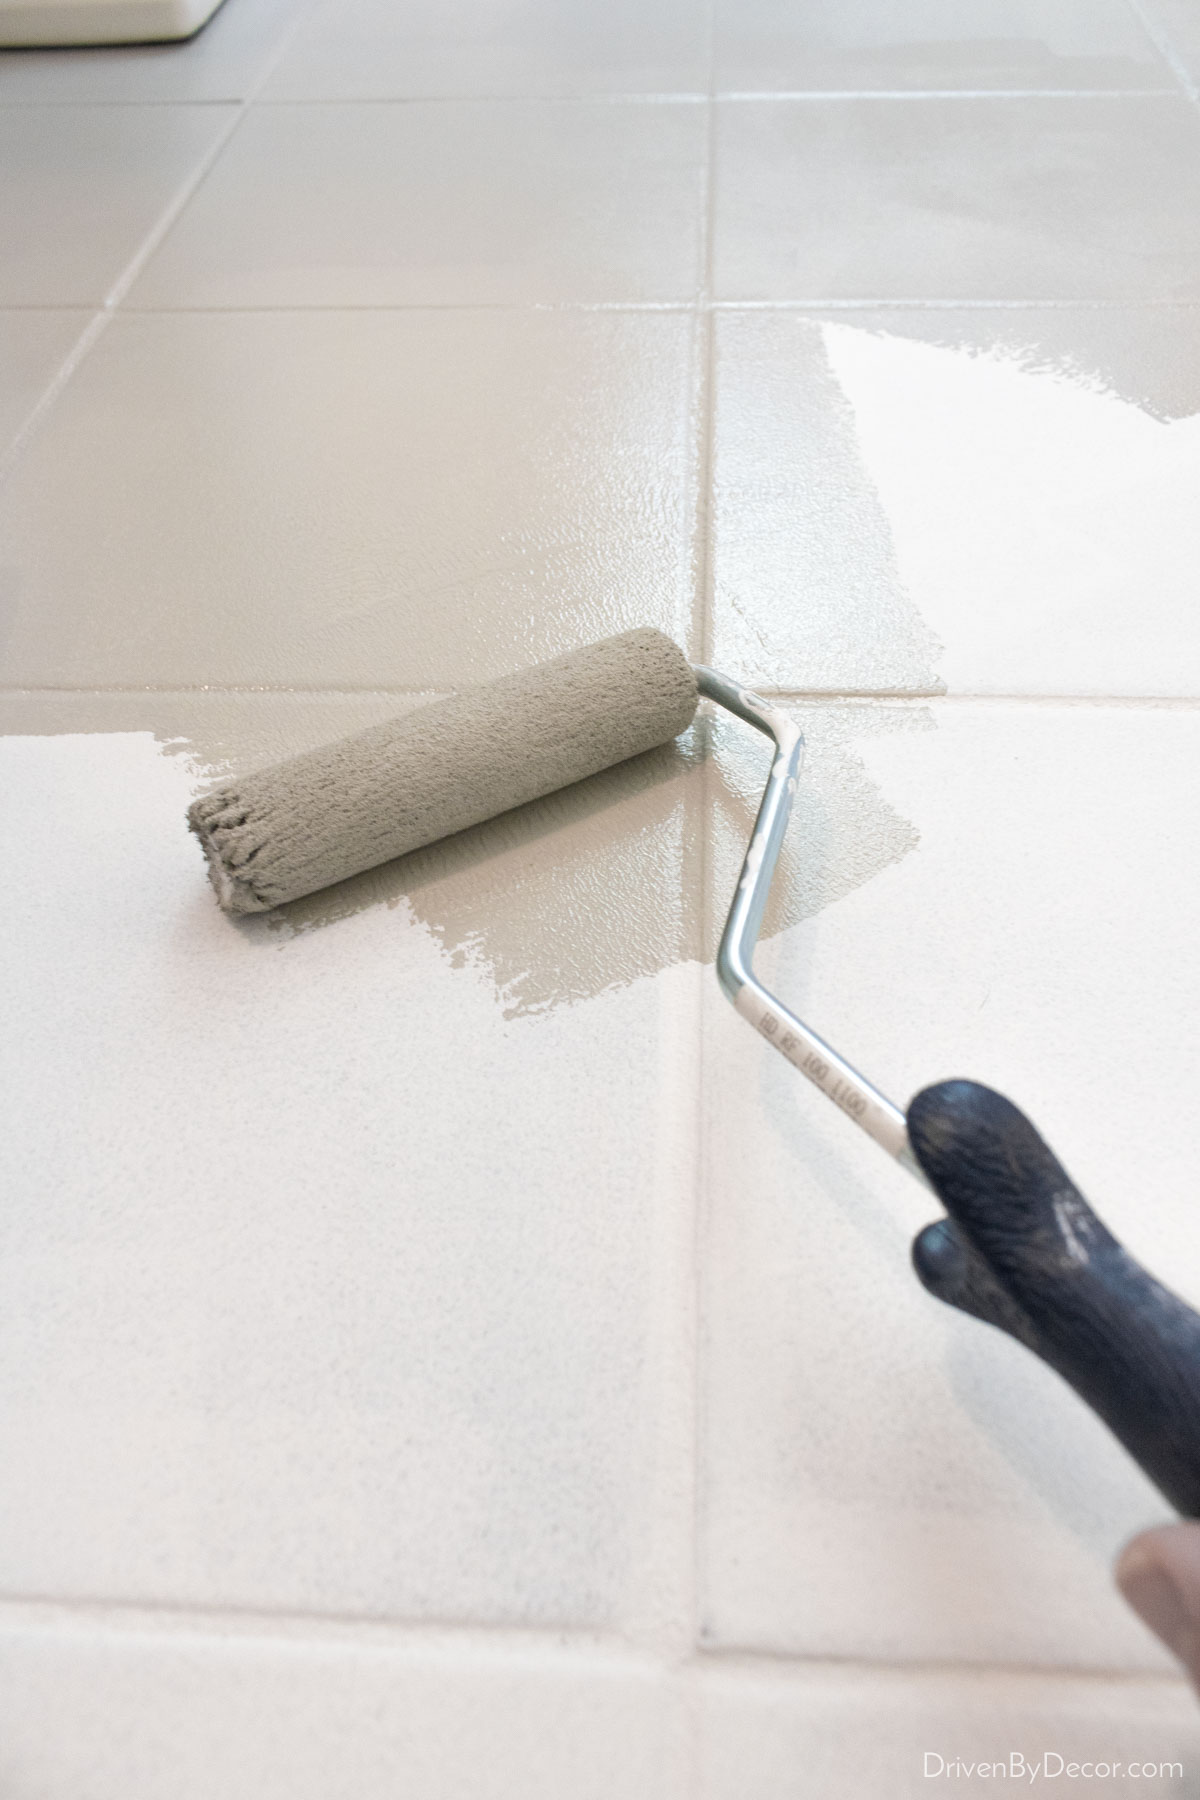
You could also inexpensively transform a dated tile backsplash by painting it! Simply use the same steps that I share in my post on how to paint a ceramic tile floor when I transformed our bathroom floor:
2. Paint Your Kitchen Cabinets &/Or Trim
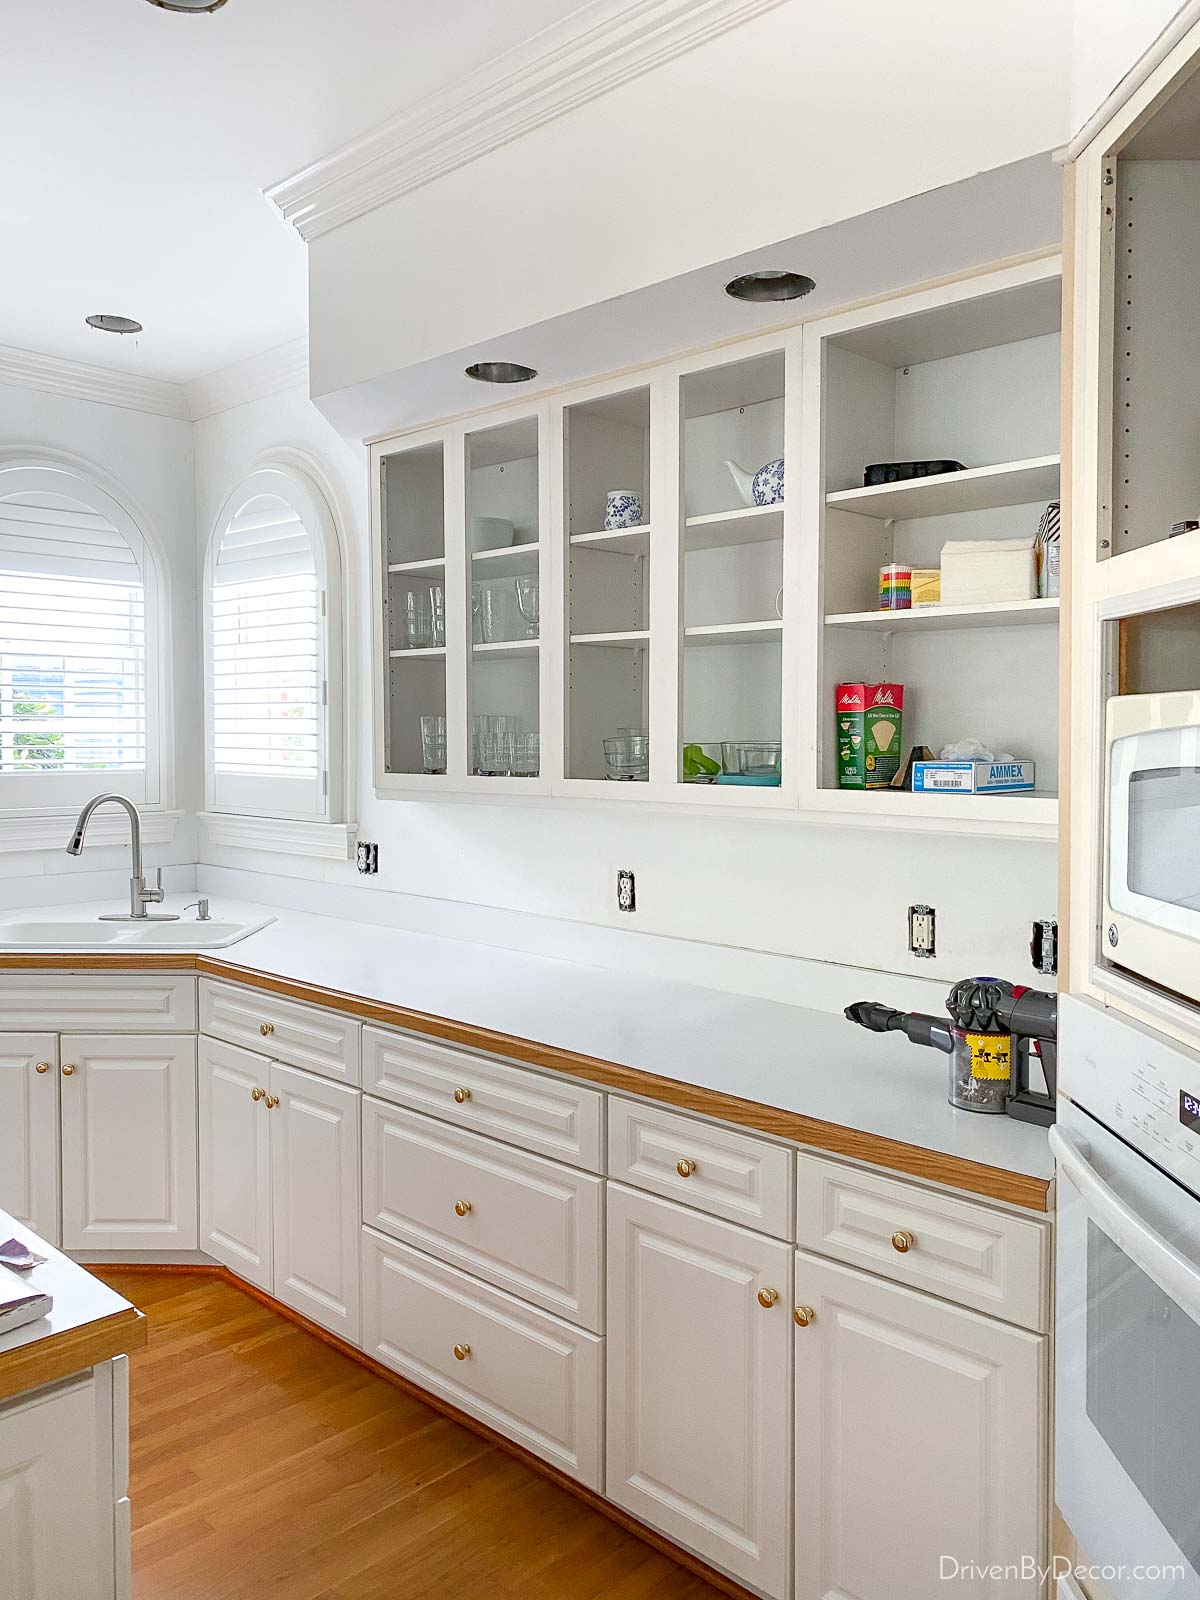
If your cabinets are an ugly wood stain or paint color or you have white cabinets that have yellowed with age like mine, painting them can have a huge impact! My cabinet doors are white thermofoil so they hadn’t yellowed but the trim around them was a different story:
There was a BIG color difference between the white cabinet doors and yellowed trim:
To fix the issue I took all of the upper cabinet doors off,
lightly sanded the cabinet frames with 220 grit sandpaper, used a towel and then a tack cloth to get all of the dust off, and then primed them with {this bonding primer} that’s made to stick to almost any surface:
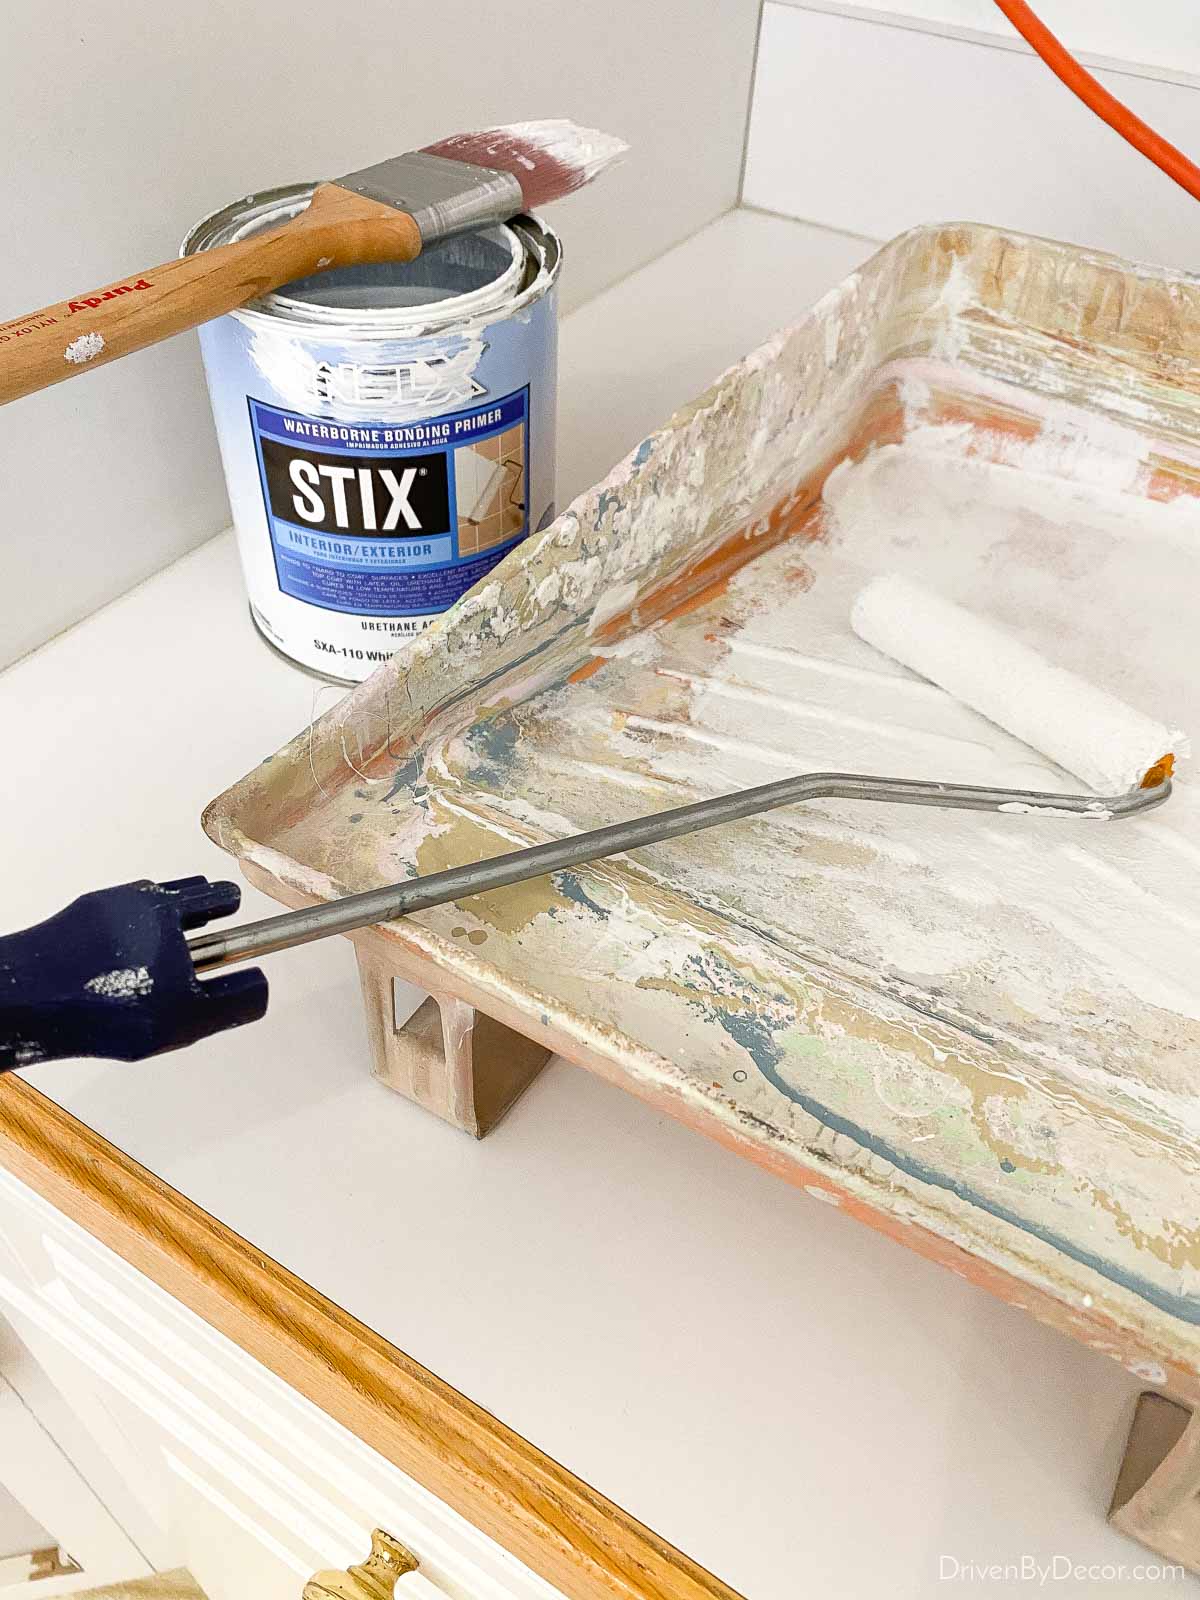
Once the primer had dried and I’d allowed enough time to re-coat, I very lightly sanded again and then painted with Benjamin Moore Advance paint in Simply White (satin finish). After two coats of the Advance paint, my cabinet framing and trim looked like new and matched the cabinet doors perfectly with no more ugly yellow:
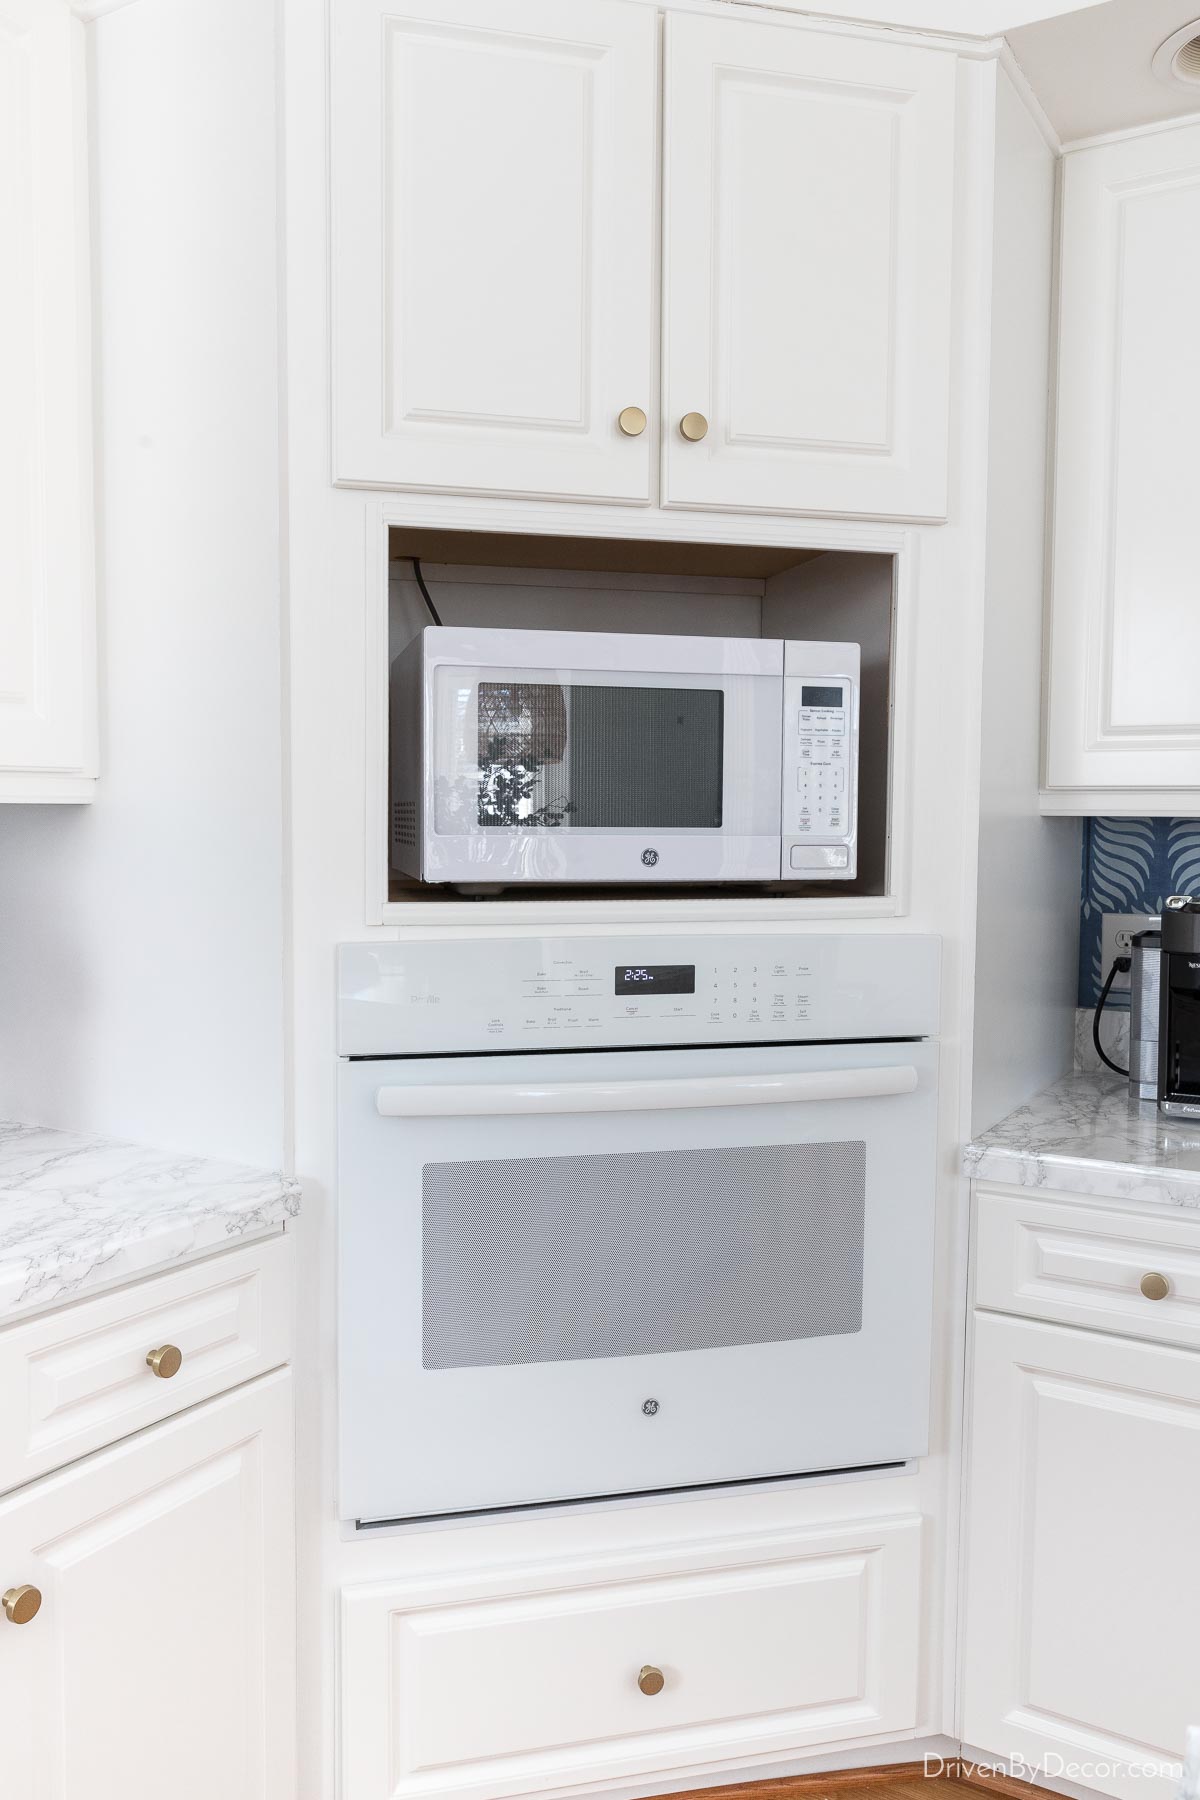
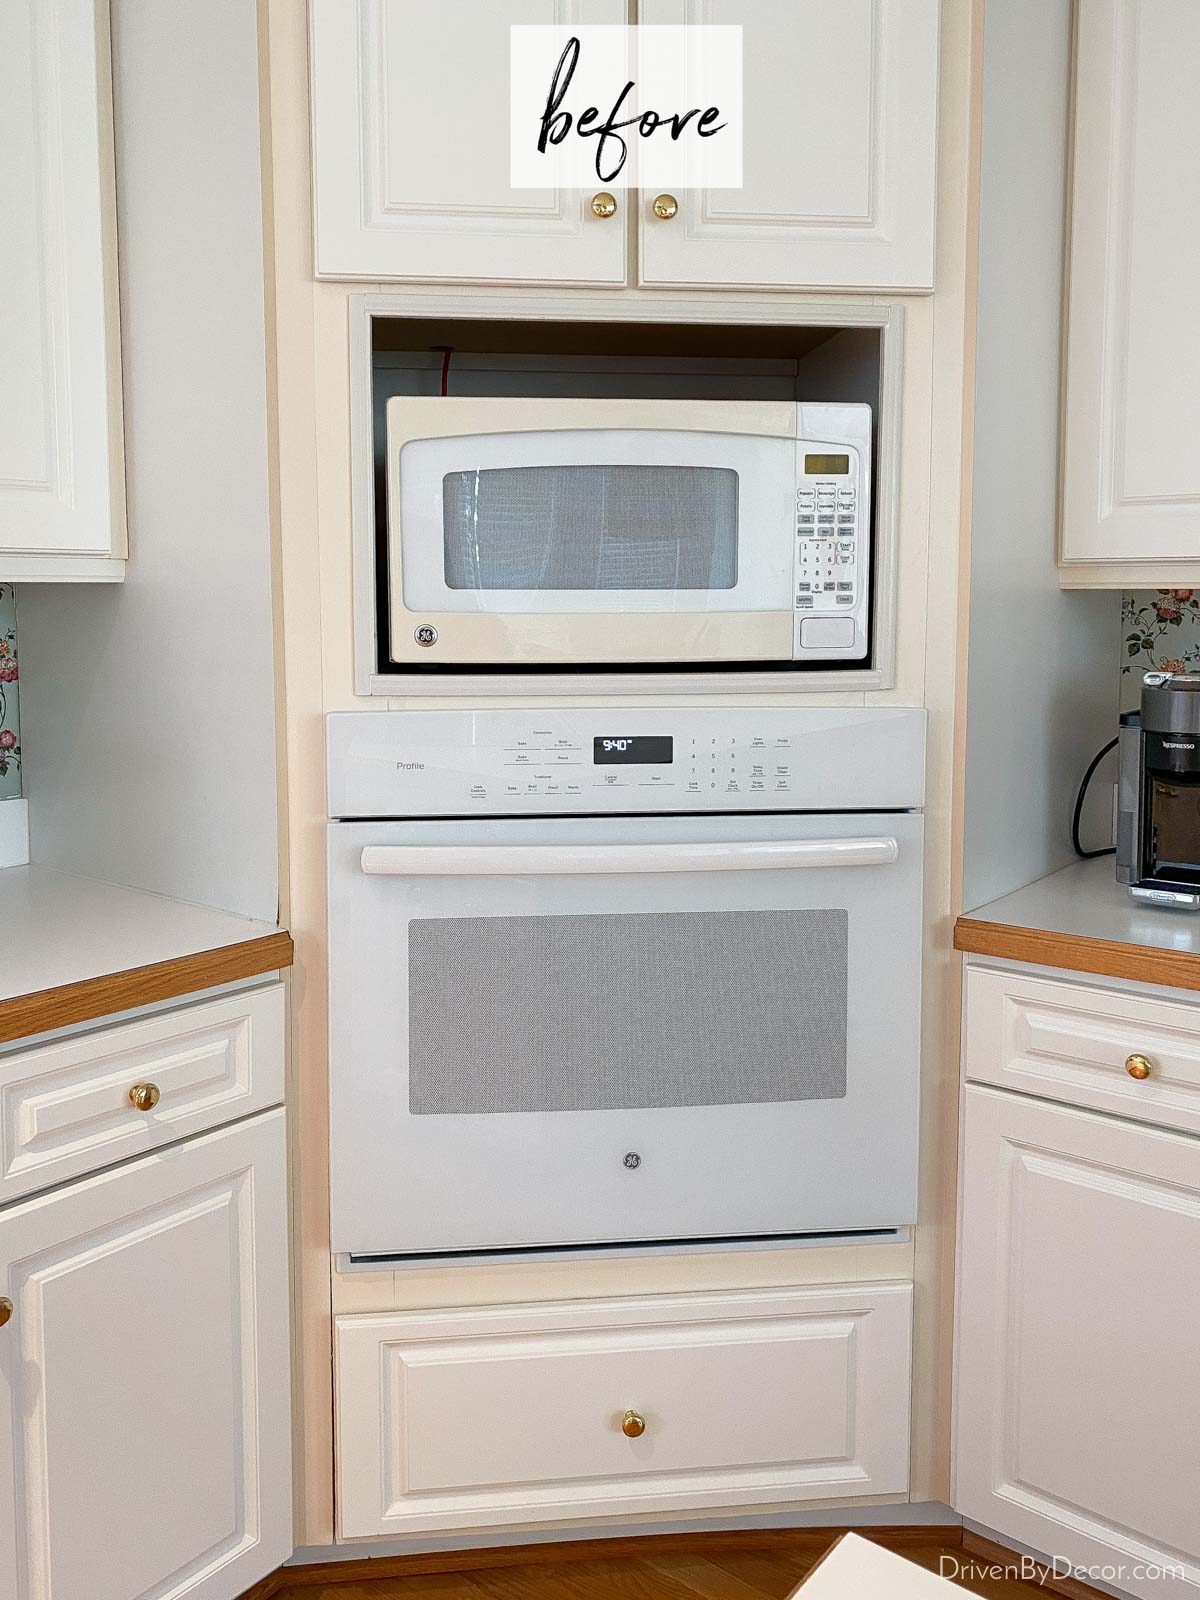
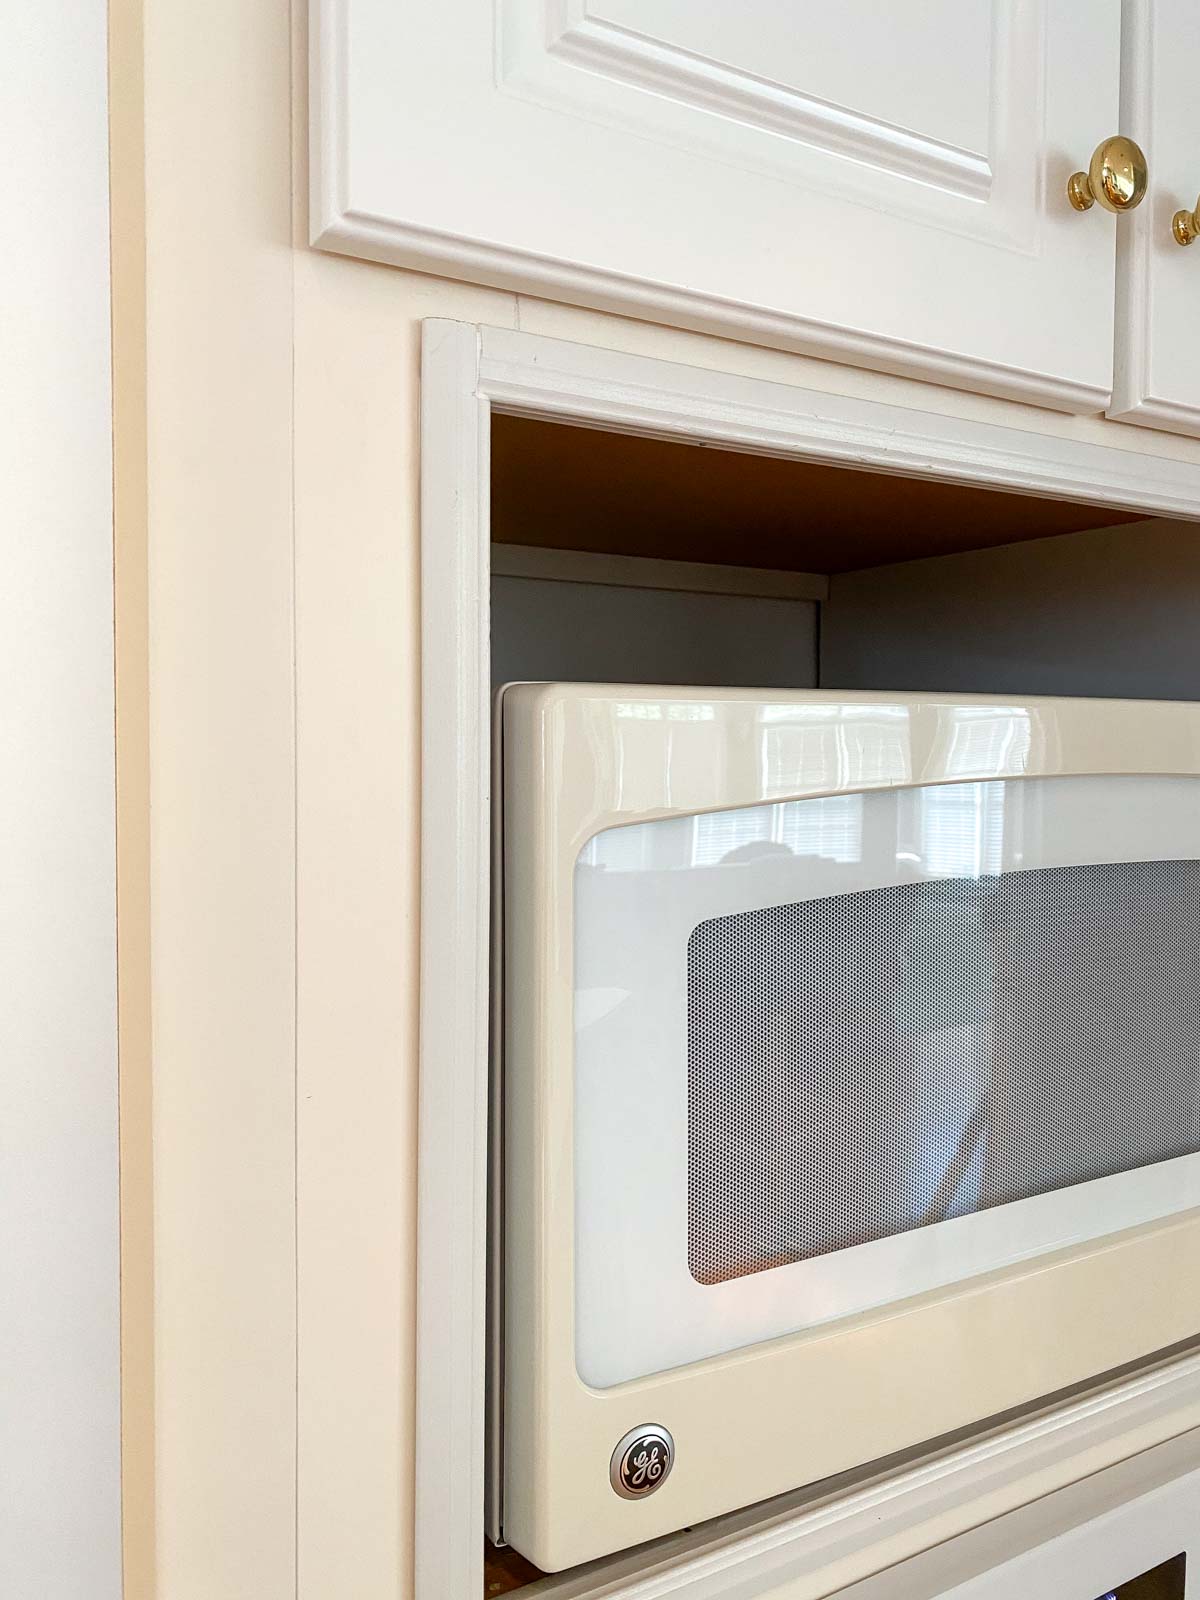
We also got a new microwave and now need to address the ugly black hole around it. I’m guessing that the previous owners removed a built-in microwave and replaced it with a stand-alone one but the hole doesn’t fit any standard trim kits so we’re working on figuring out an easy budget-friendly solution for that.
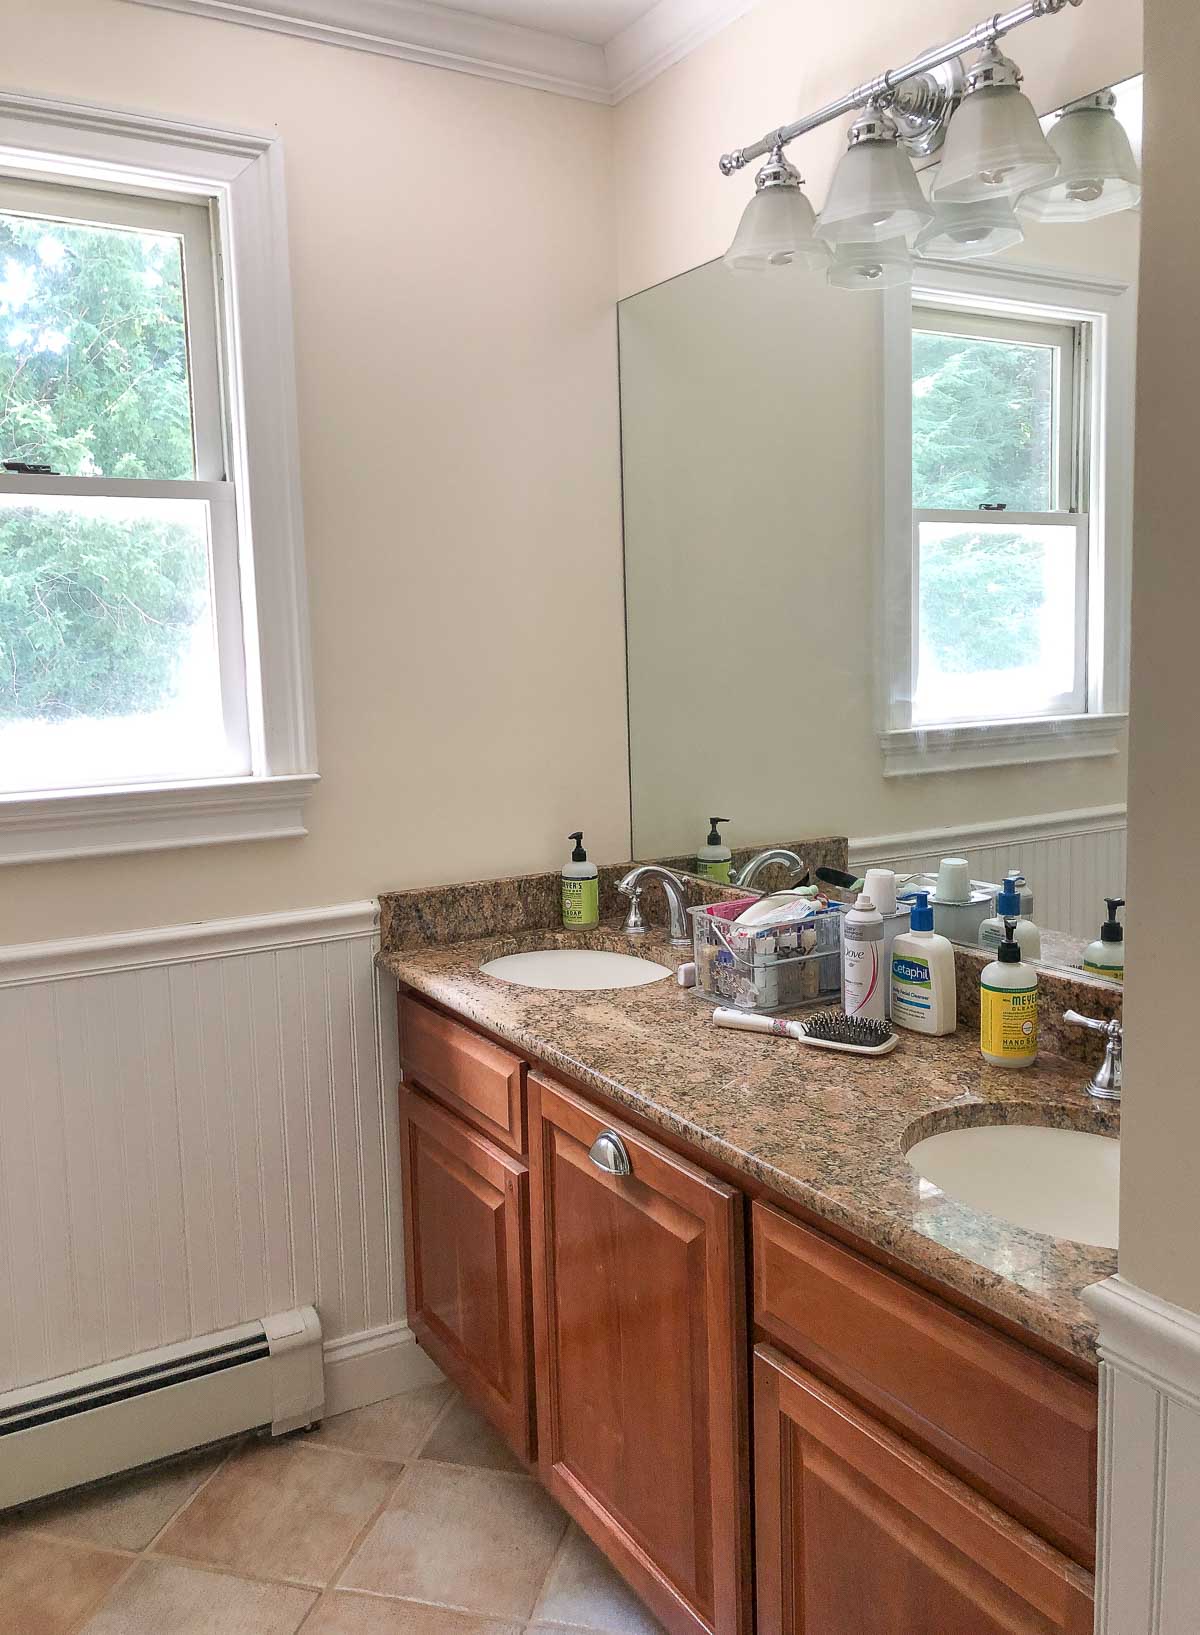
While we only needed to paint our trim, you can use these same steps to repaint your cabinet doors too, just like I did with the cabinets in my daughters’ bathroom. They were a dark wood stain with lots of signs of wear:
that looked like new after a few coats of paint:
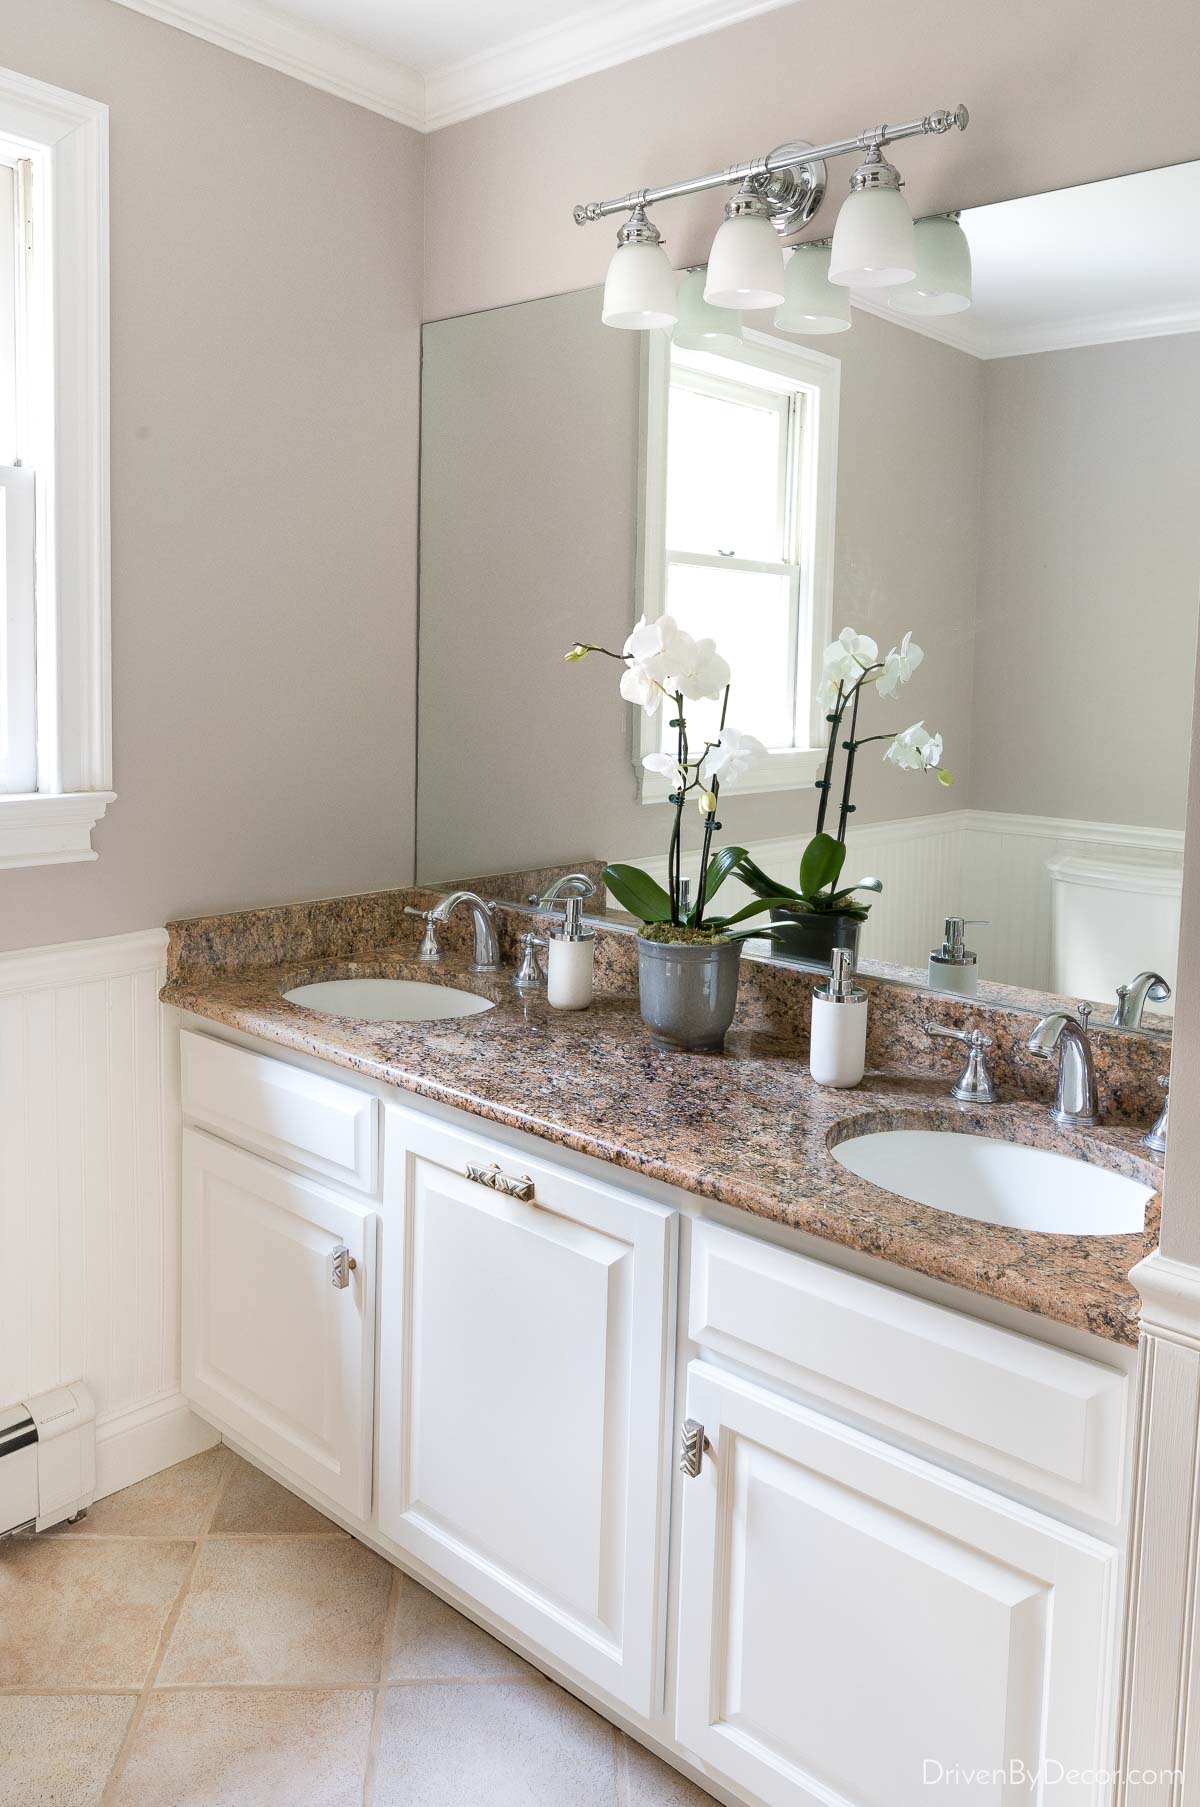
I share my detailed step by step in my post on how to paint bathroom cabinets. Definitely check it out if you’re thinking about tackling this project in your kitchen!
Refacing your kitchen cabinets is another option for giving your cabinets new life. It’s pricier than painting them but not as pricey as buying new cabinets. See my post on kitchen cabinet refacing for details on the refacing project we knocked out in our Ohio home.
3. Spray Paint Yellowed Recessed Lighting Trim
Often if you have a dated kitchen, your recessed lighting is showing its age too. Spray painting yellowed recessed lighting trim white makes such a difference – it’s one of my favorite kitchen remodel ideas on a budget!
Here’s what our recessed lighting trim used to look like:
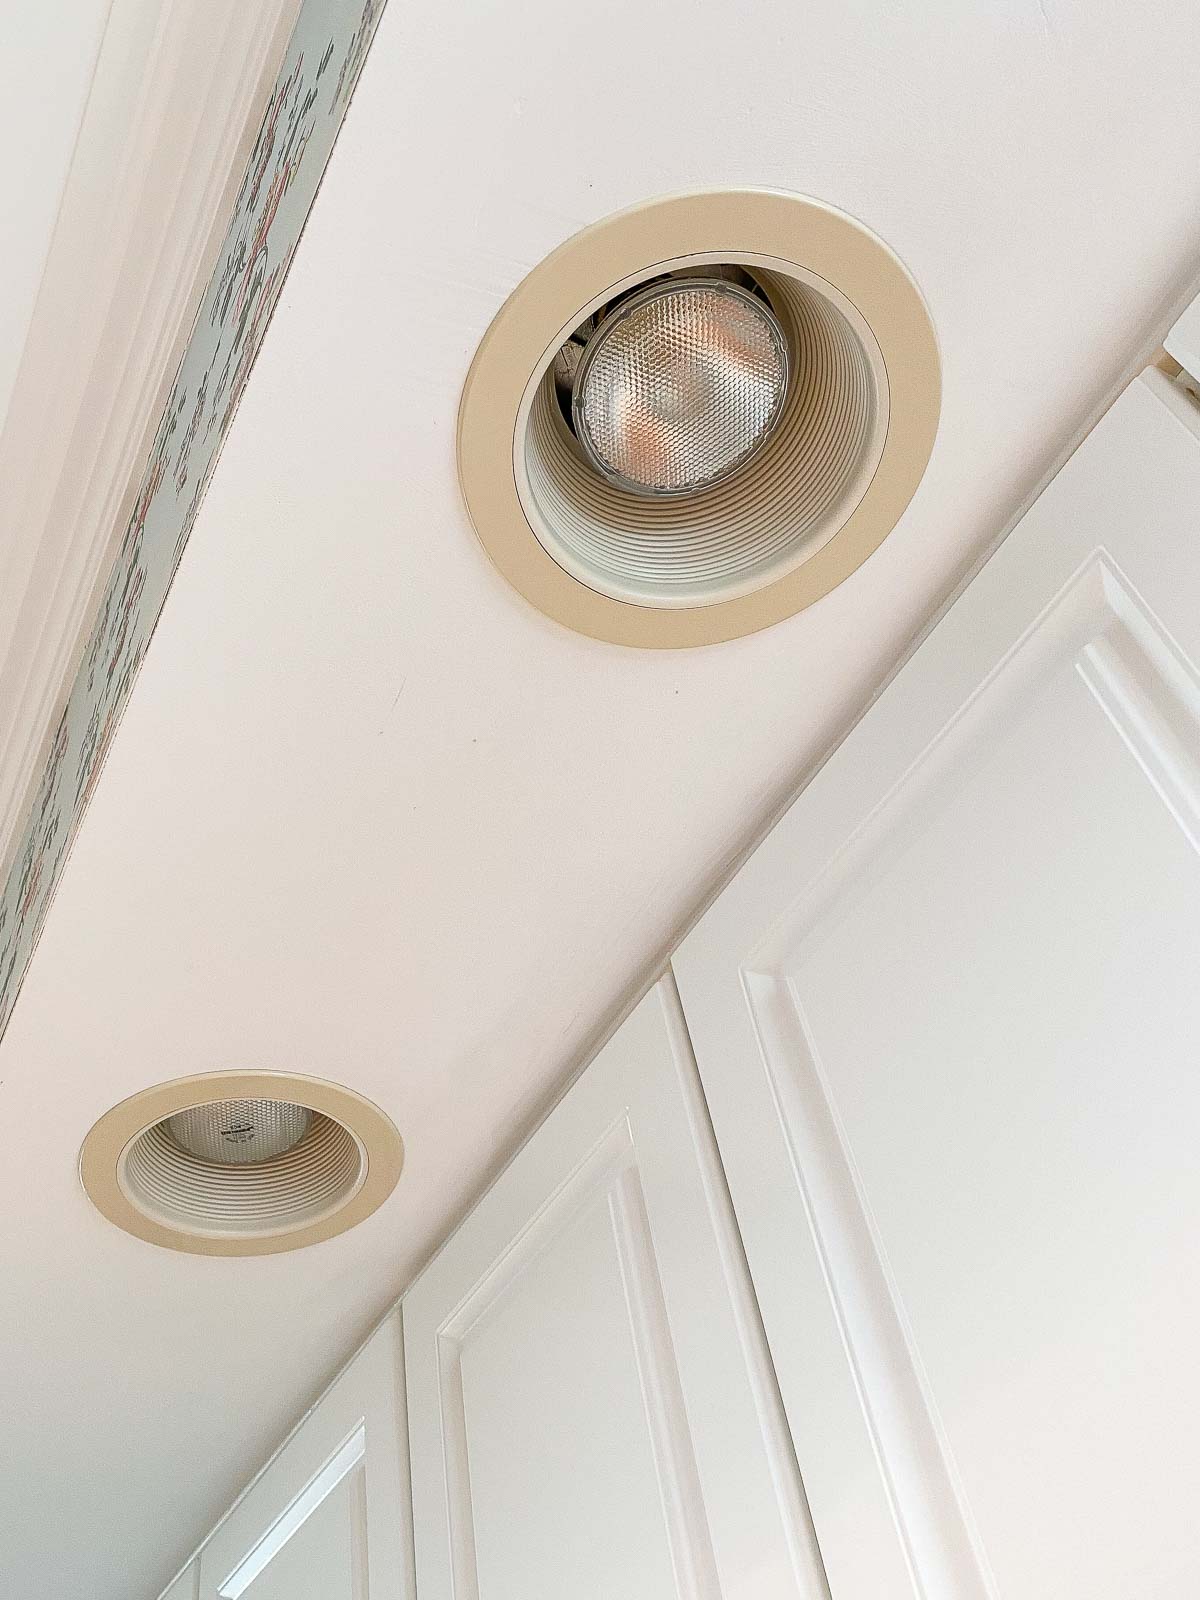
I removed the trim, spray painted it with {this high heat spray paint} (I sprayed two coats) and reinstalled it the next day. I was able to whiten the trim of all 14 recessed lights in our kitchen area with just a single can of spray paint. It’s super quick and easy to do!
These are the same two lights with a fresh newly whitened look:
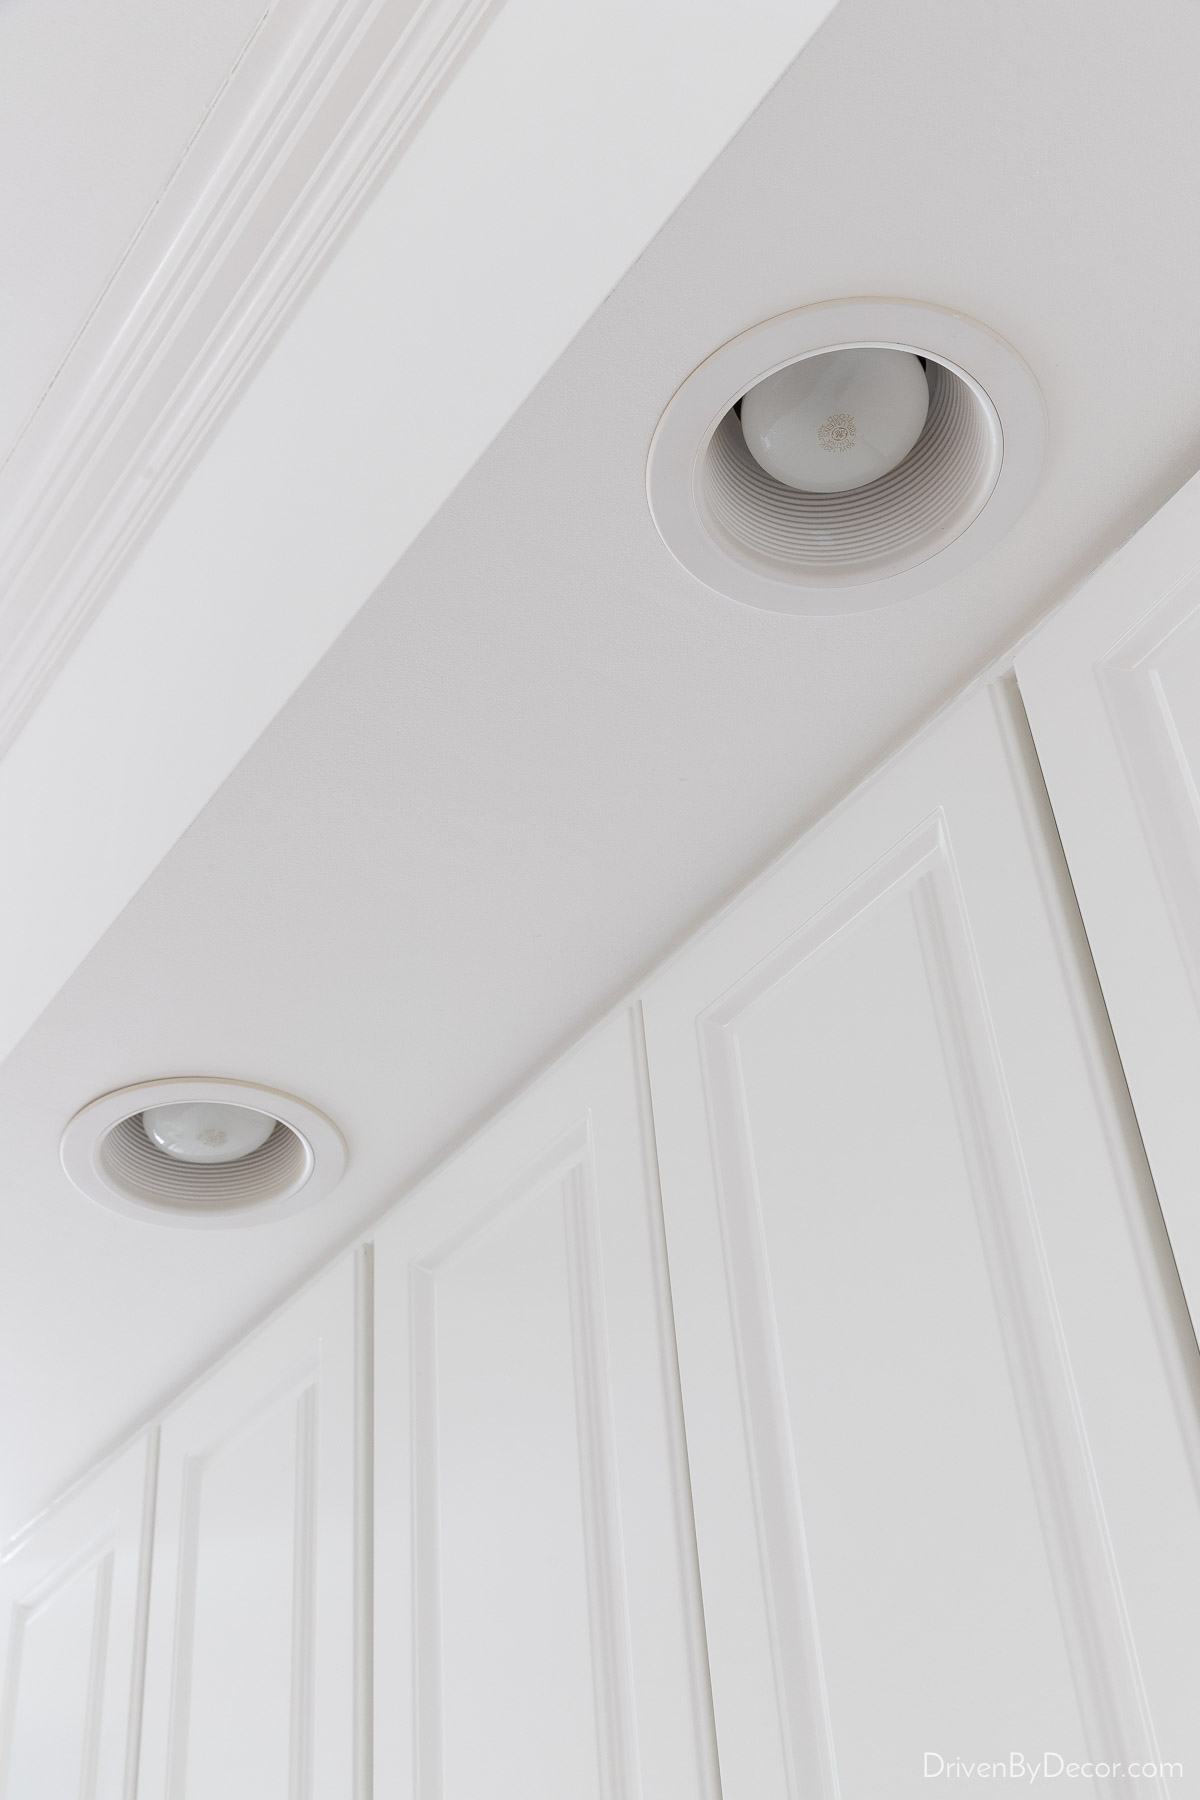
If you aren’t a DIYer and just want to replace them instead of spraying them, {this 12-pack of baffle trim} will do the trick if you have standard 6-inch recessed can lights.
4. Swap Out Dated Hardware & Faucets
A change in cabinet hardware is an easy way to make a big difference! Our old knobs were a shiny brass in a dated style:
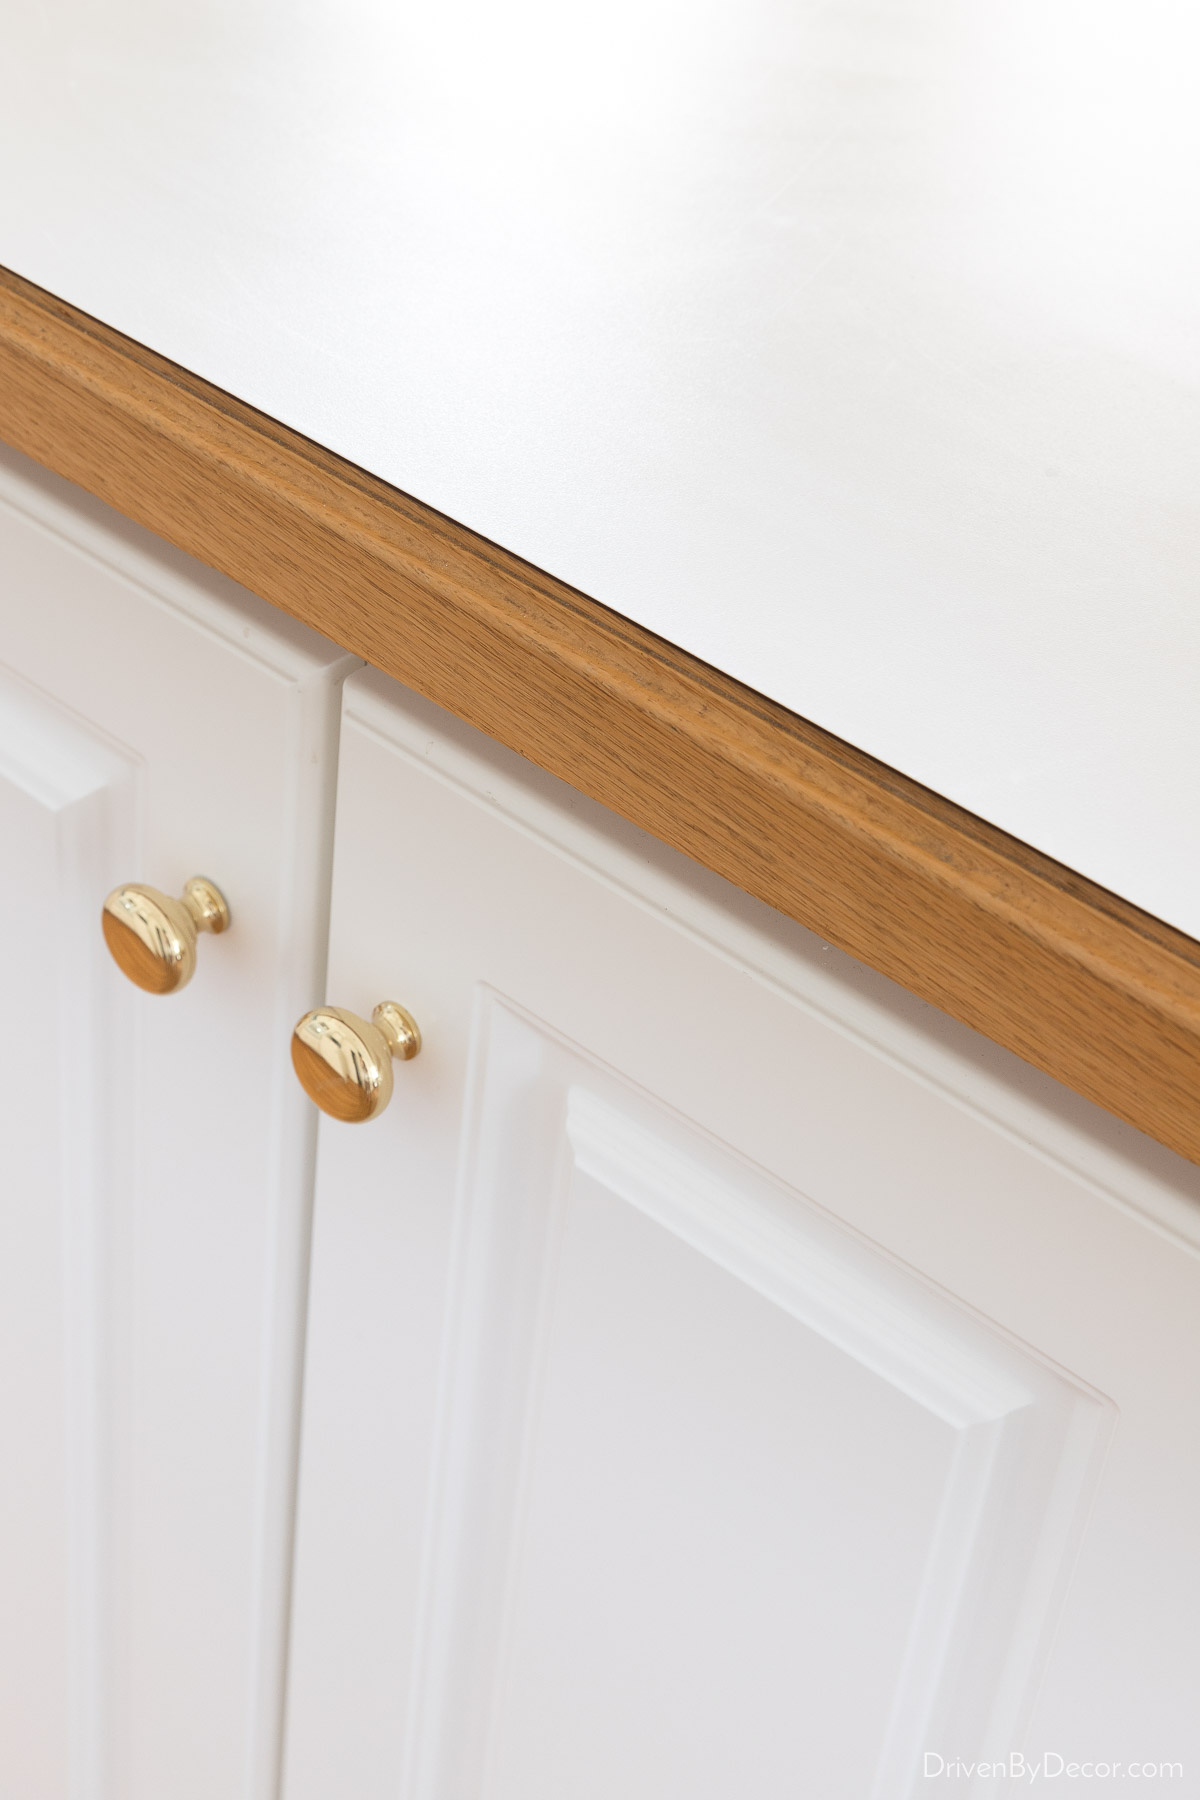
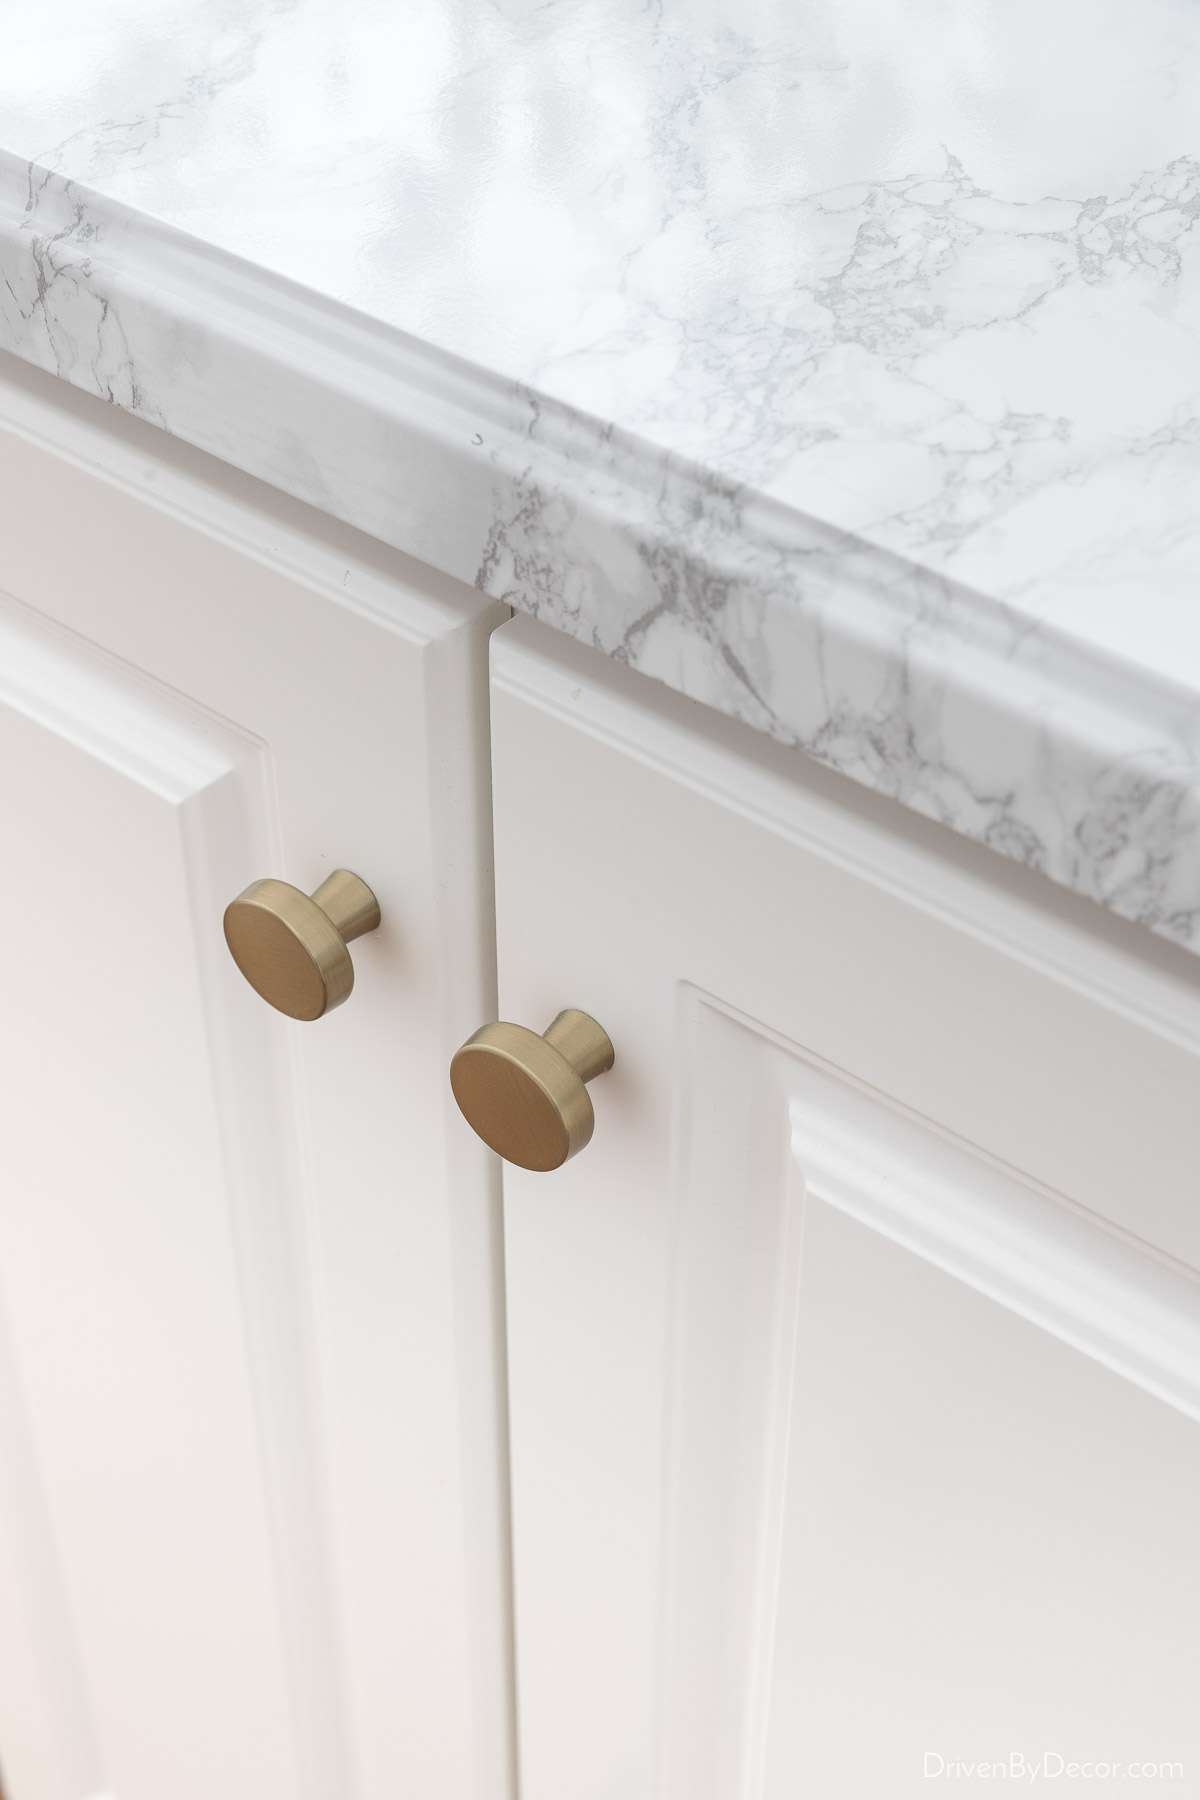
I feel like these were the knobs that were put in 80% of kitchens in the ’90s right?! I swapped them out with {these knobs} in the 1 5/16 size & Golden Champagne finish which is a really beautiful matte brass:
If you have a mix of knobs and pulls in your kitchen {these pulls} that I used when we remodeled our kitchen in CT would complement them nicely. They’re well-priced for the quality (Amerock hardware is top notch) but if you’re on a strict budget, you’ll get the best pricing by searching for knobs that are available in packs of 20 or 30 like {these similar brushed brass knobs} or {these matte black knobs}.
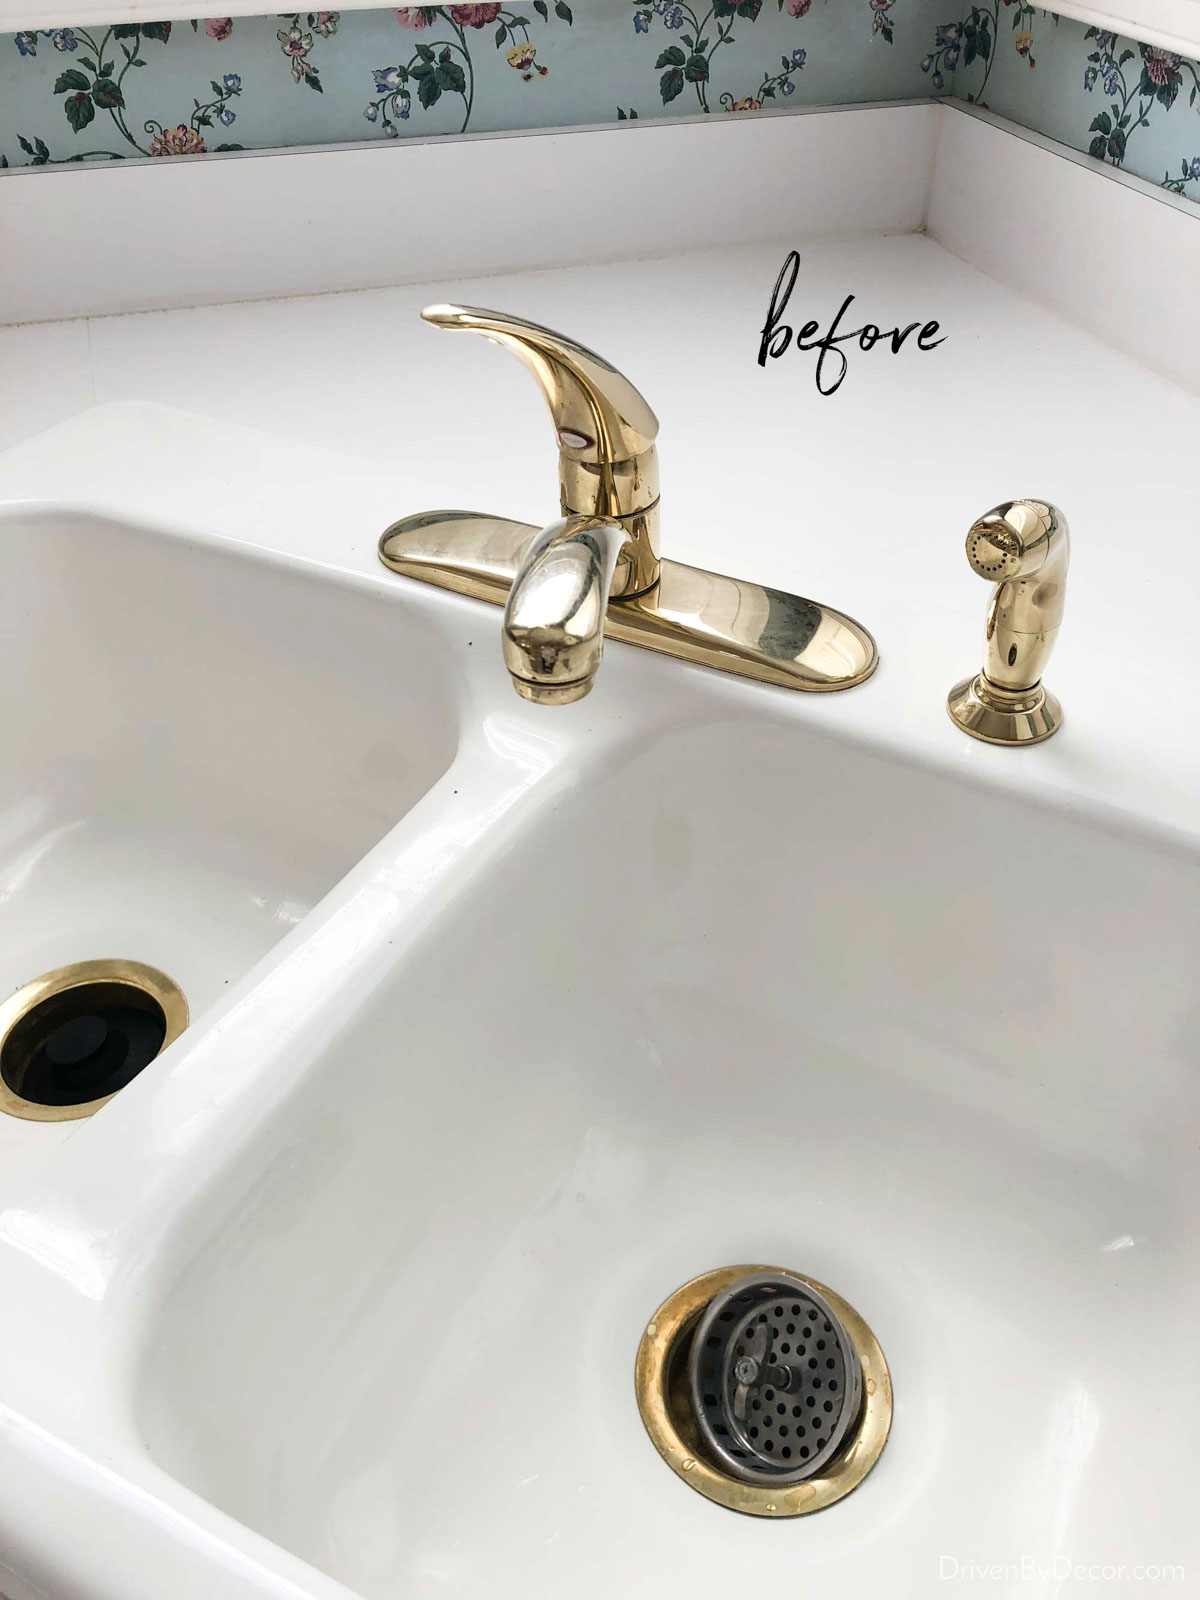
A new faucet is another budget-friendly option to consider. The kitchen faucet we had when we bought our house wasn’t only dated, but the spout was so low that it wasn’t very functional either:
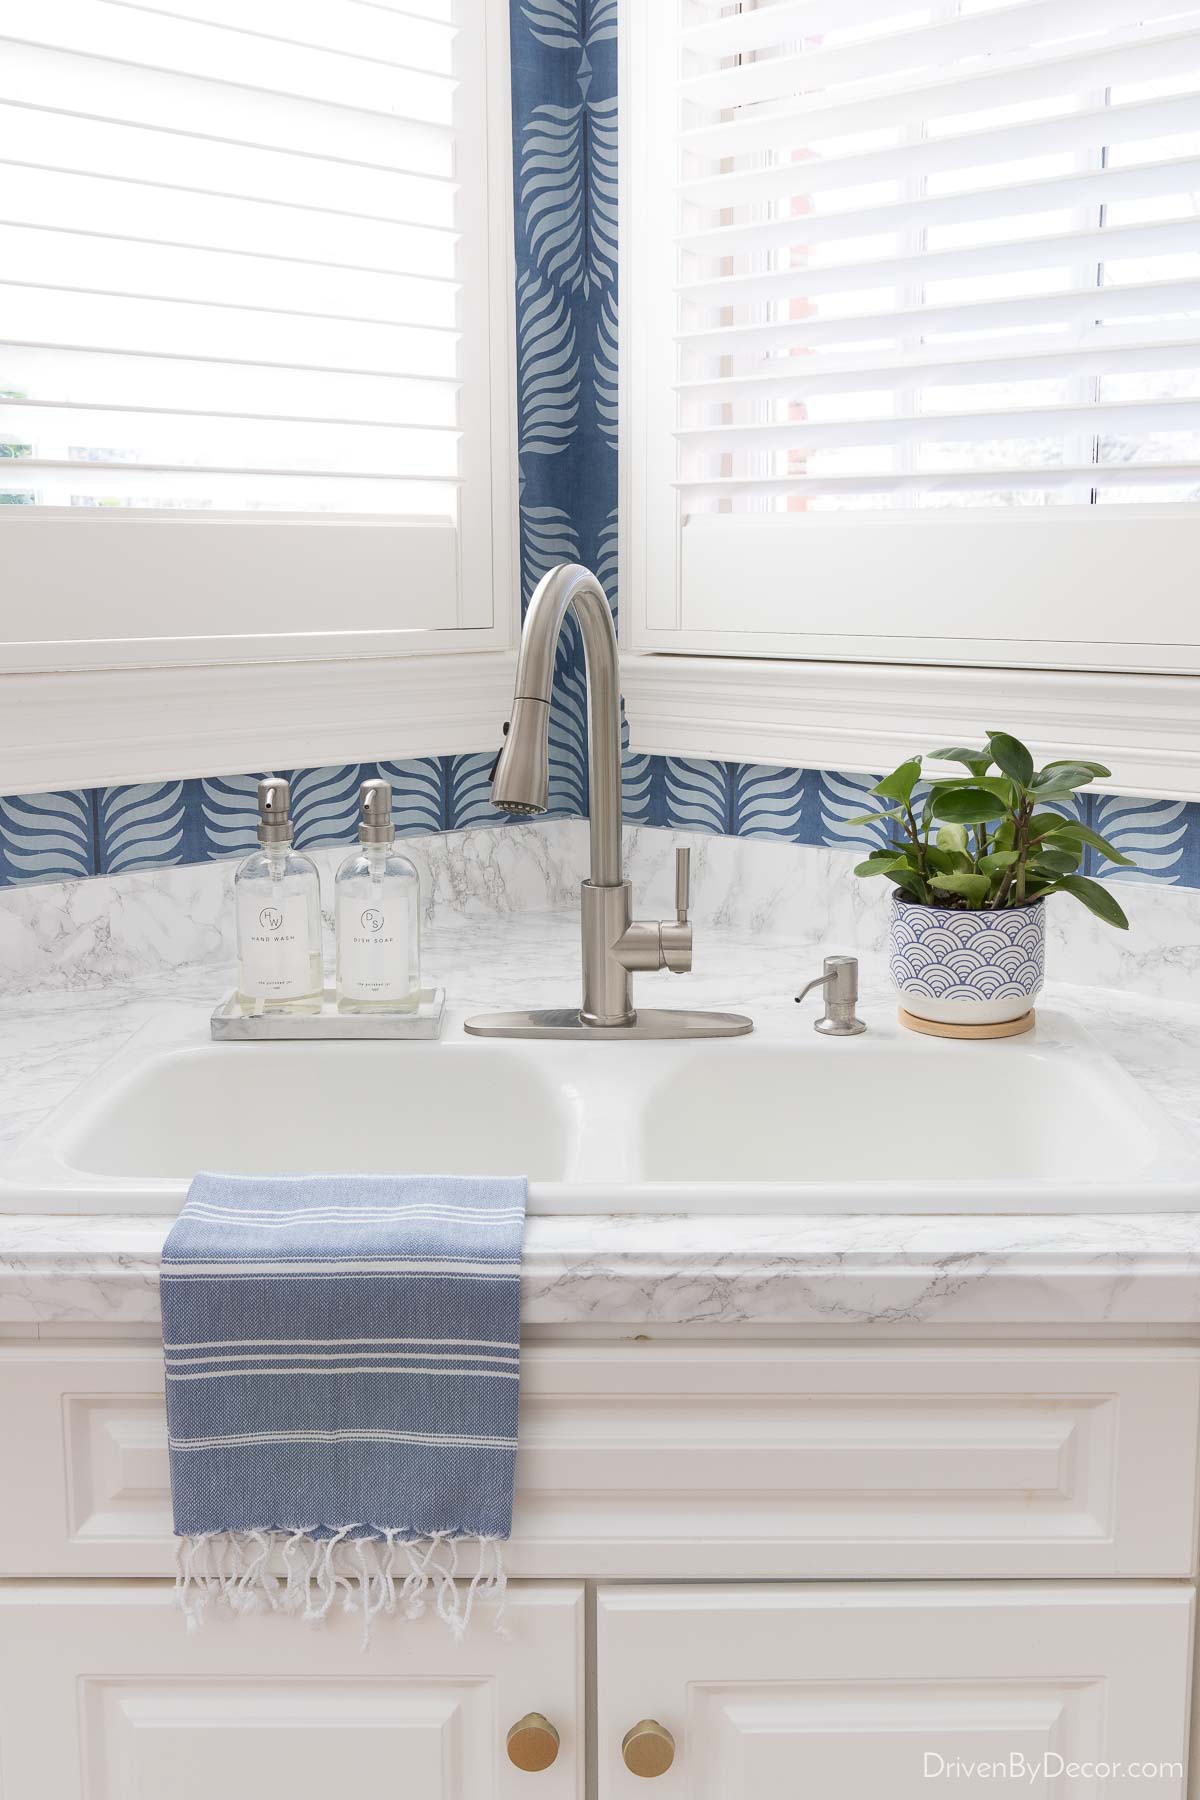
We replaced it with {this high arc brushed nickel faucet} that was a steal along with {this soap pump}:
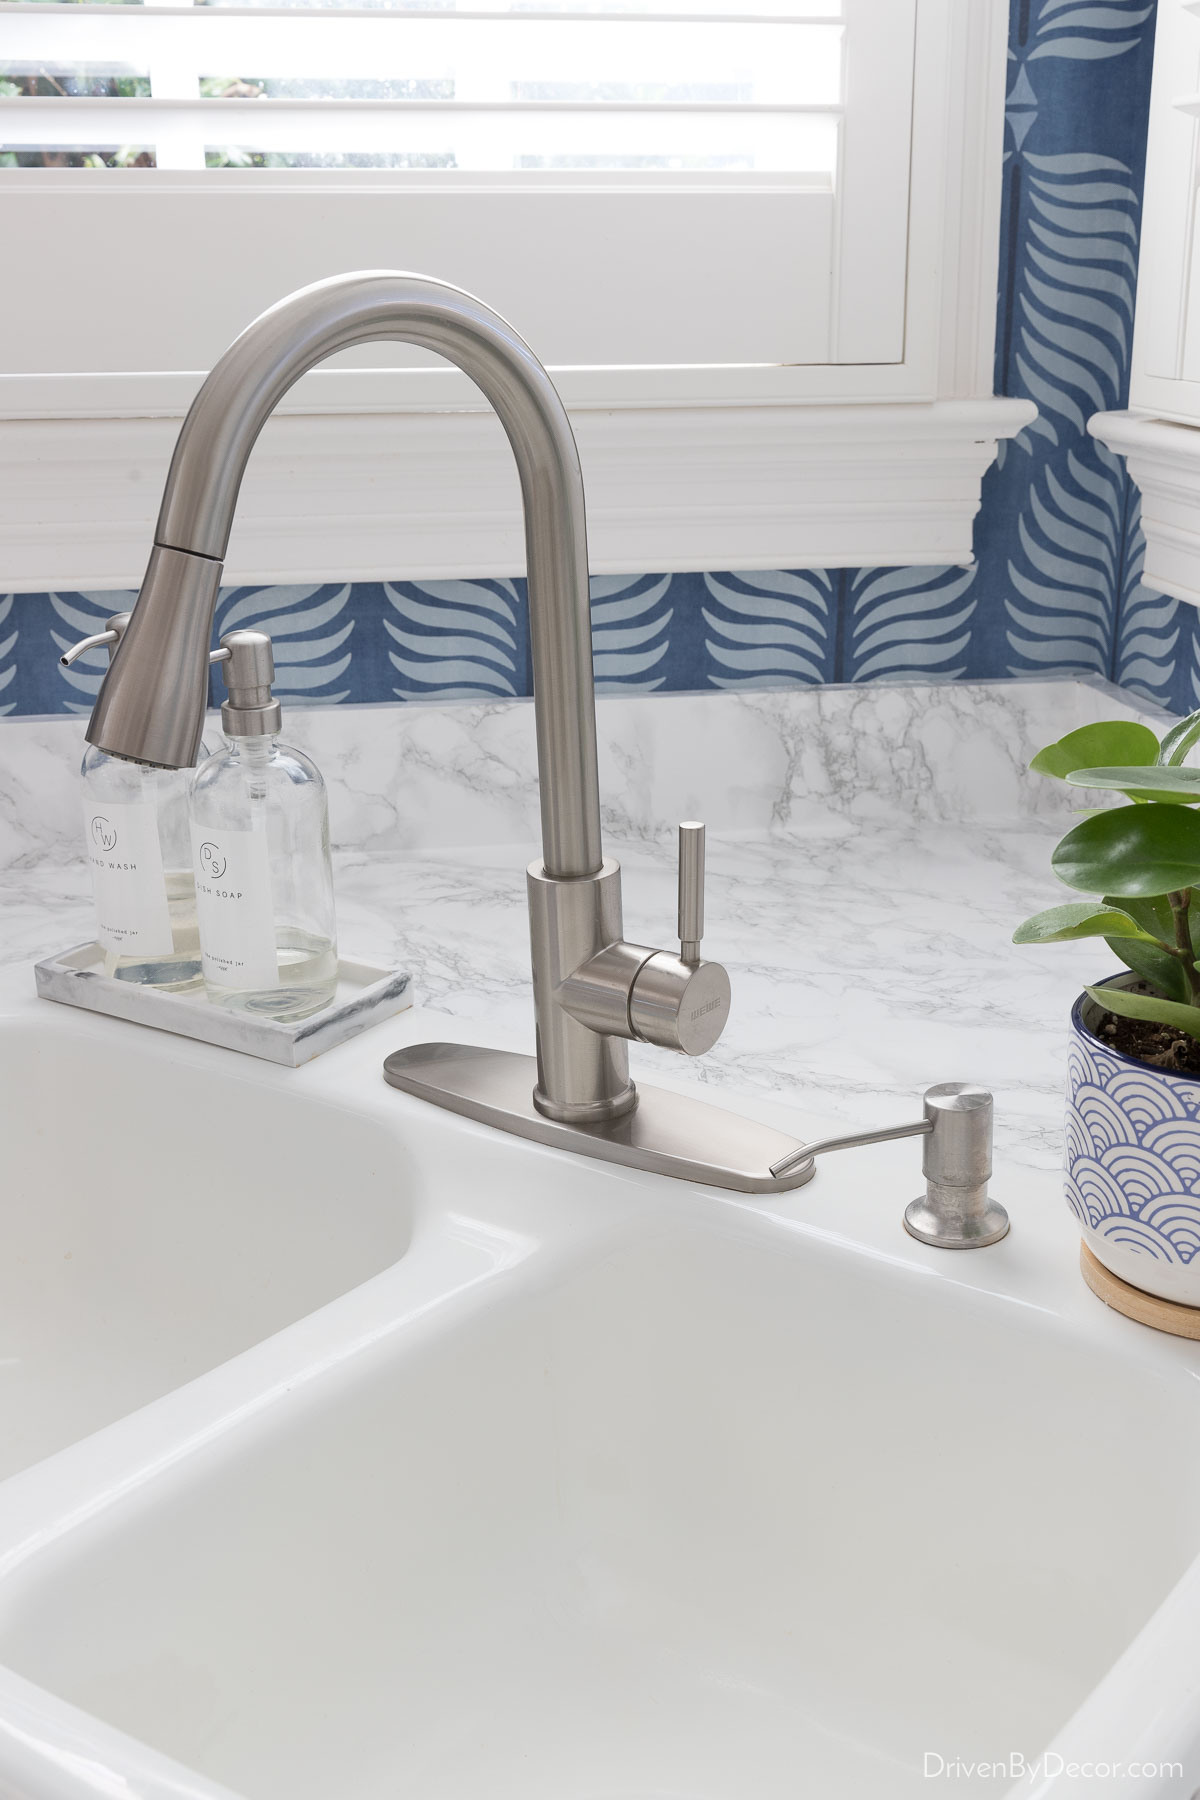
So much better!
5. Dress Up Your Ugly Countertops
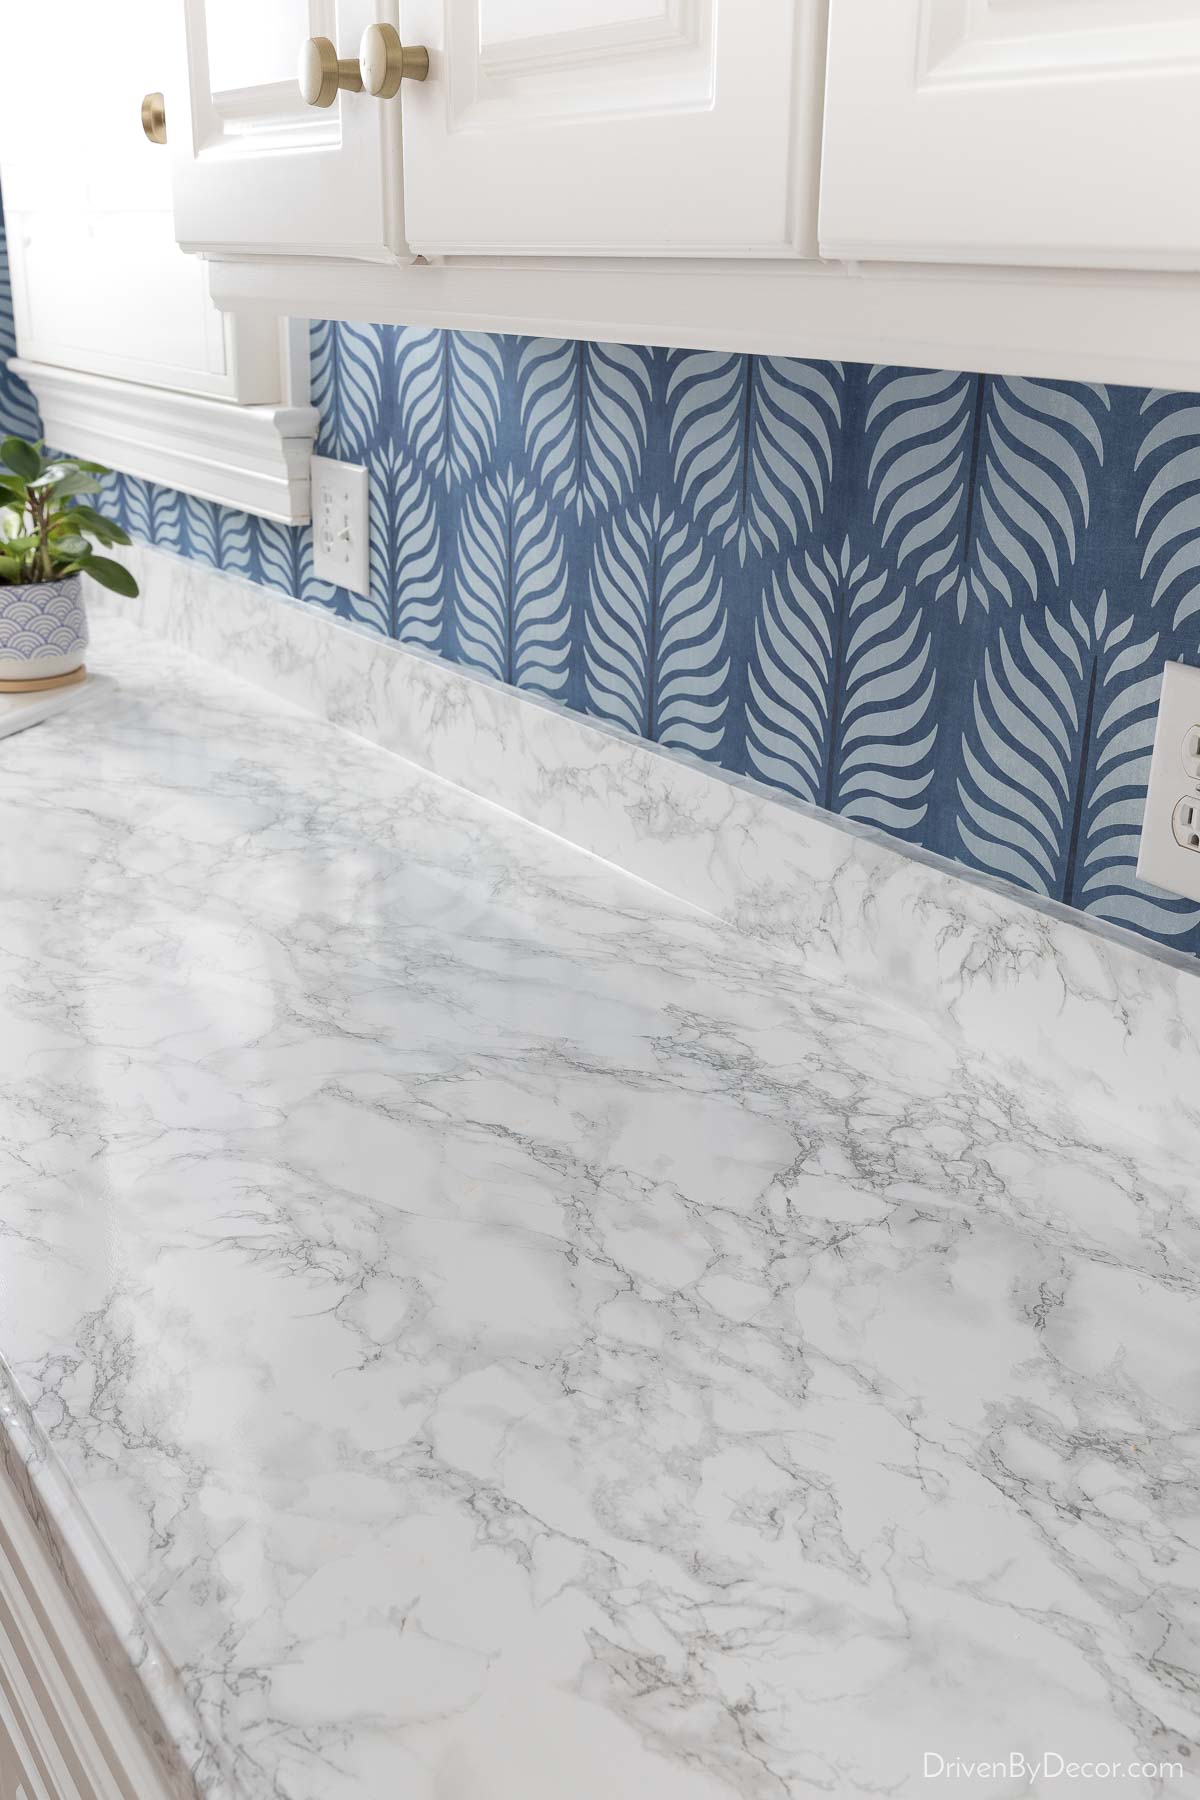
Did you notice one other big change from the pics I’ve shared so far? I covered our countertops with {this peel and stick marble contact paper} that’s made for kitchens and bathrooms (it’s water resistant). It changed the laminate wood-edged countertops that we had before:

into something a whole lot prettier:
Check out my step by step post about usin marble contact paper for countertops including the tools I used and several installation tips.
6. New Lighting
Most kitchens don’t have many light fixtures (typically just a pendant or two) so consider swapping those out for an instant upgrade! Our kitchen had just a single pendant over the island:
that we swapped out for {this 6-light chandelier with shade}:
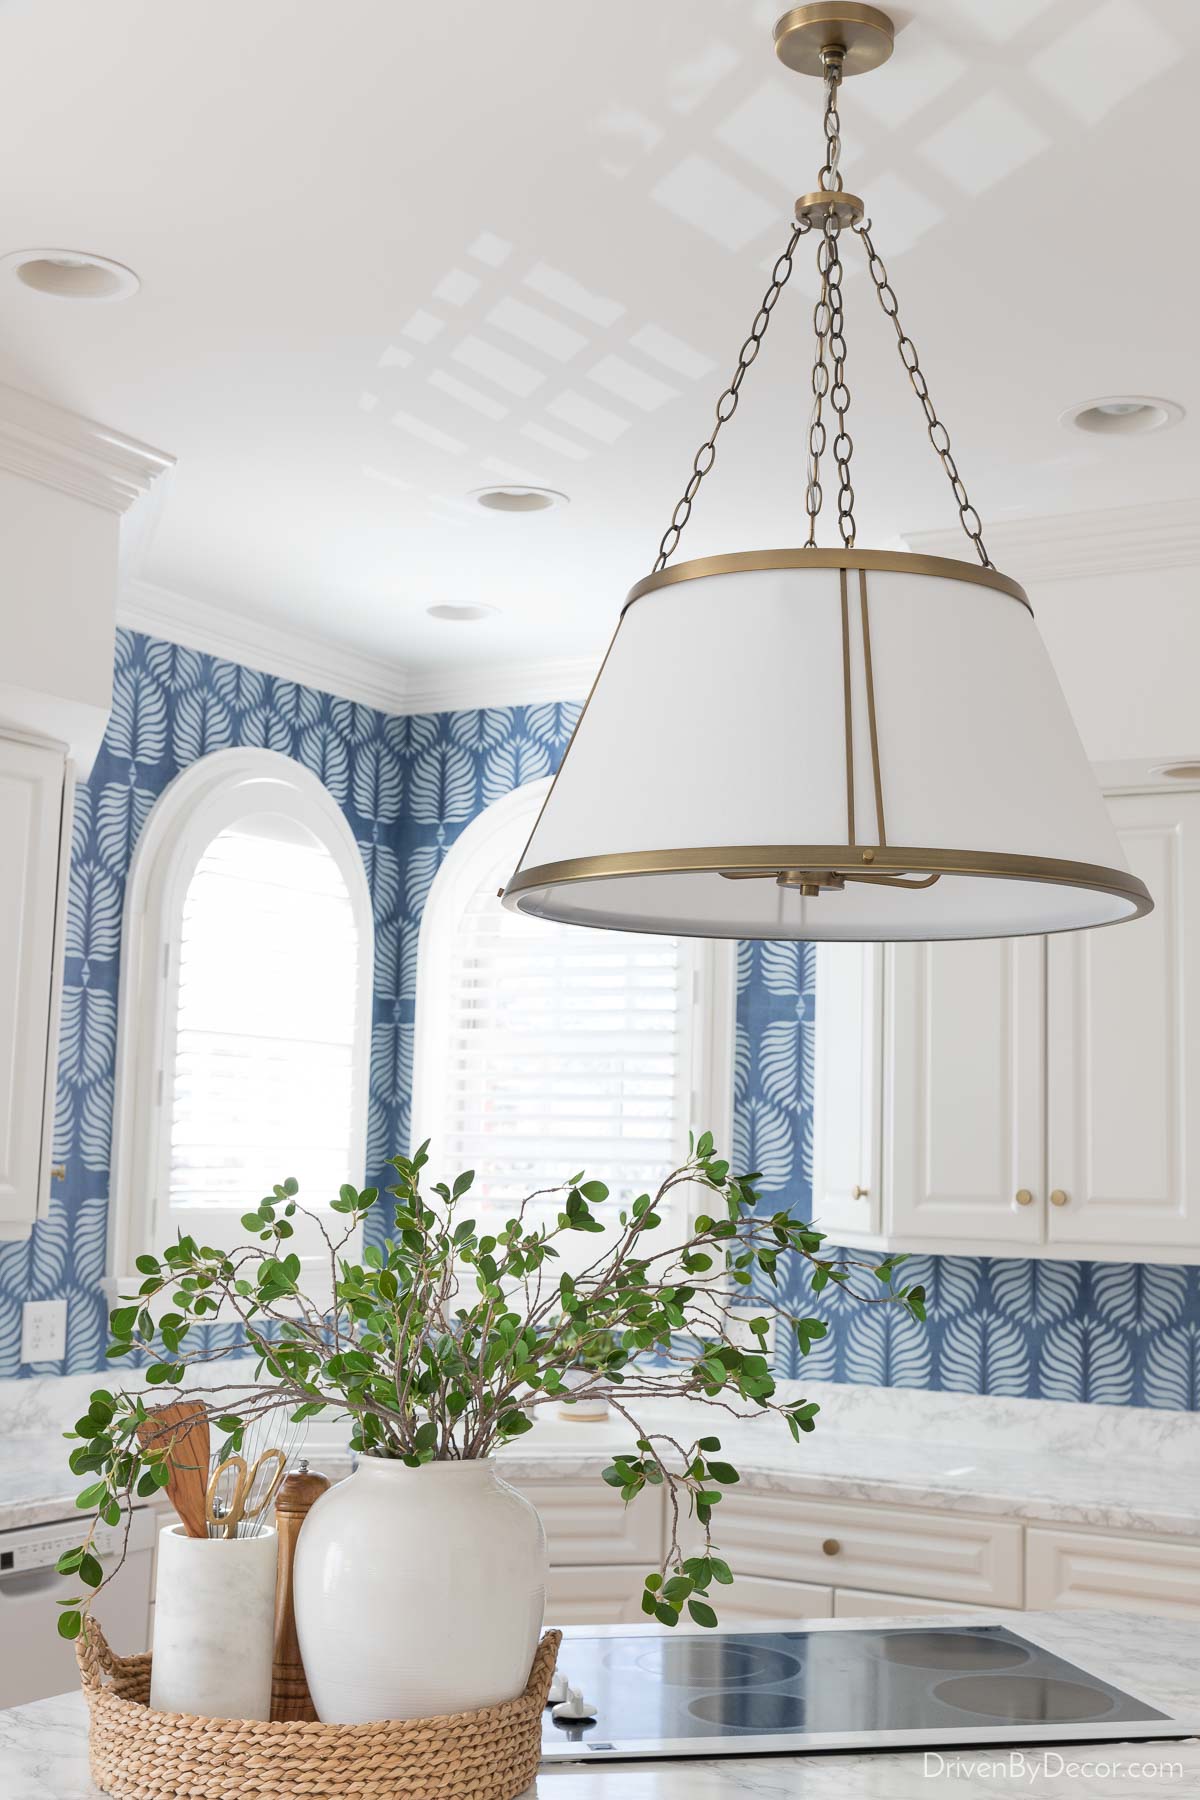
I love it! I have a long-term plan to use it in our home office (which is our room above the garage that is currently “furnished” with a card table and ikea chair 😂) so I was ok with spending a little more on it. But if you’re looking for low priced options, eBay and Facebook Marketplace are great options.
7. Add Interior Cabinet Organizers
If your kitchen cabinets were installed 20+ years ago, odds are that they’re lacking any of the useful interior organizers that you can get with cabinets today. But there are so many easy options for adding them yourself! For example, I love {these expandable bamboo drawer dividers} for creating wood divisions within my drawers to keep everything neatly in place:
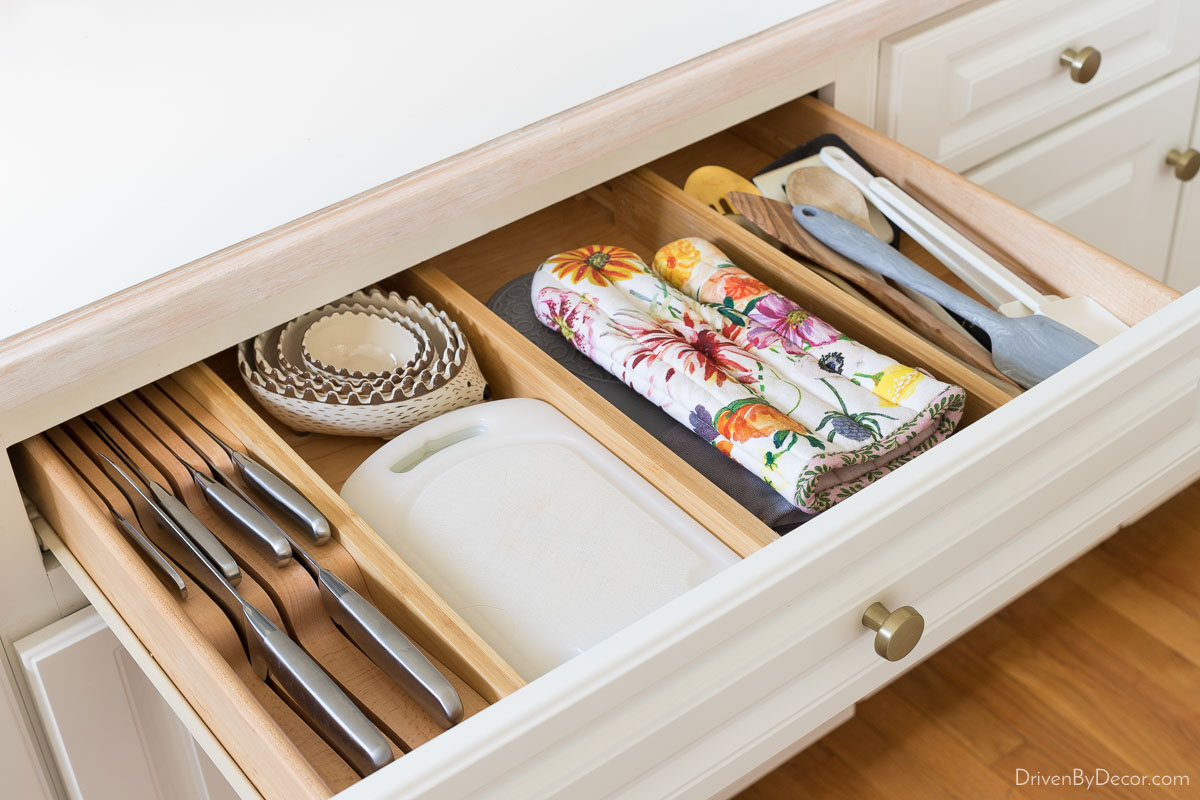
Other Sources: Drawer knob | Hedgehog measuring cups | Floral oven mitt
Or you can go a little fancier and add one of {these wood spice drawer organizers} to one of your kitchen drawers:
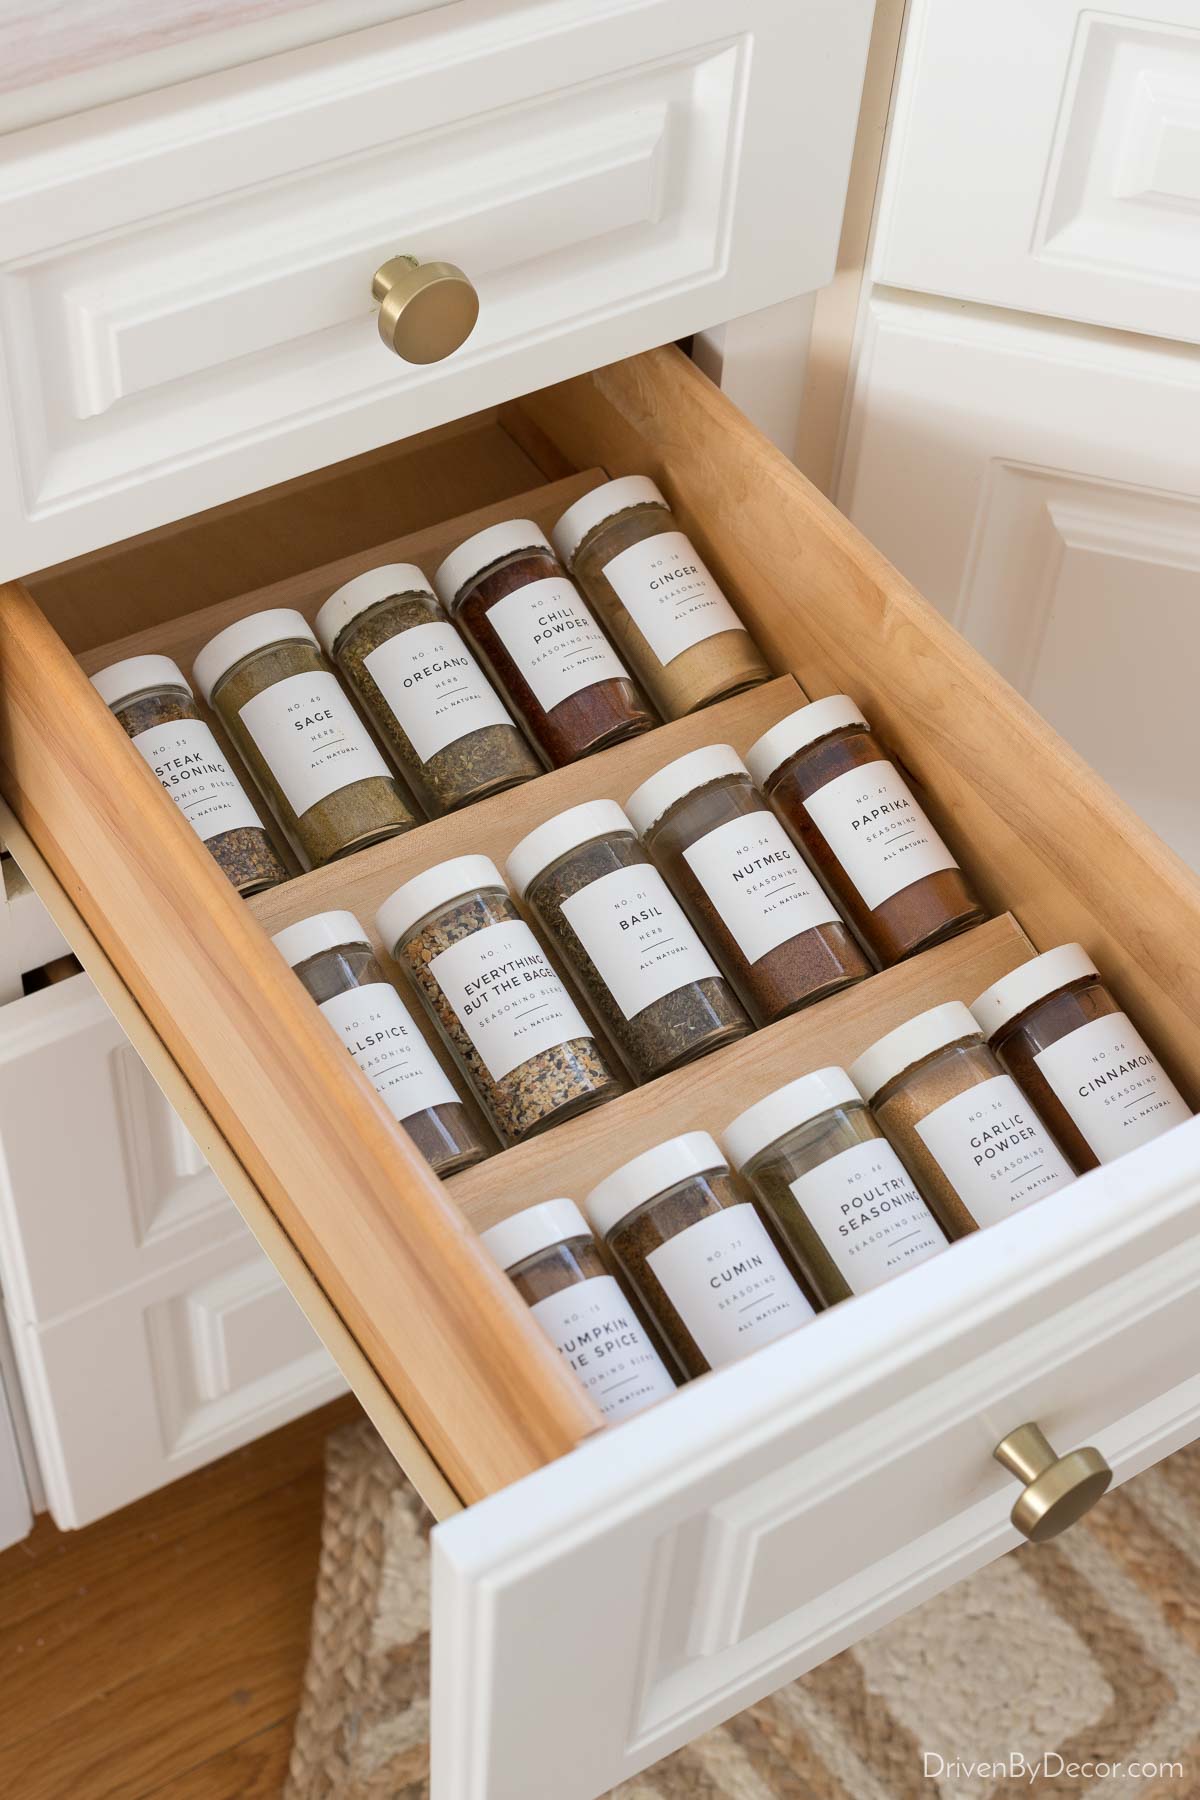
Check out my post on kitchen drawer organizers for lots of other options too!
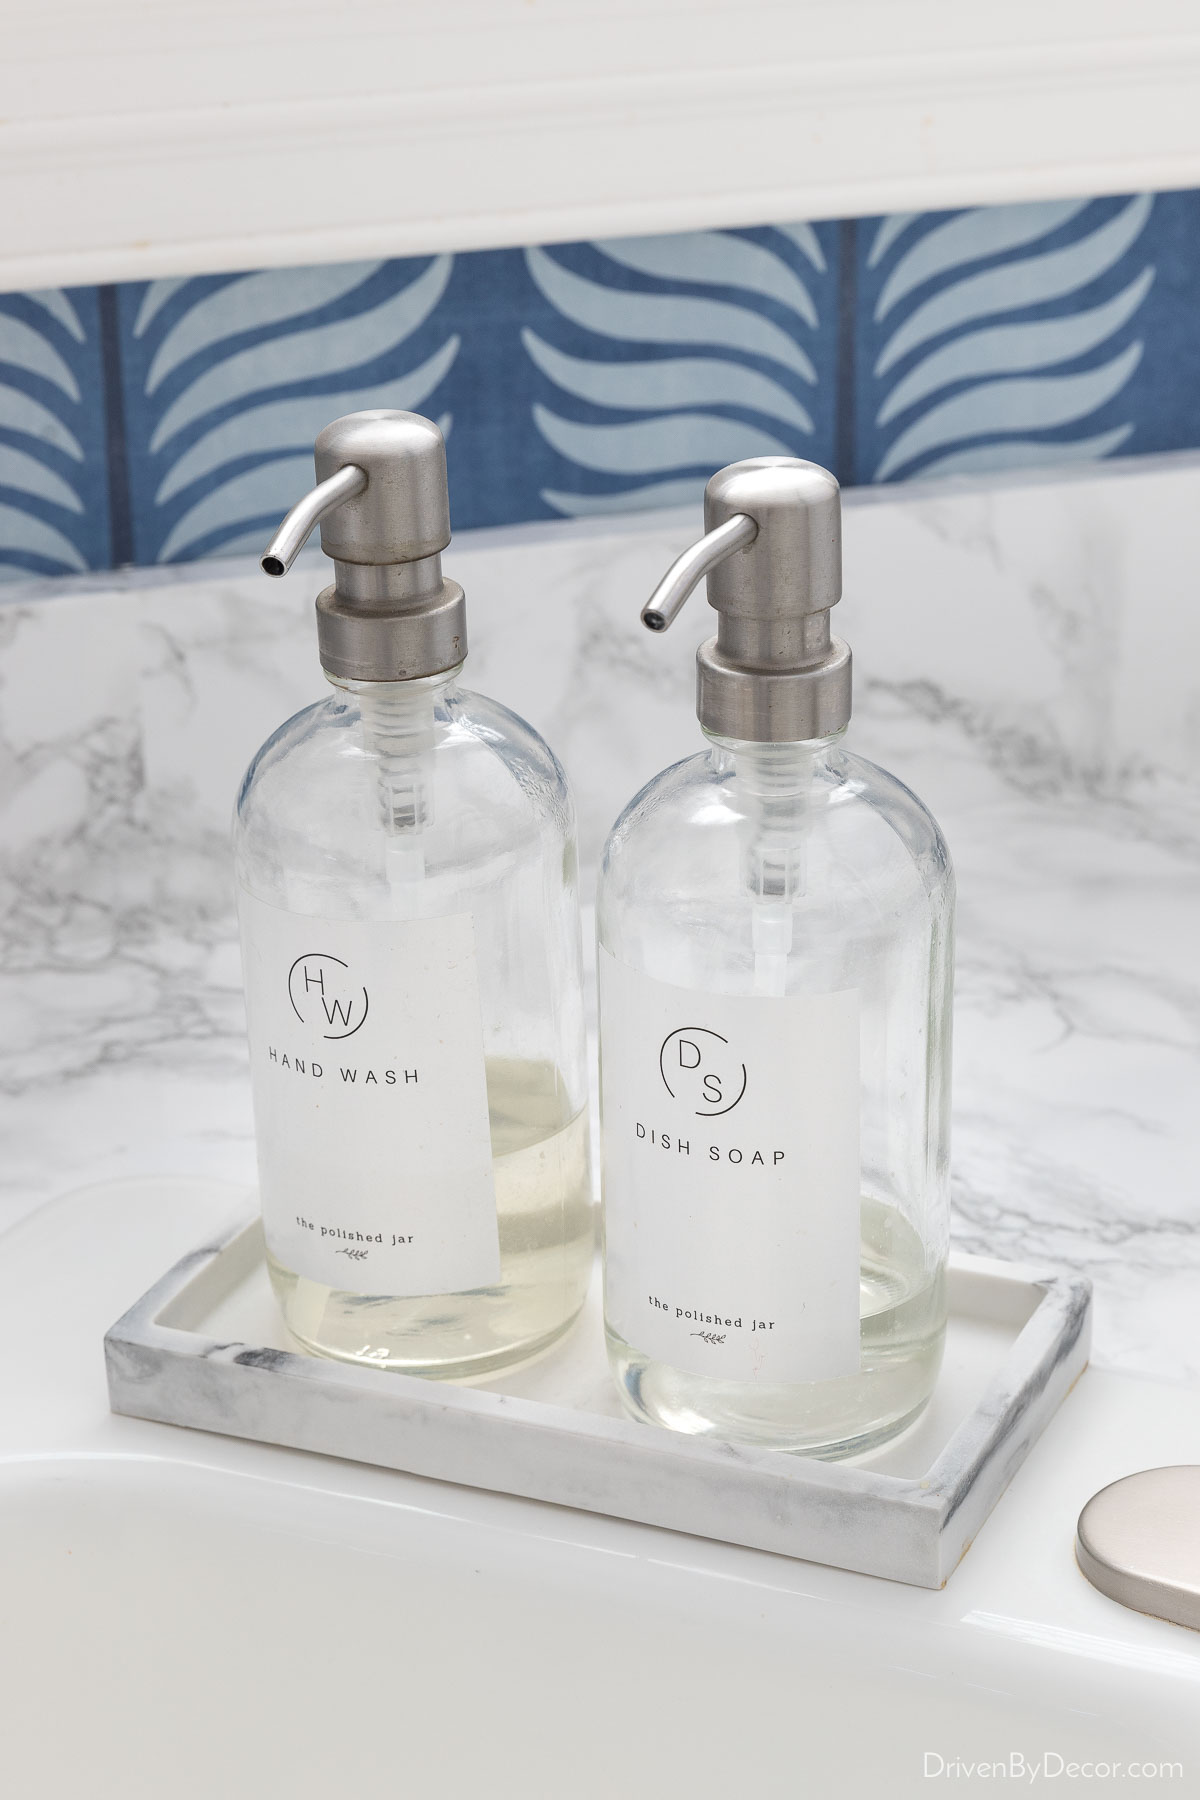
8. Freshen Things Up With New Accessories
Never underestimate the power of accessories! I don’t like having a ton of accessories cluttering up my kitchen countertops but adding a few stylish pieces here and there can make a world of difference. Some of the accessories I added to our kitchen include a pair of {these soap pumps} (mine are the 16 ounce clear) that fit perfectly in {this resin tray} next to our sink:
I also have a plant in {this cute planter} plus {this striped dish towel} in denim blue:
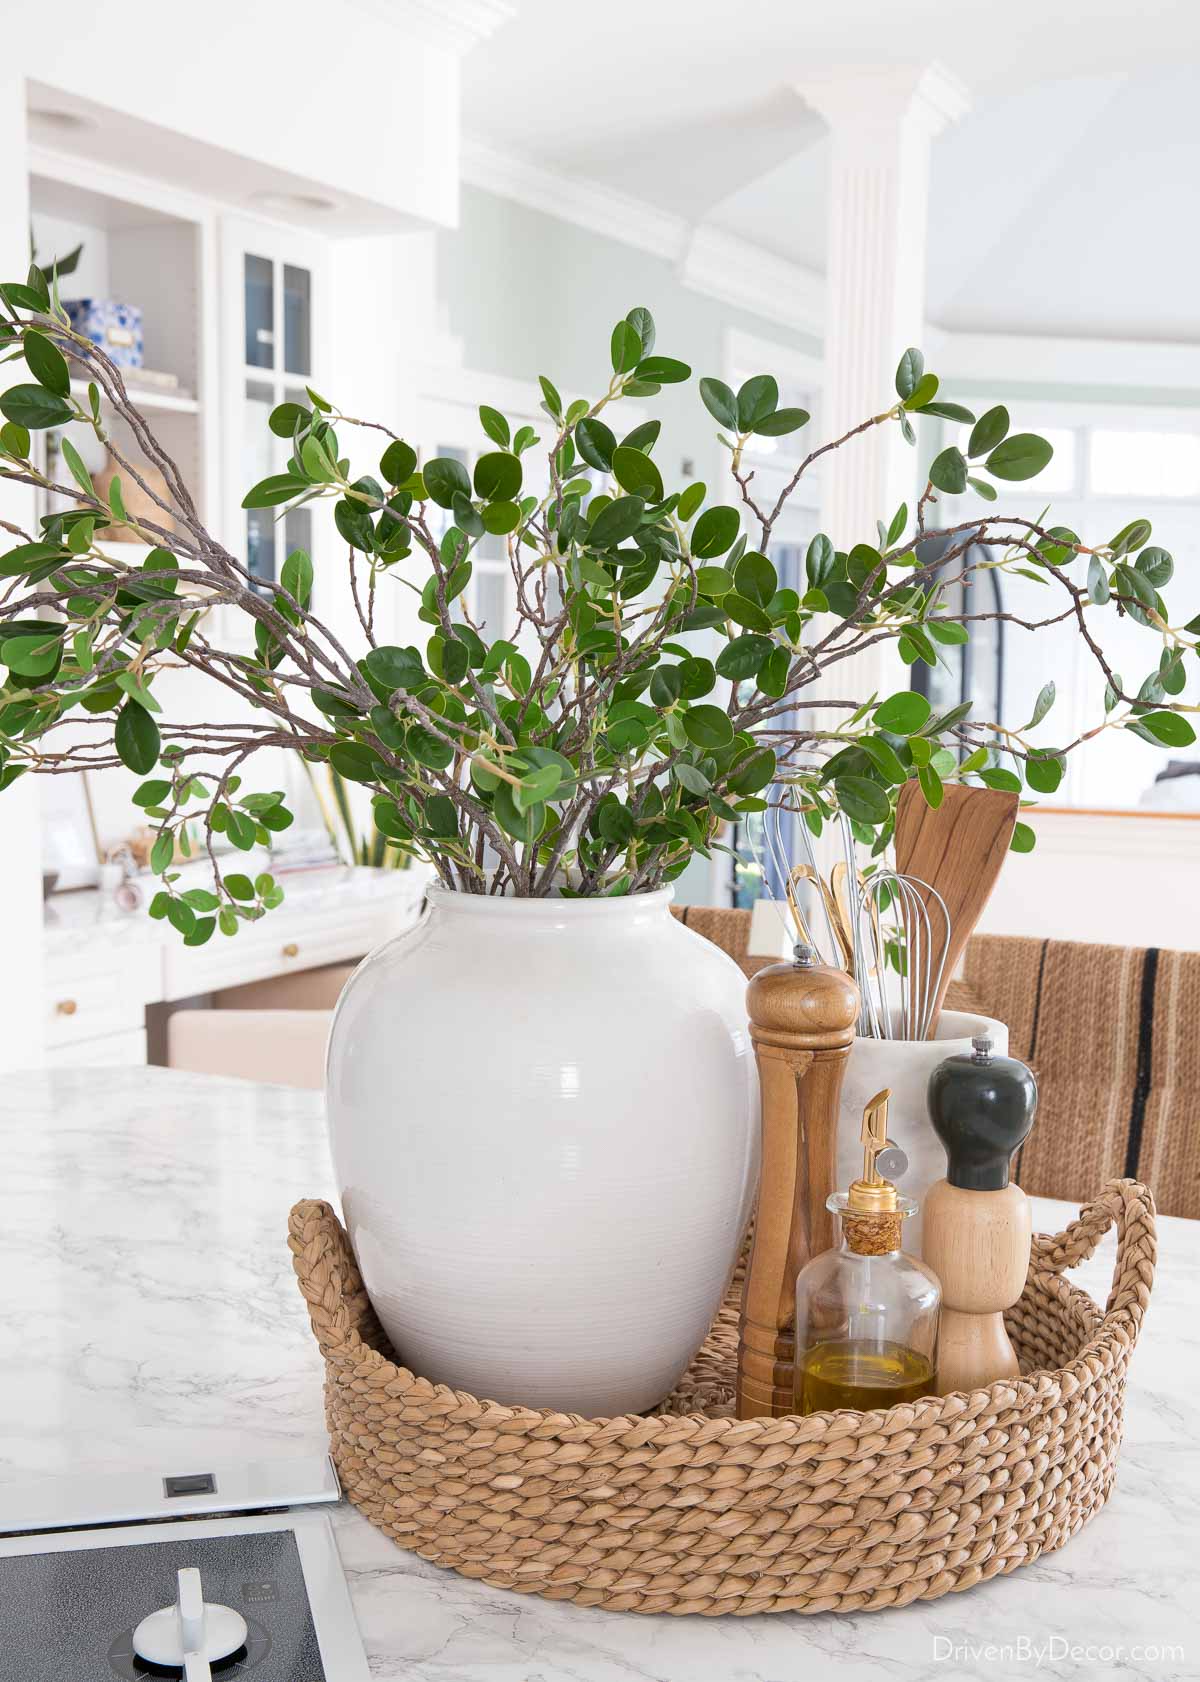
Next to our island cooktop I have {this round woven tray} (also check out {this similar tray} for a more budget-friendly option) with a large white planter (no longer available) filled with some of {these faux greenery branches}. My round woven tray includes {this marble wine cooler} that I use as a utensil holder, {this glass oil bottle}, and salt and pepper mills:
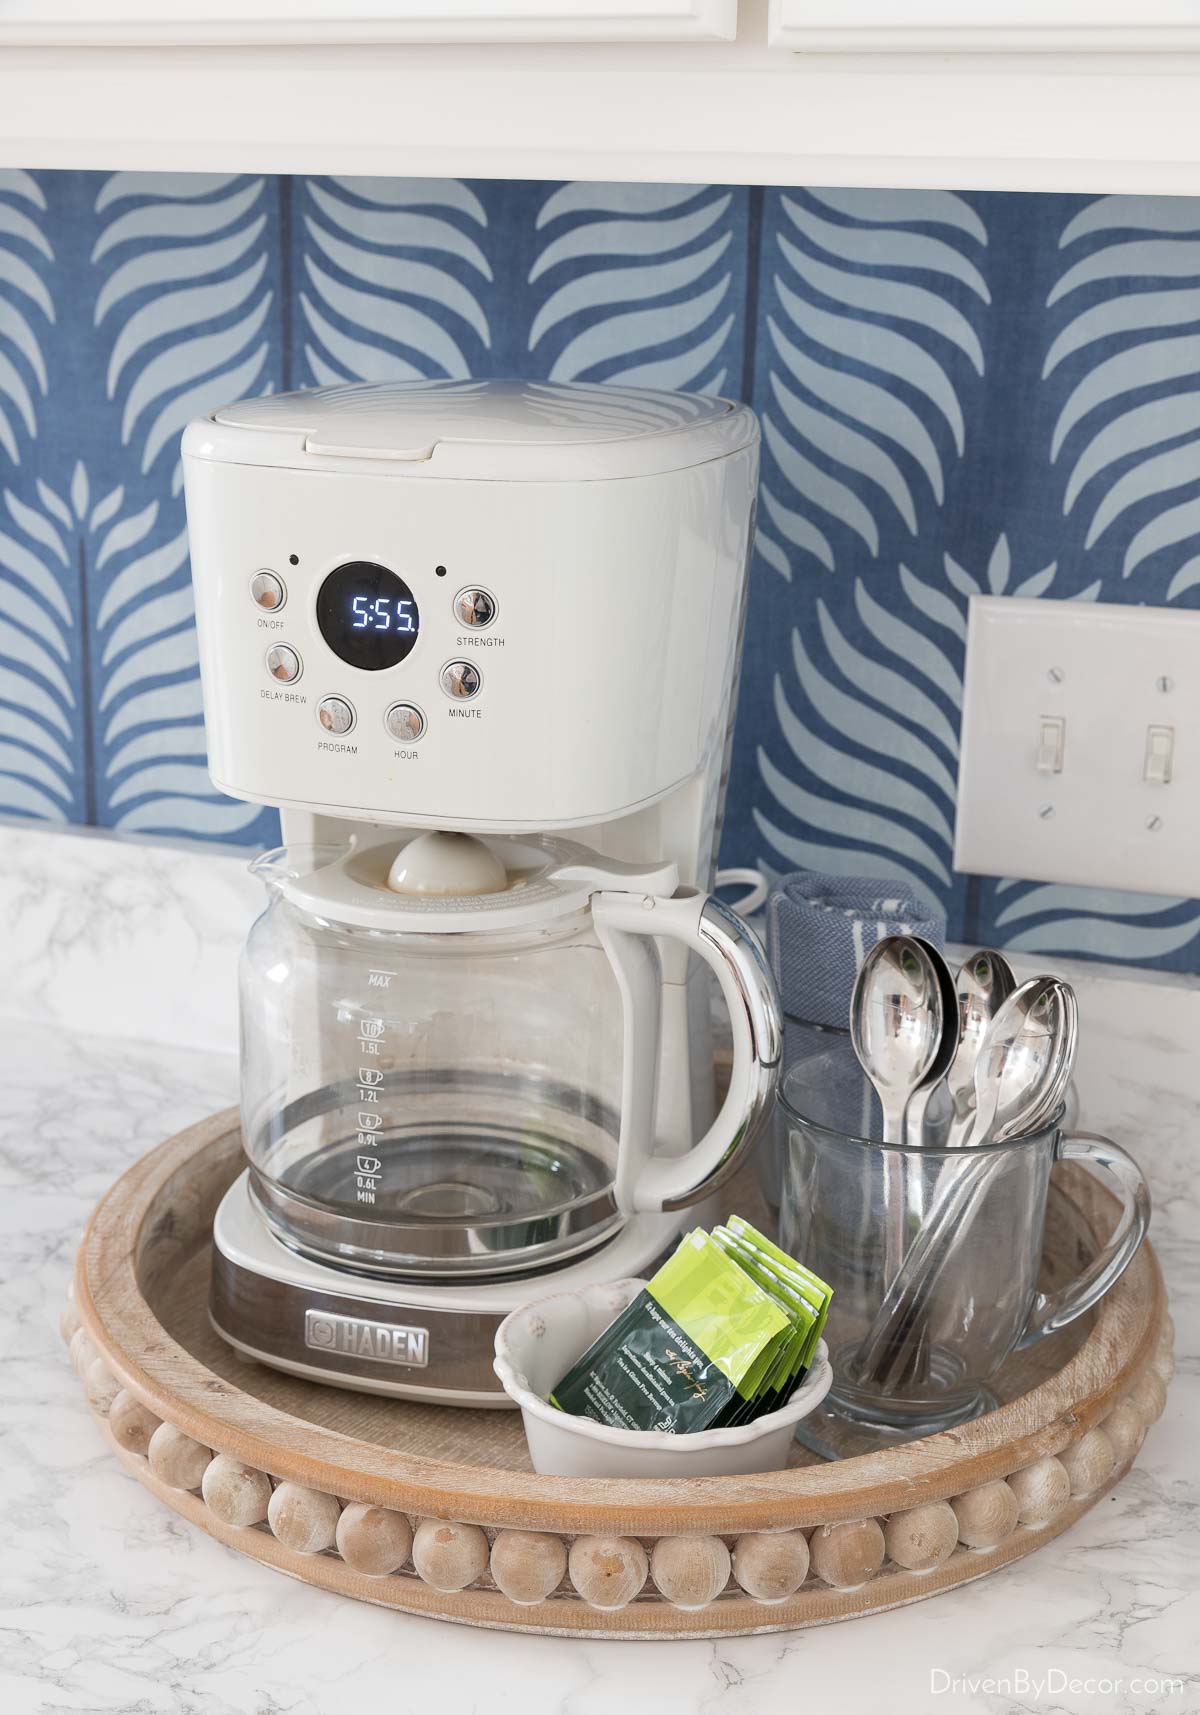
Near our oven we have {this coffee maker} in {this round wood tray} with a few of {these glass coffee cups}:
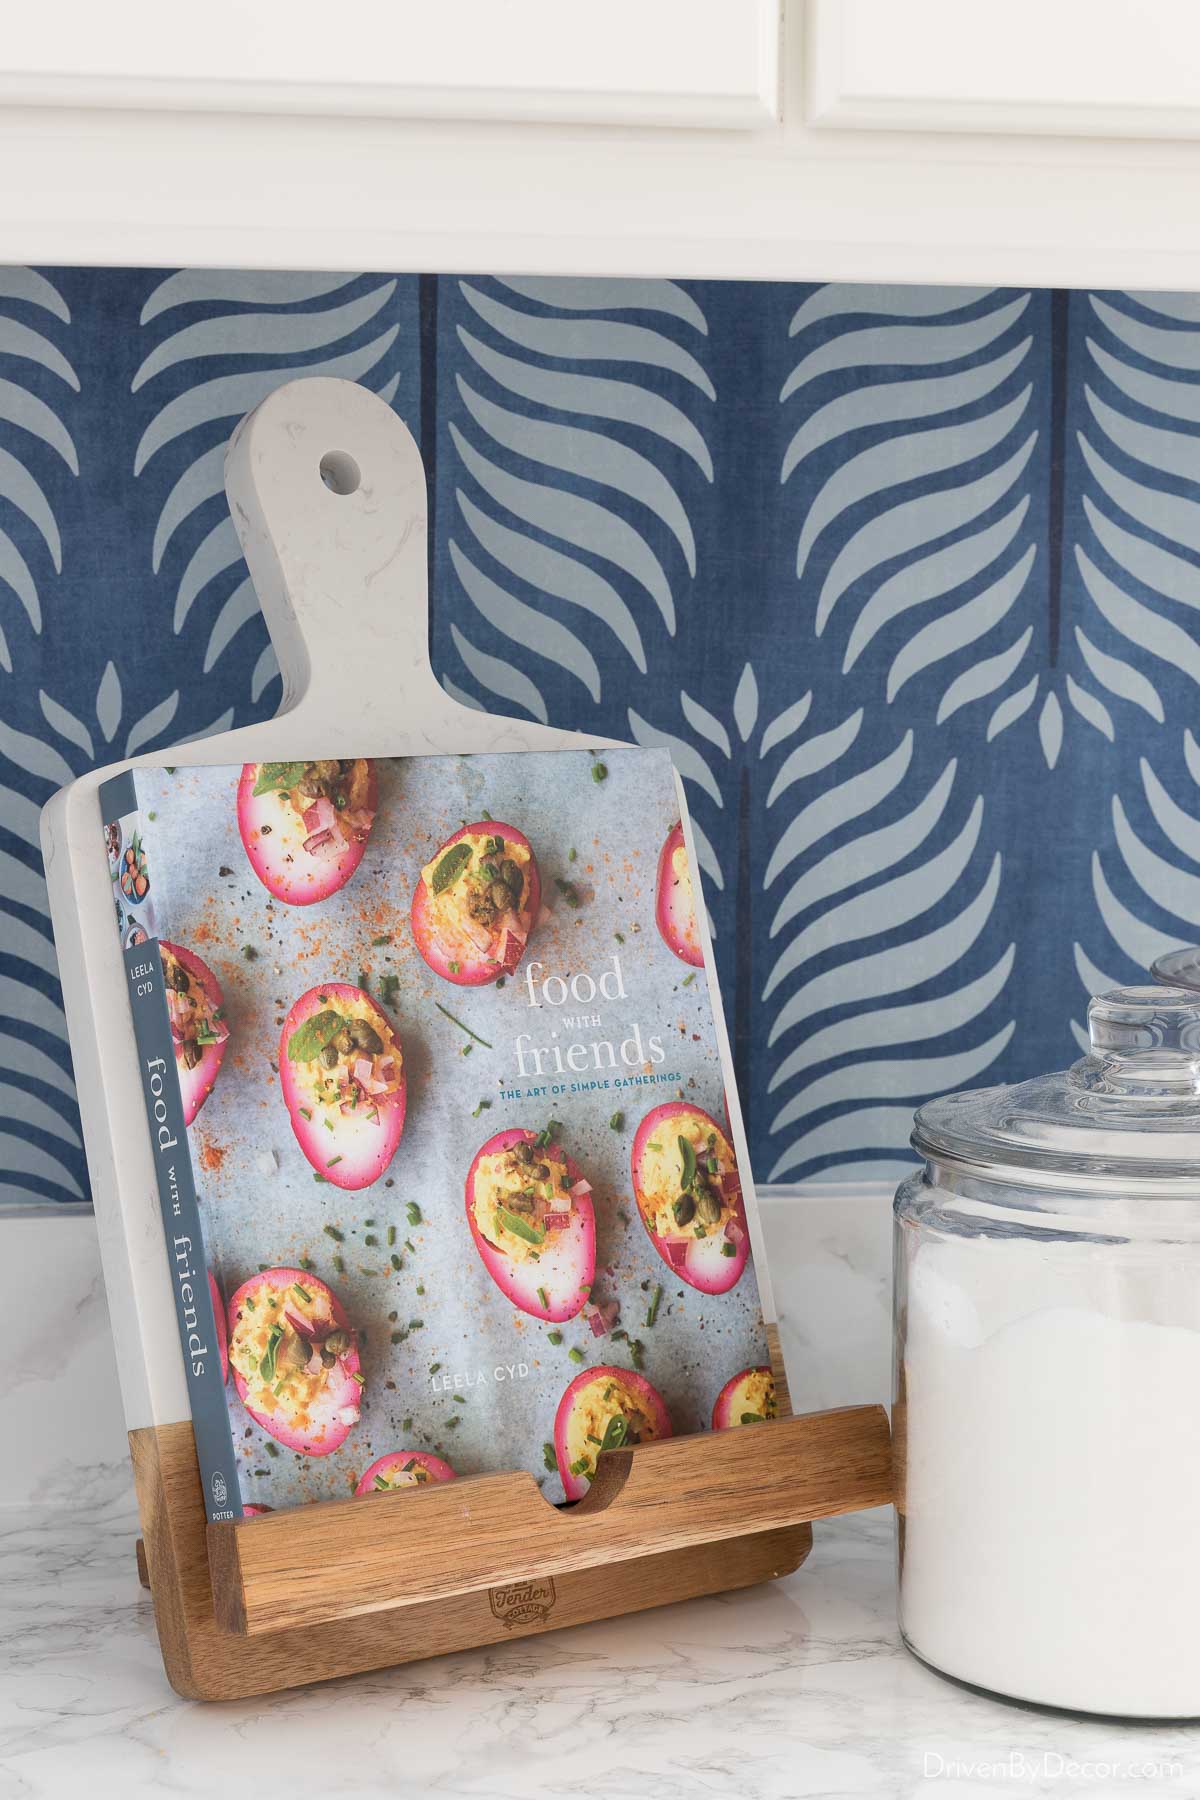
And on the other side of our kitchen near the refrigerator I have {this marble & wood cookbook holder} along with two of {these glass storage jars} for flour and sugar:
To wrap things up, how about a good ole “before” and “after” pic to see the difference that all of those changes made? Here’s what our kitchen looked like when we bought it:
and here’s its new look:
One change I didn’t mention in my post was swapping out the counter stools because I definitely can’t include those suckers in the “budget” category – they are {these woven counter stools}. I LOVE how the woven design ties this main kitchen area in with our breakfast nook (which is NOT usually as dressed up as when I took this pic – ha!):
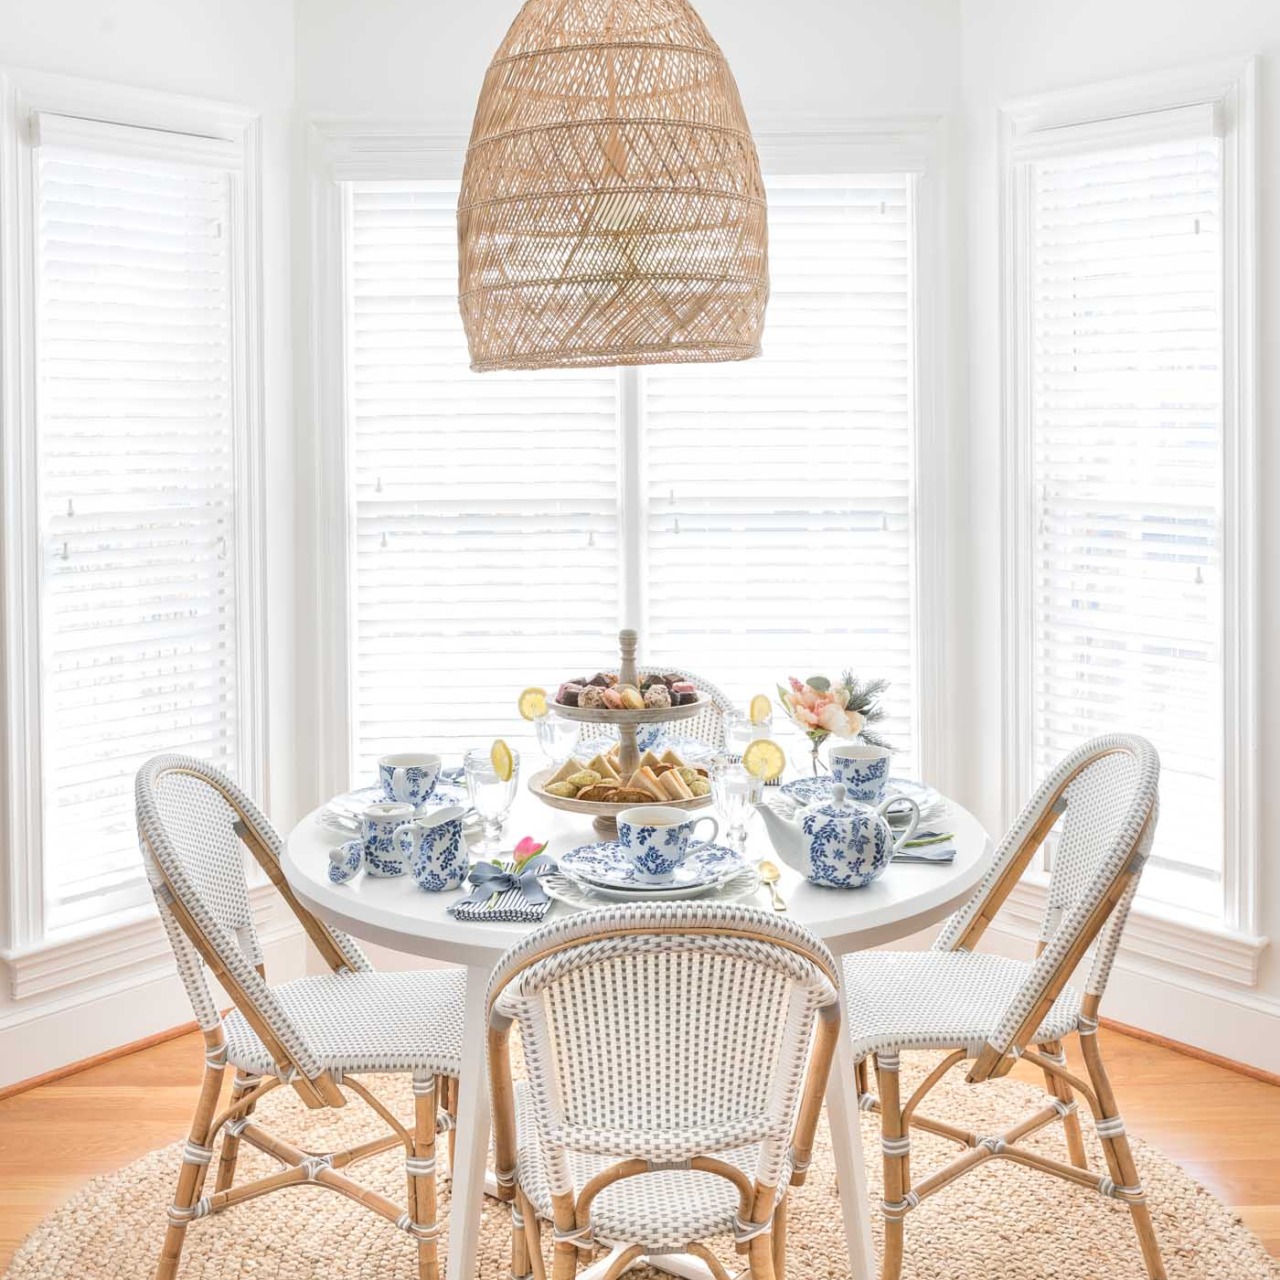
Sources: Woven pendant | Round dining table | Bistro chairs | 7′ Round jute rug
Now that our kitchen has a newly refreshed look, I feel like I can more patiently wait until the time is right for a larger kitchen remodel. And most importantly, our home now feels more like “us” than someone else’s home that we’re living in 🙂
Let me know if you have any questions about our newly refreshed kitchen or if there’s anything I missed. Be sure to stop by my Shop page {HERE} to check out all of the latest deals I found!
Thanks for stopping by today!


elle says
Great ideas – like refreshing the can lights with spray paint! It is now maybe 10 months later and I am wondering how the countertop has held up. Would you consider a post about it?
Kris Jarrett says
They have held up CRAZY well! Look just like the day I installed them!
YW Designs says
I love that you painted the soffits white to blend in and extend the visual height of the cabinets, whereas the original wallpapered version was overpowering.
Pamela says
Truly incredible! And just beautiful. Those counter tops must have a bear to do. We had a similar wall oven/microwave setup when we bought our home only we were the ones to remove the old microwave when we replaced the oven. We then bought a new microwave that was much than the space the old had occupied. There was an older paneled fridge in the garage that matched the kitchen cupboards because former owners had put a new fridge in the kitchen. my husband removed a piece off the extra paneled fridge, turned it sideways, cut it to fit over the whole hole and installed it with a piano hinge. It looks like a built in cupboard, opens like a dishwasher door and inside sits the smaller microwave. I’ve not gotten around to finishing off the interior of the space because no one but us sees it. 😉 I call it my Edgar Allen Poe microwave because it’s hidden inside a wall.
Jenn says
Such a great update! So glad you revealed the name of those types of cabinets, we have those and some need to be replaced but I didn’t know what it was called! Love your countertops too!
Karen B. says
Hi Kris,
This information is timely. I often refer to your previous posts and your easy-to-understand instructions along with your great resources for details needed to create more storage are so valuable as I transform my cottage [read: small home].
Karen B.
Cynthia says
Were new countertops in that large kitchen part of the budget design? They are gorgeous, but budget….?
Lizzy says
Super impressive! I like everything you did. How are the contact papered countertops holding up?
Patti says
Oh my goodness! I can use almost every tip you have here! I have already used your ideas to remodel my bathroom! One more Driven by Decor room may be in my future!!
Jill says
Oh my goodness, that is flawless! I LOVE the idea of adding one or two higher-end things (your stools and pendant) to a budget cosmetic reno. It raises everything to a level where no one would question anything in that kitchen. Great job.
Renae says
Gorgeous! It’s a lovely transformation.
Susan says
Beautiful renovation…every last detail. Especially love the countertop and wallpaper!
Ann says
Wow, what an incredible transformation and budget besides. My favorite is the new wallpaper. I am definitely inspired!
Patti says
Wow! What an inspirational makeover! So many terrific tips! I wouldn’t be in any hurry to remodel! Lol!
Lyn says
I laughed when you said it was a ’90’s design. As very young newlyweds we were able to purchase a brand new home. It was small, and we lived there for 7 years. We then purchased our second home which was over 3 times larger than the first one, but it was 17 years old. I refer to a house that is 17 years old as being “in the danger zone”. Everything was ready for updating. We ended up living there for 17 years and during those years we had to completely update the house. New windows, roof, furnace and C/A, new bathrooms and kitchen, new driveway, landscaping, swimming pool and fencing, as well as many other things. My husband was then transferred out of town, and I told him we had to have a brand new home because I didn’t want to go through all of that again. We got lucky and bought a builder’s show house. Well, after living here for 28 years and maintaining it very well and doing some updates as needed, we are now ready to downsize. I just hope we can find a home that doesn’t need work, fingers crossed! My husband’s uncle owned a real estate business and his advice was to buy a brand new home – live there for 15 years – then pass it along to the next owner to do all those repairs and updates. Looking back – it was good advice – wish we had listened!!
Anonymous says
I just love everything you’ve done. I’m going to do the countertops at my daughter’s apartment next time I visit. They really make a difference!