After remodeling all four of the bathrooms in our previous home and two bathrooms in our current home, I’ve found all sorts of ways to cut costs without sacrificing style. Today I’m sharing 15 bathroom remodel ideas on a budget that you can use for remodeling the smallest of powder rooms all the way up to spacious primary bathrooms. Let’s get to it… (post includes commissionable links; for more information, see my full disclosure statement {here})
1. Paint Your Bathroom Vanity
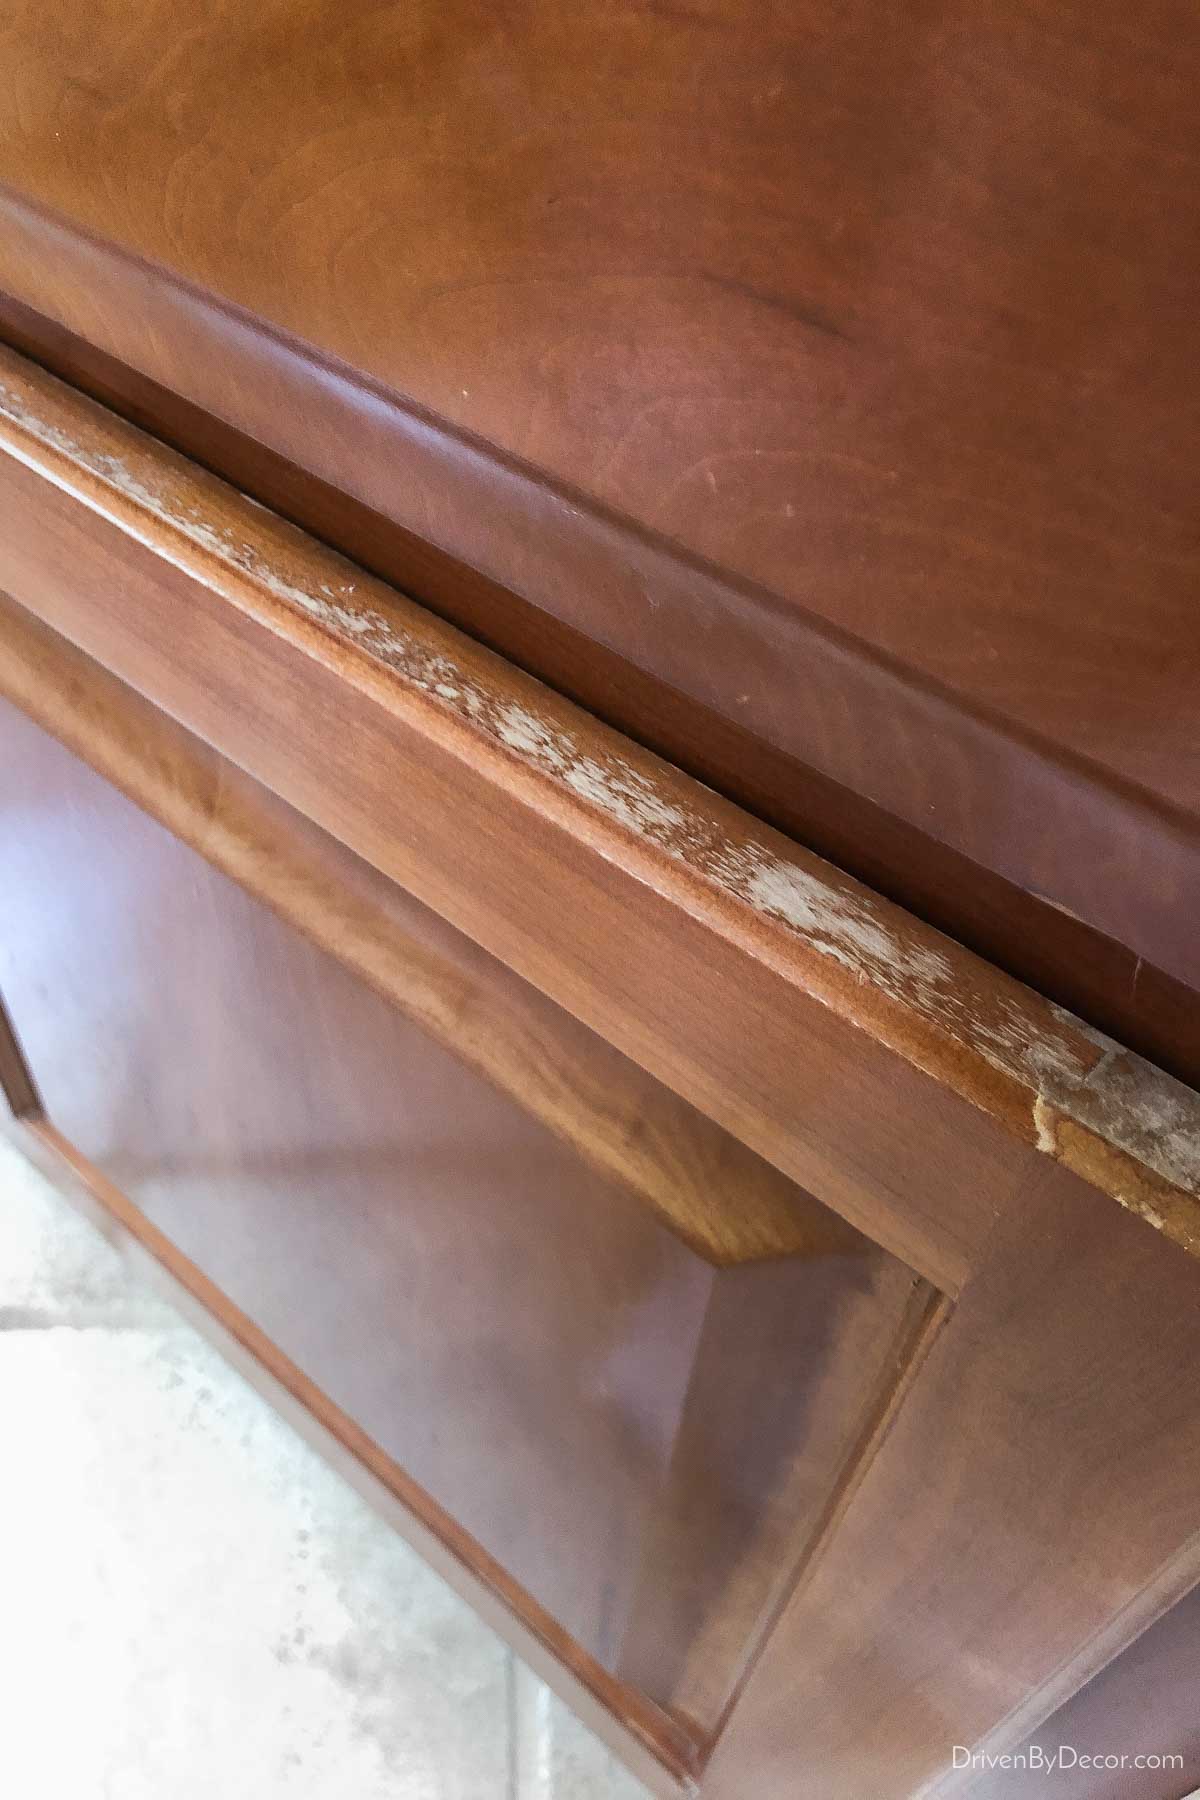
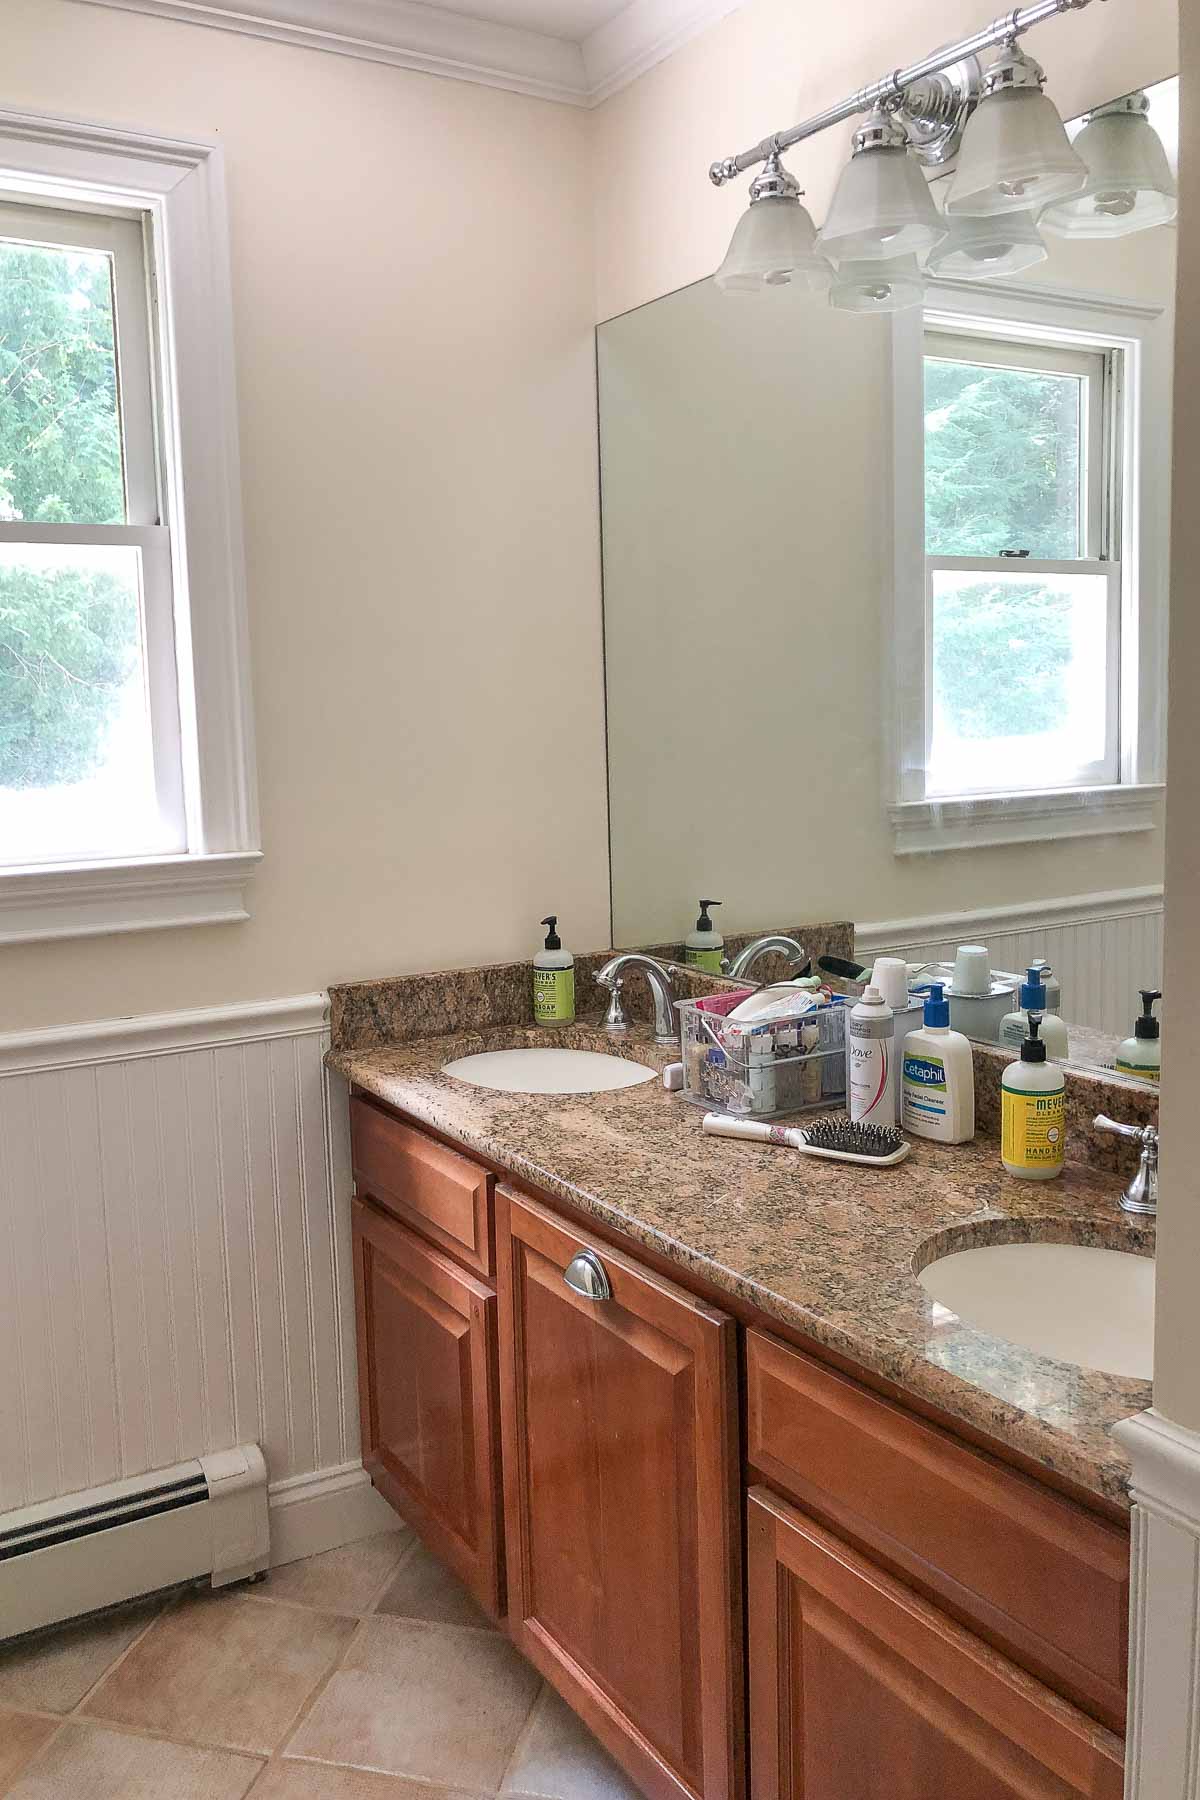
If your bathroom vanity is showing its age, a few coats of paint can completely transform it! In our previous home, my girls’ bathroom had a high-quality wood vanity, but the dark stain made the space feel gloomy and the cabinet doors had a lot of wear and tear:
With a few coats of paint, it went from this:
to this:
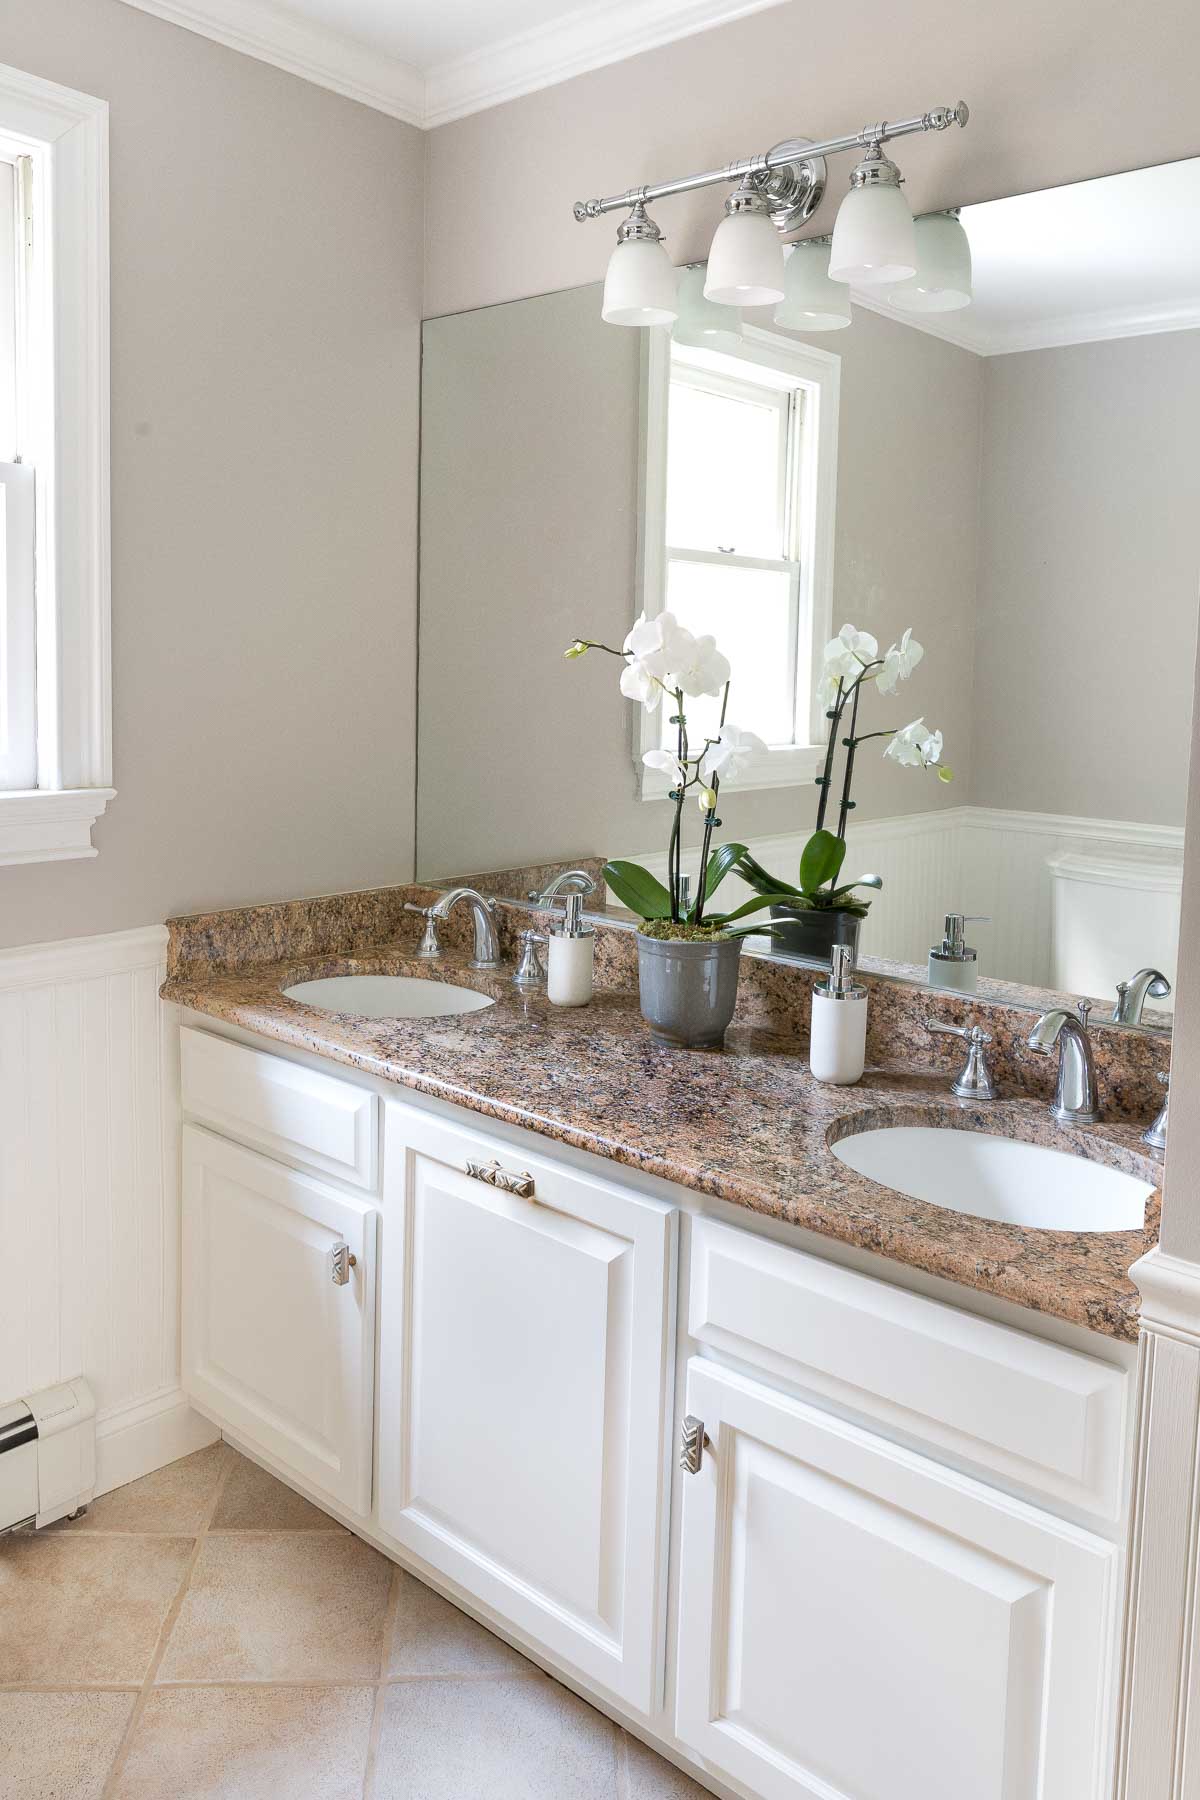
Get the step-by-step details in my post on how to paint bathroom cabinets. It’s simple enough for anyone to do!
What if the style of your vanity is too dated to salvage with paint? Replace it with a freestanding vanity that includes the cabinet, sink(s), and countertop, such as {this 54″ double vanity} we put in my girls’ Jack & Jill bathroom in our current home:
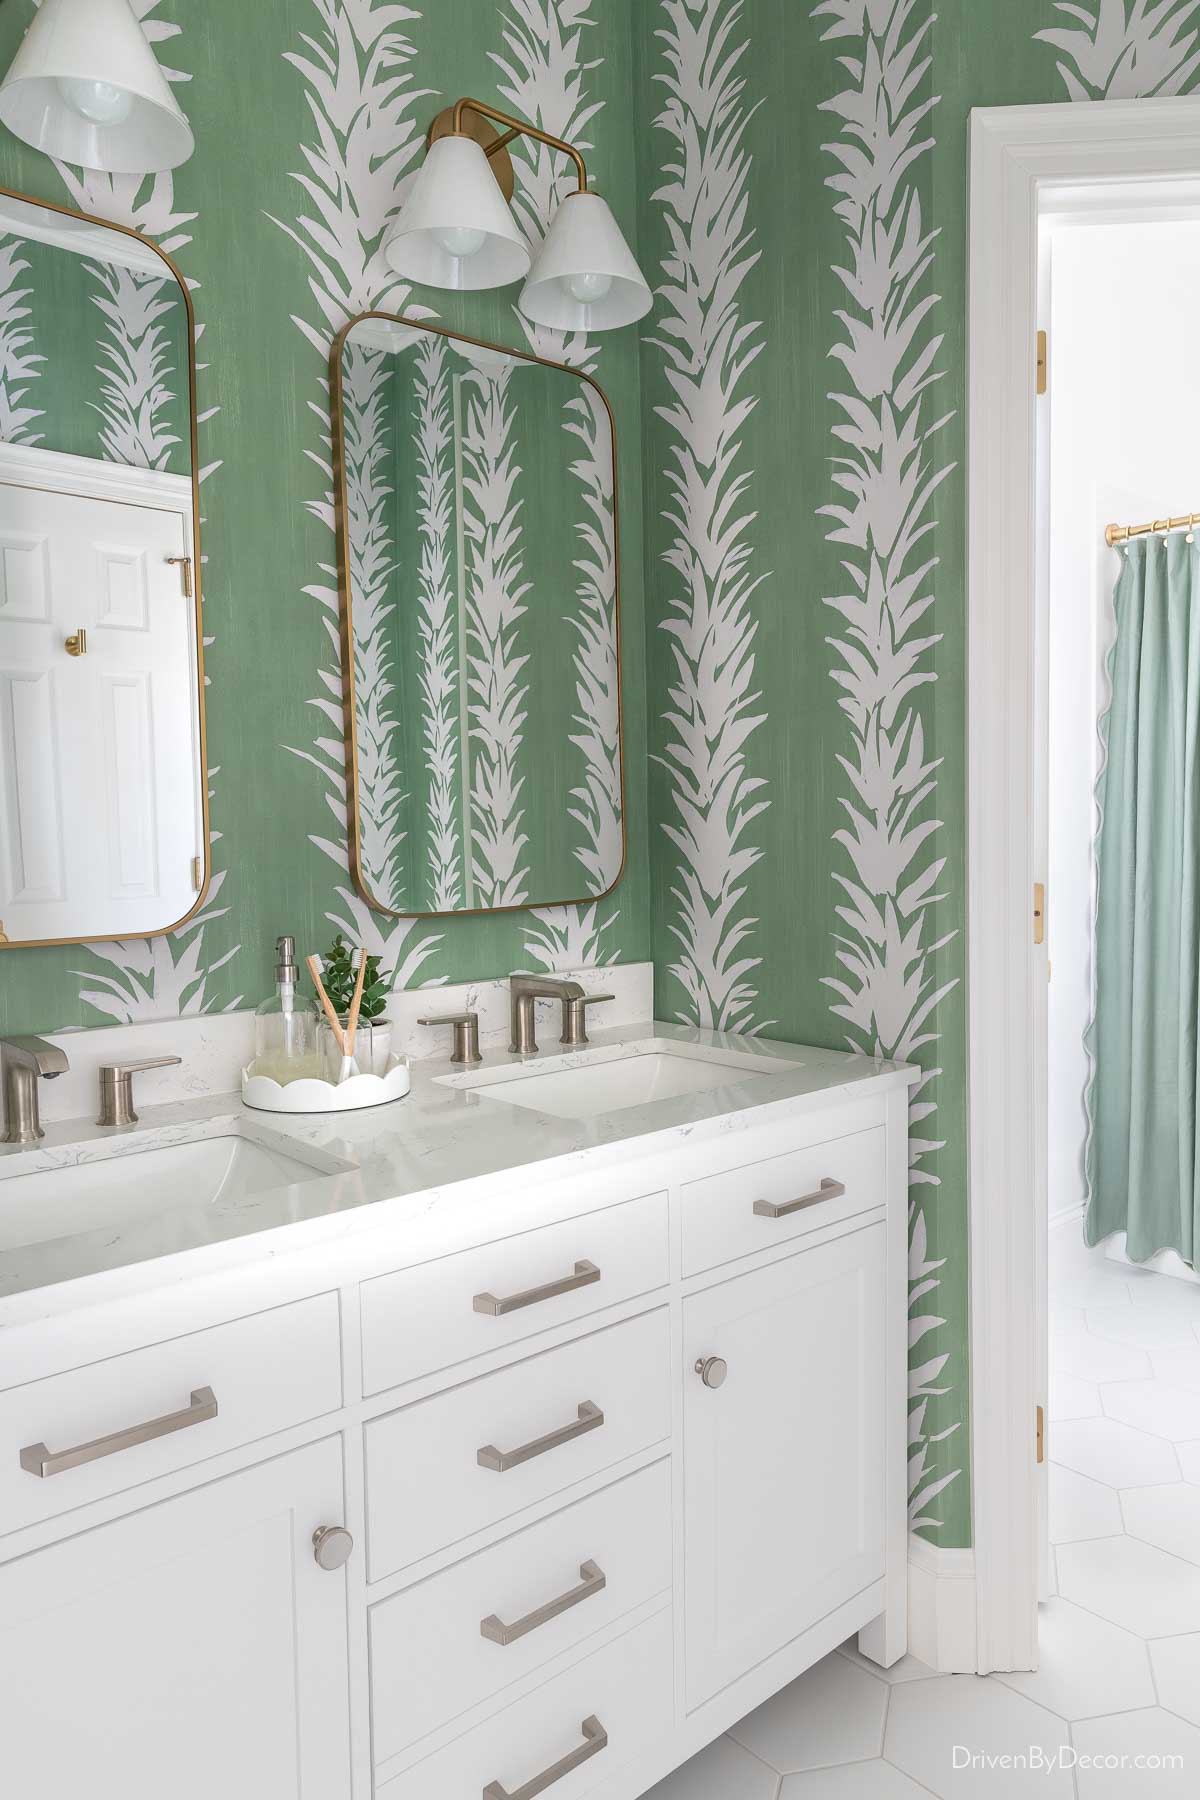
Sources: Wallpaper | Double vanity | 2-Light cone sconces | Medicine cabinet mirrors | Faucets | White hexagon floor tile
It’s always cheaper to go this route vs. buying cabinets, sinks, and a countertop separately.
2. Swap Out Your Sconce Shades
If your bathroom sconces look dated, a simple shade swap may be all that you need! In my girls’ old bathroom, we swapped out the dated glass shades for {these new ones} that come in a set of four. It completely updated the look of this sconce for under $50:
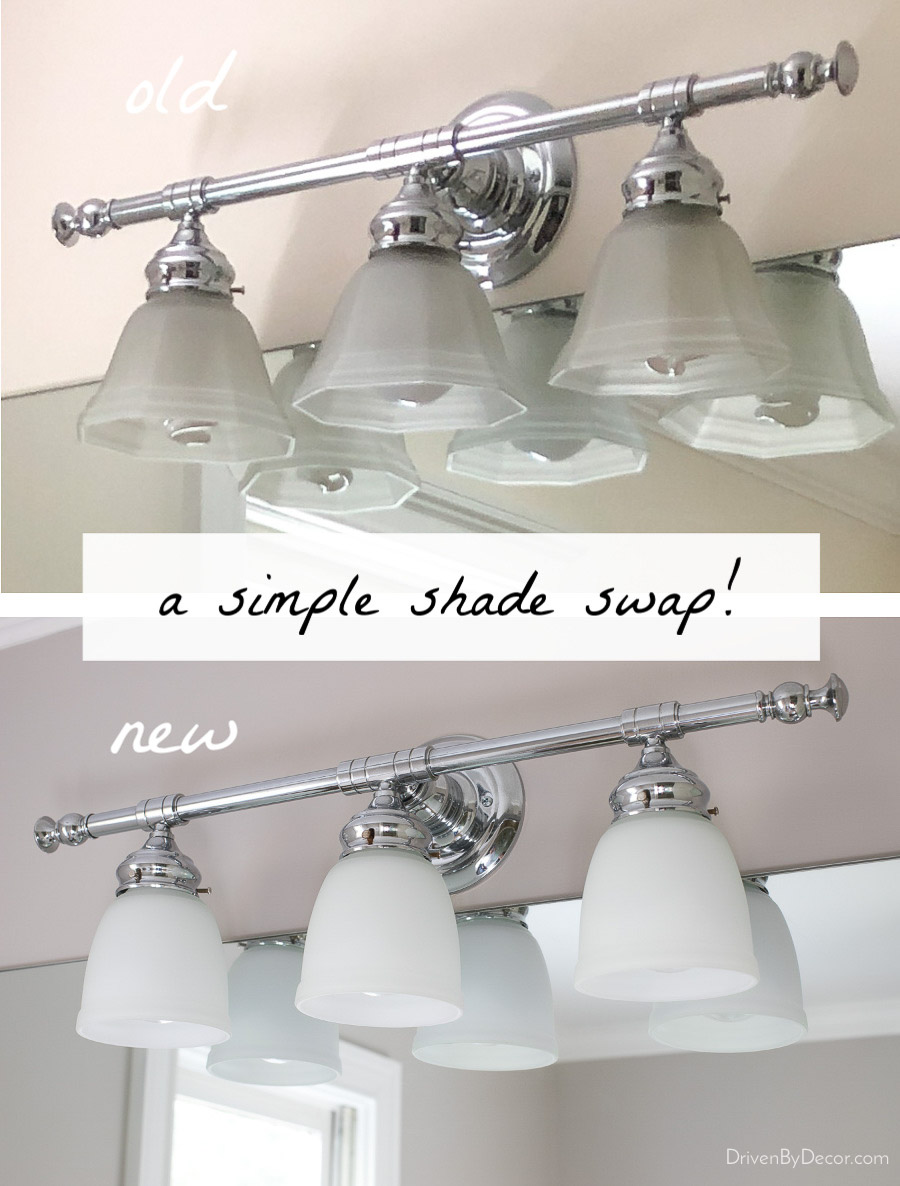
Not only does it save you money by not having to buy a whole new light fixture, but you save on electrician costs too. You also save the potential hassle of having to patch and paint the area around the sconce base if the new sconce has a smaller footprint than the old.
3. DIY Your Own Art
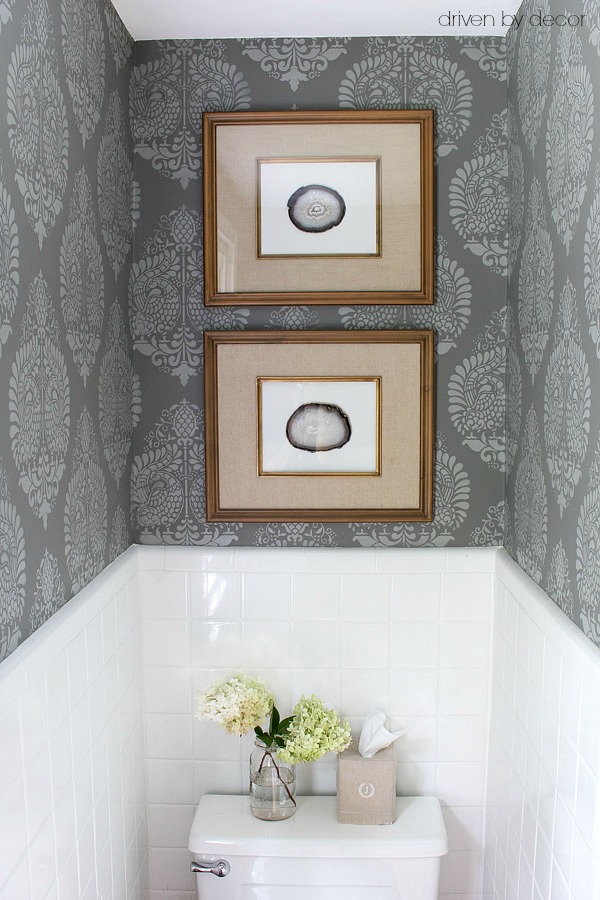
Nothing brings a space to life like art! And it doesn’t need to be anything elaborate or expensive, especially in a bathroom. In the powder room of our previous home, I made art out of two agate slices, adhering them to paper with glue dots and placing them in matching frames:
You can also buy inexpensive printables on Etsy or create your own. I created this super simple “hello sweet cheeks” printable in just a few minutes using Canva:
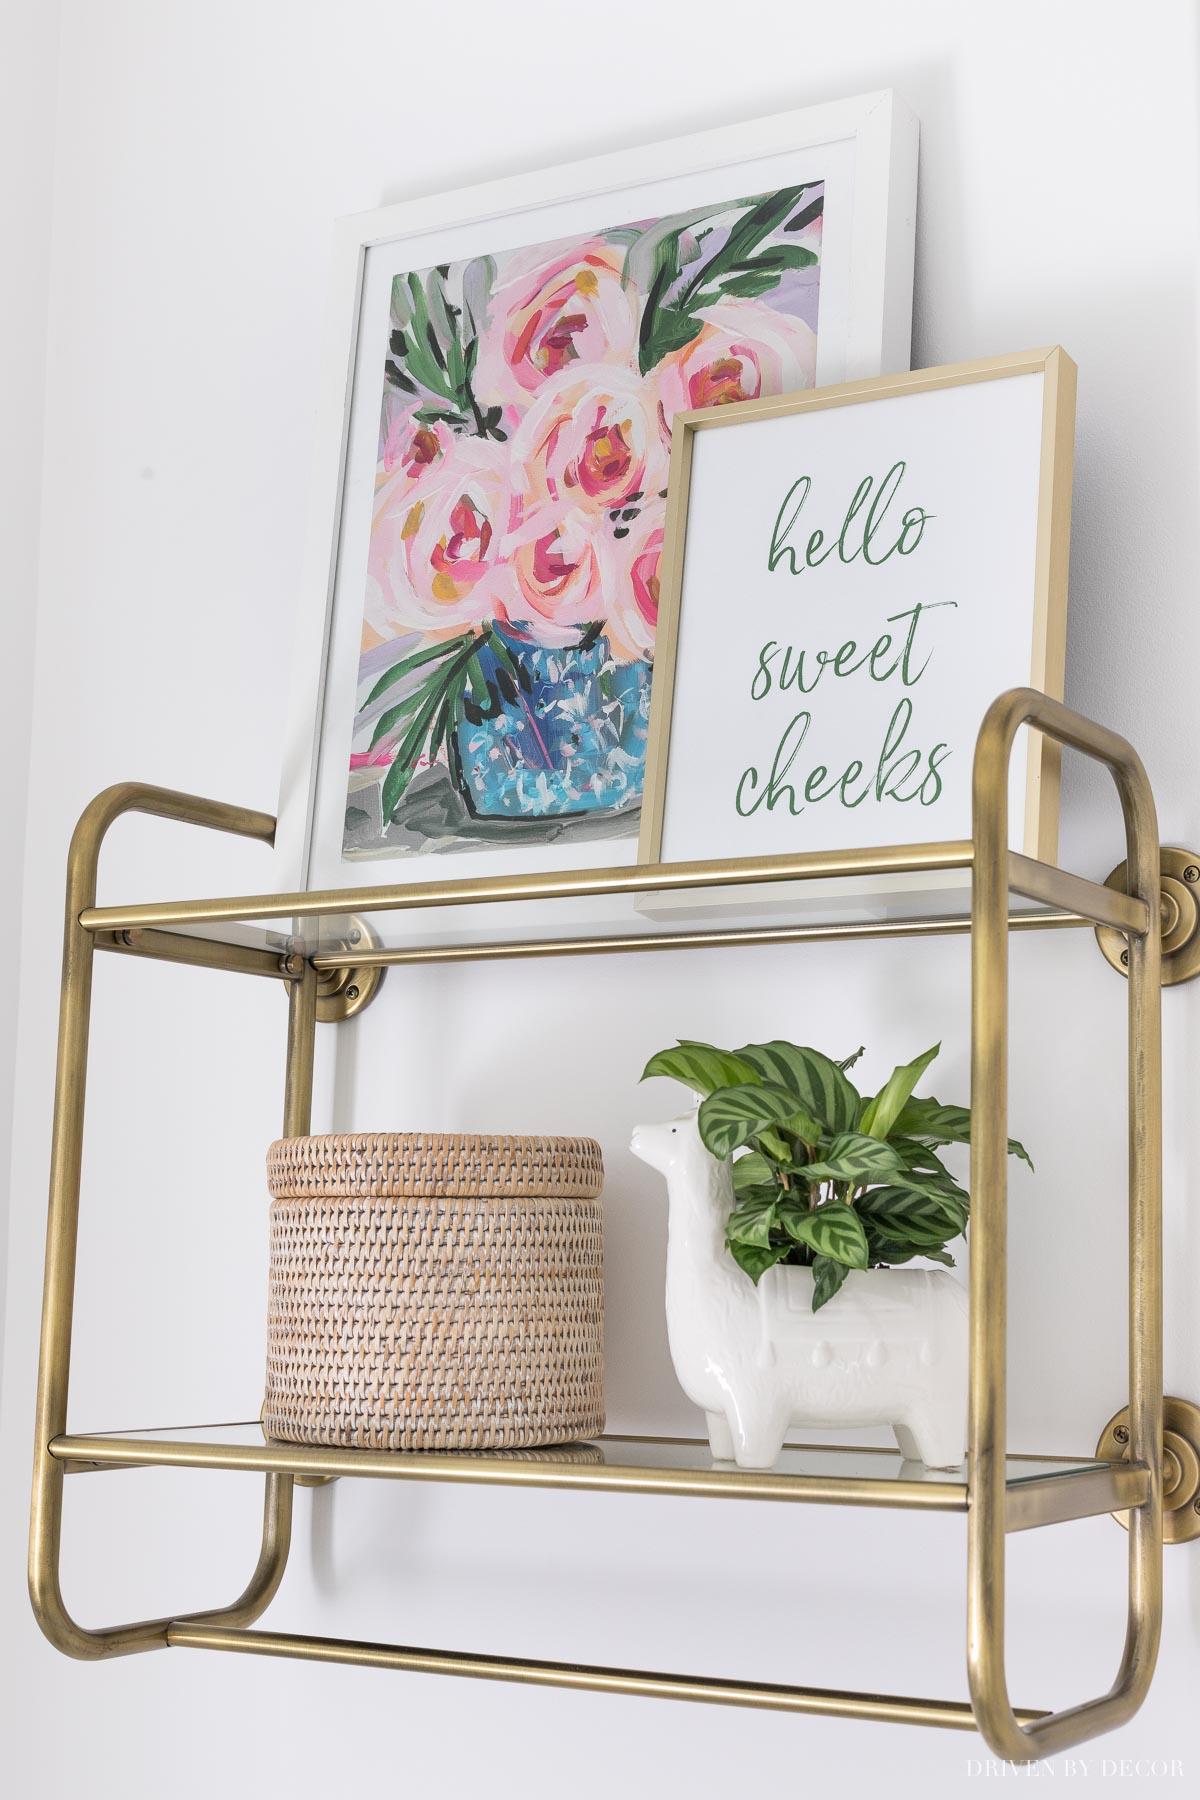
Sources: Shelf (similar) | Rose art print | Rattan TP roll cover | Llama planter
Framed kid art can also be super cute in a bathroom, so take advantage of any budding artists in the family!
4. Clean Up Your Grout & Caulk
Grungy grout and cracked caulk will make your bathroom look worn and tired, regardless of what you’ve done to the rest of it. Give your grout a facelift by deep cleaning it, and you might find that the tile floor you thought you needed to replace looks like new! Using a cleaner such as Zep Grout Cleaner & Brightener can make a huge difference:
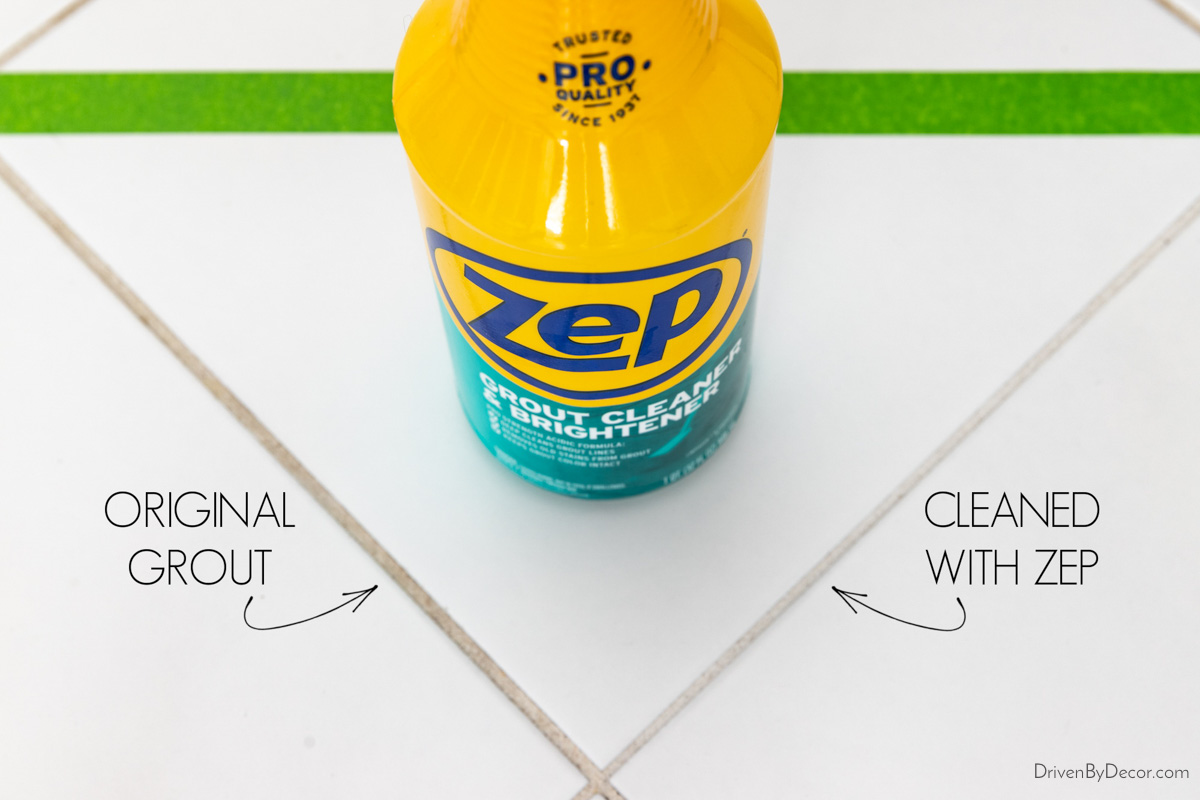
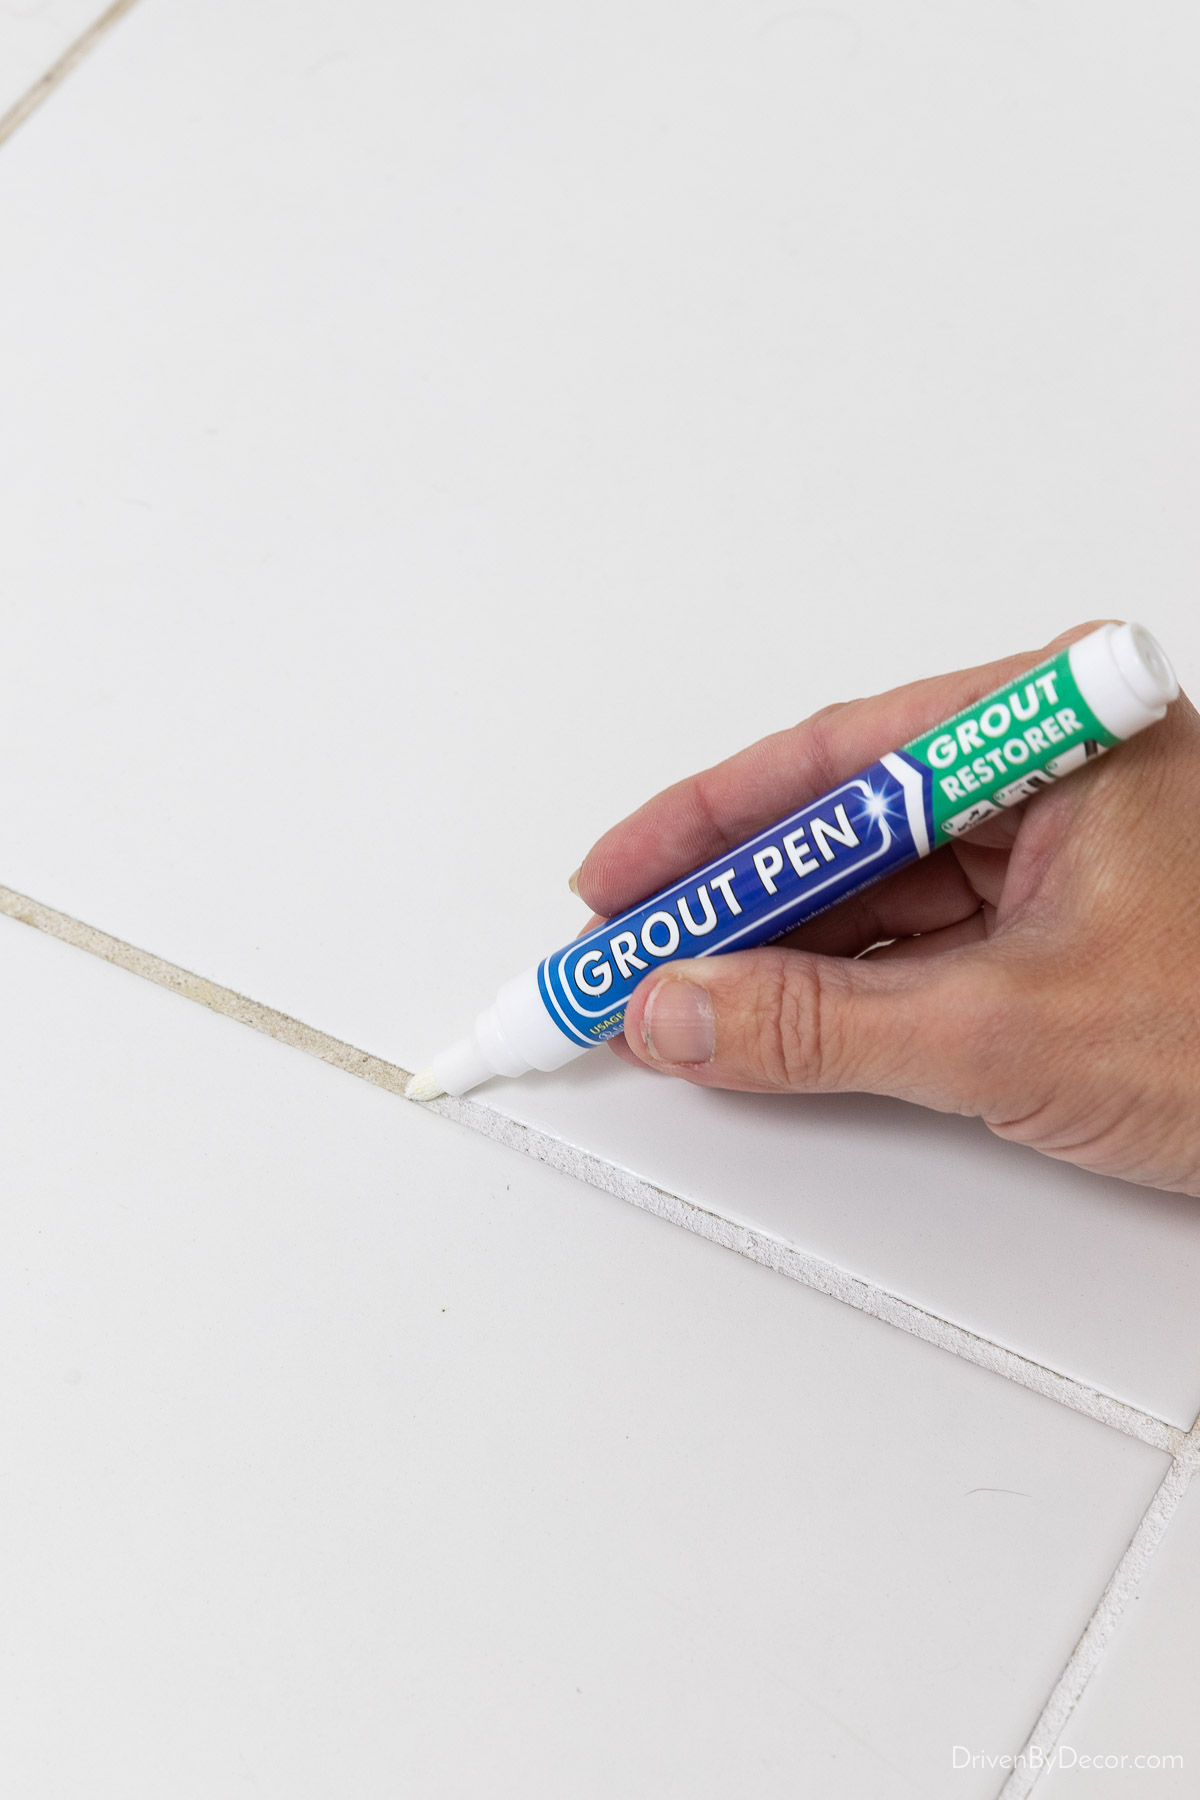
Check out my post on how to clean floor tile grout for cleaning options that truly work, including a recipe for a homemade grout cleaner! If your grout is stained beyond what a good cleaning can fix, {this grout pen} is a great solution. It works similarly to a paint pen to restore grout to its original color:
What about the cracked caulk around your tub or shower? Re-caulking isn’t a glamorous job, but it isn’t difficult either:
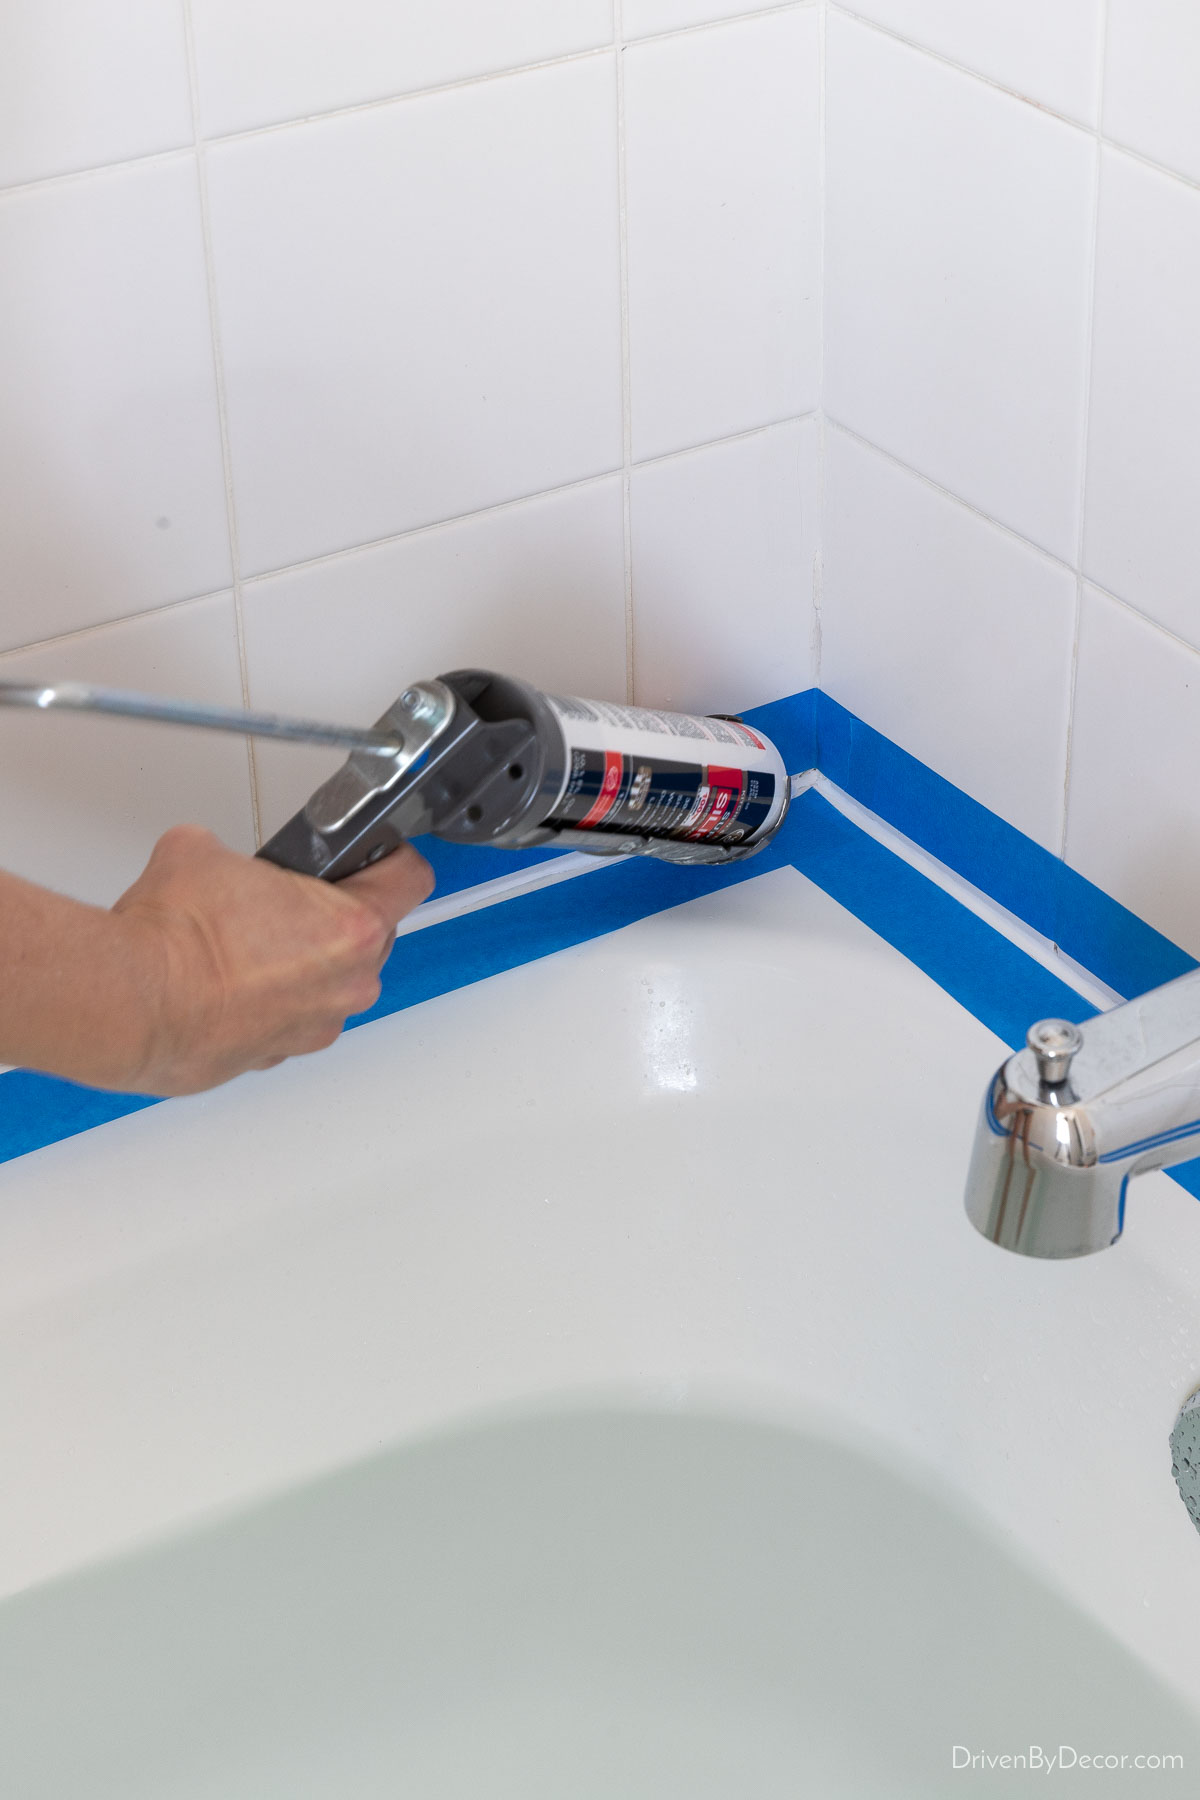
See my post on how to caulk a bathtub for the simple step-by-step tutorial.
5. Paint Your Bathroom Tile
If you have ugly bathroom floor tile… paint it! I painted this ugly floor tile in the powder room of our previous home:

and it made such a huge difference:
I had no problems with the paint not adhering to the tile, and my painted tile floors wore so much better than I expected! Check out my post on how to paint a tile floor for the tools and tips to get the job done.
Another option is to use vinyl decals over ugly tile to freshen up the look. Check out {this Etsy shop} for some beautiful options, such as {these black & white patterned decals}:

6. Swap Out Faucets & Other Fixtures
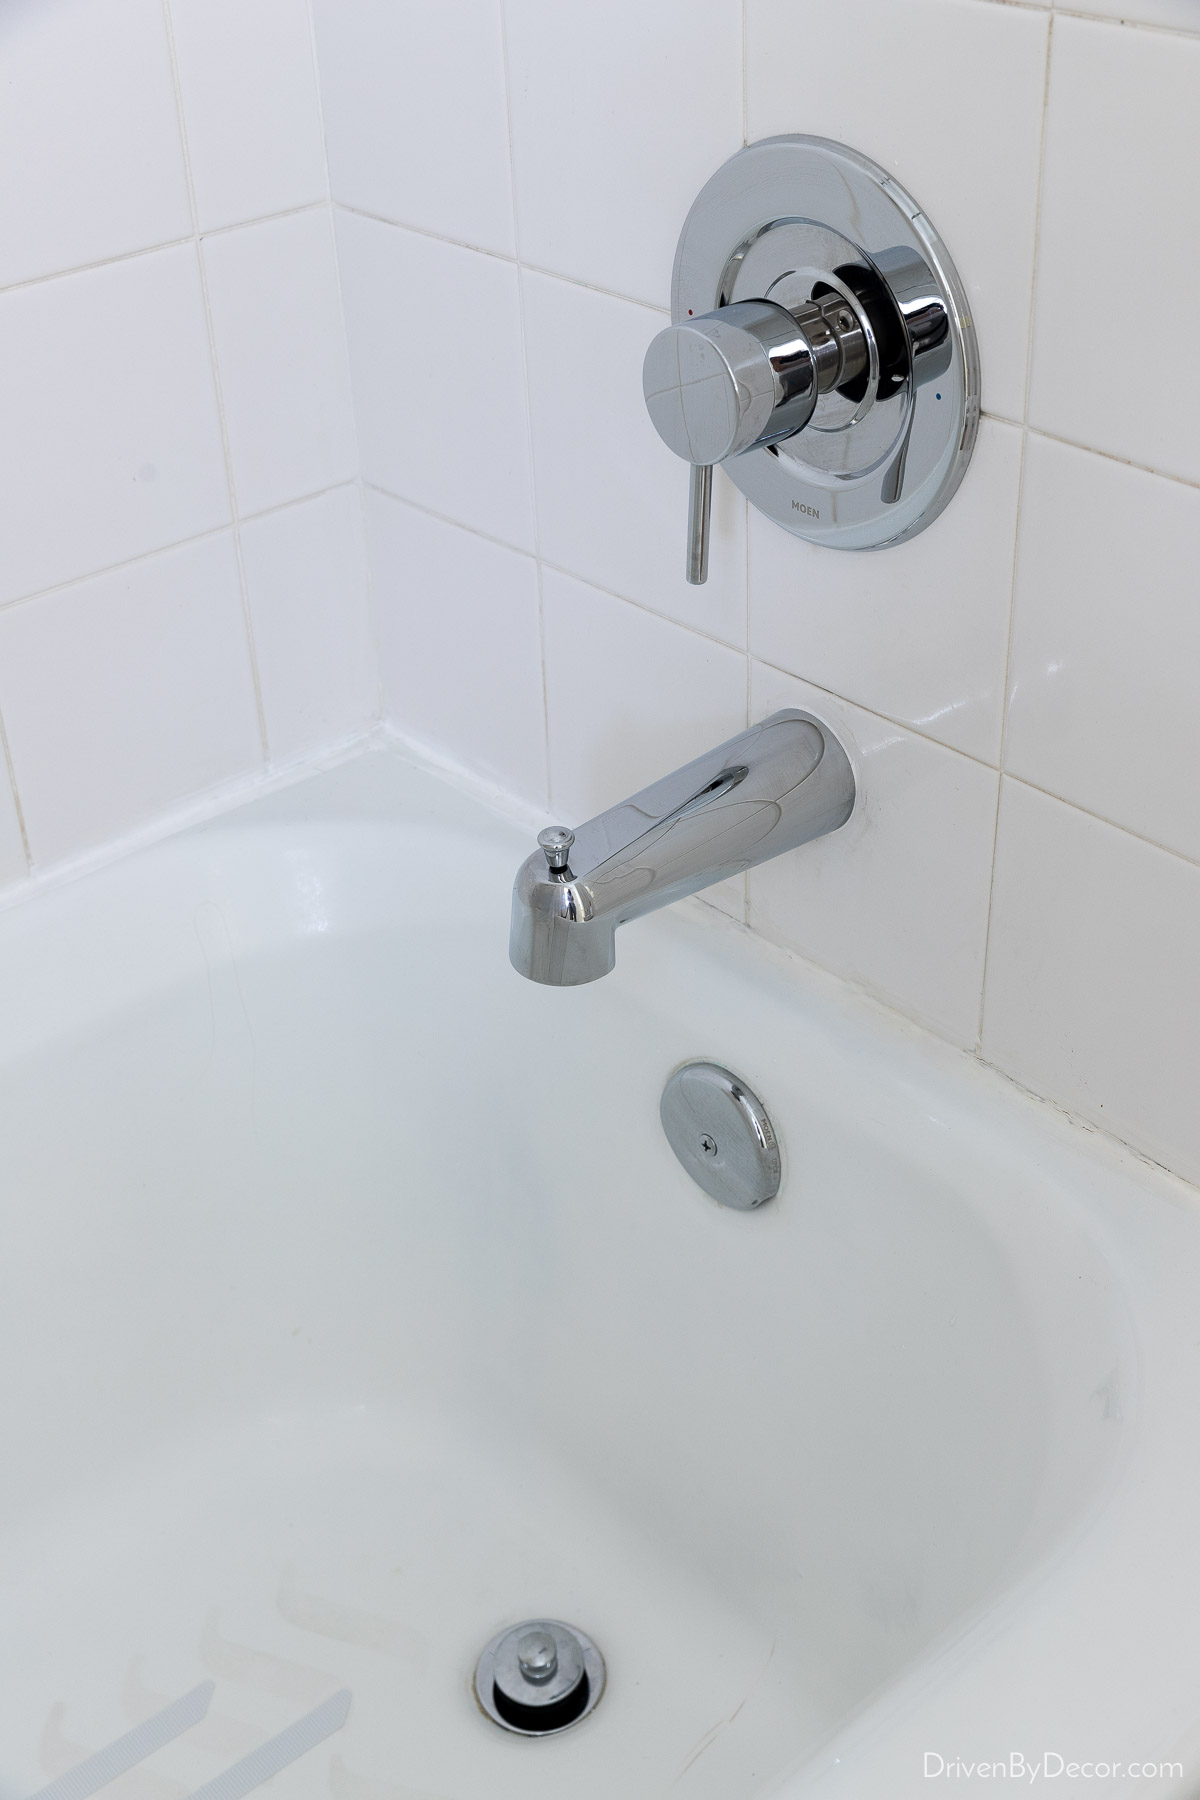
Swapping out faucets and other bath and shower fixtures is part of most bathroom renovations. But before you get all new fixtures, do a little research on the brand and type of faucet, shower, and bath fixtures that you have. You may find that you have fixtures that use a common valve system, meaning that you can leave the guts of your fixtures in place and simply swap out the exterior trim.
For example, I did a little research on the dated shower valve in my girls’ bathroom before we remodeled and found that it was part of Moen’s M-Pact common valve system ({this guide} was super helpful):
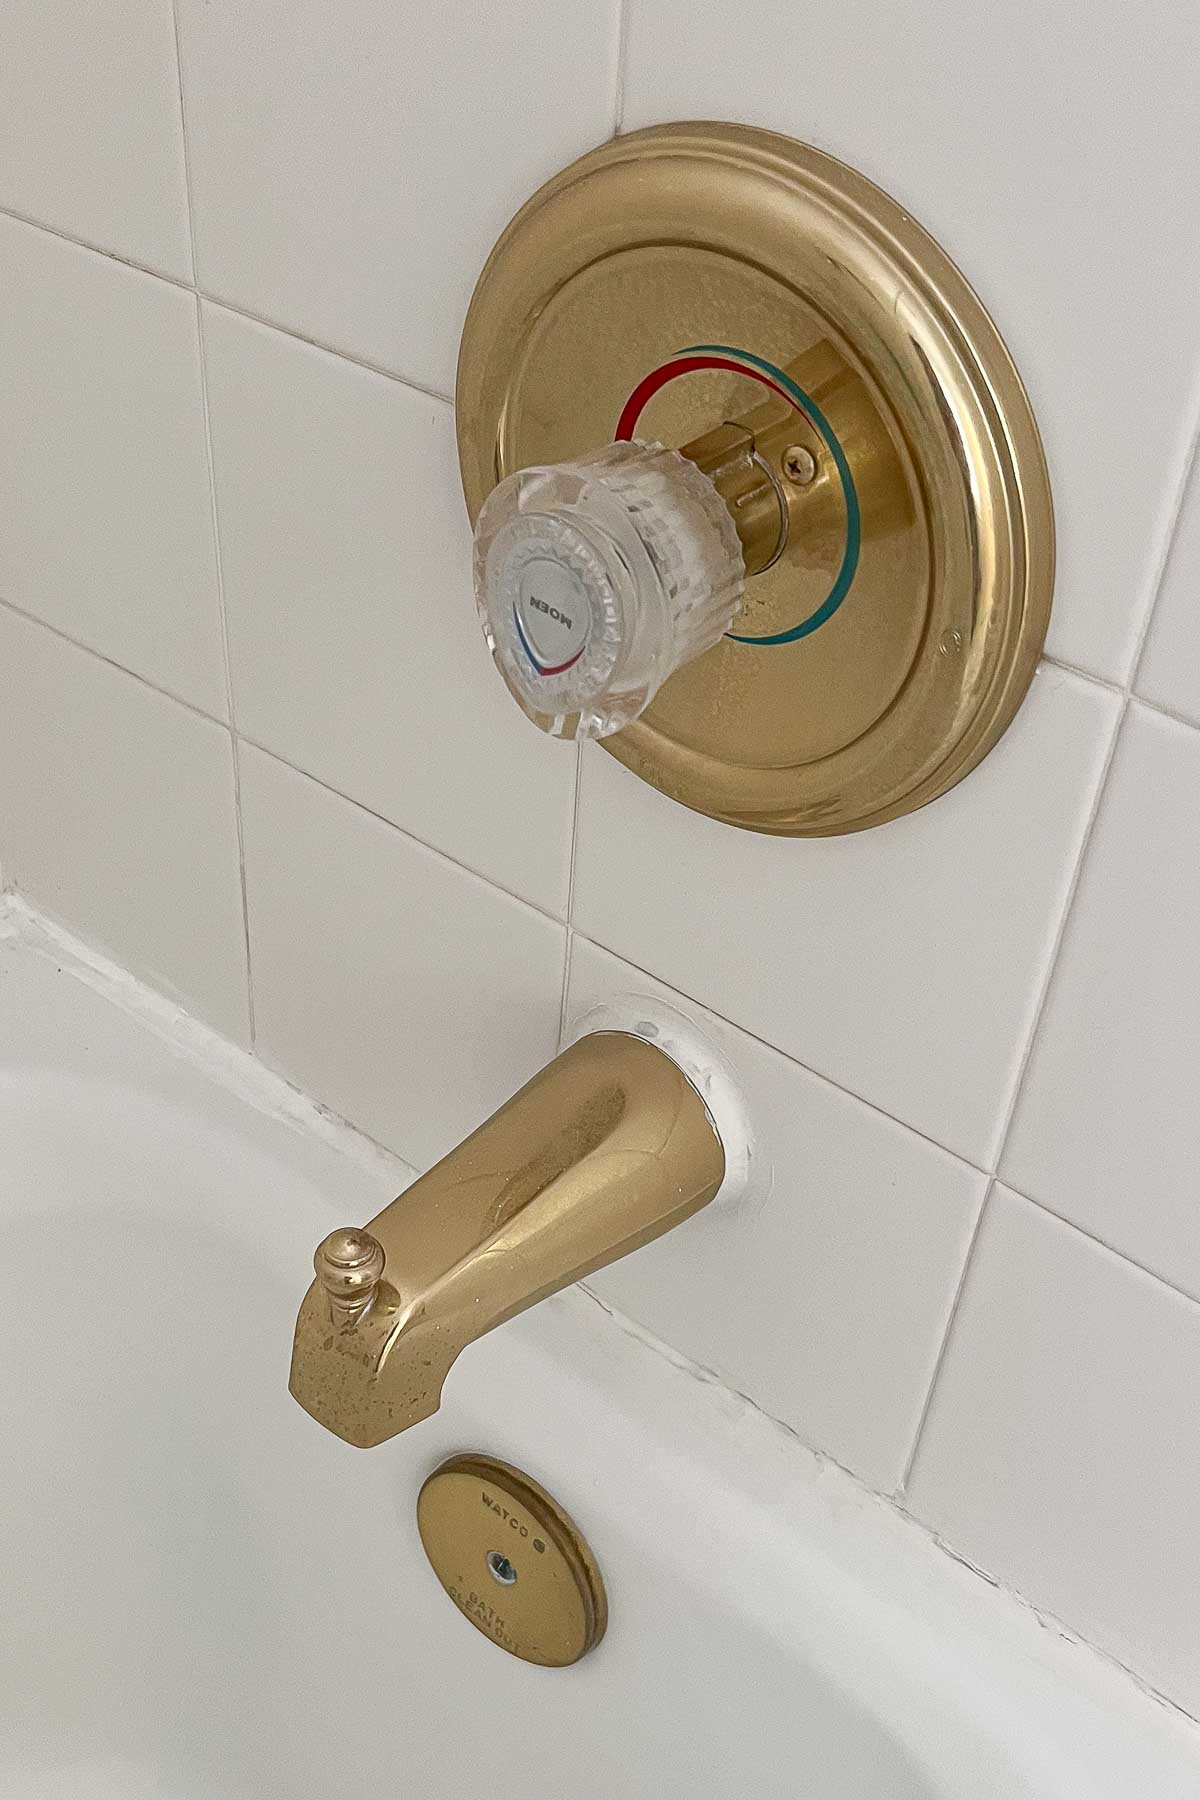
So instead of having to change out the entire shower valve (including the parts behind the tile), I was able to swap out just the “trim” (outside parts) with {this shower/tub valve trim kit}. It was simple to do (no plumber necessary) and so much less expensive too!
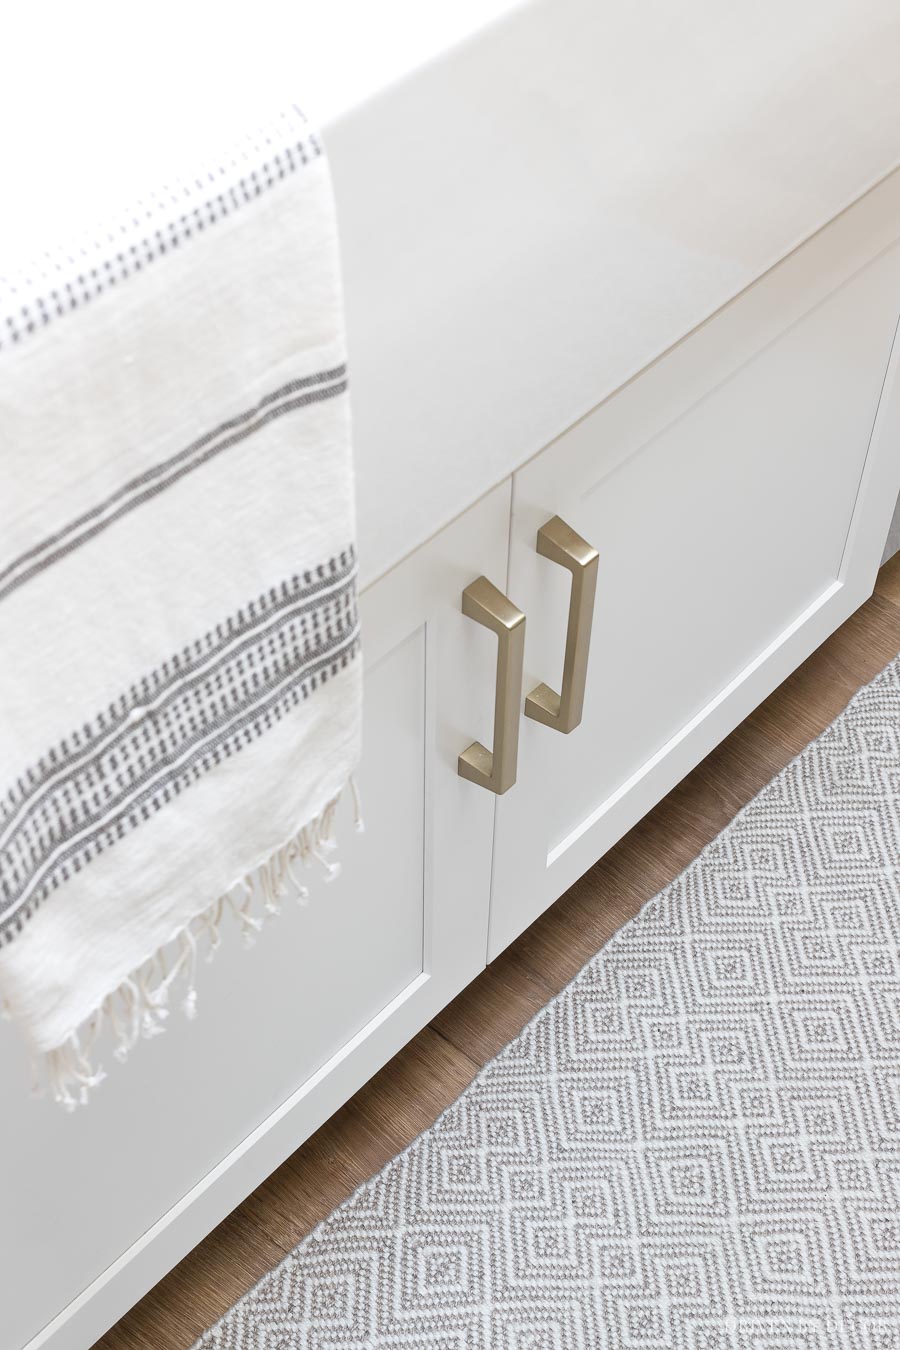
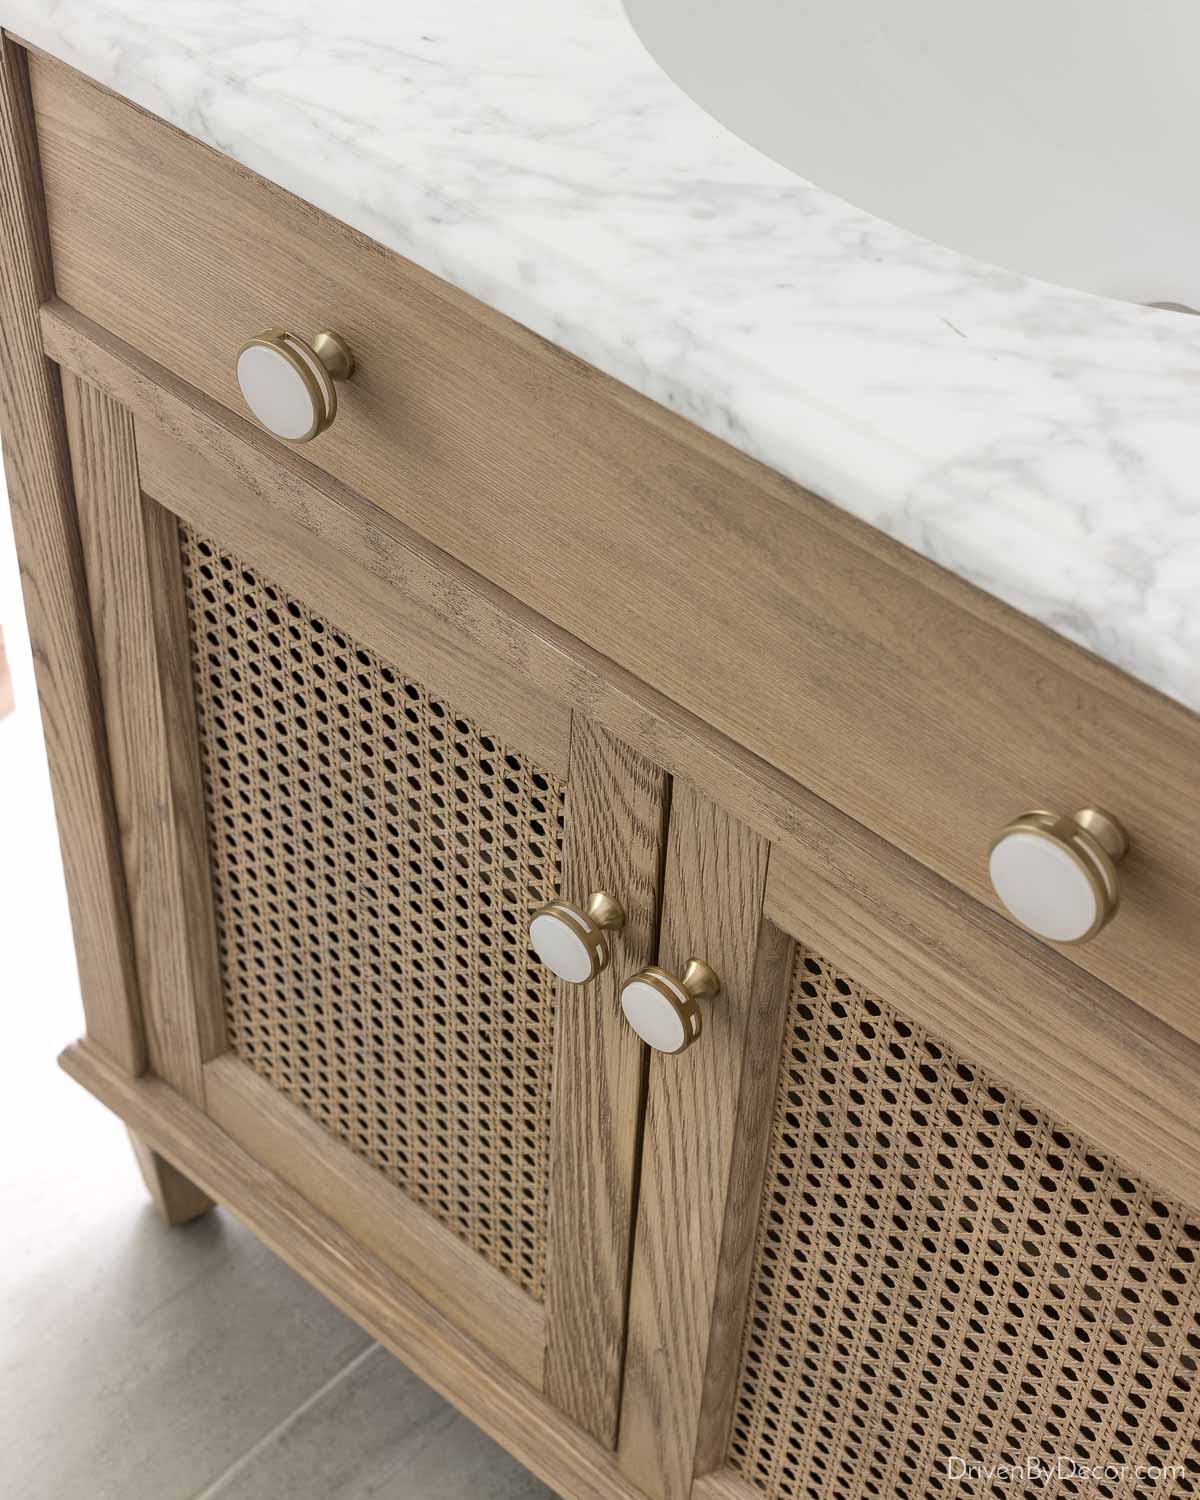
7. Upgrade Your Cabinet Hardware
Upgrading the hardware on cabinet doors and drawers is a simple, inexpensive way to give your bathroom cabinetry a fresh look! My go-to replacement hardware for not only the bathroom, but also the kitchen and other rooms in your home are {these Blackrock knobs} and {these Blackrock pulls} that come in a variety of sizes and metal finishes:
I’ve also used {these Oberon knobs} several times:
As another option, if you like the style of your hardware but wish it had a different metal finish, you can use Rub ‘n Buff to change it! As you would expect from the product’s name, it’s a paste that you simply rub on and then buff out. Here’s an example of one coat of gold Rub ‘n Buff paste used on a bronze drawer pull:
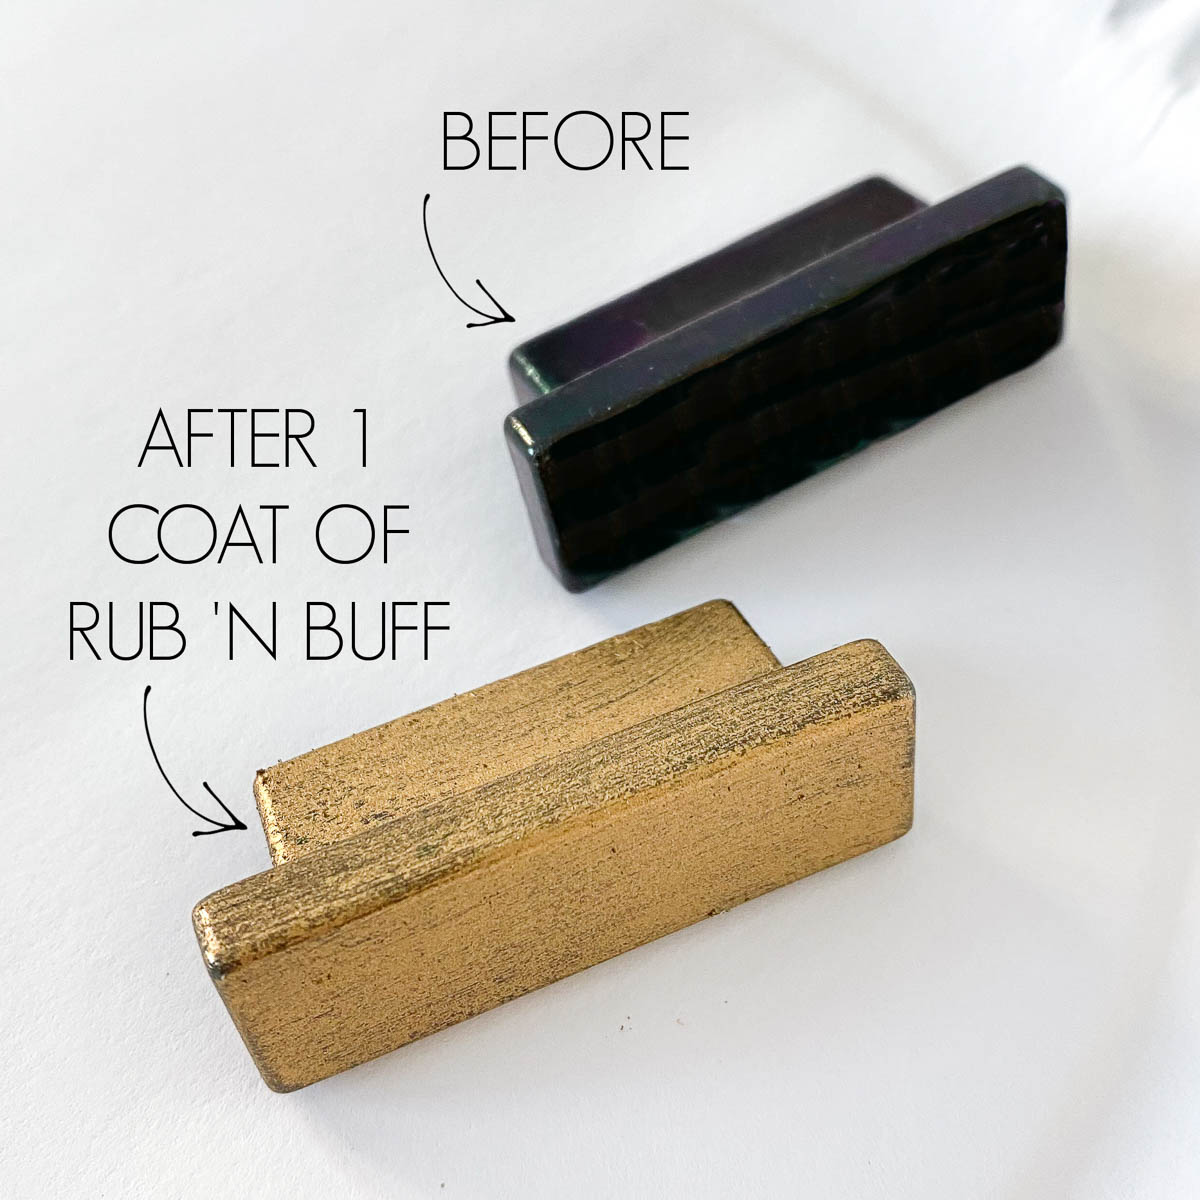
Adding a second coat of Rub ‘n Buff would give it a solid gold appearance, without any of the bronze showing through. See my post on Rub ‘n Buff colors for more details on how to use it and my favorite colors.
Do you want to replace door or drawer pulls, but the distance between the two holes left by your old pulls is an odd size? See my post on what to do when your cabinet pull holes are slightly off.
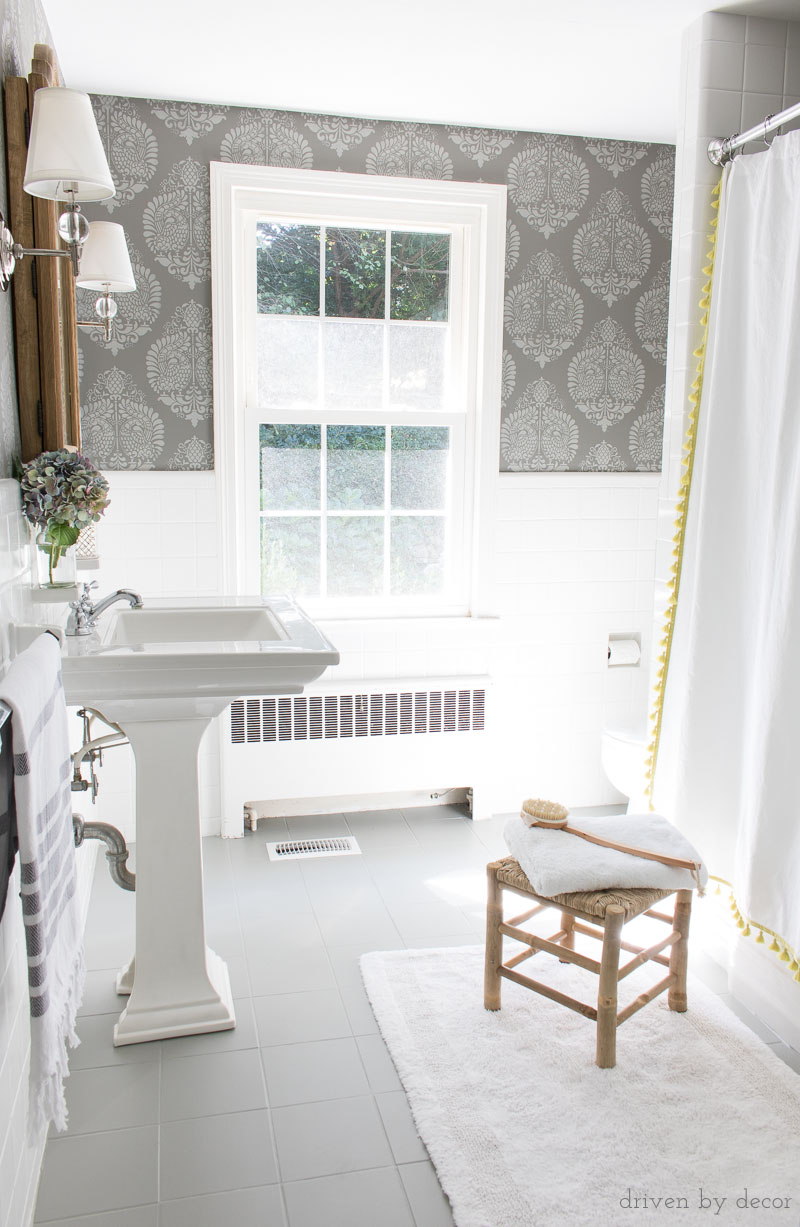
8. Add Pattern With Stencils
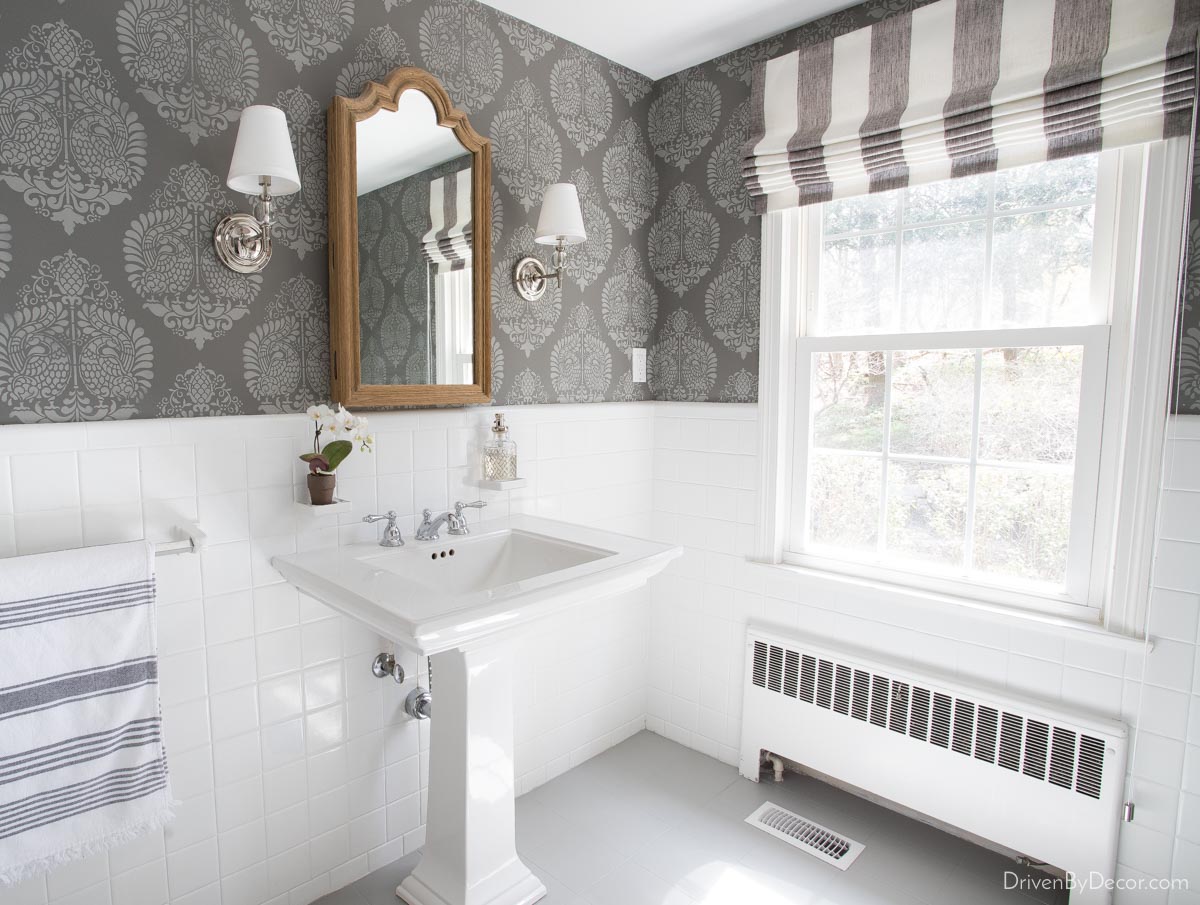
One of my favorite things about remodeling small bathrooms is that you can go a little crazy with color and/or pattern without it being too much. While I often do that with wallpaper, a more budget-friendly way is with stenciling! I used {this damask stencil} on the walls of our powder room in our previous home:
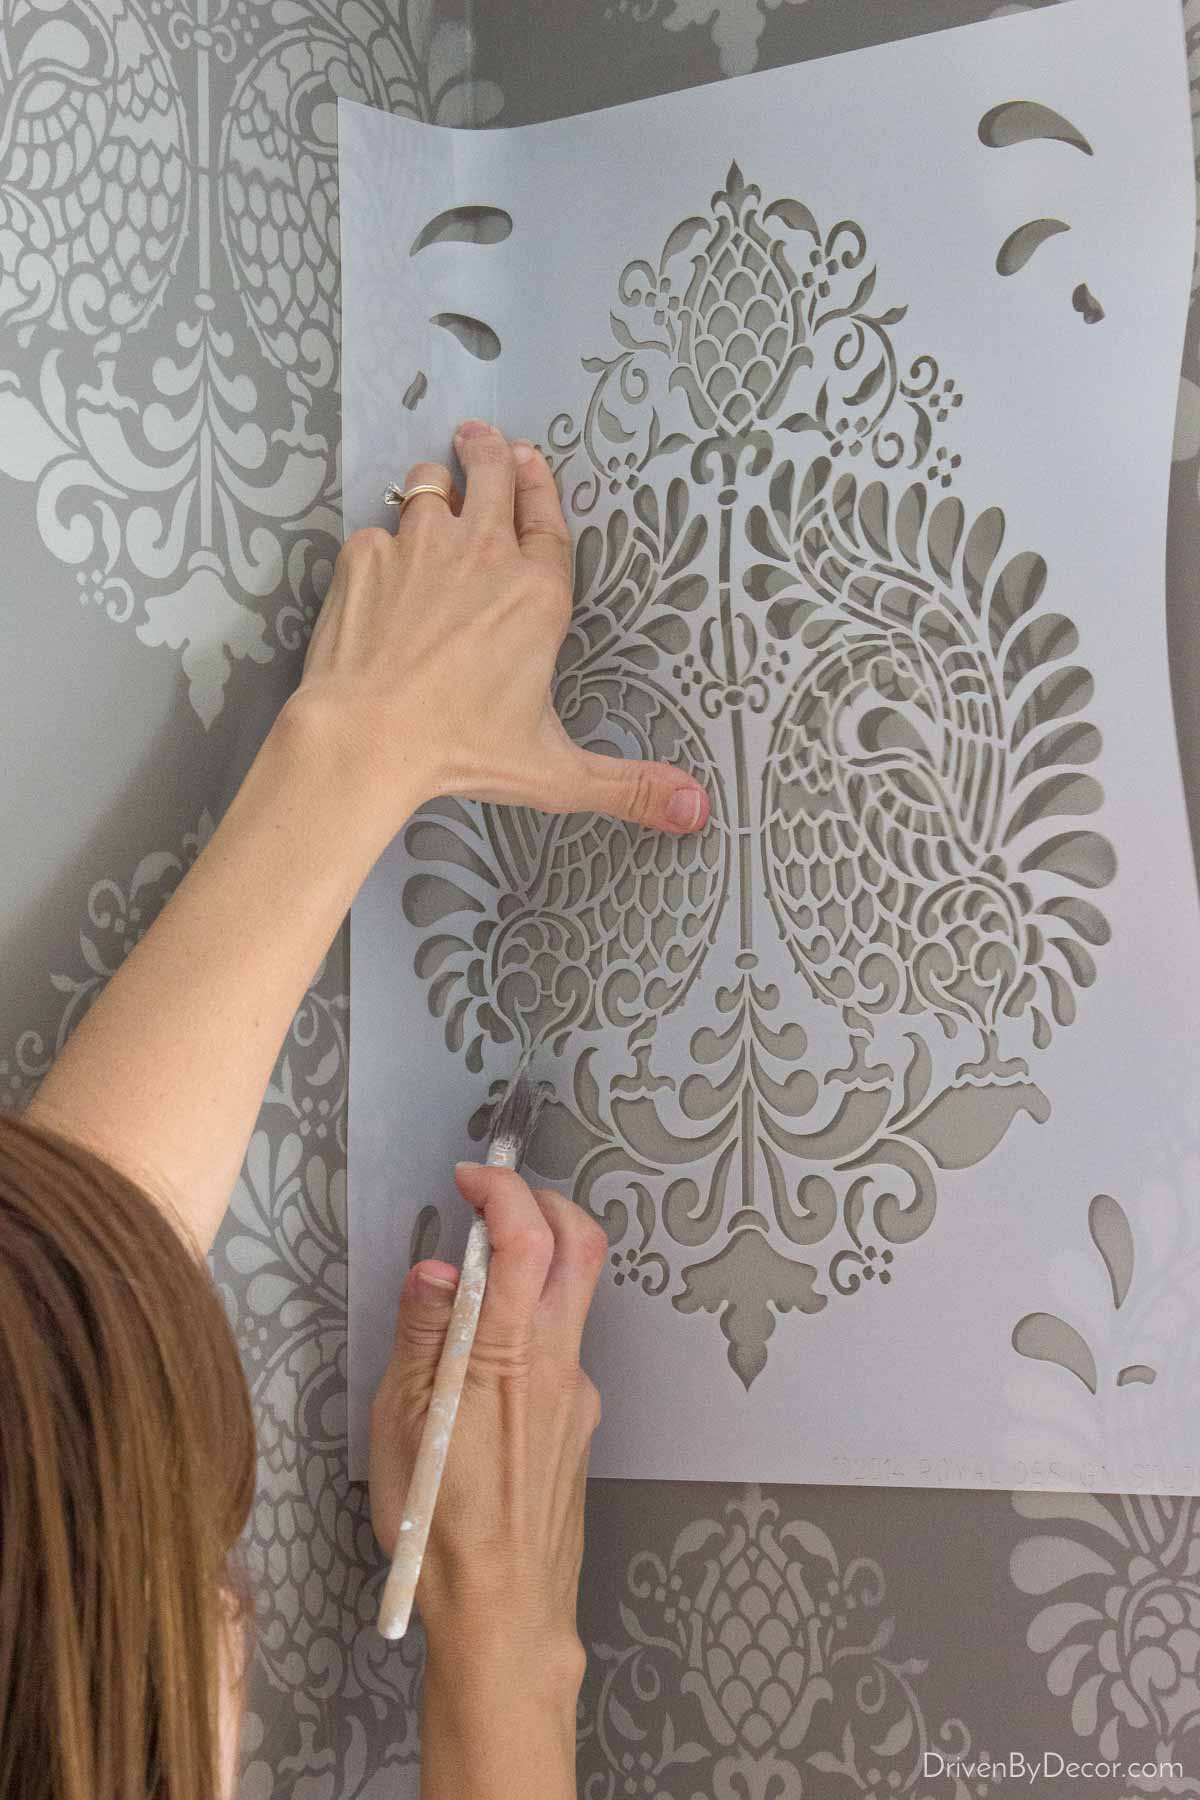
to add a two-toned design that looked just like wallpaper:
See my post on how to stencil a wall for all the tips and details that will make your stenciling project turn out right!
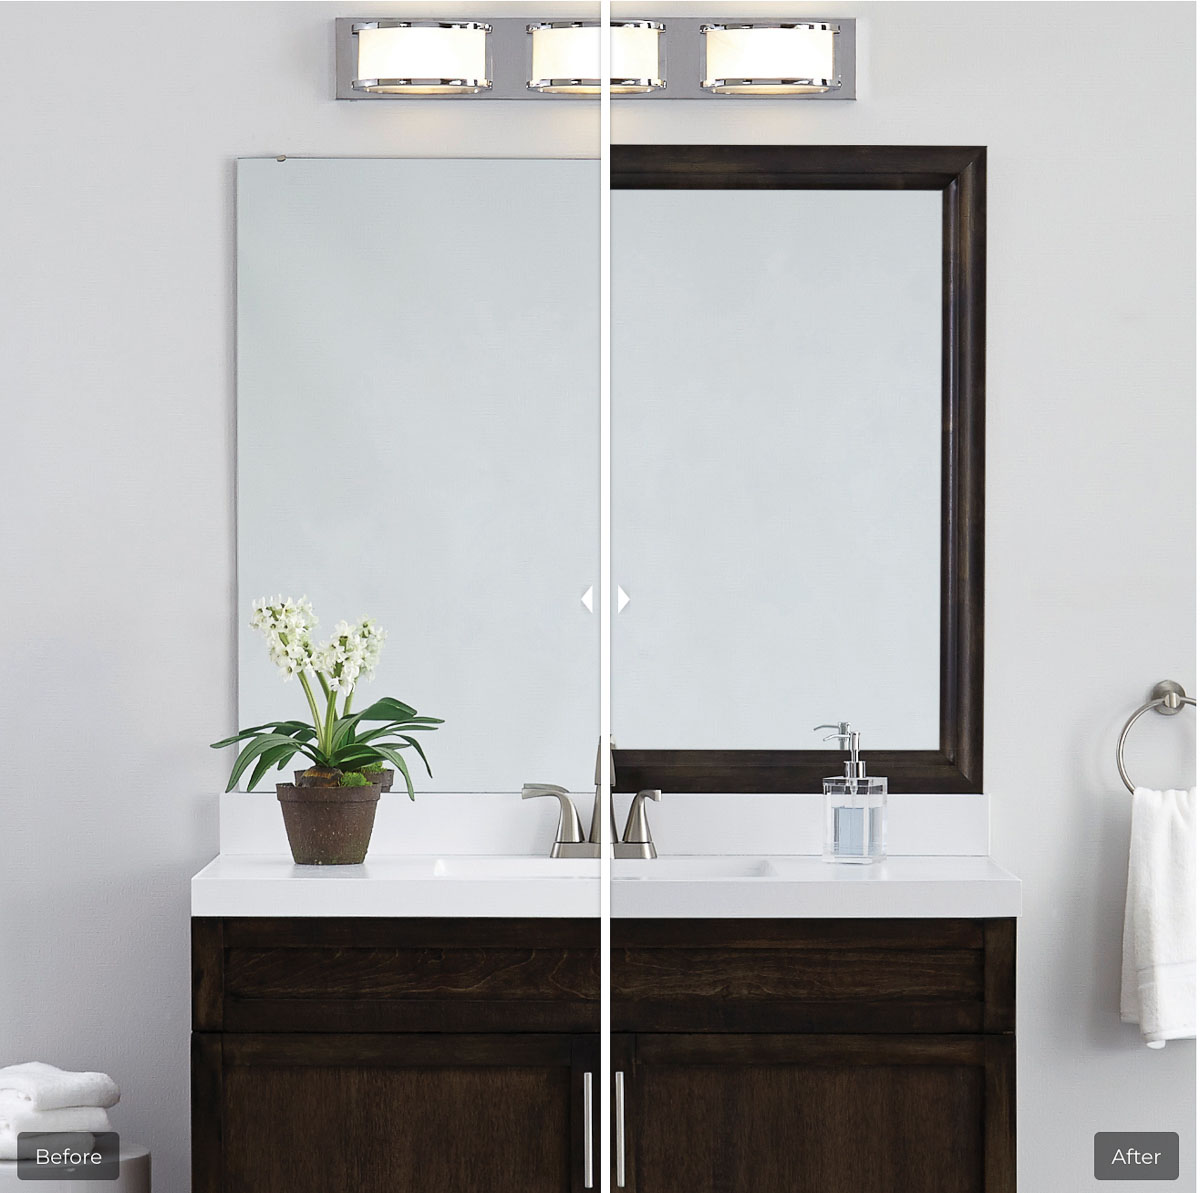
9. Frame Your Mirror
Do you have a builder’s basic mirror above your bathroom vanity? Framing it can make all the difference! You can use wood trim pieces and a miter saw to create your own frame, or you can order a custom frame from an online shop such as MirrorMate.
When ordering from MirrorMate, you simply select a frame style, measure your existing mirror, and place your order. You’ll receive a custom size frame kit that you assemble, peel off the backing of the frame to expose the adhesive, and then press the frame onto the mirror. Here’s a split frame image of one MirrorMate’s “before” and “afters”:
10. Declutter By Adding Storage Space
No matter how many changes you make to your bathroom, you won’t get the look you want if your bathroom is full of clutter. Declutter by getting rid of what you don’t need and adding storage space for what you do. I added a TON of extra storage space to my girls’ bathroom with {this behind-the-door storage cabinet}:

It attaches to the hinge pins on the back of the door and has a magnet on top that holds it tightly to the magnet that you place on your door. When the door cabinet is closed, your door operates as usual, and when you need to grab something inside, it’s easy to pull the cabinet away from the door to access it. The amount of storage space it adds is HUGE!
Want a bunch more storage ideas? See my post on 15 small bathroom storage ideas.
11. Tile an Accent Wall
If you’ve fallen in love with a pricey tile for remodeling your bathroom but it’s over your budget to use it on the floor or in the shower, consider an accent wall! That’s exactly what I did in our previous home when I realized that {this gorgeous tile} was too expensive to use on the floor like I originally planned.
I instead chose a very budget-friendly tile for the floors and used the tile I loved on the wall behind the tub, where only about ¼ as much was needed:
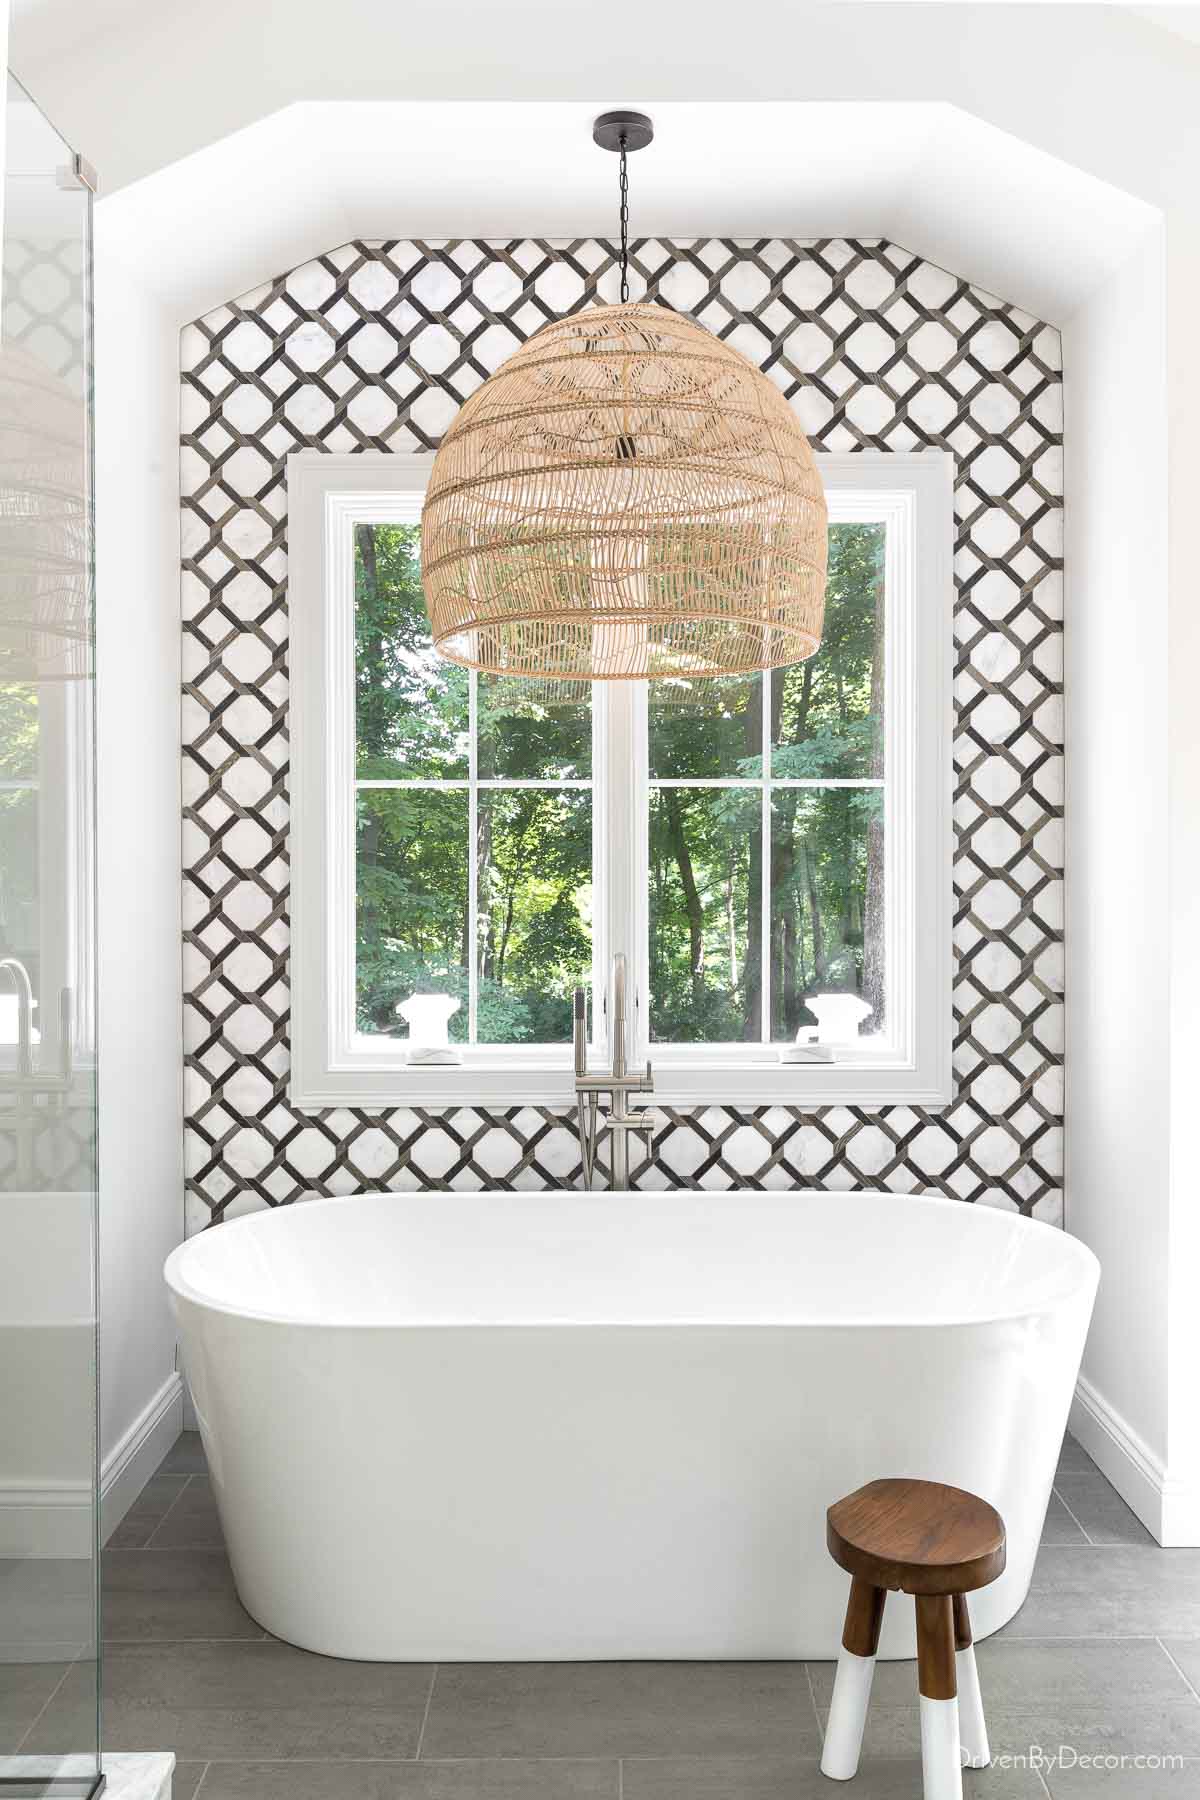
Sources: Rattan pendant | Bathtub | Tub filler | Stool
Check out our master bathroom for a tour of the rest of this remodeled space!
12. Refinish Your Bathtub
If your bathtub is dated by being Pepto pink, sunflower yellow, or some other color from the ’70s or ’80s, and it’s not within your budget to replace it, refinish it! You can hire the job out or use a DIY bathtub refinishing kit such as {this one} that’s a two-part resin or {this one} that’s a two-part epoxy. These are some before and after examples from the epoxy kit:
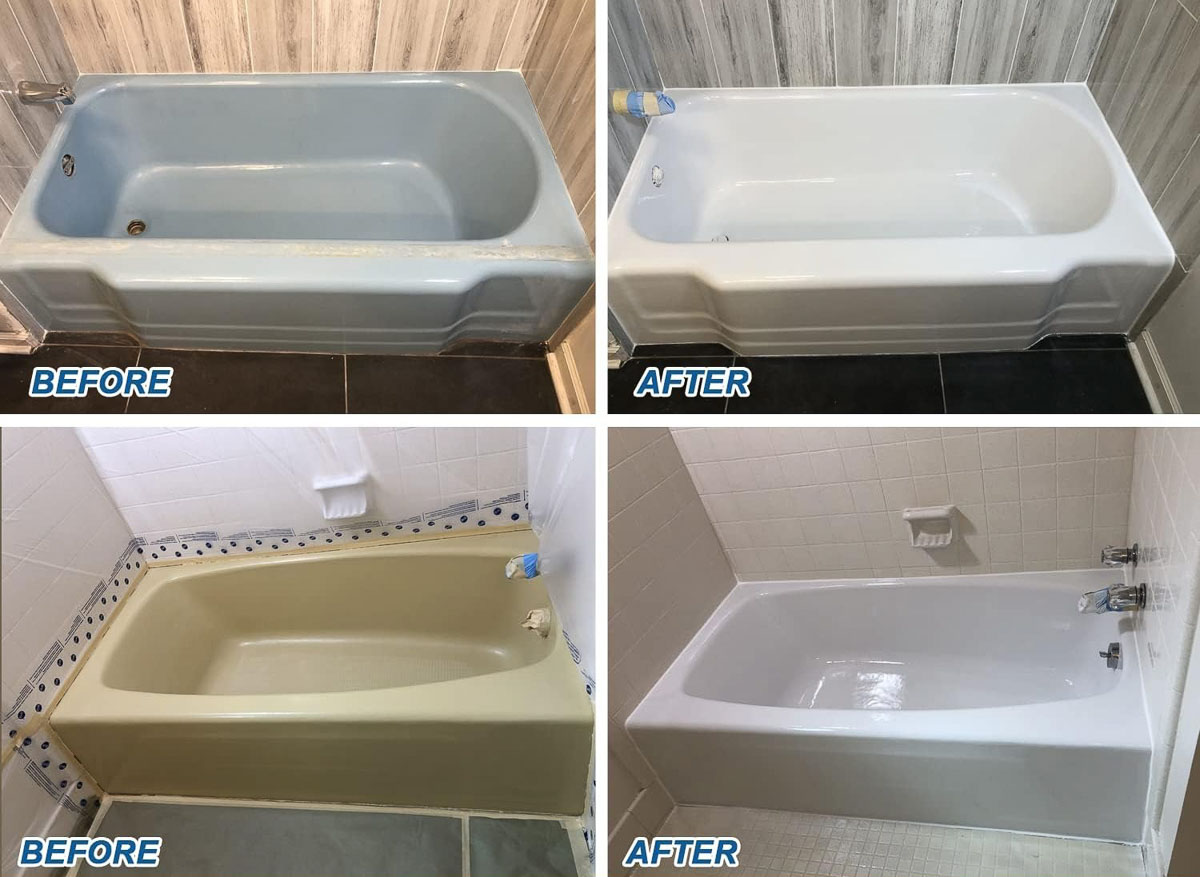
In addition to using these kits to refinish bathtubs, they can also be used on showers, vanities, and sinks.
13. Cover Your Countertop with Contact Paper
If your bathroom has really ugly countertops and it’s not in your budget to replace them, consider covering them with contact paper:
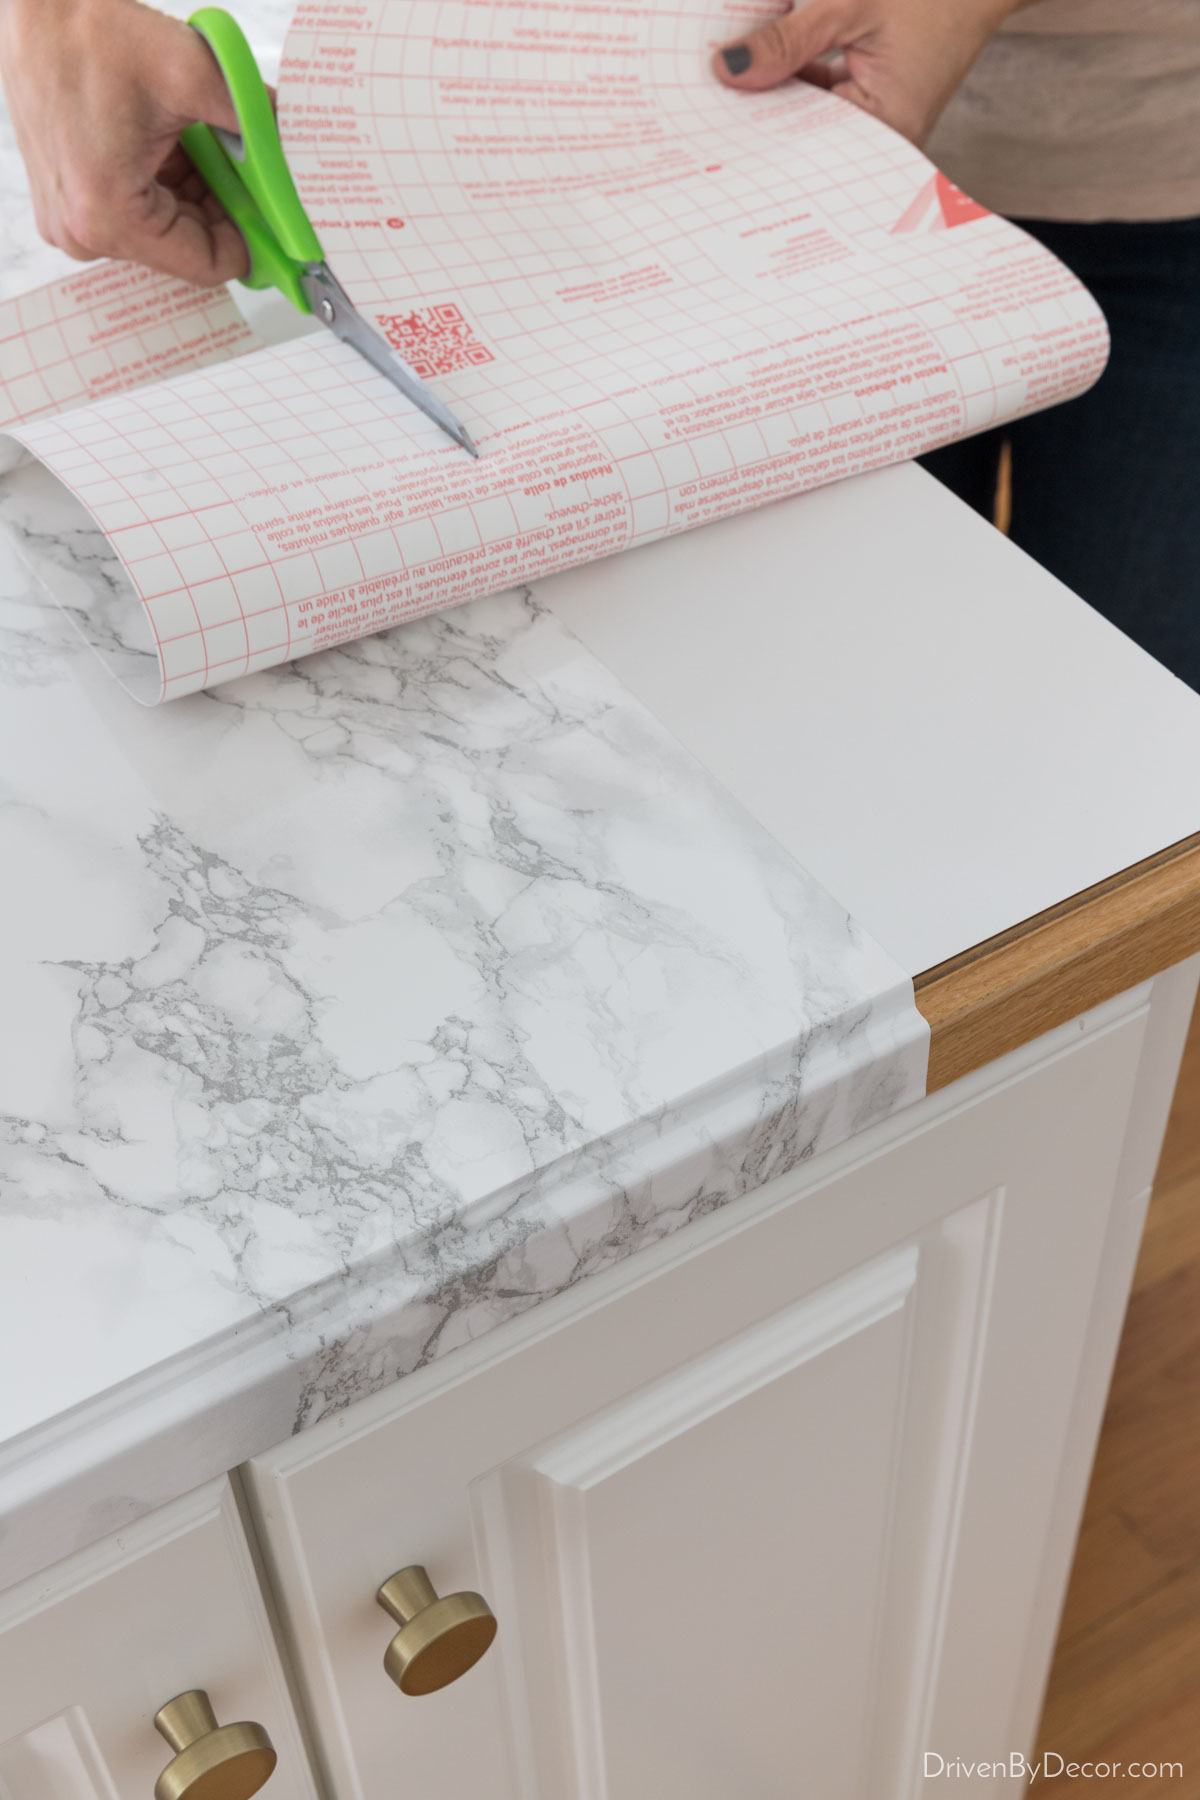
Your first reaction might be that it’s a dumb idea because the contact paper will peel and stain. But I did it in our kitchen almost three years ago, and it’s held up beautifully! The key is to use paper that’s waterproof. There’s been no peeling whatsoever, including in the area around the sink, and it’s been surprisingly easy to clean too!
Along with a few other budget-friendly changes (new kitchen light and new wallpaper), covering our countertops with {this marble contact paper} took our kitchen from this:
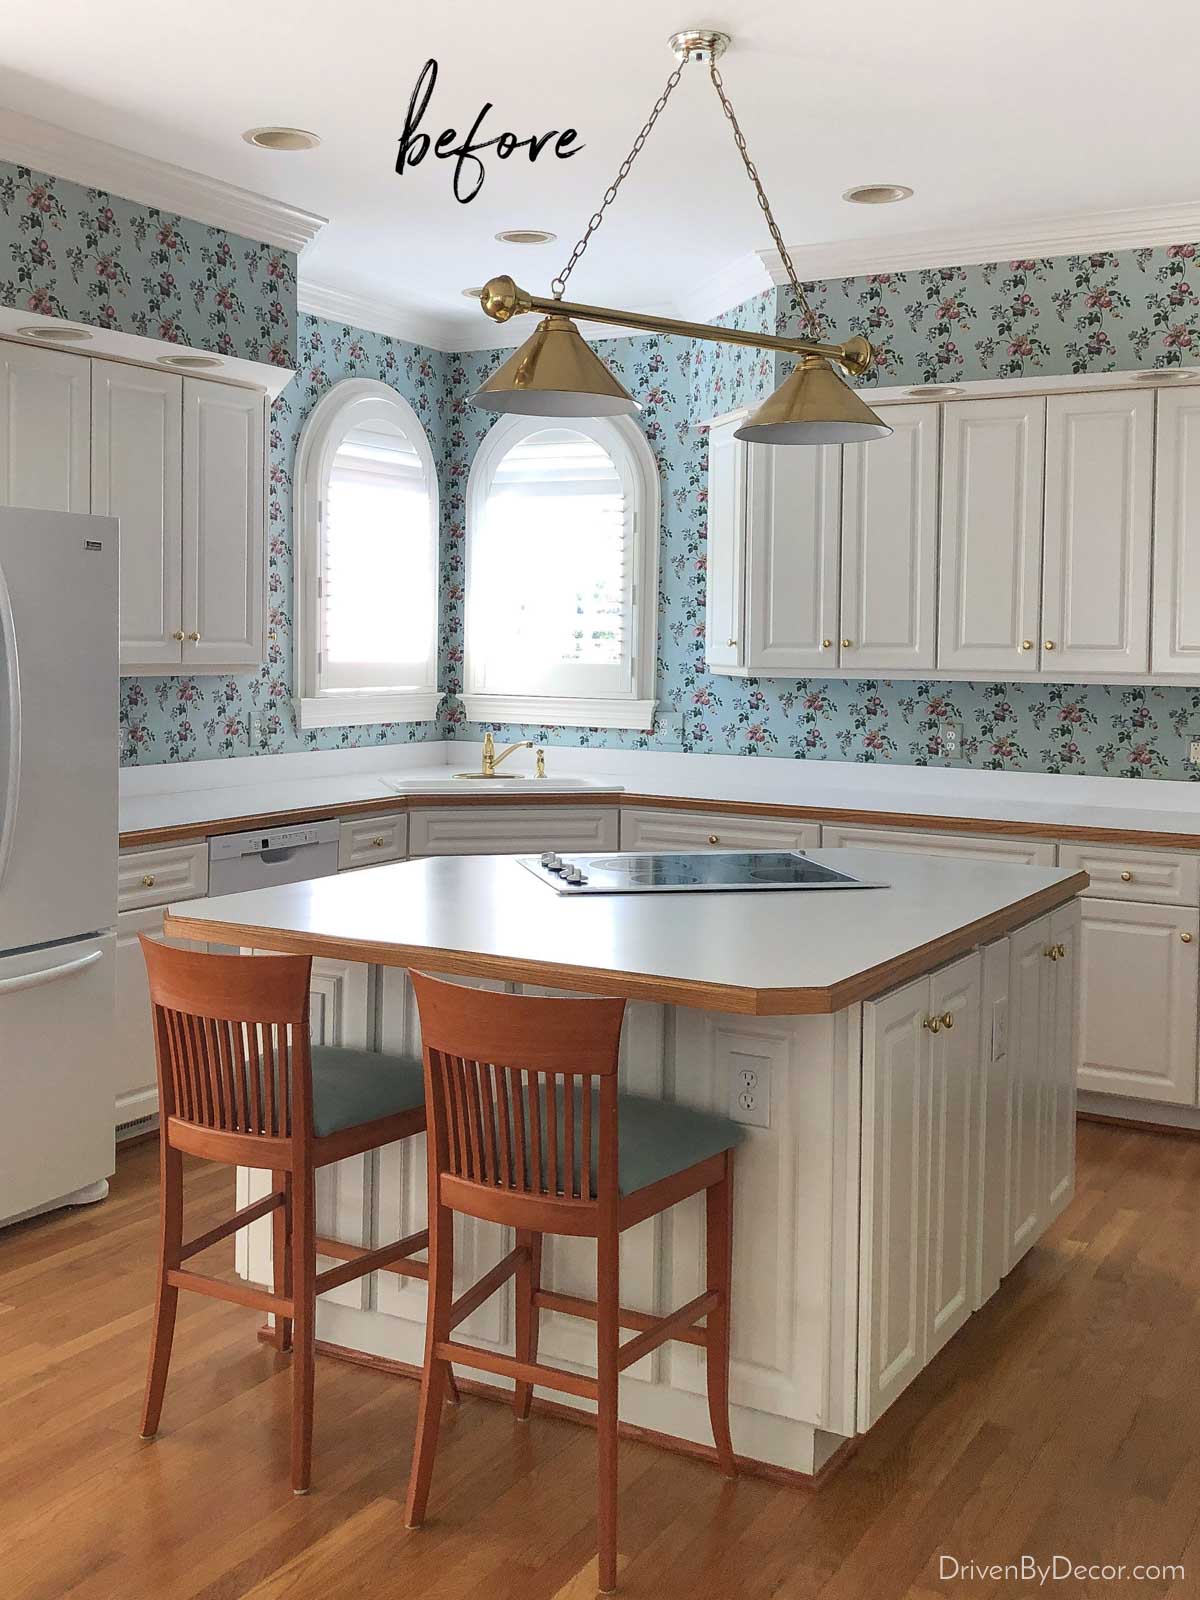
to this:
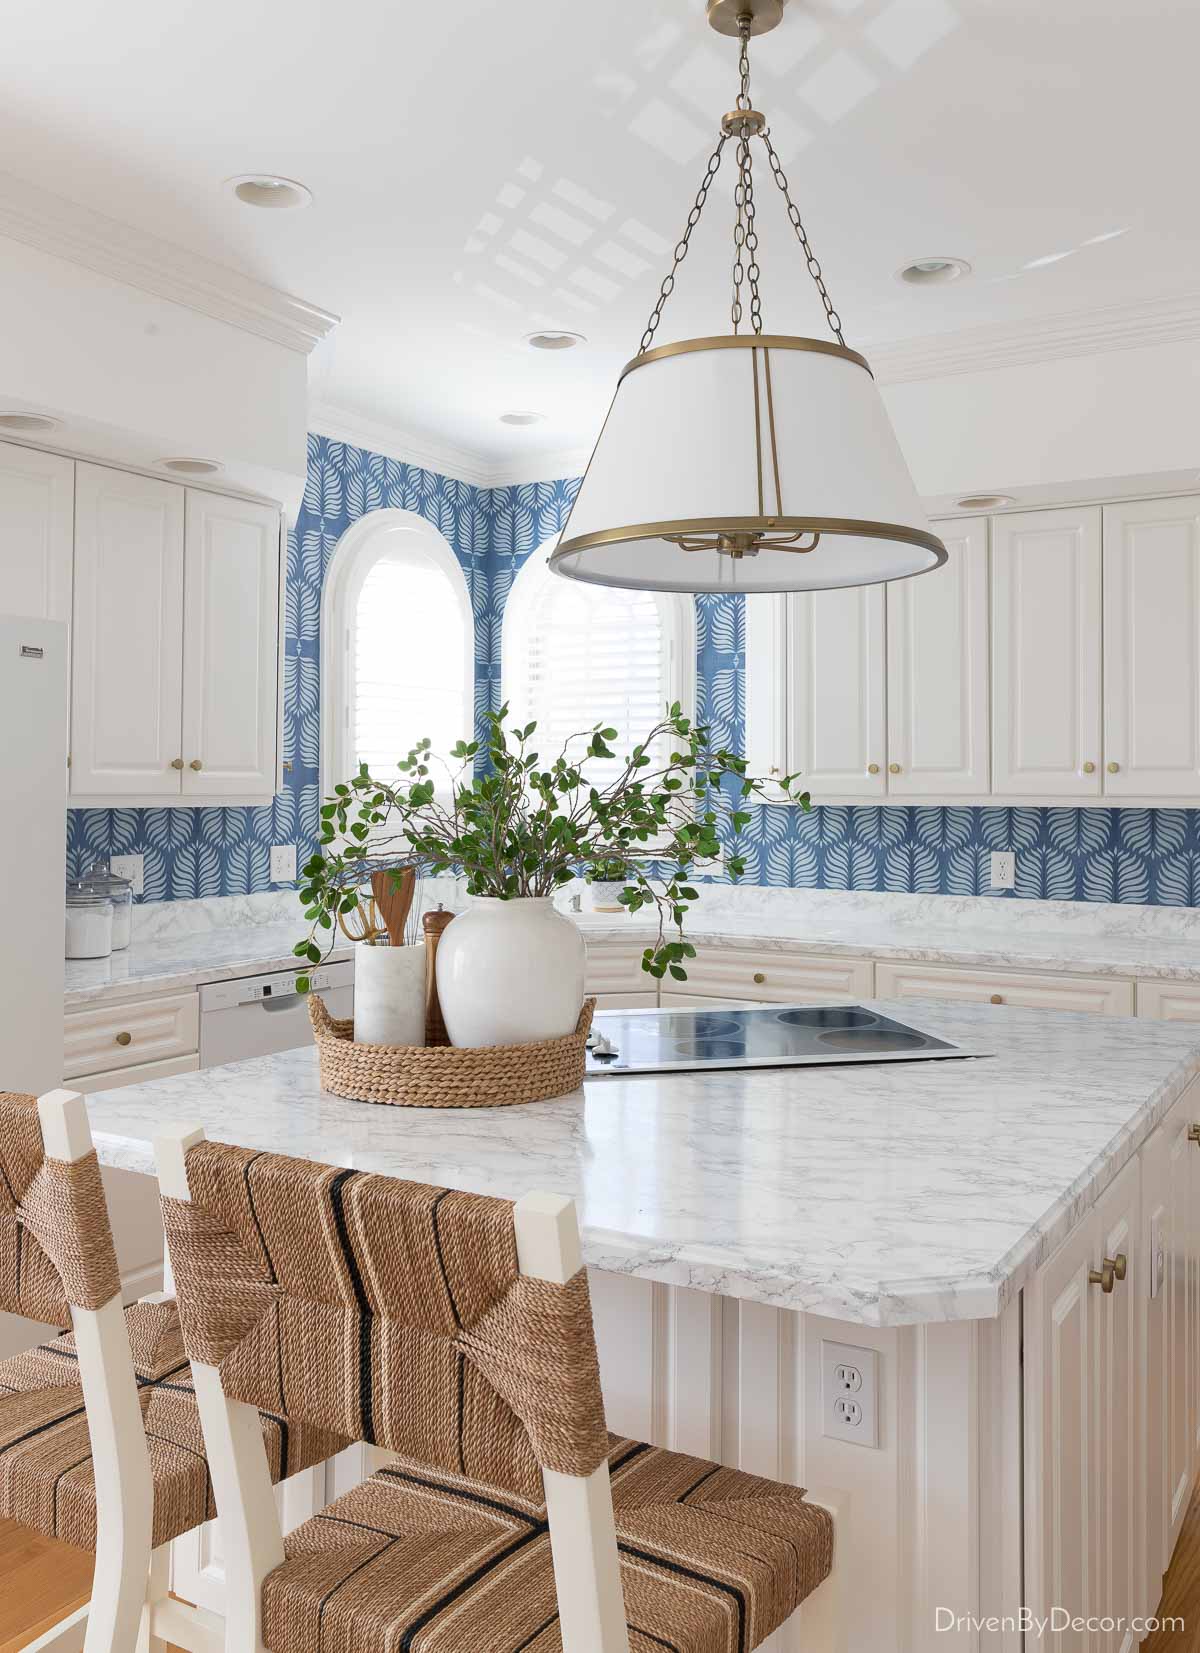
Sources: Woven counter stools | Wallpaper | Pendant over island | Cabinet knobs | Round woven tray | White vase – no longer available | Faux leafy branches | Marble utensil holder
See my post on contact paper for countertops for all the details and my post on kitchen remodel ideas on a budget if you want other ideas for improving the look of your kitchen without spending a lot.
14. Add Stylish Accessories
While people usually accessorize their living room, bedroom, and other spaces, the bathroom is often a neglected space. Never underestimate the power of a stylish accessory or two, because the right accessories can completely refresh a tired bathroom!
A few simple ideas include corralling countertop accessories with a stylish tray like {this scalloped tray} in our Jack and Jill bathroom (check out {this round tray} and {this round turntable} for lower priced options):
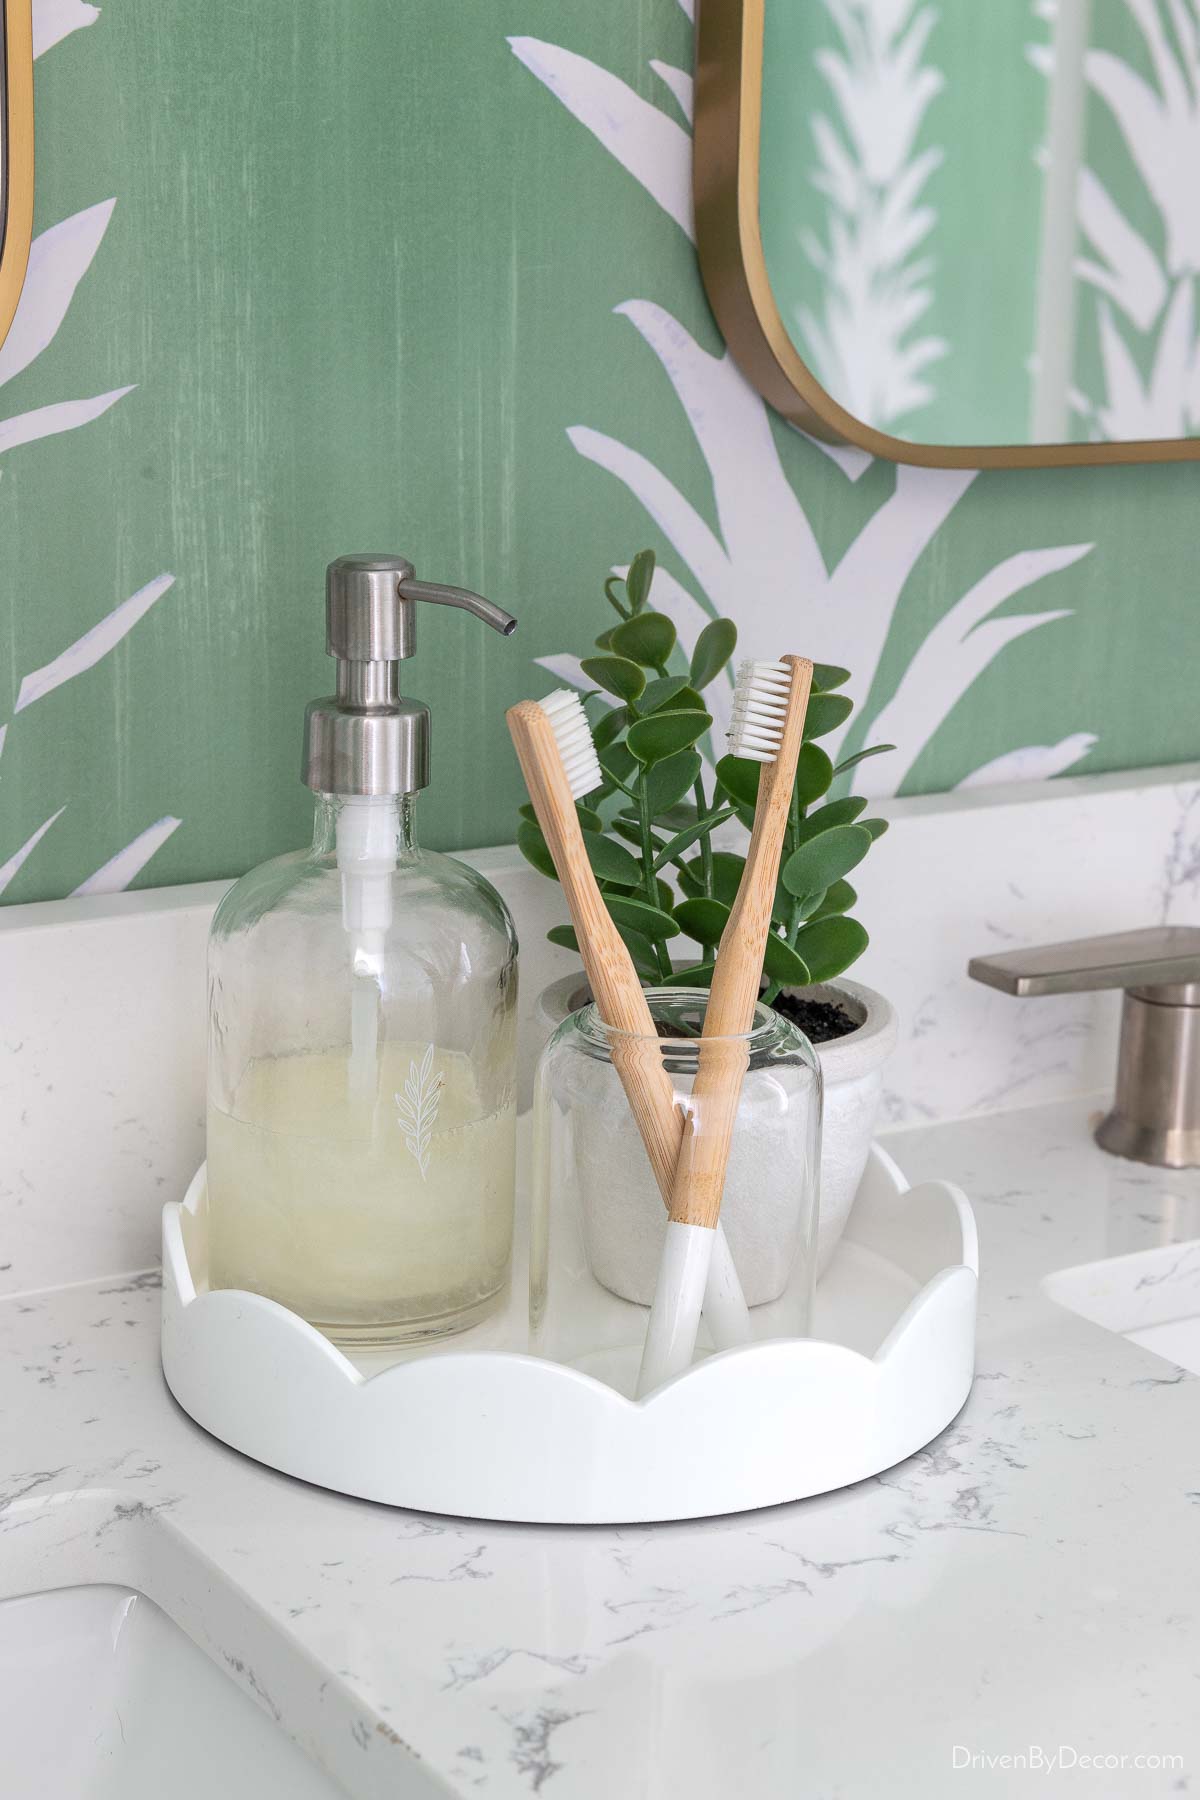
Other Sources: Mini faux succulent | Glass vase for toothbrushes | Wallpaper | Medicine cabinet mirrors | Vanity
or adding some stylish accessories to your tub or shower:
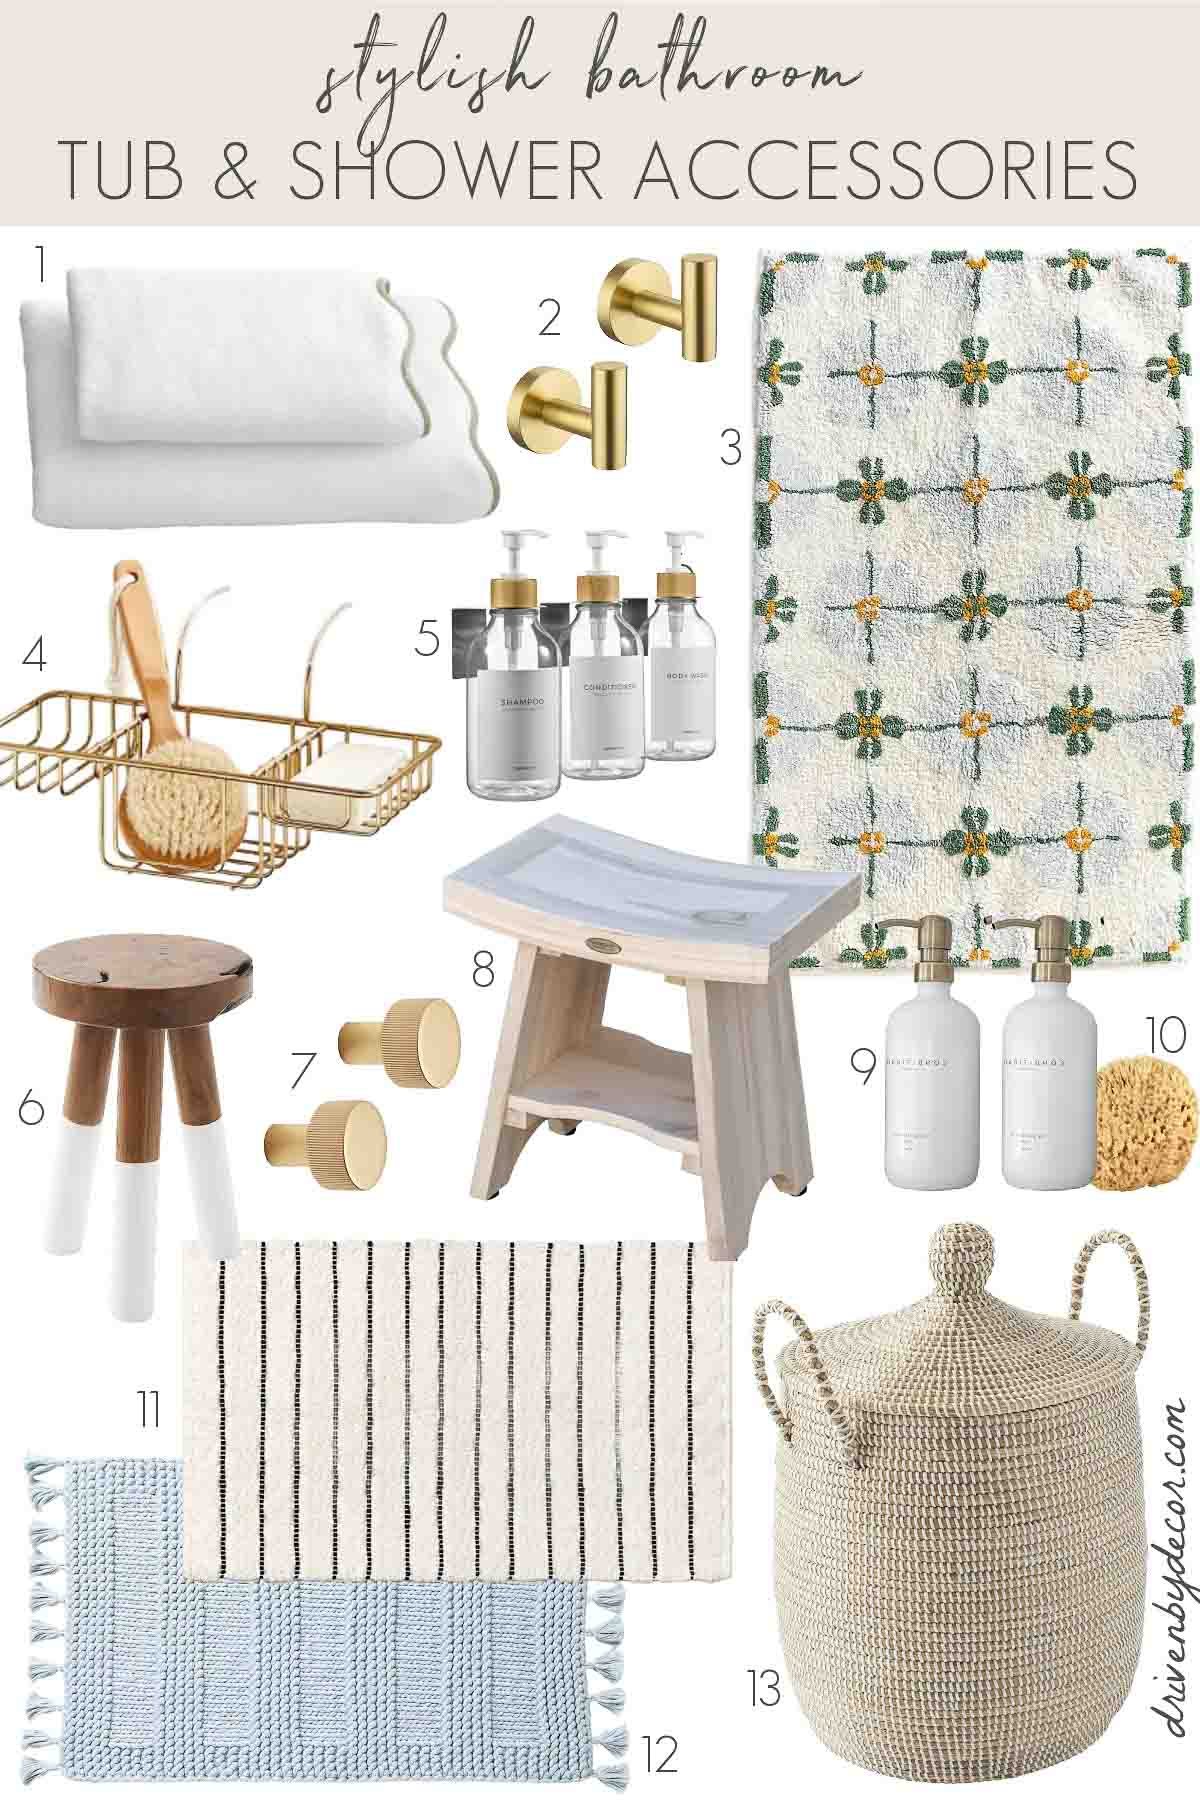
Sources: 1. Scalloped towels | 2. Towel hooks | 3. Patterned bath mat | 4. Wire bathtub caddy | 5. Wall-mounted shower pumps | 6. Dip dyed wood stool | 7. Knurled towel hooks | 8. Teak shower bench | 9. Shampoo & conditioner pumps | 10. Natural sponge | 11. Black & white striped bath mat (similar) | 12. Blue tassel bath mat | 13. Lidded woven basket as hamper
See my posts on bathroom decor ideas and toilet tank decor ideas for more ideas on adding style with accessories.
15. Get Creative & Work With What You’ve Got
And last but not least, when you reach a roadblock in your remodel, use your creativity to work with what you’ve got. Sometimes a creative solution to a design dilemma will end up being better than your original plan!
As an example, when we remodeled the powder room in our old house, I absolutely hated the toothbrush and bar soap holders that were part of the tile behind the sink (especially since this isn’t a bathroom we brushed our teeth in):
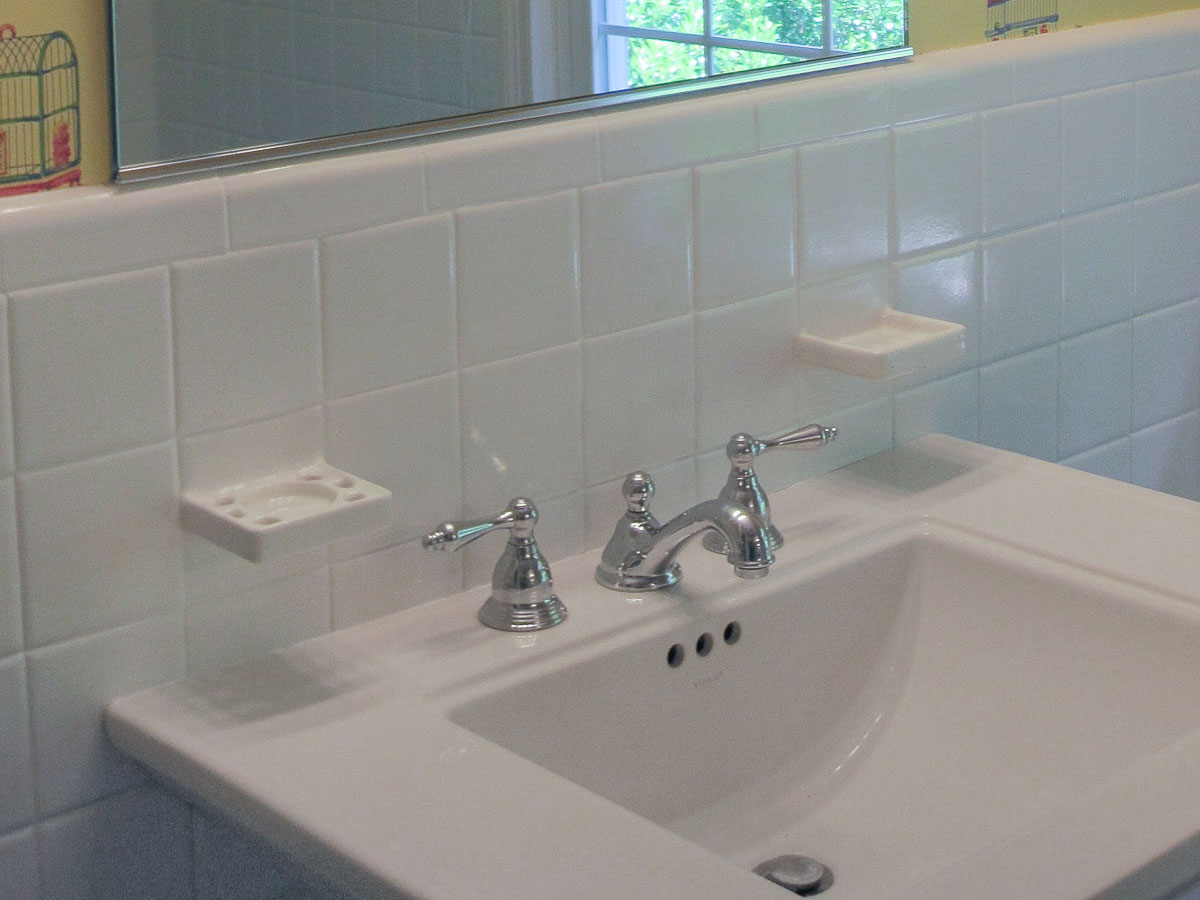
Ugly right?! The thought of leaving them there bothered me so much, but there was no way to replace them with regular tile without it being a big project (the tile had been reglazed by the previous owner, so we had no way of matching it). I ended up using the toothbrush holder to hold a small plant and the bar soap holder to hold a soap pump. And honestly, I loved the unique vibe of it once the whole bathroom was done:

And with that… I’m switching my focus from bathrooms to kitchens! In the next few days, I’m finishing up the design for the kitchen remodel in our current house AND tweaking the kitchen plans for our new build. More on both is coming soon!
XO,


Steve Bianco says
This post is a goldmine of practical, budget-friendly bathroom ideas! I love how you combine DIY resourcefulness with stylish solutions especially the vanity painting, sconce shade swap, and creative use of contact paper. So many clever takeaways for anyone tackling a remodel without breaking the bank. Bookmarking this for sure!
Mohd Yasir says
Really informative post! Your tip on swapping out sconce shades is brilliant—it’s such an affordable update that can instantly refresh the lighting and overall look. Thanks for the awesome post kris
T J says
What wonderful, inexpensive ideas! Thank you!