Our budget bathroom remodel is done! Over the past six weeks I’ve been remodeling our hall bathroom as part of the One Room Challenge – it’s been full of unexpected hurdles and setbacks at every turn. Well I finally made it to my finish line and I’m so excited to show you how our budget bathroom remodel turned out! (post includes affiliate links – full disclosure statement available {here})
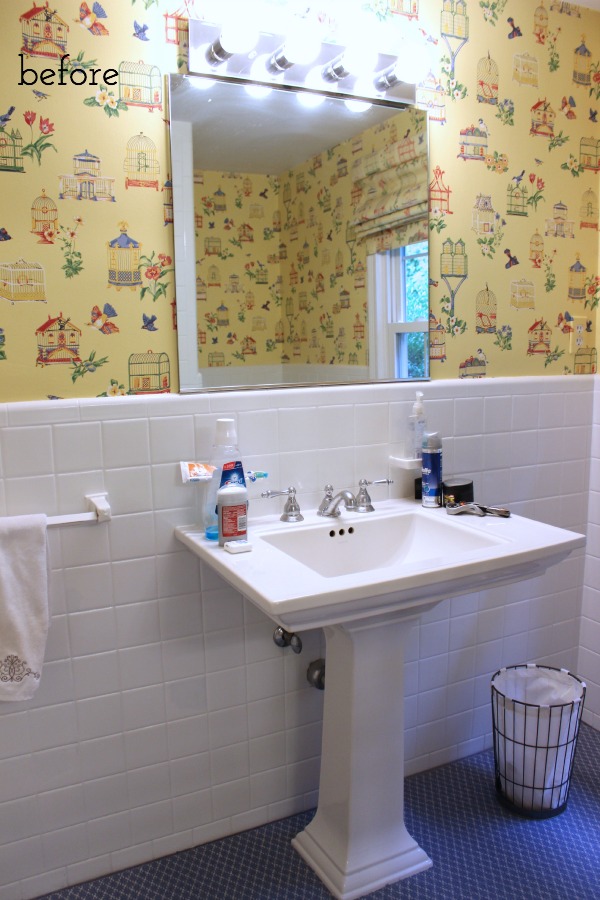
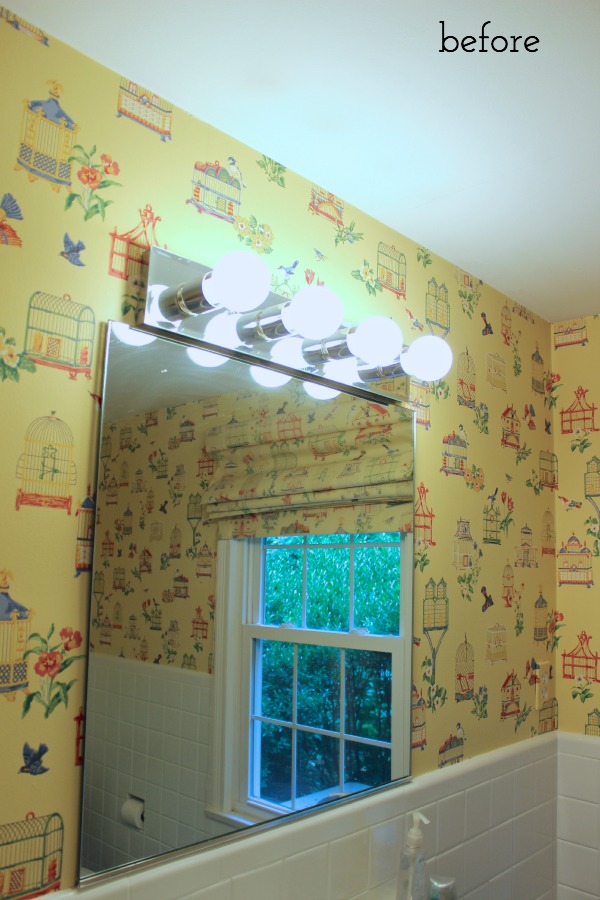
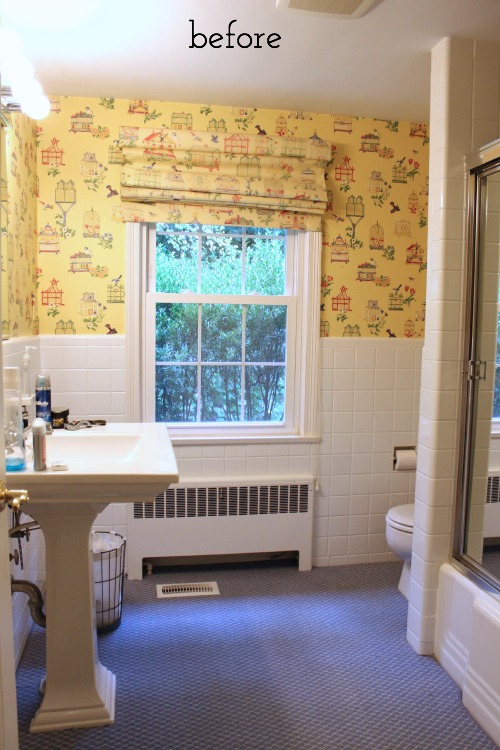
First, let’s throw it back to the “before”. Do you all remember what it looked like when I started? We had dated wallpaper, weird vanity bulbs, a plain Jane mirror, and carpet (gross!)…
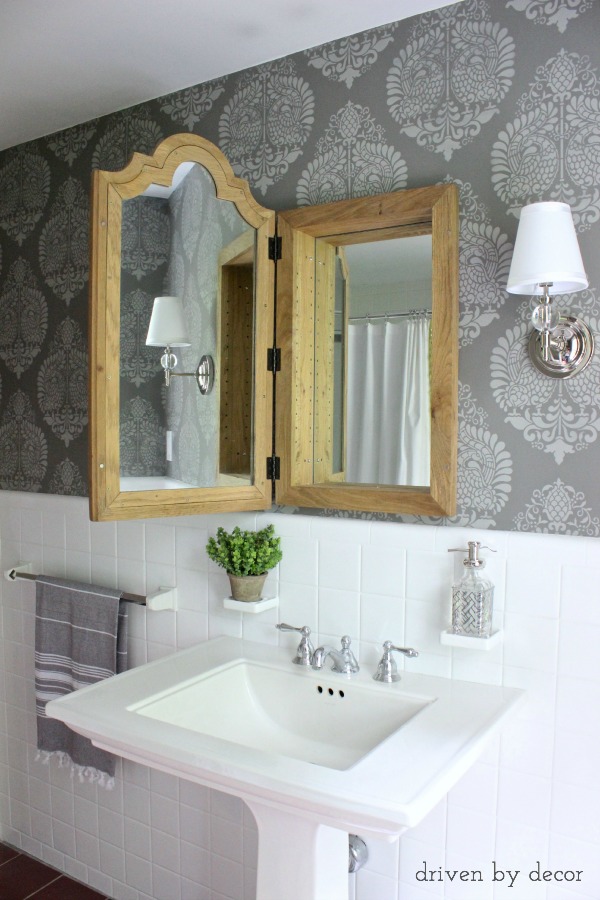
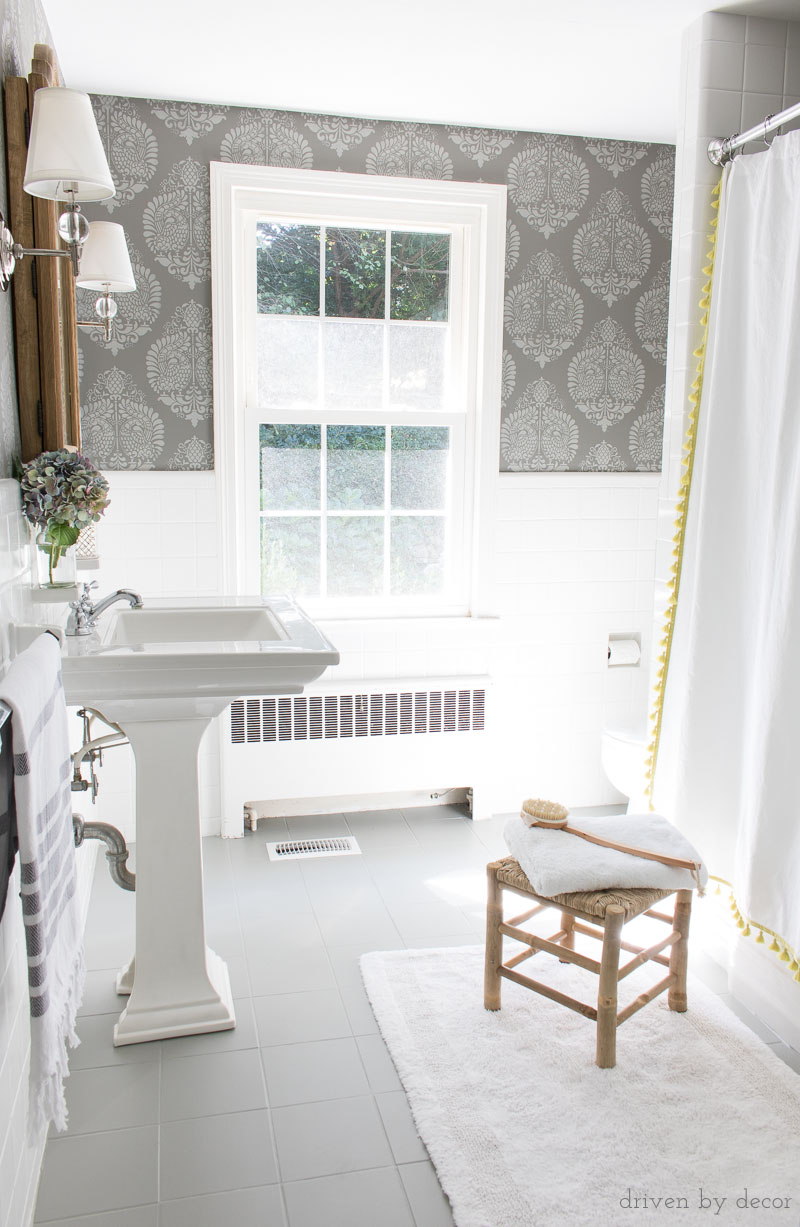
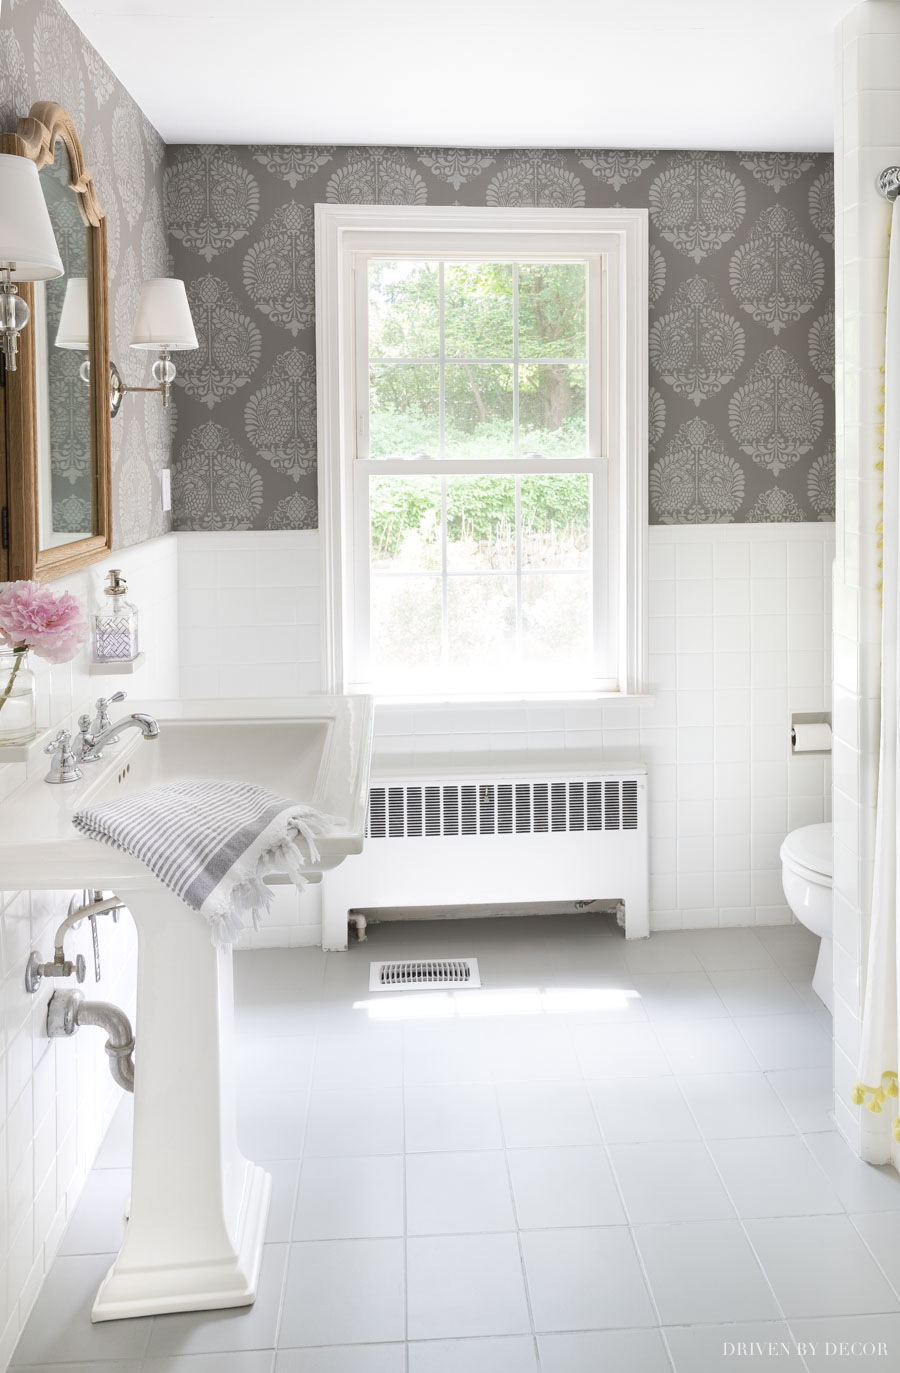
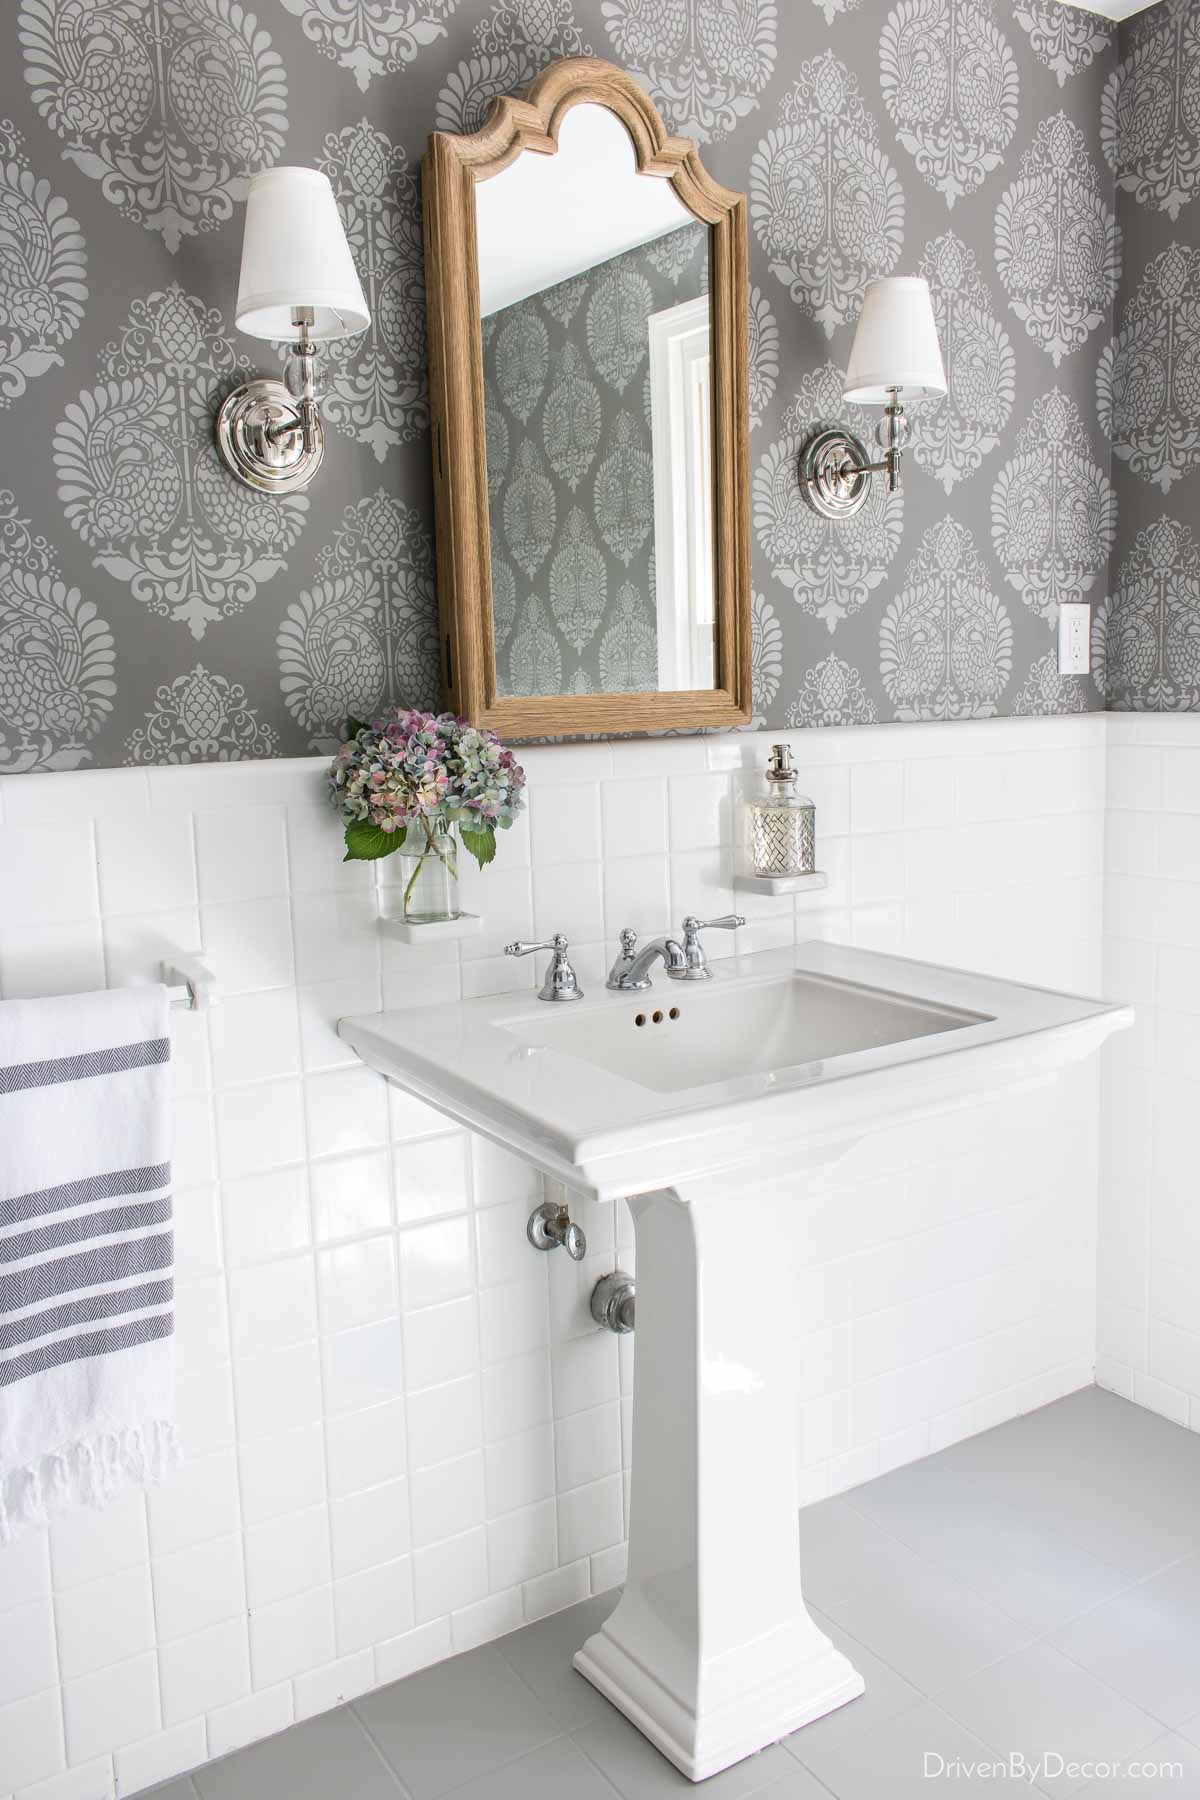
Say hello to newly painted and stenciled walls, wood medicine cabinet, and glamorous sconces!
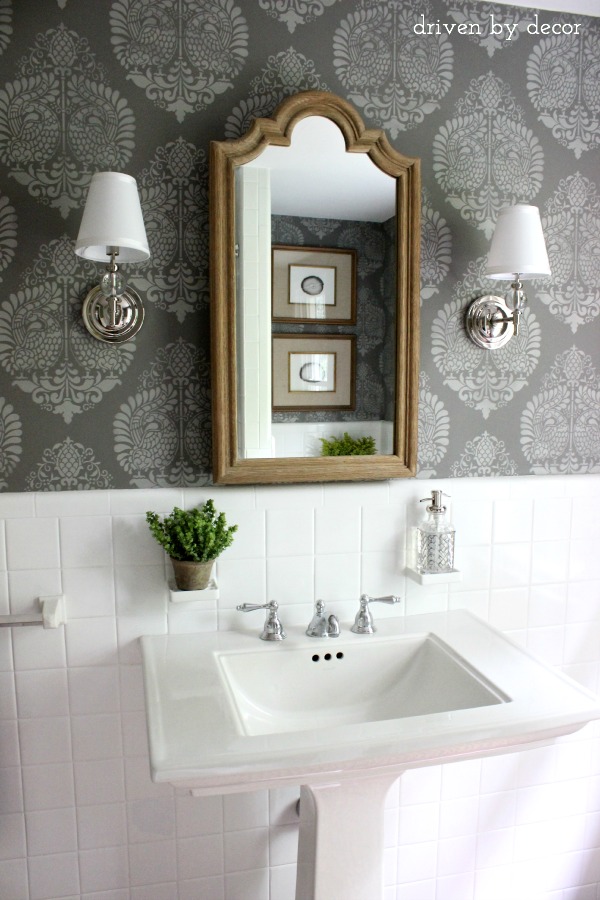
Sources: Medicine Cabinet – no longer available but {this arched wood mirror} is similar | Pedestal sink | Sconces
Here are some take-away tips from our budget transformation:
Stencil the Bathroom Walls
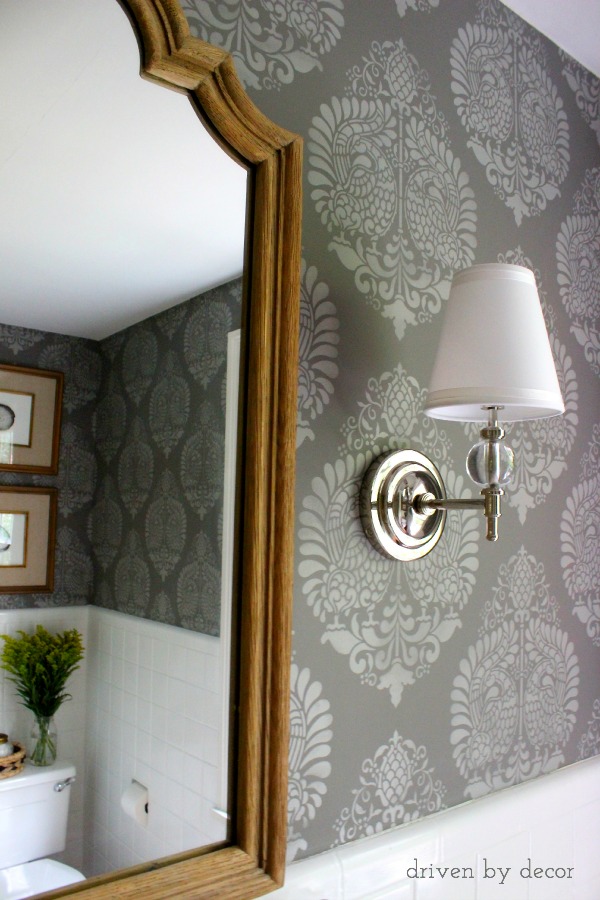
Stenciling the bathroom walls is what made the biggest difference! I had NEVER stenciled before doing this room and definitely learned a lot through trial and error but am so happy with how it turned out:
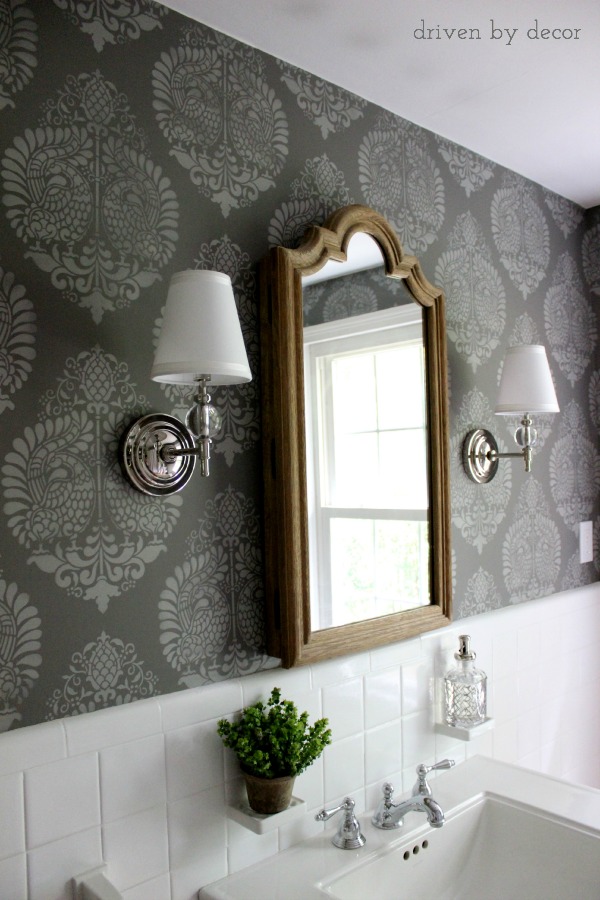
While it was time intensive, once I got the hang of it, it was fairly easy. And also budget friendly – while it looks like wallpaper, it cost a fraction of the price. I painted the walls Benjamin Moore Chelsea Gray and then used {this furniture stencil} with Benjamin Moore Platinum Gray for the stenciling. For more details on the step by step of stenciling plus lots of tips, see my post on wall stencils.
Work With What You’ve Got
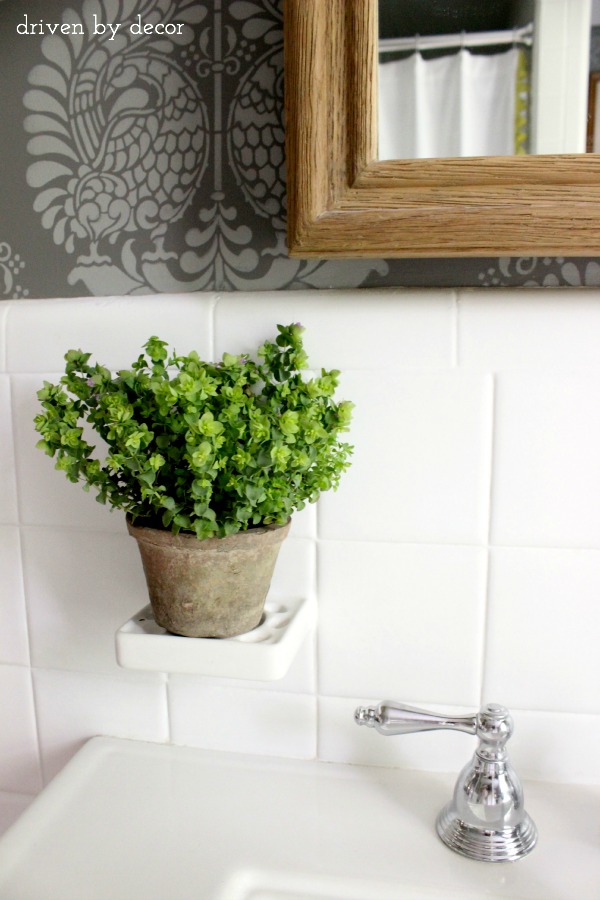
Being able to do a bathroom remodel with a limitless budget would be amazing but… it’s rarely feasible. Sometimes you’ve got to think outside of the box and work with what you’ve got. Two of the awkward things to work around in our bathroom were the built-in soap and cup/toothbrush holders. I originally had some semi-elaborate plans to fix them up but then realized that my grand plan was adding up $$$ so I made the best of it. The cup/toothbrush holder turned into the perfect plant stand:
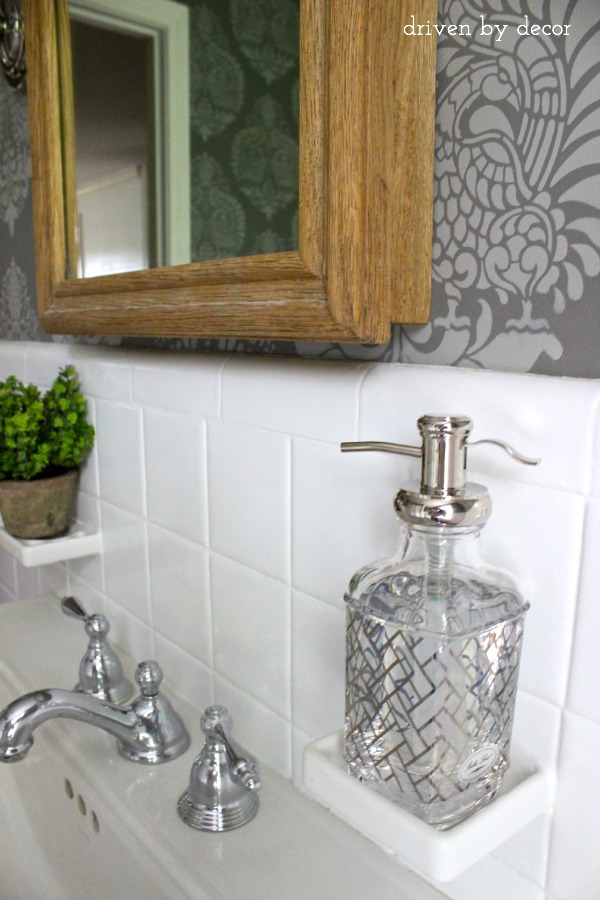
and the soap dish fits my new HomeGoods soap dispenser like a glove!
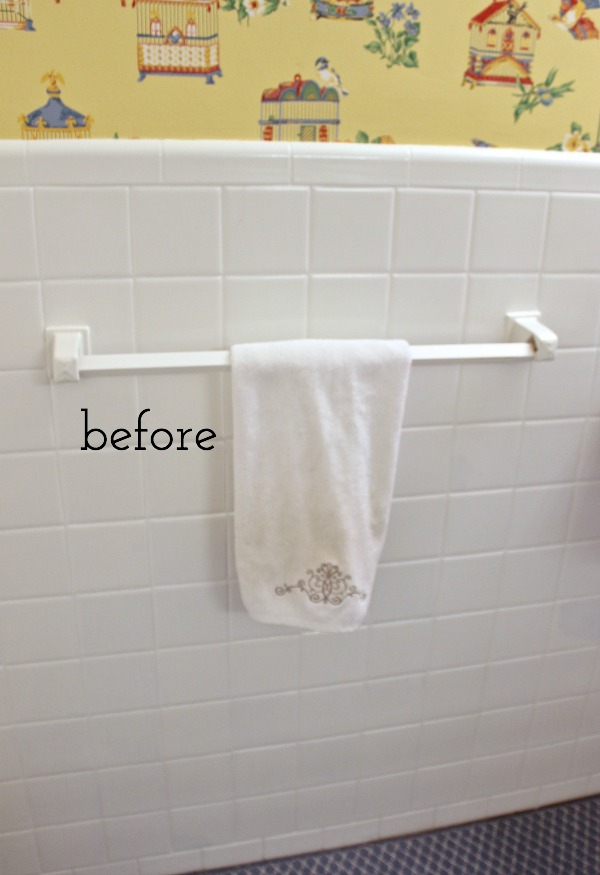
We also had a junky plastic towel bar that I would have loved to replace but removing the towel bar ends would have damaged the tile beneath it:
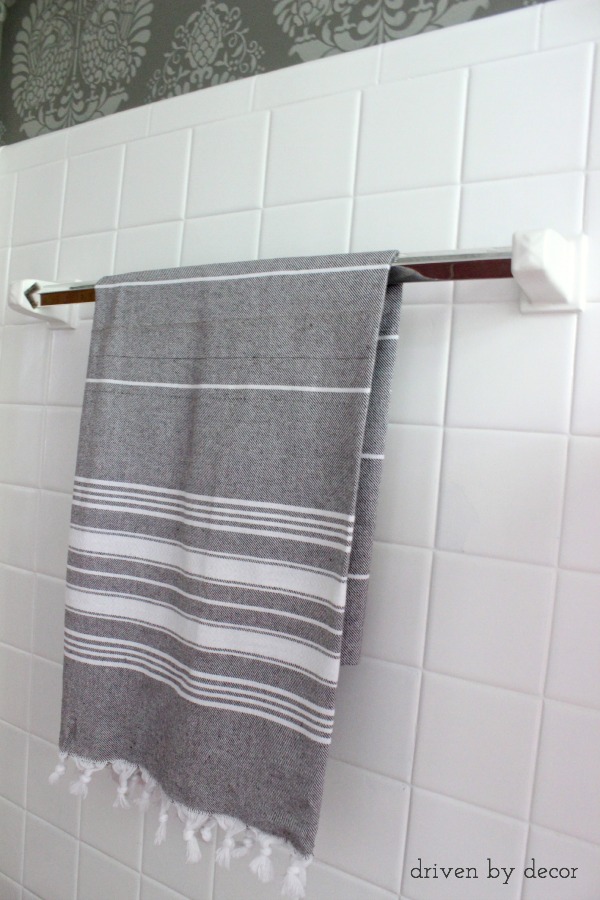
So instead I left the towel bar ends as-is and replaced the bar with a new chrome one. If you’ve got those annoying fixed ceramic ends on your towel bar too, I explain how to replace a towel bar with fixed ends {here}. Then I prettied it up with a gray and white striped Turkish towel:
Add Storage With a Medicine Cabinet Mirror
This bathroom is the one that my husband uses to shower and get ready in so some storage for all of his bathroom junk was priority #1. Originally we were planning to find a narrow furniture piece to put in the corner of the bathroom to add some storage. But since we also needed to switch out the plain builder’s grade mirror…
we decided to kill two birds with one stone and add a mirrored medicine cabinet instead of a plain mirror (one of my favorite bathroom mirror ideas!). The medicine cabinet has plenty of room to store all of his crapola that previously cluttered up the top of the sink (pic is from before we added the shelves to it):
No more heart palpitations when an unexpected guest to our home asks to use the bathroom!
Want to save this post?
DIY Your Own Art
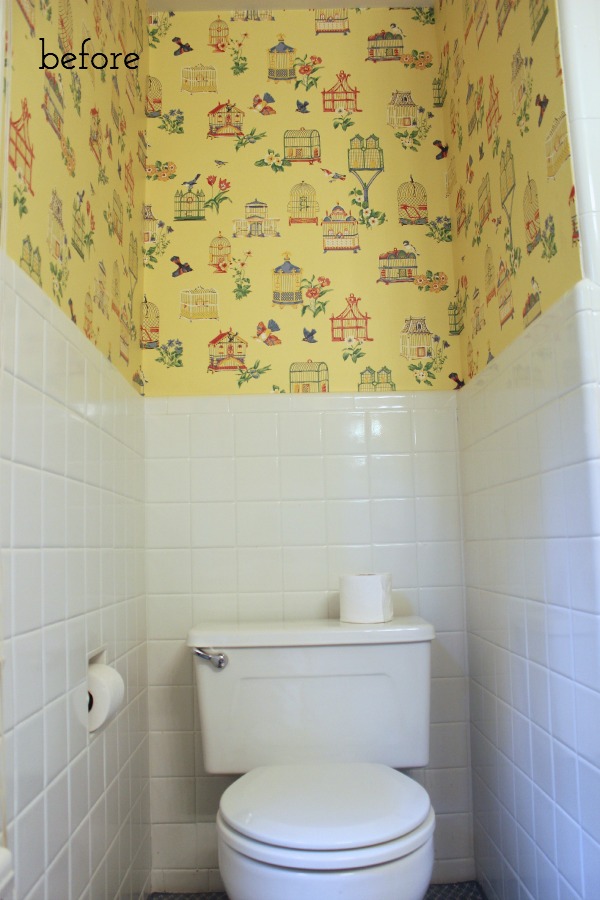
The wall space above the toilet got a little makeover too:
I bought two Target frames and then simply added an agate slice to eat one to create my own art:
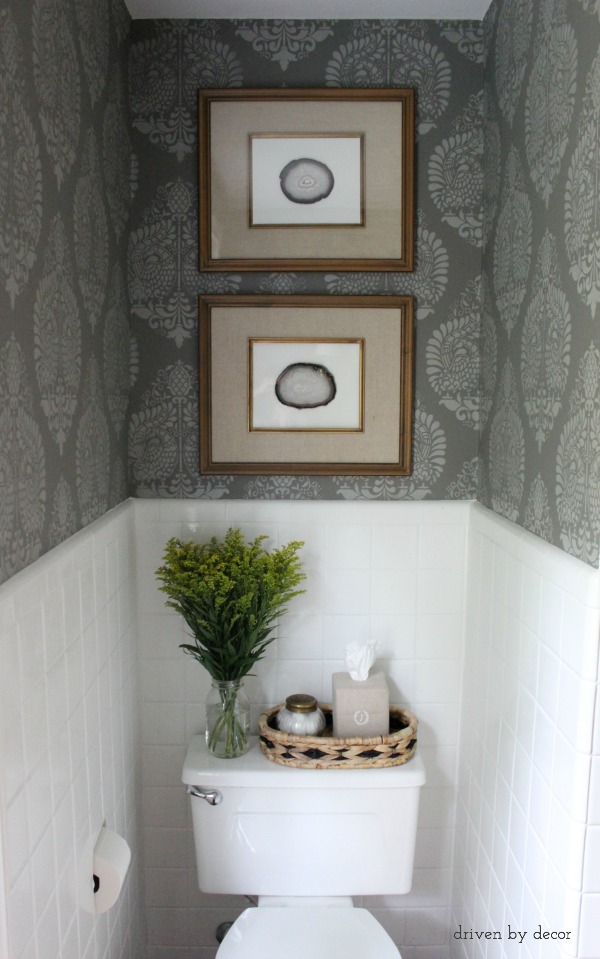
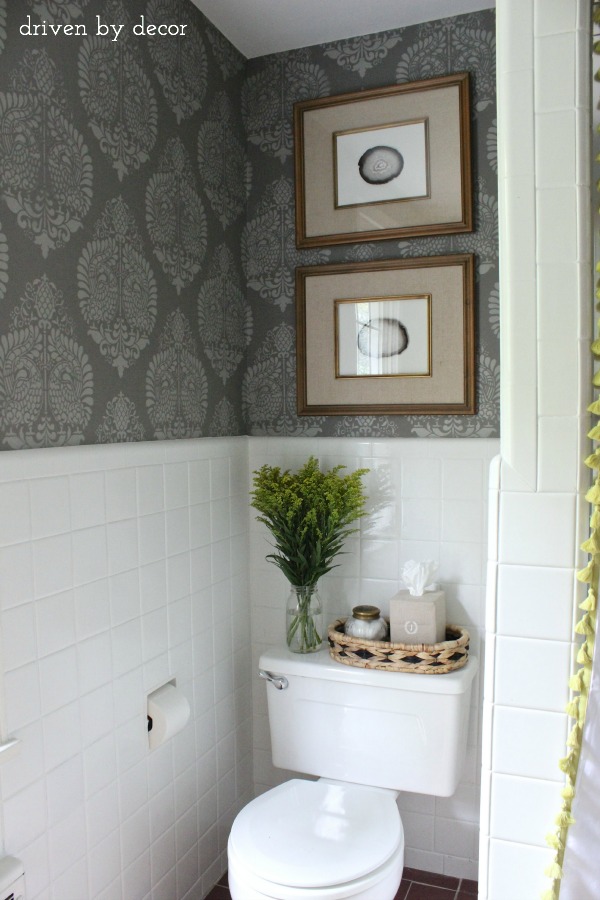
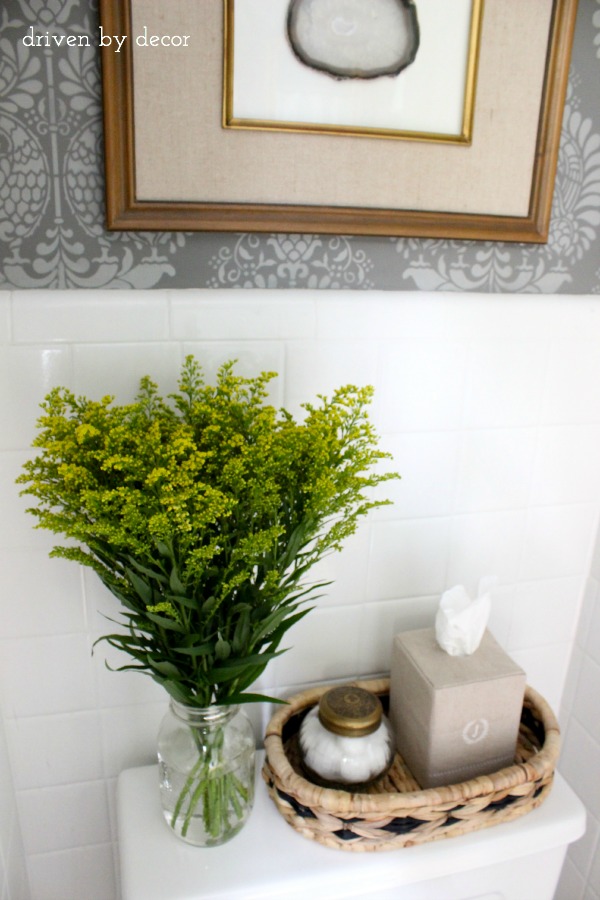
The top of the toilet tank even got a little bit of love:
Freshen Up The Look of Your Shower With a New Curtain
And remember when I was debating between three different shower curtains? Did you guess that this was the one that I would end up with?
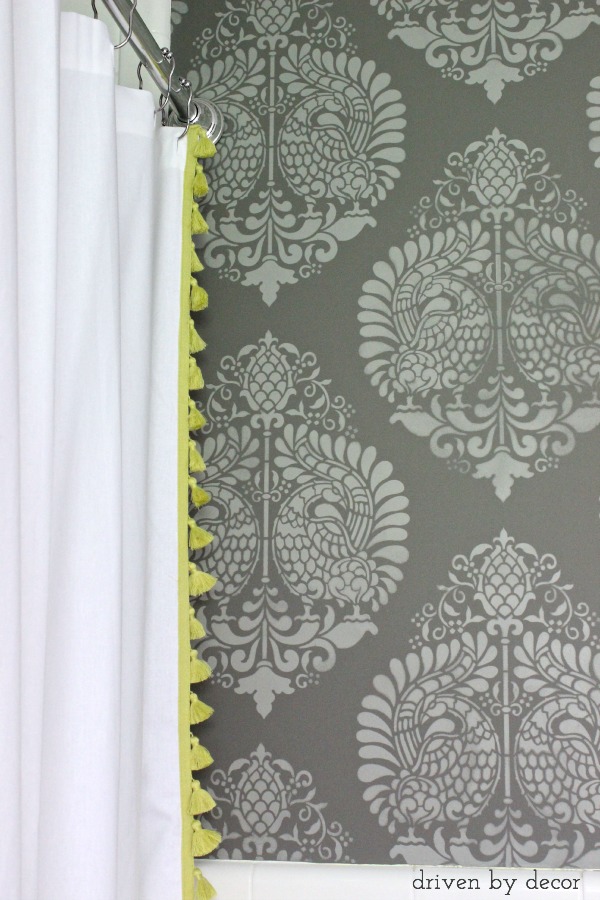
Adding a shower curtain in front of my ugly mirrored shower doors not only made the space so much prettier but it was more budget friendly than removing the mirrored doors too!
Paint Your Tile Floors
And what about our carpeted bathroom floors? Underneath the carpet I found tile but… it was REALLY ugly red tile:

Replacing it would have cost big bucks so a few weeks after my One Room Challenge reveal, I painted it! It made a HUGE difference:
Get all the details of how I painted our bathroom’s ceramic tile floors {here}. And as an update, yes the painted tile held up REALLY well for years after!
Here’s one last look at the complete “before” and “after”:
Have any questions about our new space? I’ve included a full source list for everything in our bathroom below. While this was a very budget friendly bathroom remodel, a few years later we went all out on a complete master bathroom remodel. I share ten of my best master bathroom remodel ideas if you want to check it out!


Wall Colors & Stencil: Annapakshi Indian Damask Wall Stencil – I used the 11.25″ x 15.5″ furniture stencil (c/o Royal Design Studio) | Basecoat paint: Benjamin Moore Aura Bath & Spa (Matte) in Chelsea Gray | Stencil paint: Platinum Gray (Benjamin Moore color but mixed in Behr Premium Plus Ultra in Satin)
Medicine Cabinet: No longer available but if you’re looking for a mirror in a similar design, check out {this arched wood mirror} | Pedestal Sink: Kohler Memoirs sink found {here} | Sconces: Crystal ball sconces
Shower Curtain: Tassel Shower Curtain in Citrine | {this shower curtain} is similar and comes in more color options | Soap dispenser, woven basket on toilet, agate slices: HomeGoods | Gold & glass jar in basket: No longer available | Plant: Ornamental Oregano in Linen Wrapped Pot (Terrain) | Frames: Target Threshold (no longer available) but {these linen mat frames} are a pretty alternative | Tissue Box Cover: Linen Hemstich Tissue Box Cover


Shelia @ House of Highlands says
I love this makeover! The wallpaper, the mirror, the sconces, and the shower curtain – all of it is just beautiful! Great job!
Shelia
Kris @ Driven by Decor says
Thanks so much Sheila!
Linda @ Calling it Home says
First, that stencil would have taken me six weeks and I probably would have given up. This looks amazing and you kept at it. I will be curious to see how the floors turn out when you do them. The medicine cabinet was so worth the aggravation, it makes the space. Just beautiful.
Kris @ Driven by Decor says
Linda, if it wasn’t for the ORC, it would have taken me six weeks but the deadline made me keep on plugging away at it (so thanks for that!). Glad you like the space – I’m looking forward to finishing of the floors so I can cross this little space off as done!
Laurie Orlando says
Wow! What a stunning transformation! Everything ties together so well. LOVE the stencil work on the walls – that must have been trying! Can’t wait to see how the floor turned out. Great job!
Kris @ Driven by Decor says
Thanks Laurie – I’m going to jump into working on those floors this week and am crossing my fingers that they turn out ok!
Kristen says
Such a pretty bathroom! So sophisticated and serene. Great work – congrats!
Kris @ Driven by Decor says
Thanks Kristen!
Emily Simpson says
WOW! So stunning, Kris! Fabulous once again 🙂
Kris @ Driven by Decor says
Thanks so much Emily!
Candace Petree says
Gorgeous makeover! Especially love your framed agate prints…I know the frames are from Target but where did you find the agate? Thanks!
Kris @ Driven by Decor says
Thanks Candace. The agate slices were coasters and I just removed the plastic dot feet from them so they were flat. I got mine at HomeGoods but if you Google “agate coasters” you’ll find other places like Z Gallerie and Etsy shops that carry them. They were definitely cheaper than most other places at HomeGoods so look there first if you have one by you!
Lisa @ Fern Creek Cottage says
The bathroom is stunning! The stenciled walls…whoa! Just love them! Thinking I may have to do that to a wall in my master bedroom. I’m eagerly awaiting a tutorial from you. 😉 Love the mirror too! Your frumpy old gal of a bathroom became one elegant, glamorous lady!
Kris @ Driven by Decor says
Thanks Lisa – now I’m wondering why my husband gets this glam bathroom and I have the one that’s still frumpy 🙂
stephanie kraus says
this is total perfection! The wall stencil and color combination that touch of charteuse pom pom against the wall. the styling, the art — all perfect! looks awesome kris!
Kris @ Driven by Decor says
Thanks so much Stephanie!
Kelly says
How did you replace the towel bar…I have a similar and yet even more disastrous 1960″s pink tile in no less that 4 styles on every surface that I have plans on re-glazing because it is still in excellent shape but the towel bar has alluded me…mine is painted wood easy enough to cut and remove but how did you get the metal into the ceramic holders…please share!
Kris @ Driven by Decor says
Hi Kelly – it sounds like we do indeed have similar bathrooms. Mine is also pink underneath the white glaze! I will be posting about the towel bar replacement in the next week because so many people have asked me about it – I used these spring-loaded end caps that made it a breeze! Stay tuned!
Jessie says
Your bathroom is simply gorgeous! I didn’t realized you were using stencils on the walls until you mentioned it. Such perfection! A very crisp, tailored and warm space. You did a marvelous job!
Jessie
http://www.mixandchic.com
Kris @ Driven by Decor says
I really appreciate that Jessie – thanks!
Sam @ Away She Went says
It’s stunning! The stenciled wall, the mirror, everything is gorgeous! I love it!
Kris @ Driven by Decor says
Thanks Sam!
Laura Ingalls Gunn says
Wow~ An absolutely stunning space! I love the wall treatment and medicine cabinet. As a fellow 6 week participant the six weeks was indeed a challenge and you rose up. Well done!
Kris @ Driven by Decor says
Thanks so much Laura – cheers to being done!
Melanie @ The Painted Chandelier says
Kris~ I LOVE it ALL!! That is one of the best stencil jobs I’ve seen. Looks so good 🙂 Love the agate slices, the wooden medicine cabinet, & the pretty sconces. You knocked it out of the ballpark again, my friend! Kudos.
Kris @ Driven by Decor says
Thanks Melanie – you may not say that about my stenciling job if you look at it super close up but the great thing is that all of the little mess-ups somehow just blend in so I think I’m the only one that knows they’re there. Thanks so much for the sweet comment!
Dana says
Love it! I have the same kind of challenges in one of my bathrooms and watching your make over has inspired me! Couple of questions as I start on my quest: How long did it take you to stencil the room? Where did you get the bars for the towel holder and how does it go in? Thank you!!
Kris @ Driven by Decor says
Hi Dana – thanks so much for your comment! The stenciling took me quite a bit longer than I expected but part of that was because I had never stenciled before and there was a bit of a learning curve (I was much, much faster by the end!). I would guess that if I added up all of the hours that I worked on it, it would be 15-20 in total (including painting the base coat of paint). As far as the towel bar and holder, that took me a long time to figure out! I ordered a replacement bar and these little spring loaded end caps on Amazon – I have had so many emails about it that I’m doing a post about it in the next week and will describe the process in more detail!
Kris @ Driven by Decor says
Thanks Kylie! No shame in liking the old wallpaper! I wouldn’t have minded the wallpaper either at a quaint little bed and breakfast but it stuck out like a sore thumb with the design of the rest of my house.
sherry hart says
Love it! I am smitten with those walls…..they look so darn good. It is so “you” Kris…clean crisp and tailored! I am sure you will figure out the floor issue and by the way I love the touch of color on the shower curtain:)
Kris @ Driven by Decor says
Thanks Sherry – I’m pretty predictable, right?! 🙂 I sure hope the floors turn out – TBD…