Our budget bathroom remodel is done! Over the past six weeks I’ve been remodeling our hall bathroom as part of the One Room Challenge – it’s been full of unexpected hurdles and setbacks at every turn. Well I finally made it to my finish line and I’m so excited to show you how our budget bathroom remodel turned out! (post includes affiliate links – full disclosure statement available {here})
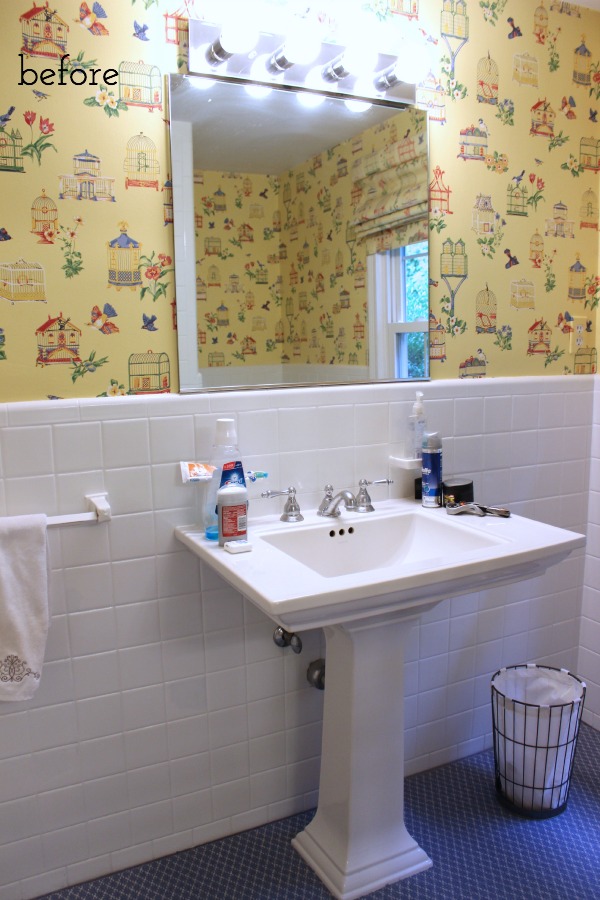
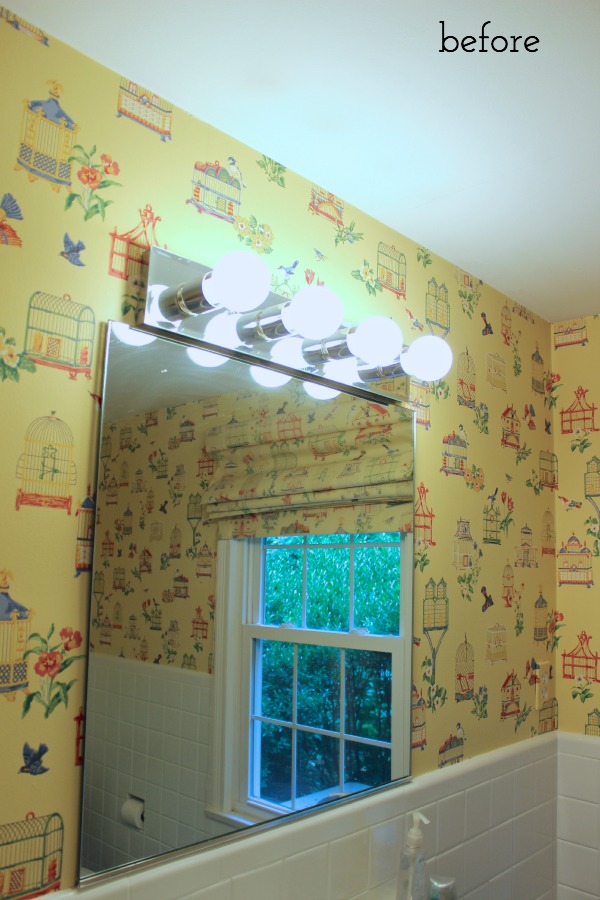
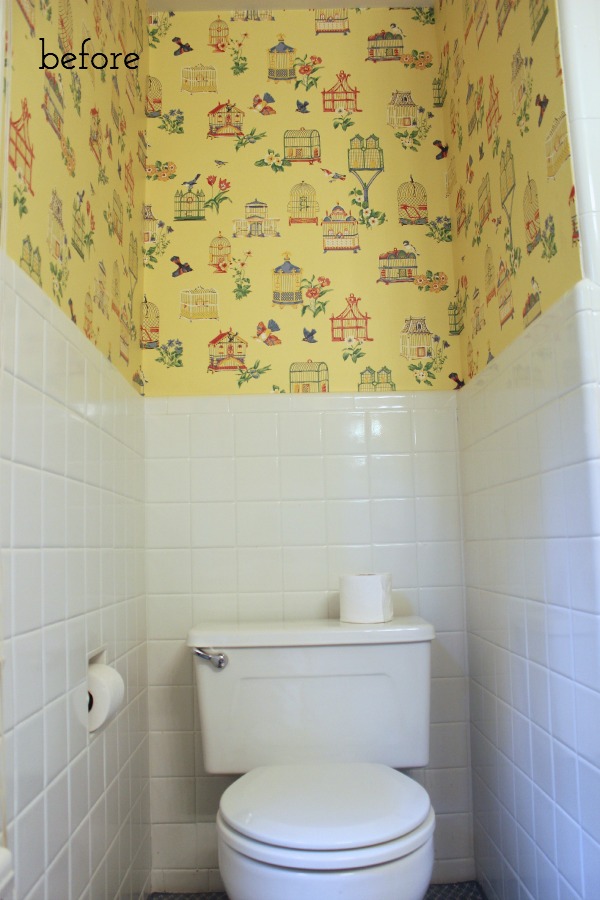
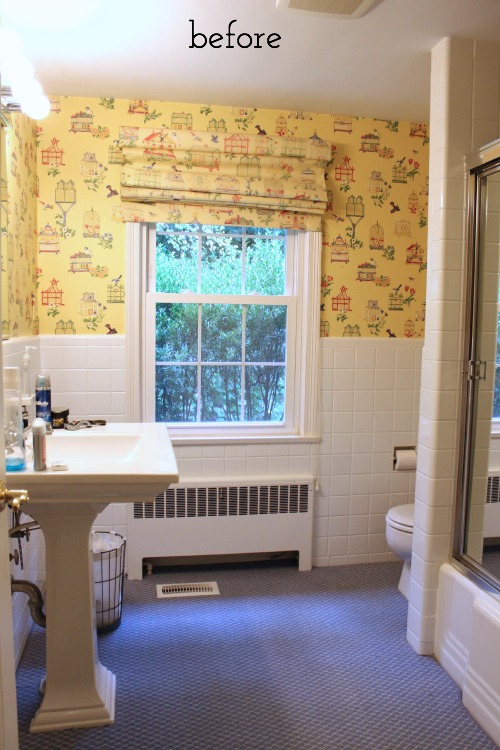
First, let’s throw it back to the “before”. Do you all remember what it looked like when I started? We had dated wallpaper, weird vanity bulbs, a plain Jane mirror, and carpet (gross!)…
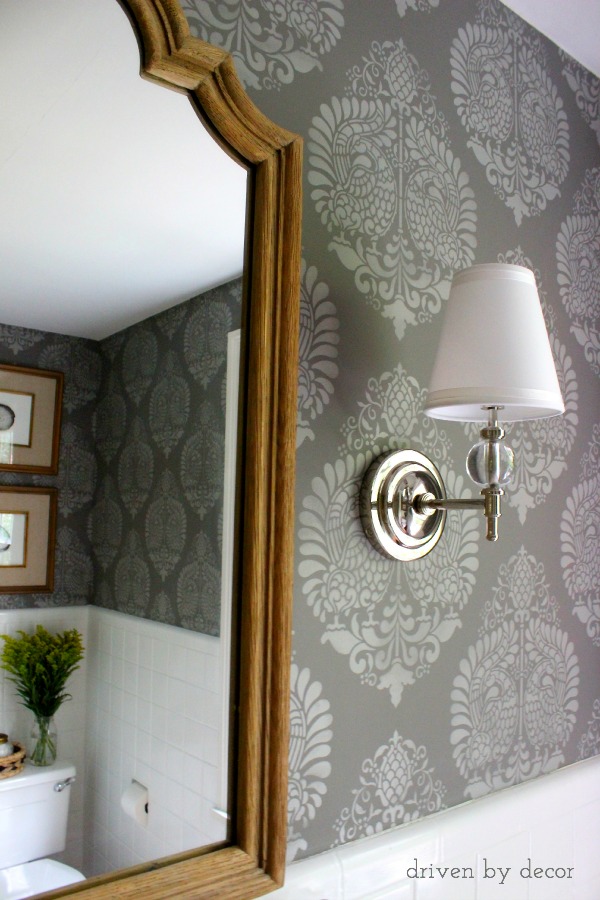
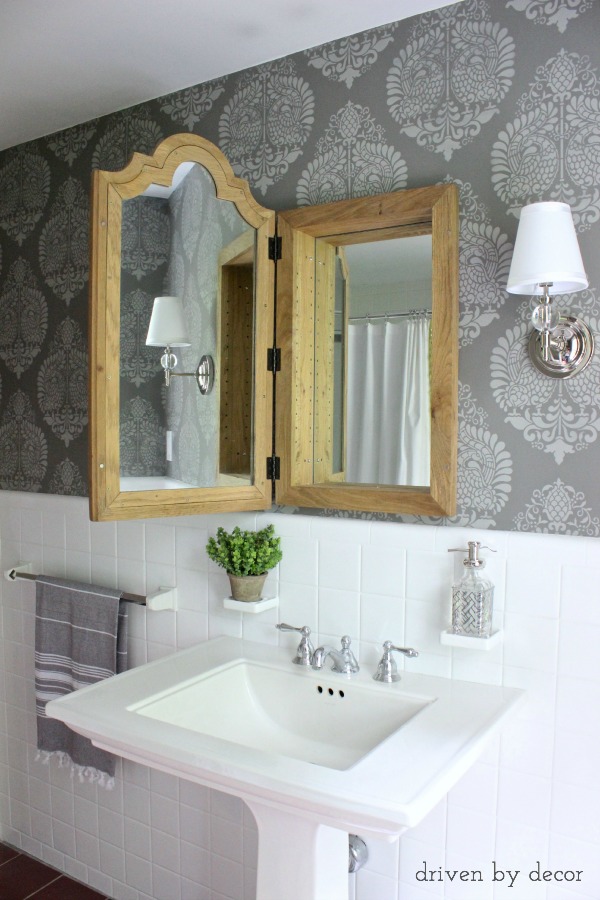
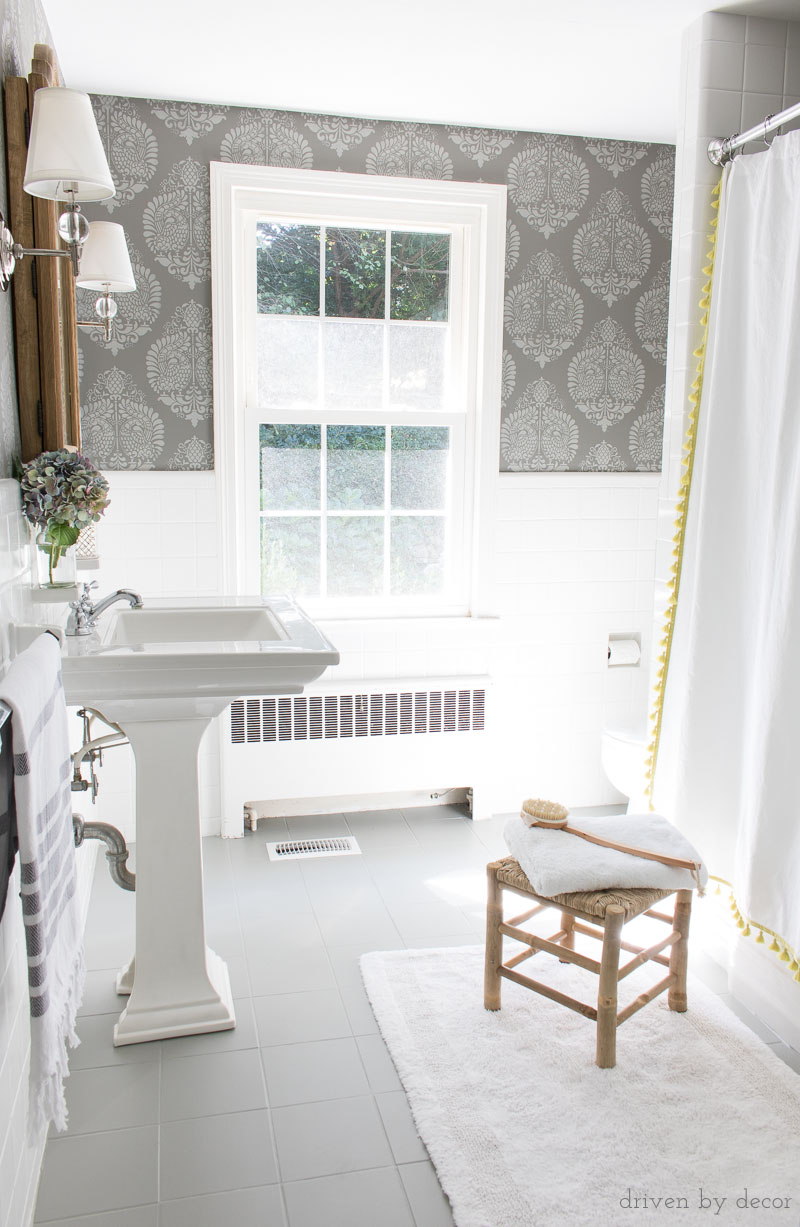
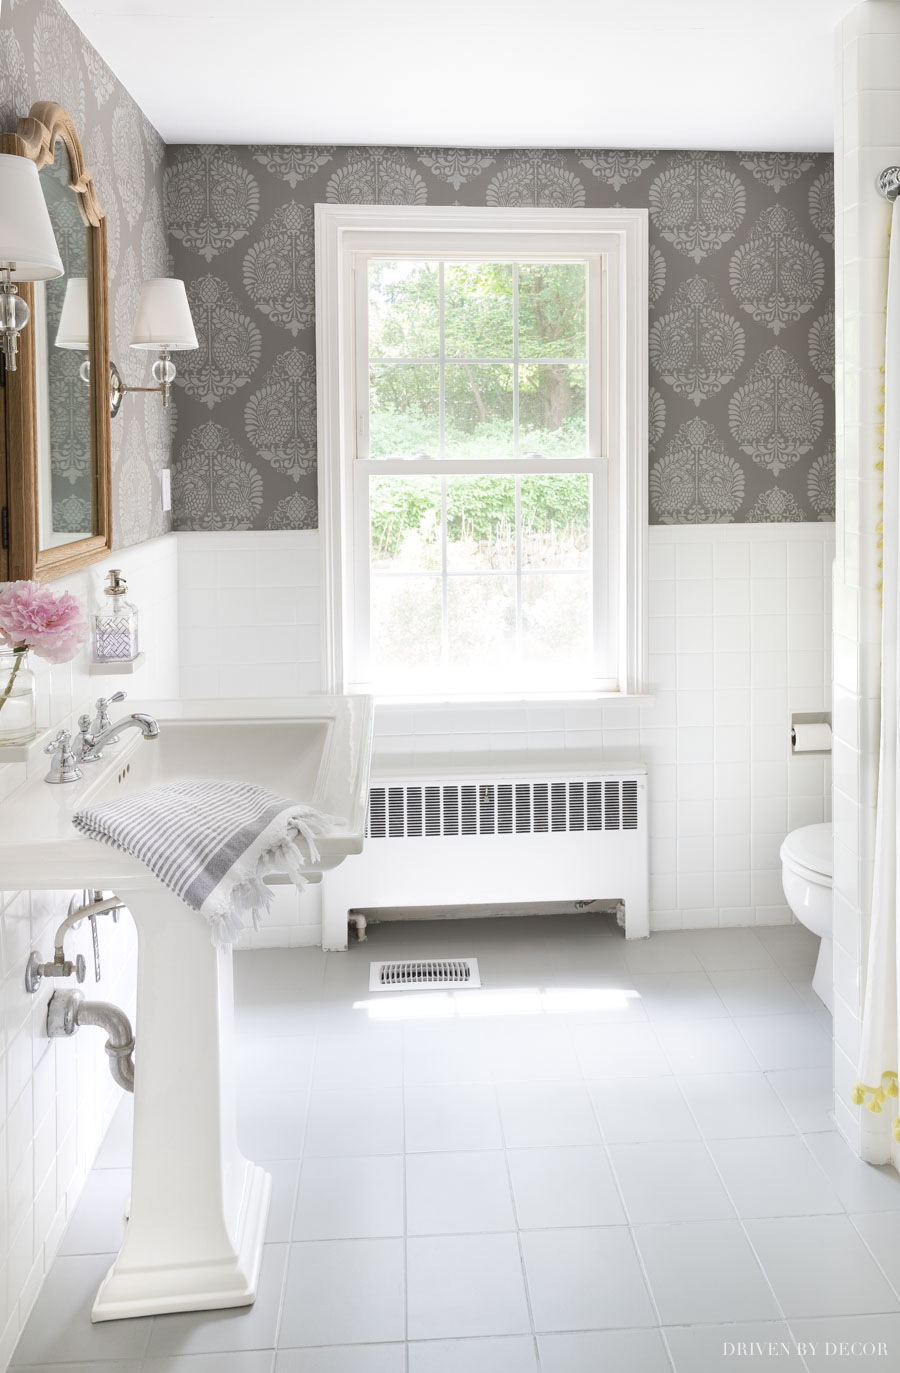
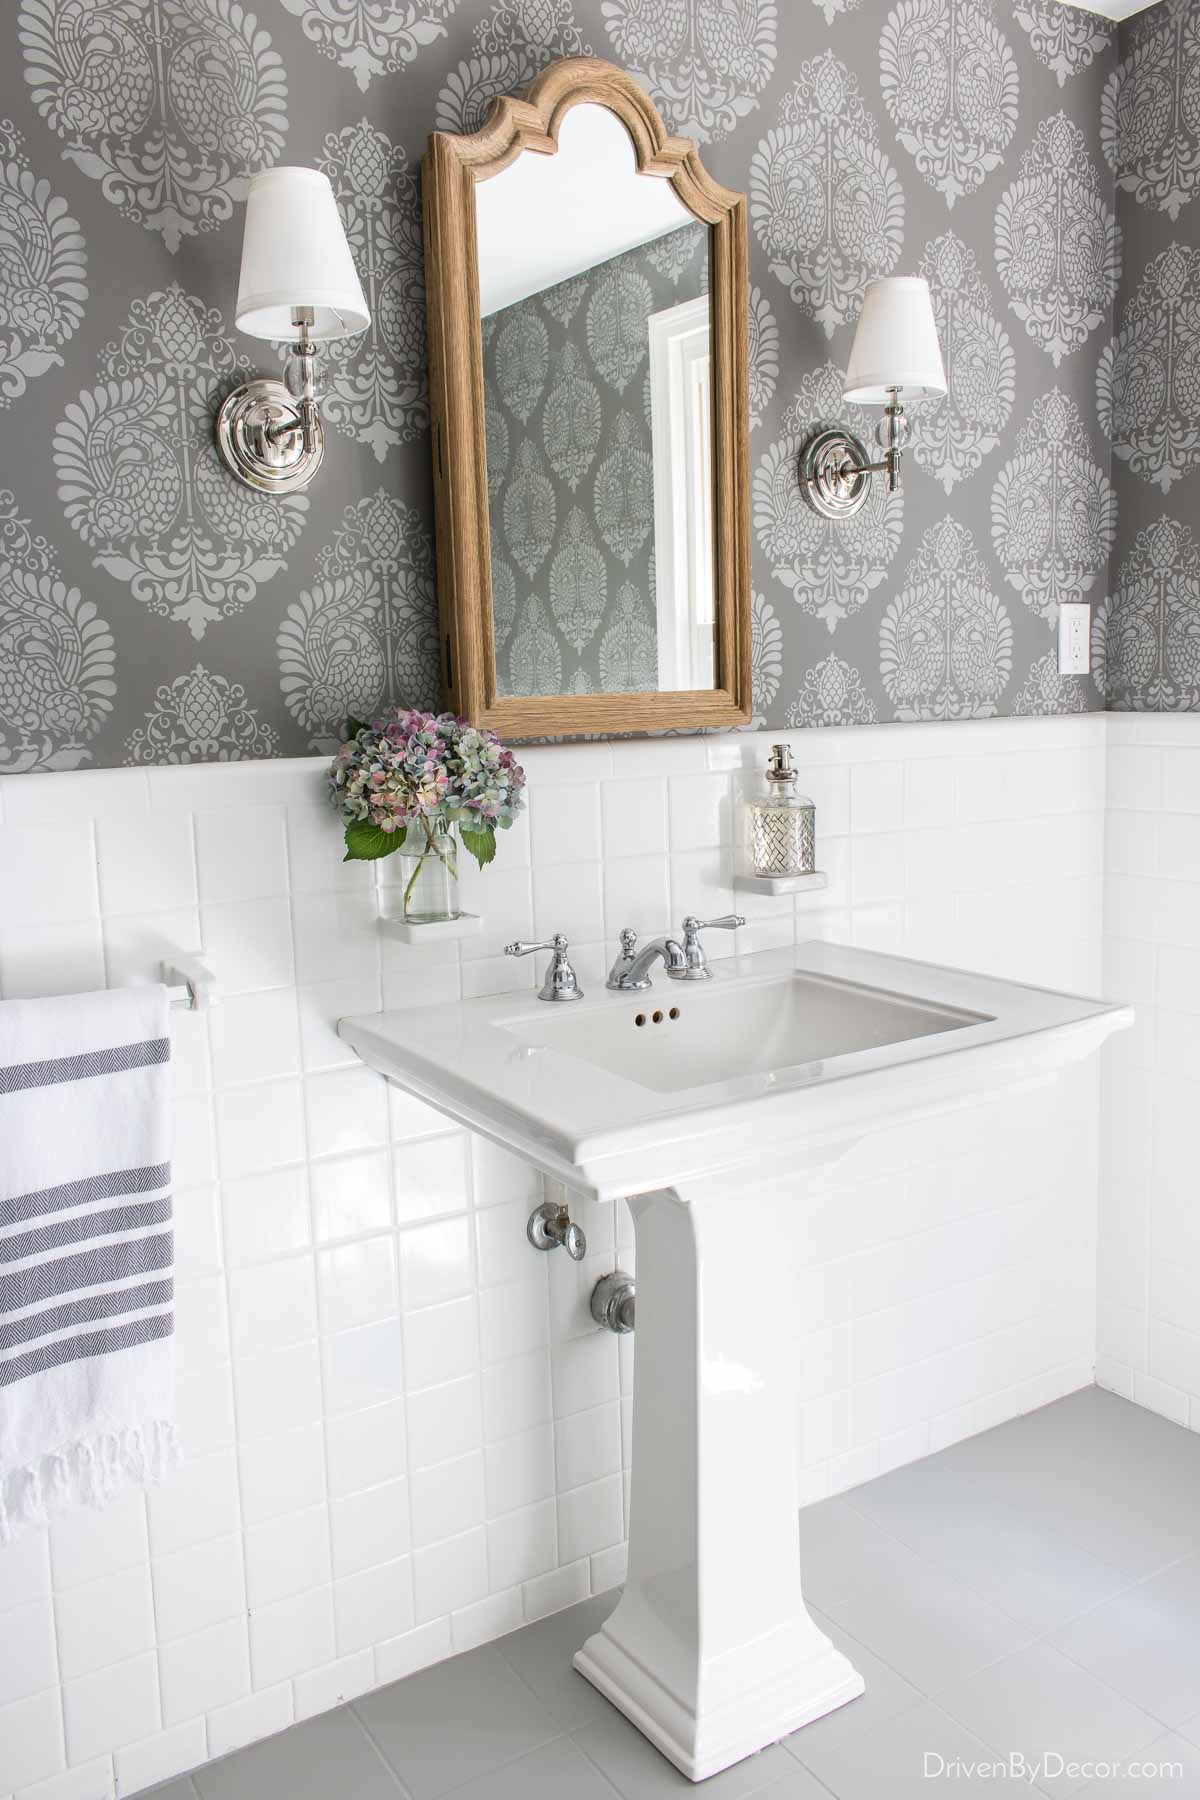
Say hello to newly painted and stenciled walls, wood medicine cabinet, and glamorous sconces!
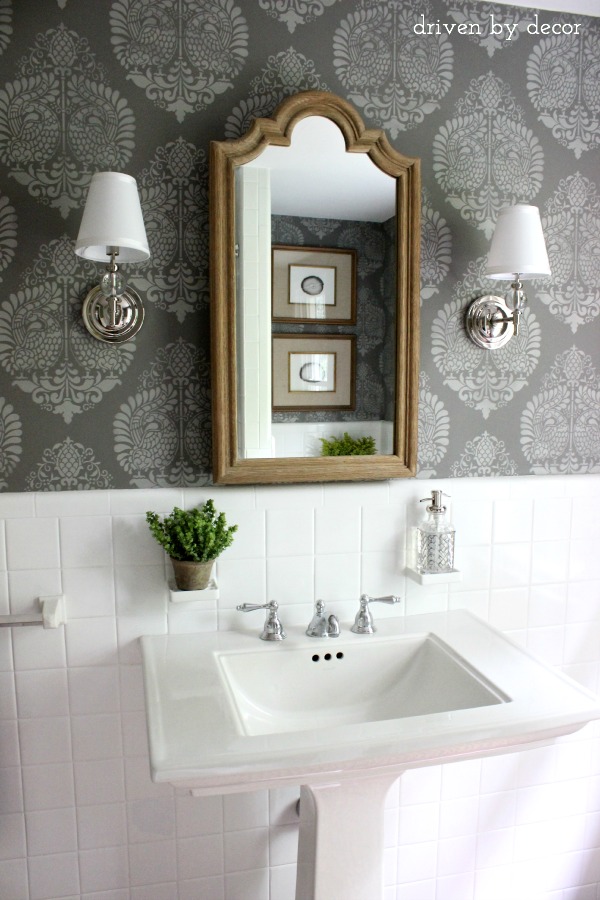
Sources: Medicine Cabinet – no longer available but {this arched wood mirror} is similar | Pedestal sink | Sconces
Here are some take-away tips from our budget transformation:
Stencil the Bathroom Walls
Stenciling the bathroom walls is what made the biggest difference! I had NEVER stenciled before doing this room and definitely learned a lot through trial and error but am so happy with how it turned out:
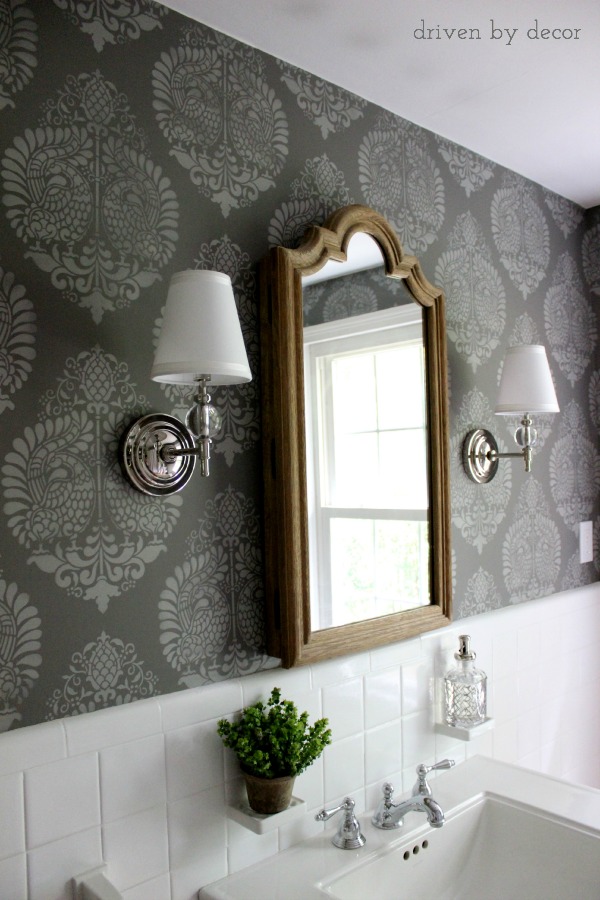
While it was time intensive, once I got the hang of it, it was fairly easy. And also budget friendly – while it looks like wallpaper, it cost a fraction of the price. I painted the walls Benjamin Moore Chelsea Gray and then used {this furniture stencil} with Benjamin Moore Platinum Gray for the stenciling. For more details on the step by step of stenciling plus lots of tips, see my post on wall stencils.
Work With What You’ve Got
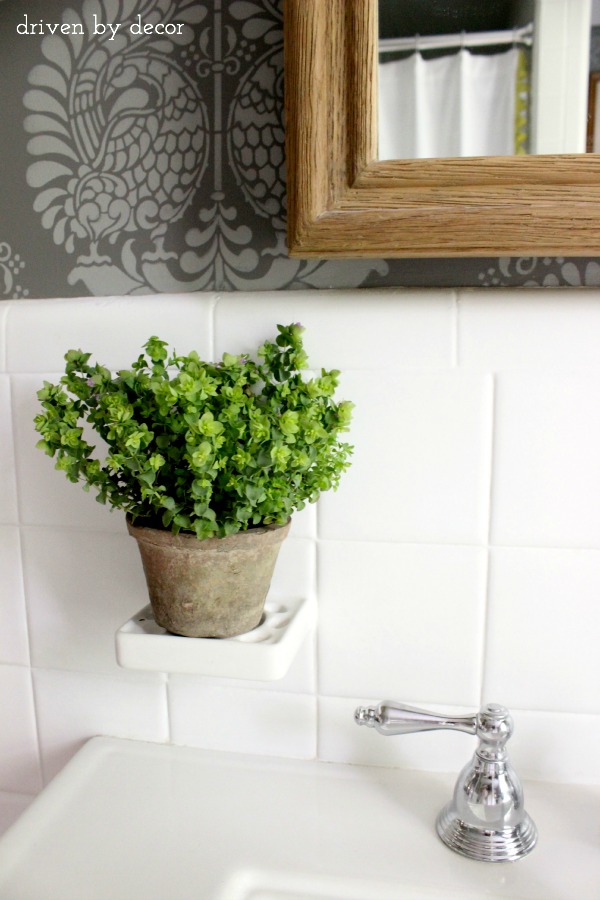
Being able to do a bathroom remodel with a limitless budget would be amazing but… it’s rarely feasible. Sometimes you’ve got to think outside of the box and work with what you’ve got. Two of the awkward things to work around in our bathroom were the built-in soap and cup/toothbrush holders. I originally had some semi-elaborate plans to fix them up but then realized that my grand plan was adding up $$$ so I made the best of it. The cup/toothbrush holder turned into the perfect plant stand:
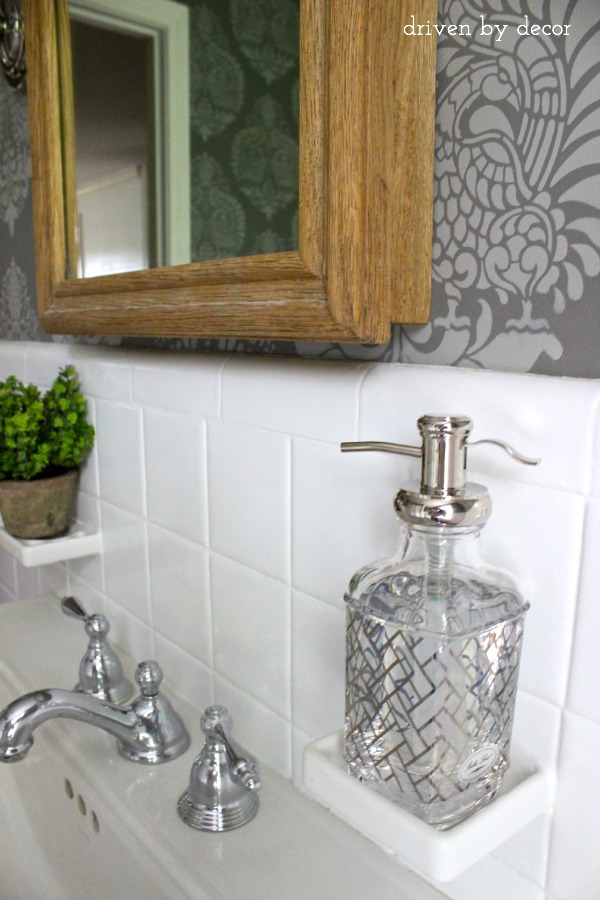
and the soap dish fits my new HomeGoods soap dispenser like a glove!
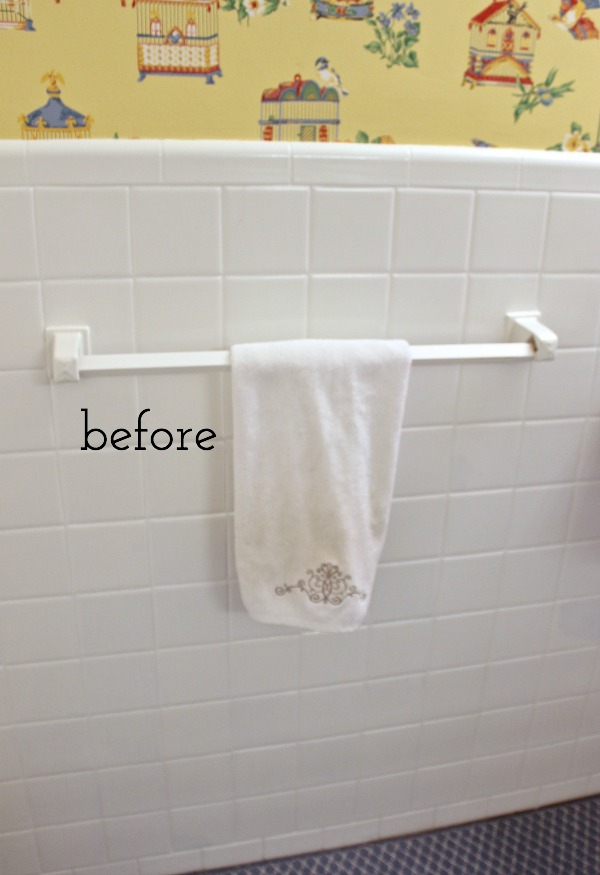
We also had a junky plastic towel bar that I would have loved to replace but removing the towel bar ends would have damaged the tile beneath it:
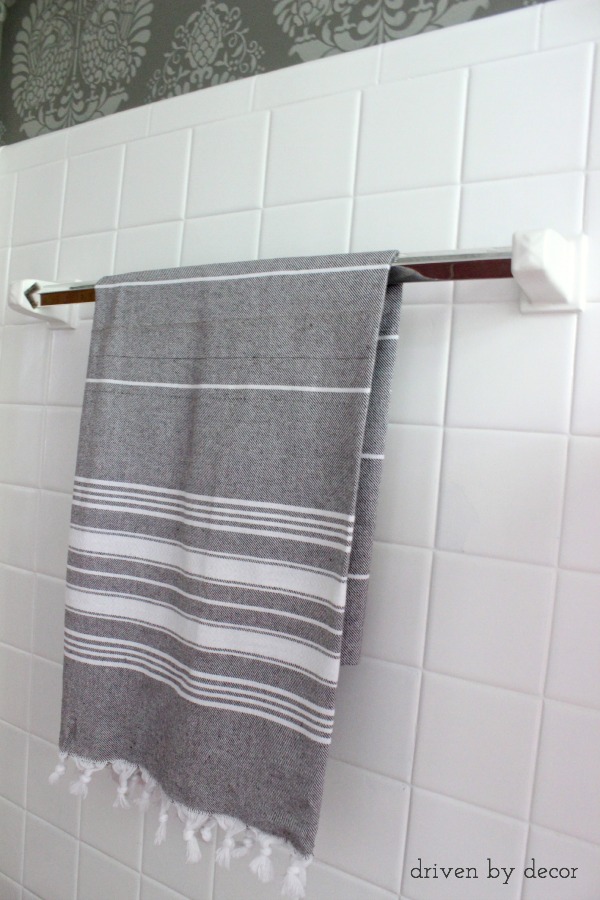
So instead I left the towel bar ends as-is and replaced the bar with a new chrome one. If you’ve got those annoying fixed ceramic ends on your towel bar too, I explain how to replace a towel bar with fixed ends {here}. Then I prettied it up with a gray and white striped Turkish towel:
Add Storage With a Medicine Cabinet Mirror
This bathroom is the one that my husband uses to shower and get ready in so some storage for all of his bathroom junk was priority #1. Originally we were planning to find a narrow furniture piece to put in the corner of the bathroom to add some storage. But since we also needed to switch out the plain builder’s grade mirror…
we decided to kill two birds with one stone and add a mirrored medicine cabinet instead of a plain mirror (one of my favorite bathroom mirror ideas!). The medicine cabinet has plenty of room to store all of his crapola that previously cluttered up the top of the sink (pic is from before we added the shelves to it):
No more heart palpitations when an unexpected guest to our home asks to use the bathroom!
Want to save this post?
DIY Your Own Art
The wall space above the toilet got a little makeover too:
I bought two Target frames and then simply added an agate slice to eat one to create my own art:
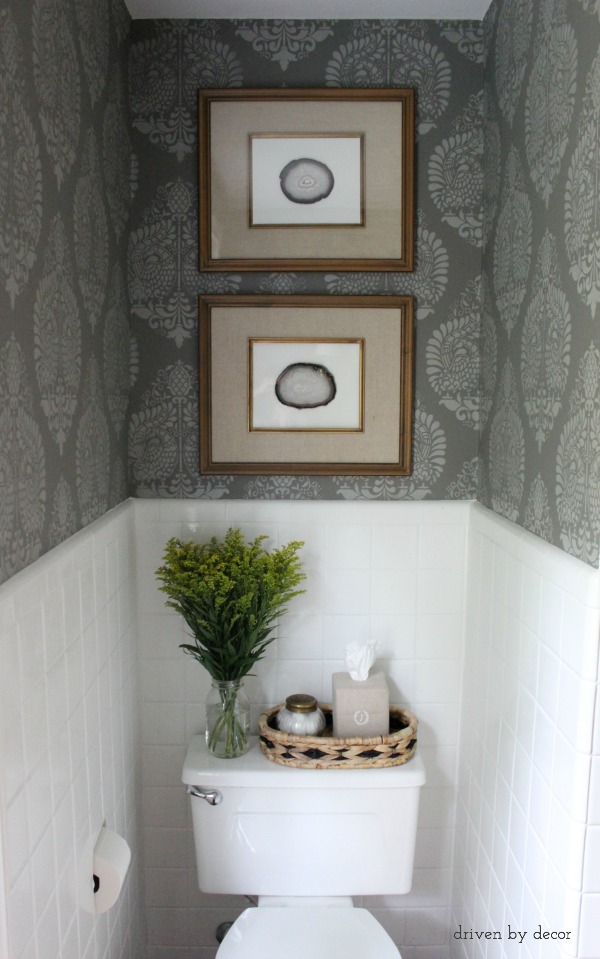
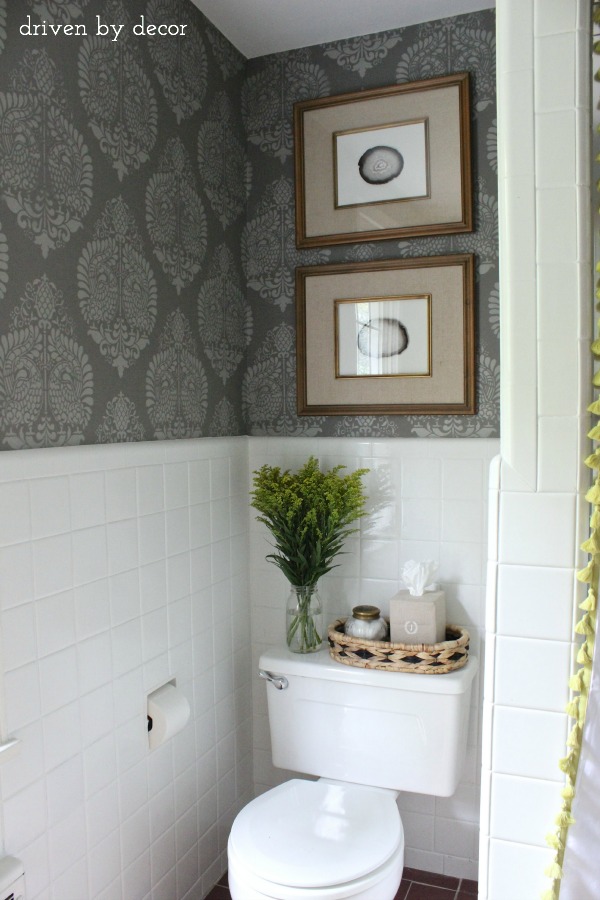
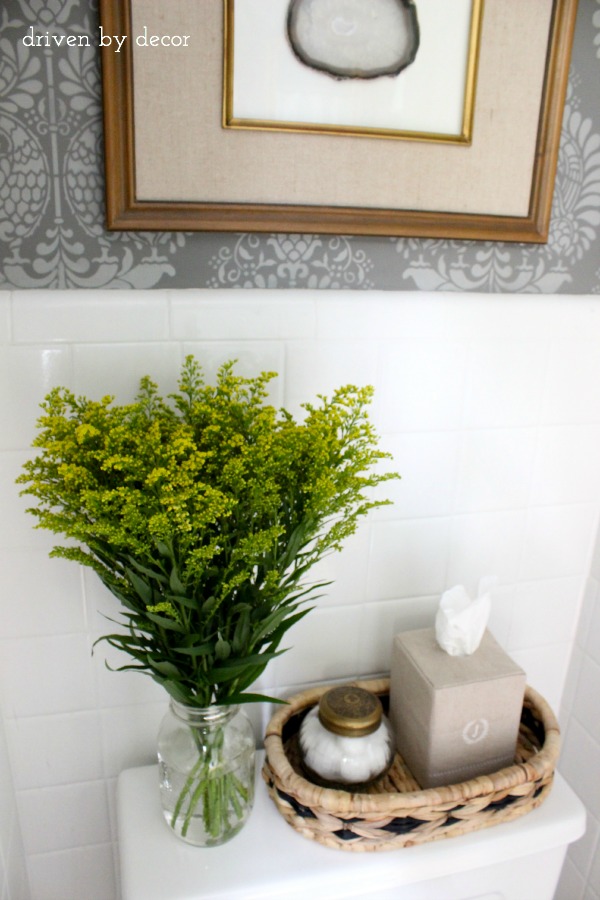
The top of the toilet tank even got a little bit of love:
Freshen Up The Look of Your Shower With a New Curtain
And remember when I was debating between three different shower curtains? Did you guess that this was the one that I would end up with?
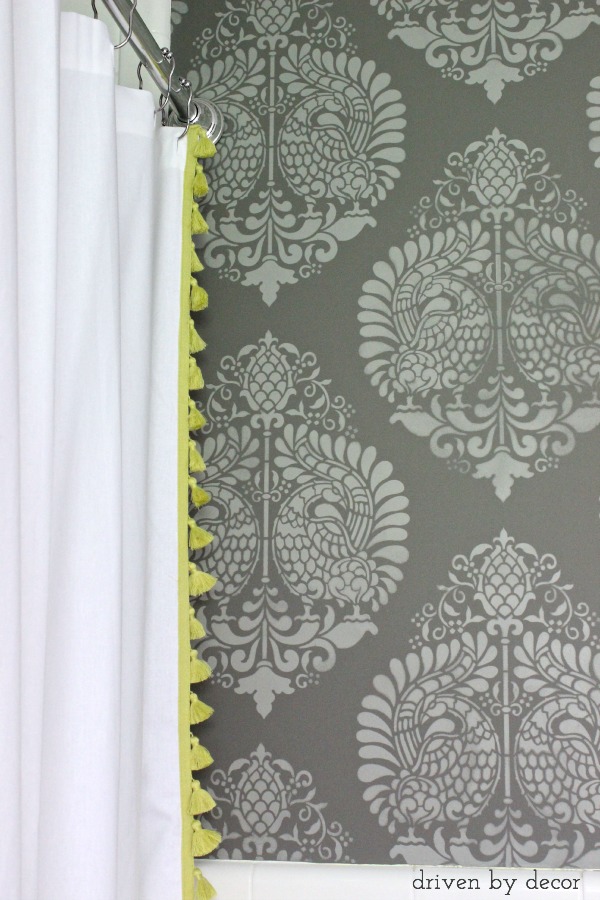
Adding a shower curtain in front of my ugly mirrored shower doors not only made the space so much prettier but it was more budget friendly than removing the mirrored doors too!
Paint Your Tile Floors
And what about our carpeted bathroom floors? Underneath the carpet I found tile but… it was REALLY ugly red tile:

Replacing it would have cost big bucks so a few weeks after my One Room Challenge reveal, I painted it! It made a HUGE difference:
Get all the details of how I painted our bathroom’s ceramic tile floors {here}. And as an update, yes the painted tile held up REALLY well for years after!
Here’s one last look at the complete “before” and “after”:
Have any questions about our new space? I’ve included a full source list for everything in our bathroom below. While this was a very budget friendly bathroom remodel, a few years later we went all out on a complete master bathroom remodel. I share ten of my best master bathroom remodel ideas if you want to check it out!


Wall Colors & Stencil: Annapakshi Indian Damask Wall Stencil – I used the 11.25″ x 15.5″ furniture stencil (c/o Royal Design Studio) | Basecoat paint: Benjamin Moore Aura Bath & Spa (Matte) in Chelsea Gray | Stencil paint: Platinum Gray (Benjamin Moore color but mixed in Behr Premium Plus Ultra in Satin)
Medicine Cabinet: No longer available but if you’re looking for a mirror in a similar design, check out {this arched wood mirror} | Pedestal Sink: Kohler Memoirs sink found {here} | Sconces: Crystal ball sconces
Shower Curtain: Tassel Shower Curtain in Citrine | {this shower curtain} is similar and comes in more color options | Soap dispenser, woven basket on toilet, agate slices: HomeGoods | Gold & glass jar in basket: No longer available | Plant: Ornamental Oregano in Linen Wrapped Pot (Terrain) | Frames: Target Threshold (no longer available) but {these linen mat frames} are a pretty alternative | Tissue Box Cover: Linen Hemstich Tissue Box Cover


Aimee says
This is gorgeous! We are about to move into a new house with the same (old) lights that you had in your bathroom. Sort of the dressing room at the theatre lights and I can’t wait to get rid of them! Did you do that bit yourself or hire an electrician? Did you need to replace drywall? Totally impressed with this blog!
Kris @ Driven by Decor says
Aimee,
I’m so sorry I’m so late replying to your question – it got lost in my sea of emails 🙂 We ended up hiring an electrician to run the new wire for the lights because my husband and I have no skills whatsoever in the electrical department. It wasn’t all that much costwise though – it took him about an hour. We did have to do some patching at the spot of the old lights. I simply bought a mesh patch from Home Depot and did a few coats of spackling and sanding – you’d never know that there was a hole there. Hope that helps – good luck with your project!
laura@top this top that says
Love how your bathroom turned out. gorgeous. i wanted to know what size stencil pattern you used. i love this pattern and was thinking about getting it. Thanks!
Kris @ Driven by Decor says
Hi Laura,
So sorry for the super late reply but the stencil in our bathroom is Royal Design Studio’s Annapakshi Indian Damask Wall Stencil in small. Thanks for stopping by the blog!
Bethany @ Dwellings by DeVore says
Wow, what a transformation! Love the gray and that stenciled wall, great job!
Kris @ Driven by Decor says
Thanks so much Bethany!
Nancy says
Did you do the stencil yourself? It’s totally amazing! However did you get the stencil to wrap around the wall (over the toilet) so beautifully? And the medicine cabinet mirror is stunning! I love it! Makes me want to paint our bathroom all over again!
Nancy
Kris @ Driven by Decor says
Hi Nancy,
Yes I stenciled every last bit of that wall myself. The hardest part was where the stencil met the ceiling and the wall tile – I ended up cutting the stencil so that I could get those parts done much more easily. For the corners, I just jammed it into the corner as much as I could and hoped for the best – some of my corners look much better than others! Thanks so much for your sweet words about my bathroom!
Patty@That's So Pretty says
Oh my that is very pretty!
Kris @ Driven by Decor says
Thanks so much Patty!
kate@willowinteriors says
First, sorry I’m just now getting over here! I hit publish on my room and ran out the door on vacation. Secondly…Kris!!!! Perfection!!! Who cares about the damn floor, there is so much other beautiful stuff to look at…and you were right to not rush a job like that for the challenge. Okay on to the pretties…the medicine cabinet looks great (i know that was a fight) and I love how you then tie the warm brown over to the toilet area with those frames (love!!) and accessories. Love the shower curtain and sconces, but the stencil is stunning! I may have to try one in my small powder room…BTW, the white tile looks gorgeous now, even the plant holder. 🙂 Such a great job Kris!! This was so fun to watch!!
Kris @ Driven by Decor says
Please, no sorries needed! I did a quick look at a bunch of ORC rooms when they are done and still haven’t gone back to look at them in more detail and comment (including yours I think!). Thanks so so much for all of the sweet comments – you’re one of my fave gals to suffer through the ORC with 🙂
Tone on Tone Loi Thai says
Epic transformation!!!! Love, love the stenciled walls. Very beautiful work, Kris. xo
Kris @ Driven by Decor says
I really appreciate that Loi – thank you!!
VEL says
This room turned out so perfect Kris!!!!!! I love all the details , it really matters you know, and can’t wait to see how you change up the floors too! Great job as always dear!
Kris @ Driven by Decor says
Thanks so much Vel – now that the timeline of the ORC is done I’ve been a terrible procrastinator about jumping in on those floors. Maybe this week…
Heather says
What a stunning reveal! It gives me hope for a heinous powder room that I have. This is very similar to what I want to do with it. I love what you have done and will use it a inspiration. Thank you!
Kris @ Driven by Decor says
Thanks Heather – this powder room is right in the heart of our home so it makes me happy to have a newly refreshed space! Good luck with yours!
[email protected] says
This is so stunning I’m speechless. Gorgeous!!!!!! I can’t believe you got all that stenciling done, never mind everything else. And the agate framed is genius in those colors and frames, to say nothing of how much I love that you went with wood for the mirror. So.love,.this.
Kris @ Driven by Decor says
How sweet of you – thanks so much!
Martina says
GORGEOUS makeover!! Love that stencil I thought it was wallpaper!
Kris @ Driven by Decor says
Thanks Martina!
Suzan says
Gorgeous makeover – that wallpaper is just spectacular – what a statement it makes – so sophisticated!
Love!
XOXO
Kris @ Driven by Decor says
Thanks so much Suzan – it’s actually a stencil!
Kim Macumber says
Kris … LOVE LOVE LOVE! It is so fantastic … and by the way … the little built in toothbrush holder and soap holder … Phillipe Starck used something similar to CREATE fun in his bathroom at Ma Cocotte in Paris at the Marché du Puces … here is a link to my instagram photo … I think you’ll feel very forward now! http://instagram.com/p/tgtdwntQQo/?modal=true … I hope that links correctly!
Kris @ Driven by Decor says
Well who knew that my antiquated old wall mount holders are back in vogue 🙂 Thanks for sharing the IG link – love that it was incorporated into such a recent, trendy design!
Katie says
love this! especially loving on how that curtain plays against the walls. gorgeous transformation!
Kris @ Driven by Decor says
Thanks Katie – I wasn’t sure if the tassel curtain was going to be too juvenile but I ended up loving it!
tara // sproutzdesign says
i knew this was going to be awesome, and i was 100% correct. so glad you picked that shower curtain, it was definitely the right call. and let’s talk medicine cabinets….it has mirrors on the inside and the inside of the door?! spectacular!! really really great job…can’t wait to see those floors eventually!
Kris @ Driven by Decor says
Thanks so much Tara – I wasn’t expecting the mirrors on the inside of the cabinet but it’s a great feature!
Elizabeth @ The Little Black Door says
It turned out beautifully. Well done my friend!! What a sophisticated space!!
Kris @ Driven by Decor says
Thanks Elizabeth!!