Looking for family room ideas? I’m sharing ten ideas to steal from our One Room Challenge family room makeover!
It’s One Room Challenge reveal day and you guys, I’m seriously limping across the 6-week finish line of my room makeover. I have more paint brushes and rollers in my refrigerator than food, most of my house is approaching Hoarders status, and my whole family is suffering from a serious shortage of clean clothes. But my family room is D. O. N. E. and I’m dying to tour you guys around! (post includes sponsored and affiliate links – full disclosure statement available {here}).
1. Paint Your Walls For a Fresh New Look!
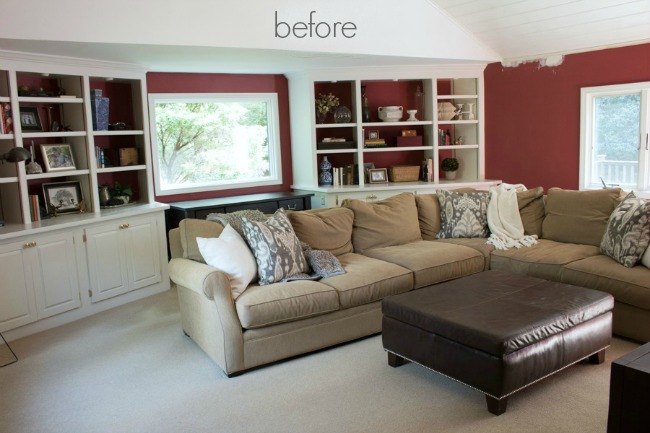
Paint can completely transform a room – it was a huge part of my family room makeover! This is what our we-hadn’t-touched-it-since-moving-in-three-years-ago space looked like before:
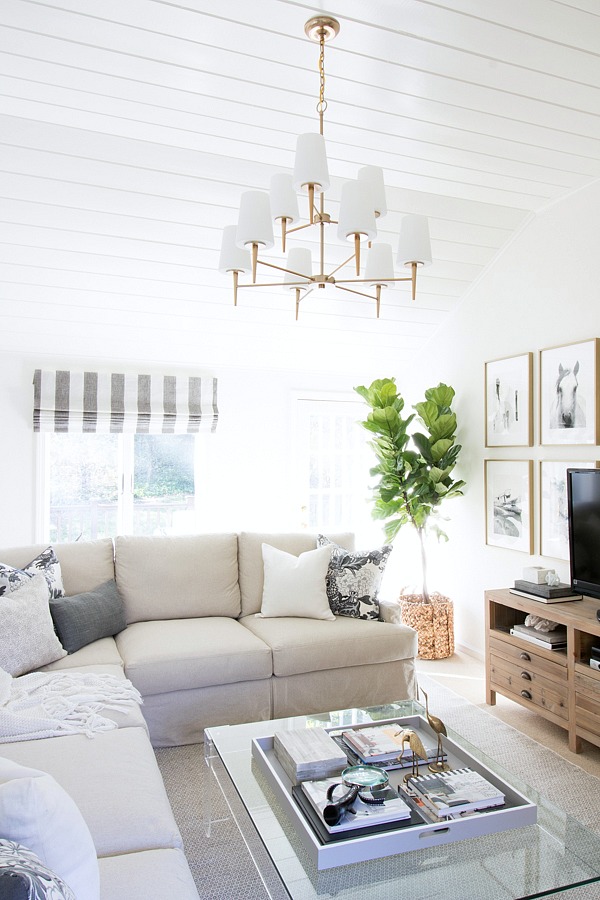
And here’s that same space today after painting all the walls white:
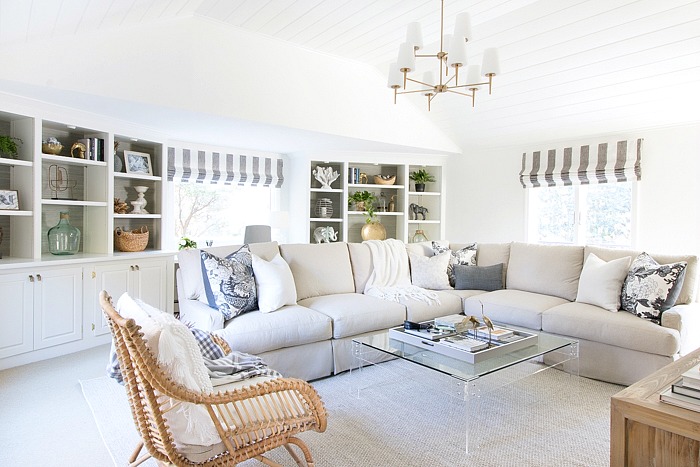
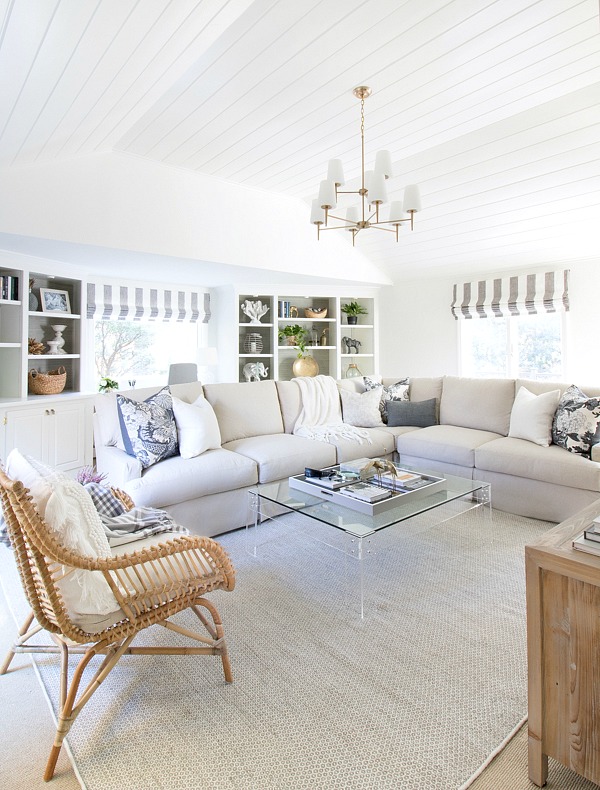
Room Sources: Chandelier (satin bronze) | Sectional | Patterned gray pillow covers | Black & white dot pillow covers | Rug | Acrylic coffee table (similar) | Coffee table tray | Rattan chair | Tasseled pillow on chair
Our family room seriously looks and feels twice as big as it did when it was red! Remember when I was trying out these three white paint colors?
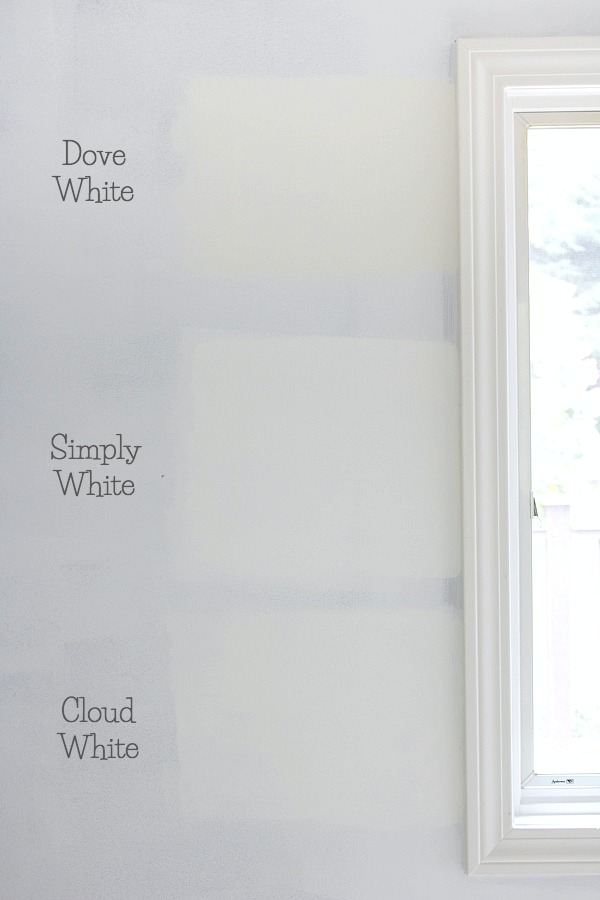
My original plan was to paint it with Benjamin Moore Simply White but after throwing that color up on the wall in some sample spots, it was a little too bright white for my space and even had a bit of a green cast to it due to reflecting the greenery outside. Then I figured I’d go with my old stand-by of Benjamin Moore White Dove but it had more of a yellow undertone than I wanted in this space.
So I hit the paint store to find something in between the two and landed on Benjamin Moore Cloud White. It ended up being the Goldilocks of warm whites – not too bright of a white and not too yellowy. Painting both the walls and ceiling the same white paint color helped disguise this room’s funky ceiling angles and draw your eye up. Check out my post on the best white paint colors for more details on all three of these whites and several other favorites.
Want to paint your room a color other than white? Check out my posts on the best greige paint colors and best blue paint colors for some tried-and-true favorites. You also might find my post on how to choose paint colors to be helpful!
2. Add Interest With a Large Area Rug
Our family room has low-pile carpet in a dull beige color that made it feel drab. Layering {this honeycomb area rug}) on top of it was a game-changer!
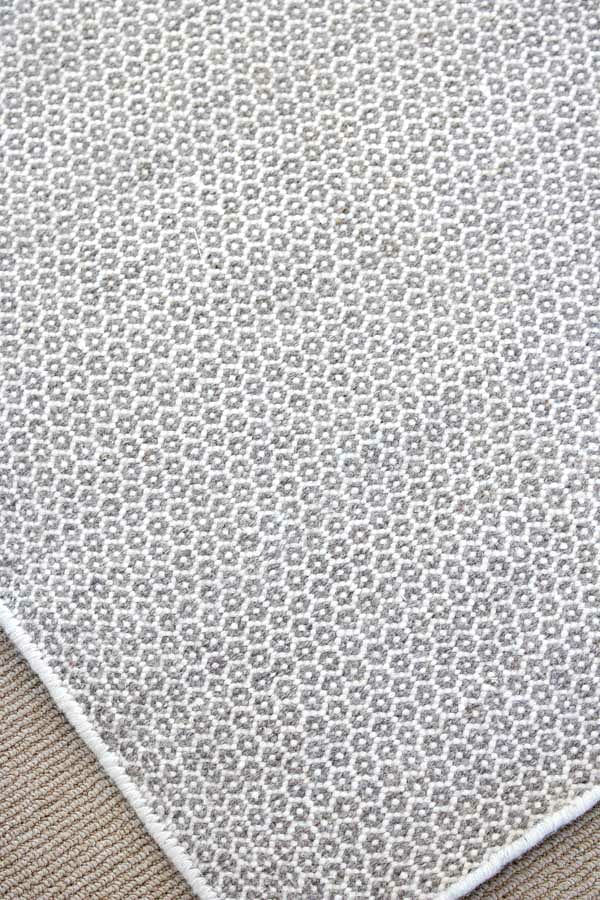
It lighted up the room and added some interesting pattern too! Be sure you don’t skimp on the size of your family room area rug. At minimum, the front feet of your sofa/chairs should sit on the rug. I went with a 10 x 14 size for my space.
3. Bring In Pattern & Color With Pillows
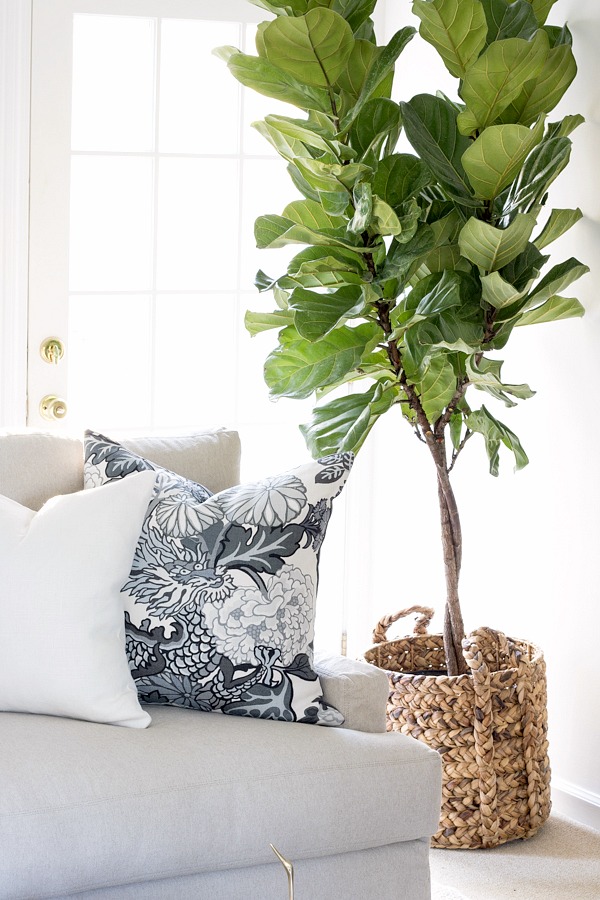
Another major player in my room is our new L-shaped Lee Industries slipcovered sectional (I went with {this model}). I couldn’t be happier with it (it’s so, so plush and comfy!). I chose a neutral fabric for our sectional which allows me to use any colors and patterns I want for pillow covers, changing them up seasonally.
On each end of our sectional, I have a white linen pillow paired with {this dragon patterned pillow}:
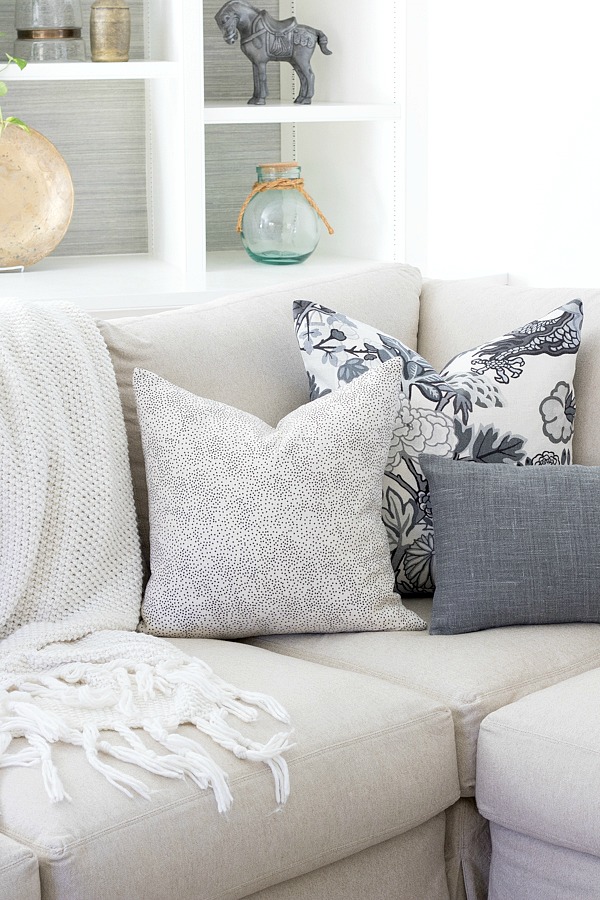
And in the corner of the sectional, I added a trio of pillows, including {this 23″ square dragon patterned pillow}, {this beautiful cream & black dotted pillow}, and a gray linen lumbar pillow:
Check out my post on the best sectional sofas for more details on my sectional and other favorite sectional choices.
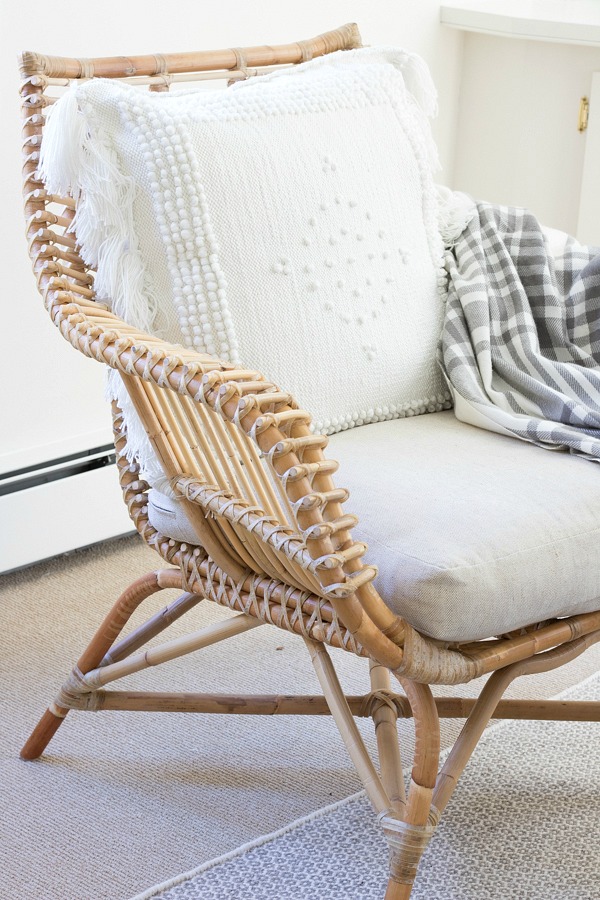
I also added {this rattan accent chair } with {this textured Montecito pillow} on the back. If you’ve ever thought that rattan can’t be comfy, you have to sit in this chair because it even convinced my skeptic husband otherwise! I love the textural beauty that it adds to the room!
4. Add Life with Greenery
In the corner of our family room I added a large fiddle leaf fig tree that added so much life to the space! Unfortunately I don’t have much of a green thumb and it only lasted a few months. I ended up replacing it with {this faux fiddle leaf fig tree} and felt that it still added some life to the space even though it was faux:
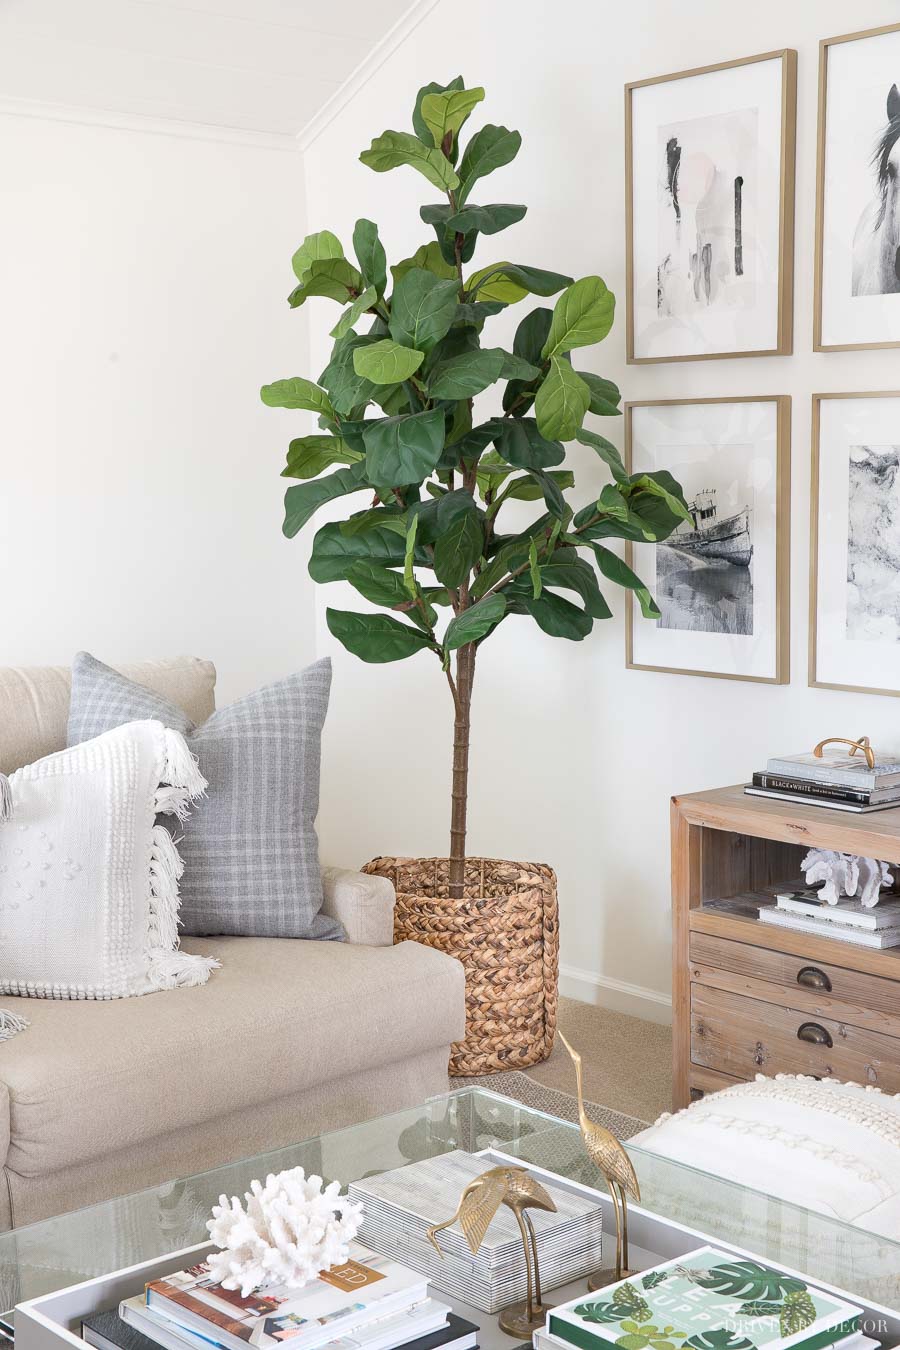
As a bonus, this one actually stayed green 🙂
If you have an empty corner in your family room, see my post on living room corner ideas for other tips for decorating them.
5. Corral Coffee Table Items With a Tray
Since there are a lot of large furniture pieces in this room, I wanted a coffee table that didn’t have much visual weight. I’d been obsessing over this beautiful acrylic coffee for months and was thrilled to find that it’s even more beautiful in person than I expected (my exact coffee table is no longer available but you can find similar options in my post on acrylic coffee tables).
Instead of placing my coffee table decor pieces directly on my acrylic coffee table, I corralled them with a large 28″ wood tray similar to {this tray}. Using a tray keeps your coffee table looking neat and organized and also makes it easy to clear your coffee table off if you want to use it for a puzzle or game.
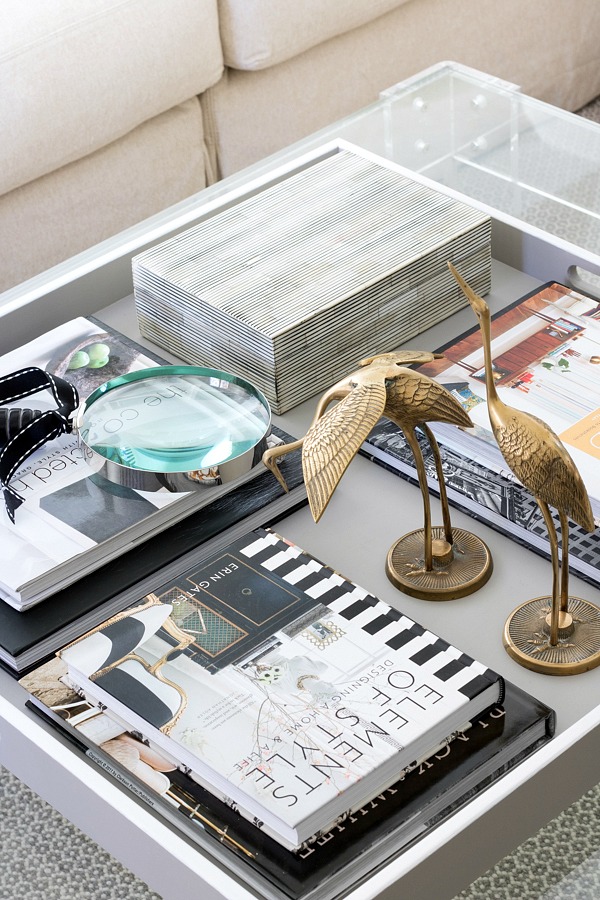
The decor on my coffee table includes several books, {this black & white striped storage box that holds remotes, and a pair of {these brass cranes}. See my post on coffee table decor ideas if you need inspiration for decorating your own coffee table.
6. Layer Your Lighting
All of the lighting in our family room used to be utilitarian lighting with can lights in our bookcases and track lighting on beams overhead:

I wanted to upgrade the ceiling lighting in this space so we removed the falling apart ceiling beams and track lighting and had our electrician wire the room for an overhead fixture. I chose {this gorgeous two-tiered chandelier} that added so much style to this space:
I also added a lamp to our new desk (more on that in a minute!) too so that we have different layers of lighting throughout the space. Family rooms are a great spot to also add a floor lamp for reading if you have the space.
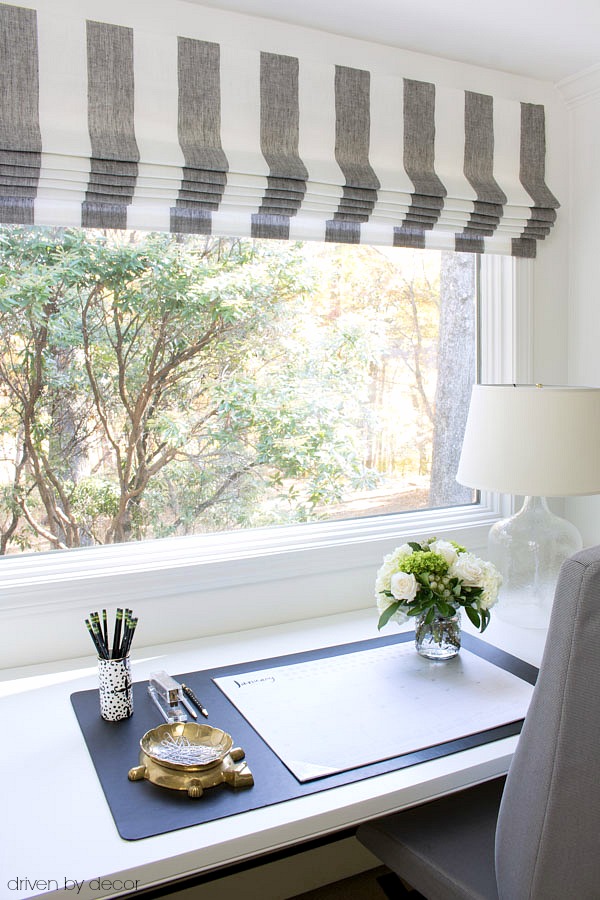
7. Add Softness with Shades or Curtains
Other additions to the room are new Roman shade window treatments from The Shade Store – I chose a soft stripe linen fabric and absolutely love the finished, tailored look that the shades add to our room. And since this is sleepover central, my teenage daughters and their friends will love that they can block the morning sun from streaming in! There are more details about my Roman shades in {this post}.
8. Decorate Your TV Wall
Ready to move on and check out the wall with the TV (did you catch the sneak peek of it two pics back?)? This is what that wall looked like before:

and this is the same wall now:
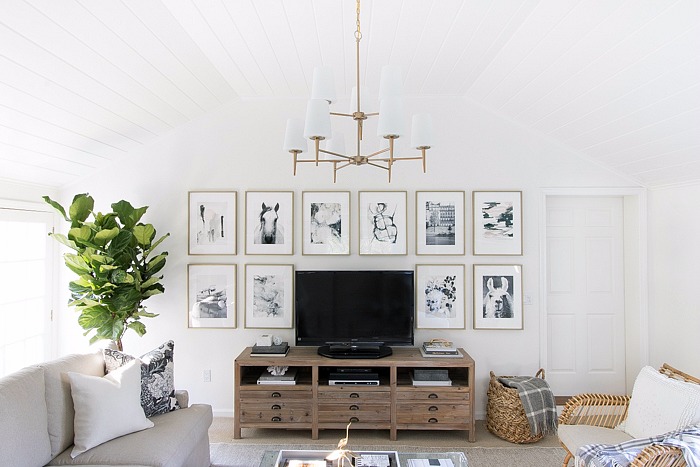
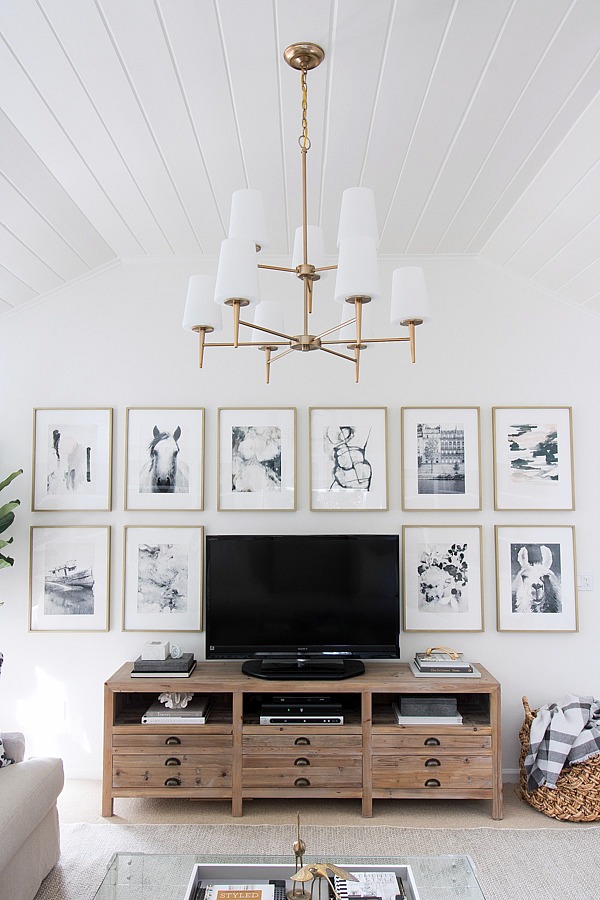
Sources: TV console (similar) | Chandelier (satin bronze)
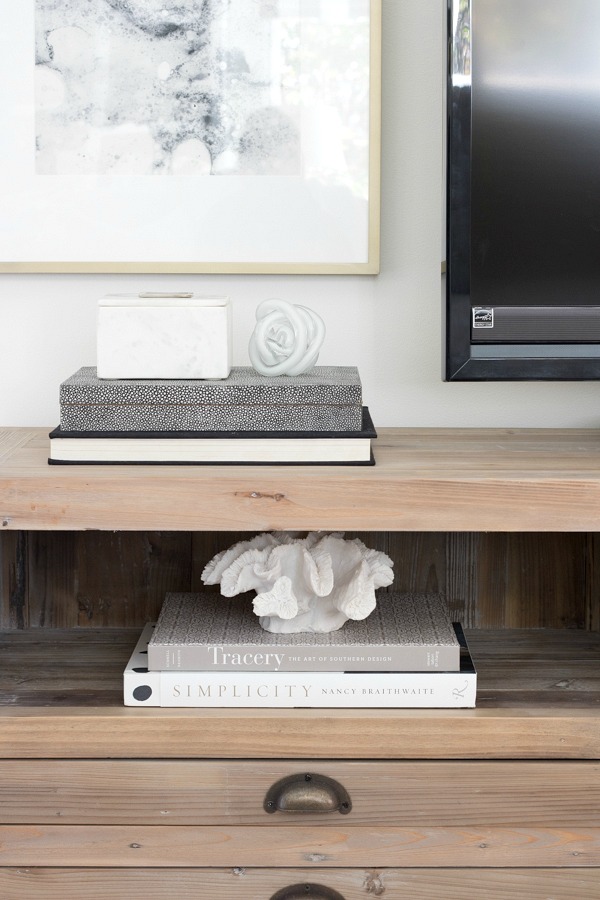
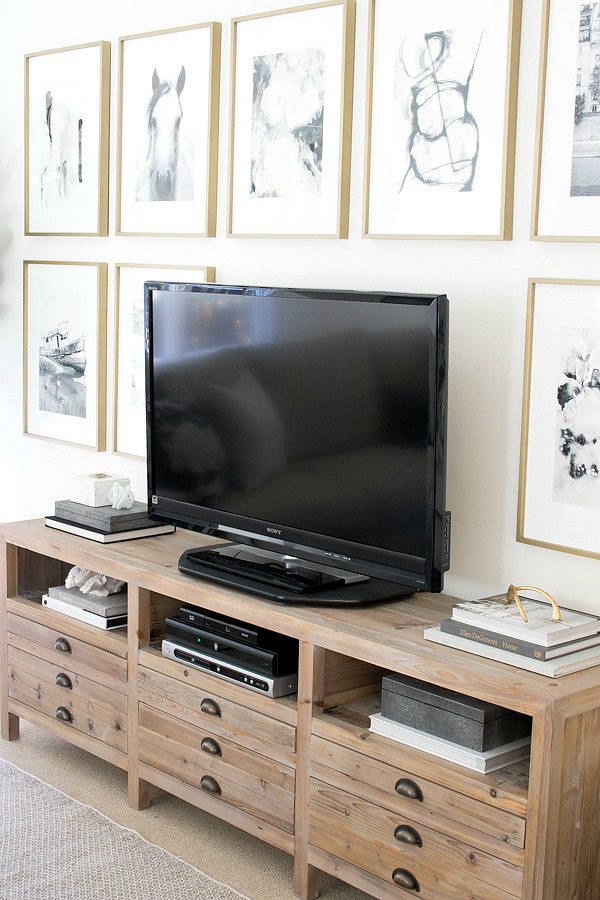
First off, I changed out our media console for this beauty that’s a much better size for our space (update: unfortunately my exact media console no longer available but {this console} is super similar). Pictures simply don’t do this console justice – the finish on it is just gorgeous and I love that it has both drawers and open cubbies:
Surrounding the TV is framed & matted artwork from Minted arranged in a grid pattern. How did I go about doing it? First there was a lot of measuring and calculating to figure out what size frames would work best for giving me a gap in the bottom row large enough for the TV along with equal spacing between each print. I ended up choosing 18″ x 24″ prints that were matted and framed by Minted to a final finished size of 18.5″ x 24.5″.
For the artwork I decided to stick with black and white prints (a mix of abstracts, photographs, and sketches) and identical frames and mats so they felt cohesive and didn’t distract from the TV too much.
After my framed art arrived, I used a laser level to tape out the location for each print and then got them all hung (you can see this process in a little more detail {here}). And… that’s it! I am so impressed with the quality of the matting and framing of my Minted pieces – the matte brass frames are gorgeous!
Art Sources (from top left): Son (abstract) by Lori Wemple | Sand Spirit (horse print) by Leslie Le Coq | Mesmerize by Melanie Severin | Marble Two by Melissa Selmin | Brainchild (abstract) by Misty Hughes | Morning Walk on the Seine by Sharon Rowan | Stormy Sunrise by Melanie Severin | Reflection (boat print) by Neeta Sawhney (no longer available) | Flora in B+W by Very Marta (no longer available) | Llama Love by Jocelyn Eden (no longer available)
Want to see other options for how to arrange art around your TV? Check out my post on gallery wall layouts!
9. Add a Workspace
On the wall opposite the TV, we were lucky enough to have two large built-in bookcases. However, there was this awkward space in between them that we didn’t have time to fix so we just stuck a mismatched desk there:
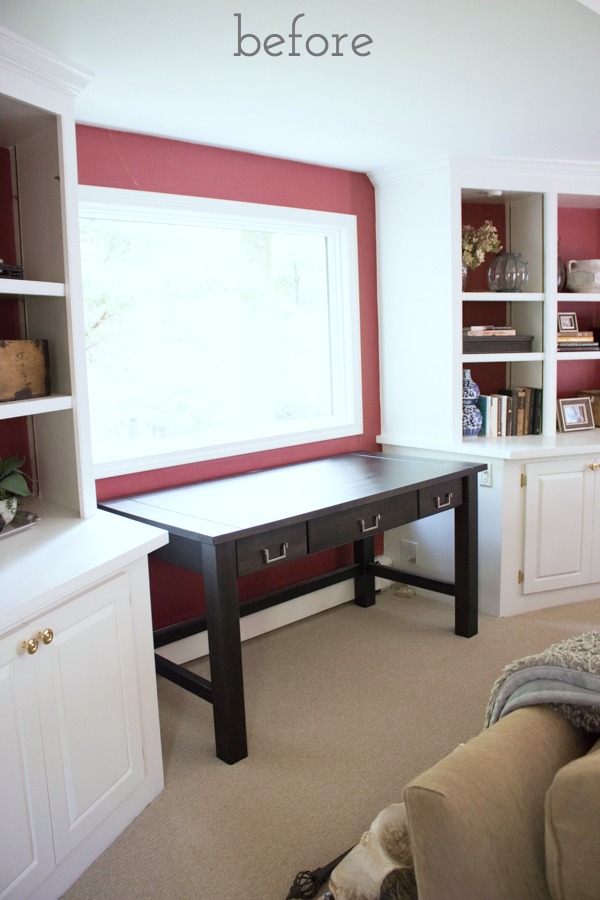
We wanted to keep a desk there since my husband works from home some days but wanted it to look like part of the bookcase so I had my contractor cut and install a simple desktop that fits the space exactly. I think my husband and I will both love having this beautiful wooded view while working here!
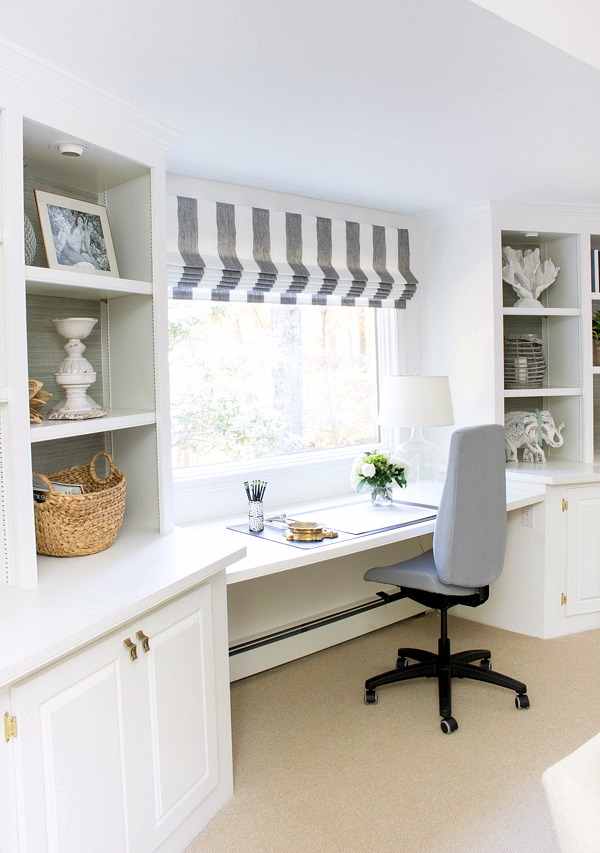
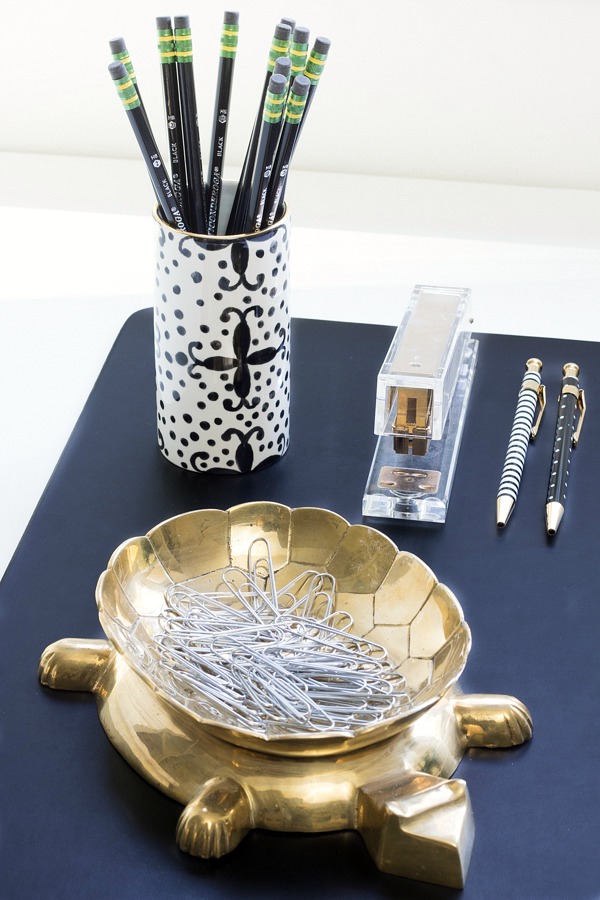
On the desk are two of my favorite accessories in the space including a pencil cup hand painted by Jill Rosenwald – she has so many beautiful pieces and is such a talent – thank you Jill! It’s sitting beside my cute gold turtle dish which is one of my fun Chairish finds.
10. Wallpaper The Back of Your Bookcases
The bookcases underwent a little transformation too:
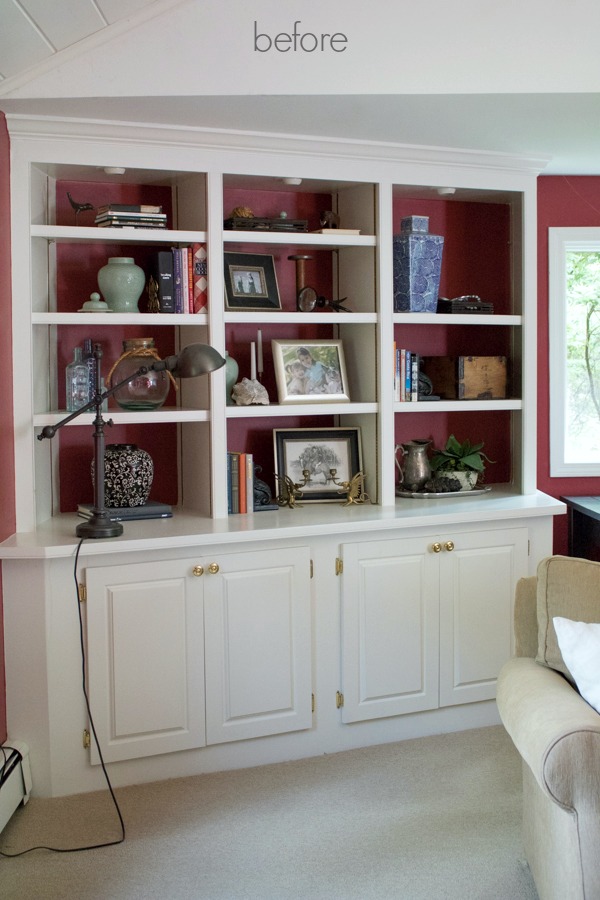
I replaced the knobs with brass finger pulls, painted the gold shelf brackets on the inside of the bookcases so they’d blend in, and wallpapered the back of the shelves with {this charcoal/natural combination grasscloth}:
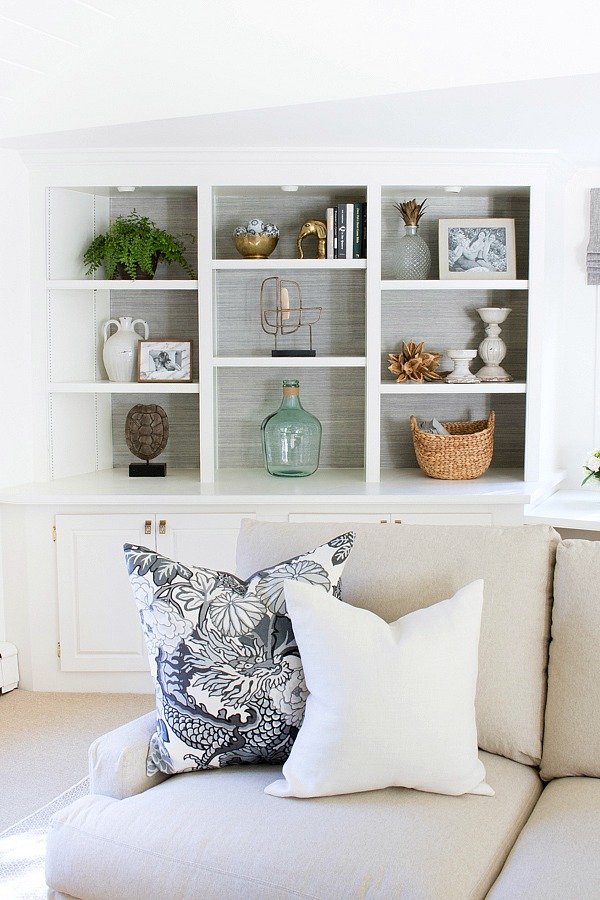
Thank you so much to Denise at Ring’s End Wilton for helping me get it ordered last minute! This round of wallpapering was more successful than when I attempted to put up grasscloth in my daughter’s room, but I was surprised by how long it took me to do.
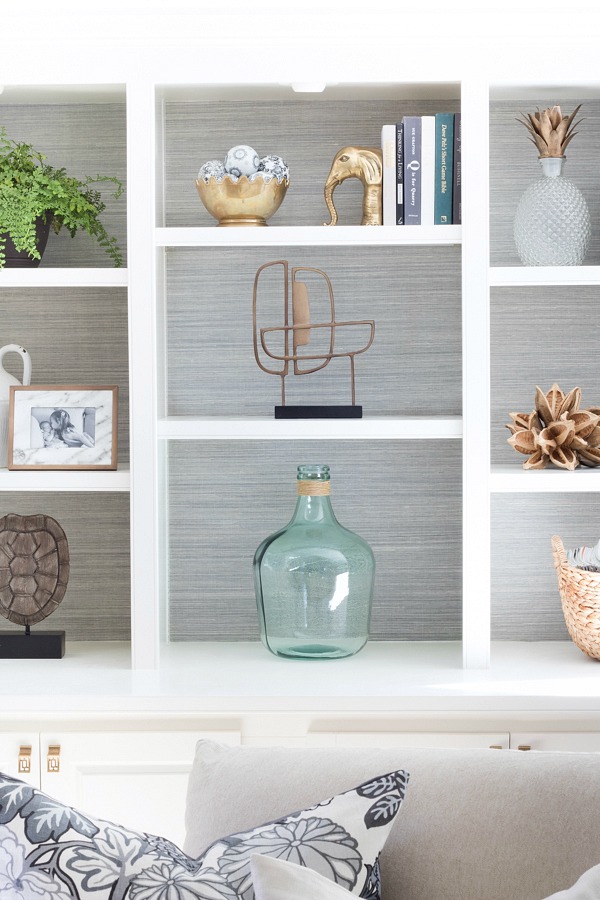
My shelves are filled with a combination of finds from thrift shops, HomeGoods, my favorite online accessory shops, and my own stash. You can find the links to most things in the source list below!
That wraps up my reveal! I know there’s nothing crazy fancy about it, but I also know that it’s a comfy, warm, relaxing space that our family will enjoy for years and I’m thrilled to have it. I so appreciate you all following along over the course of this 6-week challenge! If you’d like to continue to follow future projects on Driven by Decor, you can subscribe by email {here}.
XOXO,


Emily says
Beautiful! Where is the fiddle leaf fig tree from? I have a brown thumb but have been looking for a realistic faux version for our living room.
Kris Jarrett says
It’s actually a real one! I recently found a good faux at HomeGoods and also have one on my Shop page!
Kenny says
Wow, this really is so gorgeous! Great job, Kris!
Kris Jarrett says
Thank you!!
Laurie says
The room is stunning! I was a little saddened to click on all the different links for materials and see the prices. The total for this room is pretty high. It gave me some great ideas but the materials are out of reach.
Kris Jarrett says
Hi Laurie, there are definitely some higher end items in the room like the rug but I also mixed in a lot of low-cost options to like our IKEA desk chair, HomeGoods shelf accessories, etc.
Edina says
I jut found your site and in love with your beautiful family room. Would you please share the name of the fabric you used for your sectional? I love it so much!
Thank you very much for your help
Kris Jarrett says
Hi Edina,
Our sectional fabric is Basket Natural!
FROM THE RIGHT BANK says
A little late to the party here….. your room transformation is simply stunning! It is so airy and bright – bravo! It’s been fun to discover your blog via the ORC!
kay says
What size prints did you order from minted?
Kris Jarrett says
Kay,
I’m sorry this reply is coming so so late but the art prints are 18″ x 24″ prints that were matted and framed by Minted to a final finished size of 18.5″ x 24.5″. Hope that helps!
Susan says
Thanks for providing the Minted art print measurements but I am still confused and I am hoping you can clarify. You indicated that the art prints are 18×24 and the finished product is 1/2″ larger (both width & height). It looks like the matting would add at least 2-3″ to the width and height. Wondering if you can double-check on size of the art print versus the overall size when the matting & frame were added. I absolutely love your artwork wall and would like to borrow the idea for my space so the precise dimensions would be greatly appreciated.
Kris Jarrett says
Hi Susan – the dimensions I gave you are correct. This info from Minted might help clarify things for you (the final size is going to depend on the type of frame you choose): http://help.minted.com/articles/General/Framing . Good luck with your project!
Cori E. says
I love this room!
Can you tell me the finished size of the prints around the TV? What is the size of each print? The overall look of this is perfect for my living room.
Kris Jarrett says
Cori,
I’m so sorry that my reply is coming so late (I just realized I missed a bunch of comments on this post!) but the art prints are 18″ x 24″ prints that were matted and framed by Minted to a final finished size of 18.5″ x 24.5″. Hope that helps!
Kris
Summer says
This really is SO beautiful Kris! Amazing job!
Amanda K. says
beautiful! do you have wall-to-wall carpet? we recently bought a new home and I’m shocked by how the wall-to-wall carpet has me stumped! Great to see what you did here!
(you can see my living room design challenge here! http://www.thekriegers.org/2016/10/come-on-in-take-your-coat-off-and-stay-a-while/)
carol beck interiors says
Wow! there just are no words! I love love that you took the whole room white. The change in the desk area was brilliant, your styling of the shelves — to die, love the rug, ok, love it all. Congratulations, what a space. Oh, and the rattan chair and details you added are heaven to me.
shirley says
Just so pretty! A beautiful room!
Erin says
Your room is gorgeous!!! Just curious…did you apply the wallpaper directly to the back of the bookcases, or did you attach them to a board first?
Kris Jarrett says
Hi Erin,
I know I’m waaayyy late in responding to your comment but I applied the wallpaper directly to the back of the bookcase just like I would have if I was attaching it to the wall. I painted the back of the bookcase with a good wallpaper primer first so if I should ever decide to remove the wallpaper, it should come off easily. I think putting it on a board would work too but you’d have to make sure you have room for it behind your shelves – my shelves fit pretty snuggly so I’d have had to have all of the backs of the shelves cut down to make it work with a board.
Calling it Home says
As I sloooowly make my way through each and every room, I am just pinning and dying. I guess I missed the details about you removing the beams? What a difference! I love every single thing in this room. You have amazing style and talent. Hope the laundry doesn’t last too long. P.S. I can imagine lying on the sectional with snow falling outside and drinking hot coco.
Lisa @ferncreekcottage says
Yours is the ORC reveal I’ve been looking forward to the most and, WOW…..you have exceeded my expectations! The transformation is absolutely incredible! The space is so beautiful and peaceful and wonderfully put together. Rest up this weekend girly! Well done!!!
Laurie @ Laurie Jones Home says
Hands down one of my favorites! I’m a neutral loving girl so your beautiful space speaks to me so much! Your details to the space takes it to the next level! Congrats on such a fantastic job and I hope you and your family enjoy your lovely space!!!!
Michele M says
What a pretty, cozy room! I’ve been searching for a coffee table/ottoman. I love your acrylic table! But with our furniture arrangement, we need something to put our feet up on. Would your table work for that?
Kris Jarrett says
Hi Michele, I know I’m WAY late in responding to your comment – sorry! My husband uses it that way (puts his feet up on it) – he just throws a pillow under them and it works great!