Sharing the “before” and “after” (actually “afters” since this space got two makeovers in the time we lived in our home) of our master bedroom!
(post includes affiliate links – full disclosure statement available {here})
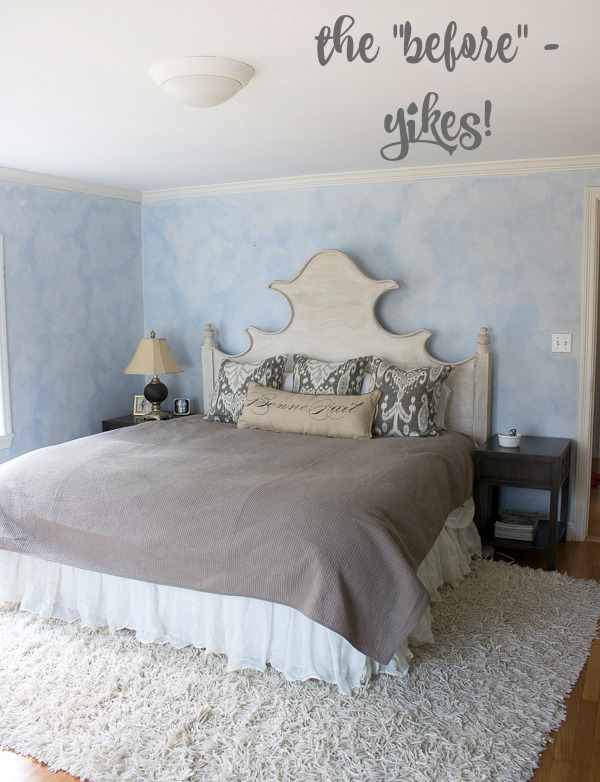
Our master bedroom was quite a sight when we first moved in – gotta love the faux finished blue walls, overhead boob light, and mishmash of furniture:
We lived with it like this for three long years while we focused on renovating other parts of our home but then I joined in the One Room Challenge and during the course of six weeks, our bedroom went through the first of its two transformations. This was the newly made-over look:
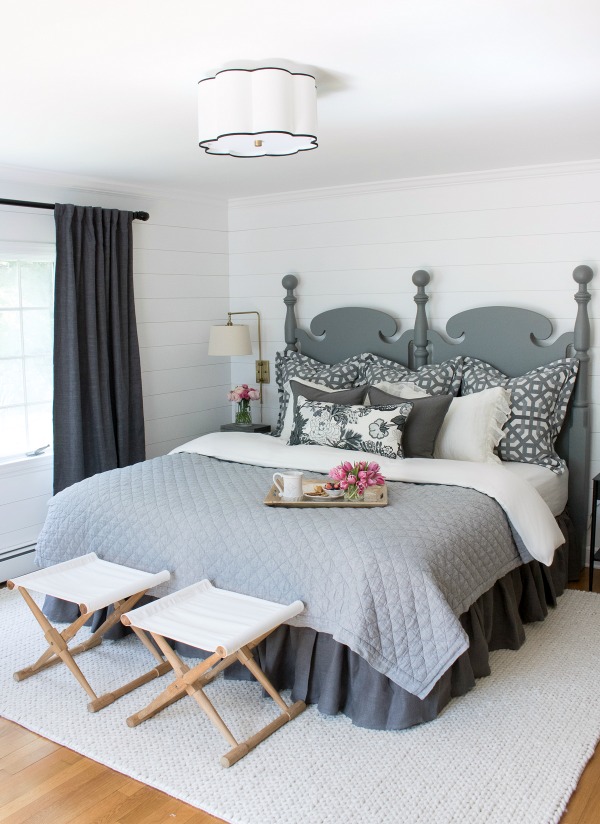
One of the most obvious changes is the walls – the whole cracked, faux finished mess was covered in faux shiplap:
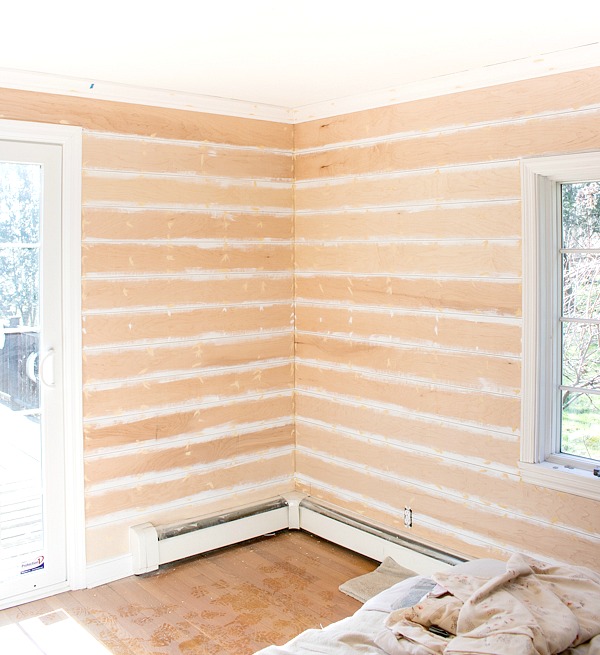
and painted in Farrow & Ball’s All White which provided the perfect backdrop for all of the gray tones I was throwing into the space. I share all of the details for DIYing your own shiplap walls in my full post on our DIY shiplap walls.
I was on a tight timeline for getting a new headboard in order to finish for my One Room Challenge reveal so I ended up snagging this cheap headboard on Craigslist, adding some extra height to it,
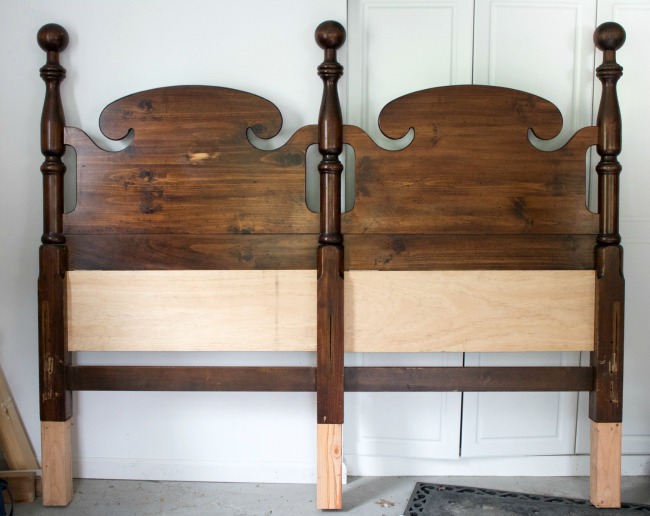
and painting it with Benjamin Moore Steel Wool. For the bedding, my jumping off point was the Schumacher fabric that’s on the front pillow, which was made for me by the lovely Linda of Pillow Time Girls. You can find it in her Etsy shop in a square size {here} but she’ll also sew up custom orders in any size that you need.
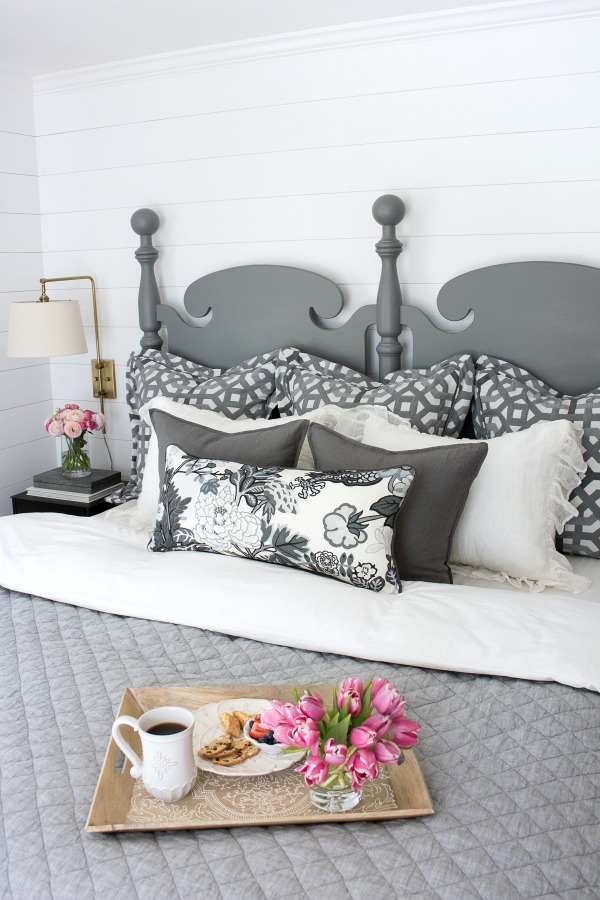
The linen shams are {these beauties} and the euro shams were made with {this gorgeous indoor/outdoor fabric}. The quilt is {this one} in Flagstone – it’s definitely stood the test of time and it washes like a dream! The drapes are {these lined blackouts} in charcoal and the linen ruffled bed skirt is from Pine Cone Hill but is no longer available.
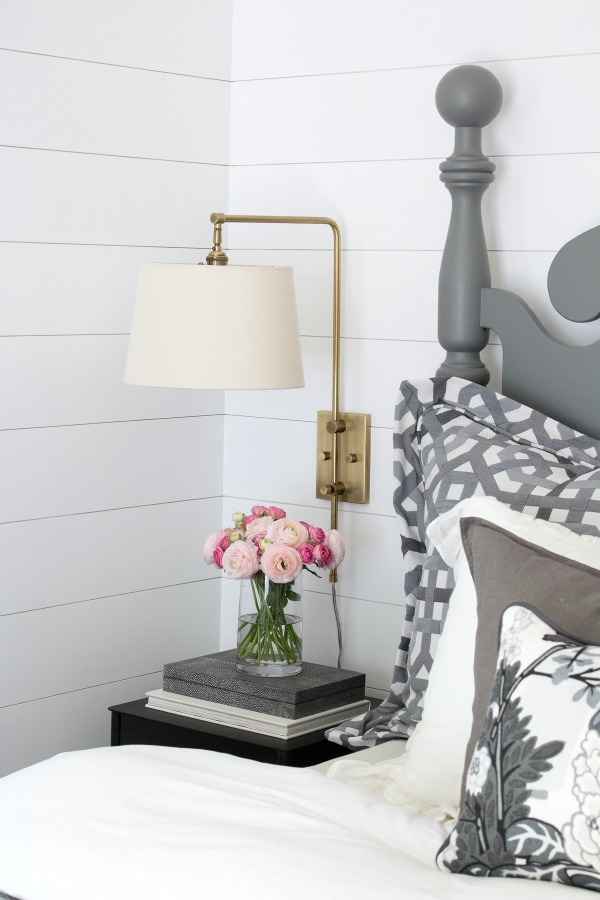
For lighting on both sides of the bed, I went with {these swing arm sconces} so that we don’t have lamps using up the little nightstand space that we have. The sconces swing towards the bed, can be raised up and down, and the shades pivot at the top – love! And speaking of nightstands, the nightstands that I had bought for the room ended up being too wide after I went with a wider than planned headboard so I ended up with {these 16″ wide gunmetal nightstands}. It’s hard to find nightstands that are as narrow as this – I’ve gathered together my 15 favorite narrow nightstands in {this post} if you’re on the hunt!
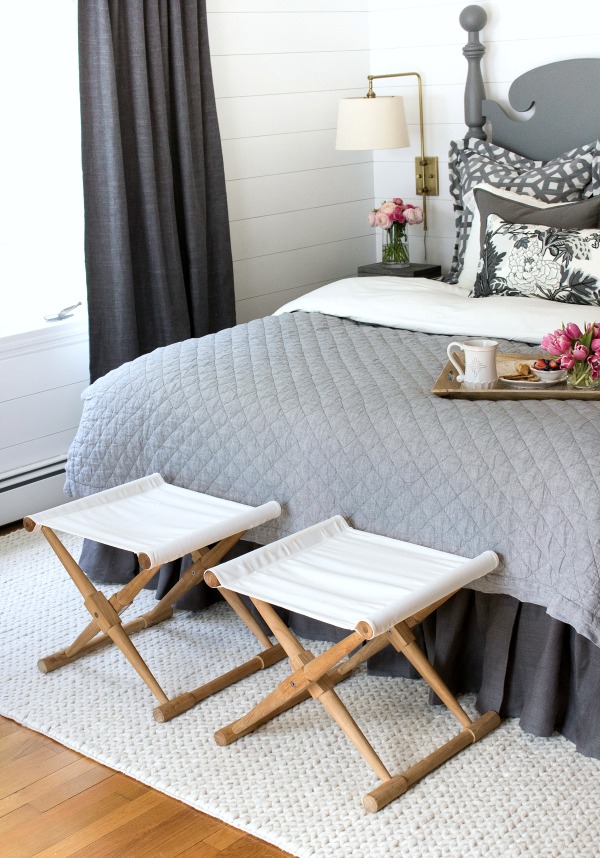
At the foot of the bed, I stuck with my original design plan and used a pair of camp stools similar to {these} that are the perfect place to stack all of our new bed pillows before crawling into bed at night. The rug is {this braided beauty} that added some great texture.
For overhead lighting, I switched the old boob light out to this scalloped beauty found {here} – love it! You can check out my other flush mount lighting favorites in {this post}.
And did you notice a few other changes to that previously ugly corner?

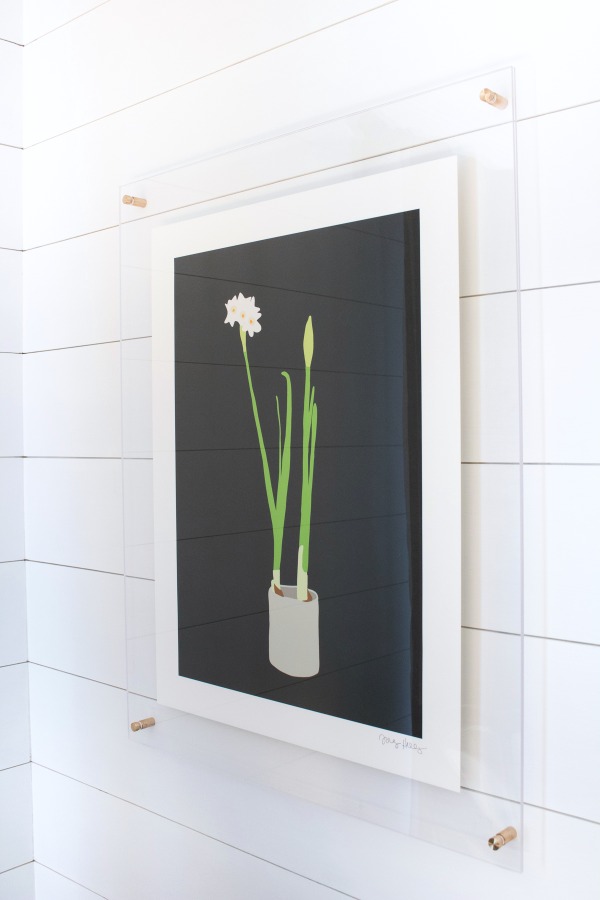
For one, my worn chair was given a new life after being painted with Velvet Finishes “Luxurious” and reupholstered with an oversized buffalo check fabric – I’m totally smitten by it! And I have new artwork – it’s {this Minted print} by Jorey Hurley framed in an amazing acrylic and brass frame found {here}:
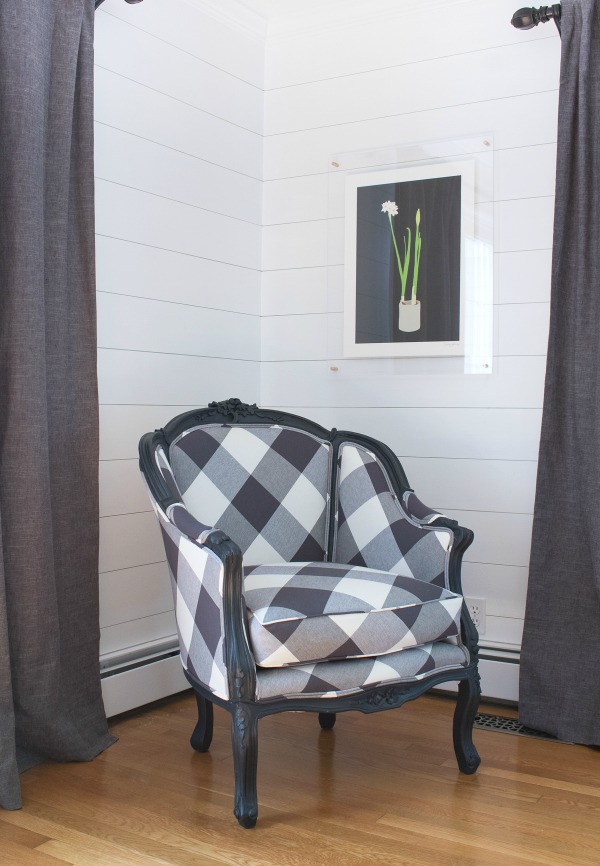
The photos don’t do this frame justice – it’s gorgeous!!
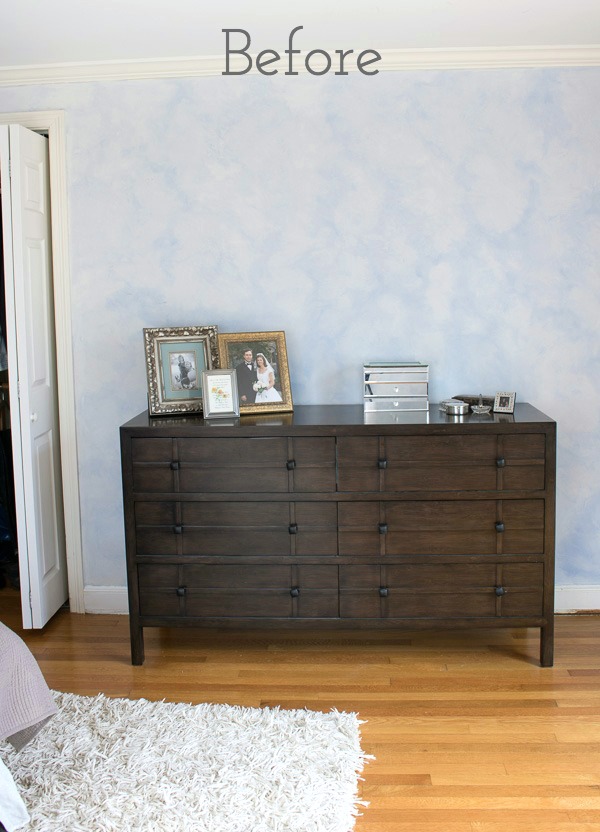
Across the way, things were also looking pretty darn sad before our makeover. We had a dark wood dresser with not a single thing on the wall above it:
I kept the dresser but gave it a whole new look with a few coats of paint and hung {this large round mirror} above it. The mirror came in a beautiful bronze finish but I used {this amazing stuff} to make a quick and easy change to a gold leaf finish that fit a little better with the design of my space:
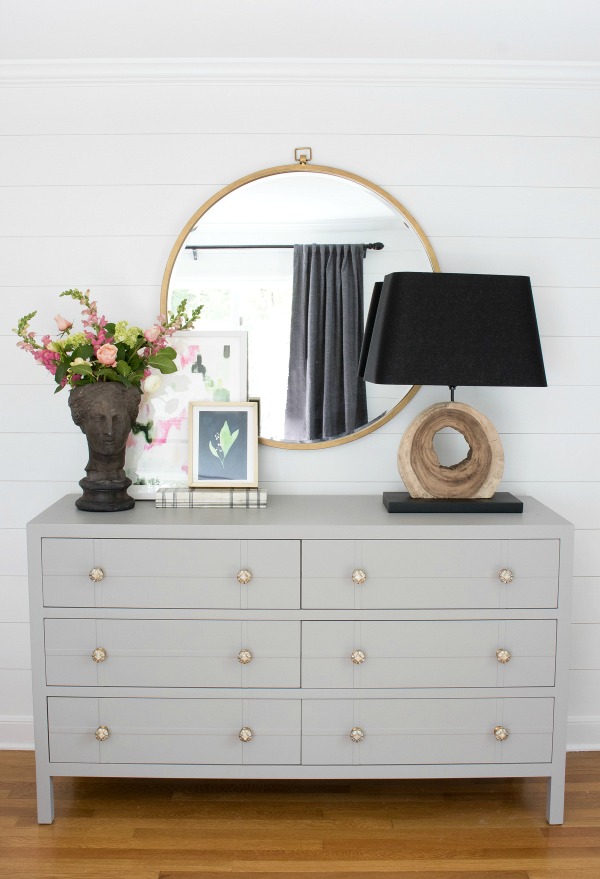
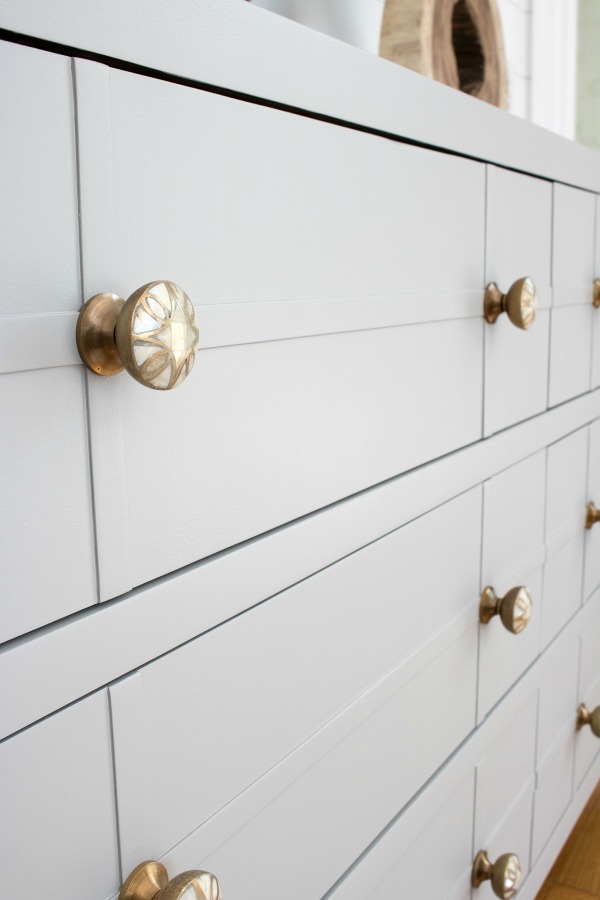
The dresser paint color is Farrow & Ball’s Worsted which is a rich greige. It’s truly a stunning color with a lot of depth. The dresser knobs are {these mother of pearl knobs} that are my never-fail favorites:
Want to save this post?
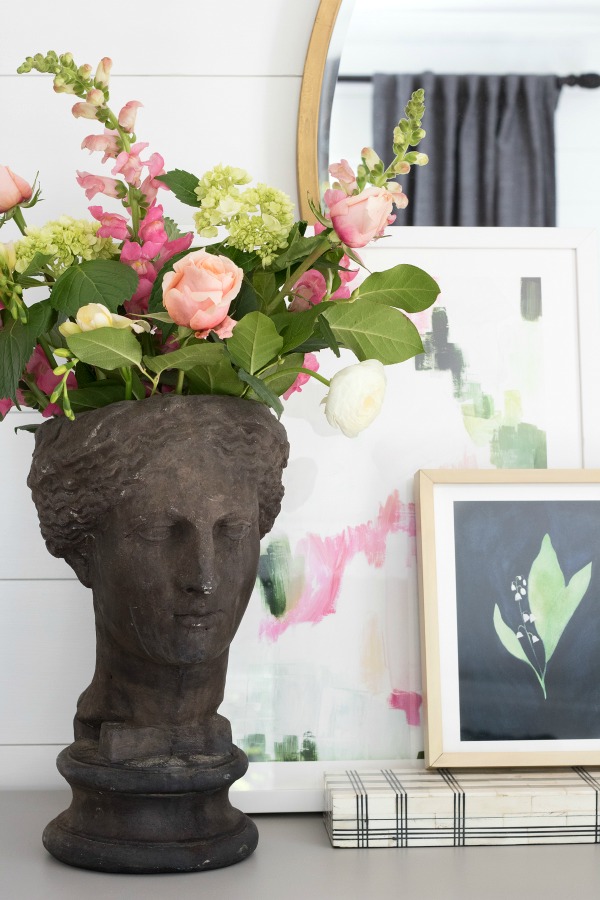
I kept the styling of my dresser super simple with {this lamp}, my thrifted planter girl head thingy, and two pieces of layered art from Minted including {this piece} by Melanie Severin and {this piece} by Renee Anne:
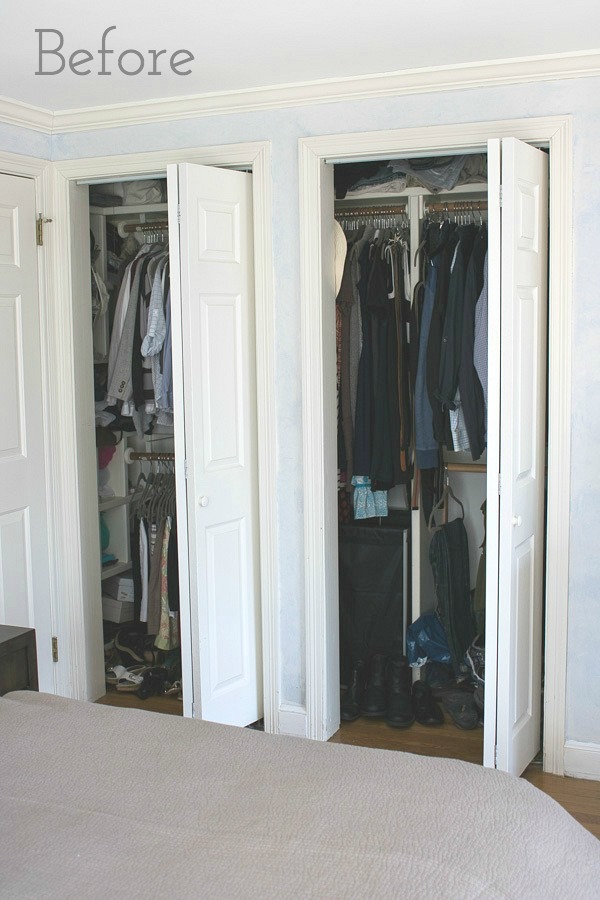
Our closet got a makeover too! Before it had two bifold doors and a center section that basically made half of the closet very difficult to access. So not cool:
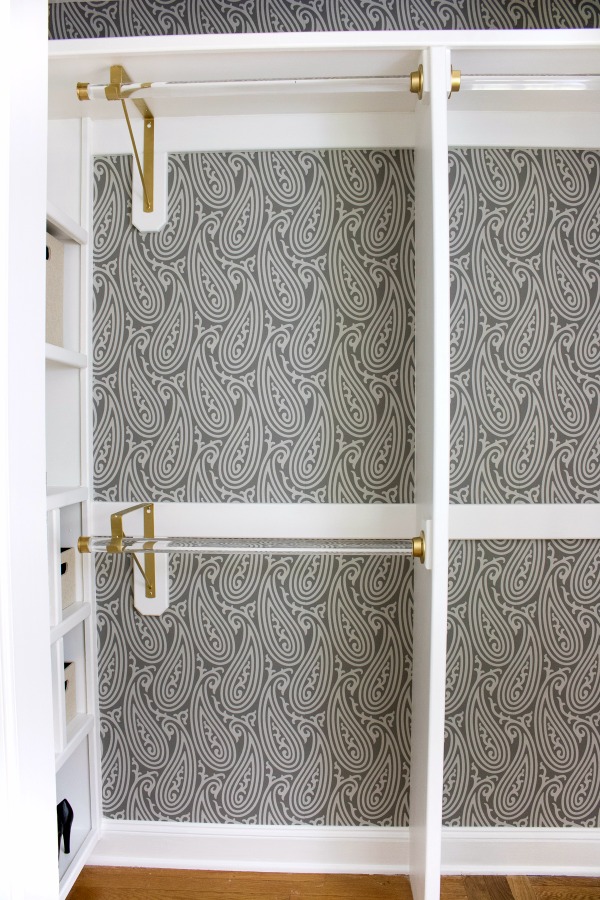
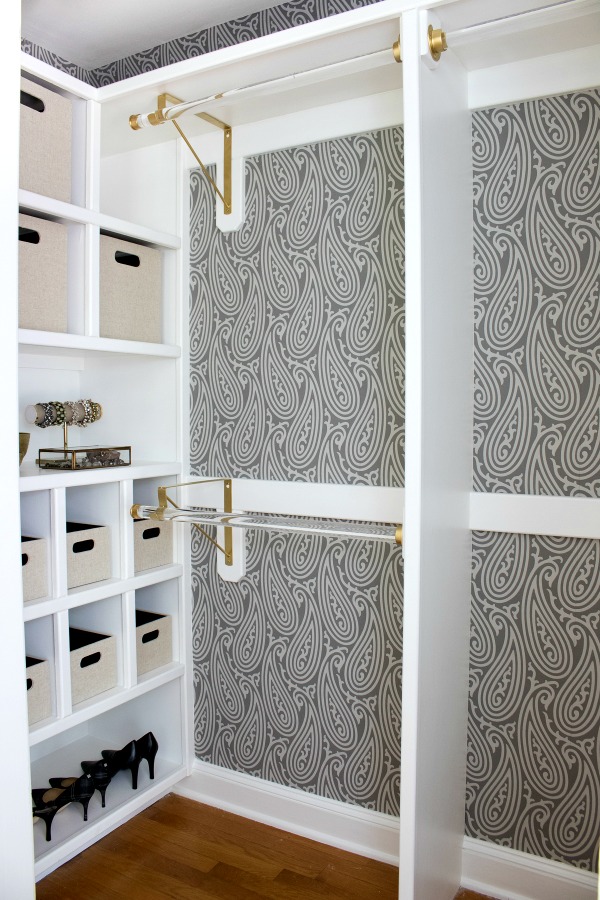
I had my contractor remove the doors and the center support and then had the back of the closet wallpapered in {this phenomenal Farrow & Ball paisley paper}. I also kicked the old wood clothing rods to the curb and added some glam new acrylic and gold ones:

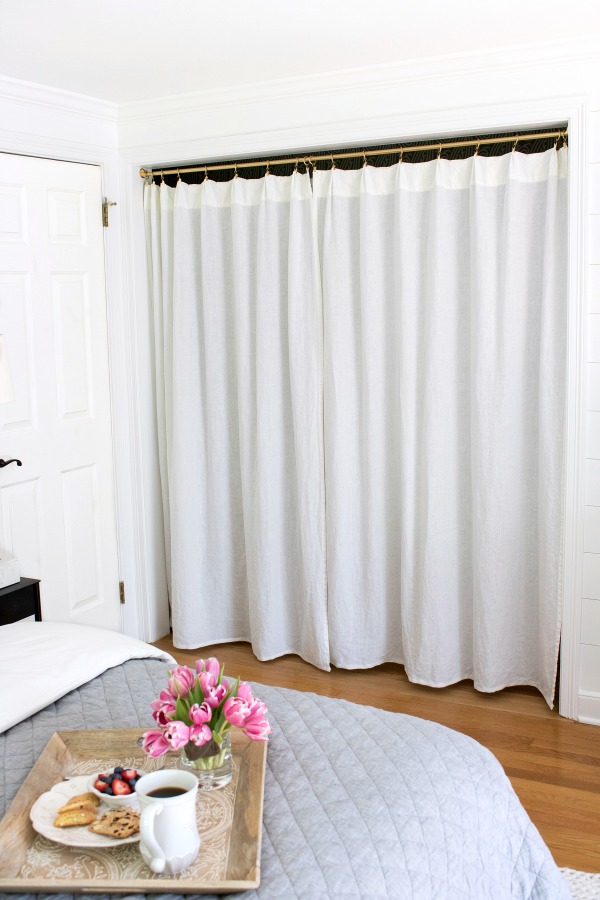
At the opening of the closet, I added a rod (a spray painted plumbing pipe from Lowe’s) and white linen IKEA drapes that I can pull closed when needed:
For the full details on our closet makeover, see {this post}
But come on, who wants to close the drapes when you’ve got this gorgeousness inside??
We already had built-in shelving on the left side of the closet but never used it very efficiently – I lucked into finding some great fabric bins at Lowes that were perfect fits for my space! Now instead of trying to see what’s buried back in the dark cubbies I can just pull out the fabric bins and easily get a good look at what’s inside:
That wraps up makeover #1 but a few years later I finally bought the bed I’d been wanting for forever and I did a little room refresh with a couple new additions too:

I bought {this upholstered bed} in a great neutral fabric – I absolutely love the classic, simple style. I also changed out the rug to {this braided jute beauty} that you can see more of in {this post}. I also changed out the nightstands since our new bed is much lower so shorter nightstands were needed – I went with {these gray nightstands} that work beautifully:
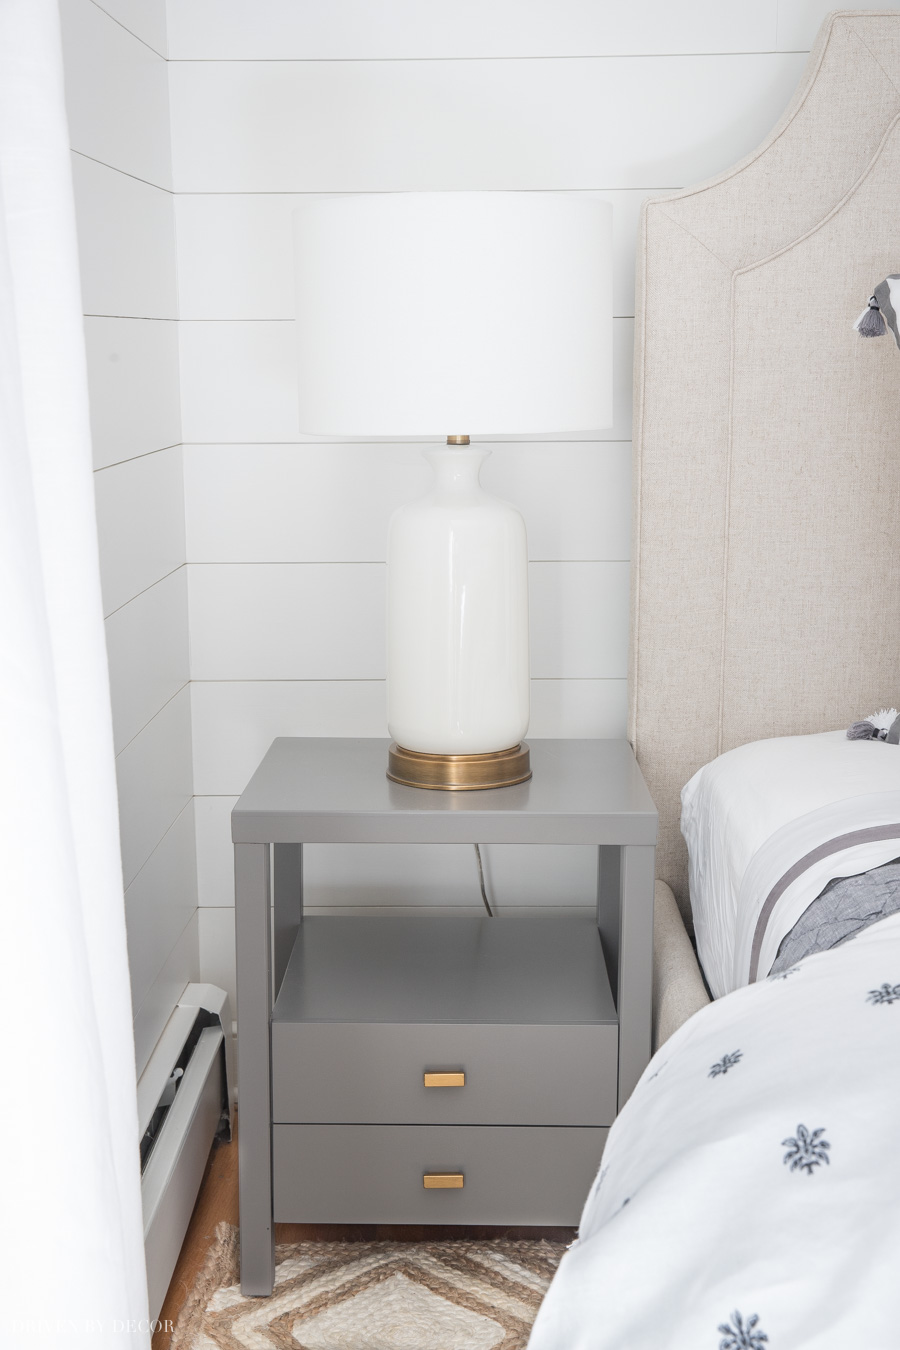
For bedside lamps, I chose {these USB lamps} because I love the convenience of being able to charge my phone bedside. I kept {this gray linen quilt} and added {this gray and white linen duvet & shams}. My pillows are {these gray and white dragon pillows} and {this velvet crosshatch pillow}:

The camp stools and scalloped overhead light {found here} stayed the same. To lighten up the room, I swapped out the dark gray drapes with white ones – I went with {these} which are the same brand and style – they’re definitely one of my go-to’s! The newly refreshed look goes so well with our new master bathroom addition – I love the way these two spaces flow together!
Thanks for coming along on my tour! If you’re wondering where anything is from, I’ve detailed it all in the Source List below:
XOXO,


Wall Color: Farrow & Ball All White | Closet Wallpaper: Farrow & Ball Paisley wallpaper
Furniture: Headboard was Craigslist find painted with Benjamin Moore Steel Wool | New Upholstered Bed | Vintage chair made over with this paint and buffalo check fabric from McGee & Co. (no longer available) | Original black metal nightstands | New gray painted nightstands | Camp stools (similar) | Dresser (old) with these knobs
Lighting: Brass swing arm sconces | White USB table lamps | Semi flushmount light (available {here} and {here} | Wood lamp on dresser – no longer available
Bedding: Euro sham fabric (gray geometric) | Cream standard shams | Gray & white dragon/floral pillows | Quilt in king (color is Flagstone) | Bed skirt – no longer available | Gray & white patterned linen duvet | Gray velvet crosshatch pillow
Drapes & Rugs: Window drapes (mine are single-width blackout lined) – had Charcoal color first and then White | White closet drapes | Cream braided rug | Diamond jute rug
Mirror, Art, & Frames: Large round mirror | Large floral print by chair (size 18 x 24) | Acrylic and brass frame | Colorful abstract print (16 x 20) | Small lily print (8 x 10)


Denise says
Kris this room!!! Stunning! Every last inch of it! That chair is just awesome! And the headboard turned out beautiful – I love the idea of adding height. I agree with not wanting the headboard completely covered by pillows! The shiplap, and the closet! Everything turned out perfectly!! Good work girl! Now, go take a nap, you deserve it 😉
Kris Jarrett says
Thanks Denise – I got in a good, long nap today 🙂 Looking forward to your reveal tomorrow!
Design Chic says
It looks fabulous, Kris. I love every, single detail! I can’t get over all of the work you got accomplished so quickly…such a fun transformation to follow!
Kris Jarrett says
Thank you Kristy!!
dee clegg says
where did you get your acrylic frame??? I love it–your bedroom turned out beautiful:)
Kris Jarrett says
Hi Dee! It’s from an Etsy shop called Highland Hardware. There’s a direct link at the bottom of this post if you want to get there easily. It’s really gorgeous in person!
Shelly@ConfettiStyle says
What a beautiful transformation. Your headboard is gorgeous, the chair is stunning and your closet is amazing. Such beautiful details all around.
Kris Jarrett says
Shelly thanks so much for sharing in my excitement over my new space!
Haneen says
So SO good! Adding height to the headboard was genius!!!
Kris Jarrett says
Thank you Haneen!!!!
kim says
You knocked it out of the park!!
Kris Jarrett says
Thank you Kim!!
Amy says
This is amazing!!! Nice work–I can tell you put in a tremendous effort. What a fabulous space you have now. I wouldn’t be able to pick a favorite part–enjoy the space–you have earned it!
Amy
Kris Jarrett says
Thanks Amy – I really appreciate your sweet words!
Kathy says
Well your dad and I are trying to figure out from whom you inherited your creativity????
Looks great and I would never in a million years have guessed that headboard would
be so stunning!
Kris Jarrett says
I think it’s in the Buysse genes! Thanks mom 🙂
Julia@Cuckoo4Design says
Gorgeous! That chair wants to come live with me. I just know it 😉
Kris Jarrett says
Thanks Julia! I don’t think I’ll ever let that chair go 🙂
cassie @ primitive & proper says
kris, this is gorgeous! i have to admit i didn’t see the headboard but i LOVE how it turned out.
Kris Jarrett says
Thanks Cassie – that headboard could have gone either way! So glad it worked out!
Emily Clark says
Turned out beautifully! And, I love the potential you saw in that headboard.
cassie @ primitive & proper says
haha! just saw your comment, emily and that was what i mentioned, too- i didn’t see it! 😉
Kris Jarrett says
Thanks Emily! 🙂
Betsy Gordon says
Kris,
It’s absolutely stunning!! It doesn’t even look like the same room, you must be giddy with delight.
I am so happy you went with the wood headboard, it looks fabulous painted in that color. Such a statement piece.
All the touches are perfect. The fabric choices, acrylic rods, hardware, and art work.
Well done!! Enjoy your amazing room.
Betsy
Kris Jarrett says
Thanks so much Betsy – you’re so sweet! I’m excited about my new space!
Jenny@EvolutionofStyle says
It looks fantastic Kris!! Such a gorgeous transformation – I love the soft, soothing color palette in here, and I can’t even choose a favorite thing! The wallpaper, the reupholstered chair, the gorgeous bedding – well done! Now go enjoy a Mother’s Day getaway on a beach so you can recover. 😉
Kris Jarrett says
Thanks Jenny! That getaway sounds pretty darn awesome right now!
Cyndy says
Wow, wow, wow Kris!! So amazing and I am just in awe of you girl. It turned out so good!! I love it all. I’m with Lisa.., the shiplap, the closet wallpaper, the dresser, oh my… High five friend! So proud of you! xoxo
Kris Jarrett says
Thank you Cyndy! I really appreciate it!!
Alison at The Gracious Posse says
Congratulations, Kris! What a comfortable retreat you’ve created. Sure hope you’ll do a tutorial on your acrylic and gold closet rods! I’ve got three sets of those same closets that could use your treatment.
Kris Jarrett says
Thank you Alison! Yes, I plan to do a post detailing the closet makeover! I was nervous about how it would turn out but it’s so much more functional now!
Lisa | Shine Your Light says
Absolutely stunning Kris, as I knew it would be!! I can’t even decide on a favorite element – the wallpaper and closet rods, the bedding, the shiplap and the art you chose are all gorgeous! It all came together so beautifully and I’m so happy for you that you’re done!!!!!!
Kris Jarrett says
Lisa, thank you so much! You are such a great ORC buddy – can’t wait to see your room tomorrow!!!
leslie says
where did you get the clear and brass closet rods ???